
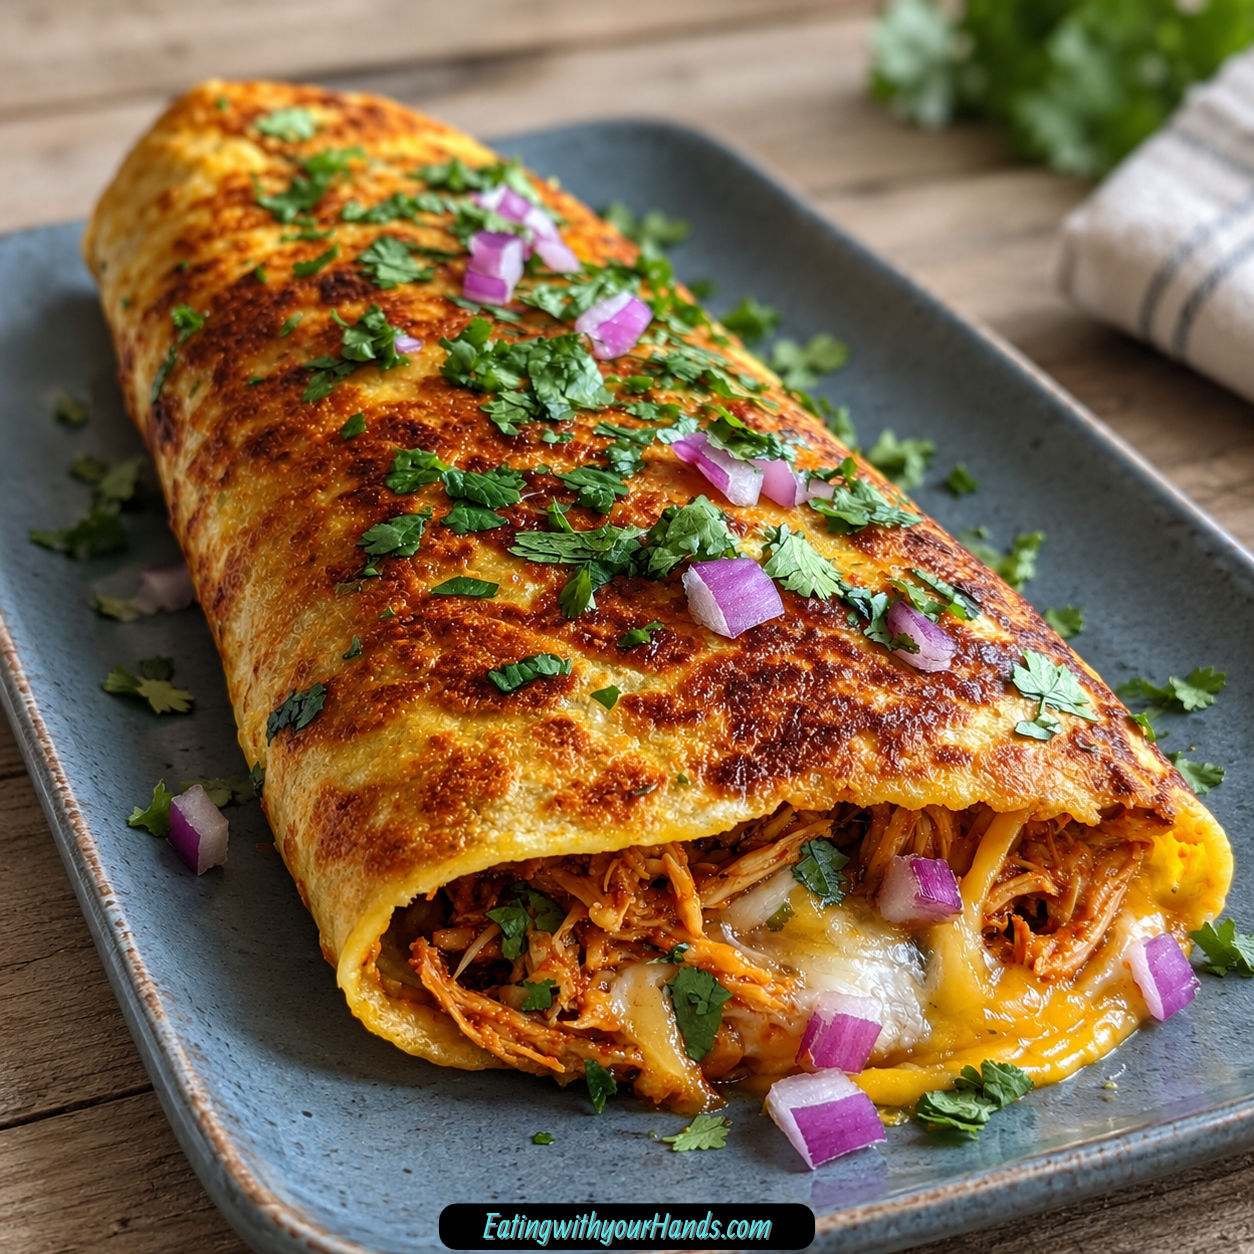

Some recipes stay in your life because they are impressive, while others earn their place because they rescue dinner when you are tired, hungry, and unwilling to make a mountain of dishes. These Crispy BBQ Chicken Wraps somehow manage to do both, delivering a golden, lightly crunchy tortilla around smoky-sweet chicken, melted cheese, fresh cilantro, and red onion in about 25 minutes.
I first leaned on this kind of meal during college, when speed mattered almost as much as flavor. A skillet, a bowl, a few tortillas, and whatever cooked chicken happened to be available could turn into something hot and satisfying without taking over the entire evening.
The smell alone was enough to make roommates appear in the kitchen. Barbecue sauce warming against chicken and cheddar while a tortilla crisped in a lightly oiled skillet made the whole meal seem far more deliberate than it really was.
One roommate used to joke that I could build an entire food truck around these wraps. Considering how quickly they disappeared whenever I cooked them, the idea never sounded completely ridiculous.
What keeps me making them now is how forgiving they are. Rotisserie chicken works beautifully, leftover grilled chicken is just as welcome, and the cheese can change depending on what happens to be waiting in the refrigerator.
The wrap itself is equally flexible. It can stay classic with cheddar and barbecue sauce, lean spicy with pepper jack and jalapeños, or move in a completely different direction with Buffalo sauce and ranch.
But the original combination remains hard to beat. Tender strands of chicken catch the barbecue sauce, melted cheddar keeps the filling rich, cilantro gives it freshness, and finely chopped red onion brings little bursts of sharpness.
Then comes the skillet. That final crisping step changes everything by turning a simple filled tortilla into a hot, crunchy meal that feels somewhere between a quesadilla, a folded wrap, and pure comfort food.
Table of Contents
- Why You’ll Love These Crispy BBQ Chicken Wraps
- Ingredients for Crispy BBQ Chicken Wraps
- Why Shredded Chicken Works Best
- Choosing the Barbecue Sauce
- Why Cheddar Is Such a Good Fit
- Red Onion and Cilantro Keep Things Bright
- Why Large Tortillas Matter
- Equipment You’ll Need
- How to Make Crispy BBQ Chicken Wraps
- Step 1: Prepare the Chicken
- Step 2: Add the Cheese, Onion, and Cilantro
- Step 3: Add the Barbecue Sauce Gradually
- Step 4: Warm the Tortillas
- Step 5: Preheat the Skillet
- Step 6: Fill the Tortillas
- Step 7: Fold and Flatten Slightly
- Step 8: Crisp the First Side
- Step 9: Flip Confidently
- Step 10: Crisp the Second Side
- Step 11: Rest Before Cutting
- Step 12: Serve Hot
- How to Get the Crispiest Exterior
- Why You Shouldn’t Overfill
- Pepper Jack Variation
- Mozzarella Variation
- Feta Variation
- Green Onion or Shallot Variation
- Spicy BBQ Chicken Wraps
- Buffalo Ranch Variation
- Teriyaki Variation
- Pineapple Variation
- Liquid Smoke Variation
- Gluten-Free Option
- Low-Carb Lettuce Wrap Variation
- Baking Instead of Pan-Frying
- Serving With Coleslaw
- Game Day Serving Ideas
- Roasted Sweet Potato Wedges
- Green Salad With Ranch
- Preparing the Filling Ahead
- Storage
- Reheating in a Skillet
- Air Fryer Reheating
- Freezing the Wraps
- Keeping Them Crispy for a Party
- Frequently Asked Questions
- Nutritional Information
- The College Meal That Never Left My Rotation
- Crispy BBQ Chicken Wraps Ready in 25 Minutes
Why You’ll Love These Crispy BBQ Chicken Wraps
The biggest advantage is speed. From opening the refrigerator to putting a hot wrap on the plate, the whole process takes about 25 minutes.
Texture is another major reason these wraps are so satisfying. The tortilla becomes golden and crisp outside while the cheese melts into the saucy chicken inside.
The ingredient list is refreshingly simple. Cooked chicken, cheddar, tortillas, barbecue sauce, onion, cilantro, and a little oil do nearly all the work.
You can also make the recipe fit what you already have. Pepper jack, mozzarella, feta, green onions, shallots, spicy barbecue sauce, jalapeños, and other swaps can change the flavor without changing the basic method.
The wraps are hearty enough for dinner but portable enough for game day or a casual lunch. Cut them into smaller portions and they easily move into snack territory too.
Most importantly, they taste like more work than they actually require. That combination of convenience and payoff is exactly why I keep returning to them.
Ingredients for Crispy BBQ Chicken Wraps
The filling is built around shredded cooked chicken coated lightly in barbecue sauce, with cheese, herbs, and onion mixed throughout. Large tortillas hold everything together, while a small amount of vegetable oil creates the crisp exterior.
- 2 cups cooked chicken, shredded
- 2 cups shredded cheddar cheese
- ¼ cup fresh cilantro, chopped
- ¼ cup red onion, finely chopped
- ½ cup barbecue sauce
- 4–5 large flour tortillas, about 10 inches each
- 2 tablespoons vegetable oil
Rotisserie chicken is the easiest shortcut. Leftover grilled chicken also works well as long as it is shredded rather than cut into large cubes.
Sharp cheddar brings the strongest cheese flavor. Shredding cheese from a block also gives it an especially smooth melt.
Why Shredded Chicken Works Best
Shredded chicken catches sauce differently from diced chicken. The thin strands give the barbecue sauce more surface area to cling to, so the flavor is distributed through the filling instead of collecting around separate chunks.
Two cups create enough substance to make the wraps feel like a meal. Rotisserie chicken makes that amount especially easy to prepare.
Before mixing, pat the chicken dry if it seems wet. Extra surface moisture can make the tortilla soften from the inside instead of staying crisp.
The chicken is already cooked, so the skillet stage is mainly about heating the filling, melting the cheese, and browning the tortilla. That is one reason dinner comes together so quickly.
Choosing the Barbecue Sauce
The recipe uses ½ cup barbecue sauce, but it is best added gradually. Starting with about ⅓ cup lets you judge the texture before adding the remainder.
The goal is coated chicken, not a filling swimming in sauce. Too much liquid can seep into the tortilla and work against the crisp exterior.
Sweet and smoky barbecue sauce creates the classic version. A spicy variety can bring more heat without requiring another ingredient.
Use whichever style you already enjoy. Because barbecue sauce is one of the strongest flavors in the wrap, its personality will naturally shape the finished result.
Why Cheddar Is Such a Good Fit
Cheddar brings both flavor and structure to the filling. As it melts, it connects the chicken, onion, cilantro, and barbecue sauce into a cohesive center.
The recipe uses 2 cups shredded cheddar. Sharp cheddar is especially good when you want the cheese to remain noticeable next to a bold barbecue sauce.
Cheese shredded from a block melts particularly well. It creates that soft, gooey center that contrasts so nicely with the crisp tortilla.
The cheese can also reach the edges slightly during cooking. Those little melted spots can brown against the skillet and become some of the best bites.
Red Onion and Cilantro Keep Things Bright
A quarter cup finely chopped red onion adds sharpness without taking over. The pieces should be small enough to provide flavor bursts rather than large crunchy chunks.
Another ¼ cup chopped fresh cilantro brings an herbal note that cuts through the richer cheese and sauce. It keeps the filling from tasting like nothing but barbecue and cheddar.
Flat-leaf parsley can replace cilantro when needed. The flavor changes, but the fresh green element remains.
These two ingredients are small compared with the chicken and cheese, yet they make the wrap taste much more balanced. Their role is less about bulk and more about contrast.
Why Large Tortillas Matter
Use 10-inch flour tortillas rather than small taco-sized ones. The filling needs enough surface area to fold over cleanly without spilling everywhere.
Large tortillas are also easier to flatten slightly in the skillet. That broader surface allows more direct contact with the pan, which means more golden crispness.
Pliable burrito-size tortillas work particularly well. Brittle or very dry tortillas can crack as soon as you fold them.
A quick 10-second warm-up in the microwave helps prevent that problem. You want the tortilla flexible, not hot or cooked.
Equipment You’ll Need
A large skillet is the central cooking tool. It should be wide enough for the folded wrap to sit flat against the surface.
You will also need a large mixing bowl, a fork or spoon for combining the filling, and a wide spatula for confident flipping. A cutting board and knife handle the onion, cilantro, and final slicing.
Parchment paper is useful later if you are storing cooked wraps. Foil can also help hold a wrap securely for serving or transportation.
No special grill or sandwich press is necessary. A skillet and a little pressure from a spatula are enough to create the crisp exterior.
How to Make Crispy BBQ Chicken Wraps
The recipe is simple, but the texture depends on controlling moisture, heat, and filling amount. Keep the chicken fairly dry, add the barbecue sauce gradually, use medium heat, and resist the temptation to overstuff the tortillas.
Step 1: Prepare the Chicken
Place 2 cups shredded cooked chicken in a large mixing bowl. If the chicken has visible moisture, pat it lightly before adding the other ingredients.
Make sure the pieces are shredded rather than left in large chunks. Smaller strands coat more evenly and make the wrap easier to bite through.
Rotisserie chicken can go straight into this step once the meat is removed and shredded. Leftover grilled chicken works the same way.
Step 2: Add the Cheese, Onion, and Cilantro
Add 2 cups shredded cheddar, ¼ cup chopped cilantro, and ¼ cup finely chopped red onion to the chicken. Toss the ingredients loosely before adding sauce.
Breaking up the cheese at this stage helps prevent large clumps in the finished wrap. The onion and cilantro should also distribute throughout the bowl.
Do not compress the filling. Keeping it loose makes it easier for barbecue sauce to coat everything evenly.
Step 3: Add the Barbecue Sauce Gradually
Pour in about ⅓ cup barbecue sauce first. Mix thoroughly with a fork so the sauce reaches the chicken strands and cheese.
Add more from the remaining sauce until the filling is well coated. You can use up to the full ½ cup while keeping the mixture moist but not dripping.
Stop once the filling holds together without becoming wet. The tortilla will crisp much better when excess sauce is kept under control.
Step 4: Warm the Tortillas
Warm the tortillas for about 10 seconds in the microwave. This small step makes them more pliable and less likely to crack.
Keep them covered or stacked while you work so they stay flexible. Do not leave them heating long enough to dry out.
You can also warm them briefly in a dry pan. Either method should make folding easier without actually toasting the tortillas yet.
Step 5: Preheat the Skillet
Place a large skillet over medium heat. Give the pan enough time to warm evenly before adding the first wrap.
Add about 1 tablespoon vegetable oil and swirl it across the cooking surface. The oil should coat lightly rather than pooling deeply.
Medium heat is important. High heat can burn the tortilla before the cheese melts, while very low heat can leave the wrap greasy instead of crisp.
Step 6: Fill the Tortillas
Lay one tortilla flat and spoon about ½ cup filling onto one half. Leave roughly 1 inch of open space around the outer edge.
Spread the filling into an even layer rather than creating a tall mound. A flatter wrap cooks more evenly and is easier to flip.
Avoid the urge to keep adding filling until the tortilla looks overstuffed. A generous wrap is good, but excess filling makes sealing and crisping much harder.
Step 7: Fold and Flatten Slightly
Fold the empty half of the tortilla over the filling like a large taco. Line up the edges as neatly as possible.
Press gently with your hand or spatula to flatten the wrap slightly. You want good contact between the tortilla and filling without squeezing anything out.
A tiny amount of cheese peeking near the edges is perfectly fine. Those exposed spots can become crisp and browned in the skillet.
Step 8: Crisp the First Side
Carefully place the folded wrap into the heated skillet. Leave it undisturbed for about 2–3 minutes.
Do not keep lifting or sliding it around. Steady contact with the pan is what creates an even golden crust.
The first side is ready when the underside is deeply golden and cheese visible near the edges has begun melting. Listen for a steady sizzle rather than an aggressive frying sound.
Step 9: Flip Confidently
Slide a wide spatula completely under the wrap. Lift and turn it in one decisive motion.
A hesitant half-flip is more likely to let filling escape. Once turned, settle the wrap flat against the skillet again.
Press gently with the spatula. This promotes even browning without forcing the filling out of the edges.
Step 10: Crisp the Second Side
Cook the second side for about 2 minutes. Watch for the same golden color you developed on the first side.
The cheese inside should now be melted and the chicken thoroughly warmed. The tortilla should feel crisp rather than soft when touched with the spatula.
Remove once the second side is evenly browned. Add a little of the remaining vegetable oil to the skillet as needed for subsequent wraps.
Step 11: Rest Before Cutting
Transfer the cooked wrap to a plate or cutting board and let it rest for about 1 minute. This brief pause allows the filling to settle.
Cutting immediately can cause hot cheese and chicken to spill out dramatically. Waiting a minute keeps more of the filling where it belongs.
Do not let it sit too long. The wrap is best while the tortilla remains hot and crisp.
Step 12: Serve Hot
Slice into halves or smaller portions depending on how you plan to serve it. Bring extra barbecue sauce to the table if you like dipping.
Serve the wraps directly from the skillet whenever possible. That is when the contrast between crisp tortilla and molten center is strongest.
For game day, smaller pieces work especially well as finger food. For dinner, a whole wrap with a simple side makes a complete plate.

How to Get the Crispiest Exterior
Start with chicken that is not wet. Moisture trapped inside the filling eventually works its way into the tortilla.
Control the barbecue sauce as well. Enough sauce creates flavor, but an overly wet filling makes crisping more difficult.
Use only enough oil to coat the skillet lightly. The goal is a toasted exterior rather than a deep-fried tortilla.
And most importantly, keep the burner around medium. The tortilla needs time to crisp at roughly the same pace the cheese melts.
Why You Shouldn’t Overfill
A very full tortilla may look appealing before cooking, but it becomes much harder to handle in the skillet. Filling escapes, cheese burns on the pan, and the center can stay cool while the exterior browns.
About ½ cup filling per tortilla is a useful starting point. Spread it over half the surface while leaving a border.
A reasonably thin layer also means more of the tortilla touches the skillet. More contact leads directly to more crispness.
If you have leftover filling, make another wrap rather than forcing it into the first one. The recipe works with 4–5 large tortillas depending on how generously they are filled.
Pepper Jack Variation
Pepper jack can replace the cheddar when you want extra heat. It melts well and gives the entire filling a spicy edge.
Use it in the same role as cheddar. The barbecue sauce and chicken remain unchanged.
This variation is especially useful when you want more spice without adding jalapeños. The heat is spread evenly throughout the cheese.
A smoky or sweet barbecue sauce pairs nicely with the sharper cheese. Keep the onions and cilantro for freshness.
Mozzarella Variation
Mozzarella creates an especially stretchy center. Its flavor is milder than sharp cheddar, allowing the barbecue sauce to become more prominent.
Use shredded mozzarella in the same quantity. It will melt readily as the tortilla crisps.
Because mozzarella is mild, the cilantro and red onion become even more noticeable. That creates a softer cheese flavor without losing the overall balance.
This is a good option when you care most about that long cheese pull. The skillet method stays exactly the same.
Feta Variation
Crumbled feta creates a tangier wrap. It does not melt in quite the same way as cheddar, but it adds a strong salty contrast.
Scatter it through the chicken mixture rather than expecting a completely gooey center. The barbecue sauce softens some of its sharpness.
This version feels less like a classic cheesy wrap and more like a savory variation. Red onion works especially well alongside feta.
Use a moderate amount so the cheese does not overpower the sauce. The chicken should remain the heart of the filling.
Green Onion or Shallot Variation
Green onions are a milder option when red onion tastes too sharp. Chop them finely and distribute them through the filling.
Shallots work in the same general role. They add onion flavor without quite the same bite.
Either substitution makes the filling softer in flavor. The barbecue sauce and cheese become a little more dominant.
You can also simply omit onion. The wrap still has enough flavor from barbecue sauce, cheese, cilantro, and chicken.
Spicy BBQ Chicken Wraps
Add ½ teaspoon chili powder or cayenne pepper to the filling when you want more heat. Mix it in evenly with the chicken and sauce.
Diced fresh or pickled jalapeños can provide another layer of spice. Add them in a quantity that matches your heat preference.
A dash of hot sauce also works. Spicy barbecue sauce is the simplest option because it changes the filling without adding another ingredient.
Crushed red pepper flakes can be used as well. The point is to increase heat while keeping the same basic smoky-sweet profile.
Buffalo Ranch Variation
Barbecue sauce can be swapped for Buffalo sauce when you want an entirely different flavor. Ranch pairs naturally with the Buffalo-style filling.
The chicken and cheese structure can stay familiar. The sauce combination shifts the wrap from smoky-sweet to creamy and tangy with more heat.
Keep the filling controlled so the tortilla stays crisp. Too much liquid still creates the same sogginess problem regardless of the sauce used.
This variation shows how flexible the recipe can be. The skillet method does not have to change at all.
Teriyaki Variation
Teriyaki sauce gives the chicken a sweeter, different personality. The wrap suddenly moves away from barbecue while keeping the same convenient format.
Use the sauce carefully so the filling does not become overly wet. The same moisture rules still apply.
This variation can create a Hawaiian-inspired direction. The original method even invites playful additions such as pineapple for another sweet contrast.
Keep the tortilla crisp and the cheese melted. Those textural elements continue to make the wrap satisfying even when the flavor changes.
Pineapple Variation
Pineapple can be added for a sweeter, fruitier version. Use it as an optional extra rather than replacing the chicken.
Keep the pieces small and control excess moisture. Too much juice can soften the tortilla.
Pineapple works particularly well with smoky barbecue sauce. The sweet fruit emphasizes the sauce’s sweeter side while still leaving room for the cheddar and chicken.
This variation has become one of those personal twists people tend to remember. It gives the wrap a completely different mood without requiring a new cooking technique.
Liquid Smoke Variation
A dash of liquid smoke can deepen the smoky character. Use it sparingly because the flavor can become intense quickly.
Mix it into the filling so it distributes evenly. The barbecue sauce already contributes substantial flavor, so only a small accent is needed.
This works best when you want a more pronounced grilled or smoked impression. The rest of the filling can stay unchanged.
It is another example of how the base recipe welcomes customization. Small additions can make each cook’s version feel personal.
Gluten-Free Option
Use your preferred gluten-free wraps in place of flour tortillas. Choose wraps flexible enough to fold without splitting.
Warm them briefly before filling if they are stiff. Gluten-free tortillas can be more fragile than standard flour versions.
Keep the filling amount manageable. A thinner wrap may need a little more care during flipping.
Cook over the same moderate heat. Watch color and crispness closely because different tortillas brown at different rates.
Low-Carb Lettuce Wrap Variation
Large lettuce leaves can replace flour tortillas for a lower-carb version. This creates a completely different texture from the skillet-crisped wrap.
Skip the crisping step entirely. Fill the lettuce with barbecue chicken, cheese, cilantro, and onion and serve fresh.
Because there is no hot tortilla, the cheese will not melt in the same way. Treat this as a cold or room-temperature variation rather than trying to recreate the skillet texture.
The flavor of the filling still works well. The lettuce simply shifts the meal toward something lighter and fresher.
Baking Instead of Pan-Frying
Preheat the oven to 400°F. Assemble the wraps and place them on a parchment-lined baking sheet.
Brush both sides lightly with oil. This helps the tortilla brown in the dry oven heat.
Bake for about 10 minutes per side. Turn each wrap carefully halfway through the cooking time.
The exterior may not become quite as crisp as the skillet version. The advantage is that several wraps can cook at once.
Serving With Coleslaw
A crisp, vinegary coleslaw is one of the best sides for these wraps. The acidity and fresh crunch cut through the barbecue sauce and melted cheese.
Keep the slaw on the side rather than inside if you want the wrap itself to remain crisp. That separation also gives the meal a more noticeable textural contrast.
This pairing works equally well for dinner and game day. The flavors already fit naturally beside barbecue chicken.
A sharp slaw keeps the plate from feeling overly rich. It is especially useful with a sweeter barbecue sauce.
Game Day Serving Ideas
Cut cooked wraps into smaller pieces and serve them hot. Add pickle spears and extra barbecue sauce for dipping.
The smaller portions make them easy to pick up without a full plate. Keeping the pieces relatively large still allows the filling to stay inside.
Cold drinks are especially good beside the hot, crisp wraps. The contrast makes them even more enjoyable straight from the skillet.
Prepare several batches if serving a crowd. These have a habit of disappearing very quickly.
Roasted Sweet Potato Wedges
Roasted sweet potato wedges make a hearty side. Their natural sweetness works well with smoky barbecue sauce.
Serve the wedges separately so they stay crisp. They turn the wrap into a more substantial dinner without adding another complicated component.
This combination is especially good when you want something warmer than coleslaw or salad. The sweet potato echoes the sweetness of the sauce.
Keep the wrap as the main attraction. A simple side is all it needs.
Green Salad With Ranch
A basic green salad with ranch dressing creates a fresh counterpoint. Crisp greens balance the warm tortilla and rich melted cheese.
The ranch also fits naturally with barbecue flavors. You can keep the salad straightforward without competing with the wrap.
Serve everything immediately. The contrast of cold salad and hot wrap is part of what makes the plate work.
This is one of the easiest ways to stretch the wraps into a full meal. No elaborate side recipe is necessary.
Preparing the Filling Ahead
The filling can be mixed in advance. Combine the chicken, cheese, cilantro, onion, and barbecue sauce and refrigerate it tightly covered for up to 2 days.
The flavors can become even more integrated after resting for a few hours. Before using, give the filling a good stir.
Cold cheese may clump slightly during storage. Stirring redistributes it before you begin filling tortillas.
Keep the tortillas separate until cooking time. Assembling too early would give the sauce more opportunity to soften the bread.
Storage
Let cooked wraps cool completely before storing. Transfer them to an airtight container and place parchment paper between layers.
Refrigerate for up to 3 days. The parchment helps prevent the wraps from sticking together and reduces trapped surface moisture.
The tortilla will naturally lose some crispness in the refrigerator. Proper reheating brings much of that texture back.
Avoid cutting every wrap before storage when possible. Whole pieces retain their filling more effectively.
Reheating in a Skillet
Place the refrigerated wrap in a dry skillet over medium-low heat. No additional oil is necessary.
Warm slowly until the center is heated through. Turn as needed so both sides become crisp again.
This method gives you good control over the tortilla texture. It also avoids the rubbery quality that can come from microwaving.
Serve immediately once heated. The wrap will be much closer to freshly cooked than if reheated in a microwave.
Air Fryer Reheating
Place the wrap in an air fryer at 375°F. Heat for about 3–4 minutes.
The hot circulating air helps restore the crisp exterior while warming the filling. Check before adding extra time.
This method is especially convenient for one or two leftover wraps. No skillet monitoring is required.
Serve immediately when the tortilla feels crisp again. The cheese should be soft inside.
Freezing the Wraps
Cooked wraps can be frozen, although the tortilla texture may soften somewhat after thawing. Freeze them individually on a baking sheet first.
Once firm, transfer the wraps to a freezer bag with parchment between layers. This keeps them from freezing together.
Reheat directly from frozen in a 375°F oven for about 15 minutes. The filling holds up well even though the tortilla may not return to exactly the same texture.
Freezing is therefore practical but not the ideal choice for maximum crispness. Fresh or refrigerated wraps provide the better tortilla texture.
Keeping Them Crispy for a Party
Place finished wraps in a single layer on a cooling rack set over a baking sheet. Keep them in a 200°F oven while the remaining food is prepared.
The rack lets air move underneath the tortillas. This prevents the bottoms from steaming against a flat pan.
They can stay crisp for up to 1 hour this way. Avoid stacking them because trapped steam would soften the surfaces.
This is especially helpful when preparing several batches for guests. Everyone can still get a warm, crunchy wrap instead of a limp one.
Frequently Asked Questions
Can I Bake These Instead of Pan-Frying?
Yes. Heat the oven to 400°F and place assembled wraps on a parchment-lined baking sheet.
Brush both sides lightly with oil and bake for about 10 minutes per side. They will be a little less crisp than the skillet version but still delicious.
How Can I Make Them Spicier?
Add ½ teaspoon chili powder or cayenne pepper to the filling. Spicy barbecue sauce is another easy choice.
Diced jalapeños, hot sauce, or crushed red pepper flakes can also increase the heat. Adjust according to your preference.
Can I Freeze the Wraps?
Yes, although the tortilla may become somewhat softer. Freeze cooked wraps individually first, then transfer them to a freezer bag with parchment between layers.
Reheat from frozen in a 375°F oven for about 15 minutes. The filling keeps its flavor well.
How Do I Keep Them Crispy for a Party?
Place them in a single layer on a cooling rack set over a baking sheet. Hold them in a 200°F oven.
The air circulation helps prevent steam from softening the tortilla. They can stay crisp for up to 1 hour.
Can I Make the Filling Ahead?
Yes. Refrigerate the mixed filling in a tightly covered container for up to 2 days.
Stir well before using because the chilled cheese can clump. Keep the tortillas separate until you are ready to assemble and cook.
Can I Use Rotisserie Chicken?
Absolutely. Rotisserie chicken is one of the fastest ways to make these wraps.
Shred it rather than dicing it. Pat away excess moisture before mixing with the sauce.
What Other Cheese Can I Use?
Pepper jack, mozzarella, or feta can all replace cheddar. Each creates a noticeably different flavor and texture.
Pepper jack adds heat, mozzarella gives more stretch, and feta brings tanginess. Use whichever suits the version you want.
Nutritional Information
One wrap contains approximately 350 calories. It also provides around 20g protein, 30g carbohydrates, 18g fat, and 8g sugar.
The chicken and cheese contribute much of the protein. The tortilla and barbecue sauce provide a significant share of the carbohydrates, while barbecue sauce also accounts for much of the sugar.
The exact values can change with tortilla size, barbecue sauce, cheese choice, and filling amount. A low-sugar barbecue sauce will naturally produce different numbers.
Additions such as avocado, extra cheese, pineapple, or other toppings will change the nutritional profile as well. These figures are best treated as approximate values for a standard wrap.
The College Meal That Never Left My Rotation
I have cooked plenty of more elaborate meals since college, but there is something about these wraps that still pulls me back to that simpler kitchen. They remind me of the years when dinner needed to be inexpensive, quick, flavorful, and possible without filling the sink with dishes.
The original batches were rarely identical. One night there might be sharp cheddar, another night whatever cheese was already open, and rotisserie chicken was always welcome when time was short.
What stayed consistent was the skillet. The second that filled tortilla hit hot oil and began sizzling, the meal felt much more exciting than the ingredient list suggested.
The crisp exterior was what turned it into a favorite. Without that step, it would simply be barbecue chicken folded inside a tortilla, but browning both sides makes the whole thing feel complete.
I also love the little bits of cheese that sometimes escape. They hit the pan, brown around the edge, and become salty, crisp pieces that are almost impossible not to pick at before serving.
Cilantro and red onion keep the filling from becoming one-note. Every bite moves between smoky sauce, melted cheese, savory chicken, freshness, and crunch.
Over the years, the recipe has become even more flexible. I have learned that pepper jack can turn it spicy, Buffalo sauce can take it somewhere completely different, and a handful of jalapeños can wake everything up instantly.
Some people add pineapple, while others swear by a little extra smoky flavor. That is part of the fun because the basic wrap gives you plenty of room to make it your own.
Still, I never feel the need to change the classic version. There is something deeply satisfying about chicken, sharp cheddar, barbecue sauce, onion, cilantro, and a golden tortilla coming together in one hot, crunchy package.
That is why Crispy BBQ Chicken Wraps have survived every change in my cooking routine. They began as a college meal built around speed and minimal cleanup, but they stayed because 25 minutes is still a very small investment for something this crisp, cheesy, smoky, and satisfying.
Crispy BBQ Chicken Wraps Ready in 25 Minutes

Cheesy, smoky, crisp, and easy to make, these Crispy BBQ Chicken Wraps combine shredded chicken with cheddar, red onion, cilantro, and barbecue sauce inside golden flour tortillas. Ready in just 25 minutes, they make a simple American-style main dish for lunch or dinner.
Recipe Details
- Prep Time: 10 minutes
- Cook Time: 15 minutes
- Total Time: 25 minutes
- Course: Main Dish
- Cuisine: American
- Servings: 4–5 wraps
- Calories: 350 kcal
Ingredients
For the Filling
- 2 cups cooked chicken shredded, rotisserie chicken works great
- 2 cups shredded cheddar cheese
- ¼ cup fresh cilantro chopped
- ¼ cup red onion chopped
- ½ cup barbecue sauce your favorite kind
For the Wraps
- 4–5 large flour tortillas
- 2 Tablespoons oil vegetable or canola oil
Instructions
Step 1: Prepare the Chicken
Shred the cooked chicken and place it in a bowl.
Rotisserie chicken works especially well when you want to make the wraps quickly.
Step 2: Mix the Filling
Add the shredded cheddar cheese, chopped cilantro, chopped red onion, and barbecue sauce to the chicken.
Mix until the filling is evenly combined.
Step 3: Heat the Skillet
Place a large skillet over medium heat and add the vegetable or canola oil.
Let the skillet warm before adding the first tortilla.
Step 4: Fill the Tortilla
Place one large flour tortilla in the skillet.
Spoon some of the BBQ chicken mixture onto one half of the tortilla.
Step 5: Fold and Cook
Fold the tortilla over the filling and press it lightly.
Cook until the bottom is golden brown.
Step 6: Flip the Wrap
Carefully turn the wrap over.
Continue cooking until the second side is golden and crisp.
Step 7: Repeat
Repeat the filling, folding, and cooking process with the remaining tortillas and chicken mixture.
Cook each wrap until both sides are evenly browned.
Step 8: Serve Warm
Remove the finished wraps from the skillet.
Serve warm while the tortillas are crisp and the cheddar is melted.
Notes
- Use rotisserie chicken for quicker prep.
- Adjust barbecue sauce to your taste.
- Serve with extra sauce for dipping.
Serving Suggestions
Serve Crispy BBQ Chicken Wraps warm for the best contrast between the golden tortilla and the cheesy chicken filling. The combination of barbecue sauce, cheddar, cilantro, and red onion gives each wrap a smoky, savory flavor with a little freshness.
This recipe makes 4–5 wraps, making it easy to prepare for lunch, dinner, or sharing. Extra barbecue sauce can be served on the side for dipping.
Adjust the barbecue sauce to your preferred flavor level. Rotisserie chicken is a convenient option when you want to keep the preparation especially quick.
Storage
These wraps are best served warm while the tortillas are still crisp and the cheese remains melted.
Chicken Tip
Use 2 cups shredded cooked chicken.
Rotisserie chicken works well for quicker preparation.
Cheese Tip
Use 2 cups shredded cheddar cheese and mix it directly into the chicken filling.
Barbecue Sauce Tip
Use ½ cup of your favorite barbecue sauce.
Adjust the amount to taste if desired.
Cilantro Tip
Add ¼ cup chopped fresh cilantro to the filling.
Red Onion Tip
Use ¼ cup chopped red onion for extra texture and flavor.
Tortilla Tip
Use 4–5 large flour tortillas.
Fill one half of each tortilla before folding it over.
Oil Tip
Use 2 Tablespoons vegetable or canola oil for cooking.
Cooking Tip
Cook each folded wrap over medium heat until golden brown on both sides.
Serving Tip
Serve warm with extra barbecue sauce for dipping.

Fernando is the creator and writer behind the food blog Eating with your Hands. Living and working in cities like Paris, Barcelona, and Berlin, and being married to a Canadian foodie, has given Fernando a passion and interest in food and inspired him to run EWYH.