
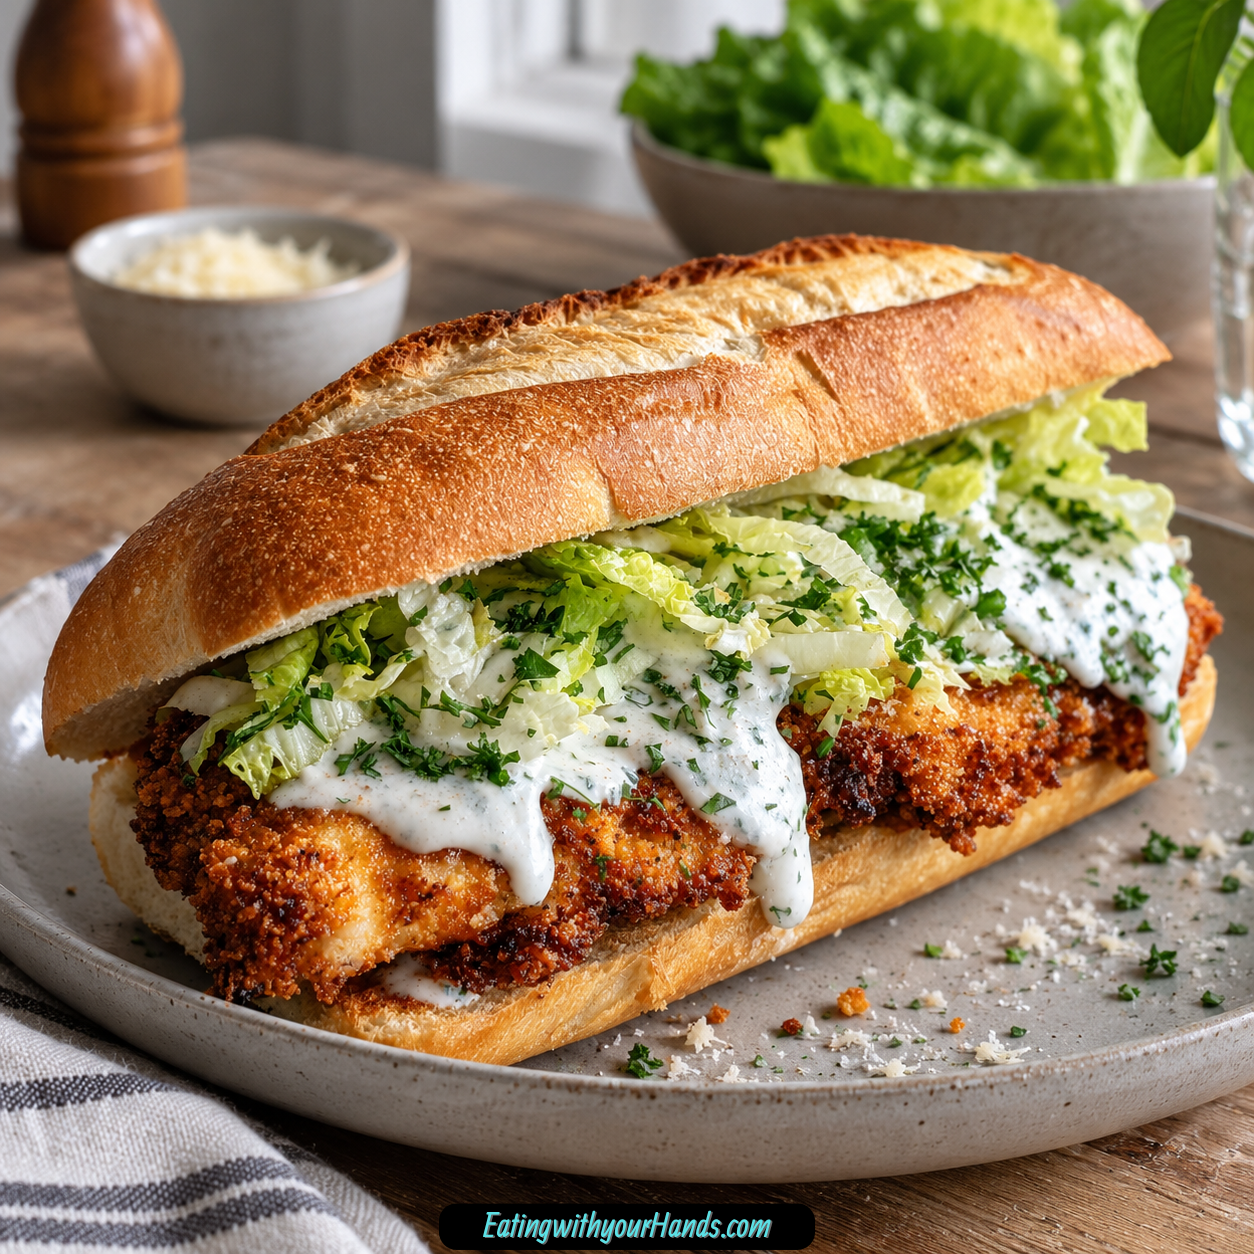

A Crispy Chicken Caesar Sandwich is what happens when a crunchy fried chicken cutlet and a creamy Caesar salad decide they belong inside a soft, sturdy roll. It is hearty, fresh, tangy, cheesy, and packed with the kind of texture that makes lunch feel exciting instead of ordinary.
This sandwich starts with juicy chicken breasts marinated in seasoned buttermilk. The chicken is coated in flour, panko breadcrumbs, and grated Parmesan, then fried until golden and crisp.
Once the chicken rests, it gets sliced into strips and tucked into ciabatta or brioche rolls with crisp romaine lettuce, Caesar dressing, a quick mayo-lemon-Worcestershire sauce, and extra Parmesan if you want that final cheesy finish. Every bite has crunch, creaminess, freshness, and a little savory depth.
This is the kind of recipe that feels perfect for busy days when takeout is tempting, but homemade food sounds better. It comes together in about 35 minutes once the chicken has marinated, and it makes four satisfying sandwiches.
The double-coating method is what makes the chicken especially crisp. Each piece goes from buttermilk to flour mixture, back into the buttermilk, and then into the flour mixture again, creating a textured crust that holds onto the chicken beautifully.
The Caesar flavor comes through in more than one way. Parmesan in the breading adds savory flavor to the chicken, Caesar dressing brings that creamy tang, and Worcestershire sauce adds depth to the quick sauce.
The rolls matter too. Ciabatta gives you a little extra chew and crunch, while brioche brings a buttery softness that makes the sandwich feel extra indulgent.
This Crispy Chicken Caesar Sandwich is perfect for lunches, casual dinners, kids, work meals, weekend cravings, and anyone who wants a sandwich that feels like comfort food but still has crisp lettuce and bright dressing. It is simple, satisfying, and easy to customize.
Table of Contents
- Why You’ll Love This Crispy Chicken Caesar Sandwich
- Recipe Details
- Ingredients
- For the Chicken
- For the Sauce
- For Assembly
- Optional Substitutions and Variations
- Ingredient Notes
- Optional Swaps, Variations, Add-Ins, and Serving Ideas
- Classic Crispy Chicken Caesar Sandwich
- Ciabatta Chicken Caesar Sandwich
- Brioche Chicken Caesar Sandwich
- Homemade Buttermilk Substitute
- Extra Crispy Double-Coated Chicken
- Spicy Crispy Chicken Caesar Sandwich
- Sriracha Mayo Chicken Caesar Sandwich
- Grilled Chicken Caesar Sandwich
- Baked Crispy Chicken Caesar Sandwich
- Chicken Thigh Caesar Sandwich
- Cucumber Chicken Caesar Sandwich
- Carrot Crunch Chicken Caesar Sandwich
- Pickled Red Onion Chicken Caesar Sandwich
- Roasted Red Pepper Chicken Caesar Sandwich
- Artichoke Heart Chicken Caesar Sandwich
- Gluten-Free Crispy Chicken Caesar Sandwich
- Vegan-Inspired Sauce Direction
- Potato Chip Side
- Simple Side Salad
- Why This Recipe Works
- Directions
- Step 1: Butterfly the Chicken
- Step 2: Prepare the Buttermilk Marinade
- Step 3: Marinate the Chicken
- Step 4: Prepare the Coating
- Step 5: Coat the Chicken the First Time
- Step 6: Dip and Coat Again
- Step 7: Heat the Oil
- Step 8: Fry the Chicken
- Step 9: Check for Doneness
- Step 10: Rest the Chicken
- Step 11: Make the Quick Sauce
- Step 12: Prepare the Rolls
- Step 13: Spread the Sauce
- Step 14: Add Romaine
- Step 15: Add the Crispy Chicken
- Step 16: Add Caesar Dressing
- Step 17: Finish With Parmesan
- Step 18: Serve Immediately
- Serving Ideas
- Storage
- Freezing
- Make-Ahead
- Helpful Notes for Best Results
- Variations
- Classic Crispy Chicken Caesar Sandwich
- Spicy Crispy Chicken Caesar Sandwich
- Sriracha Mayo Caesar Sandwich
- Grilled Chicken Caesar Sandwich
- Baked Crispy Chicken Caesar Sandwich
- Chicken Thigh Caesar Sandwich
- Cucumber Caesar Sandwich
- Carrot Crunch Caesar Sandwich
- Pickled Red Onion Caesar Sandwich
- Roasted Red Pepper Caesar Sandwich
- Artichoke Heart Caesar Sandwich
- Gluten-Free Crispy Chicken Caesar Sandwich
- Vegan-Style Sauce Adjustment
- Troubleshooting
- Frequently Asked Questions
- Why This Recipe Works So Well
- Final Thoughts
- Crispy Chicken Caesar Sandwich
Why You’ll Love This Crispy Chicken Caesar Sandwich
This sandwich is perfect for quick lunches. It is ready in about 35 minutes once the chicken is marinated.
It is full of flavor. Garlic powder, onion powder, paprika, Parmesan, lemon juice, Worcestershire sauce, and Caesar dressing all work together.
The texture is the best part. Crispy panko-coated chicken, juicy meat, crisp romaine, creamy dressing, and soft rolls make every bite satisfying.
It is easy to customize. You can make it spicy, grill the chicken, bake the chicken, add vegetables, or adjust the cheese.
It is kid-approved and filling. The crispy chicken makes it fun, while the Caesar flavors make it feel like a real meal.
It is practical for leftovers when stored properly. Keep the components separate, and you can assemble fresh sandwiches later.
Recipe Details
This Crispy Chicken Caesar Sandwich takes about 35 minutes to make after the chicken has marinated. The recipe makes 4 sandwiches.
The chicken uses 2 large boneless skinless chicken breasts. If they are thick, butterfly them into thinner cutlets so they cook evenly.
The chicken marinates in 1 cup buttermilk with garlic powder, onion powder, paprika, salt, and pepper. The chicken should marinate for at least 30 minutes.
If planning ahead, the chicken can marinate up to 4 hours for best results. Overnight also works, but do not go beyond 24 hours or the texture can become mushy.
If you do not have buttermilk, mix 1 cup milk with 1 tablespoon lemon juice or vinegar and let it sit for 5 minutes. This creates a quick substitute.
The coating uses 1 cup all-purpose flour, 1 cup panko breadcrumbs, and ½ cup grated Parmesan cheese. Panko gives the sandwich its crunchy texture.
The chicken is fried in about ¼ inch oil over medium heat. Vegetable or canola oil works well.
The chicken fries for 5 to 7 minutes per side. It is done when it reaches 165°F inside or when the thickest part has no pink.
The quick sauce uses ¼ cup mayonnaise, 1 tablespoon lemon juice, and 1 teaspoon Worcestershire sauce. A pinch of salt can be added if needed.
For assembly, use 4 sandwich rolls, such as ciabatta or brioche. Ciabatta gives crunch, while brioche adds buttery softness.
The sandwich also uses 2 cups chopped romaine lettuce, ½ cup Caesar dressing, and extra Parmesan cheese for garnish if desired. Store-bought Caesar dressing works, and homemade can also be used.
Ingredients
For the Chicken
- 2 large boneless skinless chicken breasts
- 1 cup buttermilk
- 1 teaspoon garlic powder
- 1 teaspoon onion powder
- 1 teaspoon paprika
- 1 teaspoon salt
- ½ teaspoon black pepper
- 1 cup all-purpose flour
- 1 cup panko breadcrumbs
- ½ cup grated Parmesan cheese
- Oil for frying, about ¼ inch deep
For the Sauce
- ¼ cup mayonnaise
- 1 tablespoon lemon juice
- 1 teaspoon Worcestershire sauce
For Assembly
- 4 sandwich rolls, ciabatta or brioche
- 2 cups romaine lettuce, chopped
- ½ cup Caesar dressing
- Extra Parmesan cheese for garnish, optional
Optional Substitutions and Variations
- 1 cup milk plus 1 tablespoon lemon juice or vinegar
- Cayenne pepper
- Hot sauce
- Sriracha
- Extra mayonnaise for sriracha mayo
- Grilled chicken
- Thinly sliced cucumbers
- Shredded carrots
- Quick-pickled red onions
- Roasted red peppers
- Artichoke hearts
- Chicken thighs
- Gluten-free flour alternatives
- Gluten-free panko alternatives
- Almond flour
- Crushed gluten-free crackers
- Plant-based mayo
- Nutritional yeast
- Vegetable or canola oil
Ingredient Notes
Chicken breasts are the main protein in this sandwich. If they are thick, butterflying them helps them cook evenly and stay juicy.
Buttermilk helps tenderize the chicken. It also carries the seasoning into the meat before breading.
Garlic powder adds savory flavor to the marinade. It gives the chicken a strong base flavor before frying.
Onion powder adds depth. It makes the chicken taste more rounded.
Paprika adds color and a subtle smoky note. It helps the coating taste warmer and more flavorful.
Salt is important in the marinade. It seasons the chicken before the crust goes on.
Black pepper adds mild heat. Freshly cracked pepper can be used if available.
All-purpose flour helps form the base of the crispy coating. It works with the buttermilk to cling to the chicken.
Panko breadcrumbs give the crust its crunchy texture. Regular breadcrumbs can work, but panko creates more crispness.
Grated Parmesan adds a salty, cheesy note to the coating. It helps tie the chicken to the Caesar flavors.
Mayonnaise makes the quick sauce creamy. Full-fat mayo gives the best flavor.
Lemon juice brightens the sauce. Fresh lemon juice tastes brighter, though bottled can work in a pinch.
Worcestershire sauce gives the sauce a deeper savory flavor. It adds that little something that makes the sandwich taste more complete.
Ciabatta rolls are sturdy and slightly crisp. Brioche rolls are softer and more buttery.
Romaine lettuce brings the classic Caesar crunch. Chopped romaine fits neatly inside the sandwich.
Caesar dressing adds the creamy, tangy flavor that makes this sandwich feel like a Caesar salad tucked into bread.
Extra Parmesan is optional, but it adds a final savory garnish. It works especially well on top of the chicken or lettuce.
Optional Swaps, Variations, Add-Ins, and Serving Ideas
Classic Crispy Chicken Caesar Sandwich
Make the sandwich with buttermilk-marinated chicken, a flour-panko-Parmesan coating, romaine, Caesar dressing, quick mayo sauce, and a ciabatta or brioche roll. This gives you the full crunchy, creamy Caesar sandwich experience.
Serve it right after assembling for the best texture. The chicken crust is at its peak when freshly fried.
Ciabatta Chicken Caesar Sandwich
Use ciabatta rolls for a sturdier sandwich. The slightly chewy texture stands up well to dressing and crispy chicken.
Ciabatta is a great choice when you want more bite. It keeps the sandwich from feeling too soft.
Brioche Chicken Caesar Sandwich
Use brioche rolls for a softer, buttery sandwich. Brioche adds richness and a little sweetness.
This version feels more indulgent. It pairs beautifully with crispy chicken and tangy Caesar dressing.
Homemade Buttermilk Substitute
If you do not have buttermilk, mix 1 cup milk with 1 tablespoon lemon juice or vinegar. Let it sit for 5 minutes.
Use it in the marinade the same way. It helps tenderize the chicken and hold the seasonings.
Extra Crispy Double-Coated Chicken
Use the double-coating method for maximum crunch. Dip the chicken in buttermilk, coat it in the flour mixture, dip again, and coat again.
This creates thicker, craggier layers. It is the secret to a sandwich with real crunch.
Spicy Crispy Chicken Caesar Sandwich
Add ½ teaspoon cayenne pepper to the buttermilk marinade. This gives the chicken a little heat.
You can also mix 1 tablespoon hot sauce into the Caesar dressing. It creates a spicy, creamy finish.
Sriracha Mayo Chicken Caesar Sandwich
Mix equal parts sriracha and mayo for a spicy drizzle. Add it on top before closing the sandwich.
This variation adds heat and creaminess. It is great when you want the sandwich to have more attitude.
Grilled Chicken Caesar Sandwich
Skip the frying and grill the marinated chicken. Cook over medium-high heat for about 6 to 8 minutes per side until cooked through.
This version is lighter and travels well for picnics. It still tastes great with Caesar dressing and romaine.
Baked Crispy Chicken Caesar Sandwich
Bake the coated chicken at 400°F on a wire rack for 20 to 25 minutes, flipping halfway. Spray the chicken lightly with oil before baking to help it crisp.
It will not be quite as crispy as fried chicken, but it is still delicious. This method is a good choice when you want less mess.
Chicken Thigh Caesar Sandwich
Use chicken thighs instead of breasts. They are juicier and more forgiving.
Trim excess fat and adjust the cooking time. Chicken thighs need about 8 to 10 minutes per side because they are thicker.
Cucumber Chicken Caesar Sandwich
Add thinly sliced cucumbers for extra crunch. They make the sandwich taste fresher.
Cucumbers work well with creamy Caesar dressing. Add them right before serving.
Carrot Crunch Chicken Caesar Sandwich
Add shredded carrots for texture and color. They bring a little sweetness and crunch.
This is a simple way to add vegetables. It also makes the sandwich more colorful.
Pickled Red Onion Chicken Caesar Sandwich
Add quick-pickled red onions for tang. They cut through the richness of the fried chicken.
This variation tastes bright and bold. It works especially well with extra Parmesan.
Roasted Red Pepper Chicken Caesar Sandwich
Add roasted red peppers. They bring sweetness and softness.
Roasted red peppers pair nicely with crispy chicken and Caesar dressing. They also add color.
Artichoke Heart Chicken Caesar Sandwich
Add artichoke hearts for a tangy vegetable boost. They make the sandwich feel a little more layered.
Use them with romaine and dressing. They are especially nice if you want a more savory sandwich.
Gluten-Free Crispy Chicken Caesar Sandwich
Use gluten-free flour and gluten-free panko alternatives. Almond flour with crushed gluten-free crackers can also work.
Use gluten-free rolls if needed. The final texture may vary, but the sandwich can still be crispy and flavorful.
Vegan-Inspired Sauce Direction
Use plant-based mayo and skip the Parmesan if needed. Nutritional yeast can add a cheesy vibe.
This changes the flavor and texture. It is an option for adapting the sauce and garnish.
Potato Chip Side
Serve the sandwich with potato chips. The salty crunch makes the meal feel casual and satisfying.
This is perfect for lunch. It keeps the plate simple.
Simple Side Salad
Serve with a simple side salad. The freshness balances the rich fried chicken.
This is a good choice when you want the sandwich to feel like a complete meal. Keep the salad light.
Why This Recipe Works
This Crispy Chicken Caesar Sandwich works because it balances creamy, crunchy, savory, and fresh elements. Each layer adds something important.
The buttermilk marinade makes the chicken flavorful and tender. Seasoning the marinade means the chicken tastes good before the coating even goes on.
The double-coating method creates a thicker crust. Flour, panko, and Parmesan cling to the chicken and crisp in the hot oil.
Panko breadcrumbs create a lighter crunch than standard crumbs alone. Parmesan adds salty, cheesy flavor to the crust.
Frying in ¼ inch oil gives the chicken a golden exterior without needing a deep fryer. Medium heat helps the coating crisp while the chicken cooks through.
The quick sauce adds creamy brightness. Mayo, lemon juice, and Worcestershire make a small but flavorful spread.
Caesar dressing brings the main flavor identity. It is tangy, creamy, and classic with romaine and Parmesan.
Romaine gives the sandwich a fresh crunch. Without it, the sandwich would feel too heavy.
Ciabatta or brioche rolls hold the filling well. They make the sandwich sturdy enough to handle crispy chicken and dressing.
Directions
Step 1: Butterfly the Chicken
Start with 2 large boneless skinless chicken breasts. If they are thick, slice them horizontally to make thinner cutlets.
Thinner chicken cooks faster and more evenly. It also fits better inside the sandwich.
Step 2: Prepare the Buttermilk Marinade
In a bowl, whisk together 1 cup buttermilk, 1 teaspoon garlic powder, 1 teaspoon onion powder, 1 teaspoon paprika, 1 teaspoon salt, and ½ teaspoon black pepper. Mix until the seasonings are evenly blended.
If you do not have buttermilk, mix 1 cup milk with 1 tablespoon lemon juice or vinegar and let it sit for 5 minutes. Use it as the marinade base.
Step 3: Marinate the Chicken
Place the chicken in the buttermilk mixture. Make sure each piece is fully coated.
Let the chicken marinate for at least 30 minutes. For more flavor, marinate up to 4 hours, or overnight if planning ahead.
Step 4: Prepare the Coating
In another bowl, combine 1 cup all-purpose flour, 1 cup panko breadcrumbs, and ½ cup grated Parmesan cheese. Stir until evenly mixed.
This mixture gives the chicken its crispy crust. The Parmesan adds savory flavor right into the breading.
Step 5: Coat the Chicken the First Time
Remove one piece of chicken from the buttermilk and let the excess drip off. Place it into the flour-panko-Parmesan mixture.
Press the coating onto both sides. Make sure the chicken is covered.
Step 6: Dip and Coat Again
Dip the coated chicken back into the buttermilk. Let excess drip off again.
Return it to the flour mixture and coat it a second time. This double-coating method creates extra crunch.
Step 7: Heat the Oil
Pour about ¼ inch of vegetable or canola oil into a large skillet. Heat over medium heat.
Test the oil with a tiny breadcrumb. If it sizzles right away, the oil is ready.
Step 8: Fry the Chicken
Carefully add the coated chicken to the skillet. Do not crowd the pan, and cook in batches if needed.
Fry for 5 to 7 minutes per side. The chicken should be golden brown, crispy, and cooked through.
Step 9: Check for Doneness
The chicken is done when it reaches 165°F inside. If you do not have a thermometer, cut into the thickest part and make sure there is no pink.
Let the cooked chicken transfer to a paper towel-lined plate. This drains extra oil.
Step 10: Rest the Chicken
Let the chicken rest for 2 minutes. This helps keep the juices inside.
After resting, slice the chicken into strips for easier sandwich stacking. Keep the pieces warm if possible.
Step 11: Make the Quick Sauce
In a small bowl, stir together ¼ cup mayonnaise, 1 tablespoon lemon juice, and 1 teaspoon Worcestershire sauce. Taste and add a pinch of salt if needed.
This sauce adds creamy, tangy flavor to the rolls. It also helps the sandwich taste richer.
Step 12: Prepare the Rolls
Slice 4 ciabatta or brioche sandwich rolls open. Lay them out for assembly.
Ciabatta gives more chew and structure, while brioche gives a softer, buttery bite. Use whichever you prefer.
Step 13: Spread the Sauce
Spread the mayo-lemon-Worcestershire sauce on both sides of each roll. Cover the bread evenly.
This helps flavor the sandwich from top to bottom. It also gives the romaine and chicken something to cling to.
Step 14: Add Romaine
Add chopped romaine lettuce to the bottom half of each roll. Use about 2 cups total.
Romaine brings crispness and freshness. It gives the sandwich that Caesar salad feeling.
Step 15: Add the Crispy Chicken
Layer the sliced crispy chicken over the romaine. Divide it evenly among the 4 rolls.
Use enough chicken to make each sandwich hearty. The crispy crust should stay exposed in places for texture.
Step 16: Add Caesar Dressing
Drizzle ½ cup Caesar dressing over the chicken and romaine. Use enough to make the sandwich creamy without drowning it.
Store-bought Caesar dressing works, and homemade is also delicious. Spread it evenly so every bite has flavor.
Step 17: Finish With Parmesan
Sprinkle extra Parmesan cheese over the filling if desired. This adds more savory Caesar flavor.
Close each sandwich and press gently. This helps the layers settle together.
Step 18: Serve Immediately
Serve the sandwiches right away while the chicken is still crisp. Add potato chips or a simple side salad if desired.
If packing for later, wrap tightly in parchment paper. For best texture, keep components separate and assemble close to eating.
Serving Ideas
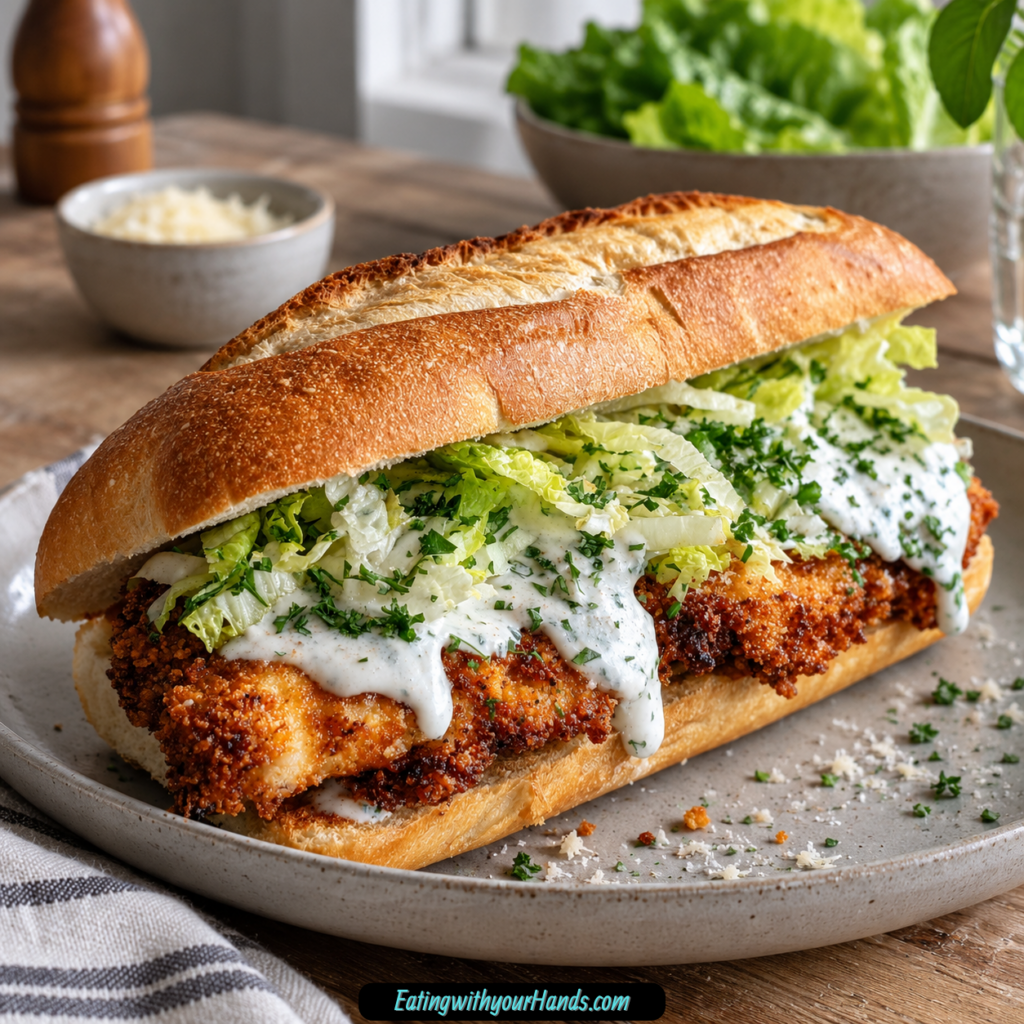
This sandwich is best served fresh. The chicken crust is crispest right after frying, and the roll tastes best before the dressing has time to soften it.
Serve it with potato chips for a classic lunch plate. The extra crunch makes the meal feel casual and satisfying.
A simple side salad also works well. It keeps the plate fresh without competing with the sandwich.
If packing for lunch, wrap the assembled sandwich tightly in parchment paper. This keeps everything snug without steaming the bread too much.
For a cleaner packed lunch, store the components separately. Keep the chicken, lettuce, rolls, sauce, and dressing apart until ready to assemble.
Serve the sandwich with extra Caesar dressing on the side if you like a saucier bite. This also lets each person adjust the amount.
For kids, cut the sandwich in half. It makes it easier to hold and eat.
For a heartier dinner, serve with chips, salad, and extra Parmesan on top. The sandwich is filling enough to be the main event.
Storage
If you have leftovers, store the components separately. This keeps the chicken from softening and the lettuce from wilting.
Cooked chicken can be stored in an airtight container in the refrigerator for up to 3 days. Let it cool before sealing.
Keep lettuce in its own container. This helps it stay crisp.
Store the sauce and Caesar dressing separately. This prevents the bread and chicken from getting soggy.
Reheat the chicken in a 350°F oven for 5 to 10 minutes. This helps revive the crispiness.
Avoid microwaving if you want the chicken crust to stay crisp. The microwave can make the coating soft.
Assemble fresh each time. This gives you the best texture and flavor.
Freezing
The best storage method for this recipe is refrigeration of separate components. The assembled sandwich is not ideal for freezing because the bread, lettuce, and dressing will not keep their best texture.
If needed, focus on storing cooked chicken separately. Protect it well in an airtight container.
For the best result after storage, reheat the chicken in the oven. The 350°F oven helps restore some crispness.
Keep the rolls, lettuce, dressing, sauce, and cheese separate. Add them only after the chicken is hot.
Do not freeze lettuce or assembled dressed sandwiches. The texture will suffer.
This sandwich is designed to taste best fresh. Make only what you plan to enjoy when possible.
Make-Ahead
The chicken can be marinated ahead. A minimum of 30 minutes works, but up to 4 hours is ideal.
Overnight marinating is possible. Do not go beyond 24 hours, or the texture may become mushy.
You can also prepare the coating mixture ahead. Keep the flour, panko, and Parmesan mixed in a covered container until ready to cook.
The sauce can be stirred together ahead and refrigerated. Mix before using.
Chop the romaine ahead if needed, but keep it dry and chilled. Crisp lettuce makes the sandwich better.
For best results, fry or bake the chicken close to serving time. The crust is best when fresh.
If packing for lunch, assemble right before eating if possible. This keeps the bread from getting soggy.
Helpful Notes for Best Results
Butterfly thick chicken breasts. Thin cutlets cook faster and stay juicier.
Marinate for at least 30 minutes. The buttermilk mixture adds flavor and tenderness.
Use the double-coating method. It creates the crispiest crust.
Use one hand for wet ingredients and one hand for dry ingredients. This helps prevent thick breadcrumb buildup on your fingers.
Make sure the oil is hot before frying. A breadcrumb should sizzle immediately.
Do not crowd the skillet. Cook in batches if necessary.
Let the chicken rest for 2 minutes before slicing. This keeps it juicy.
Assemble right before eating. This keeps the chicken crispy and the bread fresh.
Variations
Classic Crispy Chicken Caesar Sandwich
Use buttermilk-marinated chicken, flour, panko, Parmesan, romaine, Caesar dressing, quick mayo sauce, and ciabatta or brioche rolls. This gives the sandwich its classic crispy Caesar flavor.
Serve immediately after assembling. The texture is best fresh.
Spicy Crispy Chicken Caesar Sandwich
Add ½ teaspoon cayenne pepper to the buttermilk marinade. This gives the chicken a little heat.
You can also mix 1 tablespoon hot sauce into the Caesar dressing. The creamy dressing balances the spice.
Sriracha Mayo Caesar Sandwich
Mix equal parts sriracha and mayo. Drizzle it over the sandwich before closing.
This gives the sandwich a creamy spicy finish. Add extra napkins because it can get messy.
Grilled Chicken Caesar Sandwich
Marinate the chicken as usual, then grill it over medium-high heat for about 6 to 8 minutes per side. This creates a lighter version.
The chicken will not have the panko crunch, but it will still have great flavor. It travels well for picnics.
Baked Crispy Chicken Caesar Sandwich
Bake the coated chicken at 400°F on a wire rack for 20 to 25 minutes, flipping halfway. Spray the chicken lightly with oil for extra crispiness.
This option is useful when you want less frying mess. It will be slightly less crisp than the fried version.
Chicken Thigh Caesar Sandwich
Use chicken thighs instead of breasts. Trim excess fat first.
Cook for about 8 to 10 minutes per side because thighs are thicker. They are juicy and flavorful.
Cucumber Caesar Sandwich
Add thinly sliced cucumbers. They bring extra crunch.
This variation makes the sandwich feel fresher. Add them right before serving.
Carrot Crunch Caesar Sandwich
Add shredded carrots. They add color and light sweetness.
Carrots give the sandwich more texture. They work well with creamy dressing.
Pickled Red Onion Caesar Sandwich
Add quick-pickled red onions. They bring tangy brightness.
The onions cut through the richness of the fried chicken. They are a great addition if you like bold flavor.
Roasted Red Pepper Caesar Sandwich
Add roasted red peppers. They give the sandwich a sweet, savory note.
This variation adds color and softness. It pairs well with Parmesan.
Artichoke Heart Caesar Sandwich
Add artichoke hearts for tangy flavor. They make the sandwich feel more layered.
Use them with romaine for freshness. They work especially well with Caesar dressing.
Gluten-Free Crispy Chicken Caesar Sandwich
Use gluten-free flour and gluten-free panko alternatives. Almond flour with crushed gluten-free crackers can also work.
Use gluten-free rolls if needed. The texture may vary, but the flavor will still be satisfying.
Vegan-Style Sauce Adjustment
Use plant-based mayo and skip the Parmesan. Nutritional yeast can add a cheesy flavor.
This adjusts the sauce and garnish. The full sandwich will change depending on the other ingredients used.
Troubleshooting
The Chicken Is Not Crispy
The oil may not be hot enough, or the pan may be crowded. Test the oil with a breadcrumb before frying.
Cook in batches if needed. Crowding lowers the temperature and softens the crust.
The Coating Falls Off
The chicken may have had too much marinade clinging to it before coating. Let excess buttermilk drip off.
Press the flour-panko mixture firmly onto the chicken. The double coating helps it stick better.
The Chicken Is Browning Too Fast
The oil may be too hot. Lower the heat slightly and keep cooking until the chicken is done.
Thinner cutlets help avoid this problem. Thick chicken takes longer and can brown before the inside cooks.
The Chicken Is Dry
The chicken may have cooked too long. Fry until golden and cooked through, then rest for 2 minutes.
Butterflying thick breasts helps them cook evenly. Buttermilk marinating also helps keep them tender.
The Sauce Is Too Sharp
Use a little more mayo to soften the lemon and Worcestershire flavor. Stir and taste again.
A pinch of salt can also help balance the sauce. Add gradually.
The Sauce Is Too Mild
Add a little more lemon juice or Worcestershire sauce. Taste as you go.
The sauce should be creamy but bright. It should support the Caesar dressing.
The Sandwich Is Too Messy
Use less dressing or spread it more evenly. Press the sandwich gently after closing.
Choose sturdy rolls like ciabatta. Soft rolls can collapse more easily.
The Bread Gets Soggy
Assemble the sandwich right before eating. Store components separately if saving leftovers.
Avoid adding too much dressing too early. Keep sauce and dressing on the side for packed lunches.
The Lettuce Wilts
Add romaine just before serving. Keep it chilled and dry.
Use crisp romaine rather than delicate greens. Romaine holds up better in this sandwich.
Leftover Chicken Lost Its Crunch
Reheat in a 350°F oven for 5 to 10 minutes. Avoid the microwave if possible.
The oven helps bring back some crispiness. Assemble the sandwich after reheating.
Frequently Asked Questions
Can I use chicken thighs?
Yes, chicken thighs can be used. They are juicier and more forgiving than chicken breasts.
Trim excess fat first. They will need about 8 to 10 minutes per side because they are thicker.
How long can I marinate the chicken?
Marinate for at least 30 minutes. Up to 4 hours is ideal for flavor.
Overnight works too, but do not go beyond 24 hours. The texture can become mushy.
Can I bake instead of fry?
Yes, bake the coated chicken at 400°F on a wire rack for 20 to 25 minutes, flipping halfway. Spray lightly with oil before baking.
It will not be quite as crispy as frying. It is still a good less-mess option.
What can I use instead of buttermilk?
Mix 1 cup milk with 1 tablespoon lemon juice or vinegar. Let it sit for 5 minutes.
Use it the same way in the marinade. It is a simple substitute.
Can I make this gluten-free?
Yes, use gluten-free flour and gluten-free panko alternatives. Almond flour with crushed gluten-free crackers can also work.
Use gluten-free rolls if needed. The coating texture may be different.
How should I store leftovers?
Store the components separately. Keep cooked chicken in an airtight container in the refrigerator for up to 3 days.
Store lettuce, dressing, sauce, and rolls separately. Assemble fresh for the best texture.
How do I reheat the chicken?
Reheat the chicken in a 350°F oven for 5 to 10 minutes. This helps revive the crispiness.
Avoid microwaving if you want the coating to stay crisp. Microwaving makes it softer.
What should I serve with this sandwich?
Serve it with potato chips or a simple side salad. Both keep the meal easy and balanced.
You can also add extra Caesar dressing on the side. It is great for dipping.
Why This Recipe Works So Well
This Crispy Chicken Caesar Sandwich works so well because it gives you the familiar flavors of a Caesar salad in a heartier form. The crispy chicken makes it feel indulgent, while the romaine and dressing keep it fresh.
The buttermilk marinade makes the chicken tender and flavorful. Garlic powder, onion powder, paprika, salt, and pepper season it before it ever touches the coating.
The flour, panko, and Parmesan coating creates texture and flavor. Panko gives crunch, flour helps structure, and Parmesan adds savory depth.
The double-coating technique makes the crust thicker and more satisfying. That second dip is what gives the chicken its extra crispy layers.
The quick sauce adds creamy tang to the bread. Mayo, lemon juice, and Worcestershire give the sandwich a bright, savory spread.
Caesar dressing brings the classic flavor. Romaine adds crispness, and extra Parmesan gives a salty finish.
The roll choice lets you decide the feel of the sandwich. Ciabatta makes it sturdier, while brioche makes it softer and richer.
The recipe is flexible too. You can make it spicy, grill the chicken, bake it, use chicken thighs, add crunchy vegetables, try gluten-free alternatives, or adjust the sauce with plant-based mayo and nutritional yeast.
Most of all, it works because it is fast, satisfying, and layered with texture. It tastes like something you would crave from a deli, but it can come from your own kitchen in about 35 minutes.
Final Thoughts
This Crispy Chicken Caesar Sandwich Recipe is made with buttermilk-marinated chicken breasts, garlic powder, onion powder, paprika, salt, pepper, flour, panko breadcrumbs, Parmesan, oil for frying, a quick mayo-lemon-Worcestershire sauce, ciabatta or brioche rolls, romaine lettuce, Caesar dressing, and extra Parmesan if desired. The chicken is double-coated, fried until golden, rested, sliced, and stacked into rolls with crisp lettuce and creamy dressing.
Serve it fresh with potato chips, a simple side salad, or extra Caesar dressing for dipping. With its 35-minute timing, crispy Parmesan-panko crust, juicy chicken, creamy sauce, fresh romaine, and easy variations, this sandwich is a lunch or dinner worth making again whenever you want something crunchy, creamy, and truly satisfying.
Crispy Chicken Caesar Sandwich

Crispy, juicy, creamy, and full of Caesar-inspired flavor, this Crispy Chicken Caesar Sandwich layers golden fried chicken with romaine lettuce, Caesar dressing, a simple mayo-lemon sauce, and soft ciabatta or brioche rolls. Buttermilk, Parmesan, panko, garlic powder, onion powder, paprika, and black pepper give the chicken a flavorful coating with a crunchy finish.
Recipe Details
- Prep Time: 15 minutes
- Cook Time: 20 minutes
- Total Time: 35 minutes
- Course: Lunch, Sandwich
- Cuisine: American
- Servings: 4 sandwiches
Equipment
- mixing bowls
- Skillet
Ingredients
For Assembly
- Extra Parmesan cheese for garnish Optional
- ½ cup Caesar dressing
- 2 cups romaine lettuce, chopped
- 4 sandwich rolls (ciabatta or brioche)
For the Sauce
- 1 teaspoon Worcestershire sauce
- 1 tablespoon lemon juice
- ¼ cup mayonnaise
For the Chicken
- ½ cup grated Parmesan cheese
- 1 cup panko breadcrumbs
- 1 cup all-purpose flour
- ½ teaspoon black pepper
- 1 teaspoon salt
- 1 teaspoon paprika
- 1 teaspoon onion powder
- 1 teaspoon garlic powder
- 1 cup buttermilk For tenderizing the chicken
- 2 large boneless skinless chicken breasts Tender and juicy
Instructions
Step 1: Marinate the Chicken
Place the boneless skinless chicken breasts in a bowl with the buttermilk, garlic powder, onion powder, paprika, salt, and black pepper. Let the chicken marinate for at least 30 minutes.
The buttermilk helps tenderize the chicken while the seasonings build the base flavor. Make sure the chicken is well coated before it rests.
Step 2: Mix the Crispy Coating
In a shallow dish, combine the all-purpose flour, panko breadcrumbs, and grated Parmesan cheese. Stir until the coating mixture is evenly blended.
The panko gives the chicken a crisp texture, while the Parmesan adds a savory Caesar-style flavor. Keep the coating ready before removing the chicken from the marinade.
Step 3: Coat the Chicken
Lift each chicken breast from the buttermilk mixture and coat it in the flour mixture. Press lightly so the coating sticks to the surface.
For extra crispiness, double-coat the chicken by dipping it back into the buttermilk and flour mixture before frying. This adds a thicker, crunchier outside.
Step 4: Cook Until Golden and Crispy
Heat oil in a skillet over medium heat. Cook the chicken until golden and crispy, about 5-7 minutes per side.
The chicken should be browned on the outside and cooked through inside. Turn it carefully so the coating stays attached and both sides crisp evenly.
Step 5: Make the Sandwich Sauce
In a small bowl, mix the mayonnaise, lemon juice, and Worcestershire sauce. Stir until the sauce becomes smooth.
This simple sauce adds creamy brightness to the rolls. Keep it ready for spreading before assembling the sandwiches.
Step 6: Prepare the Rolls
Slice the sandwich rolls. Spread the sauce on both sides of each roll.
Use ciabatta or brioche as listed. The soft rolls help hold the crispy chicken, romaine lettuce, Caesar dressing, and sauce together.
Step 7: Assemble the Sandwiches
Layer the rolls with chopped romaine lettuce, crispy chicken, and Caesar dressing. Garnish with extra Parmesan cheese if desired.
Serve the sandwiches right away so the chicken stays crisp and the lettuce stays fresh. Each sandwich should have creamy sauce, crunchy chicken, romaine, Caesar dressing, and the optional Parmesan finish.
Notes
- For extra crispiness, double-coat the chicken by dipping it back into the buttermilk and flour mixture before frying.
Serving Suggestions
Serve this Crispy Chicken Caesar Sandwich warm, right after the chicken has been fried and the sandwiches are assembled. The contrast of crispy chicken, chopped romaine, creamy Caesar dressing, mayo-lemon sauce, and soft ciabatta or brioche makes each bite rich and fresh.
Use extra Parmesan cheese as an optional garnish if you want a stronger Caesar-style finish. The sandwich already includes Parmesan in the coating, so the garnish adds another savory layer without changing the base recipe.
For the best texture, assemble the sandwiches close to serving time. This helps the chicken stay crisp and keeps the romaine lettuce from softening too much under the dressing.
Storage
How to Store
The recipe does not provide specific storage instructions or storage duration, so no exact storage time is added here.
Marinade Tip
Marinate the chicken in buttermilk, garlic powder, onion powder, paprika, salt, and black pepper for at least 30 minutes. This gives the chicken time to absorb flavor before coating.
Coating Tip
Press the flour, panko breadcrumbs, and Parmesan mixture lightly onto each chicken breast. For extra crispiness, double-coat the chicken before frying.
Frying Tip
Cook the chicken in a skillet over medium heat for about 5-7 minutes per side. The outside should be golden and crispy.
Sauce Tip
Mix the mayonnaise, lemon juice, and Worcestershire sauce until smooth. Spread it on both sides of the sliced rolls before adding the filling.
Assembly Tip
Layer the sandwich rolls with romaine lettuce, crispy chicken, Caesar dressing, and optional extra Parmesan cheese. Serve soon after assembling for the best crunch.

Fernando is the creator and writer behind the food blog Eating with your Hands. Living and working in cities like Paris, Barcelona, and Berlin, and being married to a Canadian foodie, has given Fernando a passion and interest in food and inspired him to run EWYH.