
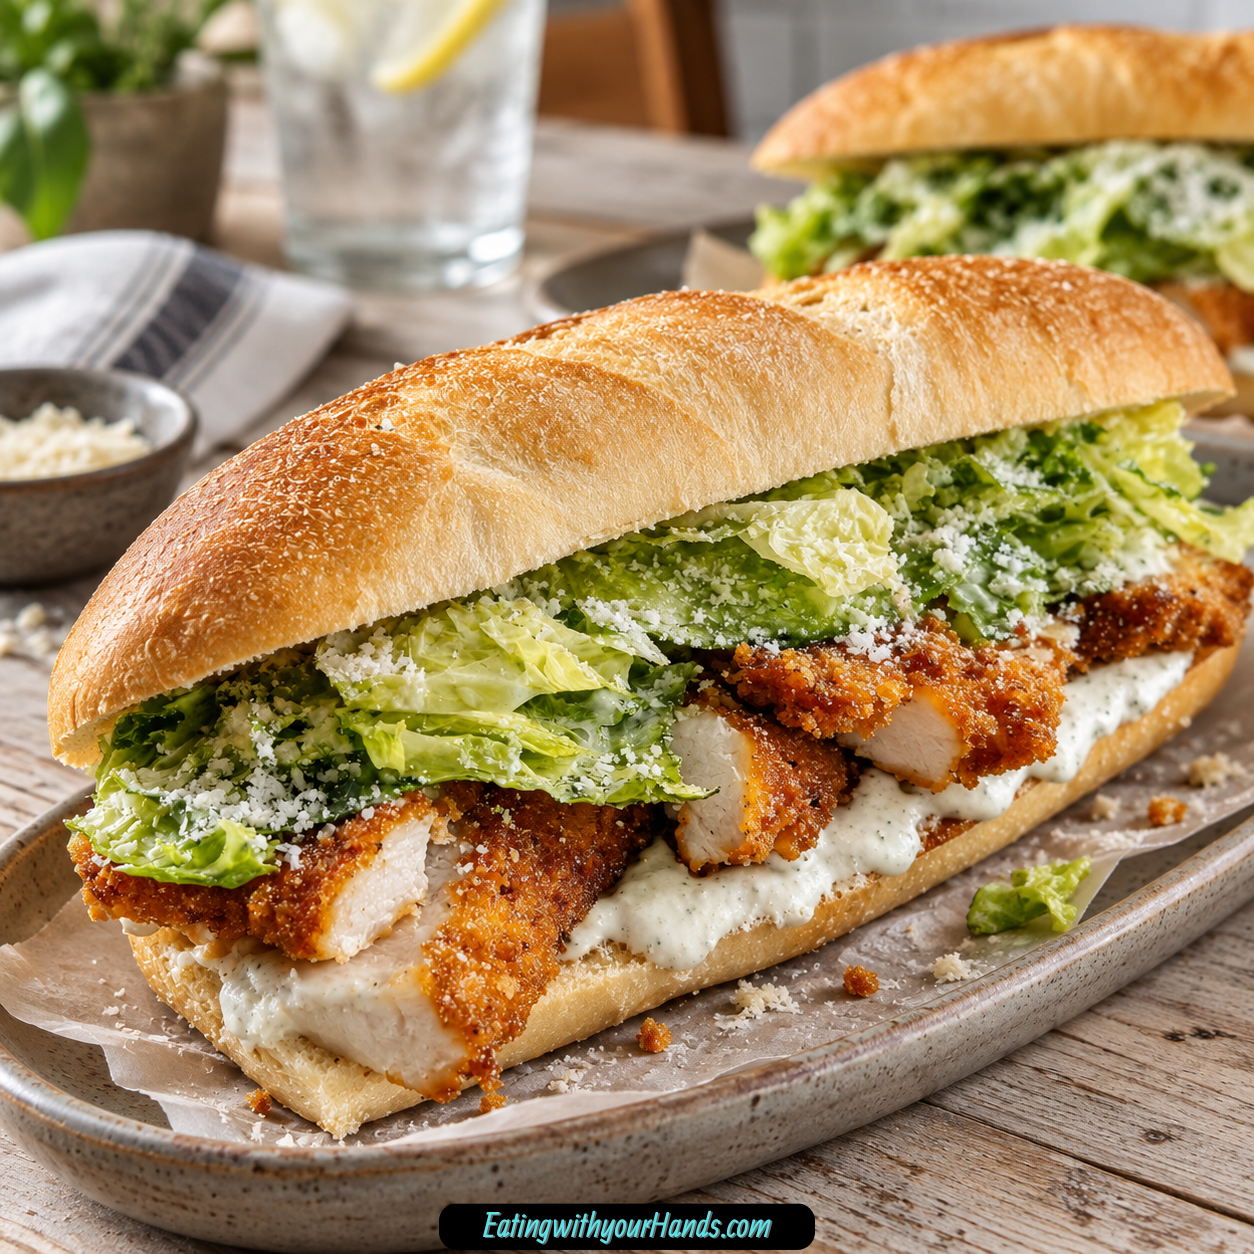
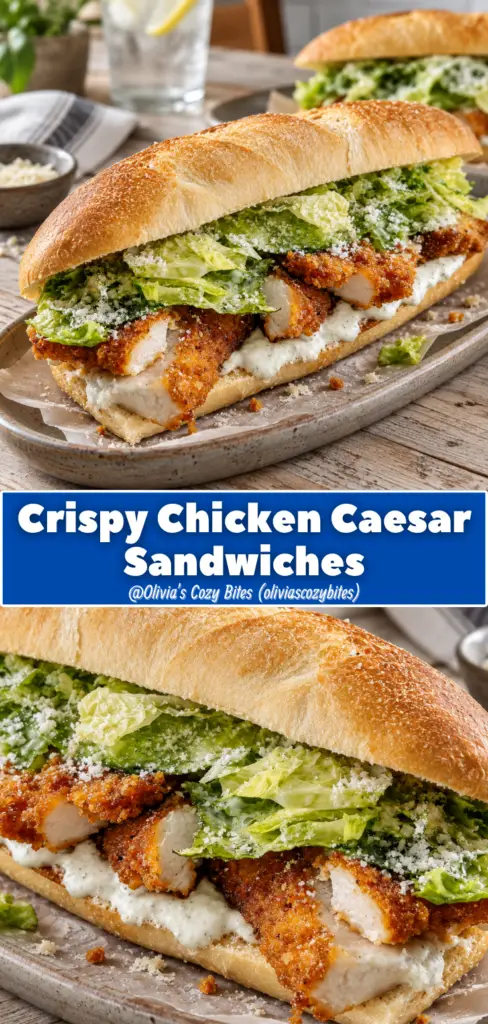
Crispy Chicken Caesar Sandwiches are the kind of meal that turns a simple lunch or weeknight dinner into something you actually look forward to all day. They bring together golden Panko-coated chicken, garlicky Parmesan butter, creamy homemade Caesar dressing, crisp romaine, and sturdy toasted bread in one messy, crunchy, deeply satisfying sandwich.
This recipe feels like the classic Caesar salad decided it wanted to become heartier, warmer, and a whole lot more filling. Instead of serving the dressing over a bowl of lettuce and croutons, everything gets layered into a toasted hoagie roll or crusty baguette with crispy chicken as the star.
The chicken is thin, seasoned, dipped in egg wash, coated in breadcrumbs and Panko, then fried until crunchy and cooked through. Each cutlet gets that golden exterior that makes the sandwich feel like comfort food from the first bite.
The garlic butter is what makes the bread unforgettable. Salted butter, mayo, minced garlic, parsley, and finely grated Parmesan are stirred together and spread onto the rolls before toasting, giving every bite a savory, buttery edge.
The Caesar dressing is creamy and tangy, with mayo, sour cream or Greek yogurt, Parmesan, lemon juice, Dijon mustard, anchovy paste, Worcestershire sauce, grated garlic, salt, and pepper. It is rich enough to cling to the chicken but bright enough to keep the sandwich from feeling heavy.
Romaine adds the fresh crunch that every good Caesar sandwich needs. Torn into sandwich-sized pieces, it gives structure and freshness without disappearing into the bread.
These sandwiches are ready in about 35 minutes and make four generous servings. They are perfect when you want something homemade, hearty, and flavorful without turning dinner into a long project.
Serve them with kettle chips, a simple side salad, extra Caesar dressing for dipping, or wrapped up for lunch the next day. Crispy, creamy, garlicky, tangy, and a little messy in the best way, these sandwiches are the kind of meal that earns a permanent spot in the dinner rotation.
Table of Contents
- Why You’ll Love These Crispy Chicken Caesar Sandwiches
- Recipe Details
- Ingredients
- For the Chicken Cutlets
- For the Garlic Butter
- For the Caesar Dressing
- To Assemble
- Optional Variations and Add-Ins
- Ingredient Notes
- Optional Swaps, Variations, Add-Ins, and Serving Ideas
- Classic Crispy Chicken Caesar Sandwiches
- Grilled Chicken Caesar Sandwiches
- Baked Chicken Caesar Sandwiches
- Gluten-Free Chicken Caesar Sandwiches
- Spicy Chicken Caesar Sandwiches
- Tomato Chicken Caesar Sandwiches
- Avocado Chicken Caesar Sandwiches
- Roasted Red Pepper Chicken Caesar Sandwiches
- Chicken Caesar Wraps
- Baguette Caesar Sandwiches
- Extra Dressing Sandwiches
- Kettle Chip Plate
- Simple Side Salad Plate
- Party Sandwich Halves
- Capers Instead of Anchovy Paste
- Soy Sauce Instead of Anchovy Paste
- Why This Recipe Works
- Directions
- Step 1: Slice the Chicken
- Step 2: Season the Cutlets
- Step 3: Prepare the Egg Wash
- Step 4: Mix the Coating
- Step 5: Coat the Chicken
- Step 6: Heat the Oil
- Step 7: Fry the First Side
- Step 8: Flip and Finish the Chicken
- Step 9: Make the Garlic Butter
- Step 10: Start the Caesar Dressing
- Step 11: Add Caesar Flavor
- Step 12: Adjust the Dressing
- Step 13: Prepare the Bread
- Step 14: Toast the Rolls
- Step 15: Add the Crispy Chicken
- Step 16: Add Romaine and Dressing
- Step 17: Close and Press
- Step 18: Serve Right Away
- Serving Ideas
- Storage
- Freezing
- Make-Ahead
- Helpful Notes for Best Results
- Variations
- Classic Crispy Chicken Caesar Sandwiches
- Grilled Chicken Caesar Sandwiches
- Chicken Thigh Caesar Sandwiches
- Baked Crispy Chicken Caesar Sandwiches
- Gluten-Free Crispy Chicken Caesar Sandwiches
- Spicy Chicken Caesar Sandwiches
- Tomato Caesar Sandwiches
- Avocado Caesar Sandwiches
- Roasted Red Pepper Caesar Sandwiches
- Chicken Caesar Wraps
- Extra Garlic Butter Sandwiches
- Extra Dressing Sandwiches
- Troubleshooting
- Frequently Asked Questions
- Why This Recipe Works So Well
- Final Thoughts
- Chicken Caesar Sandwiches
Why You’ll Love These Crispy Chicken Caesar Sandwiches
These sandwiches have serious crunch. The breadcrumb and Panko coating makes the chicken crisp, golden, and satisfying.
The garlic butter takes the bread to another level. Butter, mayo, garlic, parsley, and Parmesan melt into the rolls and make them taste savory and rich.
The Caesar dressing is homemade and full of flavor. Mayo, sour cream or Greek yogurt, Parmesan, lemon, Dijon, anchovy paste, Worcestershire, and garlic create a creamy dressing with tang and depth.
They are ready in about 35 minutes. That makes them doable for weeknights while still feeling exciting.
They make four generous servings. This is a great recipe for family dinners, casual weekends, or a sandwich board for guests.
The components store well. Chicken, garlic butter, and dressing can be kept separately so leftovers stay useful.
They are easy to customize. You can grill or bake the chicken, make them gluten-free, add vegetables, bring in spice, or turn everything into a wrap.
Recipe Details
Crispy Chicken Caesar Sandwiches come together in about 35 minutes. The recipe makes four generous servings.
The chicken starts with 2 chicken breasts. Slice them in half horizontally to make 4 thin cutlets, or pound them to ½-inch thickness.
The chicken is seasoned with ¼ teaspoon each garlic powder, salt, and pepper. The seasoning keeps the cutlets flavorful under the crispy coating.
The coating uses 1 egg whisked with a splash of milk, ½ cup breadcrumbs, and ½ cup Panko. Panko gives extra shattery crunch, though all breadcrumbs can work in a pinch.
Vegetable oil is used for frying. Add enough to coat the skillet, about ¼ inch deep.
The chicken fries for 4 to 5 minutes per side over medium heat. It should be crispy and cooked through.
The garlic butter uses 4 tablespoons salted butter, slightly melted, 2 tablespoons mayo, 2 to 3 cloves minced garlic, 2 to 3 tablespoons chopped fresh parsley, and ¼ cup finely grated Parmesan.
The Caesar dressing uses ½ cup mayo, ¼ cup sour cream or Greek yogurt, ¼ cup finely grated Parmesan, 1 tablespoon lemon juice, 1 teaspoon Dijon mustard, ½ teaspoon anchovy paste, ½ teaspoon Worcestershire sauce, grated garlic, salt, and pepper.
For assembly, use 4 hoagie rolls or a crusty baguette, lightly toasted. Romaine lettuce should be torn into sandwich-sized pieces.
The dressing can sit for 10 minutes before serving so the flavors meld. If it is too thick, add a splash of water or more lemon juice.
For storage, cooked chicken stays crispy for about 2 days in the refrigerator. The garlic butter and dressing last up to 5 days.
Cooked chicken cutlets can be frozen for 2 months. Thaw overnight in the refrigerator and reheat at 350°F for 10 minutes to bring back crunch.
Ingredients
For the Chicken Cutlets
- 2 chicken breasts, sliced in half horizontally into 4 thin cutlets or pounded to ½-inch thickness
- 1 egg whisked with a splash of milk
- ¼ teaspoon garlic powder
- ¼ teaspoon salt
- ¼ teaspoon pepper
- ½ cup breadcrumbs
- ½ cup Panko
- Vegetable oil for frying, enough to coat the skillet about ¼ inch deep
For the Garlic Butter
- 4 tablespoons salted butter, slightly melted
- 2 tablespoons mayo
- 2 to 3 cloves garlic, minced
- 2 to 3 tablespoons chopped fresh parsley
- ¼ cup finely grated Parmesan
For the Caesar Dressing
- ½ cup mayo
- ¼ cup sour cream or Greek yogurt
- ¼ cup finely grated Parmesan
- 1 tablespoon lemon juice
- 1 teaspoon Dijon mustard
- ½ teaspoon anchovy paste
- ½ teaspoon Worcestershire sauce
- Grated garlic
- Salt and pepper, to taste
To Assemble
- 4 hoagie rolls or a crusty baguette, lightly toasted
- Romaine lettuce, torn into sandwich-sized pieces
Optional Variations and Add-Ins
- Olive oil
- Grilled chicken breasts or thighs
- Gluten-free Panko
- Crushed cornflakes
- Red pepper flakes
- Hot sauce
- Sliced tomatoes
- Avocado
- Roasted red peppers
- Tortillas
- Kettle chips
- Simple side salad
- Capers, finely chopped
- Soy sauce
- Extra lemon juice
- Water for thinning dressing
Ingredient Notes
Chicken breasts are sliced into thin cutlets so they cook quickly and evenly. You can also pound them to ½-inch thickness if you prefer.
The egg and milk mixture helps the breadcrumb coating stick. A splash of milk is enough to loosen the egg.
Garlic powder, salt, and pepper give the chicken quick seasoning. This keeps the cutlets from tasting plain under the coating.
Breadcrumbs add coverage to the chicken. Panko adds extra crunch and a lighter crispy texture.
Vegetable oil is used for frying because the chicken needs enough oil to crisp. About ¼ inch in the skillet is enough.
Salted butter gives the garlic butter rich flavor. Slightly melting it makes it easier to mix and spread.
Mayo in the garlic butter helps make it spreadable. It also helps the mixture coat the bread smoothly.
Fresh parsley adds brightness to the garlic butter. Dried parsley can work in a pinch, but fresh tastes brighter.
Finely grated Parmesan is used in both the garlic butter and Caesar dressing. The powdery style blends easily.
Mayo gives the Caesar dressing its creamy base. Full-fat mayo gives maximum creaminess.
Sour cream or Greek yogurt adds tang. Greek yogurt gives a slightly sharper flavor.
Lemon juice brings brightness. Fresh lemon juice gives the best flavor.
Dijon mustard adds depth without making the dressing spicy. It helps round out the creamy dressing.
Anchovy paste adds savory depth. It should not make the dressing taste fishy, but it gives Caesar dressing its classic complexity.
Worcestershire sauce adds another layer of savory flavor. It helps make the dressing more complete.
Romaine lettuce adds crisp freshness. Tear it into sandwich-sized pieces rather than tiny shreds so it holds up better.
Hoagie rolls or a crusty baguette are sturdy enough for the filling. Light toasting helps them stand up to the dressing and chicken.
Optional Swaps, Variations, Add-Ins, and Serving Ideas
Classic Crispy Chicken Caesar Sandwiches
Make the sandwiches with fried Panko-coated chicken, garlic butter, Caesar dressing, romaine, and toasted hoagie rolls or baguette. This gives the sandwich its signature crispy, creamy, garlicky flavor.
Serve right after assembling for the best texture. Crispy chicken and toasted bread are strongest when fresh.
Grilled Chicken Caesar Sandwiches
Swap the fried cutlets for grilled chicken breasts. Brush the chicken with a little olive oil and use the same seasonings.
Chicken thighs can also be used for extra juiciness. The grilled flavor works beautifully with Caesar dressing.
Baked Chicken Caesar Sandwiches
Bake the coated chicken at 400°F on a wire rack for 20 minutes, flipping halfway. Spray the cutlets lightly with oil for extra crispiness.
This is a good option if you do not want to fry. The texture will be different but still satisfying.
Gluten-Free Chicken Caesar Sandwiches
Use gluten-free Panko for the coating. Crushed cornflakes can also work and get extra crunchy.
Use gluten-free bread or wraps if needed. Assemble just before serving for the best texture.
Spicy Chicken Caesar Sandwiches
Add red pepper flakes to the garlic butter. This gives the sandwich a warm kick.
You can also add hot sauce to the dressing. Start small so the spice does not overpower the Caesar flavor.
Tomato Chicken Caesar Sandwiches
Add sliced tomatoes to the sandwich. They bring juiciness and freshness.
Tomatoes pair well with crispy chicken and creamy dressing. Use them when you want a more loaded sandwich.
Avocado Chicken Caesar Sandwiches
Add avocado slices for creamy richness. Avocado makes the sandwich feel fuller.
It works especially well with lemony Caesar dressing. Add it right before serving.
Roasted Red Pepper Chicken Caesar Sandwiches
Add roasted red peppers for sweetness and color. They bring a soft texture against the crispy chicken.
This variation makes the sandwich feel more layered. Use them with romaine for balance.
Chicken Caesar Wraps
Skip the bread and roll the chicken, romaine, garlic butter flavor, and Caesar dressing in a tortilla. Add extra lettuce for structure.
This version is great for picnics. It is also easier to pack for lunch.
Baguette Caesar Sandwiches
Use a crusty baguette instead of hoagie rolls. The texture is sturdy and crisp.
Lightly toast it before assembling. This keeps the bread from turning soggy too fast.
Extra Dressing Sandwiches
Serve extra Caesar dressing on the side for dipping. These sandwiches are rich and messy, and extra dressing makes them even better.
A small bowl of dressing on the plate also makes the meal feel more finished. Stir the dressing before serving.
Kettle Chip Plate
Serve the sandwiches with kettle chips. The salty crunch is simple and satisfying.
This pairing works well for lunch or casual dinner. It keeps the meal easy.
Simple Side Salad Plate
Serve the sandwiches with a simple side salad. The freshness balances the fried chicken and creamy dressing.
This is a nice option when you want the sandwich to feel like a full meal. Keep the salad light.
Party Sandwich Halves
Slice the sandwiches in half and secure each piece with a toothpick. This makes them easier to serve at parties.
Guests can pick up a smaller portion without the sandwich falling apart. Serve extra dressing on the side.
Capers Instead of Anchovy Paste
If you do not have anchovy paste, use a teaspoon of finely chopped capers. They add salty depth.
The flavor will not be exactly the same. It still gives the dressing a savory note.
Soy Sauce Instead of Anchovy Paste
A dash of soy sauce can stand in for anchovy paste. It adds salty depth when anchovy paste is not available.
Use only a small amount. The dressing should still taste like Caesar.
Why This Recipe Works
Crispy Chicken Caesar Sandwiches work because they balance texture and flavor in every layer. The chicken is crunchy, the dressing is creamy, the garlic butter is rich, and the romaine is fresh.
Thin chicken cutlets cook quickly and evenly. This keeps the outside crispy without overcooking the inside.
The breadcrumb and Panko coating gives the chicken a satisfying crunch. Panko makes the texture lighter and more shattery.
Seasoning the chicken before coating is important. Garlic powder, salt, and pepper add flavor underneath the crust.
Garlic butter on the bread adds richness before the sandwich is even assembled. Toasting the bread after spreading the butter makes it even better.
The Caesar dressing brings tang, saltiness, creaminess, and depth. Parmesan, lemon, Dijon, anchovy paste, Worcestershire, and garlic all work together.
Romaine brings crisp freshness. It keeps the sandwich from tasting too heavy.
Sturdy bread matters. Hoagie rolls or a crusty baguette can handle crispy chicken, dressing, and lettuce.
Serving extra dressing on the side makes the sandwich even more satisfying. It also lets each person control how saucy they want it.
Directions
Step 1: Slice the Chicken
Slice 2 chicken breasts in half horizontally to create 4 thin cutlets. If the pieces are uneven, pound them to ½-inch thickness.
Thin cutlets cook faster and more evenly. This also makes them easier to stack inside the sandwiches.
Step 2: Season the Cutlets
Sprinkle both sides of the chicken with ¼ teaspoon garlic powder, ¼ teaspoon salt, and ¼ teaspoon pepper. Spread the seasoning evenly.
Do not skip this simple step. The coating adds crunch, but the chicken itself needs flavor too.
Step 3: Prepare the Egg Wash
In a shallow bowl, whisk 1 egg with a splash of milk. Mix until the egg is fully loosened.
This mixture helps the breadcrumb coating cling to the chicken. Keep it near the breading mixture.
Step 4: Mix the Coating
In another shallow bowl, combine ½ cup breadcrumbs and ½ cup Panko. Stir them together.
The breadcrumbs give coverage, while the Panko gives extra crunch. This combination creates the best crispy texture.
Step 5: Coat the Chicken
Dip each seasoned chicken cutlet into the egg wash. Let any extra drip back into the bowl.
Press the chicken into the breadcrumb and Panko mixture until fully coated. Make sure both sides are covered.
Step 6: Heat the Oil
Pour vegetable oil into a skillet until it is about ¼ inch deep. Heat over medium heat.
Test the oil with a breadcrumb. If it sizzles, the oil is ready.
Step 7: Fry the First Side
Place the coated chicken cutlets into the hot oil. Do not crowd the skillet if the pieces need space.
Fry for 4 to 5 minutes on the first side. The coating should become golden and crisp.
Step 8: Flip and Finish the Chicken
Turn the cutlets carefully and fry for another 4 to 5 minutes. The chicken should be crispy and cooked through.
Transfer the finished cutlets to a paper towel-lined plate. This helps drain excess oil.
Step 9: Make the Garlic Butter
In a small bowl, mix 4 tablespoons slightly melted salted butter, 2 tablespoons mayo, 2 to 3 minced garlic cloves, 2 to 3 tablespoons chopped fresh parsley, and ¼ cup finely grated Parmesan. Stir until combined.
The mixture should be spreadable and rich. Set it aside while you make the dressing.
Step 10: Start the Caesar Dressing
In another bowl, add ½ cup mayo and ¼ cup sour cream or Greek yogurt. Whisk until smooth.
This creates the creamy base of the dressing. Greek yogurt will make it tangier.
Step 11: Add Caesar Flavor
Whisk in ¼ cup finely grated Parmesan, 1 tablespoon lemon juice, 1 teaspoon Dijon mustard, ½ teaspoon anchovy paste, ½ teaspoon Worcestershire sauce, grated garlic, salt, and pepper to taste. Mix until smooth.
Let the dressing sit for 10 minutes if you can. This helps the flavors come together.
Step 12: Adjust the Dressing
Check the dressing texture. If it is too thick, add a splash of water or a little more lemon juice.
The dressing should be creamy but drizzleable. Taste and adjust salt and pepper if needed.
Step 13: Prepare the Bread
Slice 4 hoagie rolls or a crusty baguette open. Spread the insides generously with the garlic butter.
Use enough garlic butter to coat the bread. It helps add flavor and protects the bread from getting soggy too quickly.
Step 14: Toast the Rolls
Toast the buttered bread lightly in the oven or a dry skillet. Toasting after spreading the garlic butter gives the bread extra flavor.
The bread should be warm, lightly crisp, and sturdy. Do not over-toast it until hard.
Step 15: Add the Crispy Chicken
Place one crispy chicken cutlet inside each roll. If using baguette pieces, arrange the chicken so each sandwich has a generous portion.
The chicken should still be warm if possible. Warm chicken makes the sandwich taste fresh and satisfying.
Step 16: Add Romaine and Dressing
Layer torn romaine lettuce over the chicken. Drizzle generously with Caesar dressing.
Use sandwich-sized pieces of romaine rather than tiny shreds. They add better crunch and structure.
Step 17: Close and Press
Close each sandwich and press down gently. This helps the layers settle together.
Do not press too hard or the filling may slide out. These sandwiches are meant to be hearty and a little messy.
Step 18: Serve Right Away
Serve the sandwiches immediately with extra dressing on the side. Add kettle chips or a simple side salad if desired.
Napkins are a good idea. This is the crispy, creamy, delicious kind of sandwich that is best enjoyed fresh.
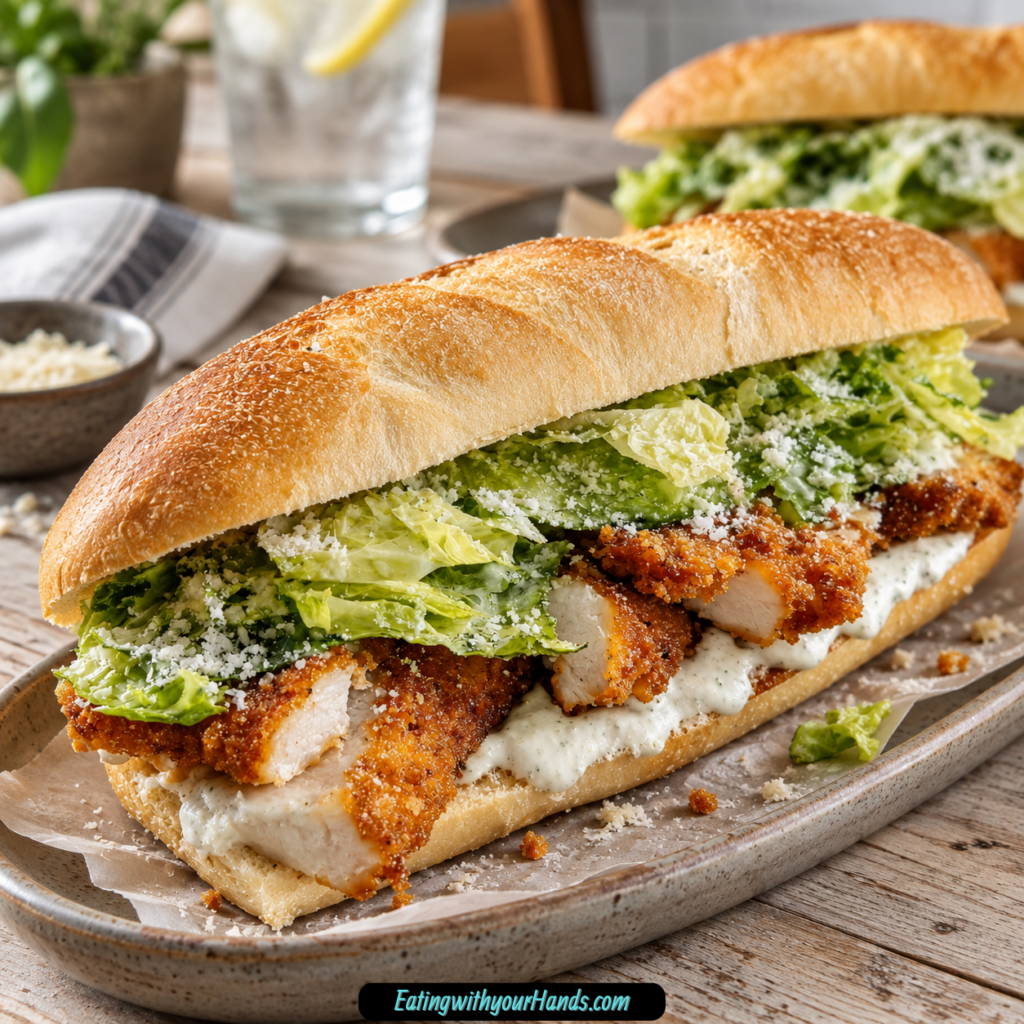
Serving Ideas
Serve Crispy Chicken Caesar Sandwiches right after assembling. The chicken stays crisp, the bread stays toasty, and the dressing tastes fresh.
Stack the sandwiches on a wooden board for casual serving. Add extra Caesar dressing on the side for dipping.
Kettle chips make an easy side. Their salty crunch fits perfectly with the creamy sandwich.
A simple side salad also works well. It keeps the meal fresh without adding much work.
For parties, slice the sandwiches in half and secure each half with a toothpick. This makes them easier to grab and less messy.
If packing for lunch, keep the components separate when possible. Assemble close to eating so the bread stays crisp.
Toast the rolls fresh each time. Soggy bread is the enemy of a good Chicken Caesar Sandwich.
Serve with extra lemon wedges if desired. A little more lemon can brighten the dressing.
Storage
If you have leftovers, store the components separately for best texture. Assembled sandwiches can be wrapped tightly in foil, but the bread may soften.
The cooked chicken stays crispy for about 2 days in the refrigerator. Store it in a sealed container.
The garlic butter lasts up to 5 days in the refrigerator. Stir it before using again.
The Caesar dressing also lasts up to 5 days. Keep it in a jar or airtight container and shake or stir before serving.
If the dressing thickens in the refrigerator, add a small splash of water or lemon juice. Stir until it returns to a drizzleable texture.
Romaine is best kept separate until assembly. This helps it stay crisp.
Bread should be toasted fresh if possible. Freshly toasted bread makes leftovers taste much better.
Do not store dressed romaine inside the sandwich for too long. It can soften the bread and lose crunch.
Freezing
Cooked chicken cutlets can be frozen for up to 2 months. Pack them in a sealed container with parchment between layers.
Let the cooked chicken cool before freezing. This helps protect the coating.
Thaw the chicken in the refrigerator overnight. This gives the best texture before reheating.
Reheat the cutlets in the oven at 350°F for 10 minutes. This helps bring back the crunch.
Do not freeze assembled sandwiches. The bread, lettuce, and dressing will not keep their best texture.
Freeze only the chicken cutlets. Make fresh garlic butter, dressing, romaine, and toast when ready to serve.
This make-ahead option is helpful for quick meals. Once the chicken is ready, the sandwiches come together fast.
Make-Ahead
You can make the Caesar dressing ahead. It tastes even better after chilling for a few hours.
Store the dressing in a jar or airtight container. Shake or stir before using.
The garlic butter can also be made ahead. Keep it refrigerated for up to 5 days and stir before spreading.
Chicken cutlets can be cooked ahead and stored in the refrigerator for about 2 days. Reheat until crisp before assembling.
For longer planning, freeze the cooked cutlets for up to 2 months. Reheat from thawed in the oven at 350°F for 10 minutes.
Prepare the romaine close to serving so it stays crisp. Tear it into sandwich-sized pieces.
Toast the rolls right before assembly. This keeps the bread sturdy and warm.
Assemble the sandwiches just before eating whenever possible. This gives you the best contrast of crispy chicken, creamy dressing, and fresh lettuce.
Helpful Notes for Best Results
Slice or pound the chicken evenly. Thin, even cutlets cook more consistently.
Use Panko if you want extra crunch. Regular breadcrumbs work, but Panko gives a lighter crisp texture.
Make sure the oil is hot enough before frying. A breadcrumb should sizzle when dropped in.
Do not overcrowd the skillet. Crowding can lower the heat and make the coating less crispy.
Drain fried chicken on paper towels. This helps remove extra oil.
Let the dressing sit for 10 minutes if possible. The flavor becomes more blended.
If the dressing is too thick, add water or lemon juice a little at a time. It should drizzle easily.
Spread garlic butter on both sides of the roll to help protect against sogginess. Toasting the buttered bread makes it even better.
Variations
Classic Crispy Chicken Caesar Sandwiches
Use fried breadcrumb and Panko-coated chicken, garlic butter, homemade Caesar dressing, romaine, and toasted hoagie rolls or baguette. This gives the sandwich its full crispy, creamy, garlicky flavor.
Serve immediately after assembling. The texture is best when fresh.
Grilled Chicken Caesar Sandwiches
Use grilled chicken instead of fried cutlets. Brush the chicken with olive oil and season it with garlic powder, salt, and pepper.
Cook over medium-high heat for about 6 minutes per side. The grilled flavor works beautifully with Caesar dressing.
Chicken Thigh Caesar Sandwiches
Use chicken thighs for extra juiciness. Season and grill them for a richer variation.
Chicken thighs bring more moisture. They work well with the tangy dressing.
Baked Crispy Chicken Caesar Sandwiches
Bake the coated chicken at 400°F on a wire rack for 20 minutes, flipping halfway. Spray the cutlets lightly with oil.
This method gives a baked version of the crispy chicken. It is a good option when you prefer not to fry.
Gluten-Free Crispy Chicken Caesar Sandwiches
Use gluten-free Panko or crushed cornflakes. Both can create a crunchy coating.
Use gluten-free bread or tortillas as needed. Keep the components separate until serving.
Spicy Chicken Caesar Sandwiches
Add red pepper flakes to the garlic butter. You can also add hot sauce to the dressing.
The spice cuts through the creamy dressing. Add gradually so it stays balanced.
Tomato Caesar Sandwiches
Add sliced tomatoes. They bring juiciness and color.
Tomatoes make the sandwich feel fresher. Add them right before serving.
Avocado Caesar Sandwiches
Add sliced avocado. It makes the sandwich richer and creamier.
Avocado pairs well with lemony Caesar dressing. Use ripe avocado for the best texture.
Roasted Red Pepper Caesar Sandwiches
Add roasted red peppers. They bring sweetness and softness.
This variation gives the sandwich extra color. It works well with romaine and crispy chicken.
Chicken Caesar Wraps
Use tortillas instead of rolls. Add extra lettuce and roll everything tightly.
This version is great for picnics. It is also easier to pack.
Extra Garlic Butter Sandwiches
Spread garlic butter on both sides of the roll. Toast after spreading.
This helps the bread taste better and resist sogginess. It also makes the sandwich richer.
Extra Dressing Sandwiches
Serve extra Caesar dressing for dipping. This makes the sandwich even more indulgent.
Keep the dressing chilled until serving. Stir before spooning into a small bowl.
Troubleshooting
The Chicken Coating Is Falling Off
The chicken may not have been pressed firmly into the breadcrumb mixture. Press the coating onto both sides after dipping in egg wash.
Let extra egg drip off before breading. Too much egg can make the coating slide.
The Chicken Is Not Crispy
The oil may not have been hot enough. Test it with a breadcrumb before frying.
Do not overcrowd the skillet. Give each cutlet enough room to crisp.
The Chicken Is Browning Too Fast
The heat may be too high. Reduce to medium if the coating darkens before the chicken cooks through.
Thin cutlets help prevent this issue. Keep them around ½-inch thickness.
The Dressing Is Too Thick
Whisk in a splash of water or more lemon juice. Add a little at a time.
The dressing should be creamy but easy to drizzle. Stir well before using.
The Dressing Tastes Too Heavy
Add a little more lemon juice. This brightens the flavor.
Greek yogurt instead of sour cream can also make the dressing tangier. Adjust salt and pepper after thinning.
The Dressing Lacks Depth
Anchovy paste, Worcestershire sauce, Parmesan, Dijon, and garlic all add depth. Make sure those ingredients are included.
If you do not have anchovy paste, finely chopped capers or a dash of soy sauce can help. The flavor will be different but still savory.
The Bread Is Soggy
Toast the bread after spreading garlic butter. The buttered, toasted surface helps protect it.
Assemble just before eating if possible. Store components separately for leftovers.
The Sandwich Falls Apart
Use sturdy hoagie rolls or crusty baguette. Soft bread may not hold the filling well.
Press the sandwich gently after assembling. Do not overload with dressing before closing.
The Romaine Is Wilting
Add romaine right before serving. Keep it dry and crisp.
Use torn sandwich-sized pieces instead of tiny shreds. Larger pieces hold up better.
The Leftover Chicken Lost Its Crunch
Reheat it in the oven rather than the microwave. Use 350°F for 10 minutes if reheating thawed frozen cutlets.
Microwaving can soften the coating. Oven heat helps bring back crispness.
Frequently Asked Questions
Can I make the Caesar dressing ahead?
Yes, the dressing can be made ahead. It actually tastes better after chilling for a few hours.
Store it in a jar or airtight container. Shake or stir before using.
What if I do not have anchovy paste?
Use a teaspoon of finely chopped capers or a dash of soy sauce. Either can add savory depth in a pinch.
The flavor will not be exactly the same. The dressing will still be creamy and flavorful.
Can I bake the chicken instead of frying?
Yes, bake the coated chicken at 400°F on a wire rack for 20 minutes, flipping halfway. Spray the cutlets lightly with oil for extra crispiness.
The texture will be different from fried chicken. It is still a good option.
How do I keep the bread from getting soggy?
Spread garlic butter on both sides of the roll. It acts like a moisture barrier.
Assemble just before eating if you can. Toasting the buttered bread also helps.
Can I use grilled chicken instead?
Yes, grilled chicken works beautifully. Brush the cutlets with olive oil and cook on medium-high heat for about 6 minutes per side.
Use the same garlic powder, salt, and pepper seasoning. Chicken thighs can also be used for extra juiciness.
Can I make these sandwiches gluten-free?
Yes, use gluten-free Panko or crushed cornflakes for the chicken coating. Use gluten-free bread or tortillas too.
The texture may vary slightly. Keep the chicken crisp by serving soon after cooking.
How long do leftovers last?
The cooked chicken stays crispy for about 2 days in the refrigerator. The garlic butter and dressing last up to 5 days.
Store components separately for best results. Assemble fresh when possible.
Can I freeze the chicken cutlets?
Yes, cooked chicken cutlets can be frozen for 2 months. Pack them in a sealed container with parchment between layers.
Thaw in the refrigerator overnight. Reheat in the oven at 350°F for 10 minutes to restore crunch.
Why This Recipe Works So Well
Crispy Chicken Caesar Sandwiches work so well because every part of the sandwich has a job. The chicken brings crunch, the dressing brings tang, the garlic butter brings richness, the romaine brings freshness, and the toasted bread holds everything together.
The chicken cutlets are thin, which helps them cook quickly. A thinner cutlet also fits better inside the sandwich.
The breadcrumb and Panko coating creates a crisp shell. Frying in a shallow layer of oil gives the outside that golden texture.
The garlic butter makes the bread taste like a side dish on its own. Mayo makes the butter spreadable, while Parmesan, garlic, and parsley add bold flavor.
The Caesar dressing is creamy but bright. Lemon juice, Dijon, Worcestershire, anchovy paste, Parmesan, and garlic make it taste full and balanced.
Romaine keeps the sandwich from feeling too heavy. Its fresh crunch is essential.
Toasting the bread helps with texture and structure. It keeps the sandwich from becoming soggy too quickly.
The recipe also works because it is flexible. Fried chicken, grilled chicken, baked chicken, gluten-free coatings, spicy additions, vegetables, wraps, capers, soy sauce, kettle chips, salads, and freezer-friendly cutlets all make it adaptable.
Most of all, this sandwich works because it feels like a full meal. It is crispy, creamy, garlicky, tangy, hearty, and easy enough to make on a weeknight.
Final Thoughts
Crispy Chicken Caesar Sandwiches are made with thin chicken cutlets coated in egg wash, breadcrumbs, and Panko, then fried until golden and layered into toasted hoagie rolls or crusty baguette with garlic Parmesan butter, homemade Caesar dressing, and romaine lettuce. The dressing is creamy and tangy, the bread is buttery and sturdy, and the chicken brings the crunch that makes the sandwich unforgettable.
Serve them fresh with kettle chips, a simple side salad, or extra dressing for dipping. With their 35-minute timing, four generous servings, make-ahead dressing, freezer-friendly chicken cutlets, and flexible variations, these sandwiches are a satisfying meal for busy dinners, casual weekends, lunch prep, or anytime a Caesar salad needs to become something bigger and crispier.
Chicken Caesar Sandwiches

Crispy, savory, garlicky, and loaded with creamy Caesar flavor, these Chicken Caesar Sandwiches turn golden chicken cutlets, homemade Caesar dressing, garlic butter, romaine lettuce, and hoagies or baguette into a hearty lunch-style sandwich. The chicken is coated with breadcrumbs and Panko, fried until golden, then layered with chopped romaine and a rich dressing for a bold American sandwich.
Recipe Details
- Prep Time: 20 minutes
- Cook Time: 15 minutes
- Total Time: 35 minutes
- Course: Lunch, Sandwich
- Cuisine: American
- Servings: 4 sandwiches
Equipment
- Skillet
- mixing bowls
Ingredients
To Assemble
- 3-4 cups romaine lettuce chopped or shredded
- 4 hoagies or baguette
For the Caesar Dressing
- Salt & pepper to taste
- 1 clove garlic grated
- 1 teaspoon Worcestershire sauce
- 1 teaspoon anchovy paste
- 1 teaspoon Dijon Mustard
- 1 Tablespoon lemon juice
- ¼ cup finely grated parmesan cheese
- ¼ cup sour cream or Greek yogurt
- ½ cup mayo
For the Garlic Butter
- ¼ cup finely grated Parmesan
- 2-3 Tablespoons chopped fresh parsley
- 2-3 cloves garlic minced
- 2 Tablespoons mayo
- 4 Tablespoons salted butter slightly melted
For the Chicken Cutlets
- Vegetable oil for frying
- ½ cup Panko
- ½ cup breadcrumbs
- ¼ teaspoon pepper
- ¼ teaspoon salt
- ¼ teaspoon garlic powder
- 1 egg whisked with a splash of milk
- 2 chicken breasts
Instructions
Step 1: Season the Chicken
Prepare the chicken cutlets by seasoning the chicken breasts with garlic powder, salt, and pepper. Make sure the seasoning reaches the surface of the chicken before coating.
This simple seasoning gives the chicken flavor before it is dipped and breaded. Keep the chicken ready while you prepare the egg mixture and breadcrumb coating.
Step 2: Bread the Chicken Cutlets
Dip each chicken breast into the egg whisked with a splash of milk. Then coat the chicken with the breadcrumb and Panko mixture.
Press the coating gently onto the chicken so it sticks well. The breadcrumbs and Panko create the crisp outside that makes these sandwiches hearty and textured.
Step 3: Fry the Chicken
Heat vegetable oil in a skillet. Fry the chicken cutlets until golden and cooked through, about 4-5 minutes per side.
Turn the cutlets carefully so both sides brown evenly. Once cooked through, set the chicken aside while you make the garlic butter and Caesar dressing.
Step 4: Mix the Garlic Butter
In a bowl, combine the slightly melted salted butter, mayo, minced garlic, chopped fresh parsley, and finely grated Parmesan. Stir until the mixture is well blended.
This garlic butter adds richness and savory flavor to the bread. It will be spread inside the hoagies or baguette before assembly.
Step 5: Make the Caesar Dressing
In another bowl, mix the mayo, sour cream or Greek yogurt, finely grated parmesan cheese, lemon juice, Dijon Mustard, anchovy paste, Worcestershire sauce, grated garlic, salt, and pepper. Stir until the dressing is smooth and creamy.
Taste and keep the salt and pepper to your preference, as listed. The dressing should be rich enough to coat the chicken and lettuce generously.
Step 6: Prepare the Bread
Slice the hoagies or baguette. Spread the garlic butter on the inside.
Toast lightly if desired. This step gives the bread extra flavor and helps it hold up to the chicken, lettuce, and Caesar dressing.
Step 7: Assemble the Sandwiches
Layer the chicken cutlets inside the prepared bread. Add the chopped or shredded romaine lettuce and a generous amount of Caesar dressing.
Serve the sandwiches right away while the chicken is crisp and the bread is fresh. Each sandwich should have crunchy chicken, garlicky bread, cool romaine, and creamy Caesar dressing.
Notes
- For a lighter version, you can grill the chicken instead of frying it.
Serving Suggestions
Serve Chicken Caesar Sandwiches right after assembly so the chicken cutlets stay crisp and the bread keeps its best texture. The garlic butter, Caesar dressing, romaine lettuce, and golden chicken make each sandwich rich, crunchy, and creamy.
Use hoagies for a softer sandwich-style bite or baguette for a sturdier base, exactly as listed. Toast the bread lightly if desired after spreading the garlic butter inside.
For a lighter version, grill the chicken instead of frying it as noted. Keep the same Caesar dressing, garlic butter, romaine, and bread assembly so the sandwich still has the same main flavor profile.
Storage
How to Store
The recipe does not provide specific storage instructions or storage duration, so no exact storage time is added here.
Chicken Tip
Fry the breaded chicken cutlets for about 4-5 minutes per side, until golden and cooked through. For a lighter version, grill the chicken instead of frying it.
Bread Tip
Spread the garlic butter on the inside of the hoagies or baguette. Toast lightly if desired before adding the chicken and toppings.
Dressing Tip
Mix the Caesar dressing until smooth before assembling. Use sour cream or Greek yogurt as listed, and season with salt and pepper to taste.
Lettuce Tip
Use 3-4 cups romaine lettuce, chopped or shredded. Add it during assembly so it stays fresh inside the sandwich.
Assembly Tip
Add a generous amount of Caesar dressing when building the sandwiches. This helps tie together the crispy chicken, romaine lettuce, and garlic butter bread.

Fernando is the creator and writer behind the food blog Eating with your Hands. Living and working in cities like Paris, Barcelona, and Berlin, and being married to a Canadian foodie, has given Fernando a passion and interest in food and inspired him to run EWYH.