
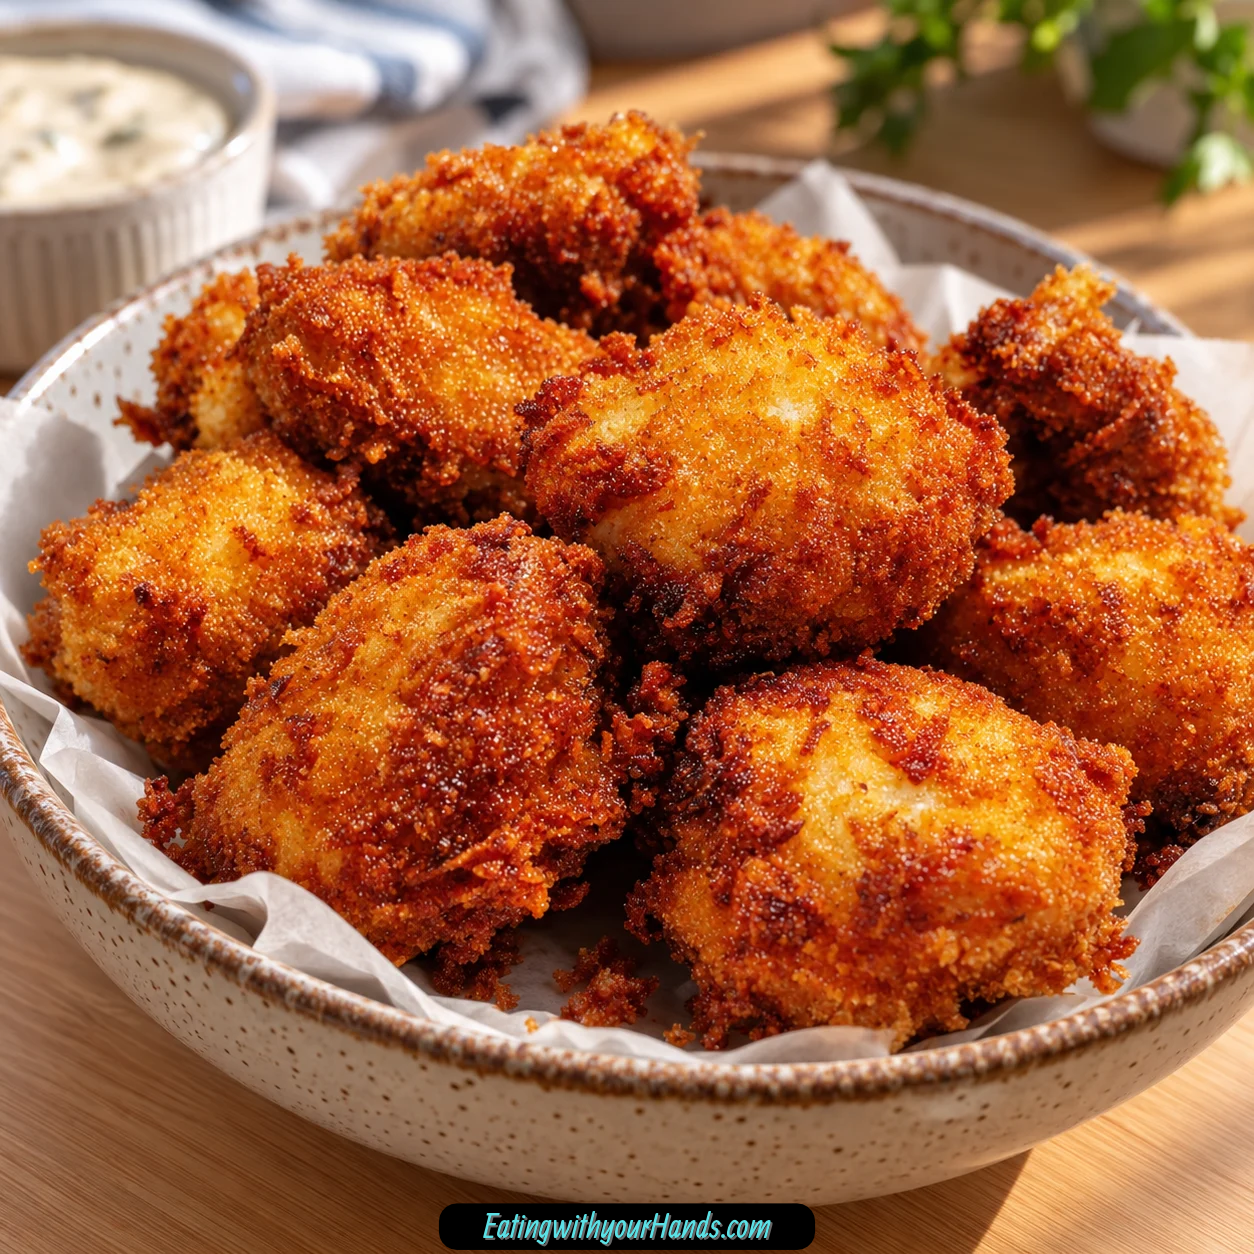

There is something almost impossible to resist about a mushroom wrapped in a deeply golden, crunchy coating. The moment that crisp shell gives way to the juicy, tender center is exactly why these Crispy Fried Mushrooms have become one of those appetizers that never seem to stay on the platter for long.
I have been making versions of them for years, and they have a habit of disappearing before I even realize everyone has started eating. One summer, my nephew managed to finish nearly an entire platter before the rest of the family had the chance to go back for seconds.
That kind of reaction is probably the best explanation for why I kept experimenting with the recipe. I went through plenty of batches, including a few that cooked far too quickly, before settling on the combination of seasoned flour, egg wash, breadcrumbs, and properly heated oil that gives these mushrooms their signature texture.
The breading is where so much of the magic happens. Each mushroom passes through flour and spices, then egg and milk, and finally seasoned breadcrumbs, creating distinct layers around the soft center.
Oil temperature matters just as much. When the oil stays around 350°F, the coating has enough heat to become crisp and golden without simply soaking up grease.
The result is exactly what I want from a fried appetizer. The outside crackles, the mushroom remains tender, and the oregano, garlic, cayenne, herbs, black pepper, and optional chili flakes give the crust enough personality to make every bite interesting.
These mushrooms also happen to be fast. From setting up the breading bowls to pulling the last batch from the oil, you can have them ready in under 30 minutes.
That makes them easy enough for a Friday-night snack but fun enough to put out at a party. Add a dipping sauce, and suddenly a simple package of mushrooms turns into the plate everyone keeps circling back to.
Table of Contents
- Why You’ll Love These Crispy Fried Mushrooms
- Ingredients for Crispy Fried Mushrooms
- Why Button Mushrooms Work So Well
- Why the Three-Part Coating Matters
- Seasoning the Flour
- Eggs and Milk Create the Middle Layer
- Choosing the Breadcrumbs
- How to Make Crispy Fried Mushrooms
- Why Dry Mushrooms Matter
- Keeping the Oil at the Right Temperature
- Why Fresh Oil Helps
- Panko Variation
- Parmesan Variation
- Extra-Spicy Variation
- Using Portobello Mushrooms
- Using Cremini Mushrooms
- Using King Oyster Mushrooms
- Air Fryer Method
- Serving With Garlic Aioli
- Ranch for a Classic Dip
- Sweet Heat Dipping Options
- Pairing With a Garden Salad
- Serving With a Cold Beer
- Reheating Crispy Fried Mushrooms
- Frequently Asked Questions
- Nutritional Information
- The Crispy Mushroom Platter That Never Lasts Long
- Crispy Fried Mushrooms Recipe
Why You’ll Love These Crispy Fried Mushrooms
The crunch is the obvious reason. The flour, egg mixture, and breadcrumb coating create a substantial shell around each mushroom rather than a thin dusting that disappears as soon as it hits the oil.
Inside that crust, the mushroom stays tender and juicy. That contrast between crisp exterior and soft center is what makes the recipe especially satisfying.
They are also surprisingly quick to make. Once the breading station is organized, the mushrooms move through the coating process rapidly and need only about 3–4 minutes in the oil.
The recipe is vegetarian-friendly as written. At the same time, the savory flavor and hearty texture make these mushrooms appealing even to people who do not normally reach for vegetable appetizers first.
The spice mixture can also be adjusted. Cayenne, red chili flakes, dried herbs, garlic powder, and other variations let you move the flavor in a hotter or more herb-forward direction.
Then there are the dipping sauces. Garlic mayo, ranch, hot honey combinations, and spicy honey mustard all give the same fried mushroom a slightly different personality.
Ingredients for Crispy Fried Mushrooms
The ingredient list is made mostly from basic pantry staples. The mushrooms provide the juicy center, while flour, eggs, milk, breadcrumbs, and seasonings build the coating.
- 16 ounces button mushrooms, stems removed
- 1 cup seasoned breadcrumbs, lightly packed
- ½ cup all-purpose flour
- 2 large eggs
- ⅛ cup milk
- ½ teaspoon dried oregano
- ½ teaspoon garlic powder
- ¼ teaspoon cayenne pepper
- ½ teaspoon black pepper
- Salt, to taste
- ¼ teaspoon red chili flakes, optional
- ¼ teaspoon dried basil
- ¼ teaspoon dried thyme
- Vegetable oil for frying, about 2 cups or enough for a depth of 1–2 inches
About ½ teaspoon kosher salt is one preferred amount when seasoning the flour mixture. Salt can still be adjusted according to taste.
The oregano can be rubbed gently between your fingers before mixing. That simple motion helps release more of its aroma before it joins the flour.
Why Button Mushrooms Work So Well
Button mushrooms are the standard choice because their compact size makes them easy to coat and fry whole. Removing the stems also leaves a neat shape that is simple to handle with your fingers or tongs.
The mushrooms should be dry before they touch the flour. If there is visible moisture, pat them thoroughly with paper towels.
Drying matters because excess moisture can interfere with how well the coating adheres. A dry mushroom gives the flour a much better surface to grab onto.
The mushrooms do not need complicated preparation beyond removing the stems and drying them. Their simple shape is part of what makes this recipe so quick.
Why the Three-Part Coating Matters
The first coating is seasoned flour. It gives the egg wash something to cling to while also distributing the herbs and spices around the mushroom.
The second layer is a smooth mixture of eggs and milk. Letting the excess drip away keeps that layer from becoming unnecessarily heavy.
The final layer is seasoned breadcrumbs. Pressing them gently against the mushroom helps create the thick, crisp exterior that makes the finished appetizer so satisfying.
Those three stages work together. Skipping one changes the texture and can make the breading feel less substantial.
Seasoning the Flour
The flour is where most of the seasoning begins. Oregano, garlic powder, cayenne, black pepper, salt, optional red chili flakes, basil, and thyme are all mixed directly into it.
This spreads the spices evenly around the mushrooms before the wet coating goes on. It also keeps the flavor from sitting only on the outermost breadcrumb layer.
The cayenne provides a warm background note rather than turning the standard batch aggressively hot. Red chili flakes are optional when you want another little burst of heat.
Basil and thyme add an extra herbal layer beside the oregano. Together, the herbs make the crust taste much more interesting than plain fried breadcrumbs.
Eggs and Milk Create the Middle Layer
Two large eggs are beaten with ⅛ cup milk until smooth. This mixture acts as the bridge between seasoned flour and breadcrumbs.
Room-temperature eggs blend especially smoothly, though the recipe remains simple even if the eggs have not been sitting out for long. The important thing is beating them well enough that the mixture is uniform.
After dipping a floured mushroom, let excess egg wash drip back into the bowl. Too much wet coating can make the breadcrumb layer uneven.
Once the dripping slows, the mushroom is ready for breadcrumbs. Work one piece at a time so the coating stays controlled.
Choosing the Breadcrumbs
One cup seasoned breadcrumbs creates the standard crust. Pack them lightly into the measuring cup rather than pressing them down firmly.
Give the breadcrumbs a quick stir in their bowl before breading. This breaks up clumps and makes them easier to distribute.
Press the crumbs gently around each mushroom. You want full coverage without crushing the mushroom underneath.
Panko can replace the regular breadcrumbs for an even flakier crust. That variation creates a visibly different texture while keeping the same breading process.
How to Make Crispy Fried Mushrooms
The process becomes very simple once the breading station is organized. Set up all three bowls before touching the mushrooms so each piece can move smoothly from flour to egg wash to breadcrumbs.
Step 1: Prepare and Dry the Mushrooms
Remove the stems from all 16 ounces of button mushrooms. Twist them away gently until they release.
Check the mushroom caps for visible moisture. Pat them thoroughly with paper towels if they feel damp.
Do not begin breading while the mushrooms are wet. A dry surface helps the first flour layer stay where it belongs.
Set the prepared mushrooms beside your breading station. Keeping everything close together makes the coating process much faster.
Step 2: Make the Seasoned Flour
Place the ½ cup all-purpose flour in the first shallow bowl. Add the dried oregano, garlic powder, cayenne, black pepper, salt, optional red chili flakes, dried basil, and dried thyme.
Stir until the seasonings look evenly distributed through the flour. Rub the oregano between your fingers before adding if you want to release more of its aroma.
Make sure no large pockets of spice remain. Every mushroom should receive roughly the same seasoned coating.
Keep this bowl first in your breading line. It is the dry foundation for everything that follows.
Step 3: Prepare the Egg Wash
Crack the 2 large eggs into the second shallow bowl. Add the ⅛ cup milk.
Whisk until the eggs and milk are completely smooth. You should not see obvious streaks of separate egg white.
Place this bowl directly beside the seasoned flour. That way the floured mushrooms can move immediately into the wet mixture.
Keep a little open space around the bowl for drips. Breading can get messy once several mushrooms have moved through the line.
Step 4: Prepare the Breadcrumb Bowl
Pour the 1 cup seasoned breadcrumbs into the third shallow bowl. Stir them briefly to break apart any clumps.
Spread the crumbs across the bottom so each mushroom has enough room to roll. Keeping the layer loose makes coating easier.
Place the breadcrumb bowl after the egg wash. Your complete station should now run flour, egg mixture, then breadcrumbs.
Once everything is lined up, begin coating the mushrooms one at a time. This keeps the layers cleaner and more consistent.
Step 5: Coat Each Mushroom
Roll one dry mushroom through the seasoned flour until the surface is covered. Shake off any loose excess before moving it to the next bowl.
Dip the floured mushroom into the egg mixture. Turn it until wet, then lift it and allow the extra egg wash to drip away.
Move the mushroom into the breadcrumbs. Roll and press gently until the entire exterior is well coated.
Set the finished mushroom aside and repeat with the remaining pieces. Continue until all of them have passed through all three coatings.
Step 6: Heat the Oil to 350°F
Pour vegetable oil into a heavy pot or deep skillet until you have approximately 1–2 inches of depth. About 2 cups is the suggested quantity.
Heat the oil until it reaches exactly 350°F. A thermometer gives you the most reliable way to monitor the temperature.
Do not start frying while the oil is still too cool. When the temperature drops below about 325°F, the coating can become greasy rather than crisp.
Keep watching the heat throughout frying. The temperature can change once cold food is added.
Step 7: Fry in Small Batches
Carefully lower about 4–5 breaded mushrooms into the hot oil. They should begin bubbling immediately.
Do not crowd the pot or skillet. Too many mushrooms at once can drop the oil temperature and change the way the crust cooks.
Fry each batch for about 3–4 minutes. Turn the mushrooms once halfway through if they need help browning evenly.
Watch closely near the end because the color can deepen quickly. Remove them once the crust reaches a deep golden brown.
Step 8: Drain Immediately
Lift the fried mushrooms from the oil and transfer them directly to paper towels or a rack. This removes excess oil from the exterior.
Keep the pieces separated as they drain. Piling them together can trap moisture around the crust.
Allow the oil to return to the proper temperature before beginning the next batch. Maintaining that heat is essential for consistent results.
Continue until every mushroom has been fried. Keep an eye on the final batches because the oil temperature may need adjustment.
Step 9: Serve While Hot
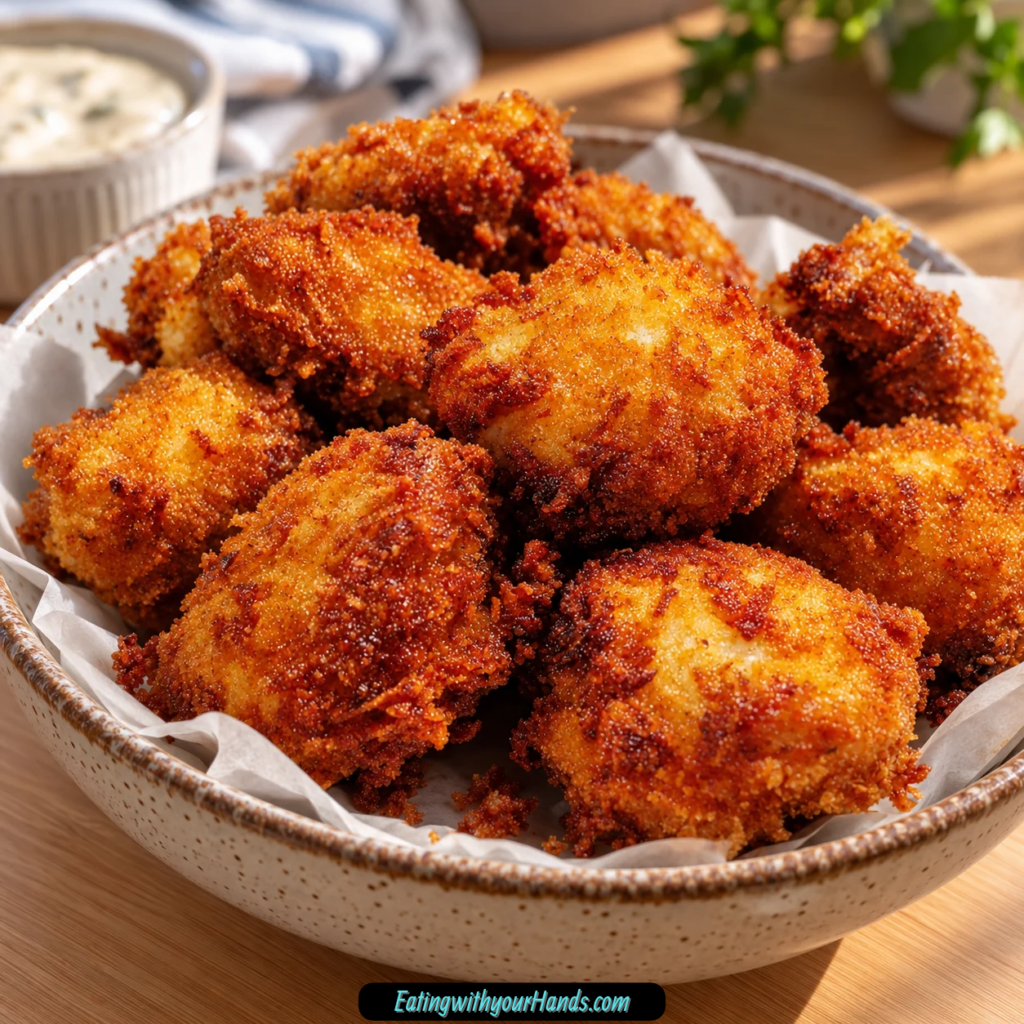
The mushrooms are at their crispiest immediately after frying. Serve them as soon as the batches are complete.
The coating begins gradually losing crunch once it leaves the oil. That is why this appetizer is best enjoyed without a long wait.
Be aware that the centers will be very hot. Give each mushroom just enough time to become comfortable to eat.
Set out your favorite dipping sauces alongside the platter. Then let everyone choose their own combination.
Why Dry Mushrooms Matter
Moisture is one of the biggest enemies of a stable coating. Wet mushroom surfaces make it harder for flour to adhere evenly.
Patting them dry is therefore more than a cosmetic step. It helps the entire flour, egg, and breadcrumb structure stay attached during frying.
This is especially important when mushrooms have visible moisture on the outside. A few quick passes with paper towels can make breading much easier.
Start with dry mushrooms and keep the coating process moving. That gives the final crust its best chance to stay intact.
Keeping the Oil at the Right Temperature
The target frying temperature is 350°F. That gives the breadcrumbs enough heat to become crisp and golden within about 3–4 minutes.
If the oil drops below 325°F, the crust can absorb more oil and become greasy. That is why small batches matter.
Letting the oil recover between rounds is worth the short pause. Consistent temperature gives the later mushrooms the same chance to crisp as the first.
A thermometer removes most of the guesswork. Watch it throughout frying instead of checking only once at the beginning.
Why Fresh Oil Helps
Fresh vegetable oil gives the mushrooms a cleaner flavor. Oil that has picked up strong flavors from previous frying can transfer them into the crust.
That matters especially with a simple appetizer where the herbs, garlic, and mushroom should remain easy to taste. An unrelated old frying flavor can overwhelm that balance.
Use enough oil for approximately 1–2 inches of depth. That allows the mushrooms enough space to fry properly.
About 2 cups is the suggested amount. The exact depth ultimately matters more than forcing a fixed volume into every skillet.
Panko Variation
Japanese panko breadcrumbs can replace the regular seasoned breadcrumbs. They create a flakier, more pronounced crust.
Follow the same flour and egg-wash steps. The only change is the final coating.
Press the panko gently around each mushroom so the pieces stay attached. Then fry at the same 350°F temperature.
This variation is especially good when maximum crunch is the priority. The outer texture becomes noticeably more rugged.
Parmesan Variation
Add ¼ cup grated Parmesan directly to the breadcrumbs. Mix until the cheese is evenly distributed.
Bread the mushrooms using the same three-stage process. The Parmesan becomes part of the outer coating.
The finished mushrooms gain an extra savory cheese flavor. The standard herb and spice mixture can remain unchanged.
Fry at the same temperature and watch the color carefully. Remove the mushrooms once the coating is deep golden.
Extra-Spicy Variation
Double the cayenne when you want significantly more heat. Add ½ teaspoon smoked paprika as well.
Mix both into the seasoned flour. That keeps the stronger spice distributed throughout the first coating.
The rest of the breading method remains exactly the same. Egg wash and breadcrumbs still complete the crust.
This variation is especially useful when serving people who enjoy hotter snacks. You can even prepare some mushrooms this way and leave another batch closer to the standard seasoning.
Using Portobello Mushrooms
Portobello mushrooms can replace button mushrooms. Slice them into thick strips before coating.
The strips should be substantial enough to hold their shape during frying. Their larger form creates a different eating experience from whole button mushrooms.
Coat them using the same flour, egg, and breadcrumb process. Make sure all surfaces receive breading.
Fry until the exterior is golden and crisp. Serve immediately just as you would the standard version.
Using Cremini Mushrooms
Cremini mushrooms can also be used. Their size and shape make them a straightforward alternative to button mushrooms.
Prepare them in the same way by removing the stems and drying the exterior. Then bread them through all three bowls.
The frying method does not need to change. Maintain the oil at 350°F and avoid crowding the pan.
This option is useful when creminis are already available. The overall process stays familiar.
Using King Oyster Mushrooms
King oyster mushrooms can be sliced into coins. This creates small rounds rather than the whole mushroom shape of the standard recipe.
Keep the pieces thick enough to remain substantial. Then dry and coat them carefully.
Move each coin through seasoned flour, egg wash, and breadcrumbs. Press the final coating gently into place.
Fry in small batches as usual. Their shape changes, but the same crisp exterior is the goal.
Air Fryer Method
Bread the mushrooms exactly as you would for frying. Once coated, spray them lightly with oil.
Arrange them in the air fryer and cook at 400°F for about 8 minutes. Flip them halfway through.
The air-fried version will not become quite as crisp as the deep-fried mushrooms. It still provides a lighter option with plenty of texture.
Do not skip the oil spray. That small amount helps the breading develop better color and crispness.
Serving With Garlic Aioli
Creamy garlic aioli is one of my favorite partners for fried mushrooms. Mayo, lemon juice, and plenty of fresh garlic create the cool, tangy contrast that works so well with a hot crust.
Dip each mushroom just before eating. That keeps the coating crisp until the moment it reaches the sauce.
A more specifically measured garlic mayo version uses ½ cup mayonnaise, 2 minced garlic cloves, and a squeeze of lemon. Stir those ingredients together until combined.
Serve the sauce on the side rather than pouring it over the mushrooms. The crunch deserves to stay intact.
Ranch for a Classic Dip
Ranch is a simple crowd-friendly option. Its cool, creamy texture balances the warm spices in the breading.
Pour it into a small bowl and serve beside the mushrooms. Guests can dip as lightly or generously as they want.
Ranch is especially useful when serving a mixed group. Its familiar flavor works well even for people who are less adventurous with dipping sauces.
Keep it separate from the platter. That prevents the mushrooms from sitting in moisture before they are eaten.
Sweet Heat Dipping Options
Hot sauce mixed with honey creates a sweet-spicy option. The sweetness contrasts with cayenne, chili flakes, and the savory breadcrumb crust.
Another version uses equal parts mustard and honey with a dash of hot sauce. This produces the spicy honey mustard variation.
Both work best as dipping sauces rather than toppings poured in advance. That lets the fried coating stay crisp.
Serve more than one sauce when feeding a crowd. Comparing the combinations can be part of the fun.
Pairing With a Garden Salad
A crisp garden salad makes a fresh contrast with the fried mushrooms. The cool vegetables provide a lighter element beside the rich, crunchy appetizer.
Serve the salad separately. This keeps any dressing away from the breaded crust.
The combination works particularly well when the mushrooms are part of a larger meal rather than only a snack. Each component keeps its own texture.
Keep the mushrooms hot and the salad fresh. The contrast makes both more enjoyable.
Serving With a Cold Beer
An icy beer can be served alongside the fried mushrooms. The cold drink contrasts with the hot, heavily textured appetizer.
This pairing works especially well for casual gatherings. A platter of mushrooms and dipping sauces already feels like party food.
Serve the beer separately and let the mushrooms remain the focus. No additional preparation is needed.
The combination fits naturally into a relaxed Friday-night setting. It also works well when the mushrooms are shared in batches straight from the fryer.
Reheating Crispy Fried Mushrooms
Freshly fried mushrooms have the best texture. Once they sit, the coating gradually becomes less crisp.
To revive leftover mushrooms, place them in a 375°F oven or air fryer. Heat for about 5 minutes.
This dry heat brings back more crunch than a softer reheating method. The mushrooms still may not be exactly the same as they were immediately after frying.
Serve them as soon as they are reheated. Waiting again only gives the crust another chance to soften.
Frequently Asked Questions
Can I Use Other Types of Mushrooms?
Yes. Button mushrooms are the standard choice, but portobellos, king oyster mushrooms, and creminis can all work.
Slice portobellos into thick strips and king oysters into coins. Choose pieces sturdy enough to hold their shape during frying.
Can I Make Crispy Mushrooms in an Air Fryer?
Yes. Spray the breaded mushrooms lightly with oil.
Air fry at 400°F for about 8 minutes and flip halfway through. They will be somewhat less crispy than deep-fried mushrooms.
What’s a Good Garlic Dipping Sauce?
Mix ½ cup mayonnaise with 2 minced garlic cloves and a squeeze of lemon. Stir until evenly combined.
Serve the garlic mayo in a bowl beside the mushrooms. Dip only when ready to eat so the coating stays crisp.
Can I Make a Sweet and Spicy Dipping Sauce?
Yes. Equal parts mustard and honey can be mixed with a dash of hot sauce.
Hot sauce and honey can also be combined for another sweet-heat option. Both provide contrast with the savory breading.
Why Is My Coating Falling Off?
The mushrooms may have had too much moisture on the outside. Pat them thoroughly dry before beginning.
Make sure each mushroom moves through flour, then egg wash, then breadcrumbs. Press the breadcrumbs gently so they adhere.
Why Are My Fried Mushrooms Greasy?
Oil temperature is important. Keep it near 350°F and avoid letting it fall below about 325°F.
Fry only 4–5 mushrooms at a time. Crowding the oil can lower its temperature too quickly.
How Long Should I Fry Them?
Fry each batch for about 3–4 minutes. Turn once halfway through if needed.
Watch for a deep golden-brown crust. The final color change can happen quickly, so stay close to the skillet.
Can I Add Parmesan to the Coating?
Yes. Mix ¼ cup grated Parmesan into the breadcrumbs.
Continue with the same breading and frying method. The cheese gives the crust an additional savory flavor.
Nutritional Information
One serving, approximately 4 mushrooms, contains about 220 calories. This value is an estimate rather than an exact number for every batch.
The final nutrition can change according to the ingredients used and how much oil the coating absorbs during frying. Different mushroom sizes, breadcrumb choices, Parmesan additions, or cooking methods can also affect the result.
Air frying will produce a different nutritional profile from frying in vegetable oil. Changing the coating or dipping sauces will also alter the final numbers.
The listed estimate applies only to the mushrooms themselves as prepared in the standard version. Dipping sauces are additional.
The Crispy Mushroom Platter That Never Lasts Long
After all the batches I have made over the years, the moment I still love most is hearing that first crunch. It tells me immediately whether the oil was right, the breading held, and the mushrooms came out the way I wanted.
There were plenty of less successful versions before I reached this one. Some batches cooked too quickly, some did not crisp enough, and more than a few taught me why guessing the oil temperature is not nearly as reliable as actually watching it.
The three-part breading became the detail I stopped compromising on. Flour gives the spices somewhere to live, egg and milk create the bridge, and breadcrumbs form the final shell.
Then the mushrooms hit the oil and everything changes. In just a few minutes, that soft breaded surface turns deep golden while the center remains juicy.
It is also why I never recommend making people wait too long once a batch is finished. These mushrooms are at their best while the crust is still fresh from the oil.
At parties, that usually is not much of a problem. The platter tends to empty faster than I can worry about the coating losing its crunch.
My nephew proved that especially well the summer he nearly claimed an entire platter for himself. By the time everyone else came back for more, very little was left.
These days I am more likely to make an extra batch from the beginning. Sometimes I use the standard breadcrumbs, and sometimes panko or Parmesan gives one platter a slightly different character.
The dipping sauces change too. Garlic mayo might be the favorite one night, while ranch or something sweet and spicy wins the next.
What never changes is the basic pleasure of that crisp shell around a tender mushroom. Crispy Fried Mushrooms are simple pantry ingredients and ordinary mushrooms transformed into the kind of snack that somehow makes everyone reach for one more.
Crispy Fried Mushrooms Recipe

Golden, crunchy, and tender in the center, these Crispy Fried Mushrooms make an easy appetizer or snack with plenty of texture and savory flavor. A seasoned flour coating, egg wash, and bread crumbs create a crisp exterior that stays especially satisfying when served hot.
Recipe Details
- Prep Time: 15 minutes
- Cook Time: 15 minutes
- Total Time: 30 minutes
- Course: Appetizer
- Cuisine: American
- Servings: 4 servings
- Calories: 220 kcal
Ingredients
For the Mushrooms
- 16 oz button mushrooms stems removed
For the Seasoned Coating
- ½ cup flour
- ½ teaspoon dried oregano
- ½ teaspoon garlic powder
- ¼ teaspoon cayenne pepper
- ½ teaspoon black pepper
- Salt to taste
- ¼ teaspoon red chili flakes
- ¼ teaspoon dried basil
- ¼ teaspoon dried thyme
- 1 cup seasoned bread crumbs
For the Egg Mixture
- 2 eggs
- ⅛ cup milk
For Frying
- Vegetable oil for deep-frying
Instructions
Step 1: Prepare the Mushrooms
Clean the button mushrooms carefully and remove the stems.
Pat the mushrooms dry before coating so the breading can adhere more evenly.
Step 2: Make the Seasoned Flour
Combine the flour with dried oregano, garlic powder, cayenne pepper, black pepper, salt, red chili flakes, dried basil, and dried thyme.
Mix until the seasonings are evenly distributed throughout the flour.
Step 3: Prepare the Egg Mixture
In a separate bowl, beat the eggs with the milk.
Whisk until the mixture is smooth and evenly combined.
Step 4: Coat the Mushrooms
Dip each mushroom first into the seasoned flour mixture.
Next, dip it into the egg mixture, then coat completely with seasoned bread crumbs.
Step 5: Heat the Oil
Heat the vegetable oil to 350°F (175°C).
Keep the oil at a steady temperature while frying.
Step 6: Fry in Batches
Carefully add the coated mushrooms to the hot oil in batches.
Fry for about 3–4 minutes, until golden brown and crisp.
Step 7: Drain
Remove the fried mushrooms from the oil.
Transfer them to paper towels to drain away excess oil.
Step 8: Serve Hot
Serve the Crispy Fried Mushrooms immediately.
Pair them with your favorite dipping sauce while the coating is still hot and crunchy.
Notes
- Use fresh mushrooms for best results.
- Don’t overcrowd the frying pan.
- Serve immediately for maximum crispiness.
Serving Suggestions
Serve Crispy Fried Mushrooms hot as an appetizer or snack with your favorite dipping sauce. The crunchy seasoned coating contrasts with the tender mushroom center for a satisfying bite.
This recipe makes 4 servings and is best enjoyed right after frying. Working in batches helps the mushrooms cook evenly without overcrowding the pan.
Storage
These fried mushrooms are best served immediately for maximum crispiness.
Mushroom Tip
Use 16 oz button mushrooms with the stems removed.
Fresh mushrooms give the best results.
Seasoning Tip
Flavor the flour with oregano, garlic powder, cayenne, black pepper, salt, red chili flakes, basil, and thyme.
Egg Mixture Tip
Beat 2 eggs with ⅛ cup milk before breading the mushrooms.
Bread Crumb Tip
Use 1 cup seasoned bread crumbs for the final coating.
Oil Tip
Heat vegetable oil to 350°F (175°C) before frying.
Frying Tip
Cook the mushrooms in batches for about 3–4 minutes, until golden brown.
Do not overcrowd the frying pan.
Draining Tip
Drain the fried mushrooms on paper towels after removing them from the oil.
Serving Tip
Serve hot with your favorite dipping sauce.

Fernando is the creator and writer behind the food blog Eating with your Hands. Living and working in cities like Paris, Barcelona, and Berlin, and being married to a Canadian foodie, has given Fernando a passion and interest in food and inspired him to run EWYH.