
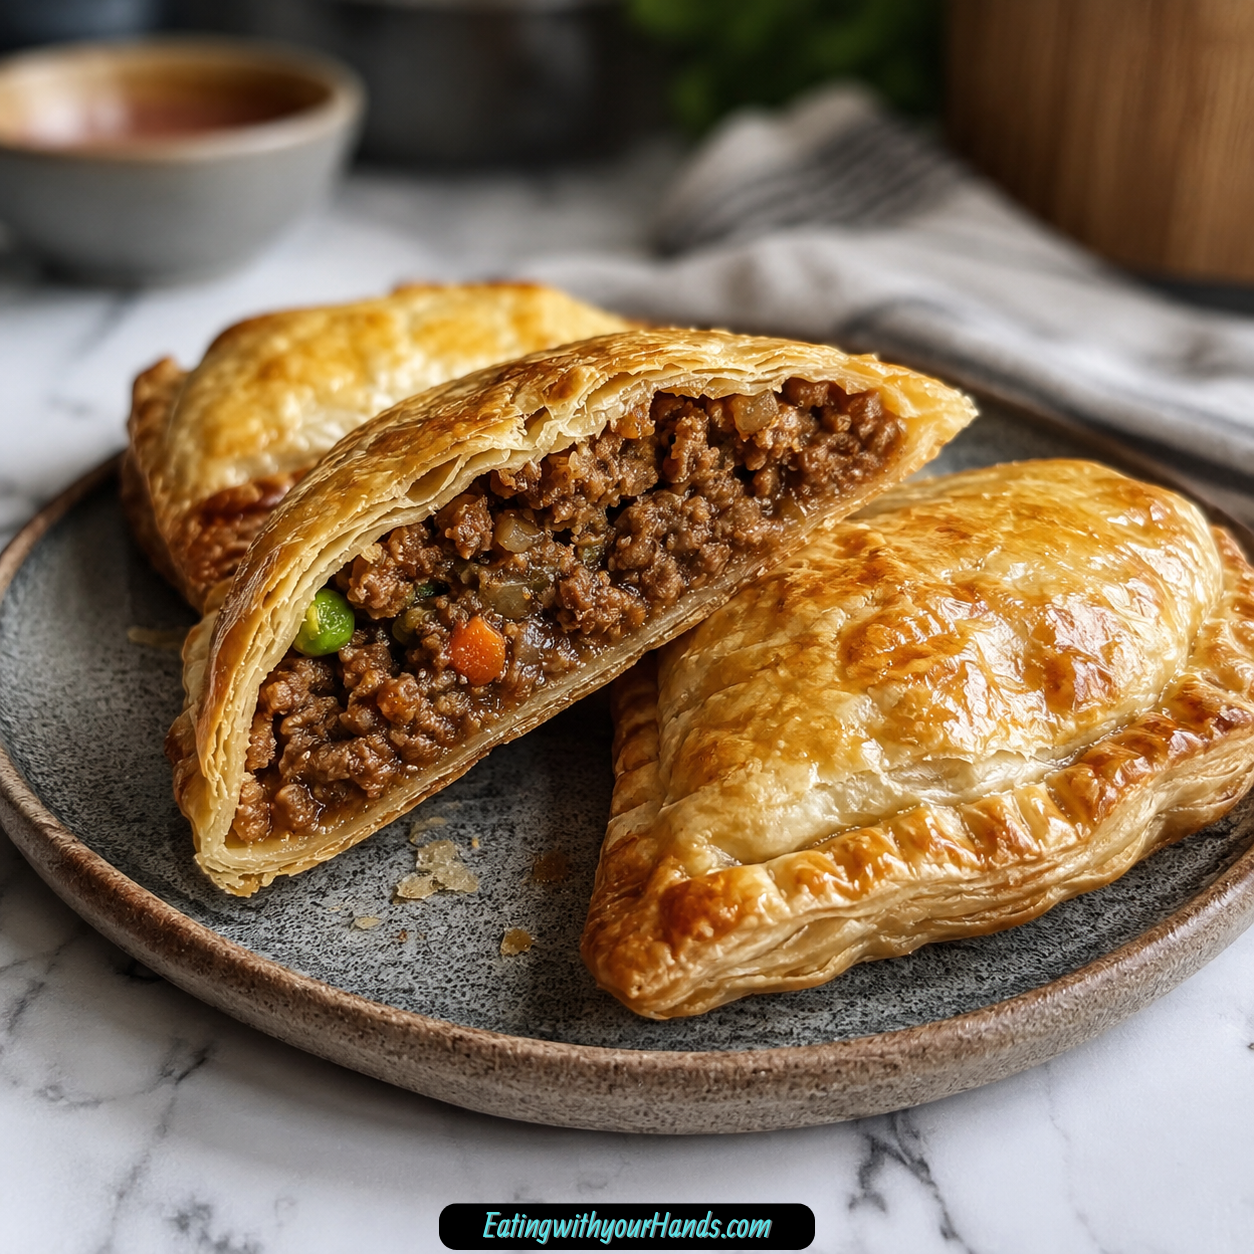

Crispy Meat Pies are the kind of food that make you stop for a second after the first bite. The crust cracks gently, the warm filling releases that savory smell of beef, onion, vegetables, and spices, and suddenly a simple little hand pie feels like the most comforting thing in the world.
I always think of meat pies as rainy-day food, the kind of snack that feels best when it is warm, golden, and just cool enough to hold in your hand. They are small enough to serve as appetizers, satisfying enough to turn into a meal, and comforting enough to make a quiet evening feel special.
These pies are built around a flaky homemade dough made with cold butter, flour, salt, and cold water. Inside, the filling is hearty and simple, with ground beef, onion, potato, carrots, peas, garlic powder, cumin, paprika, salt, and pepper.
They can be fried for that deep golden crunch or baked for a lighter version. Either way, the result is a batch of savory pockets with tender filling, crisp edges, and the kind of homemade flavor that makes people reach for seconds before the first plate is even empty.
Table of Contents
- Why You’ll Love This Recipe
- Recipe Details
- Ingredients
- Optional Swaps, Variations, Add-Ins, and Serving Ideas
- Why These Crispy Meat Pies Work
- Directions
- Step 1: Mix the Flour and Salt
- Step 2: Cut in the Cold Butter
- Step 3: Add the Cold Water Slowly
- Step 4: Wrap and Chill the Dough
- Step 5: Brown the Ground Beef
- Step 6: Add the Onion, Potato, and Carrots
- Step 7: Add the Peas and Seasonings
- Step 8: Cool the Filling Slightly
- Step 9: Roll Out the Dough
- Step 10: Cut the Dough Into Circles
- Step 11: Add the Filling
- Step 12: Fold Into Half-Moons
- Step 13: Seal With a Fork
- Step 14: Brush With Egg Wash
- Step 15: Heat the Oil
- Step 16: Fry the Pies in Batches
- Step 17: Drain on Paper Towels
- Step 18: Serve Warm
- Serving Ideas
- Storage
- Reheating
- Freezing
- Make-Ahead
- Helpful Notes for Best Results
- Variations
- Troubleshooting
- Frequently Asked Questions
- Why This Recipe Works So Well
- Final Thoughts
- Crispy Meat Pies
Why You’ll Love This Recipe
These crispy meat pies have an unbeatable crunch. The dough is rolled thin, sealed around the filling, brushed with egg wash, and fried until golden and crisp.
The filling is deeply satisfying. Ground beef, onion, potato, carrots, peas, garlic powder, cumin, paprika, salt, and pepper come together into a savory mixture that tastes hearty without being complicated.
They are perfect for many occasions. Serve them as a snack, appetizer, party food, or main dish with a simple side salad.
They are also make-ahead friendly. You can assemble the pies and freeze them for future meals or quick snacks.
The recipe is customizable. You can change the meat, add heat, try a vegetarian filling, make mini pies, or bake them instead of frying.
Most of all, they feel homemade in the best way. The crust, filling, sealing, and cooking all come together into something warm, crisp, and comforting.
Recipe Details
The dough is made with 2 cups all-purpose flour, ½ teaspoon salt, ¼ cup cold cubed butter, ¼ cup cold water, and 1 beaten egg for the egg wash. The cold butter is key for a flaky crust.
The filling uses ½ lb ground beef, 1 small finely chopped onion, 1 small diced potato, ½ cup diced carrots, ½ cup peas, 1 teaspoon garlic powder, ½ teaspoon cumin, ½ teaspoon paprika, salt and pepper to taste, and oil for frying. Vegetable or canola oil works best.
The dough is chilled for 15 minutes after mixing. This helps it rest and makes it easier to roll.
The filling is cooked in a skillet over medium heat. The beef cooks first for about 5 minutes, then the onion, potato, and carrots cook for another 5–7 minutes before peas and spices are added.
The dough is rolled to about ⅛-inch thick. Circles are cut with a round cutter or a bowl about 4 inches wide.
Each dough circle is filled with a heaping tablespoon of filling, folded into a half-moon, sealed with a fork, brushed with beaten egg, and fried in about ½ inch of oil. The pies cook for 2–3 minutes per side until deep golden and crispy.
Ingredients
Homemade Dough
2 cups all-purpose flour
½ teaspoon salt
¼ cup cold butter, cubed
¼ cup cold water
1 egg, beaten, for the egg wash
Savory Meat Filling
½ lb ground beef
1 small onion, finely chopped
1 small potato, diced
½ cup diced carrots
½ cup peas
1 teaspoon garlic powder
½ teaspoon cumin
½ teaspoon paprika
Salt and pepper, to taste
For Frying
Oil, for frying
Ingredient Notes
All-purpose flour gives the dough structure. It creates the base for the crisp crust.
Salt seasons the dough. Even a small amount helps the crust taste balanced instead of plain.
Cold butter is important for flakiness. Keep it cold until you cut it into the flour.
Cold water brings the dough together without making it too soft. Add it slowly so you do not overwork the dough.
The beaten egg is used as an egg wash. It gives the pies a golden color and a little extra shine and crispness.
Ground beef creates the hearty filling. An 80/20 blend gives extra flavor, but lean ground beef also works.
Onion, potato, carrots, and peas give the filling texture and balance. The peas add a little sweetness, while the potato and carrots make the filling more satisfying.
Garlic powder, cumin, paprika, salt, and pepper season the filling. They make the beef and vegetables taste warm and savory.
Vegetable or canola oil works best for frying. The pies need enough oil to crisp both sides evenly.
Optional Swaps, Variations, Add-Ins, and Serving Ideas
Baked Meat Pies
For a lighter version, skip the frying oil and bake the pies at 375°F for about 20 minutes until golden. They will not be quite as crispy as fried pies, but they will still be delicious.
Brush them with egg wash before baking. Place them on a parchment-lined sheet and flip halfway for even browning.
Vegetarian Meat-Free Pies
Replace the beef with mushrooms or lentils for a meat-free version. Cook them down with extra spices so they absorb plenty of flavor.
This variation keeps the same hand-pie shape and cozy filling idea. It is a good choice when you want savory pies without meat.
Spicy Meat Pies
Add a pinch of chili flakes or cayenne to the filling if you like heat. You can also stir in curry powder for a totally different flavor.
These additions change the personality of the filling while keeping the same basic method. Add them lightly so they support the beef and vegetables.
Cheesy Meat Pies
Toss a handful of shredded cheddar or feta into the filling. Cheese makes the pies richer and adds another savory layer.
Cheddar gives a familiar melty flavor, while feta adds a sharper, saltier bite. Let the filling cool slightly before adding cheese so it does not melt too early.
Mini Party Pies
Use a smaller cutter to make bite-sized pies for parties. Adjust the cooking time down slightly because smaller pies cook faster.
Mini pies are perfect for appetizer platters. They are easy to grab and serve with dipping sauces.
Dough Shortcuts
Cold shortening or chilled coconut oil can be used in the dough if you do not have butter. Store-bought pie dough or puff pastry also works when you are short on time.
If using store-bought dough or puff pastry, roll it a bit thinner for extra crispiness. The texture will be different, but the pies will still be tasty.
Why These Crispy Meat Pies Work
These crispy meat pies work because the crust and filling are built separately before they come together. The dough stays cool and rested, while the filling cooks until the beef is browned and the vegetables begin to soften.
Cold butter creates a better crust. When it is cut into the flour and kept chilled, it helps the dough bake or fry with crisp, flaky texture.
The filling is cooked before assembly so the pies do not rely on raw meat cooking inside the dough. This also lets the flavors of beef, onion, vegetables, and spices come together before frying.
Cooling the filling slightly makes assembly easier. Piping hot filling can soften the dough and make sealing messy.
Fork-sealing the edges matters. A tight seal helps keep the filling inside during frying.
The egg wash adds color and shine. It also supports the crisp, golden finish that makes these pies so appealing.
Directions
Step 1: Mix the Flour and Salt
Add 2 cups all-purpose flour and ½ teaspoon salt to a large mixing bowl. Toss them together until evenly combined.
This simple dry base becomes the dough for the pies. Mixing the salt into the flour first helps the crust taste evenly seasoned.
Use a bowl with enough space to work in the cold butter. You will need room to cut the butter into the flour without spilling.
Step 2: Cut in the Cold Butter
Add ¼ cup cold cubed butter to the flour mixture. Use a pastry cutter or your fingers to cut the butter into the flour.
The mixture should look like little pebbles in sand. Small bits of cold butter throughout the flour help create a flaky, crisp crust.
Work quickly so the butter stays cold. If the butter softens too much, the dough can become less flaky.
Step 3: Add the Cold Water Slowly
Slowly drizzle in ¼ cup cold water while mixing. Add just enough to bring the dough together.
Do not overwork the dough. The goal is a dough that holds together, not one that has been kneaded smooth for a long time.
If the dough looks a little rough, that is okay. It will rest and become easier to roll after chilling.
Step 4: Wrap and Chill the Dough
Wrap the dough in plastic wrap and place it in the refrigerator for 15 minutes. This short chill helps the dough relax and firm up.
Chilling also keeps the butter cold. That is important for the crispy, flaky texture later.
Do not skip this rest if the dough feels soft. A chilled dough is easier to roll and shape.
Step 5: Brown the Ground Beef
While the dough rests, heat a splash of oil in a skillet over medium heat. Add ½ lb ground beef.
Break the beef up with a spoon as it cooks. Let it brown for about 5 minutes.
The beef should be cooked into small pieces so it fits well inside the dough circles. Browning also builds flavor in the filling.
Step 6: Add the Onion, Potato, and Carrots
Add 1 small finely chopped onion, 1 small diced potato, and ½ cup diced carrots to the skillet. Stir them into the browned beef.
Cook everything for another 5–7 minutes, or until the vegetables begin to soften. The potato and carrots should not be large, because smaller pieces fit better inside the pies.
The onion adds savory flavor as it cooks. The filling should smell warm and hearty at this point.
Step 7: Add the Peas and Seasonings
Stir in ½ cup peas, 1 teaspoon garlic powder, ½ teaspoon cumin, ½ teaspoon paprika, and a good pinch of salt and pepper. Cook for another minute.
The peas add a little sweetness and color. The spices give the filling warmth and depth.
Taste carefully and adjust salt and pepper as needed. The filling should be flavorful before it goes into the dough.
Step 8: Cool the Filling Slightly
Remove the skillet from the heat and let the filling cool a bit. Do not assemble the pies while the filling is piping hot.
Hot filling can soften the dough and make the pies harder to seal. Slightly cooled filling is much easier to handle.
The filling does not need to be cold. It just needs to be cool enough that it will not melt the dough or burn your fingers.
Step 9: Roll Out the Dough
Place the chilled dough on a floured surface. Roll it out until it is about ⅛-inch thick.
Thin dough gives the pies a better crisp texture. If it is too thick, the crust can feel heavy around the filling.
Use light flour as needed to prevent sticking. Do not use too much, or the crust can become tough.
Step 10: Cut the Dough Into Circles
Use a round cutter or a bowl about 4 inches wide to cut circles from the dough. Press cleanly through the dough for neat edges.
Gather and reroll scraps if needed. Keep the dough lightly floured so it does not stick.
The circles should be large enough to hold a heaping tablespoon of filling and still fold over. If they are too small, sealing will be difficult.
Step 11: Add the Filling
Spoon a heaping tablespoon of filling onto one half of each dough circle. Leave a small border around the edge.
Do not overstuff the pies. Too much filling can cause leaking during frying.
Spread the filling slightly on one side, but keep it away from the edges. The border is what allows the dough to seal.
Step 12: Fold Into Half-Moons
Fold the empty half of each dough circle over the filling to form a half-moon shape. Line up the edges as neatly as possible.
Press the edges gently with your fingers first. This helps hold the shape before using the fork.
If the dough is cracking, dab a little water on the edges before sealing. The water acts like glue and helps the dough stick together.
Step 13: Seal With a Fork
Press the edges with a fork to seal each pie tightly. Work all the way around the curved edge.
Fork pressing is key because it helps keep the filling inside during frying. It also gives the pies a classic crimped look.
Do not press so hard that you cut through the dough. Firm, even pressure is enough.
Step 14: Brush With Egg Wash
Brush each pie with the beaten egg. This helps create a golden color and a slightly shiny finish.
The egg wash also helps the crust look more polished. It is a small step that makes the finished pies prettier.
If making the pies without eggs, use a milk or melted butter brush instead. The crust will not be quite as shiny but will still be delicious.
Step 15: Heat the Oil
Heat about ½ inch of oil in a pan over medium heat. Vegetable or canola oil works best.
The oil is ready when a breadcrumb sizzles after being dropped in. This simple test helps you know the oil is hot enough for frying.
Do not crowd the pan once you begin frying. Frying in batches helps the pies crisp properly.
Step 16: Fry the Pies in Batches
Place a few pies into the hot oil. Fry for 2–3 minutes per side.
The pies should become deep golden and crispy. Turn them carefully so both sides cook evenly.
Work in batches so the oil temperature does not drop too much. Crowding can make the pies greasy instead of crisp.
Step 17: Drain on Paper Towels
Transfer the fried pies to paper towels to drain. This removes excess oil from the surface.
Let them rest briefly before serving because the filling will be very hot. The crust will stay crisp as they cool slightly.
Try not to stack them while they are still hot. Stacking can trap steam and soften the crust.
Step 18: Serve Warm
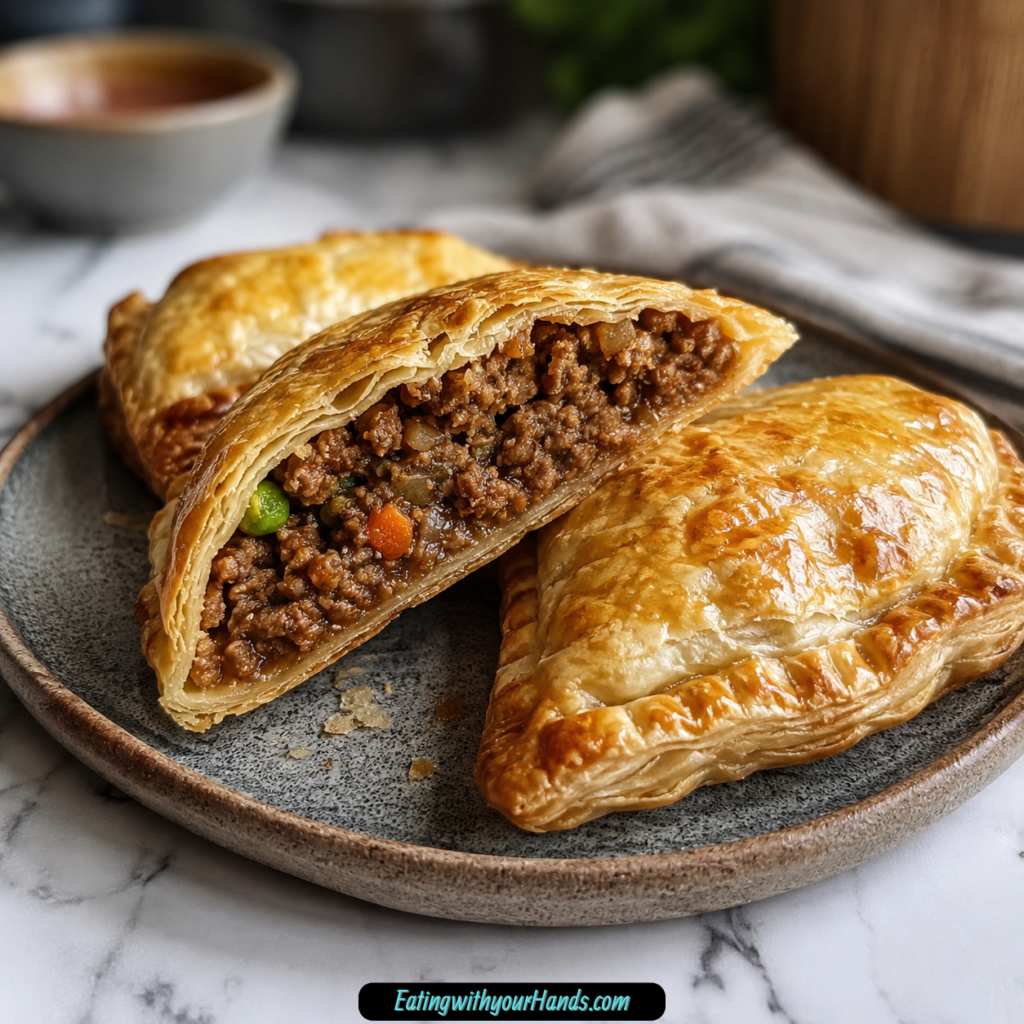
Serve the crispy meat pies warm. This is when the crust is at its crunchiest and the filling tastes most comforting.
They can be served as a snack, appetizer, or main dish. A simple side salad makes them feel like a full meal.
For dipping, offer ketchup, hot sauce, chutney, or a tangy yogurt dip. The pies are flavorful on their own, but dips make them fun for parties.
Serving Ideas
Crispy meat pies are best served warm, right after frying or baking if possible. The crust is crispest when fresh, and the filling is most comforting when it is hot.
Serve them as a hearty snack or a crowd-pleasing appetizer. They also work as a main dish with a simple side salad.
For party serving, pile them high on a platter. Add little bowls of ketchup, hot sauce, chutney, or tangy yogurt dip for dipping.
They are also wonderful on chilly evenings when you want something savory and filling. A warm hand pie has a way of feeling like a complete comfort food moment.
If making mini pies, serve them as bite-sized party snacks. Just remember to reduce the cooking time a bit because smaller pies cook more quickly.
Storage
Let leftover pies cool completely before storing. Once cooled, place them in an airtight container.
Store them in the refrigerator for up to 3 days. Keeping them covered protects the filling and crust.
Do not store them while hot, because trapped steam can soften the crust. Cooling first helps preserve texture.
If stacking, place parchment between layers if needed. This helps keep them from sticking together.
Reheating
To reheat, place the pies in a 350°F oven for 10 minutes. This brings back the crispiness better than the microwave.
Microwaving can make the crust soggy. The oven is worth the extra step if you want a crisp bite.
Reheat until warmed through. Let them cool slightly before eating because the filling can become very hot.
If reheating from frozen after cooking, add extra time as needed. The goal is a hot center and crisp outside.
Freezing
You can freeze uncooked pies. Assemble them, freeze flat on a tray, then transfer them to a bag.
Fry or bake straight from frozen. Add a couple extra minutes to the cooking time.
Freezing them flat first helps keep their shape. Once firm, they are easier to store in a freezer bag.
This is a great way to make future snacks or meals easier. When you want something warm and savory, the pies can go straight from freezer to pan or oven.
Make-Ahead
Crispy meat pies are very make-ahead friendly. Assemble them without frying, then freeze them on a tray before transferring to a bag.
You can fry or bake them straight from frozen. Add 1–2 extra minutes, or a couple extra minutes as needed, depending on size and cooking method.
You can also make the filling ahead and let it cool before assembling. Cooler filling makes the dough easier to seal.
For parties, mini pies can be assembled ahead and cooked closer to serving. This gives you warm, crisp pies when guests arrive.
Helpful Notes for Best Results
Keep the butter cold for the dough. Cold butter is the key to a flaky, crispy crust.
Do not overwork the dough. Mix only until it comes together, then let it chill for 15 minutes.
If the dough is too sticky while rolling, add a sprinkle of flour. Do not overdo it, or the crust can become tough.
If you do not have butter, cold shortening or chilled coconut oil can be used for the dough in a pinch. The texture will be slightly different.
If you are short on time, store-bought pie dough or puff pastry works too. Roll it a bit thinner for extra crispiness.
If baking instead of frying, brush with egg wash and place the pies on a parchment-lined sheet. Flip halfway for even browning.
For a gluten-free version, swap the flour for a 1:1 gluten-free blend. The texture will be slightly different but still tasty.
Variations
Baked Crispy Meat Pies
Bake the pies at 375°F for about 20 minutes until golden. This is a lighter option than frying.
They will not be quite as crispy as fried pies. Still, they remain savory, golden, and delicious.
Ground Turkey or Chicken Pies
Use ground turkey or chicken instead of beef. The spices work well with any ground meat.
Leaner meats may need a splash of oil or broth to keep the filling moist. Watch the texture as it cooks.
Vegetarian Mushroom or Lentil Pies
Replace the beef with mushrooms or lentils. Cook them down with extra spices for good flavor.
Mushrooms and lentils soak up seasoning well. They create a hearty meat-free filling.
Spicy Meat Pies
Add chili flakes or cayenne to the filling. This gives the pies a little heat.
You can also stir in curry powder for a completely different flavor direction. Add it to the filling with the other spices.
Cheesy Meat Pies
Add shredded cheddar or feta to the filling. Cheese makes the pies richer and more savory.
Cheddar melts into the filling, while feta adds a salty bite. Both work well with the beef and vegetables.
Mini Meat Pies
Use a smaller cutter for bite-sized pies. These are perfect for parties.
Adjust the cooking time down a bit. Smaller pies cook faster than larger ones.
Troubleshooting
Why Is My Dough Sticky?
The dough may need a sprinkle of flour while rolling. Add just enough to keep it from sticking to your hands or work surface.
Do not add too much flour. Too much can make the crust tough instead of tender and crisp.
Why Is My Dough Cracking When I Fold It?
Dab a little water on the edges before sealing. This helps the dough stick together.
You can also let the dough rest a few more minutes. Sometimes it just needs to relax before folding.
Why Is My Filling Leaking Out?
The pies may be overstuffed, or the edges may not be sealed tightly. Use a heaping tablespoon of filling and leave a border around the dough.
Press the edges with a fork to seal them well. A little leakage is normal and just gives the pies a rustic look.
Why Is My Crust Not Crispy?
The oil may not have been hot enough, or the pan may have been crowded. A breadcrumb should sizzle when the oil is ready.
Fry in batches so the pies crisp instead of steaming. Drain them on paper towels after frying.
Why Is My Filling Too Dry?
Leaner meats like turkey or chicken may need a splash of oil or broth. Ground beef with a little more fat can also give more flavor.
Do not overcook the filling before assembly. It only needs to be browned, softened, and seasoned.
Frequently Asked Questions
Can I Use Ground Turkey or Chicken Instead of Beef?
Yes, ground turkey or chicken can be used instead of beef. The spices work well with any ground meat.
Leaner meats may need a splash of oil or broth to keep the filling moist. Watch the filling as it cooks and adjust if needed.
My Dough Is Cracking When I Fold It. What Should I Do?
Dab a little water on the edges before sealing. The water acts like glue.
You can also let the dough rest a few more minutes. Rested dough is often easier to fold.
Can I Prep These Ahead of Time?
Yes, assemble the pies without frying, freeze them on a tray, then transfer them to a bag. Fry or bake straight from frozen.
Add 1–2 extra minutes to the cooking time. Larger pies may need a couple extra minutes.
Why Is My Filling Leaking Out During Frying?
Make sure the edges are sealed tightly with a fork. Do not overstuff the pies.
A small amount of leakage can happen. The pies will still taste delicious.
Can I Make These Without Eggs?
Yes, for egg-free pies, skip the egg wash. Use a milk or melted butter brush instead.
The crust will not be quite as shiny. It will still be delicious.
Can I Bake These Instead of Frying?
Yes, bake them at 375°F for about 20 minutes until golden. Brush with egg wash and place on a parchment-lined sheet.
Flip them halfway for even browning. They will be lighter, though not quite as crispy as fried pies.
Can I Make These Gluten-Free?
Yes, swap the flour for a 1:1 gluten-free blend. The texture will be slightly different but still tasty.
Handle the dough gently. Gluten-free dough may behave differently when rolling and sealing.
Why This Recipe Works So Well
Crispy Meat Pies work so well because the recipe balances a crisp crust with a hearty filling. The outside gives that satisfying crunch, while the inside brings warm beef, tender vegetables, and savory spices.
The homemade dough is simple but effective. Cold butter, flour, salt, and cold water create a crust that can fry or bake into golden layers.
The filling is cooked before the pies are assembled, which gives the vegetables time to soften and the beef time to brown. This makes each bite flavorful instead of bland.
The fork-sealed edges keep the filling tucked inside. The egg wash helps create that golden finish that makes the pies look as good as they taste.
The recipe is also flexible enough for real kitchens. You can bake instead of fry, use turkey or chicken, make a vegetarian version, add cheese, or freeze uncooked pies for later.
Most of all, these pies work because they feel like comfort you can hold in your hand. They are warm, crisp, savory, and just rustic enough to feel homemade.
Final Thoughts
Crispy Meat Pies are a reminder that some of the best comfort foods are simple at heart. A flaky dough, a savory beef and vegetable filling, and a hot pan of oil or a warm oven can turn basic ingredients into something deeply satisfying.
I love that these pies can be a snack, appetizer, meal, party bite, or freezer-friendly backup dinner. They feel special when fresh and golden, but they are practical enough to make ahead for busy days.
Serve them warm with a side salad, a tangy yogurt dip, ketchup, hot sauce, or chutney, and do not worry if every edge is not perfect. The slightly rustic ones taste just as good, especially when that first crisp bite gives way to the savory filling inside.
Crispy Meat Pies

These Crispy Meat Pies are savory, golden, and filled with a hearty beef and vegetable mixture wrapped in a flaky homemade dough. With a crispy fried crust and a flavorful filling made with ground beef, potato, carrots, peas, and warm spices, they work well as a filling snack, casual dinner, or handheld party food.
Recipe Details
- Prep Time: 30 minutes
- Cook Time: 20 minutes
- Total Time: 50 minutes
- Course: Dinner, Snack
- Cuisine: International
- Servings: 4 pies
Equipment
- Mixing bowl
- Skillet
- Rolling pin
Ingredients
For the Dough
- ¼ cup cold water
- ¼ cup cold butter cubed
- 1 egg beaten (for egg wash)
- 2 cups all-purpose flour
- ½ teaspoon salt
For the Filling
- ½ cup peas
- ½ cup diced carrots
- 1 small potato diced
- 1 small onion finely chopped
- ½ lb ground beef
- ½ teaspoon paprika
- ½ teaspoon cumin
- 1 teaspoon garlic powder
- Salt and pepper to taste
- Oil for frying
Instructions
Step 1: Make the Dough Base
In a mixing bowl, combine the all-purpose flour and salt. Cut in the cold butter until the mixture resembles crumbs.
Step 2: Add the Water and Chill
Add the cold water gradually and mix until a dough forms. Wrap the dough in plastic and refrigerate for 15 minutes.
Step 3: Cook the Beef Filling
In a skillet, heat the oil and cook the ground beef until browned.
Step 4: Add the Vegetables and Spices
Add the onion, potato, carrots, peas, garlic powder, cumin, paprika, salt, and pepper. Cook until the vegetables are tender, then let the filling cool.
Step 5: Roll and Cut the Dough
Roll out the chilled dough with a rolling pin and cut it into circles.
Step 6: Fill and Seal the Pies
Place the filling on each dough circle. Fold the dough over the filling and seal the edges with a fork.
Step 7: Brush and Fry
Brush the pies with the beaten egg. Fry them in hot oil until golden brown and crispy.
Notes
Serve the meat pies warm.
For a lighter version, you can bake the pies at 375°F for 20 minutes instead of frying.
Serving Suggestions
- Serve warm as a savory snack or casual dinner.
- Pair with a simple salad for a lighter meal.
- Add to a party platter as a handheld appetizer.
- Serve with a dipping sauce on the side if desired.
- Enjoy with soup for a cozy, filling meal.
Storage
How to Store
Let the meat pies cool completely, then place them in an airtight container. Refrigerate until ready to reheat.
How to Reheat
Reheat until the crust is warm and crispy again. An oven or air fryer works well for bringing back the crisp texture.
How to Freeze
Freeze cooled meat pies in a freezer-safe container or bag. Reheat from chilled or thawed until hot throughout and crisp on the outside.
Best Texture Tip
Serve the pies warm for the crispiest crust and best filling texture.

Fernando is the creator and writer behind the food blog Eating with your Hands. Living and working in cities like Paris, Barcelona, and Berlin, and being married to a Canadian foodie, has given Fernando a passion and interest in food and inspired him to run EWYH.