

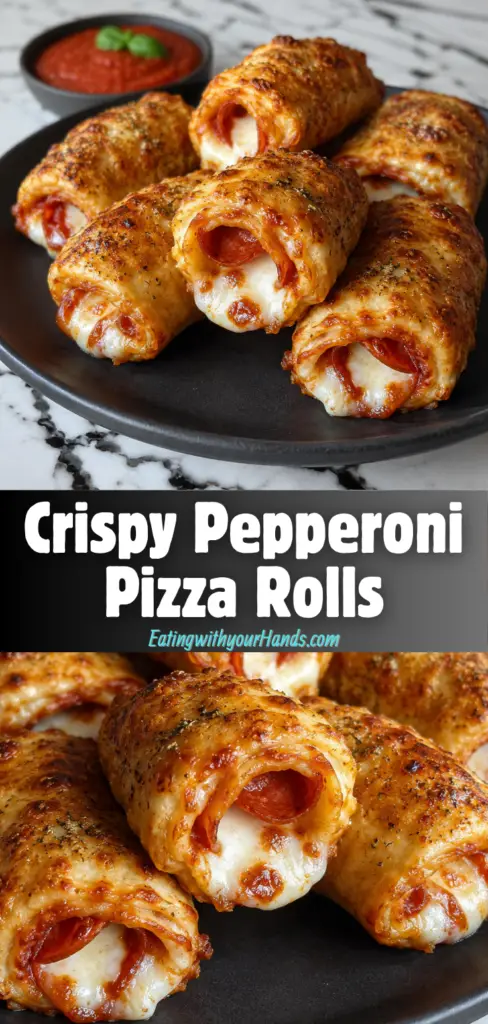
Some recipes feel like they were made for the middle of a busy table, where everyone is laughing, reaching, dipping, and asking if there are any more in the oven. Crispy Pepperoni Pizza Rolls are exactly that kind of recipe.
They take the familiar comfort of pizza and tuck it into a golden, handheld roll that is easy to serve and even easier to love. Inside each roll is a savory filling made with lean ground beef, pepperoni, crushed tomatoes, tomato paste, herbs, spices, and gooey mozzarella cheese.
Every time these rolls come out of the oven, they bring that cozy feeling of family gatherings and casual nights at home. The kitchen fills with the smell of melting cheese, tomato, oregano, pepperoni, and warm wraps crisping at the edges.
They are simple, satisfying, and full of flavor. Whether you are making them for game day, a party, a family movie night, or a quick comfort-food craving, these Crispy Pepperoni Pizza Rolls have a way of making the moment feel more fun.
Table of Contents
- What Are Crispy Pepperoni Pizza Rolls?
- Why This Recipe Feels So Comforting
- Recipe Overview
- Why You’ll Love These Crispy Pepperoni Pizza Rolls
- Ingredients You’ll Need
- Ingredient Notes
- Directions
- Step 1: Prepare Your Workspace
- Step 2: Prepare the Herbs and Pepperoni
- Step 3: Heat the Skillet
- Step 4: Add the Ground Beef and Seasonings
- Step 5: Brown the Beef
- Step 6: Add the Crushed Tomatoes
- Step 7: Add the Tomato Paste
- Step 8: Add the Parsley and Oregano
- Step 9: Add the Chopped Pepperoni
- Step 10: Simmer the Filling
- Step 11: Taste and Adjust Seasoning
- Step 12: Preheat the Oven
- Step 13: Prepare the Baking Sheet
- Step 14: Lay Out the First Wrap
- Step 15: Add the Filling
- Step 16: Add the Mozzarella
- Step 17: Roll the Wrap Tightly
- Step 18: Place the Roll Seam-Side Down
- Step 19: Arrange the Rolls on the Baking Sheet
- Step 20: Spray the Tops With Oil
- Step 21: Bake the Pizza Rolls
- Step 22: Broil for Extra Crispiness If Desired
- Step 23: Cool Before Serving
- Step 24: Serve With Dipping Sauce
- Pro Tips for the Best Crispy Pepperoni Pizza Rolls
- Variations
- Serving Suggestions
- Storage Tips
- Freezing Instructions
- Make-Ahead Instructions
- Common Mistakes to Avoid
- Helpful Notes
- Frequently Asked Questions
- Final Thoughts
- Crispy Pepperoni Pizza Rolls
What Are Crispy Pepperoni Pizza Rolls?
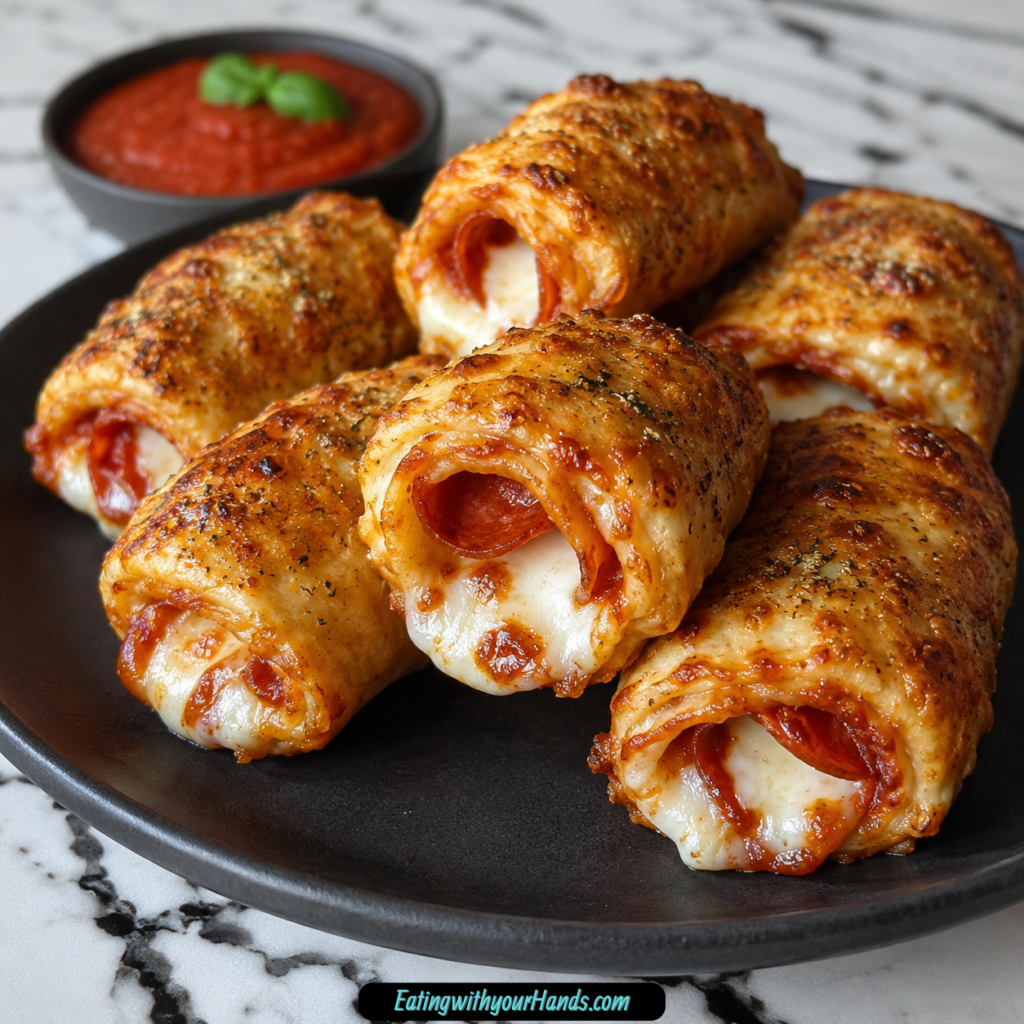
Crispy Pepperoni Pizza Rolls are handheld pizza-inspired rolls made with large wraps filled with a savory beef and pepperoni tomato mixture, then topped with shredded mozzarella before being rolled and baked until golden. They are served warm with a dipping sauce of your choice.
The filling brings together the rich flavor of lean ground beef, chopped pepperoni, crushed tomatoes, tomato paste, parsley, oregano, onion powder, garlic powder, smoked paprika, salt, and black pepper. The mozzarella adds the melty, cheesy texture that makes the rolls feel like pizza in every bite.
Instead of traditional pizza crust, this recipe uses large wraps. That makes the rolls easy to assemble, easy to bake, and wonderfully crisp once sprayed lightly with oil and placed in a hot oven.
They are perfect as a snack, appetizer, or casual meal. Since they are rolled into individual portions, they are easy to serve at gatherings and convenient for dipping.
Why This Recipe Feels So Comforting
Pizza flavors have a way of feeling instantly familiar. Tomato, cheese, pepperoni, herbs, and savory spices are the kind of combination that reminds people of relaxed nights, shared plates, and food that does not need to be fancy to be memorable.
These Crispy Pepperoni Pizza Rolls take that comfort and make it even more fun. Instead of slicing a pizza, you get a crisp roll with a warm filling tucked inside.
The outside becomes golden and lightly crunchy, while the inside stays flavorful and cheesy. That contrast makes each bite satisfying.
They also feel personal and homemade. Rolling them by hand, placing them seam-side down, and baking them until crisp gives the recipe a warm, made-with-care quality.
Recipe Overview
Prep Time: 30 minutes
Cook Time: 20 minutes
Total Time: 50 minutes
Servings: 6 rolls
This recipe takes about 50 minutes from start to finish. The filling is cooked first, then spooned into large wraps with mozzarella, rolled tightly, sprayed with oil, and baked until crisp and golden.
The recipe makes 6 rolls, making it a great choice for a small gathering, family snack, or appetizer platter. You can also prepare the rolls ahead of time and bake them when ready to serve.
Why You’ll Love These Crispy Pepperoni Pizza Rolls
You will love these rolls because they deliver classic pizza flavor in a convenient handheld form. They are easy to pick up, easy to dip, and packed with a warm, savory filling.
They are also great for last-minute gatherings because the preparation is straightforward. With 30 minutes of prep time and 20 minutes of cooking time, you can have them ready without spending hours in the kitchen.
The ingredients are simple and familiar. Ground beef, pepperoni, tomato, seasonings, wraps, mozzarella, and dipping sauce come together in a way that feels easy but still exciting.
This recipe is beginner-friendly. The steps are forgiving, and the rolling method is simple once you keep the filling amount moderate.
They are perfect for game days, family get-togethers, parties, or movie nights. A plate of warm crispy pizza rolls always feels welcome.
They can also be made ahead. You can prepare the filling and assemble the rolls in advance, then bake them right before serving for the best texture.
Ingredients You’ll Need
For the Filling
14 oz crushed tomatoes: I use Cento San Marzano crushed tomatoes for the best flavor.
0.5 oz flat-leaf parsley, freshly chopped: Adds vibrant flavor.
2 teaspoon dried oregano, crushed: Crush it between your fingers to release more flavor.
2.2 lb lean ground beef: 95% lean for best results.
2 teaspoon onion powder: Adds savory depth.
Spray oil: For greasing.
2 teaspoon garlic powder: Adds classic pizza-style flavor.
Salt and ground black pepper: To taste.
2 tablespoon tomato paste: Helps thicken and deepen the filling.
2 teaspoon smoked paprika: Adds a warm smoky note.
5.2 oz pepperoni, coarsely chopped: Brings bold, savory pizza flavor.
For Assembling
Sauce of your choice: For dipping.
6 large wraps, about 10-inch diameter: Used to roll the filling into handheld portions.
7.05 oz shredded low-fat mozzarella: Belgioioso is a good brand.
Ingredient Notes
Crushed tomatoes create the saucy base of the filling. They help bring that familiar pizza flavor into the rolls.
Fresh flat-leaf parsley adds brightness. It gives the filling a fresh herb note that balances the richness of beef and pepperoni.
Dried oregano is a classic pizza-style seasoning. Crushing it between your fingers helps release more flavor before it goes into the skillet.
Lean ground beef gives the filling structure and heartiness. Using 95% lean beef helps keep the mixture satisfying without becoming too greasy.
Onion powder and garlic powder add savory depth. They blend evenly into the filling and help create a fuller flavor.
Tomato paste makes the filling richer and thicker. This is important because the filling needs to stay inside the wraps instead of becoming too wet.
Smoked paprika adds warmth and a subtle smoky flavor. It works well with the pepperoni and beef.
Coarsely chopped pepperoni gives the rolls their bold pizza personality. Because it is chopped, it spreads throughout the filling instead of staying in large slices.
Large wraps make the rolls easy to assemble. Their size gives you enough room to add filling, cheese, and roll them tightly.
Shredded low-fat mozzarella gives the rolls that gooey, cheesy finish. It melts into the filling while the wraps crisp in the oven.
Directions
Step 1: Prepare Your Workspace
Before cooking, clear a comfortable area on your countertop. You will need space for the skillet, wraps, filling, mozzarella, baking sheet, and dipping sauce later.
Set out your ingredients so they are easy to reach. Having everything ready makes the recipe feel organized and prevents the filling from sitting too long while you search for something.
This is especially helpful once you begin assembling the rolls. The process goes more smoothly when the filling, wraps, and cheese are all ready at the same time.
Step 2: Prepare the Herbs and Pepperoni
Chop the flat-leaf parsley until it is fresh and fine enough to mix into the filling. The parsley should be small enough to spread evenly throughout the sauce and meat mixture.
Coarsely chop the pepperoni. The pieces should be big enough to taste in the filling but small enough to roll neatly inside the wraps.
Preparing these ingredients first helps the skillet step move quickly. Once the beef is browned, you can add everything without pausing.
Step 3: Heat the Skillet
Place a large skillet over medium heat. Let it warm for a moment before adding the beef and seasonings.
A warm skillet helps the beef begin cooking evenly. Medium heat is a good choice because it allows the meat to brown without burning the spices.
You do not need to rush this step. A steady heat gives the filling better texture and flavor.
Step 4: Add the Ground Beef and Seasonings
Add the 2.2 lb lean ground beef to the skillet. Sprinkle in the onion powder, garlic powder, smoked paprika, salt, and ground black pepper.
The seasonings should go in early so they can flavor the beef as it cooks. This helps the filling taste more developed.
Use a spoon or spatula to break the beef apart. Smaller pieces will mix better with the tomatoes, pepperoni, and cheese later.
Step 5: Brown the Beef
Cook the beef for about 5 to 7 minutes, stirring occasionally. Continue breaking it up as it cooks so the texture stays even.
The beef should be browned and cooked through. Try to avoid leaving large chunks, because smaller pieces make the rolls easier to bite and roll.
As the beef cooks, the spices will blend into the meat. This creates the savory foundation of the pizza roll filling.
Step 6: Add the Crushed Tomatoes
Pour the 14 oz of crushed tomatoes into the skillet with the browned beef. Stir well so the tomatoes coat the meat evenly.
The crushed tomatoes bring moisture and classic pizza-style flavor. They help turn the beef into a saucy filling rather than a dry mixture.
Make sure to scrape the bottom of the skillet gently as you stir. This helps blend all the flavor into the sauce.
Step 7: Add the Tomato Paste
Add 2 tablespoons of tomato paste to the skillet. Stir it into the beef and crushed tomatoes until fully combined.
Tomato paste deepens the tomato flavor and helps thicken the filling. This is important because a filling that is too wet can make the wraps harder to roll.
Keep stirring until the paste disappears into the mixture. The sauce should begin to look richer and slightly thicker.
Step 8: Add the Parsley and Oregano
Add the freshly chopped parsley to the skillet. Then add the dried oregano, crushing it between your fingers first to release more flavor.
These herbs give the filling a bright, pizza-inspired taste. They also help balance the richness of the beef and pepperoni.
Stir until the herbs are evenly mixed throughout the filling. You should see little flecks of parsley in the tomato mixture.
Step 9: Add the Chopped Pepperoni
Add the 5.2 oz of coarsely chopped pepperoni to the skillet. Stir until the pepperoni is evenly distributed.
The pepperoni adds bold, savory flavor and makes the filling taste more like pizza. Since it is chopped, it blends into the mixture beautifully.
Let the pepperoni warm through as the filling simmers. This helps its flavor spread into the sauce.
Step 10: Simmer the Filling
Let the filling simmer for about 5 minutes. This gives the flavors time to meld and allows the mixture to thicken slightly.
Stir occasionally so the filling does not stick to the skillet. The mixture should become thick enough to spoon into wraps without running everywhere.
This step is important for both flavor and texture. A thick filling makes the rolls easier to assemble and helps prevent messy leaks.
Step 11: Taste and Adjust Seasoning
Taste the filling carefully and adjust with more salt or ground black pepper if needed. The flavor should be savory, tomato-rich, and well-seasoned.
Because the filling includes pepperoni and cheese later, do not overdo the salt. You want the mixture flavorful but balanced.
Once the seasoning tastes right, remove the skillet from the heat. Let the filling cool slightly before assembling so it is easier to handle.
Step 12: Preheat the Oven
Preheat your oven to 400°F. A hot oven helps the wraps become crisp and golden.
Preheating is important for even cooking. If the oven is not ready when the rolls go in, they may not crisp properly.
Let the oven reach the full temperature before baking. This helps create that golden exterior.
Step 13: Prepare the Baking Sheet
Line a baking sheet with parchment paper. This helps prevent sticking and makes cleanup easier.
Place the baking sheet near your assembly area. Once the rolls are filled and sealed, you can move them directly onto the prepared sheet.
Parchment paper also helps the bottoms bake more evenly. It gives the rolls a clean surface while they crisp.
Step 14: Lay Out the First Wrap
Place one large wrap on a clean surface. Make sure it is flat and easy to fold.
The wrap should be about 10 inches in diameter. This size gives you enough space to add filling, cheese, and roll it tightly.
Keep the remaining wraps nearby. Work with one at a time so they stay flexible and easy to handle.
Step 15: Add the Filling
Spoon a generous portion of the filling into the center of the wrap. Be careful not to overfill it.
Too much filling can make the roll difficult to close and may cause leaks during baking. A moderate amount gives you a neat roll with plenty of flavor.
Spread the filling slightly, but keep it mostly centered. This makes rolling easier and helps the filling stay inside.
Step 16: Add the Mozzarella
Sprinkle shredded low-fat mozzarella over the filling. This adds the gooey, cheesy texture that makes the rolls so satisfying.
Do not pile the cheese too heavily in one spot. Spread it evenly over the filling so every bite has cheese.
The mozzarella will melt as the rolls bake. It helps bind the filling and gives the inside a warm, pizza-like texture.
Step 17: Roll the Wrap Tightly
Carefully roll the wrap from one end to the other. Keep the filling tucked inside as you roll.
A tight roll helps the pizza roll hold its shape during baking. It also keeps the filling from spilling out.
Do not press so hard that the wrap tears. The goal is snug, not crushed.
Step 18: Place the Roll Seam-Side Down
Place the finished roll seam-side down on a clean surface or directly on the prepared baking sheet. This helps keep the roll closed.
Seam-side down placement is a simple but important detail. It prevents the wrap from unrolling while it bakes.
Repeat the process with the remaining wraps and filling. Keep each roll neat and compact.
Step 19: Arrange the Rolls on the Baking Sheet
Place all assembled rolls on the parchment-lined baking sheet. Leave a little space between each one.
Spacing helps the hot air move around the rolls. This allows them to crisp more evenly.
If the rolls are crowded together, they may steam instead of crisp. Give them room for the best texture.
Step 20: Spray the Tops With Oil
Lightly spray the tops of the rolls with oil. This helps them become golden brown and crisp in the oven.
Do not skip this step if you want a beautiful finish. A small amount of oil makes a noticeable difference in color and texture.
Make sure the spray is light and even. The wraps should be coated but not soaked.
Step 21: Bake the Pizza Rolls
Place the baking sheet in the preheated oven. Bake for 15 to 20 minutes, or until the rolls are crispy and golden brown.
The wraps should firm up and turn lightly crisp on the outside. The filling inside should be hot and cheesy.
Keep an eye on them near the end of baking. The exact time may depend on how full the rolls are and how crisp you want them.
Step 22: Broil for Extra Crispiness If Desired
For an extra crispy texture, you can broil the rolls during the last 2 to 3 minutes of baking. Watch them closely the entire time.
Broiling can deepen the color quickly. It can also burn the tops if left unattended.
This step is optional, but it can make the exterior even more golden and crisp. Use it only if you are comfortable keeping a close eye on the oven.
Step 23: Cool Before Serving
Remove the pizza rolls from the oven and let them cool for a few minutes. The filling will be very hot right away.
A short cooling time makes them easier to handle. It also helps the melted cheese settle slightly inside the rolls.
Do not let them sit too long before serving. They are best enjoyed warm while the outside is crisp and the inside is gooey.
Step 24: Serve With Dipping Sauce
Serve the Crispy Pepperoni Pizza Rolls warm with the sauce of your choice. Marinara or ranch both work beautifully.
Dipping sauce makes the rolls even more fun to eat. It also adds extra flavor and moisture to each bite.
Arrange the rolls on a platter for gatherings or serve them individually for a cozy snack. Either way, they are best when warm and fresh from the oven.
Pro Tips for the Best Crispy Pepperoni Pizza Rolls
Do not overfill the wraps. A moderate amount of filling makes the rolls easier to close and helps prevent messes.
Preheat the oven fully before baking. This helps the rolls cook evenly and become crispy.
Use fresh, high-quality ingredients when possible. The recipe is simple, so the flavor of the tomatoes, pepperoni, herbs, and cheese matters.
Do not skip the spray oil. A light coating helps create the golden brown finish.
Let the filling thicken slightly before assembling. A thicker filling is easier to roll and less likely to leak.
Variations
Add diced bell peppers or mushrooms to the filling for extra flavor and nutrition. These vegetables blend well with the pizza-style ingredients.
Try using different cheeses like pepper jack or cheddar. Pepper jack adds a spicy kick, while cheddar gives a sharper flavor.
Make the rolls vegetarian by substituting the ground beef with lentils or black beans. This keeps the filling hearty while changing the protein.
For a fun twist, add BBQ sauce to the filling. This gives the rolls a barbecue-style flavor.
Use gluten-free wraps to make this recipe suitable for gluten-sensitive diets. Make sure the wraps fit your needs before using.
Serving Suggestions
Serve these Crispy Pepperoni Pizza Rolls warm. The texture is best when the outside is crisp and the cheese inside is melted.
They are excellent with marinara sauce. This keeps the pizza flavor classic and familiar.
Ranch is another great dipping option. It adds a creamy contrast to the savory filling.
These rolls make a fantastic appetizer for game days, parties, and family movie nights. They are easy to pick up and fun to share.
You can also serve them as a casual snack. They are satisfying enough to feel special without requiring a full meal.
Storage Tips
Store leftover pizza rolls in an airtight container in the refrigerator for up to 3 days. Let them cool before sealing the container.
Cooling first helps prevent steam from softening the rolls. This makes reheating easier later.
To reheat, bake them in the oven until warmed through and crispy again. This helps restore the texture better than a microwave.
Freezing Instructions
You can freeze the assembled pizza rolls before baking. Place them in a single layer on a baking sheet until frozen.
Once frozen, transfer them to a freezer-safe bag. This keeps them stored neatly and prevents them from sticking together.
When ready to enjoy, bake them directly from frozen. Add a few extra minutes to the cooking time so the filling heats through.
Make-Ahead Instructions
You can prepare the filling and assemble the rolls ahead of time. Store them in the refrigerator before baking.
When you are ready to serve, simply bake them for a fresh, crispy snack. This makes the recipe helpful for parties or busy days.
Making them ahead gives you more time to enjoy the moment with family or guests. The rolls can go into the oven when everyone is ready to eat.
Common Mistakes to Avoid
Overfilling the wraps can lead to messy rolls. Use a moderate amount of filling so they roll up neatly.
Not preheating the oven can affect the texture. Always preheat so the rolls bake evenly and turn crisp.
Using low-quality ingredients can make the flavor less satisfying. Fresh, high-quality ingredients give the best result.
Skipping the oil spray can leave the rolls pale instead of golden. A light spray helps create that crisp, browned finish.
Helpful Notes
For a dairy-free option, substitute the mozzarella with a dairy-free cheese alternative. This keeps the cheesy idea while adjusting the ingredient.
Add a pinch of red pepper flakes for a spicy kick. This is a simple way to add heat.
Feel free to mix in cooked spinach or zucchini for added nutrition. These ingredients can blend into the filling well.
If you do not have wraps, use pizza dough for a thicker roll. This changes the texture but keeps the pizza roll idea.
Frequently Asked Questions
Can Crispy Pepperoni Pizza Rolls Be Frozen?
Yes, you can freeze the assembled pizza rolls before baking. Place them in a single layer on a baking sheet until frozen.
Then transfer them to a freezer-safe bag. When you are ready to enjoy them, bake directly from frozen and add a few extra minutes to the cooking time.
Can Ingredients Be Substituted?
Yes, the ingredients can be substituted. Ground beef can be replaced with turkey or a plant-based meat alternative.
You can use any type of cheese you prefer. The wraps can also be swapped for pizza dough or gluten-free alternatives.
How Should I Store Leftovers?
Store leftover pizza rolls in an airtight container in the refrigerator for up to 3 days. Let them cool before storing.
To reheat, bake them in the oven until warmed through and crispy again. This helps bring back the best texture.
Can This Recipe Be Made Ahead?
Yes, you can prepare the filling and assemble the rolls ahead of time. Store them in the refrigerator until you are ready to bake.
When it is time to serve, bake them fresh. This gives you warm, crispy rolls with less last-minute work.
What Sauce Should I Serve With These Pizza Rolls?
Serve them with the sauce of your choice. Marinara is a classic option because it matches the pizza flavors.
Ranch is also a great choice. It adds a creamy, cool contrast to the warm savory filling.
Why Are My Pizza Rolls Messy?
Pizza rolls can become messy if the wraps are overfilled. Use a moderate amount of filling and roll them tightly.
A filling that is too wet can also leak. Let it simmer until slightly thickened before assembling.
How Do I Make Them Extra Crispy?
Spray the tops lightly with oil before baking. This helps the wraps turn golden and crisp.
For extra crispiness, broil them for the last 2 to 3 minutes. Watch closely so they do not burn.
Final Thoughts
Crispy Pepperoni Pizza Rolls are the kind of snack that brings comfort, flavor, and fun together in one warm bite. They have the familiar taste of pizza, the heartiness of beef and pepperoni, the richness of mozzarella, and the satisfying crunch of a golden baked wrap.
They are easy enough for beginner cooks, flexible enough for variations, and special enough for parties, game days, or cozy family nights. Whether you serve them with marinara, ranch, or another favorite dipping sauce, they are made to be shared.
What makes them truly special is the feeling they create. The smell of tomato, cheese, pepperoni, and herbs baking in the kitchen has a way of bringing people closer.
So gather your ingredients, roll them with care, bake them until crisp, and enjoy them warm. These Crispy Pepperoni Pizza Rolls are more than a snack; they are a simple way to turn everyday ingredients into a memory around the table.
Crispy Pepperoni Pizza Rolls

These crispy pepperoni pizza rolls are a hearty, flavorful snack or appetizer filled with seasoned ground beef, pepperoni, tomato sauce, herbs, and melted mozzarella. Baked until golden and crisp, they are perfect for dipping in your favorite sauce.
Recipe Information
- Prep Time: 30 minutes
- Cook Time: 20 minutes
- Total Time: 50 minutes
- Course: Appetizer, Snack
- Cuisine: Italian
- Servings: 6 rolls
- Calories: 350 kcal
Equipment
- Large skillet
- Baking sheet
Ingredients
For the Filling
- 2.2 lb lean ground beef, 95% lean for best results
Creates a hearty, protein-rich base for the pizza roll filling. - 2 teaspoon smoked paprika
Adds a warm, smoky depth to the beef mixture. - 14 oz crushed tomatoes, I use Cento San Marzano crushed tomatoes
Gives the filling a rich tomato base. - 2 teaspoon garlic powder
Adds savory garlic flavor throughout the filling. - 5.2 oz pepperoni, coarsely chopped
Brings classic pizza flavor and a slightly spicy, savory bite. - 2 tablespoon tomato paste
Thickens the filling and deepens the tomato flavor. - 0.5 oz flat-leaf parsley, freshly chopped for vibrant flavor
Adds a fresh herb note to balance the richness. - Salt and ground black pepper, to taste
Seasons the filling and brings the flavors together. - 2 teaspoon dried oregano, crushed between your fingers to release more flavor
Adds classic Italian-style aroma and seasoning. - 2 teaspoon onion powder
Gives the filling a mild onion flavor. - Spray oil
Helps the rolls crisp up during baking.
For Assembling
- 7.05 oz shredded low-fat mozzarella, Belgioioso is a good brand
Adds a melty, cheesy layer inside each roll. - 6 large wraps, about 10-inch diameter
Holds the filling and rolls into a crisp handheld shape. - Sauce of your choice
Served on the side for dipping.
Instructions
- Add the lean ground beef to a large skillet with the onion powder, garlic powder, smoked paprika, salt, and ground black pepper.
- Cook over medium heat until the beef is browned and fully cooked, breaking it apart as it cooks.
- Stir in the crushed tomatoes, freshly chopped flat-leaf parsley, dried oregano, tomato paste, and coarsely chopped pepperoni.
- Let the mixture simmer for a few minutes, stirring occasionally, until the filling thickens slightly and the flavors come together.
- Preheat the oven and line a baking sheet with parchment paper.
- Place one large wrap on a flat surface and spoon a portion of the filling into the center.
- Sprinkle shredded low-fat mozzarella over the filling.
- Roll the wrap tightly, folding in the sides as needed to keep the filling inside.
- Repeat with the remaining wraps, filling, and mozzarella.
- Arrange the rolls on the prepared baking sheet, then lightly coat them with spray oil.
- Bake until the outside is golden brown and crispy.
- Serve warm with the sauce of your choice for dipping.
Notes
- You can add vegetables such as bell peppers, mushrooms, spinach, or onions to customize the filling.
- Try different cheeses if you want a richer or sharper flavor.
- Let the filling cool slightly before rolling so the wraps are easier to handle and seal.

Fernando is the creator and writer behind the food blog Eating with your Hands. Living and working in cities like Paris, Barcelona, and Berlin, and being married to a Canadian foodie, has given Fernando a passion and interest in food and inspired him to run EWYH.