
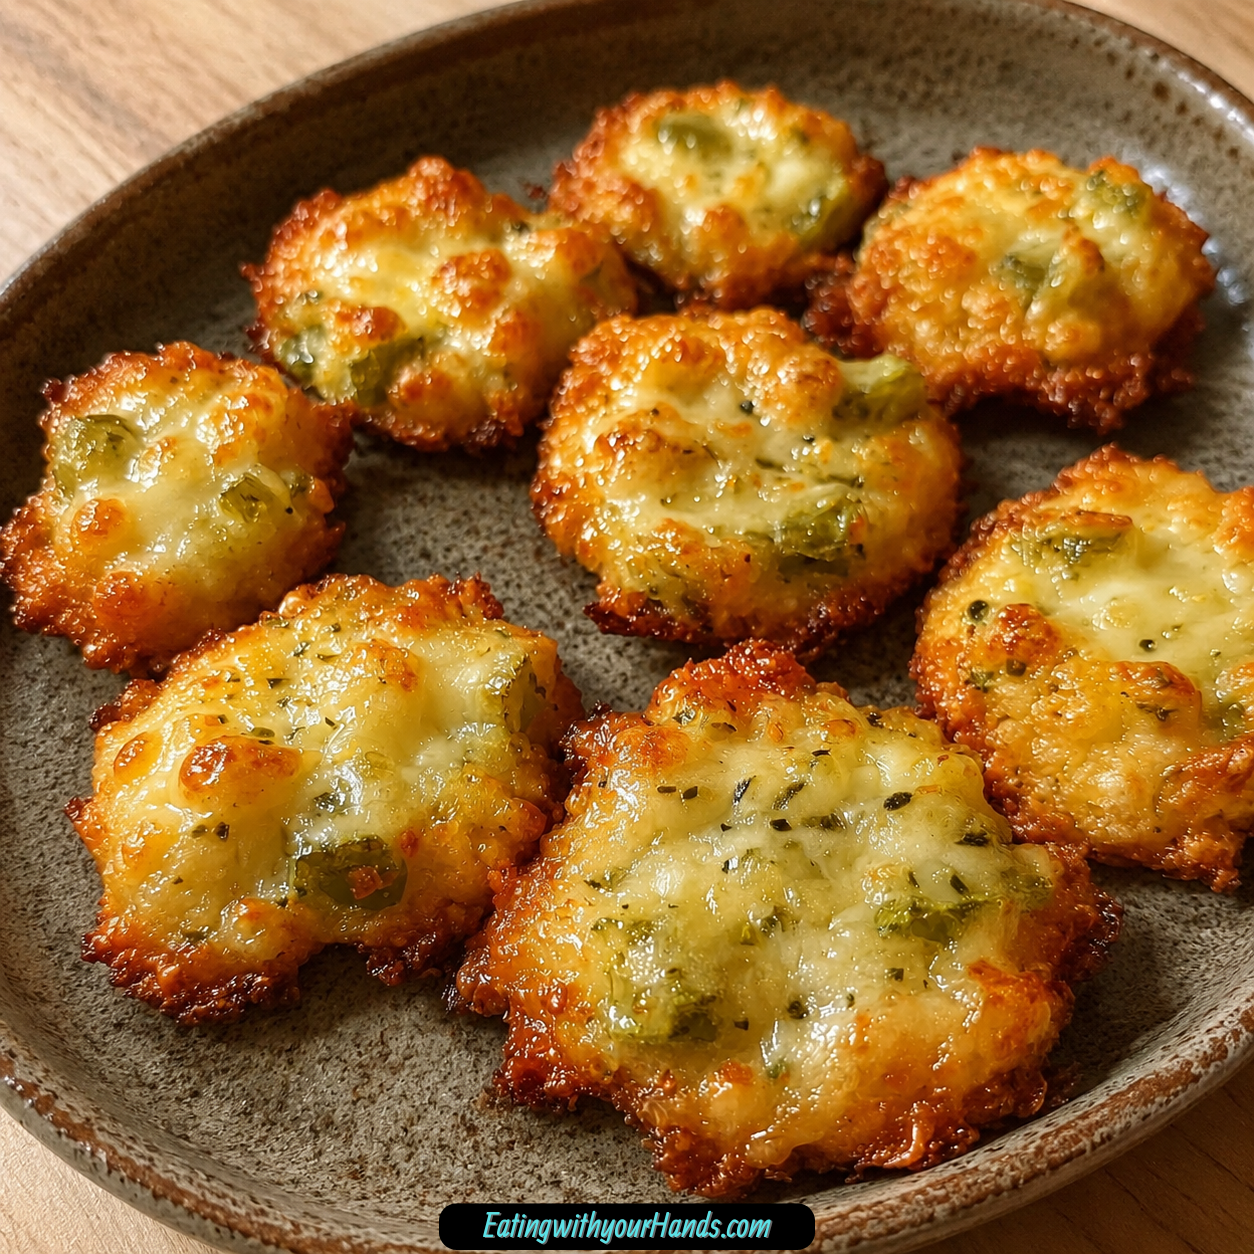

Crispy Pickle Cheese Bites are the kind of snack that feels almost too easy to be this satisfying. They are salty, cheesy, tangy, golden around the edges, and perfect for the exact moment when you want something crunchy without making a complicated appetizer.
These little bites are made with shredded cheddar, shredded mozzarella, finely chopped dill pickles, garlic powder, and optional breadcrumbs. Everything gets mixed together, shaped into small portions, baked until crisp, and served warm while the cheese is still melty inside.
The flavor is bold in the best way. Cheddar brings sharpness, mozzarella gives gooey stretch, and the pickles add little bursts of briny tang that cut through the richness.
They are wonderful for game day, movie night, parties, potlucks, book club snacks, late-night cravings, or a quick appetizer when guests show up and the fridge looks almost empty. They take just a handful of ingredients and turn them into something people will reach for before they even sit down.
What makes them so fun is the texture. The edges bake up crisp and golden, the center stays cheesy, and the tiny pickle pieces add a zesty crunch that keeps every bite interesting.
Table of Contents
- Why You’ll Love Crispy Pickle Cheese Bites
- Recipe Details
- Ingredients
- Optional Substitutions and Add-Ins
- The Snack Magic Behind Pickles and Cheese
- Why the Pickles Need to Be Chopped Small
- Why Breadcrumbs Are Optional
- Directions
- Step 1: Preheat the Oven
- Step 2: Prepare the Baking Sheet
- Step 3: Chop the Dill Pickles
- Step 4: Blot the Pickles
- Step 5: Measure the Cheeses
- Step 6: Add the Pickles
- Step 7: Add Garlic Powder
- Step 8: Add Breadcrumbs if Using
- Step 9: Mix Everything Together
- Step 10: Chill if the Mixture Is Too Sticky
- Step 11: Shape the Bites
- Step 12: Arrange on the Baking Sheet
- Step 13: Bake the Bites
- Step 14: Use the Top Rack for Extra Crispiness
- Step 15: Cool Briefly Before Serving
- Step 16: Transfer to a Plate
- Air Fryer Method
- Serving Tips
- Storage
- Reheating
- Freezing and Make-Ahead Tips
- Helpful Notes for Best Results
- Variations
- Troubleshooting
- Frequently Asked Questions
- Why These Bites Are Perfect for Parties
- Why This Recipe Works So Well
- Final Thoughts
- Crispy Pickle Cheese Bites
Why You’ll Love Crispy Pickle Cheese Bites
These bites are quick and simple. You only need a small ingredient list, one bowl, and a baking sheet.
They are full of flavor. Sharp cheddar, stretchy mozzarella, dill pickles, and garlic powder make every bite salty, tangy, and savory.
They are ready fast. The oven method bakes in about 10 minutes, and the air fryer method takes about 6 to 8 minutes.
They are easy to customize. You can use pepper jack, Monterey Jack, Colby, provolone, Gouda, Parmesan, bread-and-butter pickles, pickled jalapeños, herbs, spices, or different dipping sauces.
They are naturally easy to make gluten-free. Just omit the breadcrumbs or use gluten-free breadcrumbs.
They are perfect finger food. Serve them on a platter with sauces and napkins, and they will disappear quickly.
Recipe Details
- Recipe name: Crispy Pickle Cheese Bites
- Oven temperature: 375°F (190°C)
- Oven baking time: About 10 minutes
- Air fryer temperature: 375°F (190°C)
- Air fryer cooking time: About 6 to 8 minutes
- Air fryer method: Shake basket halfway through
- Texture: Crispy edges, melty cheese center, tangy pickle bites
- Breadcrumbs: Optional
- Optional chill time if mixture is sticky: 10 minutes
- Fridge storage: Up to 2 days
- Reheating temperature: 350°F oven
- Reheating time: 5 to 7 minutes
- Freezing leftovers: Not recommended
- Make-ahead option: Shape bites, freeze on a tray, then bake from frozen with 2 to 3 extra minutes
Ingredients
- ½ cup shredded cheddar cheese
- ½ cup shredded mozzarella cheese
- ¼ cup finely chopped dill pickles
- ½ teaspoon garlic powder
- 1 tablespoon breadcrumbs, optional
- Nonstick spray or parchment paper
Optional Substitutions and Add-Ins
- Monterey Jack
- Colby
- Pepper jack
- Provolone
- Gouda
- Parmesan
- Gluten-free breadcrumbs
- Bread-and-butter pickles
- Pickled jalapeños
- Relish, squeezed well
- Cayenne pepper
- Red pepper flakes
- Dried dill
- Dried parsley
- Chives
- Fresh herbs, finely chopped
- Everything bagel seasoning
- Garlic butter
- Smoked paprika
- Onion powder
- Ranch
- Sriracha mayo
- Tangy mustard dip
- Greek yogurt with hot sauce
- Dill yogurt sauce
The Snack Magic Behind Pickles and Cheese
Pickles and cheese are a surprisingly perfect pair because they balance each other so well. Cheese is rich, salty, and melty, while pickles are bright, tangy, crunchy, and sharp.
When they bake together, the cheese turns golden around the edges and holds the chopped pickles in little savory pockets. The result is a bite-sized snack that feels crisp, gooey, and zesty all at once.
Cheddar gives the bites their bold cheese flavor. Sharp cheddar is especially good if you want more punch, while mild cheddar keeps the flavor softer.
Mozzarella gives the mixture meltiness and stretch. Low-moisture mozzarella is the best choice because it melts well without adding too much liquid.
Dill pickles bring the signature tang. They need to be finely chopped so every bite has a little pickle flavor instead of one large wet piece.
Garlic powder adds savory depth. It is a small amount, but it makes the cheese and pickles taste more complete.
Why the Pickles Need to Be Chopped Small
Finely chopped pickles are important for both flavor and texture. Large pickle pieces can release too much moisture and make the bites harder to shape.
Small pieces distribute evenly through the cheese mixture. That means every bite gets tang without one section tasting too pickle-heavy.
The pieces should be small enough to blend into the cheese but still big enough to notice. Think tiny bursts of pickle instead of big chunks.
Blotting the chopped pickles with a paper towel is a helpful step. It removes excess moisture and keeps the bites crisp instead of soggy.
If using relish in a pinch, squeeze out the liquid very well. Relish can work, but it is wetter than chopped pickles.
Fresh cucumbers should not be used. They are too watery and do not bring the tangy pickle flavor this recipe needs.
Why Breadcrumbs Are Optional
Breadcrumbs are optional in this recipe, but they add extra crispiness. They help create a more textured bite.
If you want the simplest version, you can skip them. The cheese can still crisp around the edges.
If you want a crunchier snack, include 1 tablespoon breadcrumbs. That small amount makes a noticeable difference.
For a gluten-free version, use gluten-free breadcrumbs or leave them out completely. The other ingredients are naturally gluten-free.
Breadcrumbs also help absorb a little moisture from the pickles. This can make the bites easier to shape and bake.
The best choice depends on your texture preference. Skip them for a cheese-forward bite, or add them for more crunch.
Directions
Step 1: Preheat the Oven
Preheat your oven to 375°F (190°C). Let it fully heat before the bites go in.
A hot oven helps the cheese melt quickly and crisp around the edges. This is what creates the golden snack texture.
While the oven heats, gather your baking sheet, parchment paper or nonstick spray, mixing bowl, spoon, and ingredients. This recipe moves quickly once you start.
Step 2: Prepare the Baking Sheet
Line a baking sheet with parchment paper or spray it with nonstick spray. This step makes cleanup much easier.
Melted cheese can stick firmly to an unprepared pan. Parchment paper is especially helpful because the bites release more cleanly.
Set the baking sheet aside while you mix the ingredients. Having it ready prevents the cheese mixture from sitting too long.
Step 3: Chop the Dill Pickles
Finely chop ¼ cup dill pickles. The pieces should be small so they spread evenly through the cheese.
Avoid large chunks because they can make the bites uneven and wet. Smaller pieces give better texture.
Use dill pickles for the main version. Their tangy flavor is what makes these bites so addictive.
Step 4: Blot the Pickles
Place the chopped pickles on a paper towel and blot away excess moisture. This keeps the mixture from becoming soggy.
Pickles carry brine, and too much liquid can make the bites spread. Blotting helps protect the crispy edges.
Do not squeeze them until they are dry and flavorless. Just remove the extra surface moisture.
Step 5: Measure the Cheeses
Add ½ cup shredded cheddar cheese and ½ cup shredded mozzarella cheese to a mixing bowl. Sharp cheddar gives a stronger flavor, while mild cheddar works too.
Low-moisture mozzarella is a good choice because it melts well. It helps create that gooey, stretchy center.
Freshly shredded cheese melts beautifully, but pre-shredded cheese is fine. Use what you have.
Step 6: Add the Pickles
Add the finely chopped, blotted dill pickles to the bowl with the cheeses. Spread them across the cheese mixture before stirring.
This helps them mix evenly. Every bite should have little pickle pops.
If using bread-and-butter pickles or pickled jalapeños as a variation, chop and blot them the same way. Moisture control still matters.
Step 7: Add Garlic Powder
Sprinkle in ½ teaspoon garlic powder. This gives the bites savory flavor without overpowering the pickles.
Garlic powder blends easily into the shredded cheese. It seasons the mixture more evenly than fresh garlic would in this quick bake.
Make sure it is distributed well. A small amount goes a long way.
Step 8: Add Breadcrumbs if Using
Add 1 tablespoon breadcrumbs if you want extra crispiness. This step is optional.
Breadcrumbs help create a crunchier bite and can absorb a little moisture. They are especially helpful if your pickles were very juicy.
If making the recipe gluten-free, use gluten-free breadcrumbs or skip them. The bites will still work.
Step 9: Mix Everything Together
Stir the cheese, pickles, garlic powder, and breadcrumbs until well combined. The mixture may look slightly sticky.
That sticky texture is normal because cheese and pickle pieces cling together. You want the ingredients evenly mixed.
Do not worry if the mixture looks simple. It will transform once baked.
Step 10: Chill if the Mixture Is Too Sticky
If the mixture feels too sticky to shape, place it in the refrigerator for 10 minutes. This helps it firm up.
Cold cheese holds shape better in the oven. Chilling can also prevent the bites from spreading too flat.
This step is optional, but helpful if your kitchen is warm. It is also useful if the pickles added extra moisture.
Step 11: Shape the Bites
Take small spoonfuls of the mixture and shape them into little balls or bite-sized portions. Ping-pong ball size works well.
You can make them slightly smaller or larger depending on your snack preference. Try to keep them similar in size.
Even sizing helps them bake evenly. If some are much larger than others, they may melt and crisp at different rates.
Step 12: Arrange on the Baking Sheet
Place the shaped bites on the prepared baking sheet. Leave a little space between them.
The cheese may spread slightly as it melts. Spacing keeps the bites from joining together.
If a portion looks loose, gently press it back together before baking. It does not need to be perfect.
Step 13: Bake the Bites
Bake at 375°F (190°C) for about 10 minutes. Watch for golden brown edges and crisping around the outside.
The cheese should melt and the edges should look crispy. The centers will remain cheesy.
Do not walk too far away near the end. Cheese can go from golden to too brown quickly.
Step 14: Use the Top Rack for Extra Crispiness
For extra crispiness, bake the bites on the top rack of the oven. Watch closely so they do not over-brown.
The top rack gives the cheese a little more direct heat. This can help the edges crisp faster.
This is best for people who love crunch. If you prefer a softer, meltier bite, the center rack is fine.
Step 15: Cool Briefly Before Serving
Remove the baking sheet from the oven and let the bites cool for a couple of minutes. The cheese centers will be very hot.
This short cooling time makes them easier to handle. It also helps the bites firm up slightly.
Do not skip the cooling time if serving to guests or kids. Hot cheese can burn.
Step 16: Transfer to a Plate
Once the bites have cooled slightly, transfer them to a serving plate. Use a spatula if needed.
If any cheese has spread around the edges, those crispy bits are delicious. They add texture.
Serve while warm for the best melty center. This is when the bites taste their best.
Air Fryer Method
Step 1: Preheat the Air Fryer
Preheat the air fryer to 375°F (190°C). A preheated air fryer helps the bites crisp quickly.
The air fryer gives these bites an extra-crunchy exterior. It also cooks faster than the oven.
Prepare the cheese mixture and shape the bites the same way as the oven method. Keep the portions similar in size.
Step 2: Arrange in a Single Layer
Place the bites in a single layer in the air fryer basket. Do not stack them.
You may need to cook in batches. Air needs to circulate around each bite for the best crispiness.
Leave a little space between them. This prevents sticking and helps the edges crisp evenly.
Step 3: Air Fry Until Golden
Cook for about 6 to 8 minutes. Shake the basket halfway through.
The bites are ready when they are golden and crispy. Keep an eye on them near the end.
Let them cool briefly before eating. The cheese centers will be hot.
Serving Tips
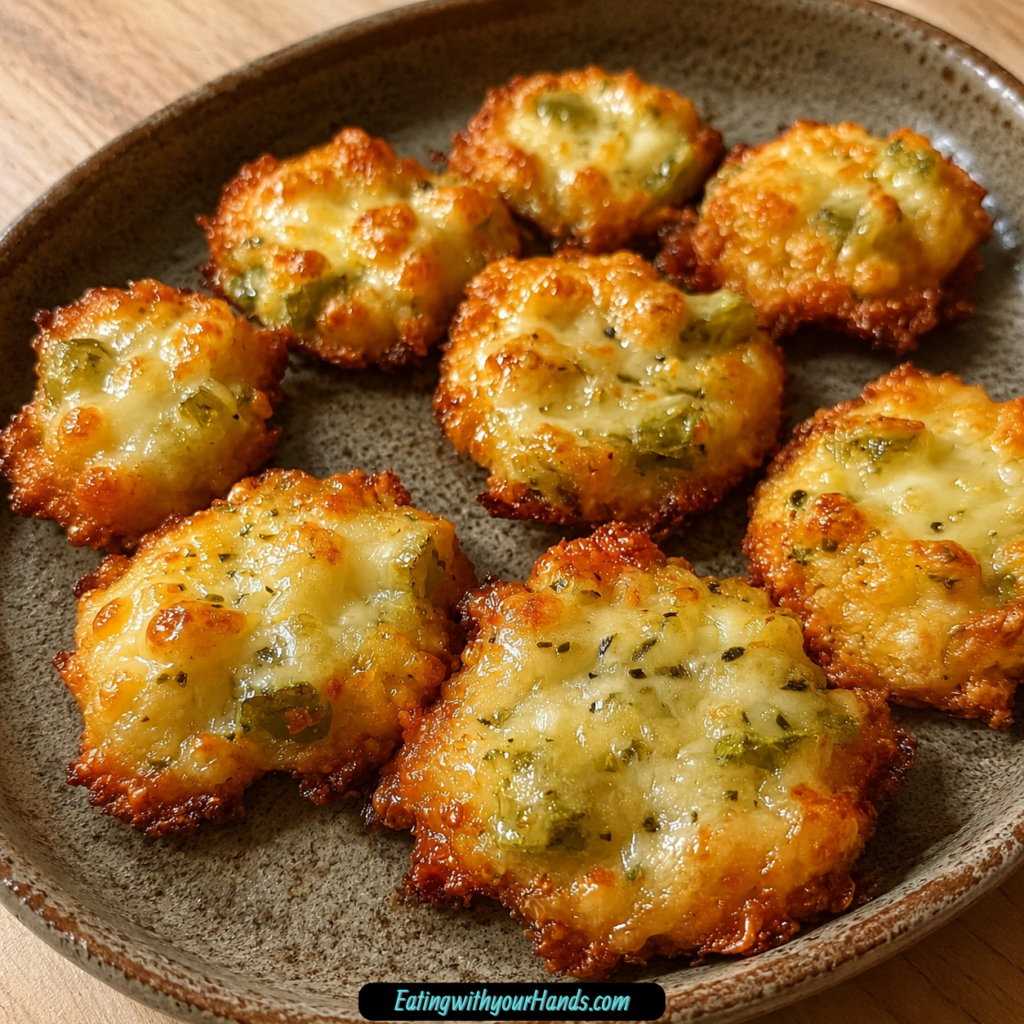
Crispy Pickle Cheese Bites are best fresh from the oven or air fryer. The cheese is still melty, and the edges are at their crispest.
Pile them on a platter and serve with small bowls of dipping sauces. Ranch is a classic choice.
Sriracha mayo adds heat and creaminess. Tangy mustard dip gives a sharper flavor that works well with pickles.
A dill yogurt sauce is also delicious. Greek yogurt with a dash of hot sauce is another easy option.
Serve them with napkins because they are finger food and can get deliciously messy. That is part of the fun.
Storage
If there are leftovers, store them in an airtight container in the refrigerator for up to 2 days. Let them cool first.
They will lose some of their crispness as they sit. The flavor will still be good.
Do not store them at room temperature for long after serving. Since they are cheese-based, refrigeration is the better choice.
For best results, reheat them in the oven instead of the microwave. The microwave makes them softer.
Reheating
To reheat, spread the bites on a baking sheet. Warm them in a 350°F oven for 5 to 7 minutes.
This brings back a lot of the crunch. It also melts the cheese again without making them soggy.
Avoid the microwave if you want crispy texture. It may make the bites soft and chewy instead of crisp.
Reheat only what you plan to eat. They are best when warmed fresh.
Freezing and Make-Ahead Tips
Freezing cooked leftovers is not recommended. The texture of the pickles can become strange after thawing.
For make-ahead prep, shape the unbaked bites and freeze them on a tray. Once solid, transfer them to a bag.
Bake straight from frozen when ready. Add 2 to 3 extra minutes to the baking time.
This make-ahead method is useful for parties. You can prepare the bites in advance and bake them fresh.
Helpful Notes for Best Results
Blot the chopped pickles before mixing. This keeps the bites crisp instead of soggy.
If the mixture is hard to shape, chill it for 10 minutes. Cold cheese holds together better.
Do not skip the brief cooling time after baking. The centers are very hot.
For more flavor, add a pinch of smoked paprika or onion powder. Both work well with cheese and pickles.
For extra crispiness, use breadcrumbs and bake on the top rack. Watch carefully to avoid over-browning.
Keep the bites close in size. Even portions bake more evenly.
Variations
Spicy Pickle Cheese Bites
Add a pinch of cayenne pepper to the mixture. This gives the bites a little heat.
You can also sprinkle red pepper flakes on top before baking. Use a light amount so the flavor does not overpower the pickles.
For a stronger spicy version, swap dill pickles for pickled jalapeños. Chop and blot them well before mixing.
Pepper Jack Pickle Bites
Use pepper jack instead of cheddar. This adds cheese flavor with a mild spicy kick.
Keep the mozzarella for meltiness. The two cheeses work well together.
This version is great with ranch or sriracha mayo. The sauce balances the heat.
Monterey Jack or Colby Bites
Swap cheddar for Monterey Jack or Colby. These cheeses create a milder flavor.
This is a good option if you want a softer cheese taste. The pickles will stand out more.
Use the same amount as the cheddar. The method stays the same.
Gouda or Provolone Bites
Use Gouda or provolone in place of mozzarella if desired. These cheeses give a different melt and flavor.
Gouda adds richness. Provolone gives a savory, smooth taste.
Keep the pickles finely chopped. The balance still depends on even distribution.
Parmesan Pickle Cheese Bites
Add a sprinkle of Parmesan for extra umami. Parmesan gives a salty, savory boost.
Use it as an addition rather than replacing all the cheese. A little goes a long way.
This version pairs well with garlic powder and herbs. It tastes slightly more appetizer-style.
Herb-Infused Bites
Mix in 1 teaspoon dried herbs such as dill, parsley, or chives. Fresh herbs also work if chopped finely.
Herbs brighten the cheese mixture. Dill is especially natural with pickles.
Do not add too much fresh herb moisture. Chop finely and mix gently.
Everything Bagel Pickle Bites
Add 1 teaspoon everything bagel seasoning to the mixture. It gives the bites a fun crunch and savory flavor.
This variation makes them taste even more snacky. The seasoning pairs well with cheese.
Watch the saltiness if your seasoning blend is very salty. Pickles and cheese already bring salt.
Garlic Butter Finish
Brush or toss the bites lightly with garlic butter after baking. This gives them a richer finish.
Use a small amount so they do not become greasy. The goal is flavor, not heaviness.
Serve right away after adding garlic butter. This version is best fresh.
Bread-and-Butter Pickle Bites
Use bread-and-butter pickles instead of dill pickles. The flavor will be sweeter.
Chop them finely and blot well. They can be a little wetter than dill pickles.
This variation creates a sweet-tangy bite. It is different but still fun.
Gluten-Free Pickle Cheese Bites
Omit the breadcrumbs or use gluten-free breadcrumbs. The rest of the ingredients are naturally gluten-free.
The bites may be slightly less crisp without breadcrumbs. They will still be cheesy and flavorful.
Bake as directed and watch for golden edges. The method does not need to change.
Troubleshooting
Why Did My Bites Spread Flat?
The cheese may not have been cold enough, or the mixture may have been too wet. Chill the mixture for 10 minutes before shaping next time.
Blot the pickles well before mixing. Excess pickle juice can make the bites spread.
Make sure the bites are shaped firmly. Loose portions may melt outward more.
Why Are My Bites Soggy?
The pickles may have carried too much moisture. Blot chopped pickles with a paper towel.
Breadcrumbs can help absorb extra moisture and add crispiness. Use them if you want a firmer texture.
Reheat leftovers in the oven, not the microwave. The microwave will make them softer.
Why Did They Stick to the Pan?
The pan may not have been lined or sprayed. Use parchment paper or nonstick spray.
Cheese can stick aggressively when melted. Parchment is the easiest cleanup option.
Let them cool for a couple of minutes before removing. This helps them firm up.
Why Are They Too Salty?
Pickles and cheese both contain salt, so strong cheeses or very salty pickles can increase the saltiness. Use mild cheddar or a milder pickle next time.
Pair them with a creamy dip like ranch or Greek yogurt sauce. That can balance the flavor.
Avoid adding extra salty seasonings if your pickles are already strong. Everything bagel seasoning should be used carefully.
Why Are They Not Crispy Enough?
Use breadcrumbs for added crunch. You can also bake them on the top rack.
Make sure the oven is fully preheated. A hot oven helps the cheese crisp quickly.
Do not crowd the baking sheet. Space allows edges to brown properly.
Why Is the Mixture Too Sticky to Shape?
The cheese may be warm, or the pickles may be wet. Chill the mixture for 10 minutes.
You can also lightly dampen or clean your hands between shaping portions. Work quickly.
Sticky mixture is common and easy to fix. Cold cheese firms up fast.
Frequently Asked Questions
Can I Use Fresh Cucumbers Instead of Pickles?
No, fresh cucumbers are too watery and do not give the tangy flavor this recipe needs. Stick with pickles.
If you are out of dill pickles, relish can work in a pinch. Squeeze out the excess liquid very well.
Why Did My Bites Spread Flat in the Oven?
The cheese mixture may not have been cold enough. Chill it for 10 minutes before shaping next time.
Excess pickle moisture can also cause spreading. Blot the chopped pickles before mixing.
How Do I Reheat Leftovers Without Making Them Soggy?
Use the oven instead of the microwave. Place them on a baking sheet and warm at 350°F for 5 to 7 minutes.
This helps bring back the crispy edges. The microwave will make them softer.
Can I Make These Ahead and Bake Later?
Yes, shape the bites and freeze them on a tray. Once frozen, transfer them to a bag.
Bake straight from frozen and add 2 to 3 extra minutes. This is a great party prep trick.
Are These Gluten-Free?
They can be gluten-free. Omit the breadcrumbs or use gluten-free breadcrumbs.
The cheese, pickles, and garlic powder are naturally gluten-free ingredients. Always use the breadcrumb option that fits your needs.
Can I Use a Different Cheese?
Yes, cheddar can be swapped for Monterey Jack, Colby, or pepper jack. Mozzarella can be swapped for provolone or Gouda.
Different cheeses will change the flavor and melt. Keep the total cheese amount balanced.
Can I Make Them Spicy?
Yes, add cayenne pepper, red pepper flakes, pepper jack, or pickled jalapeños. Use as much or as little heat as you like.
Pickled jalapeños should be chopped and blotted like pickles. This keeps the bites from becoming soggy.
Can I Freeze Leftovers After Baking?
Freezing baked leftovers is not recommended. The pickles can develop an unpleasant texture after thawing.
For best results, freeze the shaped unbaked bites instead. Then bake them fresh from frozen.
Why These Bites Are Perfect for Parties
Crispy Pickle Cheese Bites are easy to serve because they are small, warm, and snackable. Guests can grab them with their fingers and dip them as they like.
They are also quick enough for last-minute hosting. A few fridge staples become a platter of hot appetizers in about 20 minutes.
The flavor is bold, so they stand out next to chips, crackers, or basic cheese snacks. The pickle tang makes them memorable.
They also pair with many dips. Ranch, sriracha mayo, mustard dip, Greek yogurt with hot sauce, and dill yogurt sauce all work.
Because the unbaked bites can be frozen ahead, they are useful for party prep. Bake them fresh when guests arrive.
Why This Recipe Works So Well
This recipe works because cheddar and mozzarella bring different strengths. Cheddar gives flavor, while mozzarella gives melt and stretch.
The pickles cut through the richness. Their tangy crunch keeps the bites from tasting too heavy.
Garlic powder adds savory balance. Breadcrumbs, if used, help with crispiness.
The high oven temperature helps the cheese melt and crisp quickly. That gives the bites their golden edges.
Blotting pickles and chilling sticky mixture are small details that protect texture. They help the bites hold shape and stay crisp.
Final Thoughts
Crispy Pickle Cheese Bites are salty, cheesy, tangy, and wonderfully easy to make. With shredded cheddar, shredded mozzarella, finely chopped dill pickles, garlic powder, optional breadcrumbs, and a prepared baking sheet, they turn simple ingredients into a warm snack with golden edges and melty centers.
The method is quick and friendly. Preheat the oven to 375°F (190°C), blot the chopped pickles, mix everything in one bowl, shape small bite-sized portions, and bake for about 10 minutes until golden and crisp.
You can also make them in the air fryer at 375°F (190°C) for 6 to 8 minutes, shaking halfway through. Either way, let them cool for a couple of minutes before serving because the cheese centers are very hot.
Serve them fresh with ranch, sriracha mayo, mustard dip, or dill yogurt sauce, and reheat leftovers in a 350°F oven for 5 to 7 minutes. Whether you make them for game day, movie night, potlucks, late-night snacking, or last-minute guests, these little bites bring crunch, cheese, and pickle tang to every single mouthful.
Crispy Pickle Cheese Bites

These crispy pickle cheese bites are salty, cheesy, tangy, and quick to make. Cheddar and mozzarella melt together around finely chopped dill pickles, while garlic powder adds savory flavor and optional breadcrumbs give the bites a little extra crunch. They are a fun snack for game day, party trays, after-school bites, or anytime you want something warm, crisp, and packed with pickle flavor.
Recipe Details
- Prep Time: 10 minutes
- Cook Time: 10 minutes
- Total Time: 20 minutes
- Course: Snack
- Cuisine: American
- Servings: 4 people
Equipment
- Baking sheet
- Mixing bowl
Ingredients
- Nonstick spray or parchment paper
- ½ cup shredded mozzarella cheese
- ½ cup shredded cheddar cheese
- ¼ cup finely chopped dill pickles
- ½ teaspoon garlic powder
- 1 tablespoon breadcrumbs optional, for extra crisp
Instructions
Step 1: Prepare the Oven and Baking Sheet
Preheat your oven to 375°F (190°C).
Line a baking sheet with parchment paper or spray it with nonstick spray.
Step 2: Mix the Cheese and Pickles
In a mixing bowl, combine the shredded cheddar cheese, shredded mozzarella cheese, finely chopped dill pickles, garlic powder, and breadcrumbs, if using.
Mix well until everything is evenly combined.
Step 3: Shape the Bites
Form the mixture into small balls or bite-sized portions.
Place each portion on the prepared baking sheet, leaving a little space between them.
Step 4: Bake Until Crispy
Bake in the preheated oven for 10 minutes, or until the cheese bites are golden and crispy.
Step 5: Cool Slightly and Serve
Remove the baking sheet from the oven and let the bites cool slightly before serving.
Notes
For extra flavor, add a pinch of paprika or cayenne pepper to the mixture.
Serving Suggestions
- Serve with ranch dressing for dipping.
- Pair with spicy mayo or a creamy garlic dip.
- Add to a game day snack platter.
- Serve alongside sliders, wings, or fries.
- Enjoy as a quick warm snack with cold pickles on the side.
Storage
How to Store
Let the cheese bites cool completely, then store leftovers in an airtight container in the refrigerator.
How to Reheat
Reheat in the oven or air fryer until warmed through and crisp again.
Best Texture Tip
Let the bites cool slightly after baking so the melted cheese firms up just enough to hold its shape while still staying warm and crisp.

Fernando is the creator and writer behind the food blog Eating with your Hands. Living and working in cities like Paris, Barcelona, and Berlin, and being married to a Canadian foodie, has given Fernando a passion and interest in food and inspired him to run EWYH.