
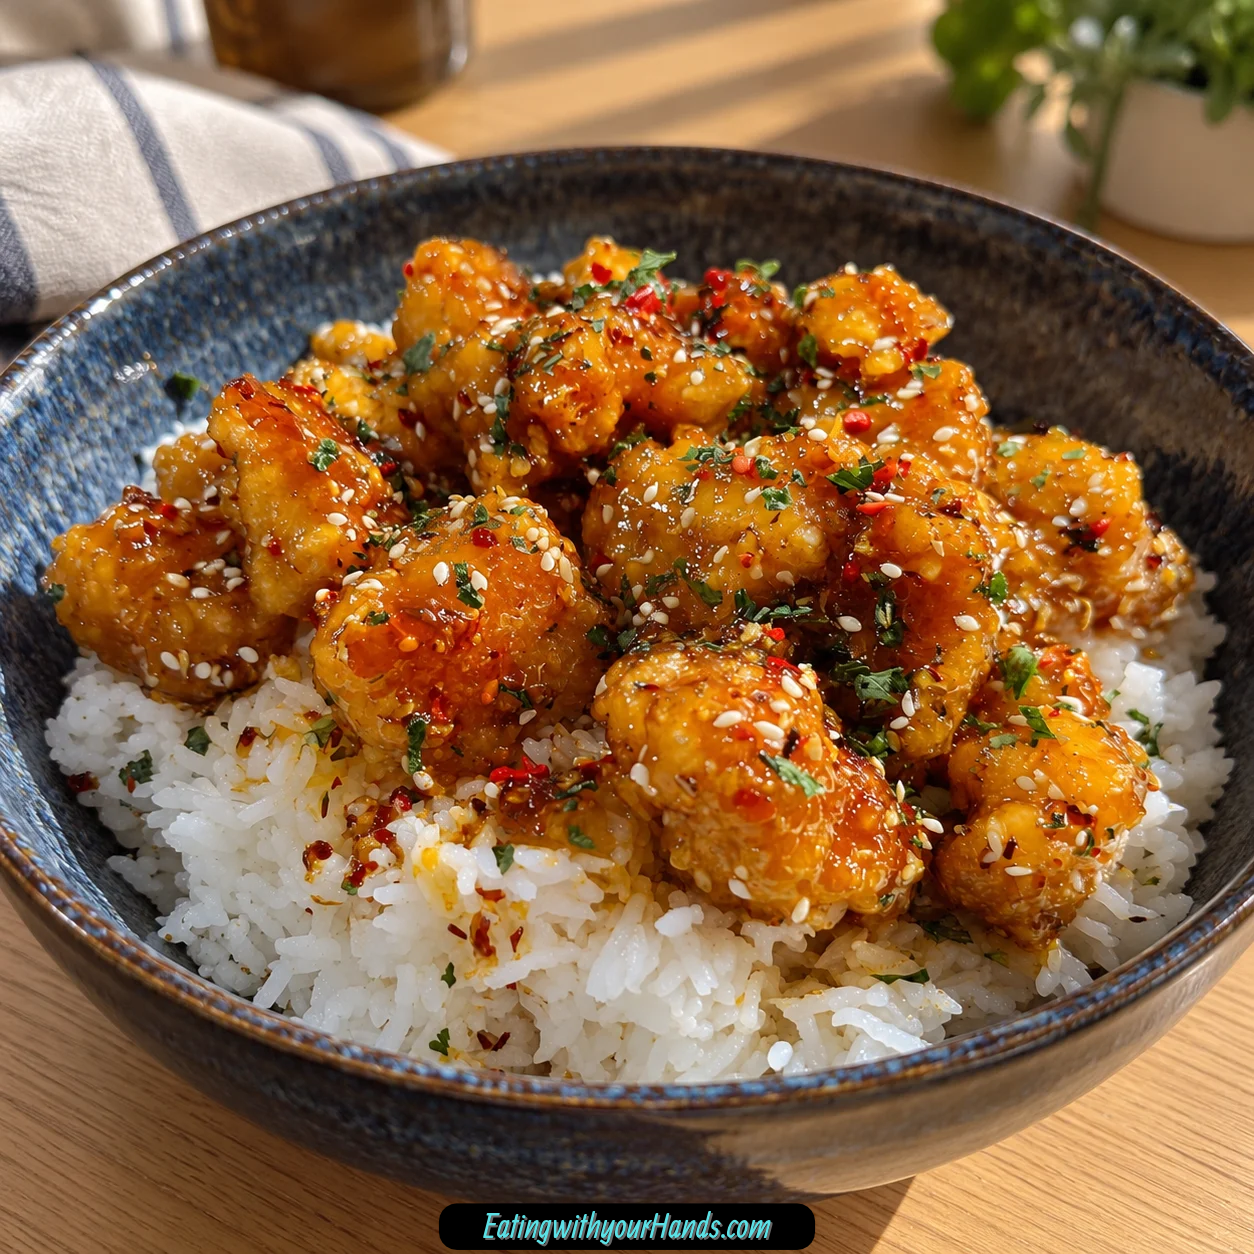

There is a particular kind of excitement in the first bite of crispy chicken when the coating cracks gently before giving way to juicy meat underneath. Add a glossy sweet chilli sauce that is sticky, savory, tangy, and just hot enough to wake everything up, and suddenly an ordinary chicken dinner becomes the kind of meal people remember.
My fascination with this combination started at a small street food stall in Bangkok, where the air seemed filled with the smell of sizzling chicken and chilli. The balance of crisp texture, sticky sauce, sweetness, and heat stayed with me long after that meal was finished.
When I started trying to recreate that feeling at home, the first few batches were not exactly graceful. Some browned too quickly, others lost their crunch under the sauce, and a few taught me just how important oil temperature can be.
Eventually, the pieces came together in a way that felt right. Cornflour gave the chicken its light coating, honey and sweet chilli sauce created the sticky finish, and a little sesame oil gave the sauce an aroma that made the kitchen smell irresistible.
Now this Crispy Sweet Chilli Chicken is one of those dinners I reach for when I want something fast enough for a weekday but exciting enough to serve to friends. It comes together in about 30 minutes, yet every glossy piece looks like it took considerably more effort.
The real appeal is the contrast. You get a crisp coating underneath a shiny sauce, tender chicken in the middle, fragrant jasmine rice beneath it, and fresh garnishes that can make every serving feel a little different.
I also love how easy it is to control the spice. The sauce can stay gently warm for a family meal or become significantly hotter with extra chilli flakes and fresh chillies.
Once the chicken reaches the table, the hardest part is keeping people from stealing pieces before the rice is served. That is usually a good sign that dinner is going exactly as planned.
Table of Contents
- Why You’ll Love This Crispy Sweet Chilli Chicken
- Ingredients for Crispy Sweet Chilli Chicken
- For the Sweet Chilli Sauce
- For the Chicken
- For Serving
- Why the Sauce Works So Well
- Why Cornflour Is the Crispy Secret
- Why Uniform Chicken Pieces Matter
- Essential Equipment
- How to Make Crispy Sweet Chilli Chicken
- Step 1: Mix the Savory Base of the Sauce
- Step 2: Add the Sweet Chilli, Tomato, and Honey
- Step 3: Finish the Sauce With Chilli Flakes
- Step 4: Give the Chicken a Quick Soy Marinade
- Step 5: Coat Each Piece in Egg and Cornflour
- Step 6: Heat the Frying Oil
- Step 7: Fry the Chicken in Batches
- Step 8: Drain Briefly
- Step 9: Coat the Chicken With the Sauce
- Step 10: Finish and Serve
- How to Keep the Chicken Crispy
- Fixing a Thin Sauce
- Air Fryer Method
- Baking Method
- Chicken Thigh Variation
- Tofu Variation
- Pineapple Variation
- Mild Chilli Variation
- Extra-Hot Variation
- Gochujang Variation
- Gluten-Free Variation
- Honey Substitutions
- Serving With Jasmine Rice
- Cucumber Salad on the Side
- Garnish Ideas
- Lunchbox Wraps
- Make-Ahead Strategy
- Storing Unsauced Chicken
- Storing Chicken Already Mixed With Sauce
- Reheating in the Oven
- Reheating in the Air Fryer
- Frequently Asked Questions
- Nutritional Information
- The Street Food Memory I Wanted to Bring Home
- Crispy Sweet Chilli Chicken Recipe
Why You’ll Love This Crispy Sweet Chilli Chicken
The first reason is speed. You can prepare the sauce, coat and fry the chicken, toss everything together, and have dinner ready in around 30 minutes.
The texture gives the dish most of its personality. Cornflour creates a crisp shell around the chicken while the sticky sauce clings to the surface without completely hiding that crunch.
The sweet and spicy balance is easy to enjoy. Honey and sweet chilli sauce bring sweetness, while chilli flakes let you decide how far you want to push the heat.
The sauce also has more going on than sweetness alone. Soy sauce adds savory depth, vinegar brings sharpness, sesame oil contributes its nutty aroma, and tomato puree gives the mixture body.
It works equally well as a casual weeknight meal or something you can dress up for company. A scattering of spring onions, sesame seeds, and sliced red chilli instantly makes the platter feel more finished.
The recipe also adapts well. Air-fried chicken, baked chicken, chicken thighs, tofu, pineapple, alternative chillies, or gluten-free sauce choices can all take it in a different direction.
Ingredients for Crispy Sweet Chilli Chicken
The recipe is easiest to think about in three parts: the sauce, the crispy chicken, and the serving ingredients. Prepare everything before frying because the final stages move quickly.
For the Sweet Chilli Sauce
- 1 tablespoon sesame oil
- 2 tablespoons soy sauce
- 1 tablespoon apple cider vinegar
- 2 tablespoons Blue Dragon Original sweet chilli sauce
- 1 tablespoon tomato puree
- 1 tablespoon runny honey, packed
- 1 teaspoon dried chilli flakes
White wine vinegar can replace the apple cider vinegar when necessary. Extra chilli flakes can be added if you want a hotter sauce.
The honey helps create that sticky finish that clings to the fried chicken. Tomato puree gives the mixture more body so it feels like a glaze rather than a thin dressing.
For the Chicken
- 600g chicken breast, chopped into 1.5cm cubes
- 1 tablespoon soy sauce
- 1 large egg, beaten
- 3 tablespoons cornflour
- 250ml sunflower oil, for frying
Vegetable oil can replace sunflower oil. The chicken pieces should stay close to 1.5cm so they cook at a similar pace.
Cornflour is the key coating ingredient here. Its light texture is what helps create the crisp exterior before the sauce is added.
For Serving
- Jasmine rice
- 3 spring onions, finely sliced, optional
- Sesame seeds
- Fresh red chillies, sliced
The rice gives the sticky sauce somewhere to go once it leaves the chicken. Spring onions, sesame seeds, and chillies provide color, freshness, texture, and optional extra heat.
Why the Sauce Works So Well
The sauce succeeds because no single ingredient has to carry the entire flavor. Sesame oil, soy sauce, vinegar, sweet chilli sauce, tomato puree, honey, and chilli flakes all contribute something different.
Soy sauce gives the mixture its savory foundation. Vinegar cuts through the sweetness and keeps the glaze from tasting flat.
Sweet chilli sauce brings both sugar and gentle heat. Honey thickens the sweet side further and helps the finished sauce cling to every crisp corner.
Tomato puree adds body. That is especially important because a thin sauce would slide away rather than coating the chicken.
Finally, the dried chilli flakes let you control the fire. Start with the listed teaspoon or move upward when you want a much hotter dinner.
Why Cornflour Is the Crispy Secret
Cornflour creates a lighter coating than ordinary flour. Once it hits hot oil, it forms a delicate shell around the chicken rather than a thick breaded crust.
Only 3 tablespoons are needed for the 600g chicken. The goal is complete coverage, not a heavy layer.
Press the cornflour gently onto each egg-coated piece. Bare patches will cook differently and will not hold sauce in the same way.
A single thorough coating is enough for the standard version. A second egg-and-cornflour coating can be used when extra crunch is the goal.
Why Uniform Chicken Pieces Matter
Cutting the chicken into roughly 1.5cm cubes helps everything cook evenly. If some pieces are tiny and others much larger, the smaller ones can dry out before the bigger ones are ready.
Uniform pieces also make frying in batches more predictable. You can judge doneness by color and timing without constantly worrying about drastically different sizes.
Chicken breast keeps the recipe quick and lean in texture. Chicken thighs can also be used when you prefer a juicier result.
If using thighs, trim excess fat and cut them slightly smaller, around 1cm. They need about an extra minute per side during frying.
Essential Equipment
A deep frying pan or wok gives the oil enough depth while helping contain splatters. The pan should have enough room to fry a batch without crowding.
You will also need mixing bowls for the sauce and coating. Keeping the beaten egg and cornflour separate makes the dredging process much easier to manage.
Tongs or a slotted spoon help turn and remove the chicken safely. A paper towel-lined baking tray or plate is useful for the brief draining stage.
A splatter screen is optional but helpful. The sauce and hot oil can both become lively once cooking begins.
How to Make Crispy Sweet Chilli Chicken
The recipe works best when you complete the sauce first and fry the chicken second. Once the coating is crisp, the final toss should happen quickly so the chicken reaches the table while still hot.
Step 1: Mix the Savory Base of the Sauce
Place 1 tablespoon sesame oil, 2 tablespoons soy sauce, and 1 tablespoon apple cider vinegar in a medium bowl. Whisk until the liquids are evenly combined.
Starting with these ingredients gives the sesame oil a chance to disperse through the mixture. White wine vinegar can replace apple cider vinegar when needed.
Keep whisking until the sauce looks cohesive rather than separated into obvious oily patches. The remaining sweet ingredients will thicken it further.
Step 2: Add the Sweet Chilli, Tomato, and Honey
Stir in 2 tablespoons sweet chilli sauce, 1 tablespoon tomato puree, and 1 packed tablespoon runny honey. Mix until there are no obvious streaks of tomato puree.
The honey may take a little more stirring because of its thickness. Once incorporated, the sauce should look glossy and noticeably fuller.
Taste the mixture before adding extra heat. The sweet chilli sauce already brings some spice on its own.
Step 3: Finish the Sauce With Chilli Flakes
Add 1 teaspoon dried chilli flakes and stir thoroughly. Make sure the flakes disperse through the sauce rather than collecting in one area.
If you prefer more heat, add another pinch. The spice can always be increased, so there is no need to rush.
Set the sauce aside for about 10 minutes while you prepare the chicken. It will thicken slightly as it rests.
Step 4: Give the Chicken a Quick Soy Marinade
Place the 600g chicken cubes in a bowl and add 1 tablespoon soy sauce. Toss until every piece has a light coating.
Let the chicken sit for about 5 minutes. A longer marinade is unnecessary here and can draw out more moisture.
Use this brief resting time to set up the beaten egg and cornflour. Once coating begins, the process should move smoothly.
Step 5: Coat Each Piece in Egg and Cornflour
Dip each chicken piece into the beaten egg and allow the excess to drip away. Transfer it immediately to the cornflour.
Press the cornflour gently onto all sides. Make sure there are no obvious bare sections.
Place coated pieces on a clean surface while you finish the batch. Do not pile them heavily on top of one another.
Step 6: Heat the Frying Oil
Pour the 250ml sunflower oil into a deep frying pan or wok so the oil reaches roughly 1.5cm deep. Heat over medium-high for about 2 minutes.
Test the oil with a breadcrumb. It should begin sizzling immediately when it touches the surface.
The oil should shimmer without smoking. Steady sizzling means the coating can crisp quickly without simply absorbing oil.
Step 7: Fry the Chicken in Batches
Add the coated chicken carefully without overcrowding the pan. Leave enough space for the oil to bubble around each piece.
Cook for about 3–4 minutes per side until the coating turns deeply golden. Listen for a steady bubbling sound throughout frying.
Work through the chicken in batches if necessary. Crowding the pan lowers the oil temperature and works against crispness.
Step 8: Drain Briefly
Use tongs or a slotted spoon to transfer each finished batch to paper towels. Let the chicken drain for about 30 seconds.
That short draining period removes extra surface oil without allowing the chicken to cool. Hot chicken works best when it meets the sauce.
Do not leave the fried pieces sitting for a long time before glazing. The goal is to move from crisp frying to saucing while everything is still hot.
Step 9: Coat the Chicken With the Sauce
Transfer the hot chicken to the prepared sweet chilli sauce. Toss gently until every piece looks glossy.
Work carefully so you do not knock off the crisp coating. The sauce should cling to the ridges and edges rather than pool at the bottom.
Serve as soon as the pieces are coated. The longer sauced chicken sits, the more the coating softens.
Step 10: Finish and Serve
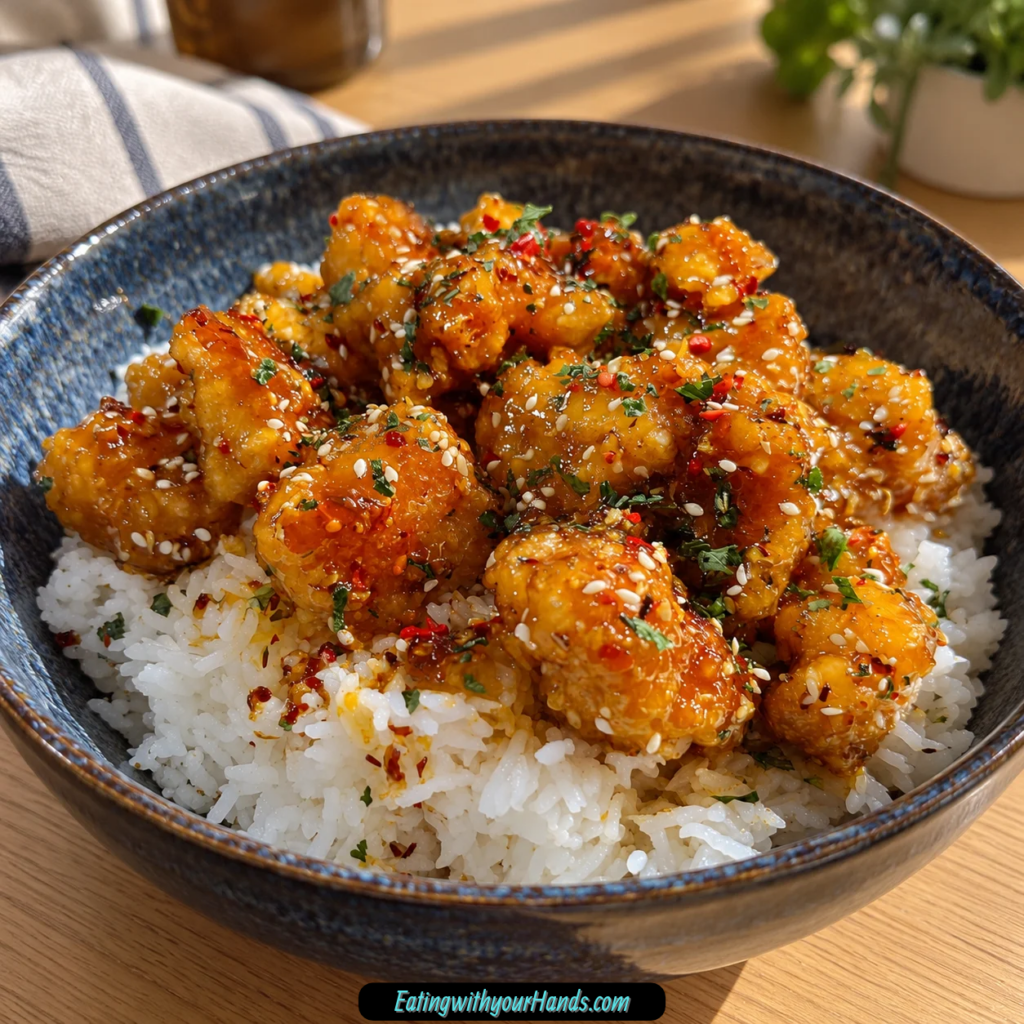
Spoon the chicken over jasmine rice. Scatter finely sliced spring onions and sesame seeds over the top.
Add sliced fresh red chilli when more heat is welcome. Serve immediately while the chicken is hot and the glaze is still shiny.
Keep extra garnishes at the table if serving a group. This lets everyone control the final level of spice and freshness.
How to Keep the Chicken Crispy
Timing is the biggest factor. Sauce the chicken immediately before serving rather than letting the fried pieces sit in glaze for an extended period.
Drain for only about 30 seconds after frying. This is long enough to remove excess oil but short enough to keep the pieces piping hot.
Oil temperature matters just as much. If the oil is too cool, the coating absorbs excess oil and never develops the light crisp texture you want.
Do not crowd the pan. Smaller batches help maintain enough heat around every piece.
Finally, make sure the sauce has some body before tossing. A watery glaze soaks into the coating much faster than a thick, sticky one.
Fixing a Thin Sauce
The sauce naturally thickens slightly if allowed to rest for about 5 minutes. The tomato puree and honey help give it more body.
If it still feels too thin, one option is to mix a small pinch of cornflour with 1 teaspoon cold water. Stir that mixture into the sauce.
Another option for a noticeably watery sauce is ½ teaspoon cornflour mixed with 1 tablespoon cold water. Stir it in until the sauce thickens.
The sauce can also be simmered for 2–3 minutes to reduce. This is especially helpful when the tomato puree is less concentrated or the honey amount was light.
Air Fryer Method
For a lighter cooking method, coat the chicken exactly as described. Lightly spritz the pieces with oil.
Air-fry at 200°C for 12–15 minutes. Shake the basket halfway through so the pieces brown more evenly.
Prepare the sauce exactly the same way. Toss the hot chicken in the glaze only after air-frying is complete.
This method will give you a different fried texture while still preserving the sweet-spicy flavor. It also reduces the amount of frying oil used.
Baking Method
Arrange the coated chicken on a wire rack set over a baking sheet. Lightly spray the pieces with oil.
Bake at 200°C for 15–18 minutes. Flip halfway through so both sides have a chance to brown.
The baked coating will not become quite as crunchy as the fried version. The flavor, however, remains the same once the chicken is tossed in sauce.
Use the wire rack rather than placing the pieces directly against a flat pan. Air circulating underneath helps prevent the bottoms from becoming soggy.
Chicken Thigh Variation
Chicken thighs can replace chicken breast. They stay especially juicy and bring a slightly richer flavor.
Trim away excess fat before cutting. Make the cubes a little smaller, around 1cm.
Follow the same soy sauce, egg, and cornflour coating process. Fry for about an extra minute per side.
The sauce does not need to change. Toss the thighs while hot and serve immediately.
Tofu Variation
Extra-firm tofu can replace the chicken for a vegetarian version. Freeze the tofu first, then thaw and press it before cutting into cubes.
That freeze-and-thaw step changes the texture and helps it hold the coating. Prepare the pieces using the same egg and cornflour method.
Fry until the exterior turns golden. Then toss the hot tofu in the sweet chilli sauce.
The crisp coating and sticky glaze remain the main attractions. Even without chicken, the basic textural idea stays intact.
Pineapple Variation
Add ¼ cup crushed pineapple to the sauce for a sweeter tropical direction. Fresh or canned pineapple can be used.
The fruit brings brighter sweetness beside the chilli. It also creates a version inspired by the Bangkok street food memory behind the dish.
Stir the pineapple into the sauce before coating the chicken. Keep the rest of the recipe unchanged.
The result will be sweeter and fruitier than the standard version. The chilli still provides enough contrast to keep the sauce lively.
Mild Chilli Variation
For a milder dish, replace the chilli flakes with ½ teaspoon smoked paprika. This gives the sauce warmth and depth without the same level of heat.
You can also leave the dried chilli flakes out completely for children or anyone sensitive to spice. The sweet chilli sauce still provides flavor.
Fresh chilli garnish can then be offered separately. That way, heat lovers can customize their own plate.
This approach works especially well for family dinners. One batch can satisfy different spice preferences without making multiple sauces.
Extra-Hot Variation
For serious heat, add 1 finely chopped bird’s eye chilli to the sauce. Handle it carefully and wear gloves.
Extra dried chilli flakes can also be added. An additional teaspoon creates a noticeably hotter version.
Fresh red chilli can still go on top at serving time. This creates heat both inside the glaze and on the finished plate.
Keep the honey and sweet chilli sauce in place. Their sweetness helps balance the stronger spice.
Gochujang Variation
Gochujang can replace the sweet chilli sauce when you want a different kind of heat. Its flavor creates a more complex fermented spice profile.
The finished sauce will taste different from the standard sweet chilli version. It still works with crispy chicken and jasmine rice.
Keep the remaining sauce ingredients in mind when adjusting the flavor. Soy sauce, honey, vinegar, sesame oil, and tomato puree continue building the overall balance.
Serve with the same fresh garnishes. Spring onions and sesame seeds are especially natural with this variation.
Gluten-Free Variation
Replace regular soy sauce with tamari or coconut aminos. Check the sweet chilli sauce label as well.
Many sweet chilli sauces may fit gluten-free needs, but the specific product should always be verified. The cornflour coating can remain the same.
Keep the frying and sauce method unchanged. The dish still depends on crisp chicken and a sticky glaze.
Serve with rice and the garnishes that suit your needs. No other structural change is necessary.
Honey Substitutions
Maple syrup can replace honey. It gives a similar sticky sweetness with a subtle caramel-like note.
Agave nectar is another option. Because it is slightly thinner, the amount can be reduced by 1 teaspoon.
Brown sugar mixed with 1 teaspoon water can also work in a pinch. The texture and flavor will shift slightly with each option.
Keep the final goal in mind: enough sweetness and stickiness for the sauce to cling. The chilli and vinegar still need to remain noticeable.
Serving With Jasmine Rice
Jasmine rice is the natural base for this dish. Its fragrant flavor works especially well with the sticky sweet chilli glaze.
Spoon the chicken over a generous bed of rice. Let any sauce that falls from the coating soak into the grains underneath.
Rinsing the rice until the water runs clear is a useful preparation step. It helps keep the cooked grains more separate.
Serve the rice hot. The contrast of steaming rice and freshly fried chicken makes the meal especially satisfying.
Cucumber Salad on the Side
A quick cucumber salad brings coolness to the plate. Thinly slice cucumber and toss it with rice vinegar, a pinch of sugar, and sesame seeds.
The crisp vegetable texture cuts through the fried chicken. Its acidity also balances the sweet glaze.
Shredded carrots and radishes can be added during summer for extra color. Keep the side fresh and simple.
Serve the salad separately rather than underneath the hot chicken. That preserves its crunch.
Garnish Ideas
Finely sliced spring onions bring a fresh green finish. Scatter them generously over the sauced chicken right before serving.
Toasted sesame seeds add a little nutty crunch. They also echo the sesame oil already used in the sauce.
Fresh red chillies work well for anyone who wants more heat. Lime wedges can be served alongside for a bright finishing squeeze.
For gatherings, place the garnishes in small bowls. Letting everyone finish their own plate makes the meal feel relaxed and interactive.
Lunchbox Wraps
Leftover chicken can be used in wraps with shredded lettuce. Add extra sauce when serving if desired.
The texture will naturally differ from the freshly fried version. Still, the sweet chilli flavor works well in a handheld lunch.
Pack enough napkins because the glaze can be messy. The lettuce provides a fresh contrast against the rich chicken.
This is especially useful when you have only a small amount of chicken left. A wrap turns it into another complete meal.
Make-Ahead Strategy
For the best texture, prepare the sauce ahead but keep it separate from the chicken. Fry the chicken when you are closer to eating.
If meal prepping, cook the chicken as directed and refrigerate it without sauce. Add the glaze only after reheating.
This preserves much more of the coating’s crispness. Once sauce sits on the chicken overnight, the texture changes substantially.
Garnishes should also be prepared separately. Add them at the last moment for the freshest result.
Storing Unsauced Chicken
Place cooled fried chicken in an airtight container. Refrigerate for up to 2 days.
Do not add the sauce before storage when you can avoid it. Keeping the components apart protects the coating.
Store the remaining sauce separately in a jar. It will keep for 4–5 days.
Reheat the chicken until piping hot, warm the sauce separately, and combine them immediately before serving. This gives leftovers the closest texture to the freshly made dish.
Storing Chicken Already Mixed With Sauce
If the chicken has already been tossed in sauce, refrigerate it and enjoy it within 24 hours. Expect the coating to become softer.
Keep it in an airtight container. The flavor will still be enjoyable even though the crisp texture changes.
Do not expect reheating to completely restore the original crunch. Once moisture has soaked into the coating, some softening is unavoidable.
Serve with fresh rice and garnishes. Those additions help bring contrast back to the leftovers.
Reheating in the Oven
Preheat the oven to 180°C. Spread unsauced chicken on a baking sheet.
Heat for about 8–10 minutes until piping hot. Avoid piling the pieces on top of one another.
Warm the sauce separately. If it has thickened too much, add a small splash of water.
Toss the chicken with the reheated sauce just before serving. This protects as much of the restored crispness as possible.
Reheating in the Air Fryer
Place the unsauced chicken in the air fryer at 160°C. Heat for about 4–5 minutes.
The circulating heat helps revive the exterior. Check the pieces toward the end so they do not dry out.
Warm the sauce separately and coat the chicken afterward. Serve immediately.
This is one of the quickest ways to bring leftovers back to life. It works particularly well when reheating a smaller portion.
Frequently Asked Questions
Can I Bake the Chicken Instead of Frying?
Yes. Arrange the coated pieces on a wire rack over a baking sheet and spray them lightly with oil.
Bake at 200°C for 15–18 minutes, flipping halfway through. They will be less crunchy than fried chicken but still work well with the sauce.
Can I Air-Fry the Chicken?
Yes. Lightly spritz the coated chicken with oil and air-fry at 200°C for 12–15 minutes.
Shake halfway through cooking. Toss with the sauce only after the chicken is finished.
How Do I Make It Gluten-Free?
Use tamari or coconut aminos instead of regular soy sauce. Check that the sweet chilli sauce is gluten-free as well.
The cornflour coating can stay the same. Continue with the regular cooking method.
What Can Replace Honey?
Maple syrup works well and brings a slightly different sweetness. Agave nectar is another option, though reducing it by 1 teaspoon can account for its thinner texture.
Brown sugar mixed with 1 teaspoon water can also work. Each substitute changes the sauce slightly while keeping the sweet element.
Can I Use Chicken Thighs?
Yes. Trim excess fat and cut the thighs into pieces around 1cm.
Follow the same coating method. Fry for approximately 1 additional minute per side.
Why Is My Sauce Watery?
The tomato puree may be less concentrated or the honey may have been measured lightly. Letting the sauce rest or simmering it for 2–3 minutes can help.
For a thicker correction, stir in ½ teaspoon cornflour mixed with 1 tablespoon cold water. Continue until the consistency becomes more glaze-like.
How Can I Make It Less Spicy?
Leave out the chilli flakes or replace them with ½ teaspoon smoked paprika. The sweet chilli sauce still gives the dish plenty of flavor.
Fresh chilli can be offered separately. This allows everyone to control the heat on their own plate.
How Can I Make It Hotter?
Add another teaspoon of chilli flakes. A finely chopped bird’s eye chilli can make the sauce considerably hotter.
Fresh red chillies can also be used as a garnish. This adds another burst of heat at serving time.
Nutritional Information
Each serving provides approximately 35g protein, with the chicken contributing most of that amount. Total carbohydrates are around 30g, with about 1g fiber.
Fat is approximately 22g per serving, including about 4g saturated fat. Using the air fryer can reduce the fat substantially compared with the standard fried version.
Sugar is approximately 12g, coming largely from the honey and sweet chilli sauce. These figures assume the sauce is used and the serving includes about 1 cup cooked rice.
The nutritional balance changes with different cooking methods, ingredient substitutions, or serving portions. Reducing the soy sauce can also lower the sodium contribution when that is a priority.
The Street Food Memory I Wanted to Bring Home
What stays with me most about that first Bangkok experience is not one individual ingredient. It is the way the crisp chicken, sticky sauce, heat, sweetness, and smell of chilli all arrived together in one bite.
That was the feeling I kept chasing through those early home batches. I did not need every piece to look identical, but I wanted that same moment when crunch gives way to juicy chicken and the sauce immediately follows.
Once I stopped rushing the frying, everything improved. Hot enough oil and smaller batches gave the cornflour coating the chance to become properly crisp.
The sauce needed its own patience too. Letting the honey, tomato puree, sweet chilli sauce, soy, vinegar, sesame oil, and chilli sit together before coating the chicken made the glaze feel much more cohesive.
Now the recipe has become much less about recreating one exact meal and more about holding onto what I loved about it. The smell of the sauce still reminds me of that street stall even before the first batch of chicken is finished.
Some nights I keep the heat restrained and serve fresh chillies on the side. Other times I add extra flakes and make the sauce as fiery as I can comfortably handle.
I have also learned that the dish does not need complicated sides. Jasmine rice and a crisp cucumber salad give the chicken all the support it needs.
For company, I like bringing out bowls of spring onions, sesame seeds, chilli, and lime so everyone can finish their own plate. That small bit of customization makes a simple 30-minute dinner feel much more festive.
The classic fried version is still my favorite because nothing quite matches that combination of crisp coating and sticky glaze. Air-fried and baked versions are useful alternatives, but the original has the texture that first made me fall in love with the dish.
Crispy Sweet Chilli Chicken has become one of those recipes that carries a memory into an ordinary evening. Every glossy, spicy-sweet bite reminds me why a simple meal can stay with you for years when the balance of texture and flavor is just right.
Crispy Sweet Chilli Chicken Recipe

Crispy chicken pieces coated in a glossy sweet chilli sauce make this quick Asian Fusion main course bold, savory, tangy, and lightly spicy. Served over jasmine rice with optional spring onions, sesame seeds, and fresh red chillies, it comes together in just 30 minutes.
Recipe Details
- Prep Time: 15 minutes
- Cook Time: 15 minutes
- Total Time: 30 minutes
- Course: Main Course
- Cuisine: Asian Fusion
- Servings: 4 servings
- Calories: 450 kcal
Ingredients
For the Sweet Chilli Sauce
- 1 tablespoon sesame oil
- 2 tablespoons soy sauce
- 1 tablespoon apple cider vinegar or white wine vinegar
- 2 tablespoons sweet chilli sauce Blue Dragon Original
- 1 tablespoon tomato puree
- 1 tablespoon runny honey
- 1 teaspoon dried chilli flakes or to taste
For the Crispy Fried Chicken
- 600 g chicken breast chopped into bite-sized chunks, 1.5cm cubes
- 1 tablespoon soy sauce
- 1 beaten egg
- 3 tablespoons cornflour cornstarch
- 250 ml sunflower oil for frying
For Serving
- Jasmine rice to serve
- 3 spring onions finely sliced, optional garnish
- Sesame seeds optional garnish
- Fresh red chillies sliced, optional garnish
Instructions
Step 1: Make the Sweet Chilli Sauce
In a bowl, combine the sesame oil, soy sauce, apple cider vinegar or white wine vinegar, sweet chilli sauce, tomato puree, runny honey, and dried chilli flakes.
Mix until the sauce ingredients are thoroughly combined.
Step 2: Season the Chicken
Cut the chicken breast into bite-sized chunks, about 1.5cm cubes.
Toss the chicken with 1 tablespoon soy sauce until evenly coated.
Step 3: Coat the Chicken
Dip the seasoned chicken pieces into the beaten egg.
Dredge each piece in the cornflour until well coated.
Step 4: Fry Until Crispy
Heat the sunflower oil in a pan.
Fry the coated chicken until golden brown and crispy.
Step 5: Drain the Chicken
Remove the crispy chicken from the oil and allow the excess oil to drain.
Keep the chicken hot while preparing it for the sauce.
Step 6: Coat with Sweet Chilli Sauce
Add the fried chicken to the prepared sweet chilli sauce.
Toss until every piece is evenly coated.
Step 7: Serve
Serve the crispy sweet chilli chicken hot over jasmine rice.
Finish with finely sliced spring onions, sesame seeds, and sliced fresh red chillies if desired.
Notes
- Use a deep pan for frying to avoid splatters.
- Adjust chilli flakes to your preferred spice level.
- For a lighter version, air-fry the chicken instead of deep-frying.
Serving Suggestions
Serve Crispy Sweet Chilli Chicken immediately while the coating is still crisp and the sauce is warm. Jasmine rice makes a simple base for the sweet, savory, tangy, and spicy chicken.
This recipe makes 4 servings and can be finished with spring onions, sesame seeds, and fresh red chillies for extra texture and flavor. Adjust the dried chilli flakes according to your preferred heat level.
For a lighter variation, air-fry the chicken instead of deep-frying it.
Storage
For the best texture, keep the cooked chicken separate from the sweet chilli sauce until close to serving.
Chicken Tip
Use 600 g chicken breast cut into bite-sized 1.5cm cubes.
Coat the pieces with 1 tablespoon soy sauce before adding the egg and cornflour.
Cornflour Tip
Use 3 tablespoons cornflour cornstarch to create the crispy coating.
Frying Tip
Use 250 ml sunflower oil for frying.
A deep pan can help reduce splattering while the chicken cooks.
Vinegar Tip
Use 1 tablespoon apple cider vinegar or white wine vinegar in the sauce.
Sweet Chilli Sauce Tip
Use 2 tablespoons Blue Dragon Original sweet chilli sauce.
Chilli Tip
Add 1 teaspoon dried chilli flakes or adjust the amount to taste.
Garnish Tip
Top with 3 finely sliced spring onions, sesame seeds, and sliced fresh red chillies if desired.
Serving Tip
Serve hot over jasmine rice.

Fernando is the creator and writer behind the food blog Eating with your Hands. Living and working in cities like Paris, Barcelona, and Berlin, and being married to a Canadian foodie, has given Fernando a passion and interest in food and inspired him to run EWYH.