
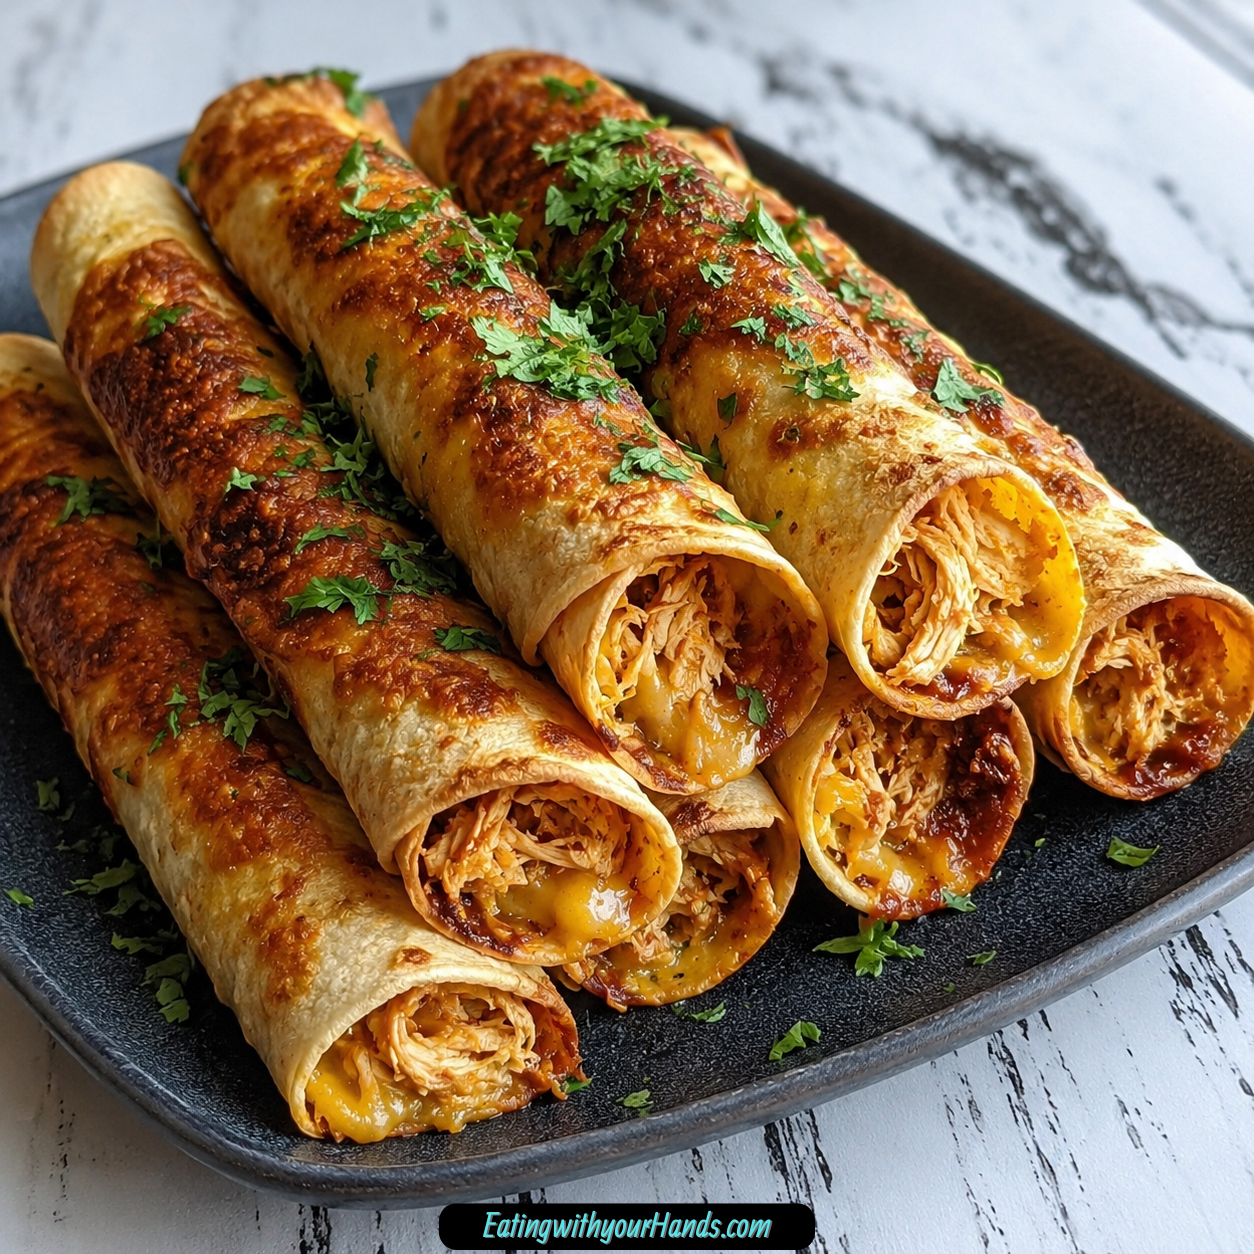
Crunchy Oven-Baked Chicken Taquitos are the kind of food that makes a regular dinner feel like a small celebration. Golden tortillas, savory shredded chicken, melted cheese, warm spices, and cool dips come together in a way that feels fun, comforting, and easy to share.
There is something especially joyful about a tray of taquitos coming out of the oven. They are crisp enough to pick up with your fingers, hearty enough to feel like dinner, and simple enough to make on a busy weeknight.
This recipe brings back that cozy feeling of family meals where everyone reaches for the same platter. The crispy tortillas, cheesy chicken filling, and bowls of salsa, sour cream, and guacamole make the table feel relaxed and full of life.
The filling is made with cooked shredded chicken, cheddar cheese, pepper jack cheese, cumin, chili powder, garlic powder, onion powder, salt, pepper, and optional cilantro. It is savory, cheesy, a little spicy, and easy to adjust based on what your family enjoys.
The oven does the work of making the taquitos crisp. Instead of frying, the rolled tortillas are sprayed or brushed with olive oil, then baked until golden brown and crunchy.
These Crunchy Oven-Baked Chicken Taquitos are ready in just 35 minutes, freezer-friendly, and perfect for gatherings, snacks, weeknight dinners, or appetizer platters. Make a batch, set out the dips, and watch how quickly they disappear.
Table of Contents
- Why You’ll Love These Crunchy Oven-Baked Chicken Taquitos
- Recipe Details
- Ingredients
- Ingredient Notes
- Optional Swaps, Variations, Add-Ins, and Serving Ideas
- Why This Recipe Works
- Directions
- Step 1: Preheat the Oven
- Step 2: Prepare the Baking Sheet
- Step 3: Set Out the Filling Bowl
- Step 4: Add the Chicken
- Step 5: Add the Cheddar Cheese
- Step 6: Add the Pepper Jack Cheese
- Step 7: Add the Ground Cumin
- Step 8: Add the Chili Powder
- Step 9: Add the Garlic Powder
- Step 10: Add the Onion Powder
- Step 11: Add Salt and Pepper
- Step 12: Add the Cilantro If Using
- Step 13: Mix the Filling
- Step 14: Lay Out the Tortillas
- Step 15: Add Filling to Each Tortilla
- Step 16: Roll the Tortilla Tightly
- Step 17: Place Seam-Side Down
- Step 18: Repeat with All Tortillas
- Step 19: Add Olive Oil Spray
- Step 20: Use Olive Oil Instead If Needed
- Step 21: Bake the Taquitos
- Step 22: Turn Halfway If Desired
- Step 23: Check for Crispness
- Step 24: Let Them Cool Briefly
- Step 25: Prepare the Dips
- Step 26: Serve Hot
- Serving Ideas
- Storage
- Reheating
- Freezing
- Make-Ahead
- Helpful Notes for Best Results
- Variations
- Troubleshooting
- Frequently Asked Questions
- Can I freeze Crunchy Oven-Baked Chicken Taquitos?
- Can I bake taquitos straight from the freezer?
- What can I substitute for the chicken?
- How do I make these taquitos gluten-free?
- Can I make these taquitos dairy-free?
- What cheeses can I use?
- What should I serve with chicken taquitos?
- Can I use taco seasoning?
- Why This Recipe Works So Well
- Final Thoughts
- Crunchy Oven-Baked Chicken Taquitos
Why You’ll Love These Crunchy Oven-Baked Chicken Taquitos
Crunchy Oven-Baked Chicken Taquitos are quick and easy to prepare. They are ready in just 35 minutes, which makes them helpful for busy weeknights.
The recipe uses simple pantry staples and familiar ingredients. Cooked chicken, cheese, spices, tortillas, olive oil, and a few dipping sauces create a meal that feels exciting without being complicated.
They are family-friendly because kids love the crispy texture and cheesy filling. Adults enjoy them too, especially with salsa, sour cream, and guacamole on the side.
They are freezer-friendly, which makes them useful for meal prep. You can assemble a big batch, freeze them before baking, and bake them later for an easy meal or snack.
They are versatile enough to customize. You can add black beans, corn, bell peppers, spinach, jalapeños, spicy salsa, or different cheeses to make them your own.
They are also perfect for gatherings. Serve them as a snack or appetizer at parties, and they tend to vanish quickly from the platter.
Recipe Details
Crunchy Oven-Baked Chicken Taquitos are baked at 425°F, or 220°C. This high oven temperature helps the tortillas become golden and crispy.
The recipe takes about 35 minutes. The taquitos bake for about 20 minutes, or until golden brown and crisp.
The filling uses 2 cups cooked shredded chicken. Rotisserie chicken works great for quick prep.
The cheese mixture includes 1 cup shredded cheddar cheese and 1 cup shredded pepper jack cheese. Sharp cheddar can be used for added flavor, and mozzarella can be used instead of pepper jack for a milder taste.
The seasonings include ground cumin, chili powder, garlic powder, onion powder, salt, and pepper. Chopped cilantro is optional but adds freshness.
The taquitos can be made with small flour tortillas or corn tortillas. Corn tortillas give a nice authentic touch, while flour tortillas are also listed as an option.
The rolled taquitos are placed seam-side down on a parchment-lined baking sheet. They are sprayed with olive oil spray or brushed with olive oil before baking.
Leftovers can be stored in an airtight container in the refrigerator for up to 3 days. Unbaked taquitos can be frozen for up to 2 months.
Ingredients
For the Chicken Taquitos
- 2 cups cooked, shredded chicken (rotisserie chicken works great for quick prep)
- 1 cup shredded cheddar cheese (feel free to use a sharp variety for added flavor)
- 1 cup shredded pepper jack cheese (adds a lovely kick, but you can use mozzarella for a milder taste)
- 1 teaspoon ground cumin (this gives a warm, earthy flavor)
- 1 teaspoon chili powder (adjust based on your spice tolerance)
- ½ teaspoon garlic powder (for that aromatic boost)
- ½ teaspoon onion powder (adds sweetness and depth)
- Salt and pepper to taste (don’t be shy – season to your preference!)
- ¼ cup chopped cilantro (optional, but it brings freshness)
- 12 small flour or corn tortillas (use whichever you prefer; corn tortillas give a nice authentic touch)
- Olive oil spray or 2 tablespoons olive oil (spraying helps keep things light and crispy)
For Serving
- Salsa, sour cream, and guacamole (for serving; it’s a must for that extra zing!)
Ingredient Notes
Cooked shredded chicken makes these taquitos fast and practical. Rotisserie chicken works especially well when you want quick prep.
Cheddar cheese gives the filling a classic cheesy flavor. A sharp variety can be used if you want added flavor.
Pepper jack cheese adds a lovely kick. If you want a milder taste, mozzarella can be used instead.
Ground cumin gives the filling a warm, earthy flavor. It helps the chicken taste deeper and more savory.
Chili powder adds spice and color. You can adjust it based on your spice tolerance.
Garlic powder gives the filling an aromatic boost. It blends easily into the chicken and cheese.
Onion powder adds sweetness and depth. It helps round out the seasoning.
Salt and pepper should be added to taste. Season according to your preference so the filling tastes complete.
Chopped cilantro is optional. It brings freshness and a little color to the filling.
Small flour or corn tortillas both work. Corn tortillas give a nice authentic touch, while flour tortillas can be used if you prefer them.
Olive oil spray keeps the taquitos light and crispy. If using olive oil instead, drizzle a little over the top and gently rub it in.
Salsa, sour cream, and guacamole are served on the side. They give the crispy taquitos cool, creamy, tangy, and fresh contrast.
Optional Swaps, Variations, Add-Ins, and Serving Ideas
Black Bean Taquitos
Black beans can be added to the filling for extra texture and flavor. They make the taquitos feel heartier.
This addition works well with chicken, cheese, cumin, chili powder, and tortillas. Keep the filling balanced so the taquitos still roll easily.
Corn Chicken Taquitos
Corn can be mixed into the filling for sweetness and texture. It gives the taquitos a little pop in every bite.
Corn pairs naturally with chicken, cheddar, pepper jack, and salsa. It also adds color to the filling.
Shredded Pork Taquitos
Chicken can be substituted with shredded pork for a different twist. This changes the flavor while keeping the same rolled and baked method.
Shredded pork works well with the spices and cheese. It gives the taquitos a richer filling.
Shredded Beef Taquitos
Shredded beef can also be used instead of chicken. This creates a heartier variation.
The cheese and spices still work well with beef. Adjust the flavor to your preference.
Rotisserie Turkey Taquitos
Shredded rotisserie turkey can be used instead of chicken. This is a helpful swap when you want a different protein.
The turkey works with the same cheese, spices, tortillas, and dips. It keeps the recipe practical and leftover-friendly.
Tofu Taquitos
Tofu can be used for a vegetarian option. It changes the texture but keeps the taquito idea.
For another vegetarian direction, black beans or lentils can be used with sautéed vegetables. These options give the filling more substance.
Different Cheese Taquitos
Feta can be used for a unique taste. It changes the flavor and gives the filling a different character.
Gouda can also be used. It creates a smoother, richer cheese flavor.
Lighter Taquitos
Whole wheat tortillas can be used for a lighter version. You can also reduce the amount of cheese.
This keeps the taquitos satisfying while making them feel a little lighter. The crisp baked texture still matters.
Spicy Taquitos
Diced jalapeños can be added to the filling. They give the taquitos more heat.
Spicy salsa can also be served on the side. This lets each person control how much heat they want.
Dairy-Free Taquitos
Use vegan cheese substitutes for a dairy-free version. Skip the sour cream when serving.
Salsa and guacamole can still be used as dips. Choose toppings that fit your needs.
Extra Vegetable Taquitos
Diced bell peppers can be added to the filling for more vegetables. Spinach can also be used.
These additions bring color, texture, and extra nutrition. Keep the pieces small so the taquitos roll tightly.
Taco Seasoning Shortcut
Pre-made taco seasoning can replace the individual spices if you are short on time. This makes the filling even quicker.
Use this shortcut when convenience matters. The taquitos will still bake the same way.
Why This Recipe Works
Crunchy Oven-Baked Chicken Taquitos work because they deliver the crispy texture people love without frying. A hot oven and a light coating of olive oil help the tortillas turn golden.
The filling is already cooked, which keeps the recipe fast. Cooked shredded chicken and cheese only need to heat through as the tortillas crisp.
The mixture of cheddar and pepper jack gives flavor and meltiness. Cheddar brings familiar richness, while pepper jack adds a little kick.
The spices keep the filling from tasting flat. Cumin, chili powder, garlic powder, onion powder, salt, and pepper coat the chicken with warm, savory flavor.
Rolling the tortillas tightly helps the taquitos hold their shape. Placing them seam-side down keeps them from opening while baking.
Serving them with salsa, sour cream, and guacamole completes the experience. The dips add freshness, creaminess, and zing against the crisp taquitos.
Directions
Step 1: Preheat the Oven
Preheat your oven to 425°F, or 220°C. This high temperature is key for achieving a crunchy baked texture.
Let the oven fully heat before baking the taquitos. Starting in a hot oven helps them become golden instead of soft.
Step 2: Prepare the Baking Sheet
Line a baking sheet with parchment paper. This helps with easy cleanup and prevents sticking.
Set the baking sheet near your assembly area. You will place each rolled taquito on it seam-side down.
Step 3: Set Out the Filling Bowl
Place a large mixing bowl on the counter. Make sure it is big enough to hold the chicken, cheeses, spices, and cilantro.
A roomy bowl makes it easier to mix the filling evenly. The chicken should be coated with the cheese and seasoning.
Step 4: Add the Chicken
Add 2 cups cooked shredded chicken to the bowl. Rotisserie chicken works great if you want quick prep.
Break up any large pieces so the filling rolls easily. Smaller shreds fit better inside the tortillas.
Step 5: Add the Cheddar Cheese
Add 1 cup shredded cheddar cheese. A sharp variety can be used for added flavor.
The cheddar gives the filling a classic cheesy taste. It melts into the chicken as the taquitos bake.
Step 6: Add the Pepper Jack Cheese
Add 1 cup shredded pepper jack cheese. It adds a lovely kick.
If you prefer a milder filling, mozzarella can be used instead. Choose the cheese that fits your table.
Step 7: Add the Ground Cumin
Add 1 teaspoon ground cumin to the bowl. This gives the filling warm, earthy flavor.
Cumin helps the chicken taste deeper and more savory. Stir it through the mixture evenly.
Step 8: Add the Chili Powder
Add 1 teaspoon chili powder. Adjust based on your spice tolerance.
The chili powder gives the filling warmth and color. It works well with the cumin and cheese.
Step 9: Add the Garlic Powder
Add ½ teaspoon garlic powder. This gives the filling an aromatic boost.
Garlic powder blends smoothly into the mixture. It seasons the chicken without extra chopping.
Step 10: Add the Onion Powder
Add ½ teaspoon onion powder. This adds sweetness and depth.
The onion powder rounds out the spices. It helps make the filling taste complete.
Step 11: Add Salt and Pepper
Season the mixture with salt and pepper to taste. Do not be shy, but season according to your preference.
Salt and pepper bring the filling together. Taste if needed before rolling.
Step 12: Add the Cilantro If Using
Add ¼ cup chopped cilantro if using it. It brings freshness to the filling.
Cilantro is optional, so the taquitos still work without it. Use it if you enjoy that fresh green flavor.
Step 13: Mix the Filling
Mix everything until well combined. The chicken should be evenly coated with cheese, spices, and cilantro.
The filling should look flavorful and cohesive. Every spoonful should have chicken, cheese, and seasoning.
Step 14: Lay Out the Tortillas
Lay the tortillas on a clean surface. Use 12 small flour or corn tortillas, whichever you prefer.
Corn tortillas give a nice authentic touch. Flour tortillas are also a good option for this recipe.
Step 15: Add Filling to Each Tortilla
Place about 2 tablespoons of filling in the center of each tortilla. Keep the filling in a line so it rolls easily.
Do not add too much filling. Overfilled taquitos can unroll or split while baking.
Step 16: Roll the Tortilla Tightly
Roll each tortilla tightly around the filling. Tuck the ends in as you go to help keep everything inside.
A tight roll helps the taquito hold its shape. It also keeps the filling tucked into the tortilla.
Step 17: Place Seam-Side Down
Place each rolled taquito seam-side down on the parchment-lined baking sheet. This helps prevent unrolling.
Leave a little space between each taquito. Space allows heat to reach the sides and helps them crisp.
Step 18: Repeat with All Tortillas
Continue filling and rolling until all 12 taquitos are assembled. Keep the seam side down on the baking sheet.
Try to keep the rolls similar in size. This helps them bake evenly.
Step 19: Add Olive Oil Spray
Lightly spray the taquitos with olive oil spray. This helps them turn golden and crispy.
Spraying keeps things light. It also gives the surface a better oven-baked crunch.
Step 20: Use Olive Oil Instead If Needed
If using olive oil instead of spray, drizzle a little over the top. Gently rub it in so the tortillas are lightly coated.
Use the 2 tablespoons olive oil option if you are not spraying. The goal is a light coating, not heavy oil.
Step 21: Bake the Taquitos
Place the baking sheet in the preheated oven. Bake for about 20 minutes.
The taquitos should become golden brown and crispy. Keep an eye on them near the end.
Step 22: Turn Halfway If Desired
Check the taquitos halfway through baking. You may want to give them a gentle turn for even crispiness.
Turn carefully so they do not unroll. This helps the tortillas crisp more evenly.
Step 23: Check for Crispness
After about 20 minutes, look for golden color and crisp edges. The tortillas should look crunchy.
If they still look soft or pale, bake a little longer while watching closely. The goal is golden, not overbrowned.
Step 24: Let Them Cool Briefly
Remove the baking sheet from the oven. Let the taquitos cool for just a minute if you can wait.
The filling will be hot. A short rest makes them easier to handle.
Step 25: Prepare the Dips
Set out salsa, sour cream, and guacamole for serving. These dips are an important part of the finished dish.
The salsa adds brightness, the sour cream adds cool creaminess, and the guacamole adds richness. Together, they make the taquitos more exciting.
Step 26: Serve Hot
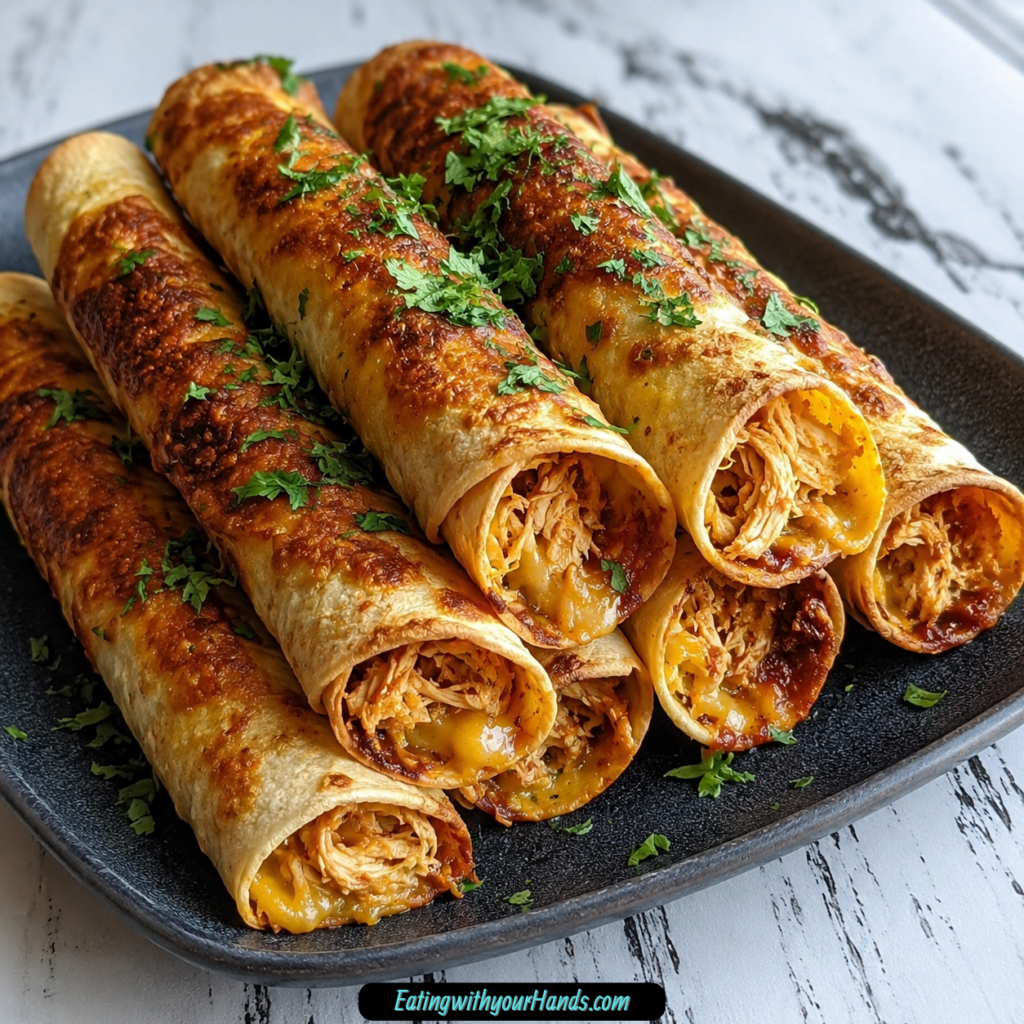
Serve the Crunchy Oven-Baked Chicken Taquitos while they are hot and crispy. Arrange them on a platter or plates.
Add the dipping sauces on the side. This is where the magic truly happens.
Serving Ideas
Serve Crunchy Oven-Baked Chicken Taquitos hot and crispy from the oven. They are best when the tortillas are golden and the cheese inside is melted.
Salsa, sour cream, and guacamole are classic serving choices. They add extra zing, coolness, creaminess, and freshness.
These taquitos also pair wonderfully with a fresh green salad. The salad balances the crispy, cheesy filling.
Mexican street corn is another side option. It makes the meal feel more complete and festive.
They are perfect as snacks or appetizers for parties. Put them on a platter and let people dip as they go.
They also work well for weeknight dinners. Add a simple side, and the taquitos become a meal everyone can enjoy.
Storage
Store leftover taquitos in an airtight container in the refrigerator for up to 3 days. Let them cool before storing.
The tortillas may soften slightly in the refrigerator. Reheating in the oven helps bring back the crisp texture.
Reheating
To reheat, bake the taquitos at 350°F, or 175°C, until warmed through and crispy again. This helps restore the texture.
The oven works better than gentle warming when crispness matters. Heat until the filling is hot.
Freezing
For longer storage, freeze the taquitos before baking for up to 2 months. Assemble them but do not bake them.
Place the taquitos on a baking sheet in a single layer and freeze until solid. Then transfer them to a freezer-safe container or bag.
When ready to enjoy them, bake straight from the freezer. Add a few extra minutes to the cooking time.
Make-Ahead
Crunchy Oven-Baked Chicken Taquitos are ideal for making ahead. Assemble them, freeze them unbaked, and keep them ready for future meals or snacks.
This is helpful for busy nights when cooking from scratch feels like too much. The taquitos can go from freezer to oven without thawing.
Keep salsa, sour cream, and guacamole ready for serving. The dips make even a freezer batch feel fresh and fun.
Helpful Notes for Best Results
Use cooked shredded chicken to keep the recipe quick. Rotisserie chicken is a great shortcut.
Do not overfill the tortillas. About 2 tablespoons of filling per tortilla helps them roll neatly.
Roll the tortillas tightly and seal the edges well. This helps prevent them from unrolling while baking.
Place the taquitos seam-side down on the baking sheet. This is one of the easiest ways to keep them closed.
Use olive oil spray or a light coating of olive oil for crispness. This helps the baked tortillas turn golden.
If using corn tortillas for a gluten-free version, be cautious when rolling to prevent cracking. Check cheese and seasoning labels to make sure they are gluten-free.
Pre-made taco seasoning can replace the individual spices if you are short on time. This keeps the recipe fast and easy.
For a dairy-free version, use vegan cheese substitutes and skip the sour cream. Salsa and guacamole still make great serving dips.
Variations
Black Bean Chicken Taquitos
Add black beans to the filling. They bring extra texture and flavor.
Black beans make the taquitos heartier. They work well with the spices and cheese.
Corn Chicken Taquitos
Add corn to the filling for a sweet pop. It gives the taquitos more color.
Corn pairs well with chicken, cheddar, pepper jack, and salsa. It is a simple addition.
Pork Taquitos
Substitute the chicken with shredded pork. This gives the taquitos a different twist.
The spices and cheese still fit the filling. Shredded pork makes the taquitos richer.
Beef Taquitos
Use shredded beef instead of chicken. This creates a heartier flavor profile.
The rolling and baking method stays the same. Adjust seasoning based on your taste.
Turkey Taquitos
Use shredded rotisserie turkey instead of chicken. This is a practical swap when turkey is available.
The cheese and spices keep the flavor bold. It is a useful way to change the protein.
Vegetarian Taquitos
Use tofu for a vegetarian option. Black beans or lentils can also be used with sautéed vegetables.
These fillings change the texture but keep the taquito format. Add seasonings so the filling tastes complete.
Feta Chicken Taquitos
Use feta for a unique taste. It gives the filling a sharper flavor.
This variation changes the cheese profile. It is a fun option if you want something different.
Gouda Chicken Taquitos
Use gouda for a smooth, rich cheese flavor. It gives the taquitos a different finish.
Gouda works well with chicken and warm spices. It makes the filling feel more mellow.
Whole Wheat Taquitos
Use whole wheat tortillas for a lighter version. You can also reduce the amount of cheese.
This keeps the recipe satisfying while adjusting the richness. The taquitos still bake until crisp.
Spicy Jalapeño Taquitos
Add diced jalapeños for heat. This makes the filling spicier.
Serve with spicy salsa for even more kick. This variation is great for spice lovers.
Dairy-Free Taquitos
Use vegan cheese substitutes. Skip the sour cream when serving.
Salsa and guacamole can stay on the plate. They add plenty of flavor without dairy.
Veggie-Boosted Taquitos
Add diced bell peppers or spinach to the filling. These vegetables bring color and extra nutrition.
Keep the pieces small so the taquitos roll neatly. Too much filling can make them harder to seal.
Troubleshooting
The Taquitos Unroll While Baking
Make sure to roll the tortillas tightly. Tuck the ends in as you go.
Place each taquito seam-side down on the baking sheet. This helps keep them closed as they bake.
The Tortillas Crack
If using corn tortillas, be cautious when rolling. Corn tortillas can crack more easily.
Handle them gently and avoid overfilling. Smaller, tighter rolls are easier to manage.
The Taquitos Are Not Crispy
Make sure the oven is preheated to 425°F, or 220°C. The high heat is important for crunch.
Use olive oil spray or a light coating of olive oil. This helps the tortillas brown and crisp.
The Filling Spills Out
Use about 2 tablespoons filling per tortilla. Too much filling can cause spilling.
Roll tightly and tuck the ends in. Make sure the seam stays down on the baking sheet.
The Filling Tastes Too Mild
Add more salt and pepper to taste. The recipe encourages seasoning to your preference.
You can also use sharp cheddar, pepper jack, jalapeños, spicy salsa, or taco seasoning for bolder flavor. Choose the option that matches your taste.
The Taquitos Need to Be Dairy-Free
Use vegan cheese substitutes and skip the sour cream. The taquitos can still be served with salsa and guacamole.
Make sure all ingredients fit your needs. Cheese and sour cream are the main dairy items.
The Taquitos Need to Be Gluten-Free
Use gluten-free corn tortillas instead of flour tortillas. Check cheese and seasoning labels to make sure they are gluten-free.
Roll carefully to prevent cracking. Corn tortillas can be more delicate.
Frequently Asked Questions
Can I freeze Crunchy Oven-Baked Chicken Taquitos?
Yes, these taquitos can be frozen before baking. Assemble the taquitos, but do not bake them.
Place them on a baking sheet in a single layer and freeze until solid. Transfer them to a freezer-safe container or bag and store for up to 2 months.
Can I bake taquitos straight from the freezer?
Yes, bake them straight from the freezer. Add a few extra minutes to the cooking time.
There is no need to thaw first. Bake until they are warmed through, golden, and crispy.
What can I substitute for the chicken?
Shredded rotisserie turkey works great. Shredded beef or pork can also be used for a different flavor profile.
For a vegetarian option, try black beans or lentils. Mix in sautéed vegetables for added texture.
How do I make these taquitos gluten-free?
Use gluten-free corn tortillas instead of flour tortillas. Be careful when rolling them to prevent cracking.
Check the labels on your cheese and seasonings to make sure they are gluten-free. This keeps the full recipe aligned.
Can I make these taquitos dairy-free?
Yes, use vegan cheese substitutes and skip the sour cream. Serve with salsa and guacamole instead.
The flavor and texture will change slightly. The crispy tortilla and seasoned filling still make the recipe enjoyable.
What cheeses can I use?
Cheddar and pepper jack are used in the main recipe. Sharp cheddar can add more flavor, and mozzarella can replace pepper jack for a milder taste.
Feta or gouda can also be used for a unique taste. Each cheese changes the filling in a different way.
What should I serve with chicken taquitos?
Serve them with salsa, sour cream, and guacamole. These dips give the taquitos extra zing.
A fresh green salad or Mexican street corn can make the meal more complete. They work well beside the crispy baked tortillas.
Can I use taco seasoning?
Yes, pre-made taco seasoning can replace the individual spices if you are short on time. This is a helpful shortcut.
The original spice blend uses cumin, chili powder, garlic powder, onion powder, salt, and pepper. Taco seasoning changes the flavor but keeps the recipe easy.
Why This Recipe Works So Well
Crunchy Oven-Baked Chicken Taquitos work so well because they are simple, crisp, and built for sharing. The filling is made with cooked chicken, melted cheese, warm spices, and optional cilantro, then wrapped tightly in tortillas and baked until golden.
The oven-baked method keeps the recipe easier than frying. Olive oil spray or a light coating of olive oil helps the tortillas crisp while they bake.
The filling is flavorful without being complicated. Cumin, chili powder, garlic powder, onion powder, salt, and pepper make the chicken taste warm and savory.
The cheeses bring comfort and texture. Cheddar gives classic flavor, while pepper jack adds a kick.
The recipe is also flexible enough for many needs. Flour tortillas, corn tortillas, gluten-free corn tortillas, whole wheat tortillas, vegan cheese, chicken, turkey, pork, beef, tofu, black beans, lentils, bell peppers, spinach, jalapeños, salsa, sour cream, and guacamole can all fit the taquito idea.
Most of all, these taquitos work because they feel fun. They are crispy, handheld, easy to dip, and just right for the kind of meal where everyone reaches for one more.
Final Thoughts
Crunchy Oven-Baked Chicken Taquitos bring together shredded chicken, cheddar, pepper jack, warm spices, tortillas, and a golden oven-baked crunch in one easy, shareable recipe. They are fast enough for weeknights, fun enough for gatherings, and practical enough to freeze before baking for later.
Serve them hot with salsa, sour cream, and guacamole, or turn them into a fuller meal with a fresh green salad or Mexican street corn. Every crispy bite has that simple comfort of cheesy chicken wrapped tight in a tortilla, baked until golden, and made for passing around the table.
Crunchy Oven-Baked Chicken Taquitos

Crispy, cheesy, and packed with seasoned chicken, these Crunchy Oven-Baked Chicken Taquitos are filled with shredded chicken, cheddar, pepper jack, spices, and cilantro. Baked until golden and served with salsa, sour cream, and guacamole, they make a fun Mexican-style dinner or snack.
Recipe Details
- Prep Time: 15 minutes
- Cook Time: 20 minutes
- Total Time: 35 minutes
- Course: Dinner, Snack
- Cuisine: Mexican
- Servings: 6 taquitos
- Calories: 300 kcal
Equipment
- Baking sheet
- oven
Ingredients
For Serving
- Salsa, sour cream, and guacamole for serving
For the Taquitos
- 12 small flour or corn tortillas
- Olive oil spray or 2 tablespoons olive oil
For the Filling
- 2 cups cooked, shredded chicken
- 1 cup shredded pepper jack cheese
- 1 cup shredded cheddar cheese
- ¼ cup chopped cilantro
- 1 teaspoon chili powder
- 1 teaspoon ground cumin
- ½ teaspoon onion powder
- ½ teaspoon garlic powder
Instructions
Step 1: Preheat the Oven
Preheat your oven to 425°F (220°C).
Step 2: Mix the Filling
In a bowl, mix the chicken, cheeses, spices, and cilantro until well combined. The filling should be evenly blended before rolling.
Step 3: Fill the Tortillas
Place about 2 tablespoons of the filling on each tortilla. Keep the filling near the center so the taquitos can roll tightly.
Step 4: Roll and Arrange
Roll each tortilla tightly and place it seam-side down on a baking sheet. Arrange the taquitos so they can bake evenly.
Step 5: Add the Oil
Lightly spray the taquitos with olive oil.
Step 6: Bake Until Crispy
Bake for 20 minutes or until golden and crispy.
Step 7: Serve with Dips
Serve with salsa, sour cream, and guacamole.
Notes
- Feel free to customize the filling with your favorite ingredients.
- Use different cheeses or add beans for variety.
Serving Suggestions
Serve these Crunchy Oven-Baked Chicken Taquitos warm while the tortillas are golden and crispy. Salsa, sour cream, and guacamole make the perfect serving trio for dipping or topping.
They work well as a snack, dinner, party food, or casual game day bite. You can use different cheeses or add beans for variety, exactly as noted.
Storage
How to Store
The recipe does not provide specific storage instructions or storage duration, so no exact storage time is added here.
Best Texture Tip
Serve the taquitos after baking for 20 minutes or until golden and crispy. This keeps the outside crunchy while the chicken and cheese filling stays warm.
Rolling Tip
Place about 2 tablespoons of filling on each tortilla and roll tightly. Set each taquito seam-side down on the baking sheet so it holds its shape while baking.
Customization Tip
Feel free to customize the filling with your favorite ingredients. Use different cheeses or add beans for variety, with no extra quantity added because the recipe does not provide one.

Fernando is the creator and writer behind the food blog Eating with your Hands. Living and working in cities like Paris, Barcelona, and Berlin, and being married to a Canadian foodie, has given Fernando a passion and interest in food and inspired him to run EWYH.