
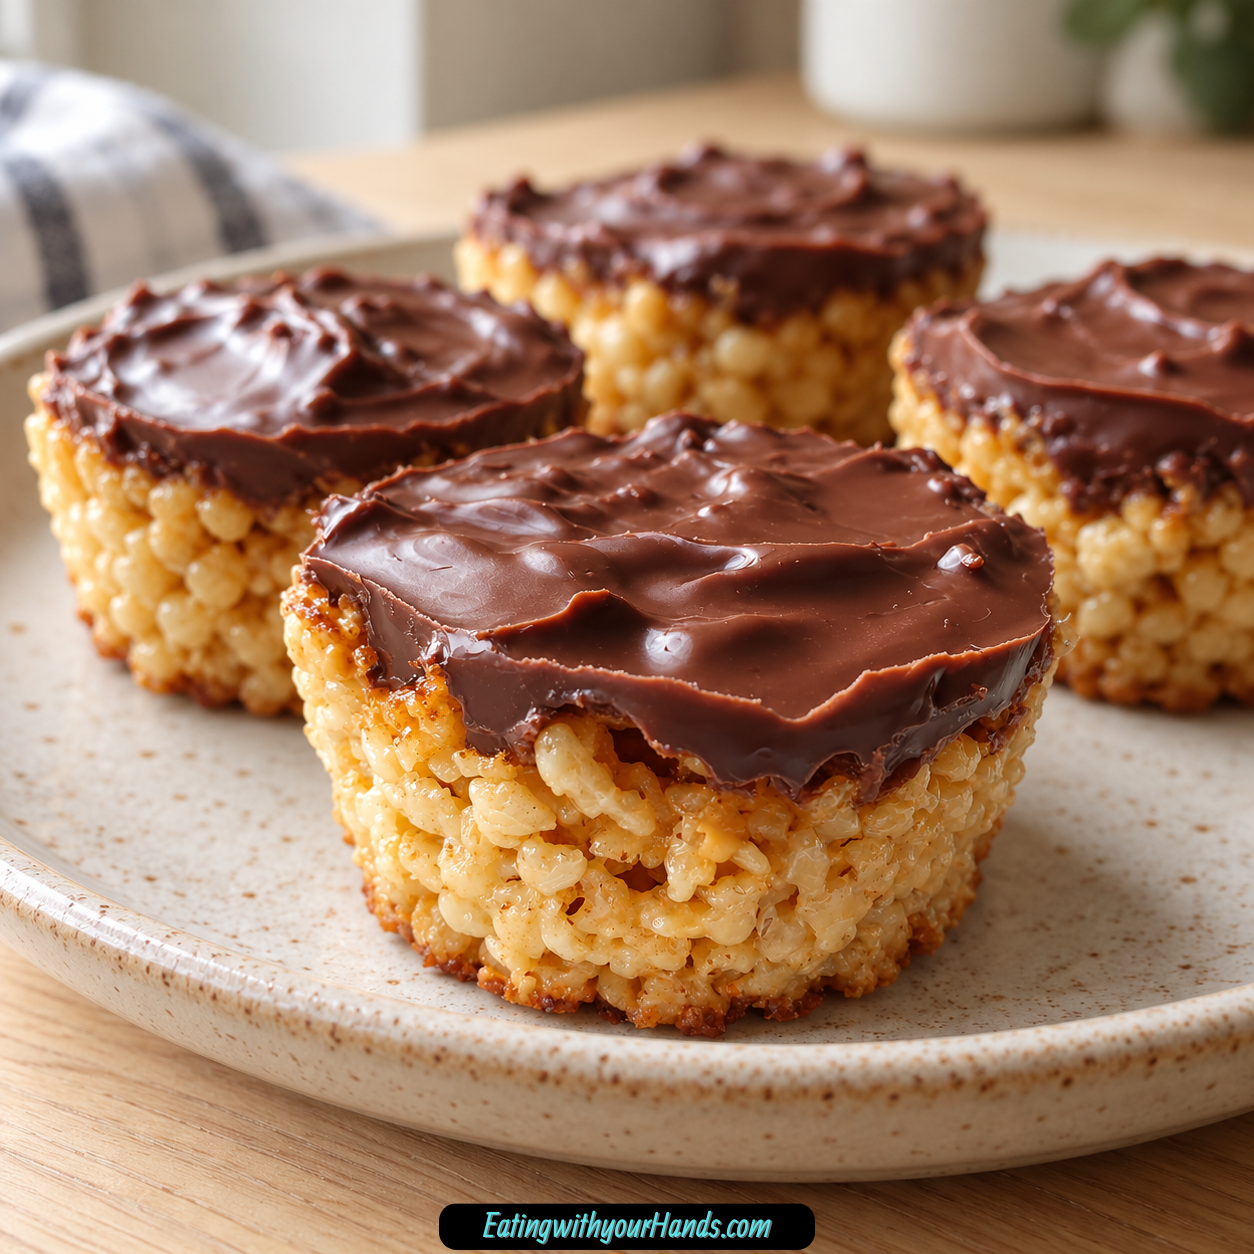
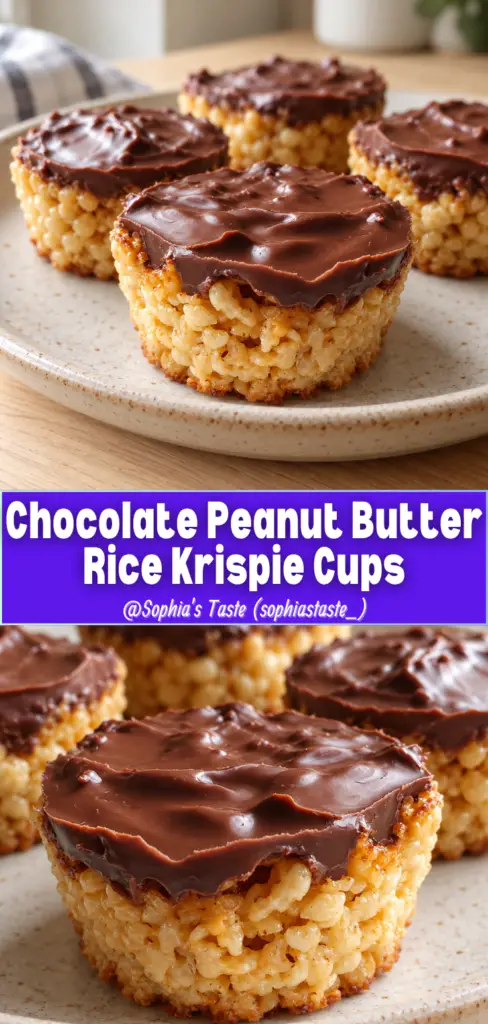
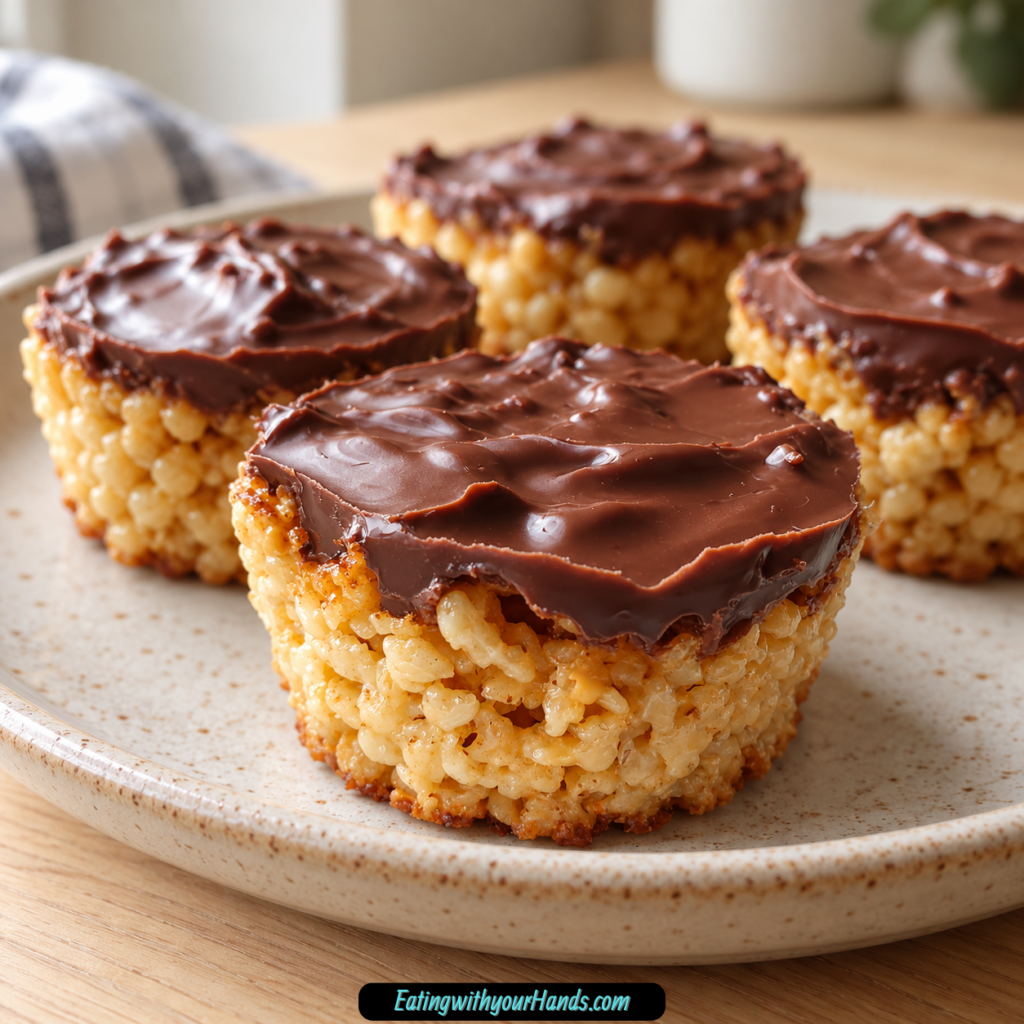
Decadent Chocolate Peanut Butter Rice Krispie Cups in 20 Minutes are the kind of no-bake treat that feels almost too easy for how quickly they disappear. Crispy cereal gets folded into a sticky peanut butter marshmallow mixture, pressed into little muffin cups, and finished with a smooth chocolate topping that makes every bite crunchy, chewy, creamy, and sweet.
These cups are pure pantry magic. They take the simple comfort of a classic Rice Krispie treat and give it a peanut butter chocolate twist that feels richer, more playful, and a little more grown-up while still tasting like childhood.
The texture is what makes them so hard to resist. The cereal stays crisp, the peanut butter marshmallow layer holds everything together, and the chocolate topping sets into a firm little cap that snaps softly when you bite in.
They are also wonderfully practical. There is no oven, no mixer, no complicated candy thermometer moment, and no long list of fussy ingredients.
All you need is a saucepan, a muffin tin, a spatula, and a little space in the refrigerator. In about 20 minutes of active time, the cups are ready to chill.
This is the recipe to make when the oven feels like too much work, the kids want to help, friends are coming over, or a peanut butter chocolate craving hits hard. It is simple enough for a weeknight and cute enough for parties.
Decadent Chocolate Peanut Butter Rice Krispie Cups in 20 Minutes are sweet, crunchy, creamy, no-bake, and endlessly customizable. They are the kind of treat that makes people reach for a second one before they finish the first.
Table of Contents
- Why You’ll Love These Chocolate Peanut Butter Rice Krispie Cups
- Recipe Details
- Ingredients
- Equipment You’ll Need
- Ingredient Notes
- Optional Swaps, Variations, and Flavor Ideas
- Classic Chocolate Peanut Butter Rice Krispie Cups
- Milk Chocolate Peanut Butter Cups
- Semi-Sweet Chocolate Cups
- Dark Chocolate Peanut Butter Cups
- Almond Butter Rice Krispie Cups
- Cashew Butter Rice Krispie Cups
- Pretzel Crunch Cups
- Potato Chip Crunch Cups
- Peanut Crunch Cups
- Double Chocolate Cups
- White Chocolate Drizzle Cups
- Nutella Peanut Butter Cups
- Why This Recipe Works
- Directions
- Step 1: Prepare the Muffin Tin
- Step 2: Measure the Cereal
- Step 3: Measure the Peanut Butter and Butter
- Step 4: Melt the Peanut Butter and Butter
- Step 5: Keep the Heat Low
- Step 6: Add the Mini Marshmallows
- Step 7: Add Vanilla and Salt
- Step 8: Remove From Heat
- Step 9: Fold in the Rice Krispies
- Step 10: Fill the Muffin Cups
- Step 11: Melt the Chocolate
- Step 12: Adjust the Chocolate if Needed
- Step 13: Top Each Cup
- Step 14: Tap the Tin
- Step 15: Rest Before Chilling
- Step 16: Chill Until Set
- Step 17: Release the Cups
- Step 18: Serve and Enjoy
- Serving Ideas
- Storage
- Freezing
- Make-Ahead
- Helpful Notes for Best Results
- Variations
- Troubleshooting
- Frequently Asked Questions
- Nutritional Information
- Why This Recipe Works So Well
- Final Thoughts
- Decadent Chocolate Peanut Butter Rice Krispie Cups in 20 Minutes
Why You’ll Love These Chocolate Peanut Butter Rice Krispie Cups
These treats are no-bake. That makes them perfect for warm days, busy afternoons, and last-minute dessert needs.
They come together quickly. The active time is about 20 minutes.
They use pantry-friendly ingredients. Rice Krispies, peanut butter, butter, marshmallows, chocolate chips, vanilla, and salt are all you need.
They are fun for kids to help make. Scooping, pressing, topping, and decorating are simple steps.
They are easy to customize. Try different nut butters, cereals, chocolates, salty add-ins, or drizzles.
They store well. Keep them at room temperature, refrigerate them, or freeze them for later.
Recipe Details
This recipe uses 3 cups Rice Krispies cereal. Measure the cereal lightly without packing it down.
The creamy base uses 1 cup creamy peanut butter and ½ cup unsalted butter. Regular creamy peanut butter gives the smooth, sticky texture needed here.
The sweet binder uses 1 cup mini marshmallows. Mini marshmallows melt faster than large marshmallows.
The topping uses 1 cup chocolate chips. Semi-sweet chocolate works well, while milk chocolate gives a sweeter, kid-friendly finish.
The optional flavor boosters are ½ teaspoon vanilla extract and a pinch of sea salt. Vanilla adds warmth, and sea salt balances the sweetness.
Use a 12-cup muffin tin. Paper liners, parchment liners, or cooking spray help prevent sticking.
The peanut butter and butter melt together over low heat in about 2 to 3 minutes. Keep the heat low to avoid scorching.
The cups need at least 30 minutes in the refrigerator to set. Let them sit at room temperature for 5 minutes before eating if stored cold.
Ingredients
For the Rice Krispie Cups
- 3 cups Rice Krispies cereal
- 1 cup creamy peanut butter
- ½ cup unsalted butter
- 1 cup mini marshmallows
- ½ teaspoon vanilla extract, optional
- Pinch of sea salt, optional
For the Chocolate Topping
- 1 cup chocolate chips
Optional Variations and Add-Ins
- Milk chocolate chips
- Semi-sweet chocolate chips
- Dark chocolate
- Dairy-free chocolate chips
- Almond butter
- Cashew butter
- Coconut oil
- Shortening
- Crushed pretzels
- Potato chips
- Crushed peanuts
- Cocoa rice cereal
- Mini chocolate chips
- White chocolate
- Nutella
- Parchment liners
- Cooking spray
Equipment You’ll Need
Basic Equipment
- Medium saucepan
- 12-cup muffin tin
- Silicone spatula
- Measuring cups
- Small microwave-safe bowl
- Paper liners, parchment liners, or cooking spray
Optional Equipment
- Butter knife
- Small offset spatula
- Plastic wrap
- Freezer bag
Equipment Notes
A medium saucepan is used for melting the peanut butter, butter, and marshmallows. A nonstick saucepan makes cleanup easier.
A standard 12-cup muffin tin creates the perfect cup shape. Mini muffin tins can be used for smaller bite-sized treats.
A silicone spatula is helpful because the peanut butter mixture is sticky. It scrapes the pan well and makes folding easier.
A microwave-safe bowl is used for melting the chocolate chips. Melt the chocolate in short bursts so it stays smooth.
Parchment liners are the best choice if you want easy release. Regular liners can be sprayed lightly with cooking spray.
A butter knife or small offset spatula helps smooth the chocolate topping. A gentle tap on the counter helps settle the tops.
Ingredient Notes
Rice Krispies cereal gives these cups their classic crisp texture. Do not pack the cereal into the measuring cup.
Creamy peanut butter is important for the smoothest texture. Regular peanut butter such as Jif or Skippy-style peanut butter works best.
Natural peanut butter is not recommended here. It can be oily or separated and may not hold the mixture the same way.
Unsalted butter lets you control the salt level. Cut it into chunks so it melts evenly.
Mini marshmallows melt faster than large ones. If they are sticking together, toss them lightly in flour before using.
Chocolate chips create the topping. Semi-sweet chocolate balances the sweetness, while milk chocolate makes the cups sweeter.
Vanilla extract is optional but adds warmth. It makes the peanut butter layer taste rounder.
Sea salt is optional but strongly helpful. A pinch cuts through the sweetness and makes the chocolate and peanut butter taste better.
Coconut oil or shortening can help loosen thick chocolate. Add only a tiny bit if the melted chocolate is too heavy to spread.
Optional Swaps, Variations, and Flavor Ideas
Classic Chocolate Peanut Butter Rice Krispie Cups
Use Rice Krispies, creamy peanut butter, unsalted butter, mini marshmallows, chocolate chips, optional vanilla, and optional sea salt. This gives the full classic version.
Chill until set before serving. The chocolate layer should be firm enough to bite cleanly.
Milk Chocolate Peanut Butter Cups
Use milk chocolate chips for the topping. This makes the cups sweeter and especially kid-friendly.
Melt slowly and spread evenly. Milk chocolate can soften quickly in warm kitchens.
Semi-Sweet Chocolate Cups
Use semi-sweet chocolate chips for balance. The slightly deeper chocolate flavor works well with peanut butter.
This is a great everyday version. Add sea salt if desired.
Dark Chocolate Peanut Butter Cups
Use dark chocolate for a richer topping. This gives the cups a less sweet finish.
It pairs nicely with flaky sea salt. Let the chocolate set fully.
Almond Butter Rice Krispie Cups
Use smooth almond butter instead of peanut butter. The flavor becomes slightly more elegant.
Keep the texture smooth. Chunky nut butter does not coat the cereal as evenly.
Cashew Butter Rice Krispie Cups
Use smooth cashew butter for a creamy variation. It gives the cups a mild, buttery nut flavor.
The mixture should still be sticky and scoopable. Press firmly into the muffin tin.
Pretzel Crunch Cups
Stir in ¼ cup crushed pretzels with the cereal. This adds salty crunch.
The salty contrast works beautifully with chocolate. Keep the pieces small.
Potato Chip Crunch Cups
Add ¼ cup crushed potato chips with the cereal. This creates a sweet-salty snack-style cup.
Use sturdy chips and fold gently. The chips should stay a little crunchy.
Peanut Crunch Cups
Stir crushed peanuts into the mixture before pressing it into cups. This adds extra nutty texture.
Use a small amount so the mixture still holds together. Press firmly.
Double Chocolate Cups
Replace ¼ cup of the cereal with cocoa rice cereal. This gives a chocolate-on-chocolate version.
You can also stir mini chocolate chips into the peanut butter base before adding the cereal. Let the base cool slightly first so they do not melt completely.
White Chocolate Drizzle Cups
After the chocolate topping sets, melt white chocolate and drizzle it over the cups with a fork. It takes only a few minutes.
The drizzle makes the cups look more finished. Let it set before storing.
Nutella Peanut Butter Cups
Add a spoonful of Nutella to the melted peanut butter mixture. This creates a richer chocolate-hazelnut note.
The flavor becomes sweeter and deeper. Keep the base smooth before adding cereal.
Why This Recipe Works
This recipe works because the peanut butter, butter, and marshmallows melt into a sticky mixture that binds the cereal together. It creates a base that is chewy enough to hold its shape but still crisp from the cereal.
Low heat is important. Peanut butter and marshmallows can scorch or become stiff if overheated.
Mini marshmallows melt quickly and evenly. They help create that soft, pull-apart texture.
The cereal is added off the heat to protect its crunch. Overmixing can crush it and make the texture less crisp.
Pressing the mixture firmly into the muffin tin helps the cups hold together. Loose scoops can fall apart when lifted.
Chocolate on top turns each cup into a more complete treat. It sets into a firm layer after chilling.
The refrigerator helps the cups set. The 30-minute chill creates a better bite and cleaner release.
Letting the cups sit briefly before refrigerating can help prevent chocolate cracking. A gentle temperature change keeps the top smoother.
Directions
Step 1: Prepare the Muffin Tin
Line a 12-cup muffin tin with paper liners or parchment liners. You can also lightly spray the muffin tin with cooking spray.
This step prevents sticking. It also makes the cups easier to lift out after chilling.
Step 2: Measure the Cereal
Measure 3 cups Rice Krispies cereal and set it aside. Do not pack the cereal into the measuring cup.
Having the cereal ready matters because the mixture thickens quickly. You will add it as soon as the marshmallow base is melted.
Step 3: Measure the Peanut Butter and Butter
Measure 1 cup creamy peanut butter and ½ cup unsalted butter. Cut the butter into chunks.
The butter chunks melt faster and more evenly. Smooth peanut butter creates the best texture.
Step 4: Melt the Peanut Butter and Butter
Place the peanut butter and butter in a medium saucepan over low heat. Stir constantly with a silicone spatula.
Let the mixture melt for about 2 to 3 minutes. It should look smooth and glossy.
Step 5: Keep the Heat Low
Do not raise the heat to rush the process. Low heat protects the peanut butter from scorching.
The mixture should melt slowly and evenly. A smooth base gives better cups.
Step 6: Add the Mini Marshmallows
Add 1 cup mini marshmallows to the melted peanut butter mixture. Continue stirring.
The marshmallows should melt completely. The mixture should become sticky, smooth, and gooey.
Step 7: Add Vanilla and Salt
If using, stir in ½ teaspoon vanilla extract and a pinch of sea salt. Mix just until incorporated.
The vanilla adds warmth, and the salt balances the sweetness. Both are optional but delicious.
Step 8: Remove From Heat
Take the saucepan off the heat. Do this before adding the cereal.
Removing the pan from heat protects the cereal’s crunch. It also prevents the mixture from becoming too stiff.
Step 9: Fold in the Rice Krispies
Add the Rice Krispies cereal immediately. Fold gently but thoroughly until every piece is coated.
Do not overmix. Too much stirring can crush the cereal and reduce the crunch.
Step 10: Fill the Muffin Cups
Scoop the cereal mixture into the prepared muffin tin. Divide it evenly among the cups.
Press each portion down firmly with lightly greased fingers or the back of a spoon. Firm pressing helps the cups hold their shape.
Step 11: Melt the Chocolate
Place 1 cup chocolate chips in a small microwave-safe bowl. Microwave in 30-second bursts, stirring between each burst.
Use low power or 50% power if possible for a smoother melt. Stop once the chocolate is melted and glossy.
Step 12: Adjust the Chocolate if Needed
If the chocolate looks too thick, add a tiny bit of coconut oil or shortening. Stir until smooth.
Do not add too much. The chocolate should be pourable but not runny.
Step 13: Top Each Cup
Spoon about 1 tablespoon melted chocolate over each Rice Krispie cup. Spread it gently to the edges.
Use the back of a spoon, butter knife, or small offset spatula. Work while the chocolate is soft.
Step 14: Tap the Tin
Tap the muffin tin firmly once on the counter. This helps settle the chocolate and remove air bubbles.
It also creates a smoother top. Wipe any messy liner edges if desired.
Step 15: Rest Before Chilling
Let the cups sit at room temperature for about 5 minutes before refrigerating. This helps reduce the chance of cracked chocolate.
A gradual temperature change is better for the topping. Do not rush this step if you want smooth tops.
Step 16: Chill Until Set
Place the muffin tin in the refrigerator for at least 30 minutes. The cups should be firm before serving.
The chocolate should set, and the base should hold its shape. This chill time makes the bite better.
Step 17: Release the Cups
Remove the cups from the muffin tin. Peel away liners if desired.
If they stick slightly, give them a minute at room temperature. They should lift out cleanly.
Step 18: Serve and Enjoy
Serve the cups chilled, cool, or slightly softened. If they have been refrigerated, let them sit for 5 minutes before eating.
This helps the peanut butter flavor wake up. The texture becomes pleasantly chewy and crisp.
Serving Ideas
Serve these cups as an after-school treat. They are easy to hold and fun to eat.
Bring them to a bake sale or party. They look neat in liners and do not need slicing.
Serve them chilled for a firmer chocolate top. The peanut butter base becomes almost fudge-like.
Let them sit at room temperature for 5 minutes before eating if refrigerated. This gives the best flavor and texture.
Add a white chocolate drizzle for a prettier party tray. It makes the cups look more decorated.
Sprinkle a little flaky sea salt on top before the chocolate sets. It gives a sweet-salty finish.
Make mini versions for bite-sized treats. Use a mini muffin tin and watch portion size.
Keep a few in the freezer for sweet cravings. They thaw quickly at room temperature.
Storage
Store the cups in an airtight container. They keep at room temperature for 2 to 3 days.
Layer with parchment paper if stacking. This protects the chocolate tops.
Room temperature storage works best in a cool kitchen. If the kitchen is warm, use the refrigerator.
Refrigeration is a great option. The chocolate stays crisp, and the peanut butter layer becomes fudge-like.
Let refrigerated cups sit at room temperature for 5 minutes before eating. Cold peanut butter tastes better after softening slightly.
Use glass containers if possible. They do not absorb odors.
Keep the lid tight. Air can make the cereal lose some crispness.
Freezing
These cups freeze well for up to 2 months. Wrap each one individually in plastic wrap.
Place the wrapped cups in a freezer bag. Press out excess air before sealing.
Thaw at room temperature for about 30 minutes when ready to eat. The texture comes back nicely.
You can freeze them before adding the chocolate topping if desired. This lets you change topping flavors later.
If freezing fully topped cups, make sure the chocolate is completely set first. This protects the finish.
Freeze in a single layer at first if needed. Once firm, the cups can be stacked.
Freezing is helpful for double batches. It gives you quick treats ready anytime.
Make-Ahead
These cups are excellent for make-ahead desserts. They hold well in the refrigerator and freezer.
Make them the day before a party and refrigerate until serving. Let them sit briefly before placing on a tray.
For longer planning, freeze individually wrapped cups for up to 2 months. Thaw only what you need.
If decorating with a white chocolate drizzle, do it after the chocolate topping sets. Let the drizzle set before storing.
You can measure the cereal, chocolate, and marshmallows ahead. This makes assembly even faster.
The peanut butter base is best made fresh. It needs to be warm and sticky when pressed into the tin.
Make a double batch if serving a crowd. These cups disappear quickly.
Helpful Notes for Best Results
Use low heat for the peanut butter and butter. High heat can scorch the mixture.
Use regular creamy peanut butter. Natural peanut butter may not create the same smooth, sticky texture.
Use mini marshmallows. They melt faster and more evenly.
Fold the cereal gently. Overmixing can crush the Rice Krispies.
Press the mixture firmly into the muffin tin. This helps each cup hold shape.
Melt chocolate slowly. Burnt chocolate tastes bitter and cannot be fixed easily.
Let the cups sit at room temperature for 5 minutes before refrigerating. This helps prevent cracked chocolate.
Chill at least 30 minutes. The cups need time to set properly.
Variations
Classic Chocolate Peanut Butter Rice Krispie Cups
Use Rice Krispies, creamy peanut butter, unsalted butter, mini marshmallows, chocolate chips, optional vanilla, and optional sea salt. This is the full nostalgic version.
Chill until firm before eating. The set texture makes them easier to hold.
Milk Chocolate Cups
Use milk chocolate chips for the topping. This creates a sweeter finish.
It is a favorite for kids. Store in the fridge if the kitchen is warm.
Semi-Sweet Chocolate Cups
Use semi-sweet chocolate chips. The flavor is balanced and classic.
Add sea salt if desired. It makes the chocolate taste deeper.
Almond Butter Cups
Use smooth almond butter instead of peanut butter. This creates a slightly more grown-up flavor.
Keep it smooth, not chunky. Smooth nut butter coats the cereal better.
Cashew Butter Cups
Use smooth cashew butter. It gives a creamy, mild flavor.
The texture stays rich and soft. Press firmly into the cups.
Pretzel Crunch Cups
Stir in ¼ cup crushed pretzels with the cereal. This adds salty crunch.
The salty-sweet contrast is excellent. Do not crush them too fine.
Potato Chip Crunch Cups
Add ¼ cup crushed potato chips. This gives a fun snacky crunch.
Fold gently so they do not disappear into crumbs. Serve soon for best texture.
Peanut Crunch Cups
Add crushed peanuts to the base before pressing. This adds extra peanut flavor.
Use a moderate amount so the cups still hold. Press tightly.
Double Chocolate Cups
Replace ¼ cup cereal with cocoa rice cereal. This creates chocolate flavor in the base and topping.
You can also add mini chocolate chips to the peanut butter base. Let the base cool slightly first.
White Chocolate Drizzle Cups
Drizzle melted white chocolate over the set chocolate topping. Use a fork for zigzags.
It looks fancy and takes only a few minutes. Let it set before storing.
Nutella Swirl Cups
Add a spoonful of Nutella to the melted peanut butter mixture. Stir until smooth.
This creates a chocolate-hazelnut note. The cups become richer.
Vegan or Dairy-Free Cups
Use coconut oil instead of butter, dairy-free chocolate chips, and vegan marshmallows. Make sure every ingredient fits your needs.
The texture comes out very close to the classic version. Chill well before serving.
Troubleshooting
The Mixture Is Too Stiff
The heat may have been too high, or the mixture may have sat too long before pressing. Work quickly after adding cereal.
If needed, warm very gently for a moment. Do not overheat.
The Cups Fall Apart
They may not have been pressed firmly enough. Pack the mixture into the muffin cups.
The ratio may also be off if too much cereal was added. Measure lightly.
The Cereal Lost Its Crunch
The cereal may have been overmixed or heated too long. Add it after removing the saucepan from heat.
Fold gently. Stop once coated.
The Chocolate Topping Cracked
The cups may have gone into the refrigerator too quickly. Let them sit at room temperature for 5 minutes after topping.
Chocolate that is too thick can also crack. Melt slowly and add a tiny bit of coconut oil or shortening if needed.
The Chocolate Looks Blotchy
The chocolate may have overheated. Melt in short bursts and stir often.
Use lower microwave power if possible. Smooth chocolate needs gentle heat.
The Cups Stick to the Liners
Use parchment liners or spray regular liners lightly with cooking spray. Wax-coated liners can stick.
Let the cups set fully before peeling. They release better when firm.
The Base Is Too Sweet
Add the optional sea salt. It balances the sweetness.
Use semi-sweet or dark chocolate instead of milk chocolate. This helps too.
The Base Is Too Soft
Chill longer. The cups need at least 30 minutes.
If the kitchen is warm, store them in the refrigerator. Warm rooms soften the chocolate and peanut butter.
The Peanut Butter Layer Tastes Flat
Add vanilla and sea salt next time. Both help the flavor.
A pinch of salt can make the peanut butter taste stronger. Do not skip it if you like balance.
The Chocolate Is Too Thick to Spread
Add a tiny bit of coconut oil or shortening. Stir until smooth.
Use only a small amount. Too much can make the topping too soft.
Frequently Asked Questions
Can I use crunchy peanut butter instead of creamy?
You can, but creamy peanut butter is better for this recipe. Crunchy peanut butter makes it harder to press the mixture smoothly into cups.
If you want crunch, stir in chopped peanuts separately. That gives better control over texture.
How do I prevent sticking to the muffin liners?
Use parchment liners if possible. They release much better.
If using regular liners, give them a quick spritz with cooking spray. This helps prevent sticking.
Can I freeze these for later?
Yes, these cups freeze well for up to 2 months. Wrap each cup individually in plastic wrap before freezing.
Thaw at room temperature for about 30 minutes. The texture returns nicely.
Why did my chocolate topping crack?
The cups may have chilled too quickly after the chocolate was added. Let them sit at room temperature for 5 minutes before refrigerating.
Chocolate can also crack if it is too thick. Melt it slowly and keep it smooth.
Can I make these vegan or dairy-free?
Yes, use coconut oil instead of butter, dairy-free chocolate chips, and vegan marshmallows. Check that all ingredients fit your needs.
The texture is very similar when chilled properly. The flavor may vary slightly.
Can I use natural peanut butter?
Regular creamy peanut butter is recommended. Natural peanut butter can separate and may not create the same smooth, sticky base.
If using a different nut butter, choose a smooth variety. Texture matters here.
Can I make mini cups?
Yes, use a mini muffin tin. The cups will be smaller and bite-sized.
Watch the portioning carefully. Mini cups set quickly.
How long do they need to chill?
They need at least 30 minutes in the refrigerator. The chocolate and base should be firm.
If they still feel soft, chill longer. Warm kitchens may need extra time.
Nutritional Information
Nutrition values can vary depending on the brands of peanut butter, cereal, chocolate, butter, and marshmallows used. The final numbers also depend on how generously the cups are portioned.
Because no exact nutrition values are included, specific numbers are not listed here. Use your own ingredients and yield for precise tracking.
These cups are sweet, rich treats. Peanut butter and butter bring richness, while the cereal gives crunch.
The chocolate topping adds sweetness and flavor. Dark chocolate, milk chocolate, and semi-sweet chocolate will all change the final nutrition.
Using natural peanut butter can lower sugar, but it may change texture. Regular creamy peanut butter is best for structure.
Dairy-free or vegan swaps can also change the final numbers. Check labels if needed.
Enjoy these as a dessert or snack. They are meant to be fun, nostalgic, and satisfying.
Why This Recipe Works So Well
Decadent Chocolate Peanut Butter Rice Krispie Cups in 20 Minutes work because each ingredient has a purpose. Peanut butter adds flavor and stickiness, butter adds richness, marshmallows bind, cereal adds crunch, and chocolate finishes everything.
Low heat keeps the peanut butter mixture smooth. Rushing the melting step can make the mixture thick or scorched.
Mini marshmallows melt quickly and blend into the base. This creates the sticky texture that holds the cereal together.
Rice Krispies keep the cups light and crisp. Folding them off heat protects that texture.
Firmly pressing the mixture into the muffin tin creates the cup shape. The cups need that pressure to hold together.
The chocolate topping turns the treat into something that feels more complete than a plain cereal bar. It adds a smooth, rich top layer.
Chilling sets everything. The base firms, the chocolate hardens, and the cups become easy to lift and eat.
Most of all, this recipe works because it is simple, fast, and nostalgic. It tastes like peanut butter, chocolate, marshmallows, and childhood all packed into one neat little cup.
Final Thoughts
Decadent Chocolate Peanut Butter Rice Krispie Cups in 20 Minutes are made with Rice Krispies cereal, creamy peanut butter, unsalted butter, mini marshmallows, chocolate chips, optional vanilla extract, and optional sea salt. The peanut butter and butter melt together, the marshmallows turn gooey, the cereal folds in gently, the mixture gets pressed into a muffin tin, and the chocolate topping sets into a sweet, smooth finish.
Serve them chilled, slightly softened, drizzled with white chocolate, sprinkled with sea salt, or packed for parties, school treats, and quick desserts. With their 20-minute active time, no-bake method, 2-to-3-minute peanut butter melting step, 30-second chocolate melting bursts, 1-tablespoon chocolate topping guide, 5-minute room-temperature rest before chilling, 30-minute chill time, 2-to-3-day room-temperature storage, refrigerator-friendly texture, 2-month freezer option, and variations like almond butter, cashew butter, pretzels, potato chips, crushed peanuts, cocoa rice cereal, mini chocolate chips, Nutella, coconut oil, dairy-free chocolate, and vegan marshmallows, these cups are fast, fun, crunchy, creamy, and impossible to ignore.
Decadent Chocolate Peanut Butter Rice Krispie Cups in 20 Minutes
Crunchy, creamy, chocolatey, and completely no-bake, these Decadent Chocolate Peanut Butter Rice Krispie Cups combine Rice Krispies cereal with peanut butter, butter, melted mini marshmallows, and a smooth chocolate topping. They come together easily in muffin tins, then chill until firm for a sweet American dessert with rich peanut butter flavor and crisp texture.
Recipe Details
- Prep Time: 10 minutes
- Cook Time: 10 minutes
- Total Time: 50 minutes
- Course: Dessert
- Cuisine: American
- Servings: 12 cups
- Calories: 220 kcal
Ingredients
For the Rice Krispie Cups
- Pinch of sea salt optional
- ½ teaspoon vanilla extract optional
- 1 cup mini marshmallows
- ½ cup unsalted butter
- 1 cup creamy peanut butter
- 3 cups Rice Krispies cereal
For the Chocolate Topping
- 1 cup chocolate chips
Optional Add-In
- Crushed peanuts for extra crunch
Instructions
Step 1: Melt the Peanut Butter Base
Melt the creamy peanut butter and unsalted butter in a saucepan over low heat. Stir gently as they soften together.
Keep the heat low so the mixture melts smoothly without scorching. The peanut butter and butter create the rich base that coats the cereal.
Step 2: Add the Marshmallows
Stir in the mini marshmallows until fully melted. Continue stirring until the mixture looks smooth and blended.
The melted marshmallows help bind the Rice Krispies together. Make sure no large marshmallow pieces remain before removing the saucepan from the heat.
Step 3: Add Optional Flavor
Remove the saucepan from the heat. Mix in the vanilla extract and sea salt if using.
The vanilla extract is optional, and the pinch of sea salt is optional. Add them only if you want a little extra flavor balance.
Step 4: Fold in the Cereal
Fold in the Rice Krispies cereal until evenly coated. Stir carefully so the cereal stays crisp while getting covered in the peanut butter-marshmallow mixture.
The mixture should look evenly combined before shaping. Work while it is still warm and easy to press.
Step 5: Shape the Cups
Press the mixture into lined muffin tins. Divide it evenly to make 12 cups.
Press each portion firmly enough to hold its shape, but do not crush the cereal too much. The goal is a compact cup with a crunchy texture.
Step 6: Add the Chocolate
Melt the chocolate chips and spread the melted chocolate over each cup. Cover the tops evenly.
Use dark chocolate if you want a richer taste, as noted. The chocolate layer gives each cup a smooth, sweet finish.
Step 7: Chill Until Firm
Chill the cups for 30 minutes before serving. This helps the chocolate set and the cups hold together.
The total time is 50 minutes because the recipe includes the 30-minute chilling step. Serve once the cups are firm enough to lift from the muffin tins.
Notes
- Store in an airtight container for up to 3 days.
- Use dark chocolate for a richer taste.
- Add crushed peanuts for extra crunch.
Serving Suggestions
Serve Decadent Chocolate Peanut Butter Rice Krispie Cups after they have chilled for 30 minutes and are firm enough to hold their shape. The Rice Krispies, creamy peanut butter, mini marshmallows, butter, and chocolate chips create a crunchy no-bake dessert with rich chocolate-peanut butter flavor.
This recipe makes 12 cups, making it a good choice for dessert trays, parties, lunchbox treats, or quick make-ahead sweets. The chocolate topping gives each cup a smooth finish over the crisp peanut butter cereal base.
For a richer flavor, use dark chocolate as noted. For extra crunch, add crushed peanuts before the cups set.
Storage
How to Store
Store in an airtight container for up to 3 days. Let the chocolate topping fully set before storing.
Cereal Tip
Use 3 cups Rice Krispies cereal. Fold it gently into the melted peanut butter, butter, and marshmallow mixture so it stays crunchy.
Peanut Butter Tip
Use 1 cup creamy peanut butter. Melt it with the unsalted butter over low heat for a smooth base.
Marshmallow Tip
Use 1 cup mini marshmallows and stir until fully melted. They help the cups hold together.
Chocolate Tip
Use 1 cup chocolate chips for the topping. Melt and spread over each cup before chilling.
Flavor Tip
Add ½ teaspoon vanilla extract and a pinch of sea salt if desired. Both are optional.
Chill Tip
Chill for 30 minutes before serving so the cups firm up and the chocolate sets.

Fernando is the creator and writer behind the food blog Eating with your Hands. Living and working in cities like Paris, Barcelona, and Berlin, and being married to a Canadian foodie, has given Fernando a passion and interest in food and inspired him to run EWYH.