
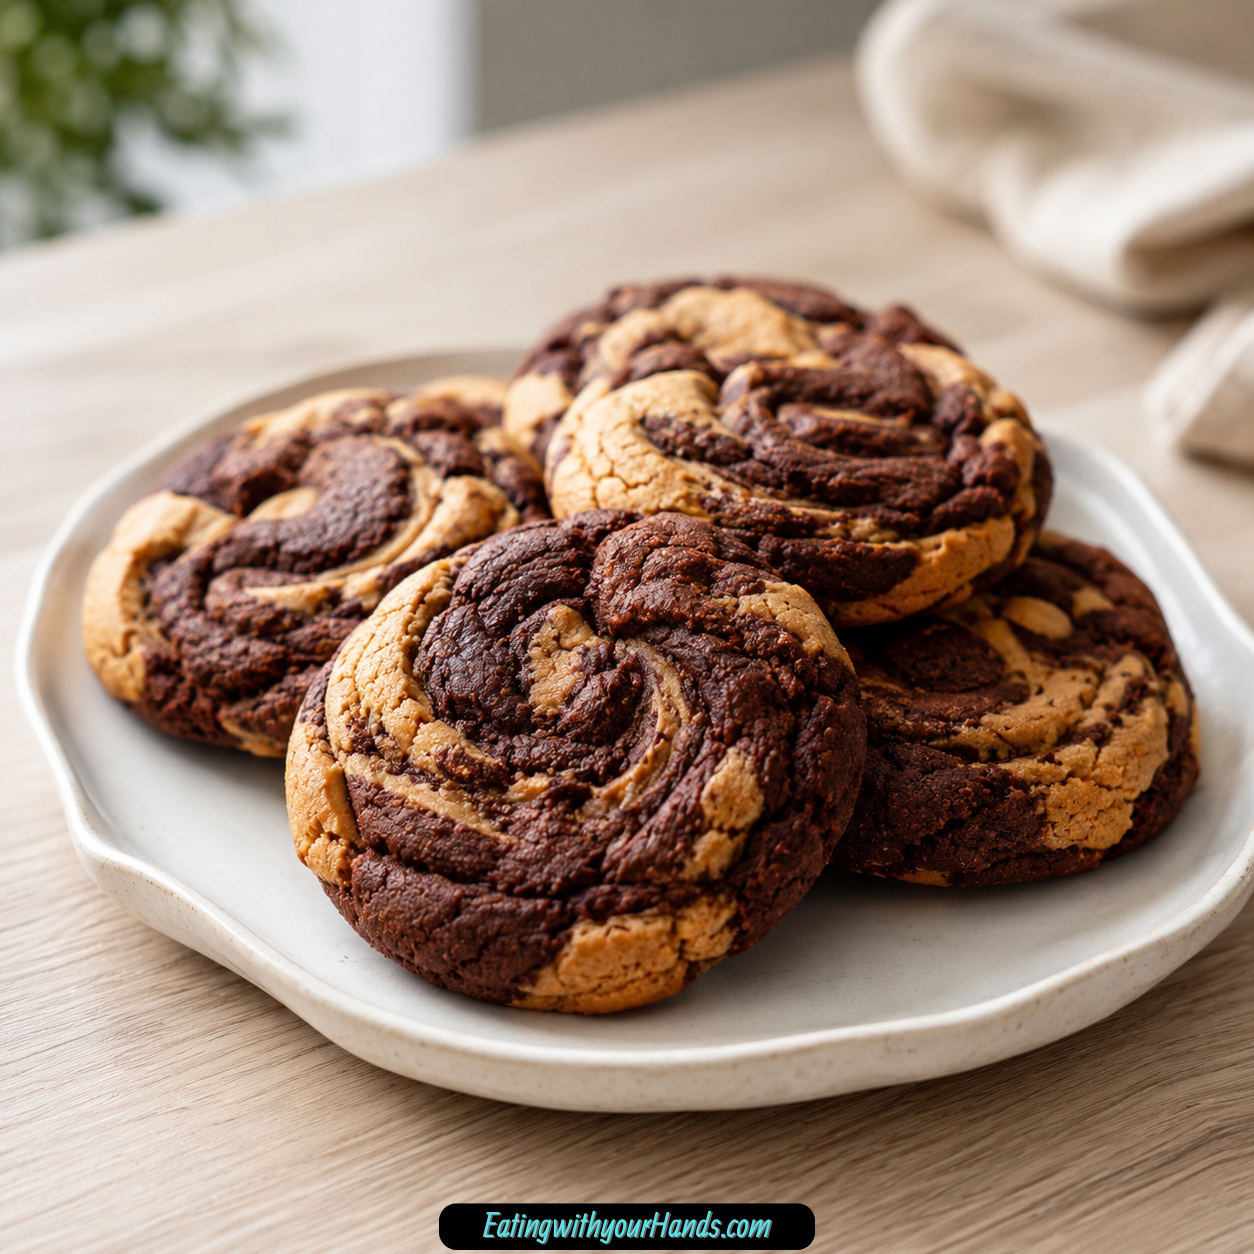
Some cookies win people over with frosting, some with sprinkles, and some with a perfect little surprise in the middle. These Decadent Chocolate Peanut Butter Swirl Cookies do it with two soft doughs wrapped together in one beautiful cookie, giving every bite a different ribbon of rich chocolate and creamy peanut butter.
They look like something that took a lot of careful effort, but the method is surprisingly simple. You make one chocolate dough, one peanut butter dough, press a little of each together, roll them gently, twist just enough to create a swirl, and bake until the edges are set while the centers stay soft.
The flavor is exactly what makes this cookie so easy to love. Chocolate brings depth and richness, peanut butter adds creamy nuttiness, and the soft cookie texture ties both sides together without letting one overpower the other.
These cookies are perfect when you want a dessert that looks special but still feels approachable. They work for parties, bake sales, weekend baking, lunchbox treats, movie nights, or any moment when chocolate and peanut butter sound like the only correct answer.
The best part is that the swirls do not need to be perfect. In fact, the slightly uneven marbled look is what makes them feel homemade, inviting, and beautiful in a relaxed way.
Table of Contents
- Why You’ll Love Chocolate Peanut Butter Swirl Cookies
- Recipe Details
- Ingredients
- Optional Variations and Add-Ins
- The Story Behind These Swirl Cookies
- Why the Swirl Technique Works
- Why Creamy Peanut Butter Is Recommended
- Directions
- Step 1: Preheat the Oven
- Step 2: Line the Baking Sheets
- Step 3: Start the Chocolate Dough Dry Mixture
- Step 4: Cream the Chocolate Dough Butter and Sugars
- Step 5: Add the Egg and Vanilla to the Chocolate Dough
- Step 6: Finish the Chocolate Dough
- Step 7: Start the Peanut Butter Dough Dry Mixture
- Step 8: Cream the Peanut Butter Dough Butter and Sugars
- Step 9: Add the Peanut Butter
- Step 10: Add the Egg and Vanilla to the Peanut Butter Dough
- Step 11: Finish the Peanut Butter Dough
- Step 12: Check Both Doughs Before Shaping
- Step 13: Portion the Doughs
- Step 14: Press the Doughs Together
- Step 15: Roll and Twist Lightly
- Step 16: Space the Cookies on the Baking Sheet
- Step 17: Add Optional Sea Salt
- Step 18: Bake the Cookies
- Step 19: Cool on the Baking Sheet
- Step 20: Optional Chocolate Drizzle
- Serving Tips
- Storage
- Freezing Baked Cookies
- Freezing Dough Balls
- Helpful Notes for Best Results
- Variations
- Troubleshooting
- Frequently Asked Questions
- Why These Cookies Are Great for Sharing
- Why This Recipe Works So Well
- Final Thoughts
- Chocolate Peanut Butter Swirl Cookies
- Recipe Details
- Ingredients
- Instructions
- Step 1: Prepare the Baking Sheet
- Step 2: Mix the Chocolate Dough Dry Ingredients
- Step 3: Make the Chocolate Dough Base
- Step 4: Finish the Chocolate Dough
- Step 5: Mix the Peanut Butter Dough Dry Ingredients
- Step 6: Make the Peanut Butter Dough Base
- Step 7: Finish the Peanut Butter Dough
- Step 8: Create the Swirl
- Step 9: Shape the Cookies
- Step 10: Bake the Cookies
- Step 11: Cool Before Serving
- Serving Suggestions
- Storage
Why You’ll Love Chocolate Peanut Butter Swirl Cookies
These cookies bring chocolate and peanut butter together in a classic, crowd-pleasing way. The chocolate dough is rich, while the peanut butter dough is creamy, sweet, and nutty.
They look impressive without being difficult. The swirl technique is simple, and even imperfect cookies still look pretty once baked.
The ingredients are pantry-friendly. Flour, cocoa powder, baking soda, salt, butter, sugars, eggs, vanilla, and peanut butter are all familiar baking basics.
The texture is soft and chewy. The edges set gently, while the centers stay slightly tender after cooling.
They are great for sharing. The swirl makes them stand out on cookie trays, dessert tables, and bake sale platters.
They are also flexible. You can add chocolate chips, use crunchy peanut butter, drizzle melted chocolate on top, use dark cocoa powder, or finish with flaky sea salt.
Recipe Details
- Recipe name: Decadent Chocolate Peanut Butter Swirl Cookies
- Oven temperature: 350°F (175°C)
- Main method: Two doughs swirled together
- Chocolate dough portion per cookie: About 1 tablespoon
- Peanut butter dough portion per cookie: About 1 tablespoon
- Baking time: 10 to 12 minutes
- Cooling time on baking sheet: 5 minutes
- Optional dough chill: 15 to 20 minutes if sticky
- Room temperature storage: Up to 5 days
- Freezer storage for baked cookies: Up to 3 months
- Frozen dough baking: Bake from frozen and add 1 to 2 extra minutes
Ingredients
Chocolate Dough
- 1 cup all-purpose flour
- ¼ cup unsweetened cocoa powder
- ½ teaspoon baking soda
- ¼ teaspoon salt
- ½ cup unsalted butter, softened
- ½ cup granulated sugar
- ¼ cup brown sugar
- 1 large egg
- 1 teaspoon vanilla extract
Peanut Butter Dough
- ¾ cup all-purpose flour
- ¼ teaspoon baking soda
- ¼ teaspoon salt
- ¼ cup unsalted butter, softened
- ¼ cup granulated sugar
- ¼ cup brown sugar
- ½ cup creamy peanut butter
- 1 large egg
- 1 teaspoon vanilla extract
Optional Variations and Add-Ins
- Semi-sweet chocolate chips
- Milk chocolate chips
- Crunchy peanut butter
- Melted chocolate for drizzling
- Dark cocoa powder
- Flaky sea salt
- 1:1 gluten-free flour blend
- Extra flour if using natural peanut butter
- Cold milk
- Coffee
- Vanilla ice cream
The Story Behind These Swirl Cookies
Chocolate and peanut butter have a way of making a cookie feel nostalgic before it even cools. The combination is rich, familiar, and comforting, like something you would hope to find in a bakery case or on a plate after dinner.
What makes these cookies special is not just the flavor combination, but the way the two doughs stay visible. Instead of blending everything into one color, the chocolate and peanut butter remain distinct, creating a marbled cookie that looks different every time.
The chocolate dough is rich and deep because of the cocoa powder. A little salt helps the chocolate flavor stand out, while brown sugar and granulated sugar keep the texture balanced.
The peanut butter dough brings the soft, nutty side. Creamy peanut butter gives it smooth flavor and helps create a tender cookie texture.
When the two doughs are pressed together, the cookie becomes more than a simple chocolate peanut butter treat. It becomes a little swirl of contrast: dark and light, rich and nutty, soft and chewy.
That is why these cookies feel fun to bake. Each one looks slightly different, and each one carries its own mix of chocolate and peanut butter in every bite.
Why the Swirl Technique Works
The swirl technique looks fancy, but it is very forgiving. You are not trying to create identical bakery-perfect cookies.
The goal is to keep both doughs visible. That means you should press them together gently, roll them lightly, and twist just enough to create a marbled effect.
If you overmix the doughs, the swirl can disappear. Instead of seeing chocolate and peanut butter ribbons, the cookie may become a blended dough.
A rough swirl is actually beautiful. The uneven pattern makes the cookies look homemade in the best way.
Using about 1 tablespoon of each dough per cookie helps keep the size balanced. It also gives every cookie a good amount of both flavors.
The cookies bake into soft rounds with distinct colors. The final look is impressive, but the process is simple enough for everyday baking.
Why Creamy Peanut Butter Is Recommended
The peanut butter dough uses ½ cup creamy peanut butter. Regular creamy peanut butter gives the smoothest texture and easiest swirl.
Natural peanut butter can work, but it may need adjustment. Because it is oilier, you may need to add 1 tablespoon more flour, and it should be stirred very well first.
For the most dependable texture, regular peanut butter such as the smooth shelf-stable kind is recommended. It blends easily with butter, sugars, egg, and vanilla.
Crunchy peanut butter can also be used if you want texture. It adds little peanut bits throughout the dough, though the swirl may look slightly less smooth.
The peanut butter flavor should be present but balanced. It should not make the dough greasy or heavy.
Choosing the right peanut butter helps the dough stay soft, scoopable, and easy to swirl with the chocolate dough.
Directions
Step 1: Preheat the Oven
Preheat your oven to 350°F (175°C). Let the oven heat fully before baking.
A steady oven temperature helps both doughs bake evenly. Since the cookies bake for only 10 to 12 minutes, the oven needs to be ready from the start.
While the oven heats, set out your baking sheets, parchment paper, mixing bowls, mixer, spatula, and cooling rack. This recipe is easier when the two doughs have their own space.
Step 2: Line the Baking Sheets
Line your baking sheets with parchment paper. This prevents sticking and makes cleanup simple.
Parchment also helps protect the swirl shape because the dough releases cleanly after baking. These cookies can be soft when warm, so a lined pan is helpful.
Set the prepared baking sheets aside. You will use them after both doughs are made.
Step 3: Start the Chocolate Dough Dry Mixture
In a medium bowl, whisk together 1 cup all-purpose flour, ¼ cup unsweetened cocoa powder, ½ teaspoon baking soda, and ¼ teaspoon salt. Mix until the cocoa is evenly distributed.
Whisking helps prevent cocoa lumps and spreads the baking soda through the flour. This gives the chocolate dough a more even texture.
You can use Dutch-processed cocoa for extra richness, or regular cocoa if that is what you have. Both options are included in the original notes.
Step 4: Cream the Chocolate Dough Butter and Sugars
In a large bowl, beat ½ cup softened unsalted butter with ½ cup granulated sugar and ¼ cup brown sugar. Mix until light and fluffy.
This should take about 2 minutes with a mixer. The mixture should look creamy and lighter in color.
Softened butter is important here. It should be soft enough to mix smoothly but not melted.
Step 5: Add the Egg and Vanilla to the Chocolate Dough
Add 1 large egg and 1 teaspoon vanilla extract to the chocolate dough butter mixture. Beat until smooth.
A room-temperature egg blends better, but the recipe can still work as long as everything is mixed well. The vanilla helps round out the chocolate flavor.
Scrape down the sides of the bowl if needed. This keeps the dough base even.
Step 6: Finish the Chocolate Dough
Gradually add the chocolate dry ingredients to the wet mixture. Mix just until combined.
The chocolate dough should be thick but not dry. Avoid overmixing, because that can make the cookies tougher.
If the chocolate dough seems too sticky, chill it for 15 minutes. Chilling makes it easier to handle and helps the swirls stay defined.
Step 7: Start the Peanut Butter Dough Dry Mixture
In another bowl, whisk together ¾ cup all-purpose flour, ¼ teaspoon baking soda, and ¼ teaspoon salt. Set this aside.
This is the dry base for the peanut butter dough. It is smaller than the chocolate dough because the peanut butter adds body.
Whisking first keeps the baking soda and salt evenly distributed. That helps the peanut butter dough bake consistently.
Step 8: Cream the Peanut Butter Dough Butter and Sugars
In a separate mixing bowl, beat ¼ cup softened unsalted butter with ¼ cup granulated sugar and ¼ cup brown sugar. Mix until creamy.
Because this dough uses less butter than the chocolate dough, it may come together quickly. Scrape the bowl so everything blends evenly.
The sugars add sweetness and moisture. Brown sugar also helps make the peanut butter dough tender.
Step 9: Add the Peanut Butter
Add ½ cup creamy peanut butter to the butter and sugar mixture. Mix until smooth.
Use regular creamy peanut butter for the best texture. If using natural peanut butter, stir it very well and be ready to add a tablespoon more flour if needed.
The mixture should look thick, creamy, and peanut-buttery. Make sure no streaks of plain butter remain.
Step 10: Add the Egg and Vanilla to the Peanut Butter Dough
Add 1 large egg and 1 teaspoon vanilla extract. Beat until combined.
The egg binds the dough and gives it structure. Vanilla softens the peanut butter flavor and makes the dough taste more complete.
Scrape the bowl if needed. A smooth dough base helps the swirl cookie bake evenly.
Step 11: Finish the Peanut Butter Dough
Add the peanut butter dry ingredients to the wet mixture. Mix just until combined.
The dough should be soft and thick. Do not overmix after the flour goes in.
If it feels sticky, chill it for 15 to 20 minutes. Chilled dough is easier to shape and swirl.
Step 12: Check Both Doughs Before Shaping
Both doughs should be soft enough to scoop but firm enough to handle. If either dough is too sticky, chill it before moving on.
The chocolate dough and peanut butter dough do not have to feel exactly the same. They only need to be manageable enough to press together.
If one dough is much softer than the other, chill the softer dough longer. This makes the swirl easier to control.
Step 13: Portion the Doughs
Take about 1 tablespoon of chocolate dough and about 1 tablespoon of peanut butter dough. Keep the portions close in size.
Balanced portions give each cookie a clear chocolate-peanut butter flavor. They also help the cookies bake evenly.
Repeat this process as you shape the cookies. Working one cookie at a time helps keep the swirl distinct.
Step 14: Press the Doughs Together
Gently press the chocolate dough and peanut butter dough together in your hands. Do not mash them into one dough.
The goal is to attach them, not blend them. You should still see both colors clearly.
If the dough sticks to your hands, chill it briefly. Sticky dough is harder to swirl neatly.
Step 15: Roll and Twist Lightly
Roll the pressed doughs lightly into a ball. Twist slightly as you place the cookie on the baking sheet.
Do not overthink the swirl. A gentle twist creates a pretty marbled pattern.
Avoid overmixing the two colors. The cookie should look swirled, not fully combined.
Step 16: Space the Cookies on the Baking Sheet
Place each swirled dough ball on the parchment-lined baking sheet. Leave space between cookies.
The cookies spread a little as they bake. Proper spacing keeps them from touching.
Do not overcrowd the baking sheet. Bake in batches if necessary.
Step 17: Add Optional Sea Salt
If using flaky sea salt, sprinkle a small amount on top before baking. This is optional.
The salt balances the sweetness and makes the chocolate and peanut butter flavors more vivid. Use a light hand.
This variation gives the cookies a sweet-salty finish. It works especially well with rich chocolate dough.
Step 18: Bake the Cookies
Bake the cookies at 350°F (175°C) for 10 to 12 minutes. The edges should be set, while the centers still look slightly soft.
Do not overbake. The cookies will firm up as they cool.
The soft centers are part of what makes the cookies chewy. Pulling them at the right time keeps the texture tender.
Step 19: Cool on the Baking Sheet
Let the cookies cool on the baking sheet for 5 minutes. This step is crucial because the cookies are delicate when hot.
The 5-minute rest helps them finish setting. It also makes them easier to move without breaking.
After resting, transfer them to a wire rack. Let them cool completely unless you plan to enjoy a few warm.
Step 20: Optional Chocolate Drizzle
If desired, drizzle cooled cookies with melted chocolate. This adds a fancy finishing touch.
Let the drizzle set before storing or stacking. Use parchment between layers if needed.
This variation makes the cookies look extra special for parties or cookie trays. It is simple but effective.
Serving Tips
These cookies are wonderful warm with cold milk. The centers are soft, and the chocolate-peanut butter flavor feels especially cozy.
They also pair well with coffee. The richness of the chocolate dough and the nuttiness of the peanut butter dough work nicely with a warm drink.
For a dessert twist, crumble them over vanilla ice cream. The swirl cookie pieces add flavor and texture.
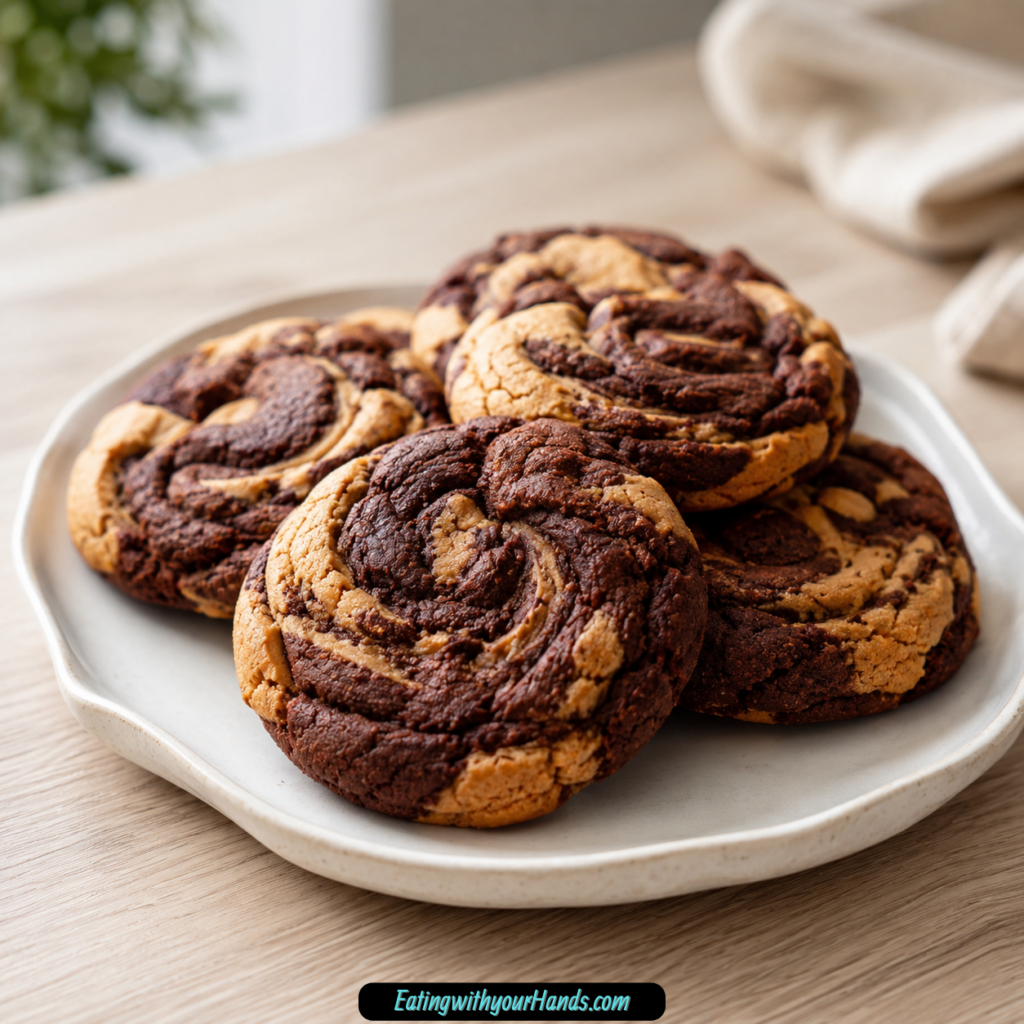
If serving at a party, arrange them so the swirls are visible. Their marbled look is part of their charm.
Let cookies cool fully if packing them for a bake sale or gift box. They hold their shape better once completely cooled.
Storage
Store cooled cookies in an airtight container at room temperature for up to 5 days. Layer with parchment paper if stacking.
The cookies stay soft when sealed well. Avoid leaving them exposed to air for too long.
If you drizzled them with chocolate, let the drizzle set before storing. This prevents smearing.
They are best within the first few days, but they remain delicious as long as they are stored properly. A quick microwave warm-up can revive day-old cookies.
Freezing Baked Cookies
These cookies freeze beautifully. Wrap cooled cookies tightly in plastic wrap, then place them in a freezer bag.
Freeze for up to 3 months. Thaw at room temperature when ready to enjoy.
Use parchment between layers if freezing several cookies together. This helps protect the swirl pattern and any drizzle.
After thawing, microwave for about 10 seconds if you want a softer, fresher texture. This brings back some of the just-baked feel.
Freezing Dough Balls
You can freeze the shaped dough balls before baking. Place them on a baking sheet and freeze until solid.
Transfer the frozen dough balls to a bag once firm. This keeps them ready for future baking.
Bake from frozen and add 1 to 2 extra minutes to the baking time. Watch for set edges and slightly soft centers.
Freezing dough is helpful for last-minute desserts. You can bake only a few cookies at a time.
Helpful Notes for Best Results
If either dough is sticky, chill it for 15 to 20 minutes. Chilled dough is easier to handle and keeps the swirls more defined.
Do not overmix when combining the two doughs. You want visible chocolate and peanut butter sections.
Use about 1 tablespoon of each dough per cookie. Cookies that are too large may not bake evenly.
Parchment paper is important. These cookies can stick to ungreased pans.
You can mix by hand if you do not have a mixer. It takes more effort to cream the butter and sugars, but it works.
Even imperfect cookies will taste good. The swirl does not need to be exact for the flavor to be wonderful.
Variations
Chocolate Chip Swirl Cookies
Add a handful of semi-sweet or milk chocolate chips to the chocolate dough. This creates extra gooey chocolate pockets.
Semi-sweet chips give a more balanced chocolate flavor. Milk chocolate makes the cookies sweeter.
Fold the chips in gently. Do not overmix the dough.
Crunchy Peanut Butter Swirl Cookies
Use crunchy peanut butter instead of creamy. This adds peanut pieces and extra texture.
The swirl may be slightly less smooth, but the flavor will still be delicious. It is a great option if you like crunch.
Use regular crunchy peanut butter for the best texture. Natural peanut butter may need adjustment.
Chocolate Drizzle Cookies
After baking and cooling, drizzle the cookies with melted chocolate. This gives them a polished finish.
Let the drizzle set before serving or storing. The cookies will look more elegant while still being easy to make.
This is a good variation for parties or gift boxes. It makes the cookies look extra special.
Dark Cocoa Swirl Cookies
Use dark cocoa powder in the chocolate dough for a deeper chocolate flavor. This makes the chocolate side richer.
The dark cocoa creates a more dramatic color contrast with the peanut butter dough. It also makes the flavor more intense.
Keep the rest of the recipe the same. Watch the texture and baking cues.
Sea Salt Swirl Cookies
Sprinkle a small amount of flaky sea salt on top before baking. This balances the sweetness.
The salt makes both the chocolate and peanut butter flavors stand out. Use only a light sprinkle.
This variation feels a little more grown-up. It is especially good with dark cocoa or chocolate drizzle.
Gluten-Free Swirl Cookies
Use a 1:1 gluten-free flour blend. The texture may be slightly different, but the cookies should still taste good.
Follow the same method and keep an eye on dough texture. Gluten-free doughs can vary.
Chill the dough if it feels sticky or soft. This helps with shaping and baking.
Troubleshooting
Why Is My Dough Sticky?
The dough may be too warm. Chill it for 15 to 20 minutes before shaping.
Sticky dough is harder to swirl and may spread more. A short chill helps both doughs firm up.
If using natural peanut butter, the dough may be oilier. Add 1 tablespoon more flour if needed.
Why Did My Swirls Disappear?
The doughs were probably overmixed when shaping. Think marble, not blend.
Press the two doughs together gently, roll lightly, and twist only a little. You should still see both colors clearly before baking.
A rough swirl is better than a fully mixed dough. Imperfect patterns look homemade and beautiful.
Why Did My Cookies Spread Too Much?
The dough may have been too warm, or the butter may have been too soft. Chill the dough before shaping next time.
Make sure your baking sheets are not hot when placing dough on them. Hot pans can make the dough spread early.
Parchment paper also helps. Ungreased pans are more likely to cause sticking and uneven spread.
Why Are My Cookies Dry?
They may have been overbaked. Remove them when the edges are set and the centers still look slightly soft.
Too much flour can also dry them out. Spoon and level flour rather than packing it.
Mix only until the ingredients are combined. Overmixing can affect texture.
Why Is the Peanut Butter Dough Oily?
Natural peanut butter may not have been stirred well, or it may be too oily for the dough. Regular creamy peanut butter gives the most reliable texture.
If using natural peanut butter, stir very thoroughly and add 1 tablespoon more flour if needed. Watch the dough consistency.
The dough should be soft but not greasy. Chill if it feels difficult to handle.
Frequently Asked Questions
Can I Use Crunchy Peanut Butter?
Yes, crunchy peanut butter can be used. It adds a nice texture to the peanut butter dough.
The swirl may not look quite as smooth, but the cookies will still taste great. Use regular crunchy peanut butter for best results.
My Dough Is Sticky. What Should I Do?
Chill the dough for 15 to 20 minutes. Cold dough is easier to handle and shape.
This also helps keep the swirls more defined. Sticky dough can blur the pattern.
Can I Freeze the Dough?
Yes, form the dough balls first, freeze them on a tray, then transfer them to a bag. Bake from frozen.
Add 1 to 2 extra minutes to the baking time. Watch for set edges and soft centers.
Why Did My Swirls Disappear While Baking?
The doughs may have been blended too much while shaping. Gentle pressing is key.
You want a marbled effect, not one combined dough. Stop mixing while both colors are still clearly visible.
Can I Make These Gluten-Free?
Yes, try a 1:1 gluten-free flour blend. The texture may be slightly different.
Keep the same baking cues. The edges should be set, and the centers should look slightly soft.
Can I Use Natural Peanut Butter?
Natural peanut butter can work, but it may need adjustment. Stir it very well first.
Because natural peanut butter is oilier, you may need to add 1 tablespoon more flour. Regular creamy peanut butter is easier and more reliable.
Can I Add Chocolate Chips?
Yes, add a handful of semi-sweet or milk chocolate chips to the chocolate dough. This gives extra gooey chocolate bites.
Fold them in gently before shaping the swirled cookies. Do not overmix.
How Should I Serve These Cookies?
Serve them warm with cold milk, with coffee, or crumbled over vanilla ice cream. They also work beautifully on dessert trays.
If serving later, store in an airtight container and warm for 10 seconds if desired. This brings back some fresh-baked softness.
Why These Cookies Are Great for Sharing
Chocolate Peanut Butter Swirl Cookies look more decorative than a simple drop cookie. That makes them a strong choice for parties and bake sales.
The marbled appearance makes each cookie unique. No two cookies need to look exactly the same.
They also have a flavor combination many people already love. Chocolate and peanut butter are familiar, rich, and satisfying.
Because they store well and freeze well, they are practical for planning ahead. You can bake them in advance or freeze dough balls for later.
They are also easy to portion. Each cookie already feels like a small, finished dessert.
Why This Recipe Works So Well
This recipe works because the two doughs balance each other. The chocolate dough brings cocoa richness, while the peanut butter dough adds nutty sweetness.
Both doughs use butter, sugars, egg, vanilla, flour, baking soda, and salt. That makes them compatible when baked together.
The swirl keeps the flavors distinct instead of blending them into one uniform cookie. Every bite has a slightly different mix of chocolate and peanut butter.
The short baking time protects the soft texture. The cookies are removed when the edges are set and the centers are still slightly soft.
The 5-minute rest on the baking sheet allows the cookies to finish setting without overbaking. This helps keep them chewy and tender.
Final Thoughts
Decadent Chocolate Peanut Butter Swirl Cookies are the kind of cookie that feels impressive without requiring complicated baking skills. With a rich chocolate dough, a creamy peanut butter dough, and a simple hand-swirled method, they bake into soft, marbled cookies that look beautiful and taste even better.
The key is keeping the doughs distinct. Make each dough separately, chill if sticky, press about 1 tablespoon of each together, roll lightly, twist gently, and avoid overmixing the colors.
Bake the cookies at 350°F (175°C) for 10 to 12 minutes, just until the edges are set and the centers still look soft. Let them cool on the baking sheet for 5 minutes before moving them to a wire rack.
Serve them with milk, coffee, or vanilla ice cream, and store leftovers in an airtight container for up to 5 days. Whether you make them for a party, bake sale, cozy night in, or chocolate-peanut butter craving, these swirl cookies bring rich flavor, soft texture, and a little homemade magic to every bite.
Chocolate Peanut Butter Swirl Cookies
These chocolate peanut butter swirl cookies bring together two classic flavors in one soft, rich cookie. The chocolate dough has deep cocoa flavor, while the peanut butter dough adds a creamy, nutty sweetness. The two doughs are gently combined to create a pretty swirled look, making these cookies a fun choice for cookie trays, bake sales, holiday boxes, or an easy homemade dessert.
Recipe Details
- Course: Cookies
Ingredients
Chocolate Dough
- ½ cup unsalted butter softened
- ½ cup granulated sugar
- ¼ cup brown sugar
- 1 large egg
- 1 teaspoon vanilla extract
- 1 cup all-purpose flour
- ¼ cup unsweetened cocoa powder
- ½ teaspoon baking soda
- ¼ teaspoon salt
Peanut Butter Dough
- ½ cup creamy peanut butter
- ¼ cup unsalted butter softened
- ¼ cup brown sugar
- ¼ cup granulated sugar
- 1 large egg
- 1 teaspoon vanilla extract
- ¾ cup all-purpose flour
- ¼ teaspoon baking soda
- ¼ teaspoon salt
Instructions
Step 1: Prepare the Baking Sheet
Line a baking sheet with parchment paper. Prepare the oven according to the temperature from your original recipe source, since the provided recipe does not include a specific baking temperature.
Step 2: Mix the Chocolate Dough Dry Ingredients
In a bowl, whisk together the all-purpose flour, unsweetened cocoa powder, baking soda, and salt for the chocolate dough.
Step 3: Make the Chocolate Dough Base
In a separate bowl, beat the softened unsalted butter, granulated sugar, and brown sugar until smooth and creamy.
Add the egg and vanilla extract, then mix until fully combined.
Step 4: Finish the Chocolate Dough
Gradually add the chocolate dough dry ingredients to the butter mixture. Mix just until a soft chocolate dough forms.
Step 5: Mix the Peanut Butter Dough Dry Ingredients
In another bowl, whisk together the all-purpose flour, baking soda, and salt for the peanut butter dough.
Step 6: Make the Peanut Butter Dough Base
In a separate bowl, beat the creamy peanut butter, softened unsalted butter, brown sugar, and granulated sugar until smooth.
Add the egg and vanilla extract, then mix until fully incorporated.
Step 7: Finish the Peanut Butter Dough
Gradually add the peanut butter dough dry ingredients to the wet mixture. Mix just until a soft peanut butter dough forms.
Step 8: Create the Swirl
Take small portions of chocolate dough and peanut butter dough and gently press them together. Roll lightly to create a swirled cookie portion, being careful not to overmix the two doughs.
Step 9: Shape the Cookies
Place the swirled dough portions on the prepared baking sheet, leaving space between each cookie.
Step 10: Bake the Cookies
Bake according to the time from the original recipe source, since the provided recipe does not include a specific baking time. The cookies should be set around the edges while still soft in the centers.
Step 11: Cool Before Serving
Let the cookies cool briefly on the baking sheet, then transfer them to a wire rack to cool further.
Serving Suggestions
- Serve with a glass of cold milk.
- Pair with hot coffee or cocoa.
- Add to holiday cookie trays.
- Pack into lunchbox treats or snack boxes.
- Include in homemade cookie gift boxes.
Storage
How to Store
Store completely cooled cookies in an airtight container at room temperature.
How to Freeze
Place cooled cookies in a freezer-safe airtight container and freeze for longer storage. Thaw before serving.
Best Texture Tip
Avoid overmixing the two doughs when creating the swirl. A gentle press and light roll keeps the chocolate and peanut butter colors distinct while helping the cookies stay soft.

Fernando is the creator and writer behind the food blog Eating with your Hands. Living and working in cities like Paris, Barcelona, and Berlin, and being married to a Canadian foodie, has given Fernando a passion and interest in food and inspired him to run EWYH.