
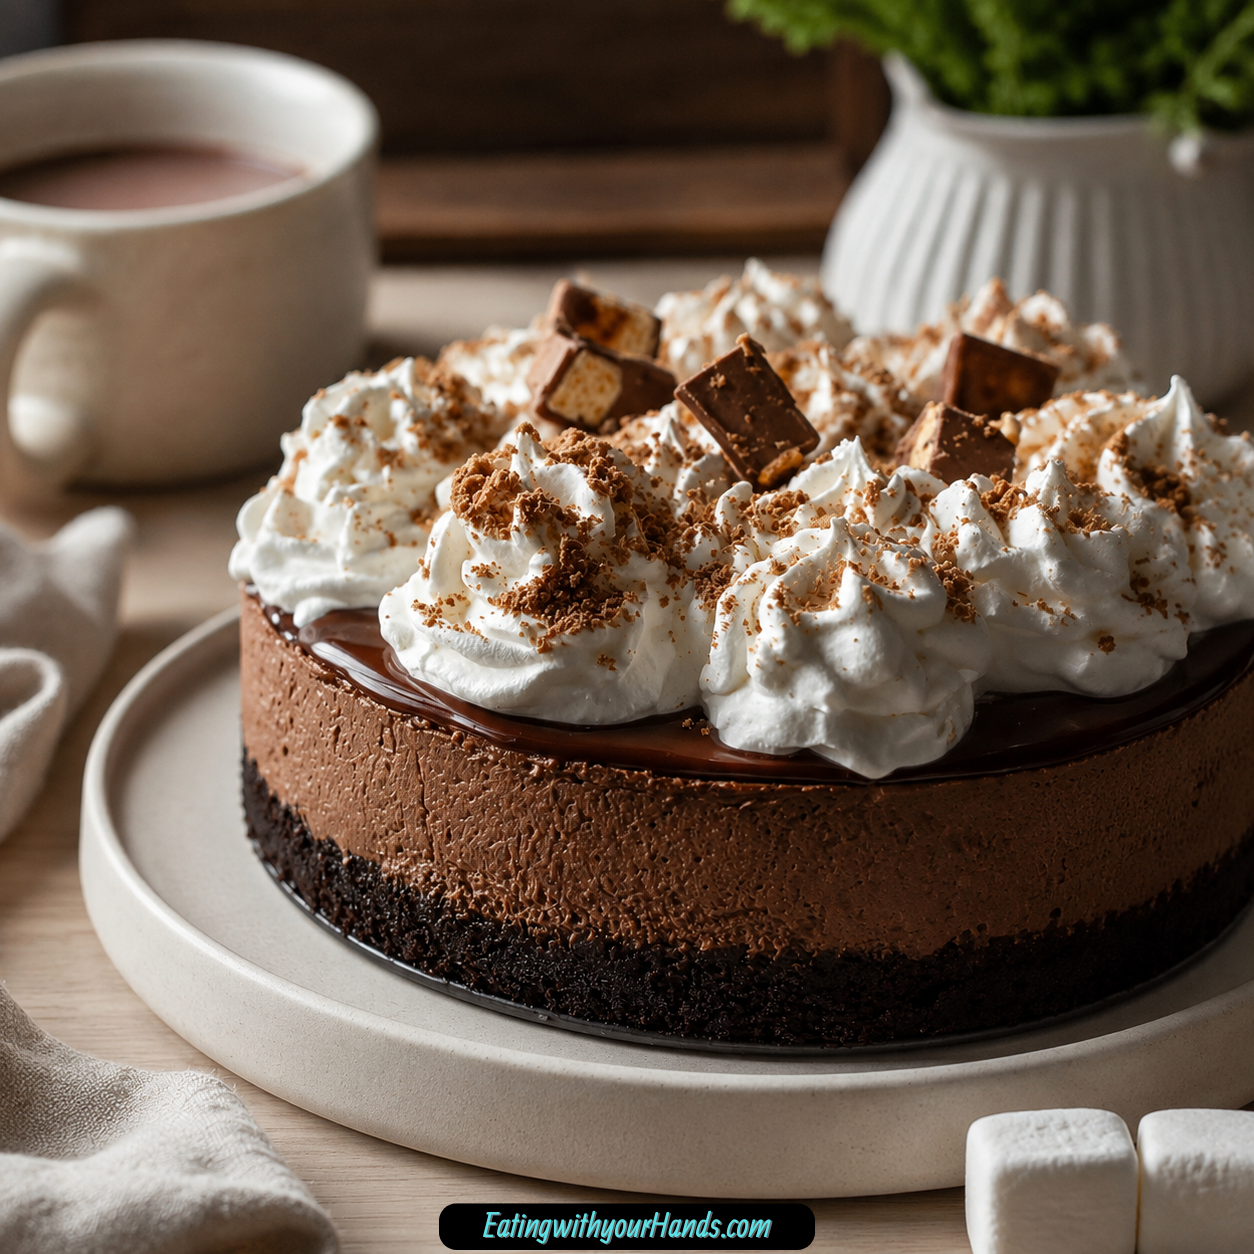
Decadent Hot Cocoa Cheesecake feels like the dessert version of pulling a soft blanket around your shoulders on a snowy evening. It brings together the creamy richness of cheesecake and the cozy sweetness of hot cocoa in a way that feels made for winter nights, holiday tables, and quiet family moments.
Every year, when the first snowflakes begin to fall, there is something comforting about reaching for a dessert that feels warm even when it is served chilled. This cheesecake captures that feeling with a chocolate cookie crust, a smooth hot cocoa cheesecake filling, and a fluffy topping of whipped cream and marshmallow fluff.
It is the kind of dessert that makes the kitchen feel full of anticipation. You can imagine kids gathering nearby, waiting for a slice, sipping cocoa, and sharing little stories from their day while the whole room feels softer and sweeter.
This Decadent Hot Cocoa Cheesecake is perfect for holiday gatherings, but it is also lovely when you simply want to brighten a cold winter day. It has that special-occasion look, yet the ingredients are familiar and simple enough to make it feel approachable.
The filling is creamy, luscious, and deeply comforting. The hot cocoa mix gives the cheesecake its cozy flavor, while the cream cheese creates that velvety texture that makes every bite feel indulgent.
This is more than a dessert for a table. It is a dessert for creating memories, especially on chilly evenings when everyone wants something sweet, rich, and full of comfort.
Table of Contents
- Why You’ll Love This Decadent Hot Cocoa Cheesecake
- Recipe Details
- Ingredients
- Optional Swaps, Variations, Add-Ins, and Serving Ideas
- Why This Recipe Works
- Directions
- Step 1: Preheat the Oven
- Step 2: Prepare the Springform Pan
- Step 3: Combine the Chocolate Cookie Crumbs and Melted Butter
- Step 4: Press the Crust into the Pan
- Step 5: Begin the Cheesecake Filling
- Step 6: Check the Texture of the Cream Cheese Mixture
- Step 7: Add the First Egg
- Step 8: Add the Second Egg
- Step 9: Add the Third Egg
- Step 10: Stir in the Hot Cocoa Mix
- Step 11: Pour the Filling Over the Crust
- Step 12: Bake the Cheesecake
- Step 13: Turn Off the Oven
- Step 14: Cool the Cheesecake in the Oven
- Step 15: Transfer the Cheesecake to the Refrigerator
- Step 16: Prepare the Heavy Cream Topping
- Step 17: Spread the Whipped Cream
- Step 18: Add the Marshmallow Fluff
- Step 19: Add Optional Serving Finishes
- Step 20: Slice and Serve Chilled
- Serving Ideas
- Storage
- Reheating
- Freezing
- Make-Ahead
- Helpful Notes for Best Results
- Variations
- Troubleshooting
- Frequently Asked Questions
- Why This Recipe Works So Well
- Final Thoughts
- Decadent Hot Cocoa Cheesecake
Why You’ll Love This Decadent Hot Cocoa Cheesecake
This Decadent Hot Cocoa Cheesecake has a quick prep time of just 30 minutes. That makes it a wonderful dessert for busy evenings when you still want something impressive and homemade.
It uses minimal ingredients that you may already have in your pantry. Chocolate cookie crumbs, butter, cream cheese, sugar, eggs, hot cocoa mix, heavy cream, and marshmallow fluff come together in a simple but memorable way.
This is a family-friendly dessert that kids and adults alike can adore. It tastes like cheesecake and hot cocoa meeting in one creamy, winter-ready slice.
It can be made ahead of time, which saves stress on special occasions. Since the cheesecake needs at least 4 hours to chill, or even overnight if you can wait, it naturally fits into a make-ahead plan.
The cheesecake is also freezer-friendly, so you can prepare it in advance and enjoy it later. Wrapped tightly, it can be frozen for up to 2 months.
Most of all, this dessert is ultimate comfort food. It combines the best parts of cheesecake and hot cocoa in a creamy dessert that feels like a big hug.
Recipe Details
Decadent Hot Cocoa Cheesecake is a baked cheesecake with a chocolate cookie crumb crust, hot cocoa cheesecake filling, and whipped cream marshmallow topping. It is rich, creamy, cozy, and designed to feel special on a winter dessert table.
The prep time is just 30 minutes. The cheesecake bakes at 325°F, or 163°C, for about 60 minutes.
After baking, the cheesecake cools in the turned-off oven for about an hour. It then chills in the refrigerator for at least 4 hours, or overnight if you can wait.
The center should be set but still slightly jiggly when the baking time is finished. It will firm up as it cools, which is why the cooling and chilling time are so important.
Leftovers can be stored in an airtight container in the fridge for up to 5 days. For longer storage, the cheesecake can be wrapped tightly in plastic wrap and frozen for up to 2 months.
Ingredients
For the Crust
- 2 cups chocolate cookie crumbs (Use store-bought chocolate crust if short on time)
- ½ cup unsalted butter, melted
For the Cheesecake Filling
- 16 oz cream cheese, at room temperature (This ensures a smooth texture)
- 1 cup granulated sugar
- 1 cup hot cocoa mix (Your favorite brand for the best flavor)
- 3 large eggs, at room temperature
For the Topping
- 1 cup heavy cream (Whip until soft peaks form for a light texture)
- 1 cup marshmallow fluff (Available in bulk, adds a fun touch)
Ingredient Notes
Chocolate cookie crumbs create the deep chocolate base for this cheesecake. If you are short on time, a store-bought chocolate crust can be used.
Melted unsalted butter helps hold the cookie crumbs together. When mixed properly, the crust mixture should look like wet sand.
Room temperature cream cheese is important because it helps create a smooth texture. Taking time with the mixing helps remove lumps and gives the filling its creamy finish.
Granulated sugar sweetens the cheesecake filling. If you use a different type of hot cocoa mix, keep in mind that different brands may have different levels of sweetness.
Hot cocoa mix gives this dessert its cozy chocolate flavor. Your favorite brand is suggested for the best flavor because that familiar cocoa taste becomes part of the cheesecake.
Room temperature eggs are added one at a time. Mixing well after each addition helps the batter become light and fluffy.
Heavy cream is whipped until soft peaks form for a light texture. It becomes the creamy topping that spreads over the chilled cheesecake.
Marshmallow fluff adds the fun hot cocoa touch. It gives the finished dessert that playful, cozy feeling you expect from a mug of hot chocolate.
Optional Swaps, Variations, Add-Ins, and Serving Ideas
Richer Chocolate Crust
Dark chocolate cookie crumbs can be used for a richer crust flavor. This variation deepens the chocolate note and makes the cheesecake feel even more indulgent.
The crust still follows the same basic idea. Cookie crumbs and melted butter come together to create the base.
Festive Peppermint Twist
A sprinkle of peppermint extract can be added to the cheesecake for a festive twist. This gives the dessert a holiday feeling while keeping the hot cocoa cheesecake flavor at the center.
Crushed candy canes can also be incorporated into the topping for a holiday theme. They add a cheerful seasonal look and a festive finish.
Dairy-Free Direction
The cream cheese can be substituted with dairy-free cream cheese for a dairy-free version. The FAQ also mentions blended silken tofu as another option that can work surprisingly well.
These swaps change the base while keeping the goal of a creamy cheesecake texture. They are helpful when you want the dessert to fit dairy-free needs.
Extra Indulgent Chocolate Layer
A layer of chocolate ganache can be added on top before the whipped cream for extra indulgence. This makes the cheesecake even more chocolate-forward.
The ganache idea is perfect when you want the dessert to feel especially rich. It sits between the cheesecake and whipped cream topping for a more dramatic finish.
Serving Finishes
A drizzle of chocolate sauce can elevate the presentation. A sprinkle of cocoa powder on top can also make the chilled cheesecake look more polished.
Pairing a slice with a warm cup of hot cocoa creates the ultimate cozy experience. It doubles down on the winter comfort that inspired the dessert in the first place.
Lighter Cheesecake Option
If you prefer a lighter cheesecake, reduced-fat cream cheese can be considered. This keeps the cheesecake idea intact while adjusting the richness.
Heavy cream remains the topping ingredient as written. The lighter option applies to the cream cheese in the filling.
Nutty Crust Option
Crushed nuts can be added to the crust mixture for a nutty flavor. This gives the chocolate crust another layer of texture and taste.
The main crust still begins with chocolate cookie crumbs and melted butter. The nuts are an optional add-in for a different flavor profile.
Gluten-Free Version
For a gluten-free version, swap the chocolate cookie crumbs with gluten-free cookies. The FAQ also mentions gluten-free chocolate cookies or graham crackers.
Always check the labels to make sure they are certified gluten-free. This keeps the dessert safe for gluten-free needs.
Chocolate Chip Add-In
Optional add-ins like chocolate chips can enhance the filling for extra texture. This makes the cheesecake even more chocolatey and fun.
The filling already has hot cocoa flavor. Chocolate chips simply bring small pockets of texture into the creamy slice.
Why This Recipe Works
Decadent Hot Cocoa Cheesecake works because it turns the feeling of a winter drink into a rich dessert. Hot cocoa mix gives the filling a familiar cozy flavor, while cream cheese turns it into something silky and sliceable.
The chocolate cookie crust supports the cheesecake with a darker, firmer base. It balances the soft filling and makes each slice feel complete.
The topping is what gives the dessert its playful hot cocoa identity. Whipped cream and marshmallow fluff echo the feeling of a cocoa mug topped with something sweet and fluffy.
The cooling and chilling process also matters. Letting the cheesecake cool in the oven helps prevent cracks, and chilling it for several hours gives it the best texture and flavor.
Directions
Step 1: Preheat the Oven
Set your oven to 325°F, or 163°C. This temperature is used to bake the cheesecake gently and help it set into a creamy texture.
Starting with a properly preheated oven gives the cheesecake the best chance to bake evenly. While the oven heats, you can prepare the chocolate crust and filling.
Step 2: Prepare the Springform Pan
Set out a springform pan for the crust and filling. This type of pan helps hold the cheesecake while it bakes and makes serving easier after chilling.
Keep the pan ready before mixing the crust. Once the cookie crumb mixture is combined, you will press it directly into the bottom.
Step 3: Combine the Chocolate Cookie Crumbs and Melted Butter
In a mixing bowl, combine 2 cups of chocolate cookie crumbs with ½ cup melted unsalted butter. Stir until the crumbs are evenly moistened.
The mixture should look like wet sand. This texture tells you the butter has coated the crumbs enough to help the crust hold together.
Step 4: Press the Crust into the Pan
Press the chocolate crumb mixture firmly into the bottom of the springform pan. The crust is key, so take your time packing it down.
The bottom of a measuring cup works well for pressing the crumbs into an even layer. A firm crust gives the cheesecake a sturdy base once it is sliced.
Step 5: Begin the Cheesecake Filling
In another bowl, add 16 oz of room temperature cream cheese and 1 cup granulated sugar. Beat them together until the mixture becomes smooth and creamy.
Take your time during this step because you want the filling to have no lumps. Room temperature cream cheese helps the ingredients blend more easily.
Step 6: Check the Texture of the Cream Cheese Mixture
Once the cream cheese and sugar are beaten together, pause and look at the mixture. It should be creamy, smooth, and evenly combined.
A smooth base makes the finished cheesecake feel velvety. This step is worth a little patience because it affects the texture of every slice.
Step 7: Add the First Egg
Add the first of the 3 large room temperature eggs to the filling. Mix well after adding it so the egg is fully incorporated.
Adding the eggs one at a time helps the batter come together gradually. This keeps the mixture smoother and helps create a light, fluffy batter.
Step 8: Add the Second Egg
Add the second egg to the bowl. Mix well again until it disappears into the cream cheese mixture.
The batter should begin to loosen slightly as the eggs are added. Keep mixing carefully so the filling stays even.
Step 9: Add the Third Egg
Add the third egg and mix well after this final addition. The batter should now look creamy and cohesive.
This step helps incorporate air into the batter. That lightness supports the cheesecake’s final texture.
Step 10: Stir in the Hot Cocoa Mix
Add 1 cup of hot cocoa mix to the cheesecake filling. Stir until it is fully combined and the batter takes on that rich cocoa character.
This is where the dessert begins to feel like hot cocoa cheesecake. The aroma becomes cozy and sweet before the cheesecake even goes into the oven.
Step 11: Pour the Filling Over the Crust
Pour the cheesecake filling over the prepared chocolate cookie crust. Make sure the filling spreads across the crust evenly.
Use a spatula to smooth the top. This helps the cheesecake look neat and pretty before baking.
Step 12: Bake the Cheesecake
Place the springform pan in the preheated oven. Bake the cheesecake for about 60 minutes.
The cheesecake is done when the center is set but still slightly jiggly. Do not worry about that gentle jiggle, because the cheesecake will firm up as it cools.
Step 13: Turn Off the Oven
Once the baking time is complete, turn off the oven. Leave the cheesecake inside the oven to begin cooling.
This slower cooling step helps prevent cracks on the surface. It also allows the cheesecake to settle gently after baking.
Step 14: Cool the Cheesecake in the Oven
Let the cheesecake cool in the turned-off oven for about an hour. This is an important step for keeping the surface smoother.
Avoid rushing the cheesecake out into a cooler room right away. The gradual cooling helps protect the creamy structure.
Step 15: Transfer the Cheesecake to the Refrigerator
After the cheesecake has cooled in the oven for about an hour, transfer it to the refrigerator. Let it chill for at least 4 hours.
If you can wait, chilling overnight is even better. This step is crucial for the best texture and flavor.
Step 16: Prepare the Heavy Cream Topping
When you are ready to serve, place 1 cup heavy cream in a bowl. Whip it until soft peaks form.
The whipped cream should be fluffy and just hold its shape. This creates a light topping that spreads beautifully over the chilled cheesecake.
Step 17: Spread the Whipped Cream
Spread the whipped cream generously over the chilled cheesecake. Do not be shy with this topping.
The whipped cream softens the richness of the cheesecake. It also gives the dessert that cozy hot cocoa feeling.
Step 18: Add the Marshmallow Fluff
Top the cheesecake with a dollop of marshmallow fluff. This final touch adds the fun, nostalgic hot cocoa vibe that makes the dessert extra special.
Marshmallow fluff makes the cheesecake feel playful and wintery. It is the finishing detail that connects the dessert back to a warm mug of cocoa.
Step 19: Add Optional Serving Finishes
If desired, finish the cheesecake with a drizzle of chocolate sauce. A sprinkle of cocoa powder can also elevate the presentation.
These serving touches are optional but beautiful. They make the cheesecake feel especially ready for a holiday table or cozy celebration.
Step 20: Slice and Serve Chilled
Serve the Decadent Hot Cocoa Cheesecake chilled for the best flavor. The cold, creamy filling holds its texture and tastes rich, smooth, and comforting.
Use the chilled cheesecake as the centerpiece of a winter dessert moment. Pair it with a warm cup of hot cocoa if you want the full cozy experience.
Serving Ideas
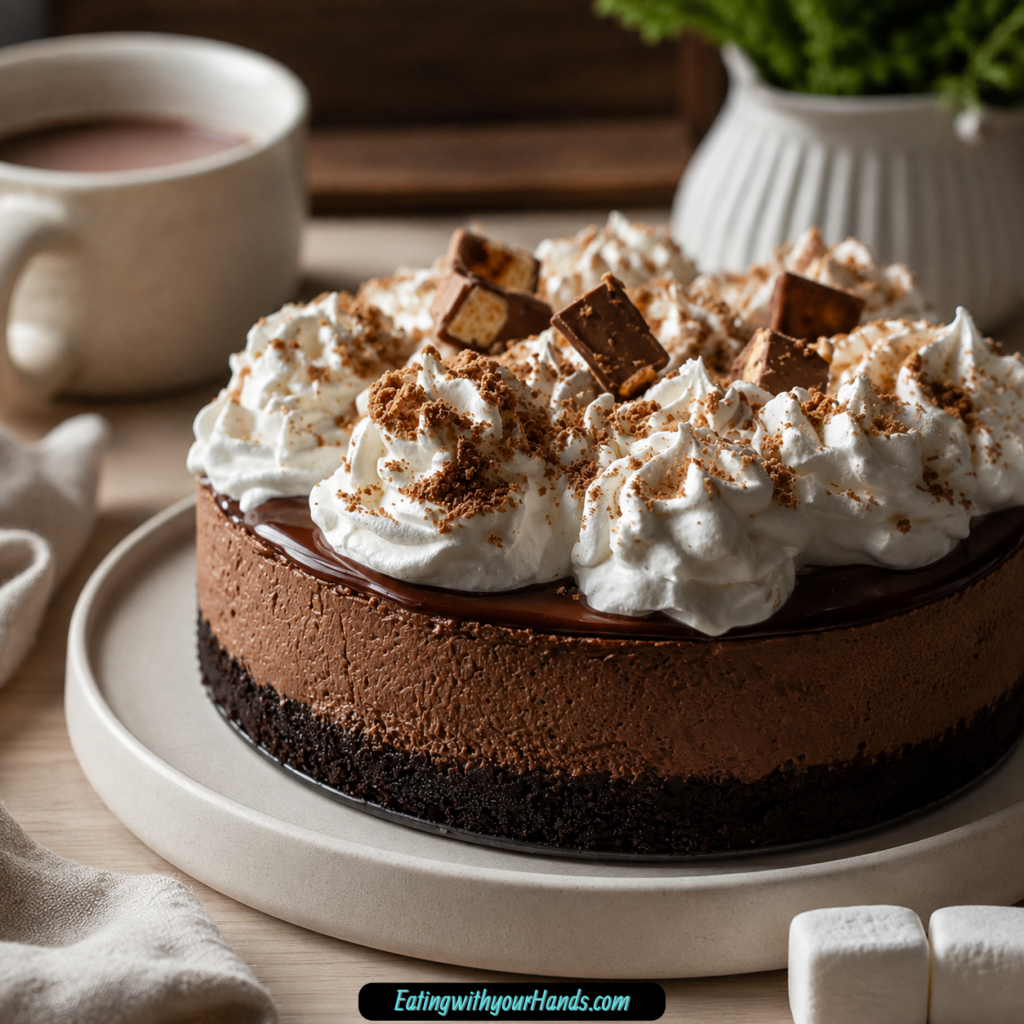
Serve Decadent Hot Cocoa Cheesecake chilled. The texture is best after the cheesecake has had time to cool, set, and rest in the refrigerator.
A drizzle of chocolate sauce can make each slice look even more indulgent. It adds shine and reinforces the chocolate flavor.
A sprinkle of cocoa powder is another simple way to elevate the presentation. It gives the top a classic cocoa-inspired finish.
For the ultimate cozy experience, serve each slice with a warm cup of hot cocoa. This pairing makes the dessert feel especially perfect for winter evenings.
The cheesecake is also a showstopper for holiday gatherings. Its creamy filling, chocolate crust, whipped cream, and marshmallow fluff make it feel festive without needing complicated decoration.
Storage
Store any leftovers in an airtight container in the fridge for up to 5 days. Keeping the cheesecake covered helps preserve its creamy texture and protects the topping.
Because this cheesecake is served chilled, it is easy to enjoy straight from the refrigerator. Slice only what you need and keep the rest covered.
Reheating
This cheesecake is served chilled, so reheating is not needed. The cold texture is part of what makes each slice smooth, creamy, and refreshing against the rich cocoa flavor.
If the cheesecake has been frozen, thaw it in the refrigerator overnight before serving. Once thawed, serve it chilled.
Freezing
You can freeze Decadent Hot Cocoa Cheesecake for up to 2 months. Wrap it tightly in plastic wrap and then in aluminum foil to prevent freezer burn.
When you are ready to enjoy it, let it thaw in the fridge overnight. This gives the cheesecake time to return to a sliceable chilled texture.
Make-Ahead
This cheesecake is a great make-ahead dessert because it needs time to chill. You can prepare it ahead for holiday gatherings or special occasions and avoid last-minute stress.
Let it chill for at least 4 hours, or overnight if you can wait. The chilling time is crucial for the best texture and flavor.
Freezing is also an option if you want to prepare the cheesecake further in advance. Wrapped tightly, it can be saved for up to 2 months.
Helpful Notes for Best Results
Make sure your cream cheese is at room temperature for optimal mixing. This helps the filling become smooth instead of lumpy.
Room temperature eggs are also used in the filling. Adding them one at a time and mixing well after each addition helps the batter become light and fluffy.
If you prefer a lighter cheesecake, consider using reduced-fat cream cheese. This keeps the cheesecake creamy while adjusting the richness.
For a nutty flavor, crushed nuts can be added to the crust mixture. This gives the chocolate crust extra texture and a different flavor note.
For a gluten-free version, swap chocolate cookie crumbs with gluten-free cookies. You can also use gluten-free chocolate cookies or graham crackers, making sure to check the labels for certified gluten-free status.
Optional add-ins like chocolate chips can enhance the filling for extra texture. They add another chocolate element to the hot cocoa cheesecake.
Variations
Dark Chocolate Crust Cheesecake
Use dark chocolate cookie crumbs for a richer crust flavor. This variation makes the base taste deeper and more intense.
The filling stays creamy and hot-cocoa inspired. The darker crust simply gives the dessert a bolder chocolate foundation.
Peppermint Hot Cocoa Cheesecake
Add a sprinkle of peppermint extract to the cheesecake for a festive twist. This turns the dessert into a holiday-style hot cocoa cheesecake.
Crushed candy canes can also be incorporated into the topping. They make the cheesecake feel cheerful and seasonal.
Dairy-Free Hot Cocoa Cheesecake
Substitute the cream cheese with dairy-free cream cheese for a dairy-free version. Blended silken tofu is another option mentioned as a surprisingly workable substitute.
This variation focuses on keeping the cheesecake creamy while adjusting the dairy. The marshmallow topping and other ingredients should be considered based on the version you choose.
Chocolate Ganache Hot Cocoa Cheesecake
Try adding a layer of chocolate ganache on top before the whipped cream for extra indulgence. This gives the cheesecake another layer of chocolate richness.
It makes the dessert feel more dramatic and dessert-table ready. The whipped cream and marshmallow fluff still bring the hot cocoa feeling.
Gluten-Free Hot Cocoa Cheesecake
Swap the chocolate cookie crumbs with gluten-free cookies for a gluten-free version. Gluten-free chocolate cookies or graham crackers are both mentioned as options.
Check the labels to make sure they are certified gluten-free. That step helps keep the dessert appropriate for gluten-free needs.
Extra Texture Cheesecake
Add chocolate chips to the filling for extra texture. This gives each bite little chocolate pieces inside the creamy hot cocoa filling.
Crushed nuts can also be added to the crust mixture for a nutty flavor. These add-ins make the cheesecake feel more layered.
Troubleshooting
The Filling Has Lumps
Make sure the cream cheese is at room temperature before mixing. Room temperature cream cheese blends more smoothly with the sugar.
Take your time beating the cream cheese and sugar until smooth and creamy. This step helps prevent lumps in the finished cheesecake.
The Cheesecake Cracks
After baking, turn off the oven and let the cheesecake cool inside for about an hour. This helps prevent cracks on the surface.
A slower cooling process is gentle on cheesecake. It lets the filling settle without a sudden temperature change.
The Center Looks Slightly Jiggly
The center should be set but still slightly jiggly when the cheesecake is done. This is expected, and it will firm up as it cools.
Do not assume the cheesecake needs more baking just because of a slight jiggle. The chilling time will finish setting the texture.
The Cheesecake Is Too Soft to Slice
Make sure the cheesecake chills for at least 4 hours before serving. If you can wait, overnight chilling gives even better texture.
This step is crucial for the best texture and flavor. A properly chilled cheesecake slices more cleanly and tastes creamier.
The Crust Does Not Hold Together
The crust mixture should look like wet sand after the cookie crumbs and melted butter are combined. If it is not pressed firmly, it may crumble.
Use the bottom of a measuring cup to pack the crust into the springform pan. A firm crust gives the cheesecake a stronger base.
The Flavor Is Sweeter Than Expected
Different hot cocoa mixes may have varying levels of sweetness. If using a different cocoa mix, you might want to adjust the sugar to get the right balance.
This is especially helpful when using your favorite brand. Taste preferences can change depending on how sweet that mix is.
Frequently Asked Questions
Can I freeze the Decadent Hot Cocoa Cheesecake?
Absolutely, you can freeze the cheesecake for up to 2 months. Wrap it tightly in plastic wrap and then in aluminum foil to prevent freezer burn.
When you are ready to enjoy it, let it thaw in the fridge overnight. Serve it chilled once it has thawed.
What can I use instead of cream cheese?
If you are looking for a substitute, mascarpone cheese can be used for a similar creamy texture. For a dairy-free option, try dairy-free cream cheese or blended silken tofu.
These options can help you adjust the cheesecake while keeping a creamy filling. Choose the one that best fits the kind of texture and dietary need you want.
How do I make this cheesecake gluten-free?
To make this cheesecake gluten-free, swap the chocolate cookie crumbs with gluten-free chocolate cookies or graham crackers. Make sure to check the labels to ensure they are certified gluten-free.
This keeps the crust aligned with gluten-free needs. The filling can remain focused on cream cheese, sugar, eggs, and hot cocoa mix.
Can I use a different type of cocoa mix?
Yes, you can use any hot cocoa mix you love. Different brands may have varying levels of sweetness.
Because of that, you might want to adjust the sugar in the recipe accordingly to get the perfect balance. Your favorite cocoa mix will help shape the final flavor.
Can I make this cheesecake ahead of time?
Yes, this cheesecake is perfect for making ahead. It needs at least 4 hours to chill, and overnight chilling is even better if you can wait.
This makes it helpful for special occasions and holiday gatherings. You can prepare it before the busy moment and serve it chilled when ready.
What can I serve with this cheesecake?
Serve it chilled with a drizzle of chocolate sauce or a sprinkle of cocoa powder on top. A warm cup of hot cocoa makes the pairing especially cozy.
The whipped cream and marshmallow fluff already give the cheesecake a hot cocoa feeling. The extra cocoa drink simply turns it into a full winter dessert experience.
Why This Recipe Works So Well
Decadent Hot Cocoa Cheesecake works so well because it takes two beloved comforts and lets them share the same slice. Cheesecake gives the dessert its creamy richness, while hot cocoa mix brings that familiar winter warmth.
The chocolate cookie crust makes the base sturdy and flavorful. It supports the filling while adding another layer of chocolate.
The whipped cream topping keeps the dessert from feeling too heavy. Marshmallow fluff adds the playful finishing touch that makes it feel like hot cocoa.
The recipe is also practical for entertaining because it can be made ahead, chilled overnight, or frozen for later. That makes it a dependable showstopper for holiday gatherings and special occasions.
Most importantly, it feels personal. It belongs to the kind of chilly evening where families gather, laughter fills the kitchen, and dessert becomes part of the memory.
Final Thoughts
Decadent Hot Cocoa Cheesecake is the dessert to make when you want something creamy, cozy, and unforgettable. It feels like winter comfort in cheesecake form, with chocolate, creaminess, whipped topping, and marshmallow sweetness all coming together.
I hope this cheesecake brings warmth to your table and smiles to the people you love. Slice it chilled, serve it with hot cocoa if you like, and let every bite become part of a sweet winter memory.
Decadent Hot Cocoa Cheesecake
Rich, creamy, and deeply chocolatey, this Decadent Hot Cocoa Cheesecake brings the cozy flavor of hot cocoa into a smooth baked dessert. A chocolate cookie crust, marshmallow fluff topping, and soft whipped cream finish make it a sweet choice for holidays, gatherings, or any time you want a chocolate dessert with a warm cocoa-inspired feel.
Recipe Details
- Prep Time: 30 minutes
- Cook Time: 1 hour
- Total Time: 1 hour 30 minutes
- Course: Dessert
- Cuisine: American
- Servings: 8 people
- Calories: 450 kcal
Equipment
- Springform pan
- Mixing bowl
Ingredients
For the Crust
- 2 cups chocolate cookie crumbs Use store-bought chocolate crust if short on time
- ½ cup unsalted butter Melted
For the Cheesecake Filling
- 16 oz cream cheese Room temperature
- 1 cup hot cocoa mix Your favorite brand
- 3 large eggs Room temperature
- 1 cup granulated sugar
For the Topping
- 1 cup marshmallow fluff Available in bulk
- 1 cup heavy cream Whip until soft peaks form
Instructions
Step 1: Preheat the Oven
Preheat the oven to 325°F (163°C).
Step 2: Make the Chocolate Crust
In a mixing bowl, combine chocolate cookie crumbs and melted butter. Press the mixture into the bottom of a springform pan to form the crust.
Step 3: Beat the Cream Cheese and Sugar
In another bowl, beat cream cheese and sugar until smooth. Keep mixing until the filling base looks creamy and evenly combined.
Step 4: Add the Eggs and Hot Cocoa Mix
Add eggs one at a time, mixing well after each addition. Stir in hot cocoa mix until fully combined.
Step 5: Fill and Bake the Cheesecake
Pour the cheesecake filling over the crust and smooth the top. Bake for 60 minutes or until the center is set.
Step 6: Cool and Chill
Let the cheesecake cool, then refrigerate for at least 4 hours or overnight.
Step 7: Add the Topping
Before serving, whip heavy cream until soft peaks form and spread it over the cheesecake. Top with marshmallow fluff.
Notes
- For a richer flavor, use dark chocolate cookie crumbs for the crust.
Serving Suggestions
Serve this Decadent Hot Cocoa Cheesecake chilled so the filling is set and creamy. The whipped cream and marshmallow fluff give each slice a soft, sweet topping that matches the hot cocoa flavor.
This cheesecake works well as a holiday dessert, a winter gathering treat, or a rich chocolate dessert for any special occasion. For a deeper chocolate flavor, use dark chocolate cookie crumbs for the crust as noted.
Storage
How to Store
Refrigerate the cheesecake for at least 4 hours or overnight after it cools. The recipe does not provide any additional storage duration, so no exact storage time is added here.
Chill Time
The cheesecake needs to be refrigerated for at least 4 hours or overnight before serving. This helps the center set fully and gives the dessert a smoother slice.
Topping Tip
Add the whipped cream and marshmallow fluff before serving. This keeps the topping soft, fresh, and ready to enjoy.
Best Flavor Tip
For a richer flavor, use dark chocolate cookie crumbs for the crust.

Fernando is the creator and writer behind the food blog Eating with your Hands. Living and working in cities like Paris, Barcelona, and Berlin, and being married to a Canadian foodie, has given Fernando a passion and interest in food and inspired him to run EWYH.