
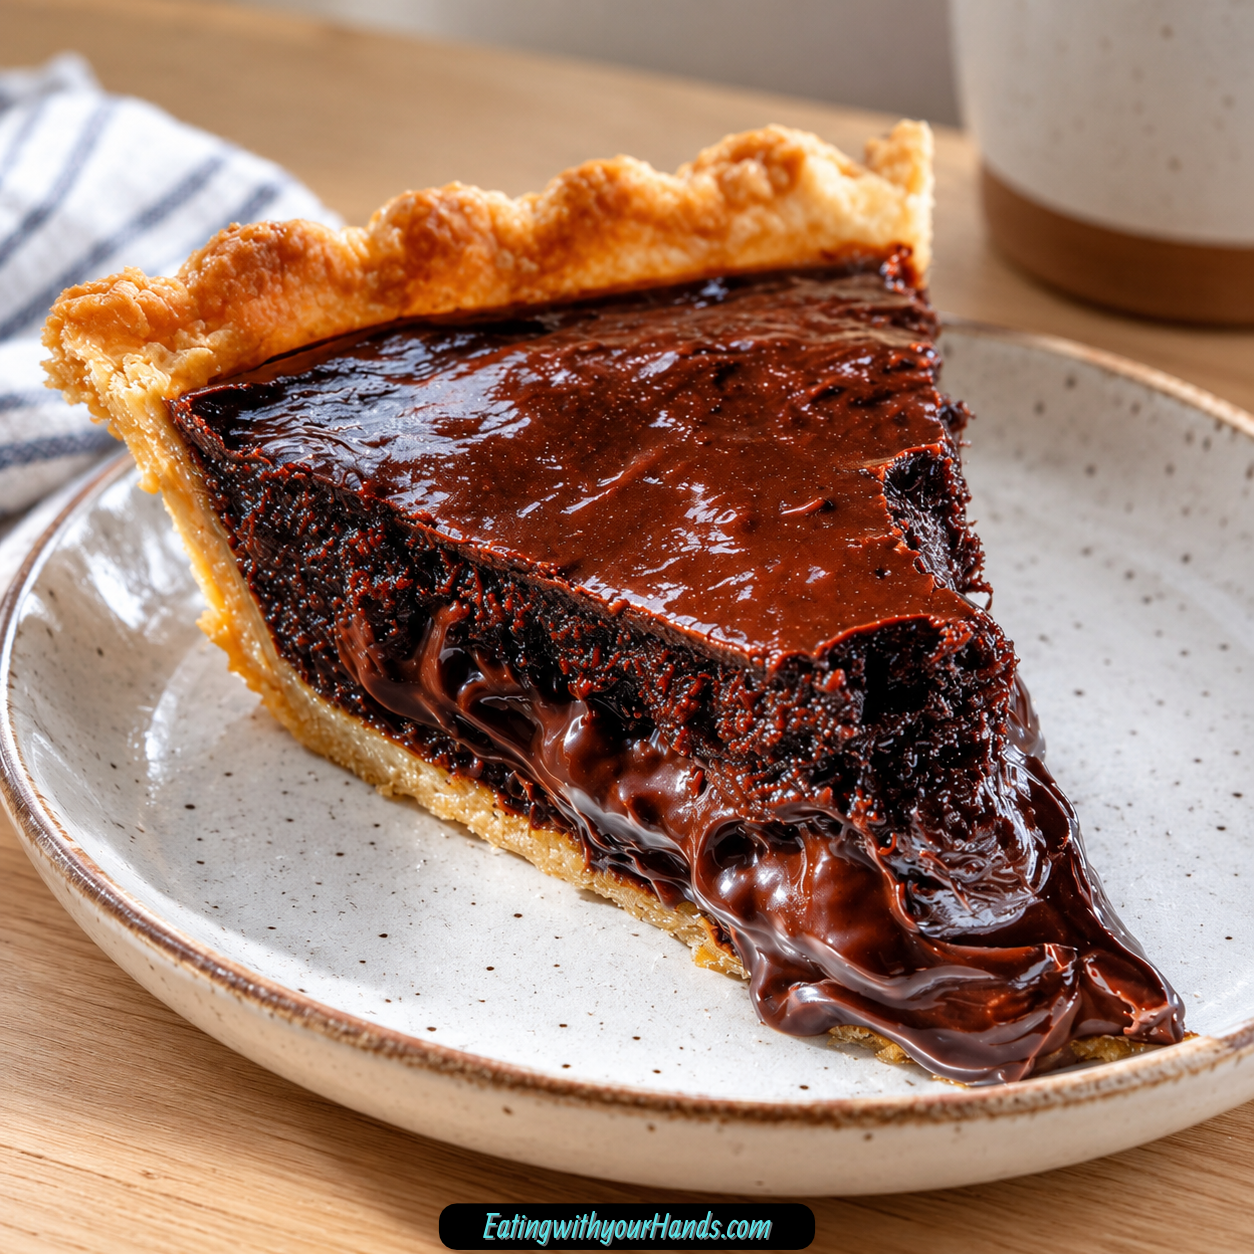

There is a very particular moment that makes this pie unforgettable: the second a fork breaks through the flaky crust and reaches that warm chocolate center. The edges are baked just enough to hold their shape, but the middle stays soft, dense, and gloriously fudgy, almost as though the filling cannot decide whether it wants to be pie, brownie, or molten chocolate.
That contrast is exactly what made Decadent Hot Fudge Pie one of the desserts I started bringing whenever I wanted people to remember what I served. I have watched entire tables grow strangely quiet after the first bite, followed almost immediately by someone asking whether there is enough left for another slice.
I have made this pie for potlucks, book club gatherings, and visits from my chocolate-loving niece, and it has become one of those desserts I trust when I do not want to gamble on the outcome. It looks dramatic when sliced warm, yet the actual preparation is surprisingly uncomplicated.
The filling comes together with butter, bittersweet chocolate, sugar, cocoa powder, eggs, vanilla, and salt before being poured into a pre-baked crust. There is no elaborate decorating step or complicated pastry technique standing between you and that deep chocolate center.
What matters most is how you bake it. The edges should become set while the middle keeps a gentle jiggle, because that slight movement is what protects the fudgy texture you are waiting for.
Leave it in the oven too long and the center becomes firmer. Pull it at the right moment, give it time to cool, and every slice carries that soft chocolate richness that makes this pie so hard to forget.
I also love that it feels far more elaborate than the process suggests. About 15 minutes of preparation can give you a dessert that looks like it belongs at the end of a special dinner rather than something mixed together in one bowl.
And then there is the smell while it bakes. Warm chocolate, butter, cocoa, and vanilla fill the kitchen in a way that makes waiting for the cooling period feel much longer than 30 minutes.
Table of Contents
- Why You’ll Love This Decadent Hot Fudge Pie
- Ingredients for Decadent Hot Fudge Pie
- Why Good Chocolate Matters
- The Importance of the Eggs
- Why Salt and Vanilla Still Matter
- Using a Pre-Baked Pie Crust
- How to Make Decadent Hot Fudge Pie
- How to Read the Jiggle Test
- Pro Tips for the Best Hot Fudge Pie
- How to Avoid Overbaking
- Semi-Sweet Chocolate Variation
- Milk Chocolate Variation
- Coconut Oil Substitution
- Serving Decadent Hot Fudge Pie
- Serve It With Vanilla Ice Cream
- Freshly Whipped Cream
- Fresh Raspberries
- Storage
- Microwave Reheating
- Oven Reheating
- How to Freeze Decadent Hot Fudge Pie
- Why Did My Pie Crack?
- What to Do if the Filling Overflows
- Frequently Asked Questions
- Nutritional Information
- The Chocolate Pie I Trust When I Want to Impress
- Decadent Hot Fudge Pie Recipe
Why You’ll Love This Decadent Hot Fudge Pie
The first reason is the texture. The outer filling sets enough to slice cleanly, while the center remains soft and fudgy rather than baking into a dry chocolate layer.
The second reason is how little effort the pie requires. Once the crust is ready, the filling is essentially a matter of melting, whisking, pouring, and baking.
The chocolate flavor is intense without requiring a long ingredient list. Bittersweet chocolate and cocoa powder work together to create a deeper chocolate profile than either one would bring alone.
It also has the kind of appearance that immediately feels special. A warm slice with a soft center already looks indulgent before you add ice cream, whipped cream, sea salt, or raspberries.
This is also an easy dessert to adapt in small ways. Semi-sweet chocolate can replace bittersweet, coconut oil can replace butter, and milk chocolate can be used with a reduced amount of sugar.
Most importantly, it is a reliable crowd-pleaser for anyone who loves chocolate. The combination of flaky crust and warm fudge-like filling tends to make second slices very difficult to resist.
Ingredients for Decadent Hot Fudge Pie
Every ingredient contributes directly to the texture or flavor of the pie, so there is very little clutter in the list. The crust gives structure, the butter and chocolate create richness, the eggs help the filling set, and the cocoa deepens the chocolate character even further.
- 1 pre-baked pie crust, homemade or store-bought
- ½ cup unsalted butter
- 1 cup bittersweet chocolate, chopped
- 1 cup granulated sugar
- ¼ cup cocoa powder
- 3 large eggs
- 1 teaspoon vanilla extract
- ¼ teaspoon salt
A 60% cacao bittersweet chocolate is a preferred choice for the filling. Semi-sweet chocolate can also work when you want slightly less bitterness.
Dutch-processed cocoa brings an especially rich chocolate flavor. Whatever cocoa you use, measure the ¼ cup carefully so the balance between cocoa, chocolate, eggs, and sugar stays intact.
Why Good Chocolate Matters
Chocolate is the heart of this pie, so its flavor remains noticeable in every bite. Using a chocolate you genuinely enjoy makes a difference because there are no strong spices or other flavors trying to cover it.
The recipe uses 1 cup chopped bittersweet chocolate. A 60% cacao chocolate gives the filling intensity while still allowing the sugar and vanilla to round out the flavor.
Semi-sweet chocolate can replace the bittersweet using the same amount. The finished pie will taste a little sweeter and slightly softer in its chocolate intensity.
Milk chocolate can also be used, but it changes the sweetness much more dramatically. In that case, reduce the granulated sugar from 1 cup to ¾ cup.
The Importance of the Eggs
Three large eggs give the filling enough structure to set around the edges while still leaving the center fudgy. Room-temperature eggs mix into the warm chocolate mixture more smoothly.
Adding the eggs one at a time also helps them incorporate evenly. This keeps the filling glossy and cohesive instead of forcing all of the egg into the chocolate at once.
The eggs should not be omitted. They are essential to the signature texture that separates this pie from a simple chocolate sauce poured into a crust.
The goal is not to beat a large amount of air into them. Whisk only enough to create a smooth, thick batter.
Why Salt and Vanilla Still Matter
One teaspoon vanilla extract may seem small compared with an entire cup of chocolate and another quarter cup of cocoa, but it rounds out the sweetness and chocolate flavor. Use a vanilla you enjoy because its aroma becomes part of the finished filling.
The ¼ teaspoon salt has an equally important role. It balances the sweetness and prevents the chocolate from tasting flat.
These two ingredients are added near the end of mixing. By that point, the chocolate, butter, sugar, cocoa, and eggs have already formed the base of the filling.
Together, vanilla and salt help the chocolate taste fuller without changing the essential character of the pie. They are subtle additions, but leaving them out would make the final flavor less complete.
Using a Pre-Baked Pie Crust
A pre-baked crust gives the chocolate filling a firm foundation and helps preserve the contrast between flaky pastry and soft center. Either homemade or store-bought crust works.
Pre-baking is preferred because it protects the crust from becoming overly soft beneath the moist filling. If necessary, you can skip the pre-baking step, but expect the crust to be somewhat softer.
The filling only reaches partway up the crust when first poured. That is normal because it rises as it bakes.
Do not assume the pie is underfilled simply because the raw mixture looks low. The baking stage changes both the height and texture.
How to Make Decadent Hot Fudge Pie
The method is simple, but temperature and timing deserve attention because the filling depends on staying soft in the center. Melt the chocolate gently, mix the eggs carefully, and rely on the jiggle rather than waiting for the entire pie to become firm.
Step 1: Preheat the Oven
Preheat the oven to 350°F (175°C) before starting the filling. Giving the oven enough time to reach the proper temperature helps the edges begin setting at the right pace once the pie goes in.
Set the pre-baked crust nearby so it is ready when the chocolate filling is finished. A glass pie plate is especially useful because it helps reduce excessive browning around the crust.
Do not rush the preheating stage. A properly heated oven makes the baking time more predictable and helps protect the texture you want.
Step 2: Melt the Butter and Chocolate Slowly
Place ½ cup unsalted butter and 1 cup chopped bittersweet chocolate in a saucepan over low heat. Stir constantly as the butter melts and begins carrying heat through the chocolate.
When only a few small chocolate pieces remain, remove the pan from the heat. Residual warmth will finish melting those last pieces without exposing the chocolate to unnecessary direct heat.
Continue stirring off the heat until the mixture is completely smooth. This gentle approach reduces the chance of scorching and creates an even base for the remaining ingredients.
Step 3: Whisk in the Sugar and Cocoa
Add 1 cup granulated sugar to the warm chocolate mixture and whisk until evenly distributed. Follow with ¼ cup cocoa powder and continue whisking until no obvious dry pockets remain.
The mixture will become thicker and darker at this stage. That dense appearance is normal and will loosen slightly once the eggs are incorporated.
Work carefully around the edges and bottom of the pan or bowl. Cocoa can hide in small dry pockets, so make sure the mixture looks uniform before moving on.
Step 4: Add the Eggs One at a Time
Add the first room-temperature egg and whisk until completely incorporated. Repeat with the second and third eggs, giving each one enough time to disappear into the chocolate mixture before adding the next.
The batter should gradually become shinier and smoother. Avoid aggressive beating because the goal is a fudgy filling rather than an airy chocolate cake texture.
Room-temperature eggs blend more naturally with the warm chocolate. They also reduce the temperature shock that can make the mixture harder to combine.
Step 5: Finish With Vanilla and Salt
Add 1 teaspoon vanilla extract and ¼ teaspoon salt. Whisk until both are distributed evenly through the thick chocolate batter.
At this point, the filling should look glossy and cohesive, almost like very thick chocolate pudding before it sets. Scrape around the sides to make sure no unmixed streaks remain.
Do not keep mixing once everything looks uniform. The batter is ready as soon as the final ingredients have disappeared smoothly into the chocolate.
Step 6: Pour the Filling Into the Crust
Set the pre-baked pie crust on a stable surface and carefully pour in the chocolate mixture. Use a spatula if necessary to transfer every bit of filling from the pan.
Do not worry if the raw filling only comes partway up the crust. It will rise while baking, so the initial height is exactly what you should expect.
Smooth the surface gently without pressing or stirring the filling inside the crust. Once even, move the pie directly to the oven.
Step 7: Bake Until the Edges Set
Bake at 350°F for 25–30 minutes. Begin watching the texture toward the earlier end of that window because overbaking is the quickest way to lose the soft fudge-like center.
The edges should look clearly set. The center, however, should still move slightly when you gently shake the pie.
Think of the movement as a soft Jell-O-like jiggle rather than loose liquid. If the center is completely firm before the pie leaves the oven, the final texture will be less gooey.
Step 8: Cool Before Slicing
Remove the pie from the oven and let it cool gradually on the counter. Avoid exposing it to a sudden dramatic temperature change.
Let it rest for at least 30 minutes before slicing. This gives the filling time to finish setting while preserving the softer center.
Cutting immediately can cause the filling to run more than intended. The short cooling period gives you a better balance between molten softness and sliceable structure.

How to Read the Jiggle Test
The jiggle test is one of the most useful indicators of doneness for this pie. You want movement in the center, but you do not want the filling to look completely liquid.
Gently move the pie plate and watch the center. It should wobble in a cohesive way while the outer portion remains stable.
If there is no movement at all, the pie has likely baked beyond the ideal fudgy stage. It can still taste good, but the interior will be firmer.
Trust the carryover setting that happens during cooling. The center continues firming after the pie leaves the oven, which is why it does not need to look fully baked while still inside.
Pro Tips for the Best Hot Fudge Pie
Use room-temperature eggs for easier incorporation. Cold eggs can make the warm chocolate mixture harder to blend smoothly.
Melt the chocolate over low heat and remove it while a few pieces remain. Residual heat is enough to finish the melting without risking scorching.
A glass pie plate is a useful choice because it can help prevent excessive browning. It also makes it easier to watch what is happening around the crust.
Start checking the pie at 25 minutes. The center should still jiggle slightly when you remove it.
Do not skip the 30-minute cooling period. That rest gives the filling enough structure to slice without destroying the fudgy interior.
How to Avoid Overbaking
Overbaking is the most common reason the filling loses its molten quality. The pie should not look completely solid when it comes out of the oven.
Watch the outer ring first. Once that portion looks set, shift your attention to the movement in the center.
Remove the pie while the middle still jiggles. The residual heat will continue setting the filling as it rests.
If you wait until the middle becomes motionless, the result will be more cake-like. Delicious chocolate flavor remains, but the signature gooey texture becomes less pronounced.
Semi-Sweet Chocolate Variation
Semi-sweet chocolate can replace the bittersweet chocolate using the same 1-cup amount. This version tastes a little sweeter and less intense.
Keep the remaining ingredients unchanged. The pie will still develop the same fudgy texture when baked correctly.
This substitution works especially well for people who find bittersweet chocolate too strong. It preserves the chocolate character without pushing the dessert as dark.
Milk Chocolate Variation
Milk chocolate can also replace bittersweet chocolate. Because milk chocolate brings significantly more sweetness, reduce the granulated sugar to ¾ cup.
Keep the amount of chocolate at 1 cup. The eggs, cocoa, vanilla, salt, and baking method remain the same.
The finished pie will taste noticeably sweeter and milkier. The texture still works, but the flavor moves away from the deeper bittersweet profile.
Coconut Oil Substitution
Coconut oil can replace the unsalted butter at a 1:1 ratio. Use ½ cup coconut oil in place of the ½ cup butter.
Expect the flavor to shift slightly. The fat still supports the chocolate filling, but the finished pie will not taste exactly like the butter version.
Follow the same gentle melting process. Combine the coconut oil and chocolate over low heat and proceed with the remaining ingredients once smooth.
Serving Decadent Hot Fudge Pie
This pie is rich enough to serve completely on its own. A warm slice already gives you the contrast between flaky crust, set edges, and soft chocolate center.
Still, a few simple toppings can make it feel even more luxurious. Vanilla bean ice cream, fresh whipped cream, flaky sea salt, and raspberries all bring a different kind of contrast.
Serve the pie slightly warm when you want the center at its softest. At cooler temperatures, the filling becomes firmer and more truffle-like.
That means the same pie can offer two different experiences depending on how you serve it. Warm emphasizes gooey richness, while cooler slices feel denser.
Serve It With Vanilla Ice Cream
A scoop of vanilla bean ice cream is one of the most satisfying additions. The cold ice cream begins melting against the warm pie and creates a creamy contrast with the dark chocolate.
Place the scoop directly beside or on top of the slice. Let it soften naturally instead of waiting until the pie has completely cooled.
This pairing is especially useful if you prefer a little milder sweetness around the intense chocolate filling. Vanilla gives your palate something softer between fudgy bites.
Freshly Whipped Cream
Fresh whipped cream adds a lighter creamy element. It is especially good when you want the pie to remain the main flavor rather than adding another strong ingredient.
Dollop it onto each slice just before serving. The softness of the cream echoes the center while still creating a cooler contrast.
A little flaky sea salt can be scattered over the top for special occasions. The salt sharpens the chocolate flavor and adds a subtle savory note.
Fresh Raspberries
Fresh raspberries bring tartness to the plate. Their acidity cuts through the rich chocolate and makes each bite feel a little brighter.
Serve a few alongside the slice rather than covering the pie completely. That way the fruit stays a contrast instead of becoming the primary flavor.
The dark chocolate and tart berry combination also makes the presentation feel especially polished. It is a simple addition that changes the entire experience of the plate.
Storage
Cover leftover pie loosely with plastic wrap and refrigerate for up to 3 days. Keep the pie chilled between servings.
The filling firms as it cools, so refrigerated slices will not have the same molten texture as a freshly warm piece. A short reheating restores much of that softness.
The crust can begin becoming soggier after the second day. Reheating in the oven is the best way to revive some of its crispness.
Microwave Reheating
Place a single slice on a microwave-safe plate. Heat for about 10–15 seconds, just until the center becomes warm and softer again.
Do not microwave for too long. The goal is to restore the gooey texture, not continue cooking the filling.
Check after the first short interval. A little warmth is often enough to make refrigerated chocolate noticeably softer.
Oven Reheating
For leftover slices with a softer crust, place them on a baking sheet. Warm at 300°F for about 5 minutes.
The oven method helps crisp the crust more effectively than the microwave. It also warms the filling more gently.
Serve immediately after reheating. The center becomes softer as it warms, while the pastry regains some of its original texture.
How to Freeze Decadent Hot Fudge Pie
Let the pie cool fully before freezing. Wrap individual slices tightly in plastic wrap, then add a protective layer of foil.
Freeze for up to 2 months. Individual wrapping makes it easy to thaw only the number of slices you want.
Move frozen slices to the refrigerator and thaw overnight. Warm slightly before serving if you want the soft fudgy texture back.
Keep the wrapping secure during freezing to protect the chocolate and crust. Once thawed, unwrap before reheating.
Why Did My Pie Crack?
Overbaking is one common cause of cracking. Leaving the filling in the oven until the center is completely firm removes more moisture and can make the surface split.
Sudden temperature changes can also contribute. Let the pie cool gradually on the counter instead of moving it immediately from a hot oven into a very cold environment.
A cracked surface does not mean the dessert is ruined. The flavor remains intact, and toppings such as whipped cream or ice cream can easily cover the appearance if presentation matters.
What to Do if the Filling Overflows
If the filling overflows during baking, the pie can still taste perfectly good. A deeper pie plate can help prevent this issue in future batches.
Placing a baking sheet underneath the pie is another useful precaution. It catches any drips before they reach the oven floor.
Do not intentionally overfill the crust just because extra space appears available. The chocolate mixture rises as it bakes.
A deep-dish pie plate gives you additional insurance when you are worried about overflow. Keep the standard ingredient quantities unchanged.
Frequently Asked Questions
Can I Use Semi-Sweet Chocolate?
Yes. Replace the bittersweet chocolate with the same 1-cup amount of semi-sweet chocolate.
The pie will taste slightly sweeter and less bitter. The texture and baking method remain the same.
Can I Use Milk Chocolate?
Yes. Use 1 cup milk chocolate in place of the bittersweet chocolate.
Reduce the granulated sugar to ¾ cup because milk chocolate is sweeter. Keep the other ingredients unchanged.
Can I Skip Pre-Baking the Crust?
Yes, if necessary. The pie can still be made without pre-baking.
The crust may be somewhat softer underneath the filling. Pre-baking gives you a stronger contrast between flaky pastry and fudgy chocolate.
Can I Freeze the Pie?
Yes. Cool the pie completely and wrap individual slices tightly in plastic wrap followed by foil.
Freeze for up to 2 months. Thaw overnight in the refrigerator and warm slightly before serving.
Why Is My Pie Too Firm?
It was likely baked too long. The center should still jiggle slightly when the pie comes out of the oven.
Begin checking at 25 minutes. Remove it once the edges are set and the middle still has that cohesive wobble.
Why Did My Pie Crack?
Overbaking is one likely reason. Cooling too abruptly can also contribute.
Let the pie cool gradually on the counter after baking. A slight crack does not affect the flavor.
Why Did the Filling Overflow?
The pie plate may not have had enough depth, or the filling may have been too close to the top. A deep-dish pie plate offers more room as the filling rises.
Place a baking sheet beneath the pie if you are concerned about drips. This protects the oven and makes cleanup easier.
Nutritional Information
One slice, approximately ⅛ of the pie, contains about 380 calories. The exact value can vary depending on the chocolate, crust, butter, cocoa, and other specific brands used.
Milk chocolate, semi-sweet chocolate, coconut oil, ice cream, whipped cream, and other substitutions or toppings will change that estimate. Larger or smaller slices will naturally change the calorie amount as well.
No additional protein, fat, carbohydrate, sugar, fiber, sodium, or other numerical values are specified. The 380-calorie estimate is therefore the most useful nutritional reference for the standard slice.
The Chocolate Pie I Trust When I Want to Impress
I think the best part of this pie is that it creates a little drama without requiring a dramatic amount of work. Nobody watching a warm slice release that glossy fudgy center needs to know how simple the filling actually was to prepare.
That is probably why I started bringing it to gatherings so often. I could spend a short amount of time in the kitchen and still arrive with something that made people pause when dessert was served.
Book club nights became an excuse to bake it. Visits from my chocolate-loving niece became another excuse, and eventually I stopped pretending I needed a special reason at all.
There is something deeply satisfying about the way such a short ingredient list becomes so rich. Butter and chocolate melt together, cocoa deepens everything, eggs give the filling structure, and vanilla and salt quietly bring the whole mixture into balance.
The real trick is knowing when to stop baking. Every time I see that gentle movement in the middle, I have to remind myself that a little jiggle is exactly what I want.
Then comes the 30-minute wait, which always feels longer than it should. The pie smells finished, looks finished, and makes a very convincing argument for ignoring the cooling instructions.
But patience pays off when the first slice comes away cleanly enough to hold its shape while the center remains soft. That is the moment when all the careful timing suddenly makes sense.
Sometimes I serve it with vanilla ice cream melting down the side. Sometimes I add whipped cream and sea salt, and sometimes fresh raspberries are all I want beside the chocolate.
Most of the time, though, the pie hardly needs anything. Warm chocolate, flaky crust, and that deeply fudgy center are enough to make the table go quiet for a few seconds.
That brief silence is still my favorite reaction. It is the reason Decadent Hot Fudge Pie remains one of the desserts I reach for whenever I want something simple to make, difficult to resist, and almost guaranteed to leave people asking for another slice.
Decadent Hot Fudge Pie Recipe

Rich, chocolatey, and wonderfully gooey in the center, this Decadent Hot Fudge Pie combines bittersweet chocolate, butter, cocoa, sugar, and eggs inside a pre-baked crust. The edges bake until set while the middle stays slightly jiggly, creating a warm, fudgy dessert that feels especially indulgent.
Recipe Details
- Prep Time: 15 minutes
- Cook Time: 30 minutes
- Total Time: 45 minutes
- Course: Dessert
- Cuisine: American
- Servings: 8 servings
- Calories: 380 kcal
Ingredients
For the Hot Fudge Filling
- ¼ teaspoon salt
- 1 teaspoon vanilla extract
- 3 large eggs
- ¼ cup cocoa powder
- 1 cup granulated sugar
- 1 cup bittersweet chocolate chopped
- ½ cup unsalted butter
For the Pie
- 1 pre-baked pie crust store-bought or homemade
Instructions
Step 1: Preheat the Oven
Preheat the oven to 350°F (175°C).
Have the pre-baked pie crust ready while you prepare the chocolate filling.
Step 2: Melt the Butter and Chocolate
Add the unsalted butter and chopped bittersweet chocolate to a saucepan over low heat.
Stir gently until both are fully melted and the mixture is smooth.
Step 3: Add the Remaining Filling Ingredients
Remove the saucepan from the heat.
Whisk in the granulated sugar, cocoa powder, eggs, vanilla extract, and salt until everything is well combined.
Step 4: Fill the Pie Crust
Pour the chocolate mixture into the pre-baked pie crust.
Spread it evenly so the filling reaches the edges.
Step 5: Bake
Bake for 25–30 minutes.
The edges should be set while the center remains slightly jiggly.
Step 6: Cool Before Serving
Remove the pie from the oven and let it cool before slicing.
Serve once the filling has had time to settle.
Notes
- Store leftovers in the refrigerator for up to 3 days.
- Serve warm with ice cream for extra decadence.
Serving Suggestions
Serve Decadent Hot Fudge Pie slightly warm for the richest texture. The set edges and soft chocolate center create a fudgy contrast that makes each slice feel especially indulgent.
This recipe makes 8 servings and works beautifully as a simple chocolate dessert for gatherings or family meals. Add ice cream when serving if you want an extra decadent finish.
Storage
Store leftover Hot Fudge Pie in the refrigerator for up to 3 days.
Chocolate Tip
Use 1 cup chopped bittersweet chocolate.
Melt it slowly with the butter over low heat until smooth.
Butter Tip
Use ½ cup unsalted butter and melt it together with the chocolate.
Cocoa Tip
Add ¼ cup cocoa powder after removing the melted chocolate mixture from the heat.
Egg Tip
Use 3 large eggs and whisk them into the chocolate mixture with the sugar, vanilla, cocoa, and salt.
Crust Tip
Use 1 pre-baked pie crust.
A store-bought or homemade crust both work.
Baking Tip
Bake at 350°F (175°C) for 25–30 minutes.
The edges should be set while the center stays slightly jiggly.
Serving Tip
Serve warm with ice cream for extra decadence.

Fernando is the creator and writer behind the food blog Eating with your Hands. Living and working in cities like Paris, Barcelona, and Berlin, and being married to a Canadian foodie, has given Fernando a passion and interest in food and inspired him to run EWYH.