
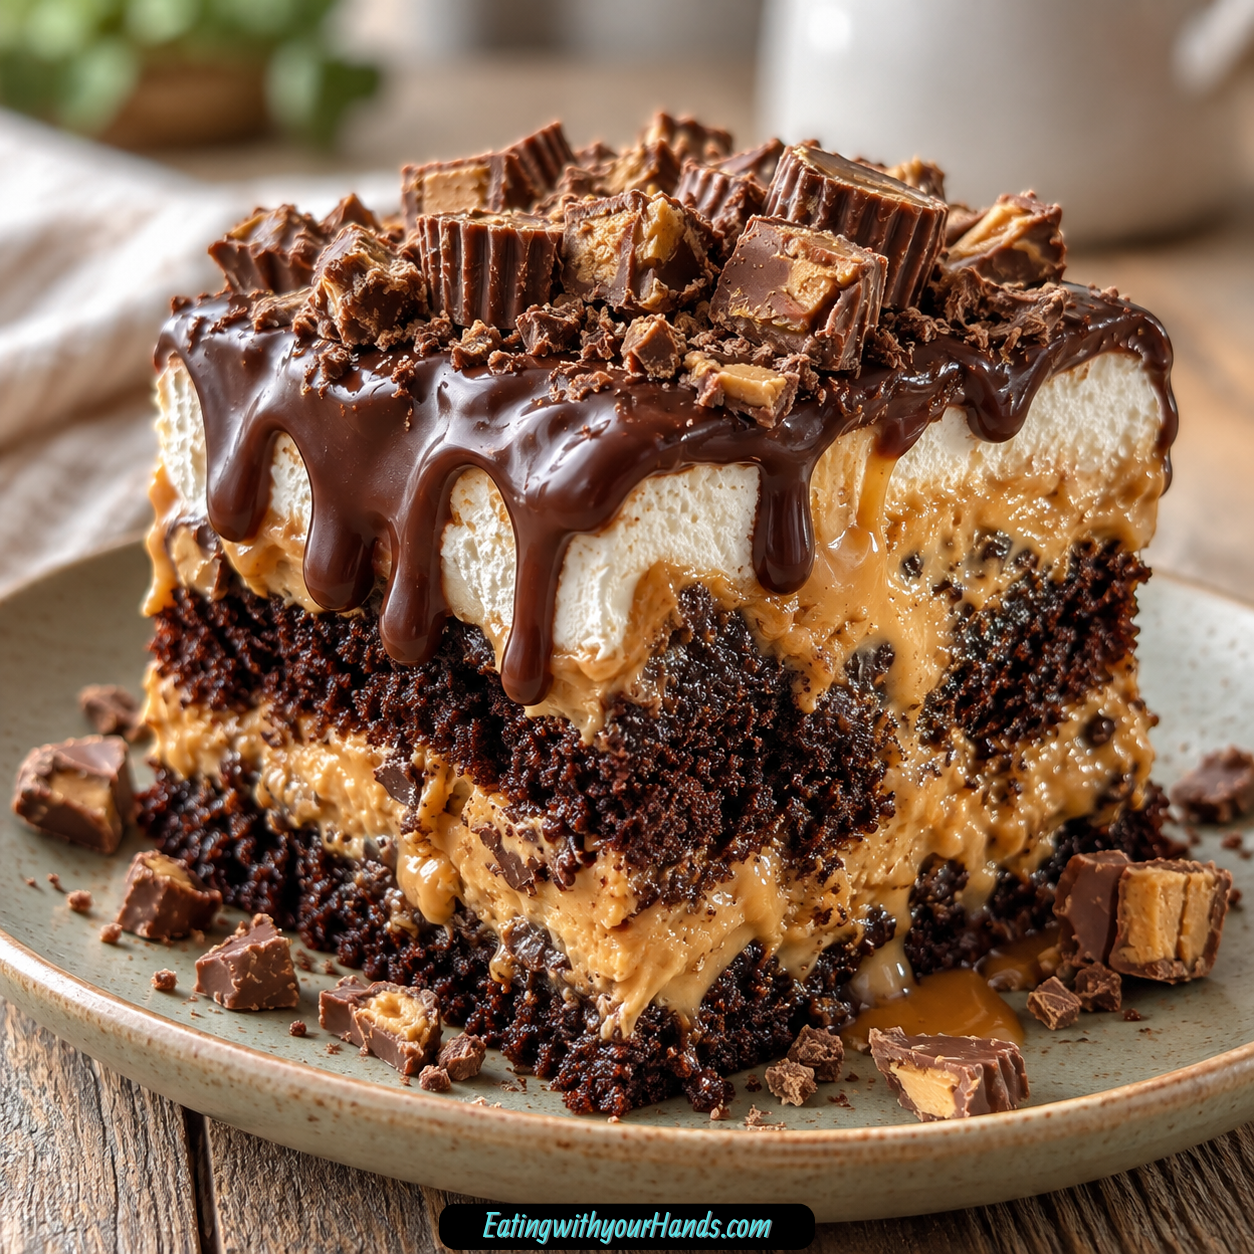
Decadent Reese’s Peanut Butter Earthquake Cake is the kind of dessert that does not whisper from the table. It shows up bold, chocolatey, peanut buttery, messy in the best way, and loaded with the kind of sweet layers that make people pause after the first bite.
This cake starts with a chocolate cake base, then gets a thick peanut butter layer swirled through the batter. Crushed Reese’s peanut butter cups and chopped mini Reese’s melt into the cake, creating pockets of candy, chocolate, and peanut butter in every slice.
Once the cake cools, it is topped with whipped topping and finished with a smooth chocolate ganache drizzle. The result is rich, chilled, fudgy, creamy, and wonderfully over-the-top.
The name fits the look. As the cake bakes, the peanut butter layer shifts, the candy melts, the surface rises and settles, and the whole thing becomes beautifully imperfect.
That is part of the charm. This cake is not meant to be perfectly level or delicate.
It is made for birthdays, potlucks, family gatherings, weekend baking, chocolate cravings, and any moment when a regular cake does not feel like enough. It is easy to make but tastes like a dessert people remember.
A boxed chocolate cake mix keeps the process simple. The peanut butter layer, Reese’s cups, whipped topping, and ganache make it feel special.
If you love the combination of chocolate and peanut butter, this cake is hard to resist. It tastes like a giant candy-bar-inspired dessert with soft cake, creamy peanut butter, melted Reese’s pieces, fluffy topping, and silky chocolate all stacked together.
Serve it chilled for clean slices and a fudgy bite, or let it sit out briefly for a softer texture. Either way, Decadent Reese’s Peanut Butter Earthquake Cake is the kind of dessert that brings all the drama and comfort of chocolate-peanut butter baking without requiring complicated steps.
Table of Contents
- Why You’ll Love This Reese’s Peanut Butter Earthquake Cake
- Recipe Details
- Ingredients
- Ingredient Notes
- Optional Swaps, Variations, Add-Ins, and Serving Ideas
- Classic Reese’s Peanut Butter Earthquake Cake
- Extra Rich Chocolate Cake Base
- Crunchy Peanut Butter Cake
- Dark Chocolate Ganache Cake
- Candy Chaos Earthquake Cake
- Chopped Peanut Topping
- Mini Layer Cake Version
- Almond Butter Version
- Homemade Whipped Cream Topping
- Ganache-Only Finish
- Extra Reese’s Garnish
- Softer Room-Temperature Serving
- Cold Fudgy Serving
- Why This Recipe Works
- Directions
- Step 1: Preheat the Oven
- Step 2: Grease the Pan
- Step 3: Mix the Chocolate Cake Batter
- Step 4: Spread the Batter in the Pan
- Step 5: Make the Peanut Butter Mixture
- Step 6: Adjust the Peanut Butter Layer if Needed
- Step 7: Add Peanut Butter to the Cake Batter
- Step 8: Add the Reese’s Candy
- Step 9: Bake the Cake
- Step 10: Cool the Cake Completely
- Step 11: Make the Ganache
- Step 12: Adjust the Ganache Texture
- Step 13: Cool the Ganache Slightly
- Step 14: Add the Whipped Topping
- Step 15: Drizzle the Ganache
- Step 16: Add Optional Garnish
- Step 17: Chill Before Slicing
- Step 18: Slice and Serve
- Serving Ideas
- Storage
- Freezing
- Make-Ahead
- Helpful Notes for Best Results
- Variations
- Classic Reese’s Peanut Butter Earthquake Cake
- Extra Fudgy Cake Base
- Crunchy Peanut Butter Earthquake Cake
- Dark Chocolate Reese’s Cake
- Snickers Earthquake Cake
- Butterfinger Earthquake Cake
- Peanut Butter M&M Cake
- Chopped Peanut Topping Cake
- Two-Layer Birthday Cake Version
- Almond Butter Earthquake Cake
- Fresh Whipped Cream Cake
- Simple Ganache-Only Cake
- Troubleshooting
- Frequently Asked Questions
- Can I use homemade chocolate cake batter instead of a mix?
- How long does this cake last in the fridge?
- My peanut butter layer is too thick. What should I do?
- Can I freeze this cake?
- Can I use natural peanut butter?
- Can I skip the whipped topping?
- Can I use fresh whipped cream instead of Cool Whip?
- What if I do not have heavy cream?
- Why This Recipe Works So Well
- Final Thoughts
- Reese’s Peanut Butter Earthquake Cake
Why You’ll Love This Reese’s Peanut Butter Earthquake Cake
This cake is full of chocolate and peanut butter flavor. The combination feels like a Reese’s-inspired dessert in cake form.
It starts with a boxed cake mix. That makes it easy, fast, and approachable.
The texture is layered and fun. You get soft cake, thick peanut butter, melty Reese’s cups, whipped topping, and ganache.
It is great for parties. A 9×13-inch pan makes enough to share, and the dessert slices easily after chilling.
It does not need advanced baking skills. Stir, spread, swirl, sprinkle, bake, cool, top, and drizzle.
It is flexible. Use crunchy peanut butter, dark chocolate, chopped peanuts, different candy, homemade cake batter, or a simpler ganache-only finish.
Recipe Details
This cake is baked in a greased 9×13-inch baking pan. Butter or cooking spray both work for greasing.
The oven temperature should follow the chocolate cake mix box, which is usually 350°F. Use the package directions as your main guide.
The cake base uses 1 box chocolate cake mix. Any brand works, and an extra fudgy or devil’s food style mix is especially fitting.
Use the ingredients listed on the cake mix box, usually eggs, oil, and water. For a richer cake, the water can be swapped for milk.
The peanut butter layer uses 16 oz creamy peanut butter and 2 cups powdered sugar. Regular creamy peanut butter spreads more easily than natural peanut butter.
The candy includes 1 cup crushed Reese’s peanut butter cups and 1 cup chopped mini Reese’s peanut butter cups. The crushed pieces spread flavor through the cake, while the chopped mini cups create gooey candy pockets.
The topping uses 8 oz whipped topping such as Cool Whip, thawed. Fresh whipped cream can also work, but it is less stable.
The ganache uses 1 cup semi-sweet chocolate chips, 2 tablespoons unsalted butter, and ¼ cup heavy cream. Dark chocolate chips can be used for a less sweet finish, and half-and-half works in a pinch.
The cake bakes for 30 to 35 minutes. It should cool completely in the pan for about 1 hour before whipped topping is added.
The ganache should cool for 5 to 10 minutes before drizzling. If it is too hot, it can melt the whipped topping; if it is too cool, it may clump.
Ingredients
For the Cake Base
- 1 box chocolate cake mix
- Ingredients listed on the cake mix box, usually eggs, oil, and water
For the Peanut Butter Layer
- 16 oz creamy peanut butter
- 2 cups powdered sugar
- 1 cup crushed Reese’s peanut butter cups
- 1 cup mini Reese’s peanut butter cups, chopped
For the Topping
- 8 oz whipped topping, like Cool Whip
- 1 cup semi-sweet chocolate chips
- 2 tablespoons unsalted butter
- ¼ cup heavy cream
Optional Swaps, Add-Ins, and Variations
- Milk, to replace the water in the cake mix
- 1 to 2 teaspoons milk, to loosen peanut butter mixture if needed
- Dark chocolate chips
- Half-and-half
- Crunchy peanut butter
- Chopped Snickers
- Chopped Butterfinger
- Peanut butter M&Ms
- Chopped peanuts
- Two 8-inch pans
- Almond butter
- Fresh whipped cream
- 1 tablespoon powdered sugar
- Extra Reese’s peanut butter cups
Ingredient Notes
Chocolate cake mix creates the easy base. A fudgy chocolate mix or devil’s food style mix gives the cake a rich flavor.
The ingredients on the cake mix box should be used as directed. These are usually eggs, oil, and water.
Milk can replace the water if you want the cake to taste richer. This is optional but works well with chocolate cake.
Creamy peanut butter creates the thick peanut butter layer. Regular peanut butter spreads more easily than natural peanut butter.
Powdered sugar thickens and sweetens the peanut butter. It helps the layer become soft and sturdy, almost like cookie dough.
Crushed Reese’s peanut butter cups spread candy flavor throughout the cake. They also add small bits of peanut butter and chocolate.
Chopped mini Reese’s peanut butter cups melt into gooey pockets as the cake bakes. They should not be skipped if you want that candy-bar effect.
Whipped topping creates a cool, creamy finish after the cake bakes and cools. It should be thawed before spreading.
Semi-sweet chocolate chips make the ganache rich without becoming too sweet. Dark chocolate can be used for a deeper finish.
Butter makes the ganache glossy and smooth. Unsalted butter is best because the cake and candy are already sweet.
Heavy cream gives the ganache its silky texture. Half-and-half can work in a pinch, but heavy cream is ideal.
Optional Swaps, Variations, Add-Ins, and Serving Ideas
Classic Reese’s Peanut Butter Earthquake Cake
Make the cake with chocolate cake mix, creamy peanut butter, powdered sugar, crushed Reese’s, chopped mini Reese’s, whipped topping, and ganache. This gives the full chocolate-peanut butter experience.
Chill before slicing for neat layers. Serve cold or slightly softened.
Extra Rich Chocolate Cake Base
Swap the water called for on the cake mix box with milk. This makes the cake taste richer.
Prepare the rest of the cake as usual. The peanut butter and Reese’s will still be the main stars.
Crunchy Peanut Butter Cake
Use crunchy peanut butter instead of creamy peanut butter. The layer will have extra texture.
This version is ideal if you love peanut pieces in desserts. The spread may be slightly thicker.
Dark Chocolate Ganache Cake
Use dark chocolate chips for the ganache. This creates a less sweet, more intense chocolate topping.
Dark chocolate balances the sweet peanut butter and candy. It also gives the cake a slightly fancier flavor.
Candy Chaos Earthquake Cake
Swap some or all of the Reese’s with chopped Snickers, Butterfinger, or peanut butter M&Ms. This makes the cake playful and different.
Keep the amount similar so the cake does not become overloaded. The texture will change depending on the candy used.
Chopped Peanut Topping
Sprinkle chopped peanuts on top after adding the ganache. This adds crunch and makes the cake look finished.
Add them before the ganache fully sets if you want them to stick. This works especially well with peanut butter lovers.
Mini Layer Cake Version
Bake the cake in two 8-inch pans for shorter layers. This can be used for a stacked birthday cake style.
Watch the baking time carefully because smaller pans may bake differently. Cool completely before assembling.
Almond Butter Version
Use almond butter instead of peanut butter for a different twist. The flavor will not taste like classic Reese’s, but it can still be delicious.
Adjust the texture if needed with powdered sugar. Almond butter can vary in thickness.
Homemade Whipped Cream Topping
Use fresh whipped cream instead of whipped topping. Fold in 1 tablespoon powdered sugar to help stabilize it.
Fresh whipped cream is less stable than Cool Whip. Keep the cake chilled.
Ganache-Only Finish
Skip the whipped topping and drizzle ganache directly over the cooled cake. This creates a simpler finish.
The cake will be richer and less creamy on top. It is a good option if you do not want whipped topping.
Extra Reese’s Garnish
Reserve a handful of Reese’s peanut butter cups for the top. Sprinkle them over the ganache for a more dramatic look.
Add them while the ganache is still soft. This helps the pieces settle into the topping.
Softer Room-Temperature Serving
Let chilled slices sit out for about 10 minutes before serving. The peanut butter layer softens slightly.
This gives a gooier texture. The cake tastes rich and melty.
Cold Fudgy Serving
Serve the cake straight from the refrigerator. The peanut butter layer becomes firm and almost cheesecake-like.
This is the best option for clean slices. It also keeps the whipped topping stable.
Why This Recipe Works
This recipe works because the cake is built in layers that bake and settle together. The chocolate cake batter rises around the peanut butter and candy, creating the “earthquake” look.
The boxed cake mix keeps the base reliable. It saves time while still giving a soft, chocolatey cake.
The peanut butter and powdered sugar mixture is thick enough to hold its place. It sinks and swirls slightly into the batter as the cake bakes.
The Reese’s pieces melt into the cake. Some stay in soft chunks, while others create gooey pockets of peanut butter and chocolate.
Cooling is important because the cake needs time to settle. If the whipped topping goes on too soon, it can melt.
The ganache adds a silky chocolate finish. Letting it cool slightly before drizzling keeps it from melting the whipped topping.
Chilling before slicing helps the layers hold together. The cake becomes easier to cut and serve.
The recipe thrives on imperfection. A slightly sunken middle, uneven peanut butter swirls, or messy ganache all fit the earthquake cake style.
Directions
Step 1: Preheat the Oven
Preheat the oven to the temperature listed on the chocolate cake mix box. This is usually 350°F.
Use the box temperature as your guide because cake mix brands can vary. Let the oven fully heat before baking.
Step 2: Grease the Pan
Grease a 9×13-inch baking pan with butter or cooking spray. Coat the bottom and sides well.
This helps the cake release more easily when slicing. Do not skip this step because the peanut butter and candy can make the cake sticky.
Step 3: Mix the Chocolate Cake Batter
Prepare the chocolate cake mix according to the package directions. Use the ingredients listed on the box, usually eggs, oil, and water.
For a richer flavor, swap the water for milk. Mix just until the batter is combined.
Step 4: Spread the Batter in the Pan
Pour the cake batter into the prepared 9×13-inch pan. Smooth the top with a spatula.
Spread it evenly into the corners. This gives the peanut butter layer a good base.
Step 5: Make the Peanut Butter Mixture
In a medium bowl, combine 16 oz creamy peanut butter with 2 cups powdered sugar. Mix until smooth.
The mixture should be thick, almost like soft cookie dough. If it feels too stiff, add 1 to 2 teaspoons milk to loosen it.
Step 6: Adjust the Peanut Butter Layer if Needed
If the peanut butter mixture is runny, add powdered sugar 1 to 2 tablespoons at a time. Mix until it thickens.
The goal is a soft, spreadable mixture that still holds shape. It should not pour like a sauce.
Step 7: Add Peanut Butter to the Cake Batter
Drop spoonfuls of the peanut butter mixture over the cake batter. Space the spoonfuls across the pan.
Use a butter knife to gently swirl and spread the peanut butter. Do not worry about perfect lines.
Step 8: Add the Reese’s Candy
Sprinkle 1 cup crushed Reese’s peanut butter cups evenly over the peanut butter layer. Then scatter 1 cup chopped mini Reese’s peanut butter cups on top.
If you want extra garnish later, reserve a small handful. Otherwise, add all the candy before baking.
Step 9: Bake the Cake
Bake for 30 to 35 minutes. The cake should puff, set, and smell rich and chocolatey.
Test with a toothpick inserted into the center. If you hit a peanut butter cup, test another spot.
Step 10: Cool the Cake Completely
Let the cake cool completely in the pan, about 1 hour. Do not add whipped topping while the cake is warm.
If the cake sinks slightly in the center, that is fine. The messy look fits an earthquake cake.
Step 11: Make the Ganache
In a small saucepan over low heat, combine 1 cup semi-sweet chocolate chips, 2 tablespoons unsalted butter, and ¼ cup heavy cream. Stir constantly until smooth.
Keep the heat low. The ganache should melt gently and become silky.
Step 12: Adjust the Ganache Texture
If the ganache is too thick, stir in a splash more warm cream. If it is too thin, add a handful more chocolate chips.
The ganache should drizzle smoothly. It should not be watery or clumpy.
Step 13: Cool the Ganache Slightly
Let the ganache cool for 5 to 10 minutes. It should still be pourable.
If it is too hot, it can melt the whipped topping. If it cools too much, it can clump.
Step 14: Add the Whipped Topping
Spread 8 oz thawed whipped topping over the completely cooled cake. Use a spatula to smooth it evenly.
Cover the whole cake from edge to edge. Keep the layer light and fluffy.
Step 15: Drizzle the Ganache
Drizzle the cooled ganache generously over the whipped topping. Let it fall in ribbons across the surface.
For a marbled effect, drag a toothpick through the ganache in swirls. Do this gently so the topping stays fluffy.
Step 16: Add Optional Garnish
Top with extra Reese’s cups, chopped peanuts, sprinkles, or candy pieces if desired. Add them while the ganache is still soft.
This makes the cake look more dramatic. It also hints at the flavors inside.
Step 17: Chill Before Slicing
Chill the finished cake for at least 1 hour before slicing. This helps the layers hold together.
Cold cake gives cleaner slices. It also makes the peanut butter layer firmer and creamier.
Step 18: Slice and Serve
Slice the cake into portions and serve straight from the refrigerator. For a softer texture, let slices sit out for about 10 minutes.
Store leftovers in an airtight container in the refrigerator for up to 3 days. If the ganache firms, microwave a slice for 10 seconds to bring back a gooier texture.
Serving Ideas
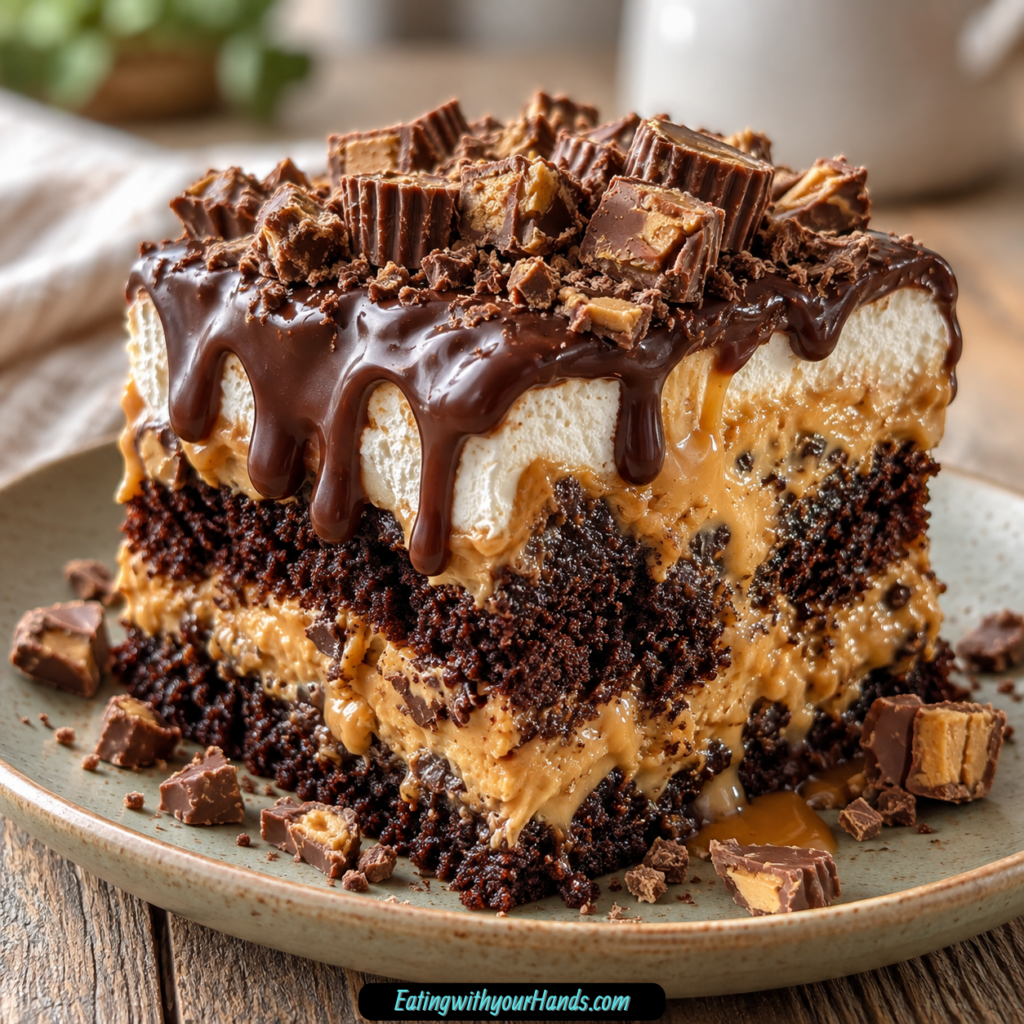
Serve Decadent Reese’s Peanut Butter Earthquake Cake chilled for the neatest slices. The peanut butter layer firms up and the topping stays fluffy.
If you like a softer, gooier cake, let slices sit at room temperature for about 10 minutes. The chocolate and peanut butter become more tender.
This cake is ideal for birthdays. The Reese’s pieces and ganache make it feel celebratory without requiring decorating skills.
Bring it to potlucks when you need a guaranteed crowd-pleaser. It travels well in the same 9×13-inch pan.
Serve small slices because the cake is rich. A little goes a long way.
Add extra chopped Reese’s cups on top for a more dramatic presentation. Chopped peanuts can add crunch, too.
For a simpler plate, skip extra garnish and let the ganache do the work. The swirled chocolate over whipped topping looks inviting on its own.
Serve with cold milk, coffee, or plain plates and forks. This cake does not need much beside it.
Storage
Store leftover cake in an airtight container in the refrigerator. It keeps for up to 3 days.
Keep it chilled because of the whipped topping. The cold also helps the layers hold together.
The ganache may firm up in the refrigerator. A quick 10-second microwave zap can bring back the gooey texture.
If microwaving, warm individual slices only. Do not microwave the whole pan with whipped topping unless needed.
Cover the cake tightly so it does not absorb refrigerator odors. Chocolate and whipped topping can pick up surrounding smells.
For cleaner slices, cut the cake while cold. Wipe the knife between slices if needed.
Let slices sit out for about 10 minutes if you prefer a softer bite. This gives the peanut butter layer a creamier texture.
Freezing
Freezing the fully topped cake is not ideal. The whipped topping can weep and change texture after thawing.
If you must freeze it, freeze the cake without the whipped topping and ganache. Add those toppings after thawing.
Wrap the cooled cake well before freezing. Protect it from freezer odors.
Thaw in the refrigerator. Once thawed, add whipped topping and ganache.
The texture may still be slightly different after freezing. This cake is best enjoyed fresh from the refrigerator.
For easiest planning, bake and refrigerate the cake instead of freezing it. It keeps well for up to 3 days.
If you want a make-ahead option, prepare it one day before serving. Chill fully before slicing.
Make-Ahead
This cake works well as a make-ahead dessert. In fact, chilling helps the layers set and slice cleanly.
Bake the cake, cool it completely, then add whipped topping and ganache. Chill at least 1 hour before serving.
You can make it the day before a gathering. Store it covered in the refrigerator.
If making ganache ahead, keep it smooth and rewarm gently if needed. It should be pourable before drizzling.
Do not add whipped topping to a warm cake. The topping will melt and lose its fluffy texture.
If using fresh whipped cream instead of whipped topping, stabilize it with 1 tablespoon powdered sugar. Keep the finished cake chilled.
Reserve extra Reese’s pieces for garnish if you want the top to look fresh. Add them after the ganache drizzle.
Helpful Notes for Best Results
Use regular creamy peanut butter for the easiest spreading. Natural peanut butter can be oilier and may need extra powdered sugar.
The peanut butter mixture should be thick like soft cookie dough. Add milk if too stiff or powdered sugar if too loose.
Do not overmix the cake batter. Stir just until combined.
Grease the pan well. Candy and peanut butter can make the cake sticky.
Cool the cake completely before topping. Warm cake melts whipped topping.
Let the ganache cool 5 to 10 minutes before drizzling. It should be warm enough to pour but not hot.
Chill the cake before slicing. This gives cleaner layers.
If the cake sinks in the middle, do not worry. That messy, cracked, settled look is part of the earthquake style.
Variations
Classic Reese’s Peanut Butter Earthquake Cake
Use chocolate cake mix, creamy peanut butter, powdered sugar, crushed Reese’s, mini Reese’s, whipped topping, and chocolate ganache. This gives the full candy-loaded version.
Chill before slicing. Serve cold or slightly softened.
Extra Fudgy Cake Base
Use an extra fudgy chocolate cake mix or devil’s food cake mix. Swap water for milk if desired.
This makes the chocolate base richer. The peanut butter layer still swirls through beautifully.
Crunchy Peanut Butter Earthquake Cake
Use crunchy peanut butter in the peanut butter layer. The cake will have added peanut texture.
This is a great option for anyone who loves crunch. Adjust with milk or powdered sugar if needed.
Dark Chocolate Reese’s Cake
Use dark chocolate chips in the ganache. The topping will taste less sweet and more intense.
This balances the sweetness of the candy and peanut butter. It also makes the cake feel richer.
Snickers Earthquake Cake
Use chopped Snickers in place of some or all of the Reese’s. The texture will include caramel and nougat-style candy pieces.
The flavor will be different but still indulgent. Keep the amount similar.
Butterfinger Earthquake Cake
Use chopped Butterfinger instead of Reese’s. This adds a crisp, candy-like crunch.
The pieces may melt differently. Sprinkle evenly before baking.
Peanut Butter M&M Cake
Use peanut butter M&Ms for a colorful variation. They add candy crunch and peanut butter flavor.
This version is fun for birthdays. Add extra candies on top if desired.
Chopped Peanut Topping Cake
Sprinkle chopped peanuts over the ganache. This adds crunch and a finished look.
Use them lightly. The cake is already rich.
Two-Layer Birthday Cake Version
Bake the batter in two 8-inch pans. This creates shorter layers that can be stacked.
Watch the baking time because smaller pans may bake faster. Cool completely before layering.
Almond Butter Earthquake Cake
Use almond butter in place of peanut butter. The flavor will be different and less Reese’s-like.
Adjust the texture with powdered sugar if needed. Almond butter can be thinner or thicker depending on the brand.
Fresh Whipped Cream Cake
Use homemade whipped cream instead of whipped topping. Fold in 1 tablespoon powdered sugar to stabilize it.
The topping will be less stable than Cool Whip. Keep the cake chilled.
Simple Ganache-Only Cake
Skip the whipped topping and drizzle ganache directly over the cooled cake. This makes a simpler, richer cake.
It will not have the fluffy topping layer. The chocolate finish will be more intense.
Troubleshooting
The Peanut Butter Layer Is Too Thick
Add 1 to 2 teaspoons milk to loosen it. Mix until it becomes spreadable.
It should still be thick like soft cookie dough. Do not add too much milk.
The Peanut Butter Layer Is Too Runny
Add powdered sugar 1 to 2 tablespoons at a time. Mix until it thickens.
The mixture should hold its shape in spoonfuls. If it is too loose, it will disappear into the batter too much.
The Cake Sank in the Middle
That is normal for an earthquake cake. The peanut butter and candy layers can shift as the cake cools.
A sunken or uneven center adds to the style. The topping will cover much of it.
The Whipped Topping Melted
The cake was likely still warm. Cool it completely, about 1 hour, before adding topping.
If needed, chill the cake before topping. Cold cake holds the whipped layer better.
The Ganache Melted the Topping
The ganache was too hot. Let it cool 5 to 10 minutes before drizzling.
It should still pour but not steam. Warm ganache is fine; hot ganache is not.
The Ganache Is Too Thick
Stir in a splash more warm cream. Mix until smooth.
Add only a little at a time. The ganache should drizzle, not pour like water.
The Ganache Is Too Thin
Add a handful more chocolate chips and stir until melted. The extra chocolate will thicken it.
Let it cool slightly before using. Ganache thickens as it sits.
The Cake Is Too Sweet
Use dark chocolate chips for the ganache. You can also serve smaller slices.
The cake is naturally rich because of the candy and peanut butter. A small piece is satisfying.
The Cake Stuck to the Pan
The pan may not have been greased enough. Grease the bottom and sides well next time.
Let slices chill before cutting. Cold cake releases more neatly.
The Cake Slices Look Messy
Chill the cake at least 1 hour before slicing. Use a sharp knife.
Wipe the knife between cuts if you want cleaner slices. Messy slices still taste wonderful.
Frequently Asked Questions
Can I use homemade chocolate cake batter instead of a mix?
Yes, you can use your favorite homemade chocolate cake batter. Make sure it is enough to fill a 9×13-inch pan about halfway.
An extra fudgy batter works especially well. Continue with the peanut butter layer and toppings as directed.
How long does this cake last in the fridge?
It lasts about 3 days when tightly covered in the refrigerator. Keep it chilled because of the whipped topping.
The ganache may firm up. Microwave an individual slice for about 10 seconds if you want it gooier.
My peanut butter layer is too thick. What should I do?
Add milk 1 teaspoon at a time until the mixture loosens. It should be thick but spreadable.
If it becomes too loose, add powdered sugar 1 to 2 tablespoons at a time. Aim for a soft cookie dough texture.
Can I freeze this cake?
Technically yes, but the texture can become less ideal because the whipped topping may weep. If freezing is necessary, freeze without the toppings.
After thawing, add whipped topping and ganache. The cake is best fresh or refrigerated.
Can I use natural peanut butter?
Natural peanut butter can work, but it is often oilier. You may need extra powdered sugar to thicken the mixture.
Regular creamy peanut butter is easier for this cake. It spreads more smoothly.
Can I skip the whipped topping?
Yes, you can skip it. Drizzle the ganache directly over the cooled cake for a simpler finish.
The cake will be richer and less creamy on top. It will still be delicious.
Can I use fresh whipped cream instead of Cool Whip?
Yes, fresh whipped cream can be used. Fold in 1 tablespoon powdered sugar to help stabilize it.
Fresh whipped cream is less stable than whipped topping. Keep the cake chilled.
What if I do not have heavy cream?
Half-and-half can work in a pinch for the ganache. Heavy cream is ideal for the silkiest texture.
If the ganache texture is too thin or thick, adjust with more chocolate or a splash of warm cream. Stir until smooth.
Why This Recipe Works So Well
Decadent Reese’s Peanut Butter Earthquake Cake works because every layer brings a different kind of sweetness and texture. The chocolate cake is soft, the peanut butter is thick, the Reese’s pieces melt, the whipped topping is cool, and the ganache is silky.
The boxed cake mix makes the base easy and dependable. It lets the peanut butter and candy become the focus.
The peanut butter and powdered sugar layer is thick enough to stand out. It swirls into the batter without disappearing completely.
The Reese’s cups add the candy-bar flavor that makes this dessert memorable. Crushed pieces spread through the cake, while chopped mini cups create gooey bites.
The whipped topping cools down the richness. It gives the cake a creamy finish.
The ganache ties everything together. Chocolate chips, butter, and heavy cream melt into a glossy drizzle that makes the cake feel finished.
Chilling improves the structure. The peanut butter firms, the topping settles, and the cake slices more cleanly.
The cake also works because it welcomes imperfection. Cracks, dips, swirls, and uneven ribbons of ganache all make it look indulgent and homemade.
Most of all, it works because chocolate and peanut butter rarely need much convincing. In this cake, they show up in layers, and every bite tastes like the dessert version of a celebration.
Final Thoughts
Decadent Reese’s Peanut Butter Earthquake Cake is made with chocolate cake mix, a thick creamy peanut butter and powdered sugar layer, crushed Reese’s peanut butter cups, chopped mini Reese’s, whipped topping, and silky chocolate ganache. The cake bakes until puffed and set, cools completely, then gets topped, drizzled, chilled, and sliced into rich chocolate-peanut butter squares.
Serve it cold for clean, fudgy slices, or let each piece sit out for 10 minutes for a softer, gooier bite. With its easy boxed cake base, candy-loaded filling, creamy topping, ganache drizzle, 3-day refrigerator storage, and endless variation options, this Reese’s Peanut Butter Earthquake Cake is a show-stopping dessert that tastes far more dramatic than the effort required.
Reese’s Peanut Butter Earthquake Cake
Rich, chocolatey, creamy, and packed with peanut butter flavor, this Reese’s Peanut Butter Earthquake Cake layers chocolate cake mix with a sweet peanut butter filling, crushed Reese’s peanut butter cups, mini Reese’s pieces, whipped topping, and a smooth chocolate ganache. It is a bold American-style dessert that can be served slightly chilled or at room temperature.
Recipe Details
- Prep Time: 20 minutes
- Cook Time: 30 minutes
- Total Time: 50 minutes
- Course: Dessert
- Cuisine: American
- Servings: 12 slices
Equipment
- Mixing bowl
- 9×13-inch baking pan
- Saucepan
Ingredients
Topping
- ¼ cup heavy cream
- 2 tablespoons butter
- 1 cup semi-sweet chocolate chips
- 8 oz whipped topping (like Cool Whip)
Peanut Butter Layer
- 1 cup mini Reese’s peanut butter cups, chopped
- 1 cup crushed Reese’s peanut butter cups
- 2 cups powdered sugar
- 16 oz creamy peanut butter
Cake Base
- Ingredients required for cake mix (usually eggs, oil, and water)
- 1 box chocolate cake mix
Instructions
Step 1: Prepare the Chocolate Cake Base
Preheat the oven to the temperature specified on the cake mix box. Prepare the chocolate cake mix according to the package instructions, using the ingredients required for the cake mix, usually eggs, oil, and water.
Spread the prepared cake batter into a 9×13-inch baking pan. Since the exact cake mix requirements depend on the box, follow the package instructions for the batter.
Step 2: Mix the Peanut Butter Layer
In a bowl, mix the creamy peanut butter and powdered sugar until smooth. The mixture should become thick, sweet, and evenly blended.
Spread the peanut butter mixture over the cake batter in the baking pan. Try to cover the batter evenly so every slice has a peanut butter layer.
Step 3: Add the Reese’s Pieces
Sprinkle the crushed Reese’s peanut butter cups and chopped mini Reese’s peanut butter cups evenly over the peanut butter layer. Spread them across the surface so the candy is distributed throughout the cake.
The crushed and chopped Reese’s pieces add extra peanut butter and chocolate flavor. Keep the pieces even so the cake slices neatly later.
Step 4: Bake the Cake
Bake the cake according to the cake mix instructions, or until a toothpick inserted into the center comes out clean. Use the package directions as the main guide for baking temperature and doneness.
The recipe lists a cook time of 30 minutes, but the exact baking temperature comes from the cake mix box. Once the center tests clean, remove the cake from the oven and let it cool.
Step 5: Make the Chocolate Ganache
While the cake cools, make the chocolate ganache. In a saucepan over low heat, melt the semi-sweet chocolate chips, butter, and heavy cream, stirring until smooth.
Keep the heat low and stir steadily so the ganache comes together without scorching. Let it cool slightly before adding it to the cake.
Step 6: Add the Whipped Topping and Ganache
Spread the whipped topping over the cooled cake. Drizzle the slightly cooled chocolate ganache over the whipped topping.
The cake should be cooled before the topping goes on so the whipped topping stays smooth. The ganache adds a rich chocolate finish over the creamy layer.
Step 7: Serve the Cake
Serve the Reese’s Peanut Butter Earthquake Cake chilled or at room temperature. The cake tastes best when served slightly chilled.
Slice into 12 pieces for serving. Store any leftover cake in the refrigerator.
Notes
- Store leftover cake in the refrigerator.
- The cake tastes best when served slightly chilled.
Serving Suggestions
Serve Reese’s Peanut Butter Earthquake Cake slightly chilled for the best texture. The chocolate cake, creamy peanut butter layer, Reese’s peanut butter cups, whipped topping, and ganache create a rich dessert with plenty of chocolate-peanut butter flavor.
This cake makes 12 slices, making it easy to serve for parties, potlucks, birthdays, holiday dessert tables, or family gatherings. Let the cake cool fully before adding the whipped topping and ganache so the top stays neat and creamy.
You can also serve it at room temperature if preferred. For a firmer slice and cleaner layers, keep it refrigerated until closer to serving time.
Storage
How to Store
Store leftover cake in the refrigerator. The recipe does not provide a specific storage duration, so no exact number of days is added here.
Cake Mix Tip
Prepare the chocolate cake mix according to the package instructions. Use the ingredients required for the cake mix, usually eggs, oil, and water, without adding unlisted quantities.
Peanut Butter Tip
Mix 16 oz creamy peanut butter with 2 cups powdered sugar until smooth. Spread it over the cake batter before adding the Reese’s candy.
Reese’s Tip
Use both 1 cup crushed Reese’s peanut butter cups and 1 cup mini Reese’s peanut butter cups, chopped. Sprinkle them evenly over the peanut butter layer.
Ganache Tip
Melt the semi-sweet chocolate chips, butter, and heavy cream over low heat in a saucepan. Stir until smooth, then let the ganache cool slightly before drizzling.
Serving Tip
The cake tastes best when served slightly chilled. Refrigerate leftovers and slice once the topping and ganache are set.

Fernando is the creator and writer behind the food blog Eating with your Hands. Living and working in cities like Paris, Barcelona, and Berlin, and being married to a Canadian foodie, has given Fernando a passion and interest in food and inspired him to run EWYH.