
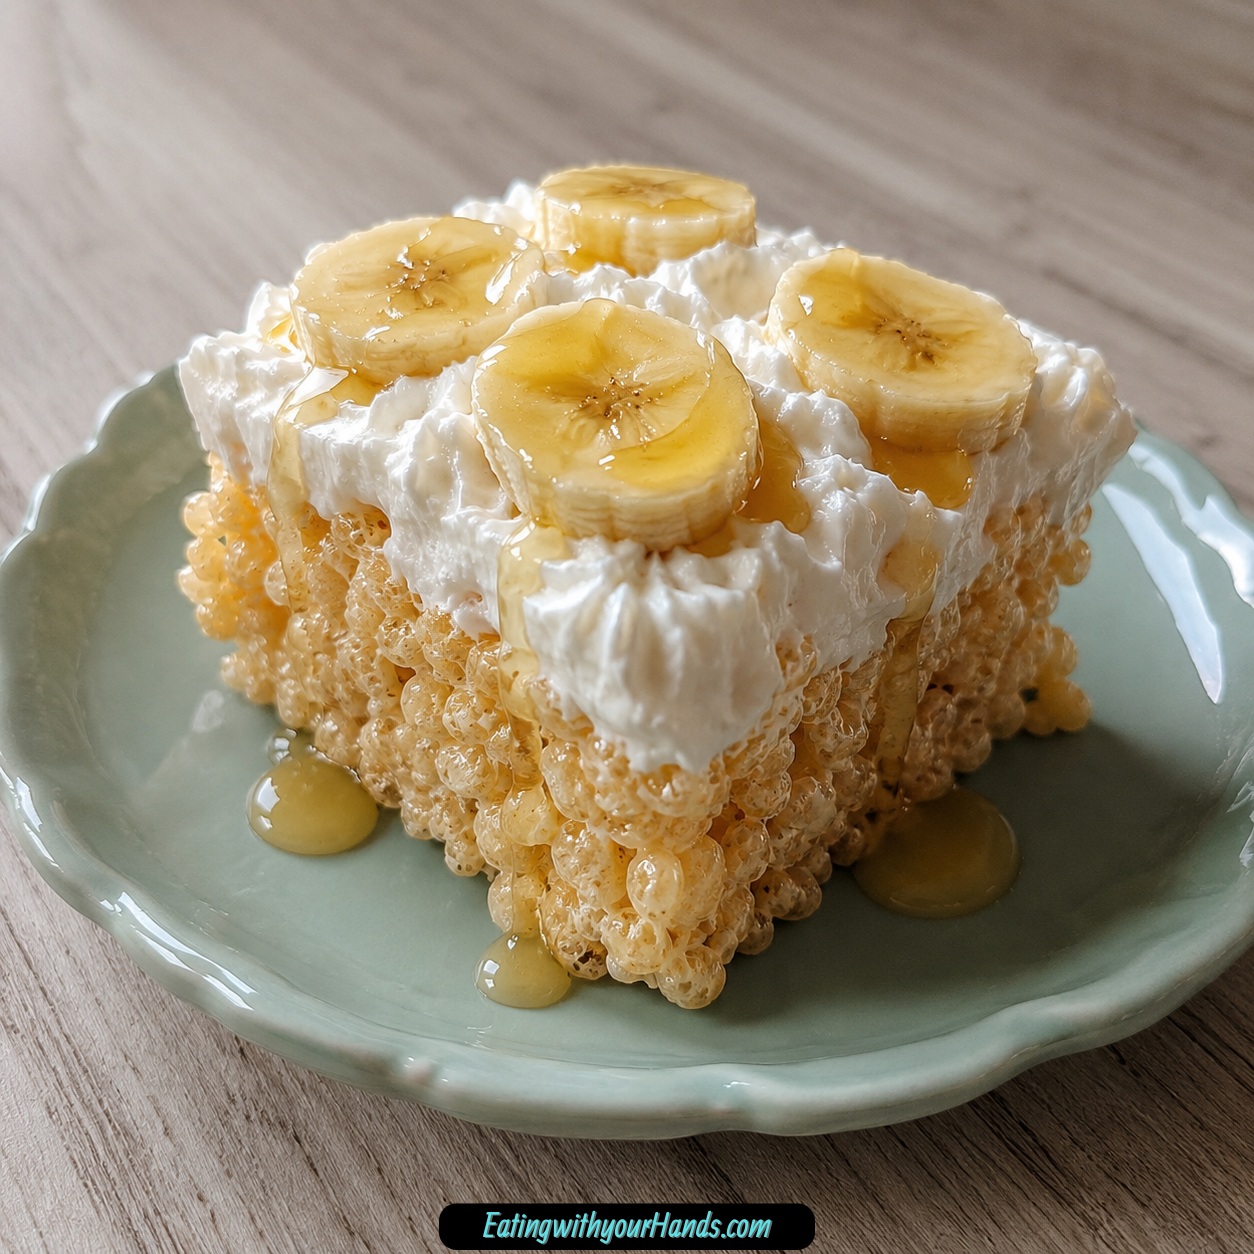
Banana Pudding Rice Krispies are the kind of dessert that immediately feels familiar, but still manages to surprise you. They bring together the crispy, marshmallowy sweetness of classic Rice Krispies treats with the creamy, fruity comfort of banana pudding.
The first bite has everything you want in a fun no-bake dessert. There is a chewy-crisp cereal base, a smooth banana pudding layer, soft slices of ripe banana, fluffy whipped cream, and a little drizzle of honey over the top.
This is exactly the kind of recipe that belongs on a potluck table, a birthday dessert spread, or a casual Sunday afternoon when you want something sweet without turning on the oven. It feels playful and nostalgic, but the banana pudding layer makes it taste just a little more special than a plain cereal treat.
What I love most about this dessert is how simple it is. There is no baking, no complicated decorating, and no long list of steps that requires half the day.
You melt butter and marshmallows, fold in Rice Krispies cereal, press everything into a dish, and let the base cool. Then you add banana pudding, sliced bananas, whipped cream, and a final honey drizzle.
The result is creamy, crispy, sweet, and easy to share. It is the kind of dessert that looks cheerful in squares and disappears quickly once people realize what is hiding under that whipped cream topping.
Table of Contents
- Why You’ll Love Banana Pudding Rice Krispies
- What Makes This Dessert So Fun
- Recipe Details
- Ingredients for Banana Pudding Rice Krispies
- For the Rice Krispies Base
- For the Banana Pudding Layer
- Optional Finish
- Before You Start
- Directions for Banana Pudding Rice Krispies
- Step 1: Prepare the Baking Dish
- Step 2: Melt the Butter
- Step 3: Add the Mini Marshmallows
- Step 4: Stir Until Smooth
- Step 5: Remove the Pot From the Heat
- Step 6: Add the Rice Krispies Cereal
- Step 7: Coat the Cereal Evenly
- Step 8: Press the Mixture Into the Dish
- Step 9: Let the Base Cool Completely
- Step 10: Make the Banana Pudding
- Step 11: Check the Pudding Texture
- Step 12: Spread the Pudding Over the Base
- Step 13: Slice the Bananas
- Step 14: Add the Banana Layer
- Step 15: Add the Whipped Cream
- Step 16: Drizzle With Honey
- Step 17: Add Optional Vanilla Wafer Crumbs
- Step 18: Chill Before Serving
- Step 19: Slice Into Squares
- Step 20: Serve and Enjoy
- Banana Pudding Rice Krispies Variations
- Serving Suggestions
- Storage Tips
- Make-Ahead Tips
- Helpful Notes for Best Results
- Frequently Asked Questions
- Can I Use Regular Marshmallows Instead of Mini Marshmallows?
- How Long Does This Dessert Keep in the Refrigerator?
- Can I Make Banana Pudding Rice Krispies Vegan?
- Why Is My Pudding Layer Runny?
- Can I Make This Ahead for a Party?
- Can I Freeze Banana Pudding Rice Krispies?
- Can I Use a Different Pudding Flavor?
- Can I Add Chocolate?
- Final Thoughts
- Banana Pudding Rice Krispies
Why You’ll Love Banana Pudding Rice Krispies
Banana Pudding Rice Krispies are easy to love because they combine two desserts people already recognize. The Rice Krispies base gives you that marshmallow-coated crunch, while the banana pudding layer adds creamy sweetness and soft banana flavor.
This recipe is also wonderfully easy. You do not need an oven, a mixer, or any complicated equipment beyond a pot, a bowl, a spatula, and a dish for layering.
It is quick enough to make when you need a last-minute dessert. The active prep time is minimal, and most of the waiting comes from letting the cereal base cool before adding the pudding layer.
It is also a great crowd-pleaser. Kids love the marshmallow cereal base, adults appreciate the banana pudding twist, and everyone enjoys the creamy-crispy contrast.
The recipe works for many occasions. It can be served at parties, potlucks, birthdays, casual family desserts, or simply as a sweet treat when the day needs something fun.
It is also flexible. You can keep it classic, add extra crunch, swap the drizzle, change the pudding flavor, or dress it up with crushed vanilla wafers.
What Makes This Dessert So Fun
The charm of this dessert comes from the layers. Each layer is simple on its own, but together they create something that feels more exciting than a basic no-bake square.
The Rice Krispies base brings texture. It is chewy from the melted marshmallows and crisp from the cereal, giving the dessert a sturdy but playful foundation.
The banana pudding layer brings creaminess. Instant banana pudding mix and milk create a smooth layer that spreads over the cooled cereal base and turns the treat into something closer to a layered dessert.
Fresh banana slices add real fruit flavor. They make each square taste more like banana pudding and less like just a flavored topping.
Whipped cream softens the whole dessert. It adds a fluffy finish that balances the cereal’s chewiness and the pudding’s sweetness.
The honey drizzle is the final touch. It adds a small shine of sweetness over the top and makes the dessert feel finished without much effort.
Recipe Details
- Recipe Name: Banana Pudding Rice Krispies
- Recipe Style: No-bake layered dessert squares
- Prep Time: About 15 minutes
- Cooling Time for Base: About 30 minutes
- Dish Size: 9×9-inch baking dish or similar
- Main Layers: Rice Krispies base, banana pudding, sliced bananas, whipped cream
- Best Served: Chilled
- Storage: Airtight container in the refrigerator for up to 2 days
- Freezing: Not recommended
- Best Make-Ahead Tip: Add bananas right before serving to prevent browning
Ingredients for Banana Pudding Rice Krispies
The ingredients for this recipe are simple and easy to find. Each one has a clear role, and together they create a dessert that tastes creamy, crispy, sweet, and nostalgic.
For the Rice Krispies Base
You need 3 tablespoons butter. Salted or unsalted butter can work, though salted butter adds a little balance to the sweetness.
You need 300g mini marshmallows. Mini marshmallows melt quickly and evenly, but regular marshmallows can be used if chopped into smaller pieces.
You need 180g Rice Krispies cereal. This cereal gives the dessert its signature light, crispy texture and should stay as the main base.
For the Banana Pudding Layer
You need 1 package instant banana pudding mix, about 3.4 oz. The instant pudding mix is important because it thickens without cooking.
You need 80ml milk. Whole milk makes the pudding extra creamy, but any milk you have can work.
You need 2 ripe bananas, thinly sliced. Bananas with a few spots give the best flavor because they are sweet, soft, and full of banana taste.
You need 240ml whipped cream. Store-bought whipped cream works, or you can use homemade whipped cream if you prefer.
You need honey for drizzling. A small drizzle adds sweetness and gives the top a pretty finish.
Optional Finish
Crushed vanilla wafers can be sprinkled on top for extra flair. This is optional, but it fits naturally with the banana pudding flavor.
Maple syrup can also be used instead of honey. It gives a slightly different sweetness while still working well with the banana and cereal layers.
Before You Start
Before making the Rice Krispies base, prepare your baking dish. A lightly greased 9×9-inch dish makes it easier to press in the sticky marshmallow mixture and remove the squares later.
It also helps to measure the cereal before melting the marshmallows. Once the marshmallows are smooth, you want to fold in the cereal quickly while the mixture is still warm and flexible.
Use a large pot for the marshmallow mixture. The cereal takes up more room than it seems, and a bigger pot makes folding much easier.
Let the base cool completely before adding the pudding. A warm base can make the pudding layer too soft and may affect the texture.
Slice the bananas close to assembly time. Bananas can brown as they sit, so adding them later keeps the dessert fresher and prettier.
Directions for Banana Pudding Rice Krispies
Step 1: Prepare the Baking Dish
Lightly grease a 9×9-inch baking dish or a similar-sized dish. Make sure the bottom and sides are coated so the sticky cereal base releases more easily.
This dessert is layered, so a prepared dish helps keep the base neat. It also makes slicing and serving much simpler once everything has chilled.
Step 2: Melt the Butter
Place a large pot over low heat and add the butter. Let it melt gently without browning or sizzling too much.
Low heat is important here because the marshmallows will be added next. A gentle start helps keep the mixture smooth instead of scorched or stiff.
Step 3: Add the Mini Marshmallows
Add the mini marshmallows to the melted butter. Stir constantly with a spatula or wooden spoon as they begin to soften.
Mini marshmallows melt quickly, which makes them ideal for this recipe. If using regular marshmallows, chopping them into smaller pieces helps them melt more evenly.
Step 4: Stir Until Smooth
Continue stirring the butter and marshmallows for about 3 to 4 minutes, or until the mixture is completely melted and smooth. Do not rush this step.
If the marshmallows are not fully melted, the Rice Krispies base can turn lumpy. Smooth marshmallow mixture creates a better texture and coats the cereal more evenly.
Step 5: Remove the Pot From the Heat
Once the marshmallow mixture is smooth, remove the pot from the heat. This keeps the mixture from cooking too long or becoming too stiff.
You want it warm and stretchy, not overheated. Removing it from the heat before adding the cereal gives you better control.
Step 6: Add the Rice Krispies Cereal
Pour the Rice Krispies cereal into the pot. Use a spatula to fold the cereal into the marshmallow mixture.
At first, it may look like there is too much cereal, but keep folding gently. The marshmallow mixture will gradually coat the crispy pieces.
Step 7: Coat the Cereal Evenly
Stir until every bit of cereal is coated in the marshmallow mixture. Work quickly but gently so you do not crush the cereal.
This even coating is what holds the base together. It also makes sure every bite has the right balance of crispy cereal and sweet marshmallow.
Step 8: Press the Mixture Into the Dish
Transfer the cereal mixture into the prepared baking dish. Press it into an even layer using the back of a spoon or lightly greased hands.
Do not press too hard. A firm but gentle press keeps the base together without making it overly dense.
Step 9: Let the Base Cool Completely
Set the dish aside and let the Rice Krispies base cool completely for about 30 minutes. The base should be firm enough to hold the pudding layer without sinking.
This cooling step is important. Adding pudding too early can soften the base and make the layers less clean.
Step 10: Make the Banana Pudding
In a bowl, combine the instant banana pudding mix with the milk. Whisk for a full 2 minutes until the pudding begins to thicken.
The full whisking time helps the pudding set properly. Do not stop too soon, because the layer needs enough body to spread over the cereal base.
Step 11: Check the Pudding Texture
Look at the pudding after whisking. It should be thick enough to spread, but still smooth.
If it seems too thick, add a small splash of milk. If it seems too thin, let it sit for a minute so it can continue thickening.
Step 12: Spread the Pudding Over the Base
Once the Rice Krispies base has cooled completely, spread the banana pudding evenly over the top. Use a spatula or butter knife and work gently.
Do not press down too hard. You want to cover the surface without disturbing or compressing the crispy base underneath.
Step 13: Slice the Bananas
Thinly slice the ripe bananas. Try to keep the slices fairly even so they layer nicely across the pudding.
Ripe bananas with a few spots give the best flavor. They are naturally sweeter and softer, which works beautifully in this dessert.
Step 14: Add the Banana Layer
Arrange the banana slices in a single layer over the pudding. Cover as much of the surface as possible so each square gets banana in every bite.
This fresh banana layer is what makes the dessert taste like banana pudding. It adds softness and real fruit flavor.
Step 15: Add the Whipped Cream
Spread or dollop the whipped cream over the banana slices. You can make it smooth and casual or pipe it on for a more decorative look.
The whipped cream gives the dessert its fluffy top layer. It also balances the chewiness of the cereal base and the thickness of the pudding.
Step 16: Drizzle With Honey
Drizzle honey over the whipped cream in a light zigzag. Use just enough to add sweetness and shine without overwhelming the banana flavor.
Maple syrup can also be used in place of honey. Both add a final sweet touch.
Step 17: Add Optional Vanilla Wafer Crumbs
For extra flair, sprinkle crushed vanilla wafers over the top. This optional finish adds crunch and makes the dessert feel even more like banana pudding.
Keep the sprinkle light so the topping does not become heavy. A little texture on top is enough.
Step 18: Chill Before Serving
For the best texture, serve the dessert chilled. Chilling helps the pudding layer settle and makes the squares easier to slice.
The cool pudding and whipped cream also make the dessert taste refreshing. This is especially nice for parties or warm-weather gatherings.
Step 19: Slice Into Squares
Use a sharp knife to cut the dessert into squares. Wipe the knife between cuts if needed for cleaner edges.
The Rice Krispies base should hold its shape while the pudding and whipped cream remain soft on top. Each square should have all the layers in one bite.
Step 20: Serve and Enjoy
Serve the squares chilled and fresh. This is when the cereal is still crisp, the pudding is creamy, and the bananas taste bright and sweet.
These are best enjoyed soon after assembling. The layers are at their best before the bananas brown or the cereal loses too much crunch.
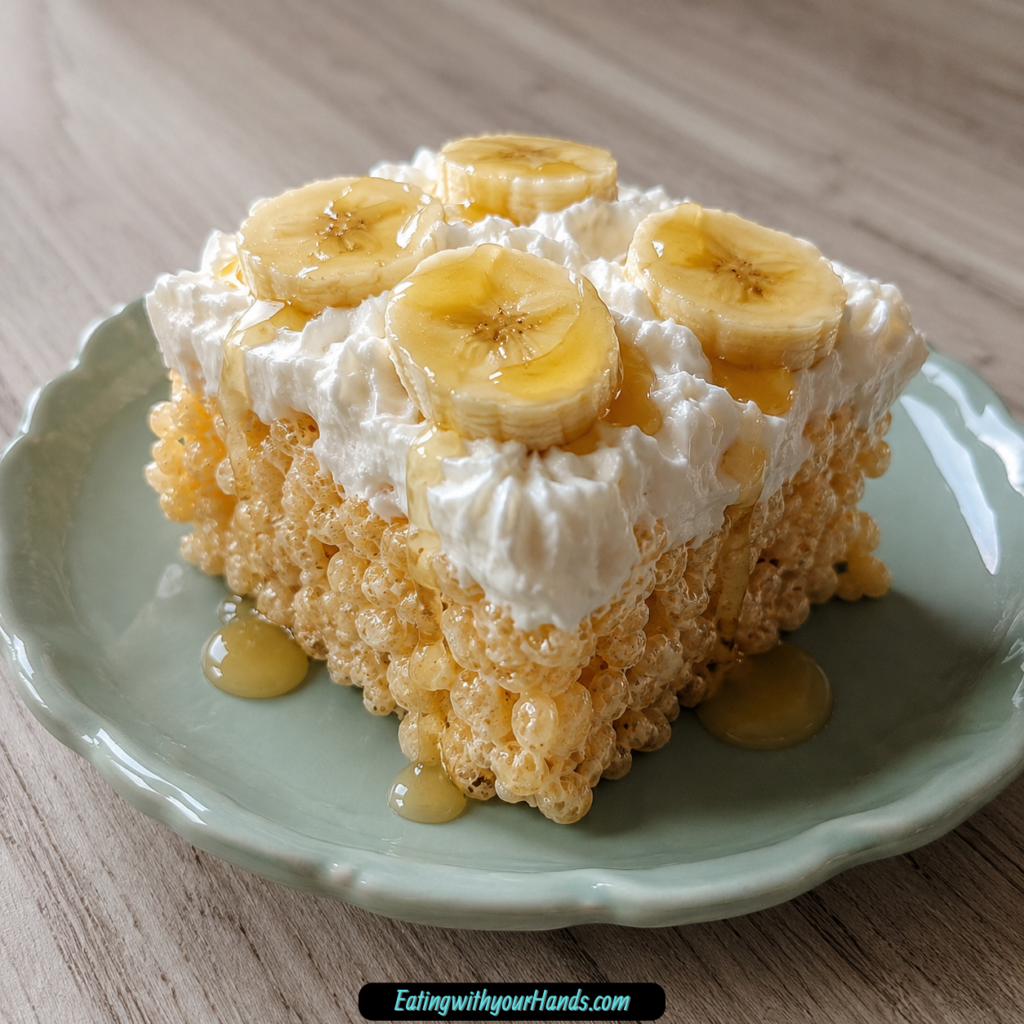
Banana Pudding Rice Krispies Variations
One of the best things about this dessert is how easily it can change. The basic idea stays the same, but you can adjust the flavors and toppings depending on what you enjoy.
Vanilla Pudding Version
Use vanilla pudding instead of banana pudding for a softer banana flavor. The fresh banana slices will still bring fruitiness, but the pudding layer will taste more classic and mellow.
This is a good option for anyone who likes banana pudding but prefers a less intense banana flavor. It also pairs beautifully with the whipped cream and honey.
Butterscotch Pudding Version
Butterscotch pudding can be used for a richer twist. Its deeper sweetness works well with the crispy marshmallow base.
This version feels more caramel-like and cozy. It is a fun change when you want something different from the classic banana flavor.
Nutty Crunch Version
Add chopped pecans or walnuts to the cereal mixture when folding in the Rice Krispies. The nuts add texture and make the dessert taste a little more grown-up.
The crunch works especially well with the creamy pudding layer. Keep the amount moderate so the cereal base still holds together properly.
Caramel Drizzle Version
Swap the honey for caramel sauce. This makes the dessert richer and more indulgent.
Salted caramel is especially good because it adds a sweet-and-salty balance. That little bit of salt helps cut through the sweetness.
Chocolate Banana Version
Add a layer of chocolate ganache or sprinkle chocolate chips over the pudding before adding the whipped cream. Chocolate and banana are a natural match.
This version tastes more like a dessert bar than a classic banana pudding treat. It is perfect for chocolate lovers.
Seasonal Fruit Version
In fall, add a sprinkle of cinnamon or swap the bananas for thinly sliced apples. This gives the dessert a warmer seasonal flavor.
In summer, fresh berries can be added for a fruitier twist. They bring color, brightness, and a little tartness.
Serving Suggestions
Banana Pudding Rice Krispies are best served chilled. The cold pudding and whipped cream make the dessert creamy and refreshing, while the base stays chewy and crisp.
They are perfect for potlucks because they slice into easy squares. People can grab a piece without needing a complicated plated dessert.
They also work beautifully for birthday parties. The dessert feels fun, sweet, and familiar enough for kids while still being interesting for adults.
For a casual family dessert, serve the squares straight from the fridge. They are simple, sweet, and satisfying after dinner.
For extra presentation, add crushed vanilla wafers just before serving. This makes the top look finished and adds another banana pudding-style detail.
Storage Tips
Store leftovers in an airtight container in the refrigerator. They will stay fresh for up to 2 days.
This dessert is best within that short window because the bananas can brown and the Rice Krispies base can lose some crunch over time. It will still taste good, but the texture is best fresh.
If you need to stack the squares, place parchment paper between layers. This helps prevent the whipped cream and topping from sticking.
Do not freeze this dessert. The texture of the pudding, whipped cream, bananas, and cereal base does not freeze and thaw well.
Make-Ahead Tips
You can make the Rice Krispies base ahead of time and let it cool completely. This is helpful when preparing for a party or potluck.
The pudding can also be mixed shortly before assembly. For the freshest look and best banana texture, add the sliced bananas close to serving time.
If assembling ahead, wait to add the banana slices until the last possible moment. This helps prevent browning and keeps the dessert looking fresh.
A small squeeze of lemon juice can help slow browning if needed. Use only a little so the banana flavor stays balanced.
Helpful Notes for Best Results
Melt Marshmallows Fully
Make sure the marshmallows melt completely before adding the cereal. Lumpy marshmallows can make the base uneven and harder to press into the dish.
Low and slow is the best approach. Gentle heat keeps the mixture smooth and easy to work with.
Do Not Press the Base Too Firmly
Press the cereal mixture into the dish evenly, but do not pack it down too hard. A very compact base can become dense instead of chewy and crisp.
Lightly greased hands or a greased spoon make pressing easier. This helps prevent sticking without crushing the cereal.
Let the Base Cool Completely
The pudding layer should only go on once the base is cool. A warm base can soften the pudding and make the layers messy.
Cooling also helps the cereal mixture firm up. This makes it easier to spread pudding over the top.
Whisk the Pudding Long Enough
Whisk the pudding and milk for a full 2 minutes. This helps the pudding thicken properly.
If the pudding is still thin, let it sit for 5 minutes. If it becomes too thick, a splash more milk can loosen it.
Use Ripe Bananas
Ripe bananas bring the best flavor. Look for bananas with a few spots because they are sweeter and softer.
Avoid overly firm bananas if you want a true banana pudding taste. Firm bananas can taste less sweet and feel less creamy.
Add Bananas Close to Serving
Bananas brown after slicing, so add them near serving time whenever possible. This keeps the dessert looking bright and fresh.
A little lemon juice can help if needed. Do not use too much because it can change the flavor.
Frequently Asked Questions
Can I Use Regular Marshmallows Instead of Mini Marshmallows?
Yes, regular marshmallows can be used. Chop them into smaller pieces so they melt more evenly.
Mini marshmallows are faster and easier, but regular marshmallows work well in a pinch. Just stir patiently until smooth.
How Long Does This Dessert Keep in the Refrigerator?
It keeps for up to 2 days in an airtight container. After that, the Rice Krispies base may lose crunch and the bananas may brown.
For the best texture, serve it fresh or within the first day. The layers taste best when the base still has some crispness.
Can I Make Banana Pudding Rice Krispies Vegan?
Yes, you can make a vegan version with a few swaps. Use vegan butter, dairy-free marshmallows, and almond or coconut milk.
Top with coconut whipped cream. The flavor will be slightly different, but the dessert can still be creamy and delicious.
Why Is My Pudding Layer Runny?
The pudding may not have been whisked long enough. Whisk for the full 2 minutes so it has time to thicken.
If it still seems thin, let it sit for 5 to 10 minutes. Pudding mix brands can vary, so the milk may need slight adjustment.
Can I Make This Ahead for a Party?
Yes, but it is best to assemble carefully. The Rice Krispies base can be made ahead, but the bananas should be added close to serving.
This keeps the bananas from browning and the base from softening too much. Add whipped cream and toppings shortly before serving for the freshest result.
Can I Freeze Banana Pudding Rice Krispies?
Freezing is not recommended. The pudding, whipped cream, bananas, and cereal base can all change texture after thawing.
This dessert is best enjoyed fresh from the refrigerator. Make only what you plan to serve within a couple of days.
Can I Use a Different Pudding Flavor?
Yes, vanilla or butterscotch pudding can be used. Vanilla gives a gentler flavor, while butterscotch makes the dessert richer.
Keep the same layering method. The cereal base and whipped cream work well with both options.
Can I Add Chocolate?
Yes, chocolate can be added. Sprinkle chocolate chips over the pudding or add a layer of chocolate ganache before the whipped cream.
Chocolate makes the dessert richer and pairs nicely with banana. It is a great option for chocolate lovers.
Final Thoughts
Banana Pudding Rice Krispies are a fun, easy dessert that turns simple pantry-style ingredients into something memorable. The crispy marshmallow cereal base, creamy banana pudding, fresh banana slices, whipped cream, and honey drizzle all come together in a way that feels nostalgic and fresh at the same time.
This recipe is especially useful because it does not require baking. You can make it quickly, chill it, slice it into squares, and serve it at almost any casual gathering.
What makes it so good is the contrast. The base is chewy and crisp, the pudding is smooth, the bananas are soft and sweet, and the whipped cream makes the whole dessert feel light on top.
It is the kind of treat that makes people smile because it feels familiar but still unexpected. Rice Krispies treats are already loved, and banana pudding turns them into something a little more playful and party-ready.
Serve them chilled, add the bananas close to serving, and enjoy every creamy, crispy bite. Once you see how quickly the tray disappears, this no-bake dessert may become one of those recipes you keep coming back to whenever you need something simple, sweet, and guaranteed to please.
Banana Pudding Rice Krispies
Banana Pudding Rice Krispies are a fun no-bake dessert with a chewy marshmallow cereal base, creamy banana pudding, fresh banana slices, whipped cream, and a sweet honey drizzle. The texture is soft, crisp, creamy, and fruity all in one bite. This easy treat is great when you want something playful and quick without turning on the oven. It brings together the nostalgic crunch of Rice Krispies with the classic comfort of banana pudding.
Recipe Details
- Prep Time: 10 minutes
- Cook Time: 5 minutes
- Total Time: 15 minutes
- Course: Dessert
- Servings: 6 servings
Ingredients
For the Banana Pudding Layer
- 1 package instant banana pudding mix
- 80 ml milk
- ripe bananas, sliced
- 240 ml whipped cream
- honey for drizzling
For the Rice Krispies Base
- 300 g mini marshmallows
- 3 tablespoon butter
- 180 g Rice Krispies cereal
Instructions
Step 1: Melt the Butter and Marshmallows
Melt the butter in a large pot over low heat. Add the mini marshmallows and stir until they are fully melted and smooth.
Step 2: Add the Cereal
Remove the pot from the heat. Stir in the Rice Krispies cereal until the cereal is evenly coated with the melted marshmallow mixture.
Step 3: Shape the Base
Press the Rice Krispies mixture into a greased baking dish. Let it cool until the base is set.
Step 4: Prepare the Banana Pudding
Prepare the instant banana pudding mix with milk according to package instructions.
Step 5: Add the Pudding Layer
Spread the prepared banana pudding evenly over the cooled Rice Krispies base.
Step 6: Finish the Dessert
Top the pudding layer with sliced ripe bananas and whipped cream. Drizzle with honey before serving.
Serving Suggestions
- Fresh banana slices
- Extra whipped cream
- Cold milk
- Hot coffee
- Vanilla wafers
- Brunch dessert trays
- Summer party platters
Storage
How to Store
Store leftovers covered in the refrigerator. Because this dessert includes pudding, whipped cream, and sliced bananas, it is best kept chilled.
How to Reheat
This dessert should not be reheated. Serve it chilled or slightly softened from the refrigerator.
Best Texture Tip
Add the sliced bananas and whipped cream close to serving time for the freshest texture and best appearance.

Fernando is the creator and writer behind the food blog Eating with your Hands. Living and working in cities like Paris, Barcelona, and Berlin, and being married to a Canadian foodie, has given Fernando a passion and interest in food and inspired him to run EWYH.