
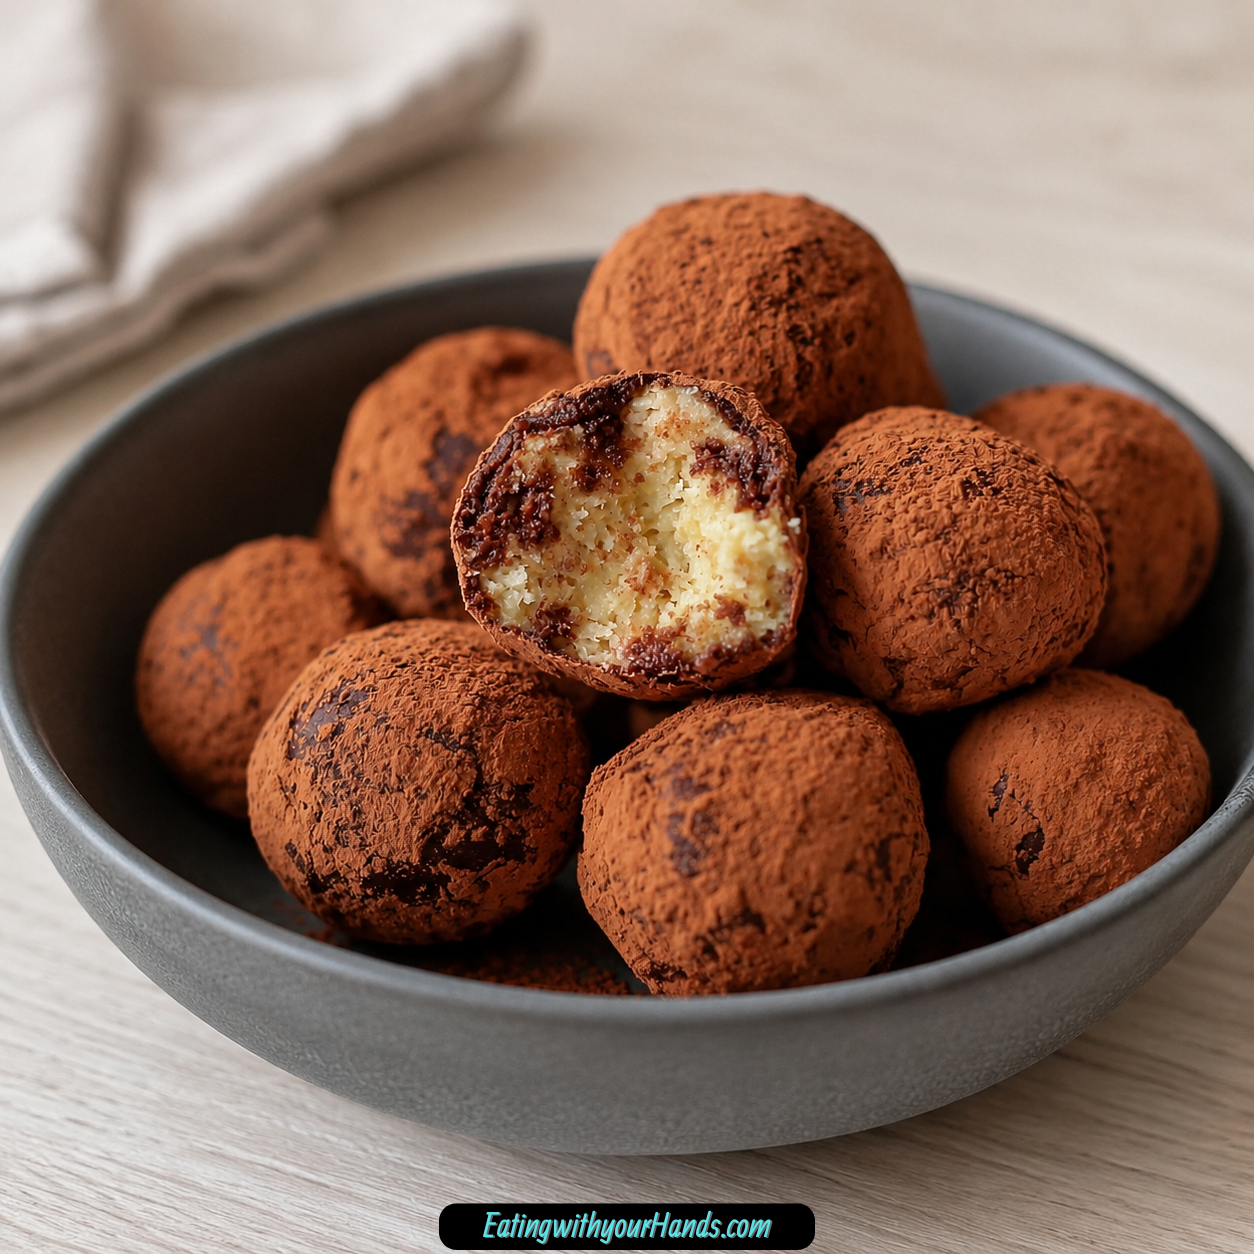
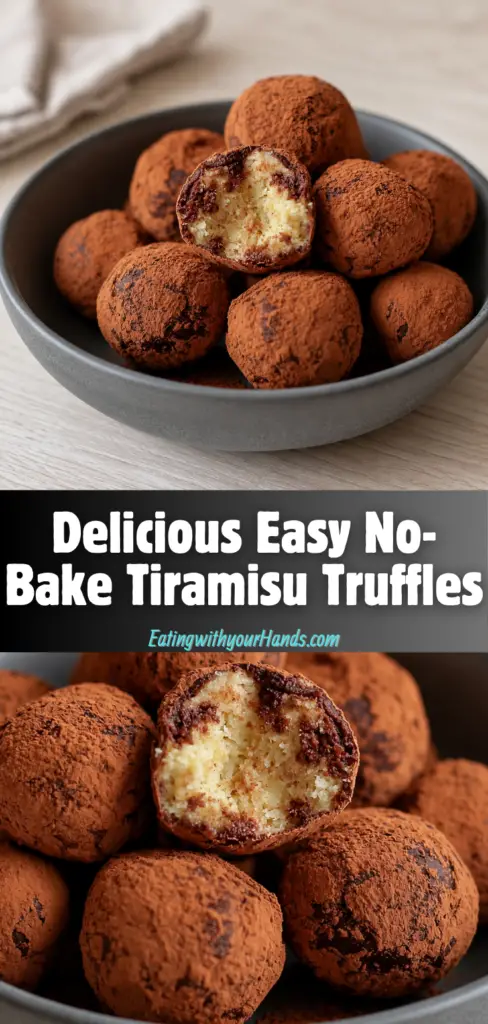
Delicious Easy No-Bake Tiramisu Truffles are the kind of dessert that feels elegant without asking you to bake, layer, chill a full pan, or plan your entire day around it. They have mascarpone, crushed ladyfingers, espresso, powdered sugar, vanilla, cocoa powder, and optional Nutella all rolled into creamy little bites that taste like tiramisu you can pick up with your fingers.
I love desserts that look like they took effort but quietly come together in a bowl. These truffles have that special kind of kitchen magic, where a few simple ingredients turn into something that feels dinner-party worthy in about 15 minutes.
They carry the familiar flavors of tiramisu in a much easier form. The mascarpone makes the filling creamy, the espresso gives that coffee-kissed depth, the ladyfingers create structure, and the cocoa dusting brings the classic finish.
This is the dessert I would make when guests are coming soon, when the oven is not an option, or when a sweet craving hits and a full cake feels like too much. They are quick, forgiving, and charming even when the shapes are a little imperfect.
The best part is how flexible they are. You can keep them classic, fold in Nutella, add a boozy coffee liqueur twist, roll them in cocoa, drizzle them with chocolate, or tuck a batch into the freezer for later.
Table of Contents
- Why You’ll Love These Easy No-Bake Tiramisu Truffles
- Recipe Details
- Ingredients
- Optional Swaps, Variations, Add-Ins, and Serving Ideas
- Why These No-Bake Tiramisu Truffles Work
- Directions
- Step 1: Crush the Ladyfingers
- Step 2: Prepare the Mascarpone
- Step 3: Add the Powdered Sugar
- Step 4: Add the Espresso
- Step 5: Add the Vanilla
- Step 6: Mix Until Smooth and Creamy
- Step 7: Fold in the Crushed Ladyfingers
- Step 8: Adjust the Texture if Needed
- Step 9: Add Nutella if Using
- Step 10: Chill Briefly if the Mixture Is Sticky
- Step 11: Scoop the Truffle Mixture
- Step 12: Roll Into Balls
- Step 13: Prepare the Cocoa Coating
- Step 14: Coat Each Truffle in Cocoa
- Step 15: Add Optional Drizzle
- Step 16: Chill to Firm
- Step 17: Serve Chilled
- Serving Ideas
- Storage
- Reheating
- Freezing
- Make-Ahead
- Helpful Notes for Best Results
- Variations
- Troubleshooting
- Frequently Asked Questions
- Why This Recipe Works So Well
- Final Thoughts
- Easy No-Bake Tiramisu Truffles
Why You’ll Love These Easy No-Bake Tiramisu Truffles
These truffles require zero oven time. They are perfect for hot days, small kitchens, last-minute desserts, and quick sweet cravings.
They deliver all the tiramisu feeling in one bite. You get creamy mascarpone, espresso flavor, ladyfinger crumbs, vanilla, and a cocoa-dusted finish.
They are impressively easy. The mixture is stirred together, rolled into balls, coated in cocoa powder, and chilled briefly.
They feel fancy without being difficult. Serve them on a pretty plate or in mini cupcake liners, and they instantly look like a special dessert.
They are fun to make with helpers. Rolling the mixture into balls is simple, hands-on, and a little messy in the best way.
They freeze beautifully. A tucked-away batch can save you when unexpected guests arrive or dessert cravings show up.
Recipe Details
These tiramisu truffles are no-bake and come together quickly. The mixture is made in a bowl, rolled into balls, dusted with cocoa powder, and chilled for about 10 minutes to firm.
The base uses 1 cup plus 1 tablespoon mascarpone, which is 250 g. Full-fat mascarpone gives the truffles their luxuriously creamy texture.
The structure comes from 5 oz crushed ladyfingers, which is 140 g. Savoiardi cookies are ideal, but any dry ladyfingers can work.
The coffee flavor comes from 2 tablespoons espresso. Cold brew or strongly brewed coffee can also work, and 1 tablespoon can be swapped for coffee liqueur for a boozy twist.
The sweetness comes from ⅓ cup plus 1 teaspoon powdered sugar, which is 50 g. Sifting the powdered sugar helps prevent lumps.
The flavor is finished with ½ teaspoon vanilla bean paste or extract. Vanilla bean paste gives pretty speckles, while extract works perfectly well.
The coating uses ¼ cup cocoa powder, which is 30 g. Dutch-processed cocoa gives a deep, rich dusting, but regular cocoa works too.
Nutella is optional. Use 4 tablespoons, or 60 g, either folded into the mixture or melted and drizzled over the finished truffles.
Ingredients
Creamy Truffle Base
1 cup plus 1 tablespoon mascarpone, 250 g
⅓ cup plus 1 teaspoon powdered sugar, 50 g
2 tablespoons espresso
½ teaspoon vanilla bean paste or extract
Cookie Structure
5 oz ladyfingers, 140 g, crushed
Cocoa Coating
¼ cup cocoa powder, 30 g
Optional Nutella Addition
4 tablespoons Nutella, 60 g, optional
Ingredient Notes
Mascarpone is the star of the truffles. Full-fat mascarpone gives the creamiest texture and the richest tiramisu-style flavor.
Cream cheese can work in a pinch if mascarpone is not available. Add an extra teaspoon of powdered sugar to balance the tang.
Ladyfingers give the mixture structure. Savoiardi cookies are ideal, but any dry ladyfingers will do.
Espresso gives the truffles their coffee flavor. Cold brew or strongly brewed coffee can also be used.
Powdered sugar sweetens the mixture and blends smoothly. Sifting it helps avoid gritty pockets or small lumps.
Vanilla bean paste or vanilla extract adds a soft background flavor. The paste gives beautiful speckles, but extract is completely fine.
Cocoa powder creates the classic tiramisu finish. Dutch-processed cocoa gives a deeper color and richer dusting, though regular cocoa works too.
Nutella is optional but adds a chocolate-hazelnut richness. It can be folded into the filling or melted and drizzled on top.
Optional Swaps, Variations, Add-Ins, and Serving Ideas
Cream Cheese Backup
Use cream cheese if mascarpone is not available. Add an extra teaspoon of powdered sugar to balance the tang.
The texture will be slightly different. Mascarpone is creamier, but cream cheese still makes a delicious truffle.
Strong Coffee Option
Use strong regular coffee instead of espresso. Make sure it has enough flavor to stand out in the mixture.
Cold brew works well too. The goal is a bold coffee note, not a weak background flavor.
Instant Coffee Option
If using instant coffee, dissolve 1 teaspoon in 2 tablespoons hot water first. Let it cool before adding it to the mixture.
This keeps the coffee flavor smooth. It also prevents gritty coffee granules in the truffles.
Boozy Tiramisu Truffles
Swap half the espresso for coffee liqueur. Kahlúa or Tia Maria both work for this variation.
Just 1 tablespoon gives the truffles a grown-up kick. It keeps the dessert familiar while making it feel a little more special.
Nutella Tiramisu Truffles
Fold 4 tablespoons Nutella into the mascarpone mixture before adding the ladyfingers. This gives the truffles a rich hazelnut surprise.
You can also melt a little Nutella and drizzle it over the finished truffles. This makes them look extra pretty.
Chocolate Crunch Truffles
Fold in mini chocolate chips or chopped dark chocolate. These add little bursts of texture.
This variation makes the truffles feel more chocolate-forward. It is a fun option when you want more bite.
Citrus Tiramisu Truffles
Add 1 teaspoon orange zest to the mascarpone mixture. The bright flavor cuts through the richness beautifully.
This variation keeps the coffee and cocoa feeling but adds a fresh lift. It is especially nice for a dessert platter.
Coconut Tiramisu Truffles
Roll the truffles in toasted coconut flakes instead of cocoa. Add a splash of coconut extract if desired.
This gives the truffles a tropical direction. The texture is different, but the dessert stays easy.
Dairy-Free Direction
Use vegan mascarpone or chilled coconut cream. If using coconut cream, chill it overnight and whip it first.
Use gluten-free ladyfingers if needed. The texture and flavor may change, but the truffles can still be delicious.
Why These No-Bake Tiramisu Truffles Work
These truffles work because they capture the main flavors of tiramisu without requiring layers or a long setting time. Mascarpone, espresso, ladyfingers, vanilla, and cocoa powder create the familiar creamy coffee dessert feeling.
The ladyfingers are crushed instead of layered. This lets them absorb the mascarpone and espresso while giving the truffles enough body to roll.
The mascarpone holds everything together. It makes the mixture creamy, soft, and rich.
The espresso flavors the whole filling. A small amount is enough because the truffles are concentrated little bites.
Powdered sugar sweetens the filling without making it grainy. Vanilla rounds out the coffee and cream.
Cocoa powder on the outside gives that classic tiramisu finish. It also keeps the truffles from feeling sticky when served.
Directions
Step 1: Crush the Ladyfingers
Place 5 oz ladyfingers in a zip-top bag. Crush them with a rolling pin until they become fine crumbs.
The crumbs should look like coarse sand. They do not need to be powdery, but large chunks can make rolling harder.
Set the crushed ladyfingers aside. They will be folded into the mascarpone mixture once the creamy base is smooth.
Step 2: Prepare the Mascarpone
Add 1 cup plus 1 tablespoon mascarpone to a large bowl. Use full-fat mascarpone for the creamiest texture.
The mascarpone should be soft enough to stir. If it is too firm from the refrigerator, let it sit briefly before mixing.
A smooth mascarpone base makes the finished truffles creamy. Take a moment to loosen it with a spoon before adding the other ingredients.
Step 3: Add the Powdered Sugar
Add ⅓ cup plus 1 teaspoon powdered sugar to the mascarpone. Sift it first if possible.
Sifting prevents little sugar lumps from staying in the mixture. This helps the truffles taste smooth instead of gritty.
Stir the powdered sugar into the mascarpone until it begins to blend. The mixture should look creamy and lightly sweetened.
Step 4: Add the Espresso
Pour in 2 tablespoons espresso. The espresso should be cool or at least not hot enough to loosen the mascarpone too much.
The coffee flavor is important because it gives the truffles their tiramisu character. Strongly brewed coffee or cold brew can also be used.
Stir slowly at first so the espresso does not splash. Then mix until the coffee is fully incorporated.
Step 5: Add the Vanilla
Add ½ teaspoon vanilla bean paste or extract. Stir it into the mascarpone mixture.
Vanilla bean paste gives little speckles and a deeper-looking finish. Extract works perfectly well if that is what you have.
This small amount of vanilla softens the coffee flavor. It makes the filling taste more rounded.
Step 6: Mix Until Smooth and Creamy
Stir the mascarpone, powdered sugar, espresso, and vanilla until smooth. The mixture should look like a thick coffee cream.
Scrape the sides of the bowl as needed. You want the sweetness and coffee evenly spread through the mascarpone.
Do not rush this step. A smooth base makes the truffles easier to roll and more pleasant to eat.
Step 7: Fold in the Crushed Ladyfingers
Add the crushed ladyfingers to the mascarpone mixture. Fold them in gently.
The ladyfinger crumbs should absorb the creamy coffee mixture. The filling will thicken as the crumbs are incorporated.
Keep folding until there are no dry pockets. The mixture should be thick enough to hold its shape when you scoop it.
Step 8: Adjust the Texture if Needed
If the mixture feels too sticky, add a few more ladyfinger crumbs. This will help firm it.
If the mixture feels too dry, add a small splash of espresso. Mix again and check the texture.
The mixture should be soft but rollable. It should hold together without spreading into a puddle.
Step 9: Add Nutella if Using
If you want Nutella inside the truffles, gently fold in 4 tablespoons Nutella before adding the ladyfinger crumbs. This creates a richer filling.
Fold just until the Nutella is blended into the mascarpone mixture. Then add the crushed ladyfingers and continue as usual.
If you prefer a decorative finish, skip folding it in and save melted Nutella for drizzling over the finished truffles. Both options work.
Step 10: Chill Briefly if the Mixture Is Sticky
If the mixture is difficult to roll, place it in the refrigerator for 10 minutes. This helps it firm up.
Chilling is especially useful if the kitchen is warm or the mascarpone has softened too much. It makes shaping cleaner.
Do not worry if the mixture feels a little rustic. These truffles are forgiving.
Step 11: Scoop the Truffle Mixture
Scoop about 1 tablespoon of mixture for each truffle. Try to keep the portions similar.
Even portions make the truffles look neat and help them chill at the same rate. A spoon works well.
Place each scoop in your palm before rolling. Work one truffle at a time.
Step 12: Roll Into Balls
Roll each scoop gently between your palms to form a ball. Do not press too hard.
The truffles do not need to be perfectly round. A little rustic shape makes them look handmade.
If the mixture sticks to your hands, lightly dampen your palms with water. You can also dust your hands with cocoa powder.
Step 13: Prepare the Cocoa Coating
Place ¼ cup cocoa powder in a shallow bowl. Keep extra cocoa nearby if your hands get messy.
Dutch-processed cocoa gives a deep, rich dusting. Regular cocoa powder can also be used.
A small sieve can be used for a smoother finish. This is helpful if you want a cleaner, more polished look.
Step 14: Coat Each Truffle in Cocoa
Roll each truffle in cocoa powder until fully coated. Make sure all sides are lightly covered.
Shake off the excess cocoa. The goal is an even dusting, not a thick powdery shell.
Place the coated truffles on a plate or tray. Continue until all the truffles are coated.
Step 15: Add Optional Drizzle
If you want a fancy finish, drizzle the truffles with melted Nutella or melted chocolate. Use a light hand.
The drizzle adds shine and extra flavor. It also makes the truffles look more like a special dessert.
Let the drizzle set before storing if needed. This keeps the tops neat.
Step 16: Chill to Firm
Place the truffles in the refrigerator for about 10 minutes. This helps them firm up.
Chilling improves the texture and makes them easier to serve. They taste best cold.
If making them ahead, keep them refrigerated until serving time. The mascarpone filling should stay chilled.
Step 17: Serve Chilled
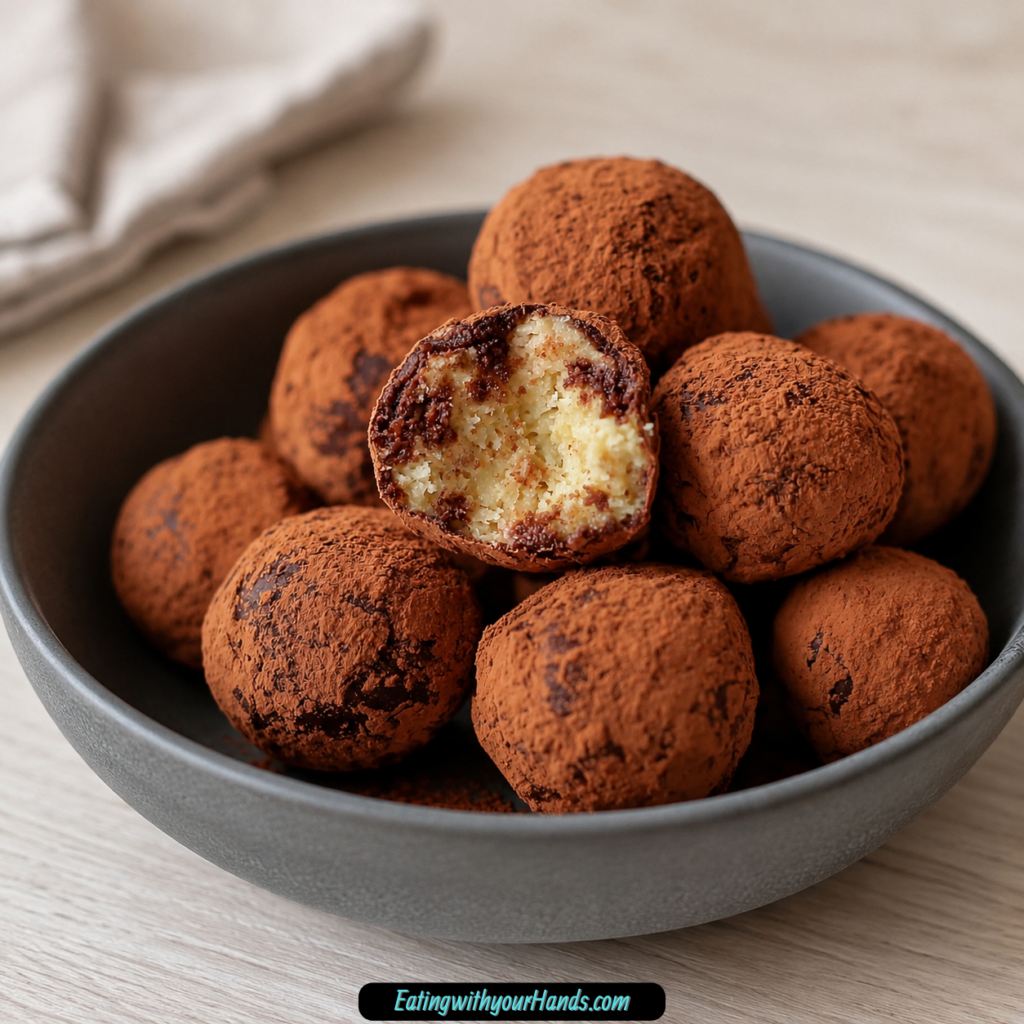
Serve the tiramisu truffles chilled. Arrange them on a pretty plate or place them in mini cupcake liners.
Dust with an extra sprinkle of cocoa powder if desired. A light finish makes them look elegant.
Serve with espresso shots for a fuller tiramisu experience. The coffee pairing makes the dessert feel complete.
Serving Ideas
Serve these truffles chilled for the best texture. The mascarpone filling is creamiest when cold and lightly firm.
Arrange them on a plate for guests. Mini cupcake liners make them look polished and easy to pick up.
Dust them with a little extra cocoa powder just before serving. This freshens the finish.
Drizzle with melted chocolate or melted Nutella for a more dramatic look. This is especially nice for dinner parties or dessert trays.
Serve them with espresso shots if you want the full tiramisu feeling. The coffee makes the creamy, cocoa-dusted bites feel even more complete.
These truffles are also perfect for potlucks, last-minute guests, and afternoon sweet cravings. They feel special but stay very simple.
Storage
Store the truffles in an airtight container in the refrigerator. They stay fresh for up to 3 days.
Keep them chilled until serving. Mascarpone-based truffles are best when cold.
If stacking them, use parchment paper between layers. This helps protect the cocoa coating and prevents sticking.
Add a fresh dusting of cocoa before serving if needed. This makes them look newly finished.
Reheating
These truffles do not need reheating. They are a chilled no-bake dessert.
If frozen, thaw them in the refrigerator for about 1 hour before serving. This keeps the texture creamy and firm.
Do not microwave them. Heat can soften the mascarpone mixture and ruin the truffle shape.
Serve cold for the best tiramisu-style texture. The coffee and cocoa flavors taste especially good when chilled.
Freezing
These truffles freeze beautifully. Layer them between sheets of parchment paper in a freezer-safe container.
Freeze for up to 1 month. This makes them great for planning ahead or keeping a quick dessert ready.
When ready to enjoy, thaw them in the refrigerator for about 1 hour. Serve once they are soft enough to bite but still chilled.
Freezing is especially helpful for unexpected guests. A stored batch can become a fast, impressive dessert.
Make-Ahead
These tiramisu truffles are excellent for make-ahead dessert planning. Roll, coat, chill, and store them in the refrigerator until needed.
They can be refrigerated for up to 3 days. This makes them useful for potlucks and dinner parties.
They can also be frozen for up to 1 month. Thaw in the refrigerator before serving.
If adding a drizzle, you can do it before chilling or closer to serving. A fresh drizzle looks especially pretty.
Helpful Notes for Best Results
If the mixture is too sticky to roll, chill it for 10 minutes. This helps the mascarpone and ladyfinger crumbs firm.
If it is still too sticky, add a few more crushed ladyfingers. Dusting your hands with cocoa powder also helps.
If the mixture is too dry, add a splash of espresso. Add only a little at a time so the mixture does not become loose.
Taste the mixture before rolling. If you want it sweeter, add more powdered sugar, 1 teaspoon at a time.
If it tastes too sweet, add a pinch of salt. This helps balance the flavor.
For a lighter version, swap half the mascarpone for Greek yogurt. The texture will be a little less creamy.
If cocoa powder is not your favorite coating, roll the truffles in crushed nuts or finely grated chocolate. Both create a different finish.
Wear an apron when dusting with cocoa powder. Cocoa has a way of traveling.
Variations
Boozy Tiramisu Truffles
Swap half the espresso for coffee liqueur. Kahlúa or Tia Maria work well.
Just 1 tablespoon gives the truffles a grown-up flavor. Keep them chilled before serving.
Nutella Tiramisu Truffles
Fold Nutella into the mascarpone mixture before adding the ladyfingers. This creates a chocolate-hazelnut filling.
You can also drizzle melted Nutella over the finished truffles. It makes them look fancy with very little work.
Mini Chocolate Chip Truffles
Fold in mini chocolate chips. They add tiny bursts of texture.
This variation keeps the tiramisu flavor but adds chocolate crunch. It is especially fun for chocolate lovers.
Dark Chocolate Truffles
Fold in chopped dark chocolate. The pieces bring a richer flavor and a little bite.
Dark chocolate pairs well with coffee and cocoa. It makes the truffles feel deeper and less sweet.
Orange Zest Tiramisu Truffles
Add 1 teaspoon orange zest to the mascarpone mixture. The citrus flavor brightens the rich filling.
This variation is elegant and fresh. It cuts through the creaminess beautifully.
Coconut Tiramisu Truffles
Roll the truffles in toasted coconut flakes instead of cocoa powder. Add a splash of coconut extract if desired.
This gives the dessert a tropical twist. The texture becomes more textured and chewy on the outside.
Dairy-Free Tiramisu Truffles
Use vegan mascarpone or chilled coconut cream. If using coconut cream, chill it overnight and whip it first.
Use gluten-free ladyfingers if needed. The result will be different but still enjoyable.
Gluten-Free Tiramisu Truffles
Use gluten-free ladyfingers. The rest of the ingredients are naturally gluten-free.
Check the texture after mixing because different ladyfingers may absorb moisture differently. Adjust with extra crumbs or espresso if needed.
Troubleshooting
Why Is My Mixture Too Sticky?
The mixture may be too soft or warm. Chill it for 10 minutes before rolling.
If it still sticks too much, add more ladyfinger crumbs. You can also dust your hands with cocoa powder.
Why Is My Mixture Too Dry?
It may need more moisture. Add a small splash of espresso and mix again.
Add liquid slowly. Too much espresso can make the filling loose.
Why Are My Truffles Gritty?
The powdered sugar may not have been sifted. Sift it before mixing for a smoother texture.
Make sure the mascarpone mixture is smooth before adding the ladyfingers. This prevents uneven pockets.
Why Did My Truffles Lose Their Shape?
They may not have chilled long enough. Refrigerate them for about 10 minutes after rolling.
If the mixture was too wet from the start, add more ladyfinger crumbs next time. The filling should be thick enough to hold its shape.
Why Is the Cocoa Coating Too Heavy?
Too much cocoa may have clung to the surface. Roll the truffles lightly and shake off excess.
A small sieve can create a smoother, lighter dusting. This gives a cleaner finish.
Frequently Asked Questions
Can I Use Regular Coffee Instead of Espresso?
Yes, regular coffee can be used if it is strong. Cold brew also works well.
If using instant coffee, dissolve 1 teaspoon in 2 tablespoons hot water first. Let it cool before mixing.
How Long Do These Truffles Last?
They last up to 3 days in the refrigerator. Store them in an airtight container.
They can be frozen for up to 1 month. Thaw them in the refrigerator for about 1 hour before serving.
My Mixture Is Too Sticky. What Should I Do?
Chill it for 10 minutes. If it is still sticky, add a few more crushed ladyfingers.
Dusting your hands with cocoa powder also helps. Lightly damp hands can work too.
Can I Make These Gluten-Free?
Yes, use gluten-free ladyfingers. Everything else is naturally gluten-free.
Different cookies may absorb moisture differently. Adjust the texture with crumbs or espresso as needed.
Do I Have to Use Mascarpone?
Mascarpone gives the truffles their creamy, classic texture. Cream cheese can work as a backup.
If using cream cheese, add an extra teaspoon of powdered sugar to balance the tang. For a dairy-free option, use chilled coconut cream and whip it first.
Can I Add Nutella?
Yes, Nutella is optional and delicious. Fold it into the filling or drizzle it over the finished truffles.
Use 4 tablespoons if adding it to the mixture. Melt a little if using it as a drizzle.
Can I Make These Ahead for Guests?
Yes, these are great for guests. Keep them chilled in an airtight container for up to 3 days.
For longer planning, freeze them for up to 1 month. Thaw in the refrigerator before serving.
Why This Recipe Works So Well
Delicious Easy No-Bake Tiramisu Truffles work because they turn classic tiramisu flavors into a quick, hand-held dessert. Mascarpone, espresso, ladyfingers, vanilla, powdered sugar, and cocoa powder create a creamy, coffee-scented bite.
The ladyfingers give the truffles structure. Once crushed and folded into mascarpone, they help the mixture become thick enough to roll.
The espresso adds bold flavor without making the mixture too wet. A small amount goes a long way.
Powdered sugar blends smoothly into the filling. It sweetens without adding crunch.
The cocoa coating finishes the tiramisu feeling. It also makes the truffles look elegant and keeps the outside from feeling sticky.
The recipe works because it is flexible and forgiving. Sticky mixture can be chilled, dry mixture can be fixed with espresso, and flavor can be adjusted with Nutella, coffee liqueur, chocolate, citrus, coconut, or different coatings.
Final Thoughts
Delicious Easy No-Bake Tiramisu Truffles are the kind of dessert that makes a small amount of effort feel wonderfully rewarding. They are creamy, coffee-kissed, cocoa-dusted, no-bake, and easy enough to make when you want something impressive without turning on the oven.
I love how they carry the spirit of tiramisu in a simpler, more playful shape. There are no layers to arrange and no long wait for a pan to set, yet every bite still tastes rich, soft, sweet, and gently bold from the espresso.
Make them for last-minute guests, potlucks, dinner parties, freezer desserts, or a quiet afternoon craving. Whether you keep them classic, add Nutella, use a boozy twist, or roll them in a different coating, these little truffles bring creamy no-bake comfort in every bite.
Easy No-Bake Tiramisu Truffles

These Easy No-Bake Tiramisu Truffles are creamy, rich, and full of classic tiramisu flavor from mascarpone, ladyfingers, espresso, cocoa powder, and optional Nutella. They make an elegant bite-sized Italian dessert for parties, holidays, coffee breaks, dessert trays, or anytime you want a simple no-bake treat.
Recipe Details
- Prep Time: 15 minutes
- Total Time: 15 minutes
- Course: Dessert
- Cuisine: Italian
Ingredients
Main Ingredients
- ¼ cup Cocoa powder 30 g
- 4 tablespoons Nutella 60 g, optional
- 2 tablespoons Espresso
- ½ teaspoon Vanilla bean paste or extract
- ⅓ cup + 1 teaspoon Powdered sugar 50 g
- 1 cup + 1 tablespoon Mascarpone 250 g
- 5 oz Ladyfingers (savoiardi cookies) 140 g
Instructions
Step 1: Crush the Ladyfingers
Crush the Ladyfingers into fine crumbs so they can blend smoothly into the truffle mixture.
Step 2: Mix the Mascarpone Base
In a bowl, combine the Mascarpone, powdered sugar, vanilla bean paste or extract, and espresso. Mix until smooth and creamy.
Step 3: Add the Ladyfinger Crumbs
Add the crushed Ladyfingers to the mascarpone mixture and stir until a soft, scoopable truffle dough forms.
Step 4: Add the Optional Nutella
If using Nutella, mix it into the truffle mixture until evenly incorporated.
Step 5: Shape the Truffles
Scoop small portions of the mixture and roll them into truffle-sized balls.
Step 6: Coat with Cocoa Powder
Roll each truffle in cocoa powder until fully coated on the outside.
Step 7: Serve
Serve the tiramisu truffles right away, or chill them briefly if you prefer a firmer texture.
Serving Suggestions
- Serve with espresso, coffee, or cappuccino for a classic tiramisu-style pairing.
- Add to dessert trays with cookies, chocolate bites, or small pastries.
- Serve chilled for a firmer, creamier truffle texture.
- Dust with a little extra cocoa powder right before serving for a polished finish.
- Offer as a no-bake party dessert for holidays, dinner parties, or special occasions.
Storage
How to Store
Store the truffles in an airtight container in the refrigerator until ready to serve.
Best Texture Tip
Chill the truffles if the mixture feels too soft after rolling, especially if serving them later.
Make-Ahead Tip
These no-bake truffles can be made ahead and kept refrigerated so they are ready for dessert trays, parties, or coffee-time treats.

Fernando is the creator and writer behind the food blog Eating with your Hands. Living and working in cities like Paris, Barcelona, and Berlin, and being married to a Canadian foodie, has given Fernando a passion and interest in food and inspired him to run EWYH.