
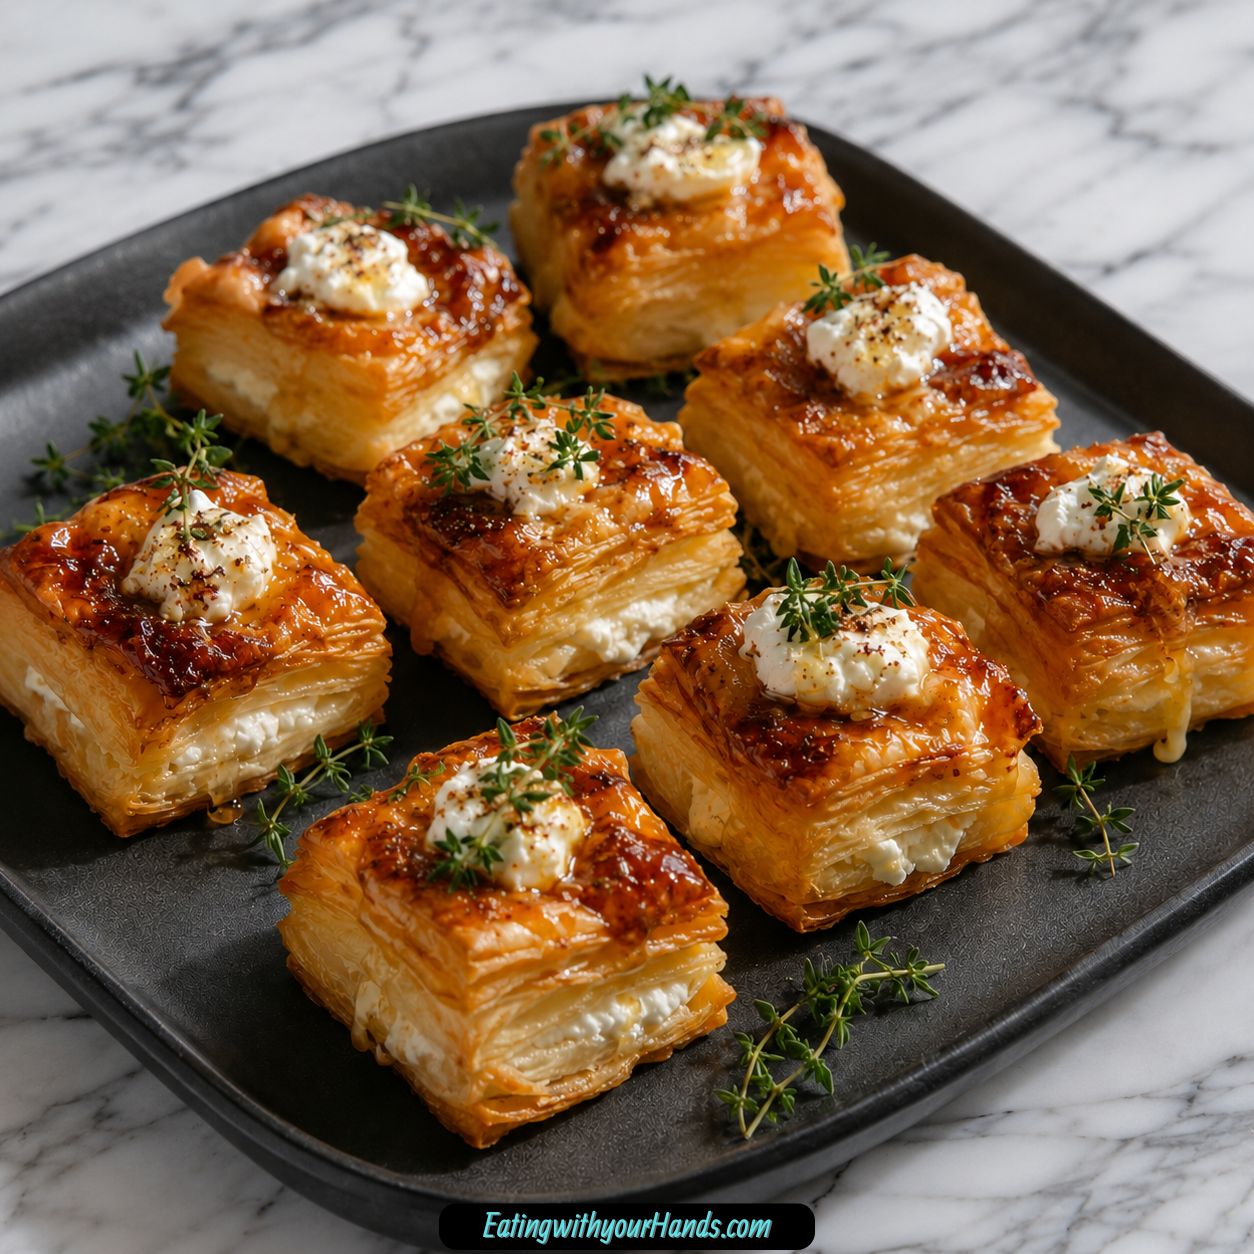

There are certain appetizers that seem to understand exactly what a gathering needs before anyone even sits down. These goat cheese and honey bites are that kind of recipe: small, golden, flaky, a little creamy, a little sweet, and just elegant enough to make the table feel special without making the cook feel overwhelmed.
The beauty of this recipe is that it looks far more polished than the effort behind it. With thawed puff pastry, creamy goat cheese, a drizzle of honey, and a finishing touch of thyme, these bites come out of the oven looking like something you might find on a carefully arranged party tray, even though the whole process is simple and quick.
This is the appetizer I would reach for when friends are arriving soon, the kitchen is still a little chaotic, and I need something that feels intentional. It has that rare combination of speed and charm, which is why it works just as well for holiday gatherings as it does for a quiet night when you want a snack that feels a little more special than usual.
The puff pastry bakes into crisp, buttery layers while the goat cheese softens in the center. Once the honey is drizzled over the warm bites, the contrast of flaky pastry, tangy cheese, and gentle sweetness turns a very short ingredient list into something memorable.
Table of Contents
- Why These Goat Cheese and Honey Bites Work So Well
- The Personal Charm of a Last-Minute Appetizer
- Recipe Details
- Ingredients
- Optional Additions
- Understanding the Main Ingredients
- Directions
- Step 1: Preheat the Oven to 400°F
- Step 2: Thaw the Puff Pastry Completely
- Step 3: Decide on the Shape of the Pastry Pieces
- Step 4: Cut Both Sheets of Puff Pastry
- Step 5: Arrange the Pastry on a Baking Sheet
- Step 6: Portion the Goat Cheese
- Step 7: Place Goat Cheese in the Center of Each Pastry Piece
- Step 8: Add Optional Savory Ingredients Before Baking
- Step 9: Bake Until Golden and Puffy
- Step 10: Watch for Overbrowning
- Step 11: Remove the Baking Sheet From the Oven
- Step 12: Drizzle With Honey
- Step 13: Add Thyme and Final Garnishes
- Step 14: Serve Immediately While Warm
- Tips for Getting the Best Texture
- How to Serve Goat Cheese and Honey Bites
- Delicious Variations
- Make-Ahead Tips
- Storage Tips
- Reheating Instructions
- Freezing Notes
- Helpful Notes for Perfect Results
- Common Mistakes and Easy Fixes
- Frequently Asked Questions
- Final Thoughts
- Goat Cheese and Honey Bites
Why These Goat Cheese and Honey Bites Work So Well
The first reason this recipe works is balance. Puff pastry brings richness and crispness, goat cheese adds tangy creaminess, and honey softens everything with sweetness.
That contrast is what makes each bite feel complete. Nothing is too heavy, too sweet, or too sharp because each ingredient has a role that supports the others.
The second reason is presentation. Even if the pastry pieces are not cut perfectly, they puff and brown in a way that naturally looks inviting.
This makes the recipe forgiving for home cooks. You do not need professional knife skills, perfect pastry edges, or careful piping to make these bites look appealing.
The third reason is speed. The original recipe comes together with about 10 minutes of prep and about 12 to 15 minutes in the oven, giving you a finished appetizer in roughly 25 minutes.
That quick timeline makes the recipe especially helpful when guests are coming over, when you need one more item for a party table, or when you want to turn simple ingredients into something that feels festive. It is the kind of recipe that can rescue a last-minute hosting moment without making it obvious that you were short on time.
The Personal Charm of a Last-Minute Appetizer
Some of the best recipes are not born from perfect planning. They come from opening the refrigerator, spotting a few useful ingredients, and hoping they can turn into something good before the doorbell rings.
These goat cheese and honey bites fit beautifully into that kind of kitchen moment. Puff pastry has a way of making simple fillings feel polished, and goat cheese has enough flavor to carry the recipe without needing a long list of seasonings.
There is something satisfying about placing a tray of these in the oven and watching them transform. Flat pieces of pastry rise into golden layers, the cheese softens in the middle, and suddenly the kitchen smells like you spent far more time preparing than you actually did.
That is the magic of this appetizer. It gives you the feeling of making something special without asking for complicated work in return.
Recipe Details
- Prep time: 10 minutes
- Bake time: 12 to 15 minutes
- Total time: About 25 minutes
- Servings: 8
- Oven temperature: 400°F (200°C)
- Main cooking method: Baking
- Best served: Warm, shortly after baking
Ingredients
- 2 sheets frozen puff pastry dough, thawed
- 1 (4-ounce) log goat cheese
- Honey
- Chopped fresh thyme
Optional Additions
- Crushed red pepper flakes
- Chopped walnuts or pecans
- Hot honey
- Smoked paprika
- Crushed pistachios
- Toasted almonds
- Fig jam
- Thin pear slices
- Chopped rosemary
- Lavender
- A pinch of salt
Understanding the Main Ingredients
When a recipe is this simple, every ingredient has to matter. These goat cheese and honey bites do not rely on complicated techniques or a long list of add-ins, so the final flavor comes from the way each basic element works together.
Puff Pastry
Puff pastry is what gives these bites their golden, flaky structure. It turns small squares or rectangles into crisp, buttery shells that hold the goat cheese and honey beautifully.
The pastry should be thawed before you begin. If it is still frozen or icy, it may crack, tear, or become difficult to unfold.
The original recipe uses 2 sheets of frozen puff pastry dough. Once thawed, each sheet can be cut into 16 pieces, creating small portions that bake quickly and serve easily as appetizers.
All-butter puff pastry can be used if you want a richer pastry flavor. Store-brand puff pastry also works well, which helps keep the recipe practical and accessible.
Goat Cheese
Goat cheese is the creamy, tangy center of this recipe. A 4-ounce log provides the filling that softens during baking and pairs beautifully with the sweetness of honey.
Plain goat cheese works wonderfully because it lets the honey and thyme stand out. Herbed goat cheese can also be used if that is what you already have.
If the goat cheese is very cold, it may be harder to crumble or portion. Letting it sit at room temperature for about 10 minutes makes it easier to handle.
You can pinch off small pieces, crumble it lightly, or slice thin rounds and press them onto the pastry. Each method works as long as the cheese is placed near the center of each pastry piece.
Honey
Honey gives the finished bites their sweet finish. It should be drizzled over the pastry after baking so the texture stays crisp and the honey remains glossy and fresh.
Any honey from your cupboard can work. The original recipe mentions wildflower honey as a personal favorite because of its floral notes.
The amount of honey can be adjusted to taste. A lighter drizzle keeps the appetizer more savory, while a heavier drizzle makes the sweet and tangy contrast more pronounced.
Fresh Thyme
Chopped fresh thyme adds a fragrant finishing touch. It gives the bites a more polished flavor and makes them look especially pretty when served warm.
Only a sprinkle is needed. The thyme should support the goat cheese and honey rather than overpowering them.
If thyme is not available, the original recipe notes that rosemary or even a tiny bit of oregano can work in a pinch. These herbs offer a slightly different character while still fitting the savory-sweet direction of the appetizer.
Directions
Step 1: Preheat the Oven to 400°F
Begin by heating the oven to 400°F (200°C). This step matters because puff pastry depends on strong, direct heat to rise properly and create those flaky golden layers.
Do not rush the preheating process. If the oven is not hot enough when the pastry goes in, the dough may not puff as beautifully and the texture may be less crisp.
While the oven heats, clear a clean work surface for the pastry. Having your space ready makes assembly much easier once the dough is unfolded and cut.
Step 2: Thaw the Puff Pastry Completely
Make sure the 2 sheets of frozen puff pastry dough are fully thawed before using them. The pastry should be flexible enough to unfold without cracking.
If the sheets are folded, open them gently on your clean work surface. Move slowly so the seams do not split or tear more than necessary.
There is no need to make the process overly precious. Puff pastry is fairly forgiving, and small uneven areas will still bake into crisp, golden bites.
Step 3: Decide on the Shape of the Pastry Pieces
Once the pastry is unfolded, decide whether you want squares or rectangles. Both shapes work, so this choice is mostly about appearance and convenience.
For a neat appetizer size, cut each sheet into 16 pieces. The original recipe describes these as about 2-inch squares, which are easy to pick up and serve.
A pizza cutter is especially useful because it glides through the pastry quickly. A sharp knife can also work if that is what you have available.
If your pieces are not perfectly even, do not worry. Once the pastry puffs and browns, slight differences in size will look rustic rather than messy.
Step 4: Cut Both Sheets of Puff Pastry
Cut the first sheet of puff pastry into 16 small pieces. Repeat the same process with the second sheet.
Try to keep the pieces similar in size so they bake evenly. Pieces that are much larger may need more time, while very small pieces may brown faster.
If the pastry becomes too soft while you are cutting, handle it gently and continue. The recipe is forgiving enough that minor stretching or uneven corners will not ruin the final result.
Step 5: Arrange the Pastry on a Baking Sheet
Place the pastry pieces onto a baking sheet. Leave a little room between each piece so the pastry has space to puff.
The original recipe says parchment paper is not required, but you may use it if you are worried about sticking. Parchment can also make cleanup easier after the honey and cheese are added.
Do not crowd the pieces tightly together. Puff pastry needs room for heat to circulate around each bite.
Step 6: Portion the Goat Cheese
Take the 1 (4-ounce) log of goat cheese and begin portioning it into small amounts. The original recipe suggests about ½ teaspoon of goat cheese per pastry piece.
The pieces do not need to look identical. Goat cheese softens as it bakes, so small rustic portions are perfectly fine.
If the cheese feels firm, let it sit at room temperature for about 10 minutes. This makes it easier to crumble, slice, or press onto the pastry.
Step 7: Place Goat Cheese in the Center of Each Pastry Piece
Set one small portion of goat cheese in the center of each pastry square or rectangle. Try to leave a small border around the edges.
That border gives the pastry space to puff around the cheese. It also helps keep the filling from spreading too far as it warms.
Do not press the cheese too deeply into the pastry. A gentle placement is enough because the cheese will settle slightly during baking.
Step 8: Add Optional Savory Ingredients Before Baking
If you want a little heat, add a small pinch of crushed red pepper flakes. The warmth of the pepper works well with the sweetness of honey.
If you want extra crunch, add chopped walnuts or pecans. Toasting the nuts first is optional, but the original recipe notes that it makes the crunch especially good.
Other optional pre-bake flavor ideas include smoked paprika, crushed pistachios, toasted almonds, chopped rosemary, or lavender. Use only the additions that fit the version you want to serve.
Step 9: Bake Until Golden and Puffy
Place the baking sheet in the preheated 400°F (200°C) oven. Bake for 12 to 15 minutes.
As the bites bake, the pastry should puff into flaky golden layers. The goat cheese should soften and may develop small toasted spots.
Begin checking near the 12-minute mark. They are ready when the pastry looks golden, puffed, and crisp.
Avoid baking them until they become too dark. Puff pastry can move from golden to overbrowned quickly, especially toward the end of baking.
Step 10: Watch for Overbrowning
If the pastry begins to brown before the cheese looks warmed through, the original recipe suggests tenting the bites with foil. This can help protect the surface while allowing the center to continue warming.
Use foil gently so it does not press down on the puffed pastry. The goal is only to shield the tops from too much color.
If a little cheese oozes onto the baking sheet, do not panic. The original recipe frames this as part of the rustic charm, and the bites will still taste delicious.
Step 11: Remove the Baking Sheet From the Oven
Once the pastry is golden and the cheese has softened, remove the baking sheet from the oven. Place it on a heat-safe surface.
Let the bites rest for about a minute before garnishing. The goat cheese will be very hot right after baking.
This brief cooling time also helps the pastry settle. The bites will still be warm, crisp, and ready for the final toppings.
Step 12: Drizzle With Honey
Drizzle honey over the warm bites after they come out of the oven. This timing helps keep the pastry crisp while allowing the honey to melt slightly into the warm cheese.
You can use a light drizzle or a more generous one depending on your taste. The original recipe notes that some people may prefer a sweeter bite, while others may want only a whisper of honey.
Move your hand back and forth over the tray for an easy, natural drizzle. The finish does not need to look perfect.
Step 13: Add Thyme and Final Garnishes
Sprinkle chopped fresh thyme over the honey-drizzled bites. This adds color, aroma, and a more complete flavor.
If desired, add a tiny pinch of salt. This can help sharpen the contrast between the sweet honey and tangy cheese.
Now is also the time to add optional red pepper flakes, nuts, or another small finishing touch if you did not add them earlier. The warm pastry and cheese help the toppings settle into place.
Step 14: Serve Immediately While Warm
Serve the bites right away while the pastry is crisp and the cheese is soft. This is when the texture is at its best.
Arrange them on a platter, a wooden board, or a simple serving plate. They look beautiful piled casually or lined up in neat rows.
If you are serving more than a few people, consider doubling the recipe. The original notes that these bites disappear quickly, especially at gatherings.
Tips for Getting the Best Texture
The most important texture rule is to keep the pastry from becoming soggy. That is why the honey is added after baking rather than before.
Warm puff pastry should be crisp on the outside and tender inside. If honey sits on it too long before baking or storage, the pastry can lose some of that delicate crunch.
Another helpful tip is to avoid overloading each piece with cheese. About ½ teaspoon per bite gives the cheese enough presence without overwhelming the pastry.
If the cheese spreads or oozes a little, that is not a failure. These bites can look rustic and still taste wonderful.
How to Serve Goat Cheese and Honey Bites
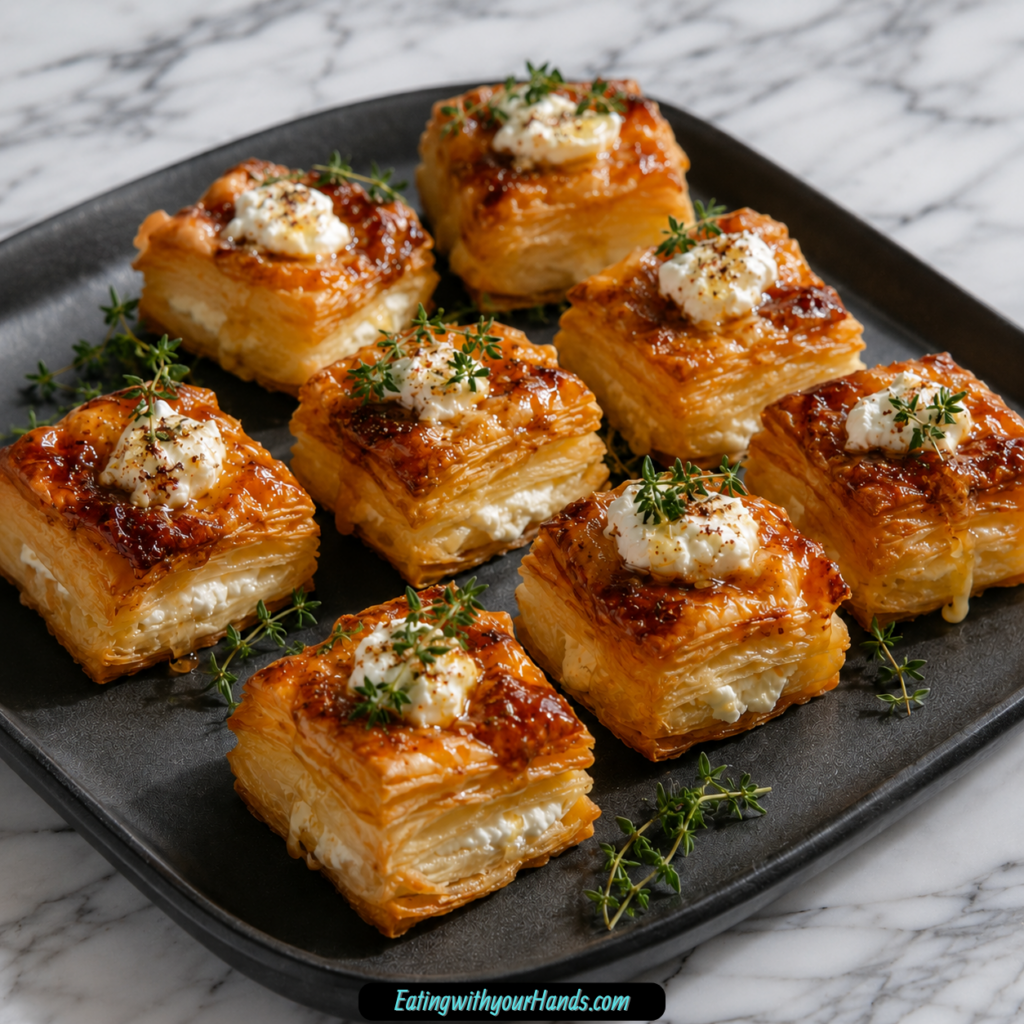
These bites are best served warm, when the pastry is flaky and the honey is slightly gooey. That moment right after baking is when the contrast between crisp pastry and creamy cheese feels most satisfying.
For a casual gathering, pile them onto a platter and let people help themselves. For a more styled presentation, arrange them on a wooden board with extra thyme sprigs.
They pair well with prosecco or a crisp white wine. The original recipe also notes that they can be satisfying with a side salad on a night when you need a quick, easy meal.
They also work beautifully for holiday gatherings, wine nights, dinner parties, or even a solo treat with tea. Their size makes them easy to serve, and their flavor makes them feel more special than the short prep time suggests.
Delicious Variations
Sweet Heat Variation
For a sweet and spicy version, use hot honey instead of regular honey. You can also add chili flakes if you want a little more heat.
The sweetness of honey and the tanginess of goat cheese handle spice well. This variation is especially good when you want the bites to feel bold without adding many ingredients.
Smoked paprika is another option mentioned in the original recipe. It adds a different kind of warmth and can make the flavor feel slightly deeper.
Nutty Goat Cheese Bites
For extra crunch, add chopped walnuts or pecans. Toasting them first is optional, but it can make the texture more noticeable.
Crushed pistachios or toasted almonds can also be pressed into the cheese before baking. These additions give the bites more texture and a slightly more dressed-up appearance.
Nuts work especially well with honey because they add contrast. Each bite becomes flaky, creamy, sweet, and crunchy at the same time.
Fruit-Topped Version
For a fruitier version, top the baked bites with fig jam. The jam adds sweetness and a rich, soft texture.
Thin pear slices can also be used for a delicate fruit finish. They pair well with goat cheese and honey while keeping the appetizer elegant.
This variation is especially nice for a party board or a holiday spread. It gives the bites a slightly more composed look while still keeping the recipe simple.
Herb Garden Version
For a more fragrant bite, mix chopped rosemary or lavender into the goat cheese. This gives the cheese a more aromatic flavor before it is baked.
Use herbs carefully so they do not overpower the goat cheese and honey. A little goes a long way in small appetizers.
Fresh thyme remains the classic finishing herb in the original recipe. However, rosemary, lavender, or a tiny bit of oregano can shift the flavor in a new direction.
Make-Ahead Tips
These bites are best baked right before serving. Puff pastry has the best texture when it is fresh from the oven and still warm.
You can prepare some elements ahead of time. The original recipe says you can prep the pastry squares and cheese portions up to 2 hours ahead, keeping them separate in the refrigerator.
Do not drizzle the honey ahead of time. Honey should be added after baking so the pastry stays crisp.
If you assemble too far ahead with honey already added, the pastry may soften before it reaches the table. Keeping the components separate preserves the texture.
Storage Tips
These goat cheese and honey bites are definitely best fresh. However, if you have leftovers, they can still be stored carefully.
If the bites will be eaten within 2 hours, they can sit at room temperature. The honey helps keep the bites moist during that short window.
For refrigerator storage, place the bites in an airtight container. Stack them gently with parchment between layers.
They will keep for 1 to 2 days in the refrigerator. The pastry will not be as crisp as when freshly baked, but reheating can help revive it.
Reheating Instructions
To reheat, place the bites in a 350°F (175°C) oven for 5 to 7 minutes. This helps bring back some of the pastry’s crisp texture.
A toaster oven can also work well. An air fryer may work in a pinch, but watch the bites closely because they can brown quickly.
Avoid adding honey before storage if you know there will be leftovers. Drizzle fresh honey after reheating to reduce sogginess.
This small step makes a noticeable difference. Fresh honey gives the reheated bites a better finish and helps them taste closer to freshly baked.
Freezing Notes
The original recipe does not recommend freezing the bites after baking. The pastry can lose its best texture once baked, frozen, and thawed.
However, unbaked assembled bites can be frozen for up to a month. This makes it possible to prepare them ahead for a future gathering.
When baking from frozen, add 2 to 3 minutes to the baking time. Watch the pastry closely so it becomes golden without overbrowning.
Honey should still be added after baking. This keeps the pastry as crisp as possible.
Helpful Notes for Perfect Results
If your goat cheese is cold and difficult to crumble, let it sit at room temperature for 10 minutes. Softer goat cheese is easier to portion and place on the pastry.
You can also slice thin rounds of goat cheese and press them gently onto the pastry pieces. This is an easy shortcut when crumbling feels messy.
If puff pastry is not available, phyllo dough can work in a pinch. Layer 2 to 3 sheets per bite and brush with butter between layers.
Phyllo will create a lighter, crispier texture rather than the same puffed layers. It will not rise like puff pastry, but it can still taste delicious.
For a dairy-free option, the original recipe mentions vegan cream cheese. It may not melt in the same way as goat cheese, so extra honey can help balance the flavor.
If the pastry sticks to the pan, slide a spatula underneath while the bites are still warm. They should loosen more easily before they cool completely.
Common Mistakes and Easy Fixes
The Pastry Is Browning Too Fast
If the pastry browns before the cheese warms through, tent the bites loosely with foil. This protects the surface while allowing the baking to continue.
Be gentle when placing the foil over the tray. You do not want to flatten the puff pastry.
The Cheese Oozed Out
If the goat cheese oozes, the bites are still usable. The original recipe suggests simply calling them rustic and finishing them with honey.
Next time, try leaving a slightly larger pastry border around the cheese. You can also use a little less cheese on each piece.
The Goat Cheese Did Not Melt Much
Some goat cheeses are firmer than others. If yours did not soften as much as expected, try crumbling it more finely next time.
Letting the cheese sit at room temperature for 10 minutes can also help. Even if it stays more crumbly, the flavor will still work with the honey and pastry.
The Pastry Lost Its Crispness
This usually happens when the bites sit too long after baking or when honey is added before storage. Puff pastry is at its best when served warm and fresh.
To help revive leftovers, reheat them in a 350°F (175°C) oven for 5 to 7 minutes. Add fresh honey after reheating rather than before.
Frequently Asked Questions
Can I Use Phyllo Dough Instead of Puff Pastry?
Yes, phyllo dough can be used instead of puff pastry. It will create a crispier, lighter texture rather than a puffed, layered one.
Use 2 to 3 sheets per bite and brush melted butter between the layers. The bites will not puff as much, but they can still taste delicious.
Can I Make These Ahead of Time?
You can prepare the pastry squares and cheese portions up to 2 hours ahead. Keep them separate in the refrigerator until you are ready to bake.
Bake the bites right before serving for the best texture. The honey drizzle should always be added at the last minute.
Why Did My Goat Cheese Stay Firm?
Some goat cheeses are naturally firmer than others. Letting the cheese sit at room temperature for about 10 minutes can help it soften before baking.
You can also crumble it into smaller pieces. Smaller pieces warm more easily and distribute better over the pastry.
Can I Freeze These After Baking?
Freezing after baking is not recommended because the pastry may lose its best texture. The crisp, flaky quality is strongest when the bites are freshly baked.
Unbaked assembled bites can be frozen for up to a month. Bake them straight from the freezer and add 2 to 3 minutes to the baking time.
Should I Add Honey Before or After Baking?
Add the honey after baking. This keeps the puff pastry crisp and gives the finished bites a glossy, fresh sweetness.
If you are storing leftovers, do not drizzle honey on the bites you plan to save. Add fresh honey after reheating instead.
Can I Use Herbed Goat Cheese?
Yes, herbed goat cheese can be used. It gives the bites an extra layer of flavor while still working with the honey and pastry.
Plain goat cheese is also excellent because it lets the honey and thyme stand out. Use whichever version you already have or prefer.
What Can I Use Instead of Thyme?
Rosemary can work in place of thyme. A tiny bit of oregano may also be used in a pinch.
The herb should be added lightly. These are small bites, so a strong herb can take over quickly.
Are These Best for Parties or Everyday Snacking?
They work for both. Their appearance makes them suitable for parties, but the simple preparation makes them easy enough for an ordinary day.
That is part of the appeal. They feel polished without requiring a special occasion.
Final Thoughts
These goat cheese and honey bites are proof that an appetizer does not need to be complicated to feel special. With puff pastry, goat cheese, honey, and thyme, the recipe creates a beautiful balance of crisp texture, creamy tang, and gentle sweetness.
They are fast enough for a last-minute gathering and elegant enough for a dinner party. They can be served on a holiday table, paired with wine, enjoyed with tea, or made on a regular night when you want something warm and satisfying.
The basic method is simple: cut thawed puff pastry, add goat cheese, bake at 400°F (200°C) for 12 to 15 minutes, then finish with honey and thyme. From there, the recipe can shift toward sweet heat, nutty crunch, fruit-topped elegance, or herb-filled fragrance.
Most importantly, these bites offer that wonderful kitchen feeling of making something that looks impressive without needing to struggle for it. They are easy, flexible, and memorable, which is exactly why they deserve a place in your appetizer rotation.
Goat Cheese and Honey Bites
These goat cheese and honey bites combine flaky puff pastry with creamy, tangy cheese and a sweet drizzle of honey. Fresh thyme adds a light herbal finish that makes each bite feel elegant without requiring much preparation. They are quick enough for casual entertaining and polished enough for holiday parties, brunches, or appetizer trays.
Recipe Details
- Prep Time: 10 minutes
- Cook Time: 15 minutes
- Total Time: 25 minutes
- Course: Appetizer
- Servings: 8 bites
Equipment
- Baking sheet
Ingredients
For the Bites
- 1 4-ounce log goat cheese
- 2 sheets frozen puff pastry dough, thawed
- Honey for drizzling
- Chopped fresh thyme for garnish
Optional Additions
- Chopped walnuts or pecans
- Crushed red pepper flakes a pinch
Instructions
Step 1: Preheat the Oven
Preheat the oven to 400°F (200°C).
Step 2: Cut the Puff Pastry
Cut the thawed puff pastry into small squares or rectangles.
Step 3: Add the Goat Cheese
Place pieces of goat cheese on top of each pastry square.
Step 4: Bake the Bites
Arrange the pastries on a baking sheet and bake for 12-15 minutes, or until the puff pastry is golden.
Step 5: Add the Finishing Touches
Drizzle the warm bites with honey and garnish with chopped fresh thyme.
Step 6: Add Optional Toppings
Top with a pinch of crushed red pepper flakes, chopped walnuts or pecans, or both, if desired.
Notes
Serve the bites warm for the best texture.
Serving Suggestions
- Arrange them on an appetizer platter for parties or holiday gatherings.
- Serve alongside fresh fruit, grapes, or sliced pears.
- Pair with a simple green salad for a light brunch.
- Add them to a cheese board with crackers and nuts.
- Serve as a warm starter before dinner.
Storage
How to Store
Place cooled leftovers in an airtight container and refrigerate.
How to Reheat
Warm the bites in the oven until heated through and the pastry becomes crisp again.
Best Texture Tip
Serve shortly after baking, while the puff pastry is still flaky and the goat cheese is warm and creamy.

Fernando is the creator and writer behind the food blog Eating with your Hands. Living and working in cities like Paris, Barcelona, and Berlin, and being married to a Canadian foodie, has given Fernando a passion and interest in food and inspired him to run EWYH.