
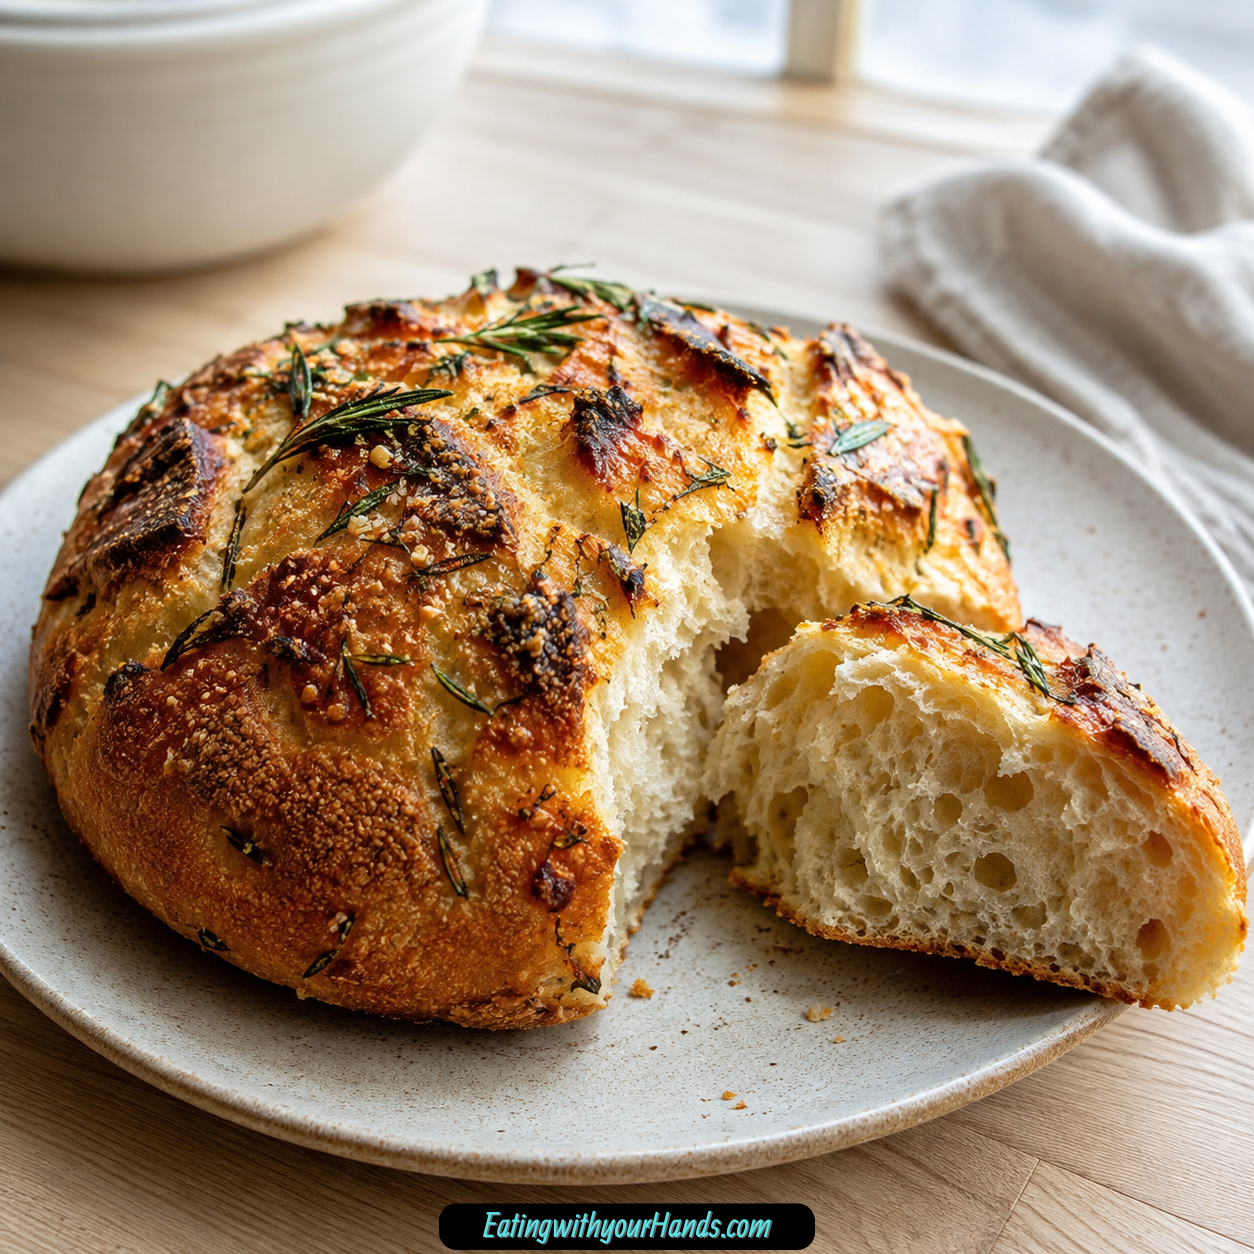
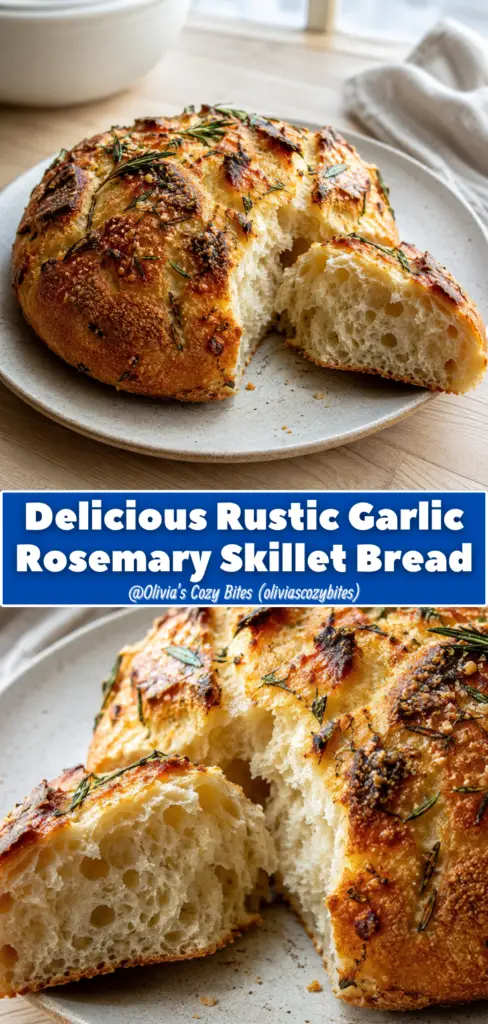
Delicious Rustic Garlic Rosemary Skillet Bread is the kind of homemade bread that makes a kitchen feel alive. The dough is simple, the method is relaxed, and the finished loaf comes out with a crisp golden crust, a soft pillowy center, and the deep savory smell of garlic and rosemary baked into every bite.
This is not a fussy bread recipe that asks for special equipment or hours of careful work. It is a quick skillet bread made with all-purpose flour, salt, instant yeast, warm water, olive oil, fresh garlic, and rosemary, then baked in a hot skillet until the bottom gets beautifully crisp.
The flavor is bold in a rustic, comforting way. Garlic brings that warm savory bite, rosemary gives the bread a Mediterranean-style aroma, and olive oil helps create richness and a gorgeous crust.
What makes this bread so lovable is how little effort it needs compared with how impressive it feels. You mix the dough, knead it briefly, let it rest, fold in the garlic and rosemary, rest again, and bake it in a preheated skillet.
The result is the kind of bread you want to tear apart while it is still warm. It belongs beside soup, pasta, a cheese board, a bowl of olive oil, or a simple dinner that needs one homemade thing to make it feel complete.
Table of Contents
- Why You’ll Love Rustic Garlic Rosemary Skillet Bread
- Recipe Details
- Ingredients
- Optional Variations and Add-Ins
- The Charm of Rustic Skillet Bread
- Why the Skillet Makes a Difference
- Why Garlic and Rosemary Work So Well
- Directions
- Step 1: Gather Your Ingredients
- Step 2: Measure the Flour
- Step 3: Add the Salt and Instant Yeast
- Step 4: Use Active Dry Yeast if Needed
- Step 5: Check the Water Temperature
- Step 6: Add Water and Olive Oil
- Step 7: Mix the Shaggy Dough
- Step 8: Turn the Dough Out
- Step 9: Knead Briefly
- Step 10: Rest the Dough for 10 Minutes
- Step 11: Mince the Garlic
- Step 12: Chop the Rosemary
- Step 13: Add Garlic and Rosemary to the Dough
- Step 14: Fold the Flavor In
- Step 15: Shape Into a Rough Ball
- Step 16: Rest Again for 10 Minutes
- Step 17: Preheat the Oven and Skillet
- Step 18: Remove the Hot Skillet Carefully
- Step 19: Add Olive Oil to the Skillet
- Step 20: Place the Dough in the Skillet
- Step 21: Slash the Top if Desired
- Step 22: Bake the Bread
- Step 23: Check for Doneness
- Step 24: Cool Before Slicing
- Serving Tips
- Storage
- Freezing
- Crouton Tip
- Helpful Notes for Best Results
- Variations
- Troubleshooting
- Frequently Asked Questions
- Why This Bread Is Perfect for Simple Meals
- Why This Recipe Works So Well
- Final Thoughts
- Rustic Garlic Rosemary Skillet Bread
Why You’ll Love Rustic Garlic Rosemary Skillet Bread
This bread is surprisingly easy. It does not need a stand mixer, bread machine, or long kneading session.
It comes together quickly. The dough is kneaded for only about 30 seconds, rests twice, and bakes in a hot skillet.
The crust is one of the best parts. Preheating the skillet gives the bottom a deep golden finish and a satisfying crisp texture.
It has simple but powerful flavor. Garlic and rosemary do most of the work, turning basic bread dough into something fragrant and memorable.
It is versatile at the table. Serve it with pasta, soup, olive oil, cheese, butter, avocado toast, or anything that needs warm bread.
It is also flexible. You can add cheese, sun-dried tomatoes, Kalamata olives, red pepper flakes, chili oil, fresh basil, cherry tomatoes, thyme, oregano, or sage.
Recipe Details
- Recipe name: Delicious Rustic Garlic Rosemary Skillet Bread
- Cooking method: Skillet bread
- Skillet size: 10 to 12 inch cast iron skillet
- Oven temperature: 450°F (230°C)
- Reheating temperature: 350°F (175°C)
- Reheating time for frozen slices: 5 to 7 minutes
- Dough kneading time: About 30 seconds
- First rest time: 10 minutes
- Second rest time: 10 minutes
- Baking time: 25 to 30 minutes
- Cooling time before slicing: At least 10 minutes
- Room temperature storage: 2 days
- Freezer storage: Up to 3 months
- Doneness cue: Golden top, deep brown bottom, and hollow sound when tapped
- Maximum suggested add-ins: About ¾ cup total
Ingredients
For the Dough
- 2 cups all-purpose flour
- 1 teaspoon salt
- 1 teaspoon instant yeast
- 1 cup warm water (100°F to 110°F)
- 2 tablespoons olive oil
For the Flavor
- 4 cloves garlic, minced
- 2 tablespoons fresh rosemary, chopped
Optional Variations and Add-Ins
- Active dry yeast
- 2 teaspoons dried rosemary
- Extra virgin olive oil
- ½ cup grated Parmesan
- ½ cup sharp cheddar
- Extra cheese on top before baking
- ¼ cup oil-packed sun-dried tomatoes, chopped and patted dry
- ⅓ cup chopped Kalamata olives
- Olive brine in place of some water
- ½ teaspoon red pepper flakes
- Chili oil
- Thyme
- Oregano
- Sage
- Fresh basil
- Halved cherry tomatoes
- Butter for serving
- Good olive oil for dipping
- Flaky salt
- Garlic clove for rubbing toasted slices
- Ripe avocado
- Chili flakes
- Baking powder, 1 tablespoon, for a yeast-free quick bread version
The Charm of Rustic Skillet Bread
Rustic skillet bread feels special because it has the soul of homemade bread without the complicated routine. It does not ask for perfect shaping, precise scoring, or hours of rising.
The loaf is meant to look handmade. A rough round shape, a few uneven edges, and little bits of garlic or rosemary peeking through the dough make it more inviting.
The hot skillet gives the bread a crusty bottom that feels almost like bakery bread. That sizzle when the dough touches the oiled pan is part of what creates the crisp texture.
Inside, the bread stays soft and chewy. The brief kneading keeps the method simple while still helping the dough come together.
The garlic and rosemary make the bread smell incredible. Their flavor spreads through the dough and becomes even more fragrant as the bread bakes.
This is the kind of bread that does not need much dressing up. A little olive oil, butter, or a warm bowl of soup is enough.
Why the Skillet Makes a Difference
The skillet is one of the most important parts of this recipe. Preheating it in the oven gives the bread a hot surface to land on.
When the dough hits the hot skillet and olive oil, the bottom begins to crisp right away. This creates a golden crust that would be harder to get on a cold pan.
A 10 to 12 inch cast iron skillet works beautifully. Cast iron holds heat well and gives the bread strong bottom browning.
A regular oven-safe skillet can work in a pinch. A baking sheet can also be used if that is what you have.
Whatever pan you use, preheat it. The hot surface is the key to the crust.
The skillet also gives the bread a cozy, rustic shape. It turns a simple dough into something that looks ready for the center of the table.
Why Garlic and Rosemary Work So Well
Garlic and rosemary are bold flavors, but they work beautifully in bread because the dough softens and carries them. The garlic becomes warm and savory, while rosemary gives the loaf a piney, herbal aroma.
Fresh garlic is the best choice here. It gives the bread a punchy, aromatic flavor that becomes mellow as it bakes.
Fresh rosemary also makes a difference. It has a brighter fragrance than dried rosemary and gives the bread that trattoria-style smell.
If fresh rosemary is not available, dried rosemary works. Use 2 teaspoons dried rosemary instead of 2 tablespoons fresh.
Chop the rosemary into small pieces so it distributes evenly. Large rosemary pieces can feel sharp in the bread.
The garlic should also be minced well. Small pieces give flavor throughout the loaf without creating harsh bites.
Directions
Step 1: Gather Your Ingredients
Set out the flour, salt, instant yeast, warm water, olive oil, garlic, and rosemary. This keeps the process smooth once you begin mixing.
The dough comes together quickly, so having everything nearby helps. You will not need a mixer or complicated equipment.
Use a large mixing bowl, a wooden spoon or your hands, a lightly floured surface, a damp towel, and a 10 to 12 inch cast iron skillet if available.
Step 2: Measure the Flour
Measure 2 cups all-purpose flour. Add it to a large mixing bowl.
All-purpose flour works well for this bread. There is no need for bread flour.
Measure carefully so the dough does not become too dry. A rustic dough should stay a little tacky.
Step 3: Add the Salt and Instant Yeast
Add 1 teaspoon salt and 1 teaspoon instant yeast to the flour. Whisk briefly to combine.
Salt adds flavor and also helps control the yeast. Do not skip it.
Instant yeast can be mixed directly into the flour. That is part of what makes this recipe quick and easy.
Step 4: Use Active Dry Yeast if Needed
If using active dry yeast instead of instant yeast, sprinkle it over the warm water first. Let it sit for 5 minutes until foamy.
That foam shows the yeast is active. If it does not bubble, the yeast may be old.
After it foams, add it to the flour mixture with the olive oil. Continue with the recipe.
Step 5: Check the Water Temperature
Use 1 cup warm water between 100°F and 110°F. It should feel pleasantly warm, not hot.
Water that is too hot can kill the yeast. Water that is too cool can make the yeast sluggish.
A finger test can help if you do not have a thermometer. The water should feel warm like a comfortable bath, not scalding.
Step 6: Add Water and Olive Oil
Pour the warm water and 2 tablespoons olive oil into the flour mixture. Add them all at once.
The olive oil adds richness and helps keep the bread moist. It also supports the golden crust.
Begin mixing right away. The dough will start out rough and shaggy.
Step 7: Mix the Shaggy Dough
Use a wooden spoon or your hands to mix until the dough comes together. It will look messy at first.
That rough texture is normal. The dough does not need to be smooth in the bowl.
Keep mixing until there are no large dry pockets of flour. The dough should hold together as one shaggy mass.
Step 8: Turn the Dough Out
Lightly flour a clean work surface. Turn the dough out onto it.
Use only a small amount of flour. Too much flour can make the bread heavy.
The dough should feel tacky but manageable. That texture helps keep the inside soft.
Step 9: Knead Briefly
Knead the dough for about 30 seconds. Fold it over itself 4 to 5 times until it feels smoother.
This is not a long knead. The bread is rustic, so it does not need an intense workout.
The dough should become smoother but still soft. Do not worry about making it perfect.
Step 10: Rest the Dough for 10 Minutes
Place the dough back into the bowl and cover it with a damp towel. Let it rest for 10 minutes.
This short rest lets the flour hydrate and the dough relax. It also makes the dough easier to handle.
The dough may not rise much during this time, and that is fine. This bread is designed to be quick.
Step 11: Mince the Garlic
While the dough rests, mince 4 cloves garlic. Keep the pieces small.
Fresh garlic gives the best flavor. It becomes fragrant and savory as the bread bakes.
Avoid large chunks because they can taste too strong or brown too much. Even pieces are best.
Step 12: Chop the Rosemary
Chop 2 tablespoons fresh rosemary into small pieces. Remove any tough stems.
The rosemary should be evenly chopped so it spreads throughout the dough. Big pieces can feel too sharp.
If using dried rosemary, use 2 teaspoons. Dried rosemary is stronger and more concentrated.
Step 13: Add Garlic and Rosemary to the Dough
Uncover the dough and scatter the minced garlic and chopped rosemary over the top. Spread them evenly.
The dough may not look dramatically risen yet. That is expected.
The goal now is to fold the flavor into the dough. The garlic and rosemary will become part of the loaf.
Step 14: Fold the Flavor In
Fold the dough over itself several times to mix in the garlic and rosemary. Work gently but thoroughly.
You should see bits of garlic and rosemary throughout the dough. A few pieces showing on the outside are fine.
If the dough sticks to your hands, wet them slightly. This helps you handle the dough without adding too much flour.
Step 15: Shape Into a Rough Ball
Shape the flavored dough into a rough ball. It does not need to be perfect.
Rustic bread is allowed to look handmade. A slightly uneven shape gives it character.
Place the dough back in the bowl or keep it on the surface. It needs another short rest.
Step 16: Rest Again for 10 Minutes
Let the dough rest for another 10 minutes. This second rest helps the dough relax after the garlic and rosemary are folded in.
The dough becomes easier to place into the skillet after this rest. It also gives the yeast a little more time to work.
Cover it lightly so the surface does not dry out. Use the damp towel again if needed.
Step 17: Preheat the Oven and Skillet
Preheat the oven to 450°F (230°C). Place the 10 to 12 inch cast iron skillet inside the oven while it preheats.
The skillet should heat with the oven. This is important for getting a crisp bottom crust.
Be careful when handling the skillet later. The entire pan, including the handle, will be extremely hot.
Step 18: Remove the Hot Skillet Carefully
Once the oven and skillet are hot, carefully remove the skillet using oven mitts. Place it on a heat-safe surface.
Do not touch the handle with bare hands. It will be very hot.
Move efficiently but safely. The hot skillet is what helps the bread start crisping immediately.
Step 19: Add Olive Oil to the Skillet
Drizzle about 1 tablespoon olive oil into the hot skillet. The oil should shimmer and may move quickly across the surface.
This oil helps create the crispy bottom. It also prevents sticking.
Tilt the pan carefully if needed to spread the oil. Use oven mitts and move slowly.
Step 20: Place the Dough in the Skillet
Place the dough in the center of the hot skillet. It may sizzle slightly when it touches the oil.
That sizzle is a good sign. It means the crust is beginning to form.
Quickly shape it into a rough round loaf if needed. Perfection is not necessary.
Step 21: Slash the Top if Desired
Use a sharp knife to slash the top of the dough if you want. This step is optional.
A slash can help the bread rise more evenly. It also gives the loaf a rustic look.
Do not overthink the cut. One simple slash is enough.
Step 22: Bake the Bread
Place the skillet back into the oven. Bake at 450°F (230°C) for 25 to 30 minutes.
The top should become golden brown. The bottom should become deep brown and crisp.
The kitchen should smell strongly of garlic and rosemary. That aroma is one of the best parts of the recipe.
Step 23: Check for Doneness
Tap the bottom of the bread carefully. It should sound hollow, almost like a drum.
The top should be golden, and the underside should look deep brown. These are signs the bread is done.
If you are unsure, it is better for this bread to be slightly more baked than underbaked. A crisp crust is better than a doughy center.
Step 24: Cool Before Slicing
Let the bread cool for at least 10 minutes before slicing. This gives the crumb time to set.
Cutting too early can make the inside seem gummy. The bread needs a short rest after baking.
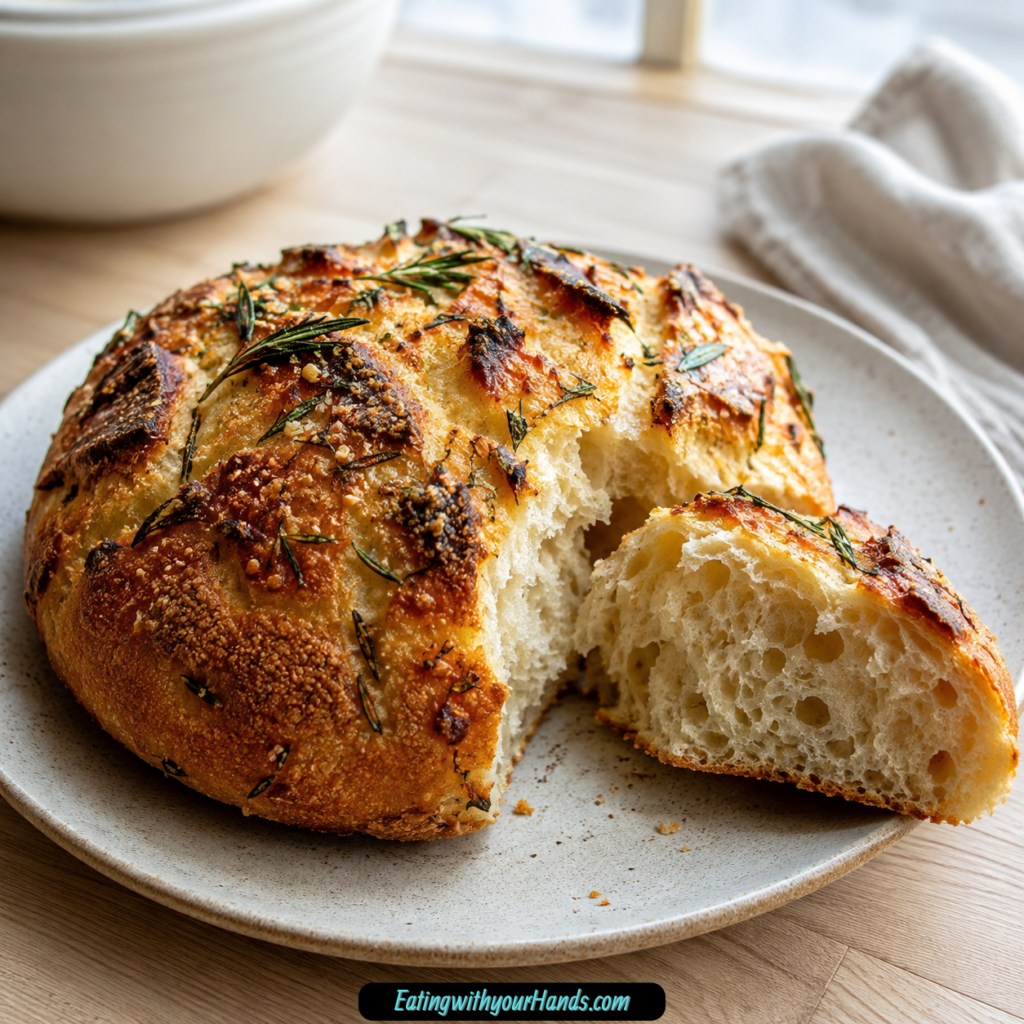
After 10 minutes, slice it thick or tear it into pieces. Serve warm for the best flavor.
Serving Tips
This bread is at its best warm. After the 10-minute cooling time, slice it thick and serve it while the crust still crackles.
A bowl of good olive oil with a pinch of flaky salt is a simple and delicious pairing. The bread is perfect for dipping.
It is wonderful with soup, especially minestrone or tomato basil. The soft interior soaks up broth beautifully.
It also works beside pasta. Tear off chunks to mop up sauce from the plate.
For a next-day breakfast idea, toast a slice, rub it with a cut garlic clove, top it with ripe avocado, and finish with chili flakes. It turns leftovers into something completely new.
Storage
Let the bread cool completely before storing. Warm bread can trap steam and soften the crust.
Wrap the cooled loaf tightly in foil or place it in an airtight container. Store at room temperature for 2 days.
Do not refrigerate the bread. Refrigeration can make it turn stale faster and lose its pleasant texture.
After 2 days, leftovers are best toasted or turned into croutons. The flavor is still excellent.
Freezing
For longer storage, freeze slices in a ziplock bag for up to 3 months. Slicing before freezing makes the bread easier to use later.
You can place parchment between slices if you want them to separate more easily. Press out extra air from the bag before sealing.
To revive frozen slices, place them straight into a 350°F (175°C) oven for 5 to 7 minutes. They should come out crisp outside and warm inside.
This makes the bread useful for quick soups, pasta dinners, or sudden garlic bread cravings. Frozen slices are a gift to your future self.
Crouton Tip
If the bread becomes stale, turn it into croutons. Cut it into cubes.
Toss the cubes with olive oil, salt, and herbs. Bake until golden and crisp.
These croutons are excellent on salads or soups. The garlic and rosemary flavor makes them much more interesting than plain croutons.
Stale bread still has plenty to offer. It simply needs a new role.
Helpful Notes for Best Results
If using active dry yeast, let it foam in the warm water for 5 minutes before mixing. This confirms that it is alive.
The dough is supposed to be tacky. Wet hands are helpful when shaping and folding.
Do not add too much flour. Extra flour can make the bread heavy and dry.
Preheat the skillet. That hot pan is what gives the bread its signature crust.
Use fresh rosemary when possible. If using dried rosemary, use 2 teaspoons instead of 2 tablespoons.
Let the bread cool for at least 10 minutes before cutting. This keeps the crumb from turning gummy.
Variations
Parmesan Skillet Bread
Fold in ½ cup grated Parmesan with the garlic and rosemary. This adds a savory cheese flavor throughout the loaf.
You can also sprinkle extra Parmesan on top before baking. It will become bubbly and golden.
This version is excellent with pasta or tomato soup. The cheese deepens the savory flavor.
Sharp Cheddar Skillet Bread
Use ½ cup sharp cheddar as an add-in. Fold it into the dough with the garlic and rosemary.
Sharp cheddar gives the bread a bolder, richer taste. It also creates little melty pockets.
Keep the total add-ins around ¾ cup. Too much cheese can weigh down the dough.
Sun-Dried Tomato Skillet Bread
Chop ¼ cup oil-packed sun-dried tomatoes and pat them dry. Add them to the dough with the garlic and rosemary.
The tomatoes bring sweetness and richness. They pair beautifully with the herbs.
Patting them dry is important. Too much oil or moisture can affect the dough.
Kalamata Olive Skillet Bread
Add ⅓ cup chopped Kalamata olives. This gives the bread a briny Mediterranean flavor.
You can also drizzle in a little olive brine in place of some water. This adds extra depth.
Be careful not to add too much brine. The bread should stay balanced, not overly salty.
Spicy Rosemary Garlic Bread
Add ½ teaspoon red pepper flakes. This gives the bread a gentle heat.
You can also swirl in chili oil with the regular olive oil. This makes the flavor warmer and bolder.
Spicy bread is especially good with soup or cheese boards. It wakes up simple meals.
Thyme or Oregano Bread
Use thyme or oregano if you do not have rosemary. Both herbs work well with garlic.
Thyme gives a softer herbal flavor. Oregano makes the bread taste more pizza-like and savory.
Use fresh or dried herbs as needed. Keep the flavor balanced and do not overload the dough.
Sage Skillet Bread
Use sage for a deeper, earthy herb flavor. This variation feels especially cozy.
Sage is stronger, so use it thoughtfully. Chop fresh sage finely if using it.
This version pairs nicely with fall soups or roasted dinners. It has a richer herb profile.
Basil Cherry Tomato Bread
In summer, use fresh basil and add halved cherry tomatoes on top before baking. This gives the bread a brighter flavor.
The tomatoes should sit on the surface. They will soften and become sweet as the loaf bakes.
This version feels fresh and colorful. It is lovely with olive oil for dipping.
Yeast-Free Quick Bread Version
If you want to try this without yeast, use 1 tablespoon baking powder. The texture will be denser and more like quick bread.
It will not have the same chew as yeast bread. It can still taste good, but it will be different.
For true bread texture, yeast is the better choice. The quick version is only an alternative.
Troubleshooting
Why Is My Dough Super Sticky?
The dough is supposed to be tacky, not dry. Wet hands can help you handle it.
If it sticks like glue, add a tiny bit of flour to your hands, not directly into the dough. This makes it easier to manage without drying it out.
Do not try to make the dough stiff. A slightly tacky dough helps create a softer interior.
Why Did My Bread Not Rise Much?
The yeast may have been old, or the water may have been too hot or too cold. Yeast needs warm water to work properly.
Test yeast by mixing a pinch with warm water and sugar. If it does not bubble within 10 minutes, it is time for new yeast.
Remember that this bread does not rise for hours. It is a quick rustic bread, so the rise may be modest.
Why Is My Bread Doughy Inside?
It may not have baked long enough. Tap the bottom to check for a hollow sound.
If the top looks golden but the inside is not done, bake a little longer. A deep brown bottom is a good sign.
It is better to err slightly on the side of a crisp crust than an underbaked center. This bread should not be wet inside.
Why Did My Crust Not Get Crispy?
The skillet may not have been preheated. The hot skillet is what creates the crisp bottom.
Make sure the oven reaches 450°F (230°C) before adding the dough. The pan needs to be hot.
Also add the olive oil to the hot skillet before placing in the dough. That oil helps fry the bottom slightly as it bakes.
Why Did My Garlic Burn?
The garlic pieces may have been too large or exposed on the surface. Mince the garlic finely.
A few pieces on the outside are fine, but large chunks can brown too quickly. Fold them into the dough evenly.
Watch the bread near the end of baking. If your oven runs hot, the garlic may darken faster.
Why Is My Bread Too Dense?
Too much flour may have been added, or the yeast may not have been active. Keep the dough tacky and use fresh yeast.
Do not knead in a lot of flour. Use wet hands or lightly floured hands instead.
Also make sure the dough gets both 10-minute rests. Those short rests help the texture.
Frequently Asked Questions
Can I Use a Regular Baking Pan Instead of Cast Iron?
Yes, a regular oven-safe skillet or baking sheet can work in a pinch. Preheat whatever you use.
The key is starting with a hot surface. Cast iron gives the strongest crust, but other hot pans can still help.
Can I Use Active Dry Yeast Instead of Instant?
Yes, active dry yeast can be used. Sprinkle it over the warm water and let it sit for 5 minutes until foamy.
Once it foams, continue with the recipe. Instant yeast is faster, but active dry yeast works.
How Do I Know When the Bread Is Done?
The top should be golden, and the bottom should be deep brown. When tapped, the bottom should sound hollow.
If unsure, bake a little longer rather than pulling it too soon. Slightly crisp is better than doughy.
Can I Make This Without Yeast?
You can try using 1 tablespoon baking powder instead. The bread will be denser and more like a quick bread.
It will not have the same chewy bread texture. Yeast gives the best result.
Can I Use Dried Rosemary?
Yes, use 2 teaspoons dried rosemary instead of 2 tablespoons fresh rosemary. Dried rosemary is stronger.
Chop or crush it a little if needed. This keeps the texture pleasant.
Can I Add Cheese?
Yes, fold in ½ cup grated Parmesan or sharp cheddar. You can also sprinkle extra cheese on top before baking.
Keep total add-ins around ¾ cup maximum. Too much can overwhelm the dough.
Can I Freeze This Bread?
Yes, freeze slices in a ziplock bag for up to 3 months. Reheat frozen slices in a 350°F (175°C) oven for 5 to 7 minutes.
Freezing slices makes the bread easy to enjoy later. It is better than freezing one large piece.
Should I Refrigerate Leftovers?
No, refrigeration is not recommended. Bread can turn stale in the fridge.
Store it at room temperature for 2 days, or freeze slices for longer storage. Toast leftovers for the best texture.
Why This Bread Is Perfect for Simple Meals
Rustic Garlic Rosemary Skillet Bread can turn a simple meal into something memorable. Soup feels heartier, pasta feels more complete, and a cheese board feels more generous with warm homemade bread beside it.
It also makes casual meals feel special. Even a basic bowl of tomato soup becomes more comforting with a piece of garlic rosemary bread for dunking.
The bread is quick enough for weeknights. It is faster than many traditional bread recipes and does not need hours of rising.
The flavor is strong enough to stand alone. A slice with olive oil and flaky salt can feel like an appetizer.
It is also a good bread for sharing. A rustic loaf placed in the middle of the table invites everyone to tear off a piece.
Why This Recipe Works So Well
This recipe works because it keeps the dough simple and lets the skillet create the crust. Flour, yeast, salt, water, and olive oil build a straightforward bread base.
The short knead brings the dough together without making the process difficult. The two 10-minute rests give the dough time to relax and develop enough structure.
Garlic and rosemary are folded in after the first rest. This helps the flavor spread without overworking the dough.
The hot skillet creates immediate contact heat. That heat gives the bottom crust its crisp texture.
Baking at 450°F (230°C) gives the bread a golden top and a chewy interior. The hollow tap test helps confirm it is done.
Final Thoughts
Delicious Rustic Garlic Rosemary Skillet Bread is a quick homemade bread with a crisp crust, soft interior, and bold garlic rosemary flavor. With all-purpose flour, salt, instant yeast, warm water, olive oil, fresh garlic, and rosemary, it turns basic ingredients into a warm, rustic loaf that feels far more special than the effort required.
The method is simple and friendly. Mix the dough, knead for about 30 seconds, rest for 10 minutes, fold in garlic and rosemary, rest another 10 minutes, place the dough into a hot oiled skillet, and bake at 450°F (230°C) for 25 to 30 minutes.
Let the bread cool for at least 10 minutes before slicing so the crumb sets properly. Then serve it warm with olive oil, butter, soup, pasta, cheese boards, or toasted the next day with avocado and chili flakes.
Store leftovers at room temperature for 2 days, freeze slices for up to 3 months, and reheat frozen slices at 350°F (175°C) for 5 to 7 minutes. Whether you make it for dinner, guests, or a quiet night at home, this skillet bread brings garlicky aroma, rosemary warmth, crisp edges, and homemade comfort to the table.
Rustic Garlic Rosemary Skillet Bread
This rustic garlic rosemary skillet bread is warm, aromatic, and full of savory Mediterranean flavor. Fresh rosemary and minced garlic give the loaf an earthy, fragrant taste, while olive oil adds richness to the tender crumb. Baked in a skillet, this simple bread makes a cozy homemade side for soups, pasta, roasted meats, or any meal that needs a fresh, flavorful loaf at the table.
Recipe Details
- Prep Time: 10 minutes
- Cook Time: 30 minutes
- Total Time: 40 minutes
- Course: Bread
- Cuisine: Mediterranean
- Servings: 1 loaf
Equipment
- Skillet
Ingredients
For the Flavor
- 4 cloves garlic minced, for that robust, aromatic punch
- 2 tablespoon fresh rosemary chopped, bringing a fragrant, earthy note
For the Dough
- 1 cup warm water ideally between 100°F and 110°F (37°C 43°C) for optimal yeast activation
- 1 teaspoon instant yeast for a quick rise
- 2 tablespoon olive oil adding richness and depth to the flavor
- 2 cups all-purpose flour perfect for creating a tender crumb
- 1 teaspoon salt enhancing the flavors beautifully
Instructions
Step 1: Prepare the Dough Base
In a mixing bowl, combine the warm water and instant yeast. Stir gently to help the yeast distribute through the water.
Step 2: Add the Olive Oil
Stir in the olive oil until it is blended into the yeast mixture.
Step 3: Mix in the Flour and Salt
Add the all-purpose flour and salt. Mix until a soft dough forms and no dry flour remains in the bowl.
Step 4: Add the Garlic and Rosemary
Fold the minced garlic and chopped fresh rosemary into the dough until evenly distributed.
Step 5: Shape the Dough for the Skillet
Lightly shape the dough into a rustic round that fits your skillet. Place it into the skillet and gently press it into an even layer.
Step 6: Bake the Bread
Bake the skillet bread for 30 minutes, or until the loaf is cooked through and the top is golden.
Step 7: Cool Slightly Before Serving
Let the bread cool slightly in the skillet before slicing or tearing into pieces.
Serving Suggestions
- Serve with pasta and marinara sauce.
- Pair with tomato soup, vegetable soup, or creamy chicken soup.
- Slice and serve with olive oil for dipping.
- Add to a Mediterranean-inspired dinner board.
- Serve warm alongside roasted chicken, grilled vegetables, or salad.
Storage
How to Store
Let the bread cool completely, then wrap it well or place it in an airtight container.
How to Reheat
Warm slices gently in the oven until heated through and slightly crisp on the outside.
How to Freeze
Freeze the cooled loaf or individual slices in a freezer-safe container. Thaw before reheating and serving.
Best Texture Tip
Use warm water between 100°F and 110°F (37°C 43°C) as listed so the yeast activates properly and helps create a tender, rustic loaf.

Fernando is the creator and writer behind the food blog Eating with your Hands. Living and working in cities like Paris, Barcelona, and Berlin, and being married to a Canadian foodie, has given Fernando a passion and interest in food and inspired him to run EWYH.