
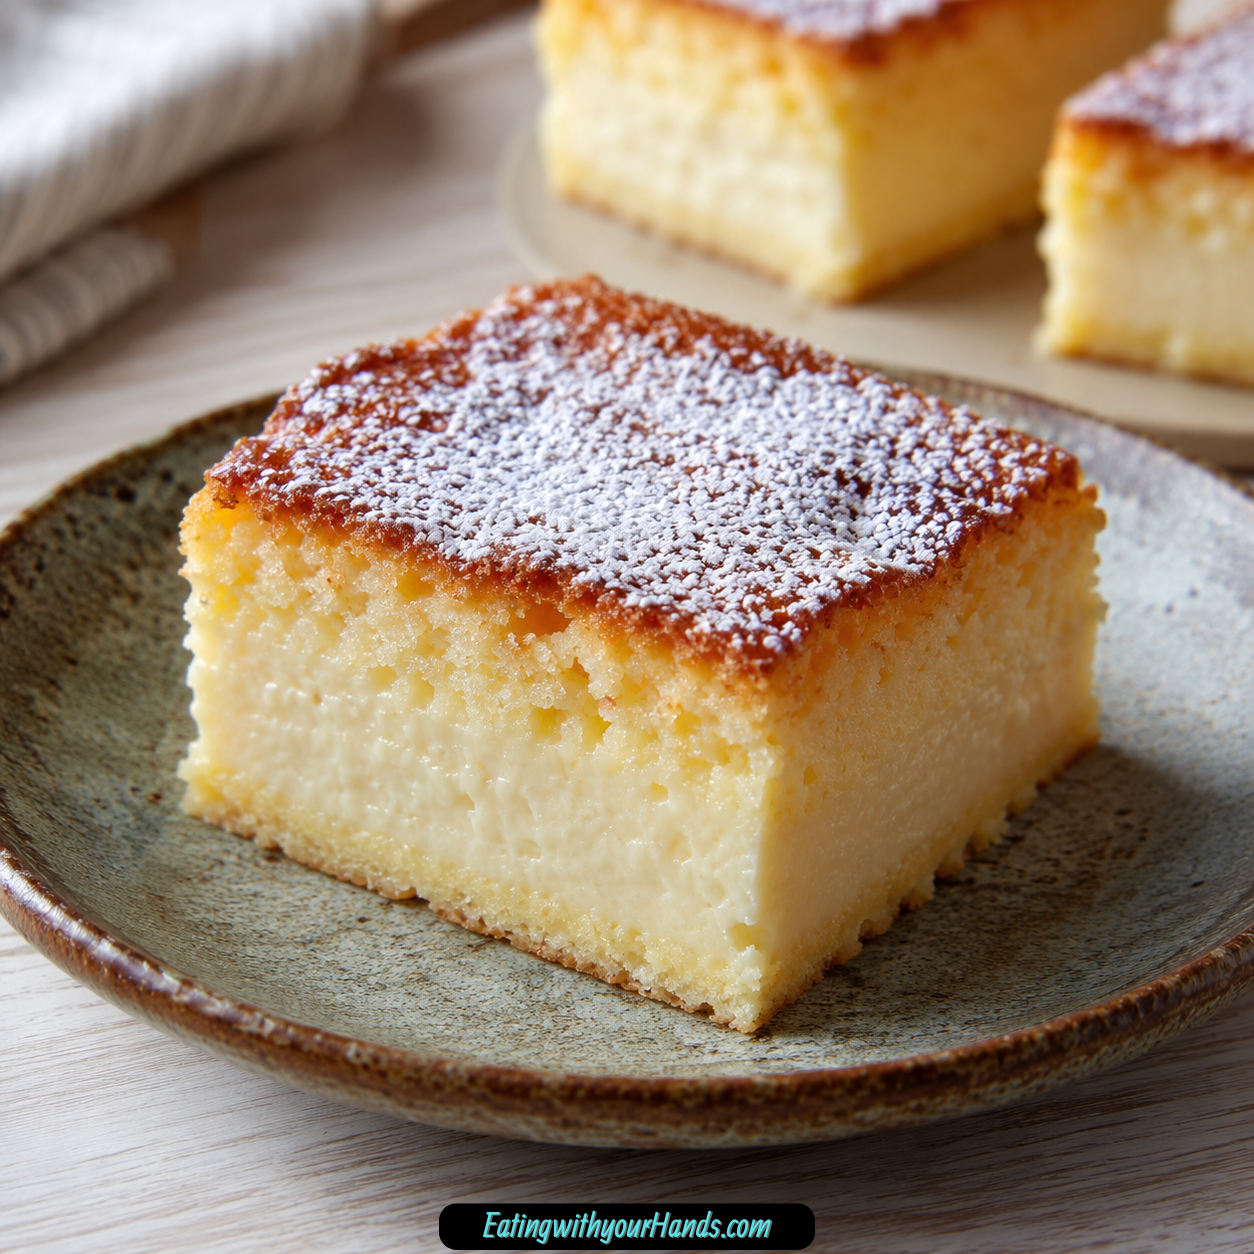
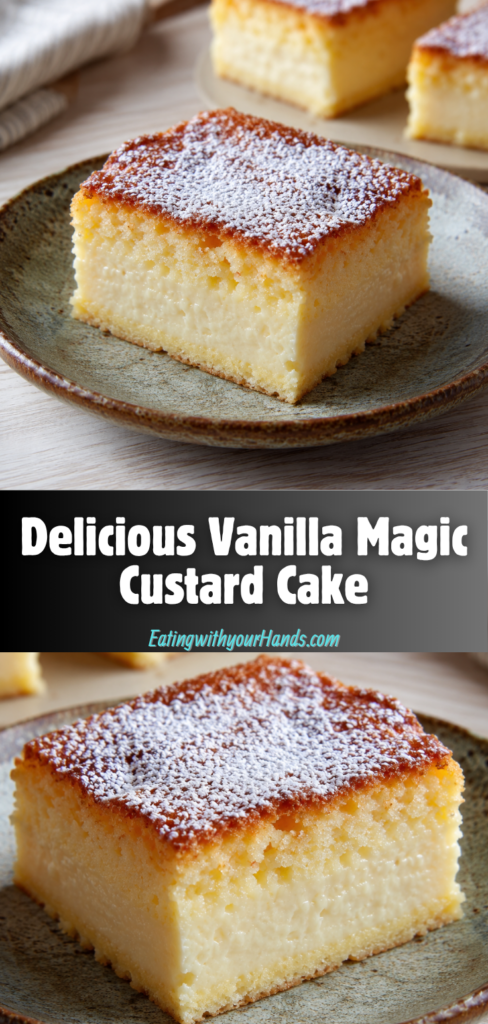
Vanilla Magic Custard Cake is one of those desserts that feels almost impossible the first time you make it. You pour one thin, slightly unusual-looking batter into a pan, slide it into the oven, and somehow it bakes into three beautiful layers without any stacking, filling, or frosting.
That is the charm of this cake. It looks like something that should take a careful pastry hand, but the real transformation happens quietly while it bakes.
The first time I made a vanilla magic custard cake, I remember staring at the pan with complete doubt. The batter was thin, the egg whites floated through it in little soft patches, and nothing about it looked like a normal cake batter.
Then the cake came out of the oven with a golden top, a creamy custard center, and a delicate cake layer underneath. It felt like the kind of baking moment that makes you understand why people fall in love with simple desserts.
This cake is perfect when you want something elegant but not complicated. There is no frosting to make, no layers to assemble, and no decorating pressure.
The vanilla flavor is gentle, rich, and comforting. It lets the custard texture shine while still giving the whole cake that warm bakery-style aroma.
It is the kind of dessert that works for dinner parties, holidays, casual weekends, or a quiet afternoon when you want something special with very little fuss. Once it cools and gets dusted with confectioners’ sugar, it looks polished enough to serve proudly.
Table of Contents
- Why You’ll Love Vanilla Magic Custard Cake
- What Makes This Cake “Magic”
- Recipe Details
- Ingredients for Vanilla Magic Custard Cake
- Butter
- Milk
- Confectioners’ Sugar
- Eggs
- Water
- Flour
- Vanilla Extract
- Before You Start
- Directions for Vanilla Magic Custard Cake
- Step 1: Preheat the Oven
- Step 2: Prepare the Baking Pan
- Step 3: Separate the Eggs
- Step 4: Whip the Egg Whites
- Step 5: Set the Egg Whites Aside
- Step 6: Whisk the Egg Yolks and Sugar
- Step 7: Add the Melted Butter
- Step 8: Add Vanilla and Water
- Step 9: Begin Adding the Flour and Milk
- Step 10: Mix Just Until Combined
- Step 11: Fold in the Egg Whites
- Step 12: Expect a Thin and Lumpy Batter
- Step 13: Pour the Batter Into the Pan
- Step 14: Bake the Cake
- Step 15: Check the Jiggle
- Step 16: Cool Completely in the Pan
- Step 17: Lift and Slice
- Step 18: Dust With Confectioners’ Sugar
- Vanilla Magic Custard Cake Variations
- Serving Vanilla Magic Custard Cake
- Storing Vanilla Magic Custard Cake
- Helpful Notes for Perfect Vanilla Magic Custard Cake
- Troubleshooting Vanilla Magic Custard Cake
- Frequently Asked Questions
- Final Thoughts
- Vanilla Magic Custard Cake
Why You’ll Love Vanilla Magic Custard Cake
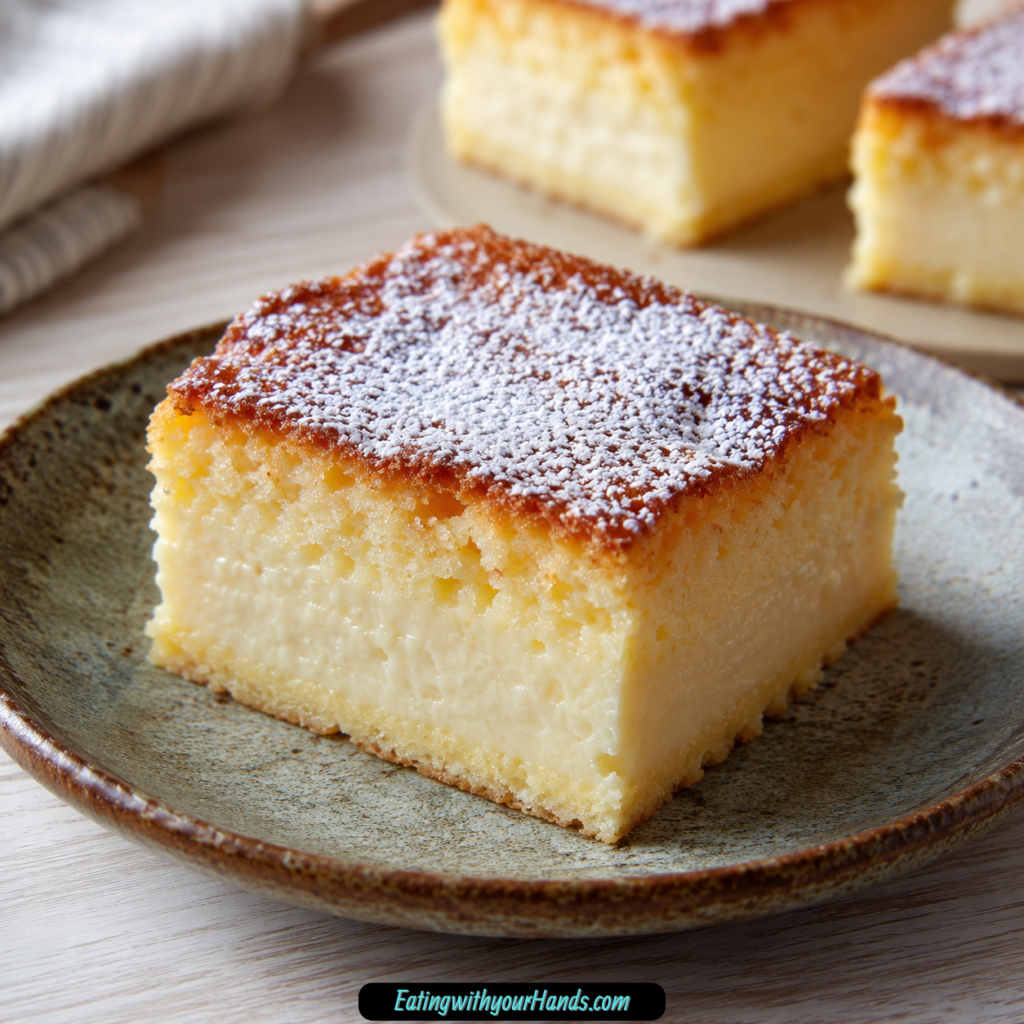
Vanilla Magic Custard Cake is easy to love because it gives you multiple textures from one batter. The top becomes lightly golden and cake-like, the center turns creamy and custardy, and the bottom settles into a tender sponge-style base.
The recipe is also much simpler than it looks. You do not need to bake separate layers or prepare a filling, because the batter separates naturally during baking.
The vanilla flavor is classic and smooth. With pure vanilla extract in the batter, the cake tastes familiar, comforting, and sweet without being too heavy.
It is also a wonderful dessert for beginner bakers who want something impressive. The steps are straightforward, and the most important details are separating the eggs properly, whipping the whites to stiff peaks, and folding gently.
This cake is also lovely served cold the next day. The custard layer becomes even creamier after chilling, making leftovers feel like a completely worthwhile treat.
Most of all, it has that little bit of surprise. When you slice into it and see the layers, it feels like the oven did something special just for you.
What Makes This Cake “Magic”
The magic of this cake comes from the structure of the batter. It starts as one thin mixture, but the ingredients settle and bake into separate textures because of the way the egg whites, milk, flour, butter, and yolks behave in the oven.
The whipped egg whites are key. They add air to the batter and help create the lighter cake-like layer.
The milk makes the batter thin and custardy. As the cake bakes, the liquid portion helps form the silky center layer.
The flour gives the cake enough structure. It helps create the sponge-like base and supports the layers as they set.
The egg yolks and confectioners’ sugar create richness and sweetness. They help the custard taste smooth, sweet, and tender.
The batter may look thin and lumpy before baking, but that is normal. In fact, that unusual texture is part of what allows the layers to form.
Recipe Details
- Recipe Name: Vanilla Magic Custard Cake
- Recipe Style: One-batter custard cake
- Cake Layers: Golden cake top, creamy custard middle, delicate cake base
- Oven Temperature: 325°F (160°C)
- Pan Size: 8×8-inch baking pan
- Bake Time: 45 to 50 minutes
- Best Cooling Method: Cool completely in the pan before slicing
- Storage: Airtight container in the refrigerator for up to 3 days
- Freezing: Not recommended
- Best Garnish: Confectioners’ sugar
Ingredients for Vanilla Magic Custard Cake
This cake uses simple pantry-style ingredients, but each one matters. Because the cake relies on one batter separating into layers, temperature, texture, and gentle mixing are especially important.
Butter
You need 1/2 cup unsalted butter, melted and cooled to room temperature. The butter adds richness and gives the cake a smooth, comforting flavor.
Letting the butter cool matters because hot butter can affect the eggs and change the batter texture. It should still be liquid, but not warm enough to cook anything it touches.
Unsalted butter gives you more control over the flavor. If salted butter is all you have, it can still work, but the final taste may be slightly different.
Milk
You need 2 cups milk, warmed to lukewarm temperature. Lukewarm milk blends more smoothly into the batter and helps keep the texture consistent.
Cold milk can make the batter harder to combine evenly. It can also interfere with the smoothness of the melted butter and egg mixture.
The milk is also one of the reasons this cake forms a custard layer. The batter is supposed to be thin and pourable after the milk is added.
Confectioners’ Sugar
You need 1 and 1/4 cups confectioners’ sugar, sifted, 150g. Sifting helps remove lumps and makes the sugar easier to mix into the egg yolks.
Confectioners’ sugar gives the cake a softer sweetness than granulated sugar would. It blends smoothly and helps create the delicate texture.
You will also need extra confectioners’ sugar for garnish. A light dusting makes the finished cake look elegant and adds a little sweetness on top.
Eggs
You need 4 eggs, yolks and whites separated. Room temperature eggs are best because the whites whip more easily and the yolks blend better into the batter.
Separating the eggs is one of the most important steps in this recipe. The yolks go into the custard base, while the whites are whipped separately and folded in later.
The egg whites must reach stiff peaks. This helps the cake form its lighter top layer and gives the batter the structure it needs.
Water
You need 1 tablespoon purified water. This small amount helps the batter blend together smoothly.
It may seem like a minor ingredient, but it is part of the original batter balance. Add it with the melted butter and vanilla when mixing the yolk base.
Flour
You need 1 cup all-purpose flour, sifted, 115g. Sifting the flour helps prevent lumps and makes it easier to fold into the batter.
The flour gives the cake structure. Without it, the batter would not form the same cake-like layers.
Because the batter is delicate, the flour should be added gently. Overmixing can affect the final texture.
Vanilla Extract
You need 2 teaspoons pure vanilla extract. Pure vanilla gives this cake its main flavor, so it is worth using a good one.
Vanilla is simple, but in a custard cake like this, it becomes the star. It makes the cake smell warm and taste classic.
Before You Start
Before mixing anything, prepare the pan and organize your ingredients. Magic custard cake works best when each step is done gently and without rushing.
Make sure the butter is melted and cooled. Make sure the milk is lukewarm, not hot.
Separate the eggs carefully. Even a small amount of yolk in the whites can make them harder to whip properly.
Use clean, dry equipment for the egg whites. Any grease or moisture in the bowl can interfere with the whipping process.
Sift both the confectioners’ sugar and the flour before using them. This helps create a smoother batter and prevents dry lumps from forming.
Do not panic when the batter looks thin or slightly lumpy after folding in the egg whites. That texture is expected for this cake.
Directions for Vanilla Magic Custard Cake
Step 1: Preheat the Oven
Preheat your oven to 325°F, or 160°C. A moderate oven temperature is important because this cake needs enough time to separate into layers while baking.
If the oven is too hot, the outside may set too quickly before the custard layer forms properly. A steady 325°F gives the batter time to transform.
Step 2: Prepare the Baking Pan
Grease an 8×8-inch baking pan. Then line it with parchment paper, leaving some overhang on the sides.
The parchment overhang makes it easier to lift the cooled cake out of the pan. This is helpful because the cake is delicate after baking.
Step 3: Separate the Eggs
Separate the 4 eggs into yolks and whites. Place the yolks in one mixing bowl and the whites in a clean, dry bowl.
Take your time with this step. Cleanly separated eggs are important for the structure of the cake.
Step 4: Whip the Egg Whites
Beat the egg whites until stiff peaks form. The peaks should stand straight up when you lift the beaters.
This is one of the key steps for the magic layers. Under-whipped egg whites can keep the cake from separating properly.
Step 5: Set the Egg Whites Aside
Once the egg whites are whipped, set them aside. Keep them nearby so they can be folded into the batter later.
Do not stir them or let them collapse. You want to preserve as much air as possible.
Step 6: Whisk the Egg Yolks and Sugar
In another bowl, whisk the egg yolks with the sifted confectioners’ sugar. Continue whisking until the mixture becomes pale and fluffy.
This creates the sweet base of the custard. The mixture should look lighter in color and smoother than when you started.
Step 7: Add the Melted Butter
Pour in the melted and cooled butter. Mix until the butter is fully incorporated into the yolk and sugar mixture.
The butter should be at room temperature before adding it. If it is too hot, it can affect the eggs and change the texture.
Step 8: Add Vanilla and Water
Add the pure vanilla extract and the tablespoon of purified water. Mix until everything looks smooth and evenly combined.
The vanilla gives the cake its signature flavor. The water helps the batter blend into a smooth base.
Step 9: Begin Adding the Flour and Milk
Add the sifted flour and lukewarm milk gradually, alternating between the two. Fold or mix gently as you add them.
This gradual method helps the batter stay smoother. It also prevents the flour from clumping when the milk is added.
Step 10: Mix Just Until Combined
Continue adding the flour and milk until both are fully incorporated. Stop mixing once the batter is combined.
Do not overmix. The batter should be thin and pourable, and it does not need to look like a standard cake batter.
Step 11: Fold in the Egg Whites
Add the whipped egg whites to the batter. Gently fold them in using a spatula.
Be patient and use slow movements. You want to keep the air in the egg whites while still distributing them through the batter.
Step 12: Expect a Thin and Lumpy Batter
The batter will look thin, loose, and somewhat lumpy after the egg whites are folded in. This is completely normal.
Do not try to beat it smooth. Those floating bits of egg white help create the layered texture during baking.
Step 13: Pour the Batter Into the Pan
Pour the batter into the prepared 8×8-inch pan. Use a spatula to gently guide it into the corners if needed.
It may look uneven at this stage. The oven will do the work of settling and separating the layers.
Step 14: Bake the Cake
Place the pan in the preheated oven and bake for 45 to 50 minutes. The cake is done when the top is golden and the center jiggles only slightly.
The center should not be liquid. It should have a soft wobble, similar to a set custard.
Step 15: Check the Jiggle
Gently nudge the pan to test the center. If it wobbles wildly like a loose liquid, bake it a few more minutes.
If the top is golden and the center has only a slight movement, it is ready. This careful check helps prevent underbaking.
Step 16: Cool Completely in the Pan
Remove the cake from the oven and let it cool completely in the pan. This step is essential for the layers to set.
Slicing too soon can cause the custard layer to collapse or run. Cooling gives the cake structure.
Step 17: Lift and Slice
Once the cake is fully cooled, use the parchment overhang to lift it from the pan. Place it on a cutting surface.
Use a sharp knife to cut the cake into squares. For cleaner slices, dip the knife in hot water and wipe it between cuts.
Step 18: Dust With Confectioners’ Sugar
Dust the top with confectioners’ sugar before serving. This simple garnish makes the cake look finished and elegant.
Add the sugar close to serving time. It looks prettiest when freshly dusted.
Vanilla Magic Custard Cake Variations
The classic vanilla version is beautiful on its own, but this cake can be adjusted in small ways. Because the batter is delicate, it is best not to overload it with heavy add-ins.
Citrus Magic Custard Cake
Add 1 tablespoon of lemon zest or orange zest to the batter. The citrus brings brightness and cuts through the richness of the custard.
This variation is especially nice when you want the cake to feel lighter. The vanilla still stays present, but the citrus adds a fresh note.
Chocolate Magic Custard Cake
Swap out 2 tablespoons of flour for cocoa powder. This gives the cake a chocolate twist while keeping the same basic structure.
The cocoa can create a slightly marbled effect. It also gives the custard layer a deeper flavor.
Berry Magic Custard Cake
Drop a handful of fresh raspberries or blueberries into the batter before baking. The berries will sink slightly and create little fruity pockets.
Use a modest amount so the batter does not become too heavy. A little fruit goes a long way in this cake.
Coconut Magic Custard Cake
Replace half the milk with coconut milk. Sprinkle toasted coconut on top for a tropical-style variation.
This version gives the cake a gentle coconut flavor while still keeping the custard texture. Toasted coconut adds a nice finishing texture.
Spiced Magic Custard Cake
Add a pinch of cinnamon or nutmeg to the batter. This gives the cake a cozy, warm flavor.
This variation works especially well in cooler months. The spice should be subtle so the vanilla and custard still shine.
Serving Vanilla Magic Custard Cake
Let the cake cool completely before serving. The layers need time to set so each slice shows the golden top, creamy middle, and cake-like base.
Cut the cake into neat squares with a sharp knife. A knife dipped in hot water can help glide through the custard layer cleanly.
A dusting of confectioners’ sugar is the simplest and most classic finish. It gives the cake a soft, elegant look without adding frosting.
This cake is delicious on its own. The custard center gives it enough richness that it does not need much else.
For a more indulgent serving, add a dollop of whipped cream. The lightness of the whipped cream works well with the smooth custard.
A drizzle of caramel sauce can also be used. It adds sweetness and makes the dessert feel a little more decadent.
Storing Vanilla Magic Custard Cake
Store leftovers in an airtight container in the refrigerator for up to 3 days. The custard layer needs to stay chilled once the cake has cooled.
This cake is delicious cold. In fact, the custard texture can feel even creamier the next day.
Dust with fresh confectioners’ sugar before serving leftovers. The original sugar dusting may absorb moisture in the refrigerator.
Freezing is not recommended. The custard layer does not hold up well after freezing and thawing.
Keep the cake covered so it does not dry out or absorb refrigerator odors. A sealed container works best.
Helpful Notes for Perfect Vanilla Magic Custard Cake
Whip the Egg Whites Properly
The egg whites should be whipped to stiff peaks. If they are under-whipped, the cake may not separate into layers as well.
Stiff peaks should stand upright when you lift the beaters. Soft peaks are not enough for this recipe.
Fold Gently
When folding the egg whites into the batter, move slowly and gently. You are not trying to make the batter perfectly smooth.
A slightly lumpy batter is normal. Overmixing can deflate the egg whites and affect the final layers.
Keep the Batter Thin
The batter should be thin and pourable. If it seems too thick, gently fold in a splash more milk.
A thick batter may not separate into layers as well. The loose texture is part of the magic.
Use the Jiggle Test
The top should be golden, and the center should jiggle slightly when nudged. A slight wobble means the custard is set but still creamy.
If the center moves like liquid, bake it a few more minutes. Underbaking can cause sinking or a loose center.
Cool Completely
Cooling is not optional. The cake needs time to set properly before slicing.
If you cut too soon, the custard layer may not hold its shape. Waiting gives you cleaner squares and better layers.
Cut With a Warm Knife
For clean slices, dip a sharp knife in hot water, then wipe it dry before cutting. Repeat between cuts if needed.
This helps the knife move through the delicate custard. It also keeps the squares looking neat.
Troubleshooting Vanilla Magic Custard Cake
Why Did My Cake Not Separate Into Layers?
The most common reasons are under-whipped egg whites or overmixed batter. The egg whites need to reach stiff peaks, and they should be folded in gently.
The batter should also remain thin and slightly lumpy. Trying to smooth it out too much can reduce the layered effect.
Why Did My Cake Sink in the Middle?
A sunken middle usually means the cake was underbaked. The center should have only a slight jiggle, not a loose wobble.
If this happens, the cake will still taste good. Dust it with confectioners’ sugar and serve it as a rustic custard cake.
Why Is My Batter So Thin?
The batter is supposed to be thin. Magic custard cake batter does not look like regular cake batter.
The thin texture allows the cake to separate into layers. Do not add extra flour just because it looks loose.
Why Is My Cake Too Dense?
The egg whites may have deflated, or the batter may have been overmixed. Gentle folding helps preserve air.
Using room temperature eggs can also help the whites whip better. Be sure your bowl is clean and dry.
Frequently Asked Questions
Can I Use Vanilla Paste Instead of Vanilla Extract?
Yes, vanilla paste can be used in the same amount. It will give the cake a speckled look from the vanilla flecks.
The flavor may be richer as well. That speckled appearance can make the cake look even more elegant.
Can I Make This Cake Gluten-Free?
Yes, you can swap the all-purpose flour for a 1:1 gluten-free blend. The texture may be slightly denser.
The layered effect should still happen. Be careful not to overmix the batter after adding the flour blend.
Why Did My Cake Not Form Three Layers?
The issue is often under-whipped egg whites or overmixing after they are added. Whip the whites to stiff peaks and fold them gently.
The batter should look a little uneven before baking. That uneven texture helps the layers form.
Can I Freeze Vanilla Magic Custard Cake?
Freezing is not recommended. The custard layer can change texture after thawing.
This cake is best stored in the refrigerator and enjoyed within 3 days. It tastes very good cold.
How Do I Know When It Is Done Baking?
The cake is done when the top is golden and the center jiggles slightly. It should not look liquid in the middle.
If it wobbles too much, bake a few minutes longer. The custard needs enough time to set.
Can I Add Fruit?
Yes, a handful of fresh raspberries or blueberries can be added before baking. They will sink slightly and create fruity pockets.
Do not add too much fruit. Heavy add-ins can interfere with the delicate structure of the cake.
Can I Serve It Warm?
This cake needs to cool completely before slicing so the layers can set. Serving it too warm can make the custard layer too soft.
After it has set, it can be enjoyed chilled or closer to room temperature. Cold slices often have the creamiest texture.
Final Thoughts
Vanilla Magic Custard Cake is the kind of dessert that reminds you how exciting simple baking can be. One batter goes into the oven, and with the right technique, it comes out with three distinct layers that feel delicate, creamy, and quietly impressive.
The recipe uses everyday ingredients, but the result feels special. Butter, milk, confectioners’ sugar, eggs, flour, vanilla, and a little water turn into a golden-topped cake with a silky custard middle.
What makes this cake so enjoyable is that it looks like a showstopper without requiring complicated decorating. There is no frosting, no filling between layers, and no elaborate assembly.
The key is patience and gentleness. Whip the egg whites well, fold them softly into the thin batter, bake until just set, and cool completely before slicing.
Once you dust the top with confectioners’ sugar and cut into those soft layers, the cake feels every bit as magical as its name promises. It is simple, elegant, comforting, and exactly the kind of dessert that makes people ask how one batter turned into something so beautiful.
Vanilla Magic Custard Cake
Vanilla Magic Custard Cake is a soft, delicate dessert with a light vanilla flavor and a creamy custard-like texture. As it bakes, the simple batter separates into distinct layers, giving the cake a tender top and smooth center. This recipe is a lovely choice for a simple dessert that feels elegant without needing frosting or complicated decoration. A dusting of confectioners’ sugar adds a classic finish before serving.
Recipe Details
- Prep Time: 15 minutes
- Cook Time: 45 minutes
- Total Time: 1 hour
- Course: Dessert
- Cuisine: American
- Servings: 8 slices
Ingredients
- confectioners’ sugar for garnish
- 2 teaspoon pure vanilla extract
- 1 cup all-purpose flour sifted (115g)
- 1 tablespoon purified water
- 4 eggs yolks and whites separated
- 1 and ¼ cups confectioners’ sugar sifted (150g)
- 2 cups milk warmed to lukewarm temperature
- ½ cup unsalted butter melted and cooled to room temperature
Instructions
Step 1: Prepare the Oven and Pan
Preheat the oven and prepare a baking pan before mixing the batter. Use a greased or lined pan so the custard cake can be removed more easily after baking.
Step 2: Separate the Eggs
Separate the 4 eggs into yolks and whites. Keep both parts, since the yolks help create the rich custard base and the whites help give the cake its light texture.
Step 3: Mix the Egg Yolks and Sugar
In a mixing bowl, beat the egg yolks with the sifted confectioners’ sugar until the mixture becomes smooth and pale.
Step 4: Add the Butter, Water, and Vanilla
Mix in the melted and cooled unsalted butter, purified water, and pure vanilla extract until fully combined.
Step 5: Add the Flour
Gradually add the sifted all-purpose flour and mix until the batter is smooth, scraping the bowl as needed.
Step 6: Stir in the Milk
Slowly pour in the lukewarm milk while mixing. The batter will be thin, which is normal for a magic custard cake.
Step 7: Add the Egg Whites
Beat the egg whites separately until they become light and airy, then gently fold them into the batter. Do not overmix, since the light texture helps the cake form its layers.
Step 8: Bake the Cake
Pour the batter into the prepared pan. Bake for 45 minutes, or until the top is set and lightly golden.
Step 9: Cool and Garnish
Let the cake cool before slicing. Dust the top with confectioners’ sugar for garnish before serving.
Serving Suggestions
- Hot coffee
- Black tea
- Fresh berries
- Whipped cream
- Vanilla ice cream
- Brunch dessert plates
- Light holiday dessert trays
Storage
How to Store
Store leftover Vanilla Magic Custard Cake covered in the refrigerator to help maintain its custard-like texture.
How to Reheat
This cake is best served chilled or at room temperature. Reheating is not recommended because the custard texture may soften too much.
Best Texture Tip
Let the cake cool fully before slicing so the custard layer has time to set cleanly.

Fernando is the creator and writer behind the food blog Eating with your Hands. Living and working in cities like Paris, Barcelona, and Berlin, and being married to a Canadian foodie, has given Fernando a passion and interest in food and inspired him to run EWYH.