
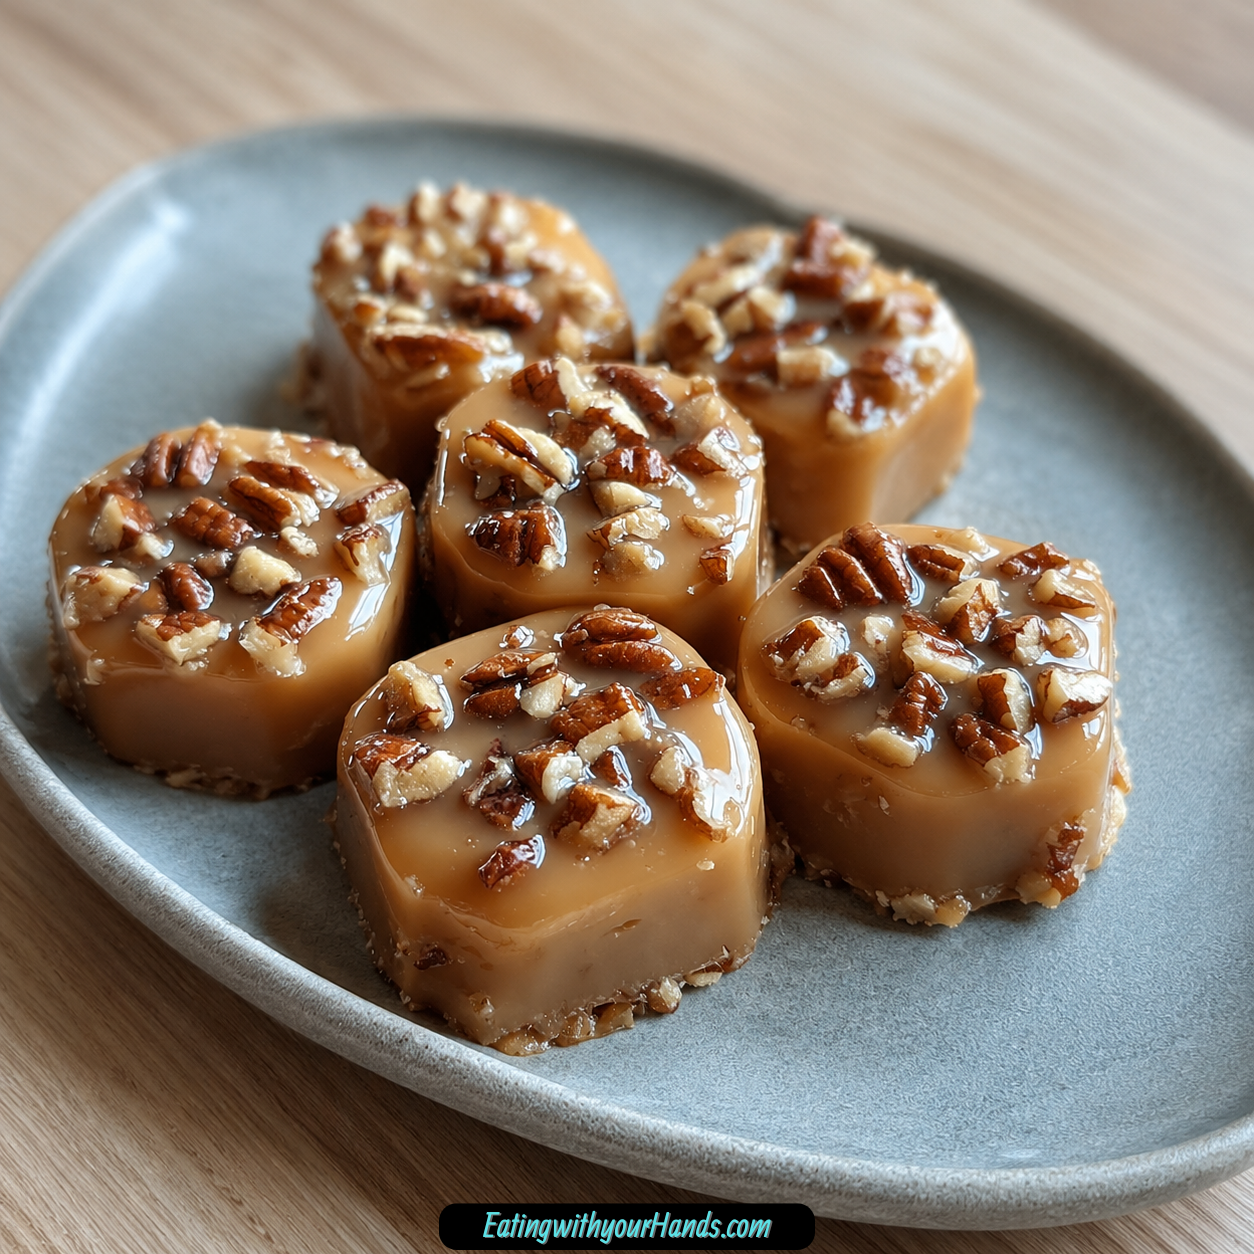
Vanilla Pecan Pralines are the kind of homemade candy that feels old-fashioned in the best possible way. They are rich, buttery, sweet, nutty, creamy, and filled with that melt-in-your-mouth texture that makes one piece turn into two before you even realize it.
The first time I tasted a praline like this, it had that unforgettable roadside-stand feeling. It was simple, sweet, and humble, but the flavor stayed with me long after the last bite.
That is what makes these vanilla pecan pralines so special. They take a handful of familiar ingredients and turn them into something that feels thoughtful enough for gifting, cozy enough for snacking, and impressive enough for a holiday tray.
Candy-making can sound intimidating, especially if you have ever worried about sugar temperatures or soft-ball stages. But this recipe keeps the process approachable, with a heavy-bottomed saucepan, steady stirring, and a clear target temperature of 240°F.
The finished pralines are loaded with chopped pecans and wrapped in a smooth vanilla sweetness. Marshmallow creme helps keep the texture soft and chewy, while vanilla chocolate chips melt into the mixture and make the candy extra creamy.
These pralines are perfect for parties, edible gifts, dessert tables, or those quiet moments when a little homemade sweetness feels completely necessary. Once you make them, they are the kind of recipe you will want to keep close.
Table of Contents
- What Are Vanilla Pecan Pralines?
- Why You’ll Love Vanilla Pecan Pralines
- Recipe Details
- Ingredients You’ll Need
- A Closer Look at the Ingredients
- The Flavor Behind These Pralines
- Directions
- Step 1: Gather Your Ingredients and Tools
- Step 2: Line the Baking Sheet
- Step 3: Add Sugar, Evaporated Milk, and Butter
- Step 4: Stir Until the Sugar Dissolves
- Step 5: Keep the Spoon Moving
- Step 6: Attach the Candy Thermometer
- Step 7: Cook to 240°F
- Step 8: Use the Soft-Ball Test if Needed
- Step 9: Remove from Heat Immediately
- Step 10: Add the Vanilla Chocolate Chips
- Step 11: Add the Vanilla Extract
- Step 12: Add the Pecans
- Step 13: Add the Marshmallow Creme
- Step 14: Watch the Texture as It Thickens
- Step 15: Drop Spoonfuls onto Parchment
- Step 16: Shape Quickly if Needed
- Step 17: Let the Pralines Cool Completely
- Step 18: Chill Briefly if You Are Impatient
- Step 19: Serve or Package
- Helpful Tips for Perfect Vanilla Pecan Pralines
- Common Mistakes
- Variations
- Serving Suggestions
- Storage Tips
- Freezing Instructions
- Make-Ahead Notes
- Frequently Asked Questions
- Final Thoughts
- Vanilla Pecan Pralines
What Are Vanilla Pecan Pralines?
Vanilla Pecan Pralines are sweet, creamy candies made with sugar, evaporated milk, butter, vanilla chocolate chips, vanilla extract, chopped pecans, and marshmallow creme. The mixture is cooked to the soft-ball stage, then combined with the remaining ingredients and dropped onto parchment paper to cool.
The texture is soft, chewy, rich, and slightly melt-in-your-mouth. The pecans give the candy crunch, while the vanilla chips and marshmallow creme help create a smooth, creamy base.
Unlike baked desserts, pralines are made on the stovetop. The key is cooking the sugar mixture to the right temperature so the candies set properly.
They are wonderful for gifting because they look charming and taste special. A few pralines in a small box or bag can feel like a homemade treat from a candy shop.
Why You’ll Love Vanilla Pecan Pralines
These pralines come together quickly. With about 10 minutes of prep, you can be on your way to a batch of homemade candy.
They have a rich, buttery flavor. The butter, vanilla, and pecans create a warm, sweet candy that tastes indulgent.
They are perfect for gifting. Wrap them in wax paper, tuck them into bags, or arrange them in a pretty box.
They do not require fancy tools. A saucepan, spoon, parchment paper, and candy thermometer are helpful, but the soft-ball test can also guide you.
They are loaded with pecans. Every piece has sweet vanilla candy and crunchy nut texture.
They store well. Keep them at room temperature for up to a week or freeze them for later.
Recipe Details
- Recipe name: Vanilla Pecan Pralines
- Recipe style: Stovetop candy
- Prep time: About 10 minutes
- Sugar mixture cook time before smooth: About 5-7 minutes
- Temperature target: 240°F (115°C)
- Soft-ball stage: Mixture forms a soft ball in cold water that can be squished between fingers
- Temperature cook time: About 10-12 minutes
- Cooling time: About 30 minutes
- Quick chill option: 10 minutes in the refrigerator
- Main texture: Soft, chewy, creamy, and nutty
- Best storage: Airtight container at room temperature
- Room temperature storage: Up to 1 week
- Freezer storage: Up to 2 months
- Humidity note: Avoid making or storing on humid days if possible
- Dairy-free swap note: Coconut milk can replace evaporated milk, but texture may be softer
- Batch note: Do not double; make one batch at a time for best results
Ingredients You’ll Need
For the Pralines
- 2.5 cups granulated sugar
- 7 oz evaporated milk
- ¼ cup butter, cubed
- 11 oz vanilla chocolate chips
- 1 teaspoon vanilla extract
- 2 cups chopped pecans
- 4 oz marshmallow creme
A Closer Look at the Ingredients
Granulated sugar creates the main candy structure. It cooks with the evaporated milk and butter until the mixture reaches the right stage for setting.
Evaporated milk is important because it is thicker and richer than regular milk. It gives the pralines a creamy texture that fresh milk cannot provide in the same way.
Butter adds richness and that classic praline flavor. Cubing it helps it melt more quickly and evenly into the sugar mixture.
Vanilla chocolate chips melt into the hot candy base and make the pralines creamy. White chocolate chips can also work, but vanilla chips bring extra vanilla flavor.
Vanilla extract deepens the flavor. The recipe works best with real vanilla because the vanilla flavor is a major part of the candy.
Chopped pecans bring crunch and nuttiness. You can buy them pre-chopped or roughly chop whole pecans yourself.
Marshmallow creme is the soft, chewy secret in this recipe. It helps keep the pralines from becoming too hard or dry.
Each ingredient has a clear job. Together, they create a praline that is sweet, creamy, nutty, buttery, and easy to love.
The Flavor Behind These Pralines
These pralines taste rich because they combine buttery candy with vanilla and pecans. The sweetness is bold, but the nuts help balance it.
The vanilla chips and vanilla extract create a smooth, sweet flavor that feels slightly softer than a classic brown sugar praline. It gives the candy a creamy, almost dreamy finish.
The pecans are what keep the candy from feeling one-note. Their crunch and toasted-style nuttiness make each bite more interesting.
Marshmallow creme helps the texture stay soft and chewy. It makes the pralines feel more forgiving and less brittle.
The final candy is sweet enough for dessert but simple enough to enjoy with coffee, tea, or as a small after-dinner treat. It is the kind of candy that feels homemade in the best way.
Directions
Step 1: Gather Your Ingredients and Tools
Start by gathering the granulated sugar, evaporated milk, cubed butter, vanilla chocolate chips, vanilla extract, chopped pecans, and marshmallow creme. You will also need a heavy-bottomed saucepan, sturdy spoon, parchment paper, baking sheet, and candy thermometer if using one.
A heavy-bottomed saucepan is helpful because sugar can scorch easily in a thin pan. The heavier base helps distribute heat more evenly.
Prepare everything before turning on the stove. Candy-making moves quickly once the sugar mixture reaches the right temperature.
Step 2: Line the Baking Sheet
Line a baking sheet with parchment paper. This is where you will drop the pralines after mixing.
Parchment prevents sticking and makes cleanup easier. Place the sheet close to your stovetop or mixing area so you can work quickly.
Do not wait until the candy is finished to prepare the pan. The mixture thickens as it cools, so the sheet needs to be ready.
Step 3: Add Sugar, Evaporated Milk, and Butter
Place 2.5 cups granulated sugar, 7 oz evaporated milk, and ¼ cup cubed butter into a heavy-bottomed saucepan. Set the pan over medium heat.
The butter will begin melting into the sugar and milk. Stir gently but steadily as the mixture warms.
Make sure you are using evaporated milk, not sweetened condensed milk. The texture and sweetness would be different.
Step 4: Stir Until the Sugar Dissolves
Keep stirring as the sugar mixture heats. The goal is for the sugar to dissolve completely.
This usually takes about 5-7 minutes. The mixture should begin looking smooth and glossy.
Check the texture carefully. You do not want obvious sugar granules remaining before moving forward.
Step 5: Keep the Spoon Moving
Continue stirring, especially along the bottom and edges of the pan. Sugar can scorch if it sits too long against the heat.
A steady spoon keeps the mixture from burning. It also helps the butter blend evenly.
Do not rush by turning the heat too high. Medium heat gives you more control.
Step 6: Attach the Candy Thermometer
Clip a candy thermometer to the saucepan if you have one. Make sure the tip sits in the mixture but does not touch the bottom of the pan.
The thermometer will help you watch for 240°F (115°C). That is the target temperature for these pralines.
If you do not have a thermometer, you can use the soft-ball stage test later. A thermometer simply makes the process easier.
Step 7: Cook to 240°F
Let the sugar mixture cook until it reaches 240°F (115°C). This usually takes about 10-12 minutes.
Keep the heat steady and resist the urge to crank it up. Slow and steady gives better control.
The mixture will become thicker as it cooks. Watch it closely as it nears the target temperature.
Step 8: Use the Soft-Ball Test if Needed
If you do not have a candy thermometer, drop a small amount of the hot mixture into cold water. If it forms a soft ball that can be squished between your fingers, it is ready.
This is called the soft-ball stage. It is the texture point needed for candies like these to set properly.
Be careful when testing because the sugar mixture is very hot. Use a spoon and avoid touching the hot candy directly.
Step 9: Remove from Heat Immediately
Once the mixture reaches 240°F or passes the soft-ball test, remove the saucepan from the heat immediately. Do not let it keep cooking.
Going too far past the temperature can make the pralines hard. Removing the pan right away helps protect the texture.
Set the pan on a heat-safe surface. You will now add the remaining ingredients.
Step 10: Add the Vanilla Chocolate Chips
Add 11 oz vanilla chocolate chips to the hot sugar mixture. Stir until the chips are fully melted.
The heat from the candy should melt them smoothly. Keep stirring until the mixture looks creamy and even.
There should be no visible chip pieces left. The mixture should look like a smooth vanilla candy base.
Step 11: Add the Vanilla Extract
Stir in 1 teaspoon vanilla extract. Mix until blended.
The vanilla extract strengthens the flavor and gives the pralines a more fragrant finish. Since this is a vanilla praline recipe, this ingredient matters.
Stir gently but thoroughly. You want the vanilla flavor spread throughout the mixture.
Step 12: Add the Pecans
Add 2 cups chopped pecans to the candy mixture. Fold them in gently.
Do not crush the pecans while stirring. The chopped pieces should stay chunky enough to give texture.
Make sure the pecans are evenly coated. Every praline should have plenty of nuts.
Step 13: Add the Marshmallow Creme
Add 4 oz marshmallow creme to the mixture. Fold it in gently until combined.
The marshmallow creme helps create a soft, chewy texture. It also makes the candy slightly more forgiving.
Do not overmix after adding it. Fold until the mixture looks blended and creamy.
Step 14: Watch the Texture as It Thickens
The praline mixture will begin thickening as it cools. This is normal.
If it starts to thicken too quickly before you finish scooping, give it a quick stir to loosen it. Work steadily but do not panic.
The mixture should be thick enough to hold spoonfuls but soft enough to drop onto the parchment. This is the ideal scooping stage.
Step 15: Drop Spoonfuls onto Parchment
Use a spoon to drop portions of the praline mixture onto the prepared parchment-lined baking sheet. Space them about 2 inches apart.
The pralines will spread slightly, so give them room. Try to keep the portions similar for even setting.
Do not worry if every piece looks different. Homemade pralines are allowed to have character.
Step 16: Shape Quickly if Needed
If any pralines look uneven, gently nudge the edges with the spoon while they are still warm. Work quickly because they firm as they cool.
You do not need perfect circles. A slightly rustic shape is normal.
The most important thing is texture and flavor. Pretty can come second.
Step 17: Let the Pralines Cool Completely
Let the pralines cool at room temperature until firm, usually about 30 minutes. Do not stack or move them too early.
As they cool, they will set into soft, chewy candies. The pecans will stay suspended throughout the vanilla candy base.
Waiting is the hardest part, but it is necessary. Moving them too soon can damage the shape.
Step 18: Chill Briefly if You Are Impatient
If you want to speed things up, place the pralines in the refrigerator for about 10 minutes. This helps them firm faster.
Do not leave them in the refrigerator too long uncovered. Candy can pick up moisture.
Once set, remove them and store properly. Room temperature storage is best for texture.
Step 19: Serve or Package
Once the pralines are firm, lift them gently from the parchment. They should release easily.
Serve them on a plate, pack them into small boxes, or wrap them for gifting. Place parchment between layers if stacking.
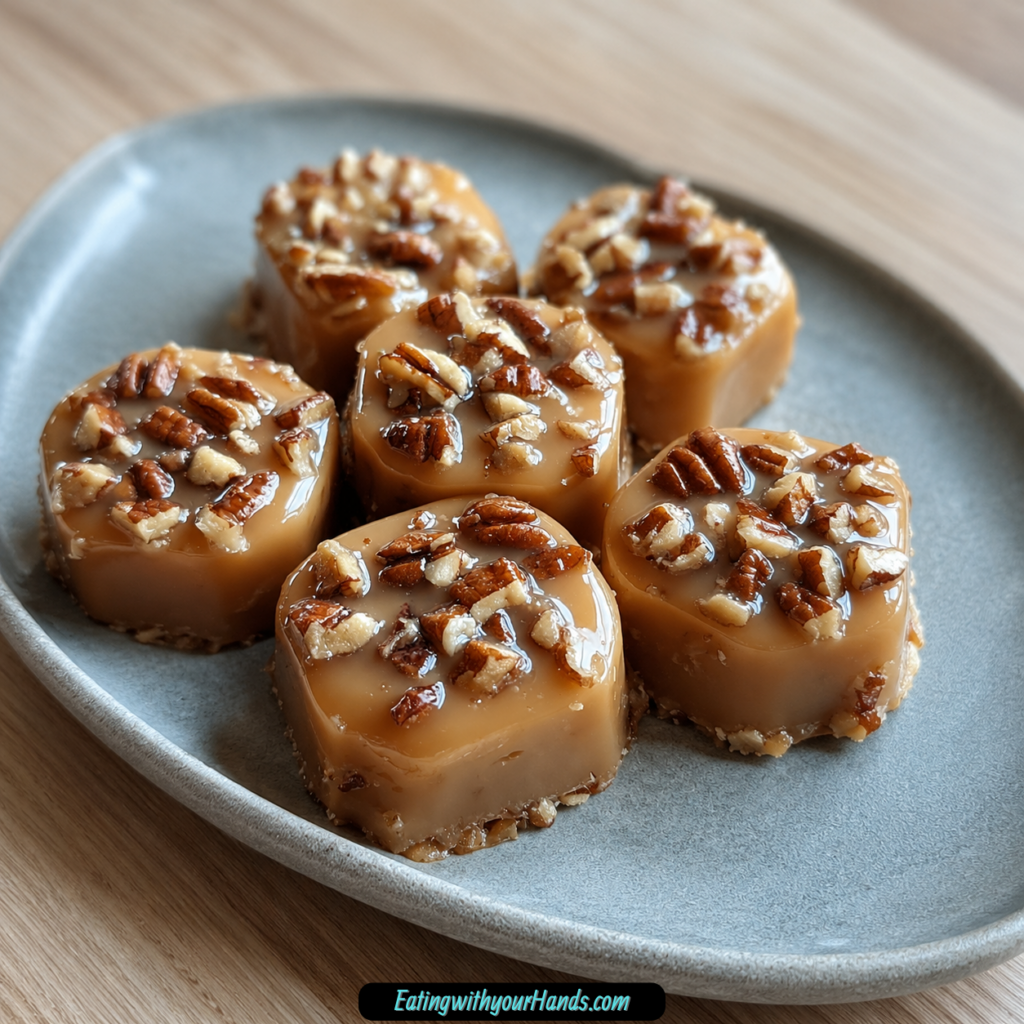
These pralines look lovely on holiday trays, dessert tables, or in gift bags. Their homemade texture makes them feel personal and special.
Helpful Tips for Perfect Vanilla Pecan Pralines
Use a heavy-bottomed saucepan. It helps prevent scorching.
Do not rush the heat. Medium heat gives you better control and reduces the chance of burning the sugar.
Cook to 240°F. If the mixture does not reach the proper temperature, the pralines may not set.
Avoid going far past 240°F. Overcooking can make the pralines too hard.
Stir steadily as the sugar dissolves. Scorched sugar can ruin the flavor.
Avoid humid days if possible. Sugar candy can absorb moisture and become sticky.
Common Mistakes
Using Regular Milk Instead of Evaporated Milk
Evaporated milk is thicker and richer than regular milk. It helps create the right creamy texture.
Fresh milk can make the mixture too runny. Use evaporated milk for best results.
Not Reaching 240°F
The candy needs to reach the right temperature to set. If it stops too early, the pralines can stay too soft.
Use a candy thermometer if possible. The soft-ball test is the backup method.
Overcooking the Sugar Mixture
Going too far past the target temperature can make the pralines hard. Watch carefully as the mixture nears 240°F.
Remove the pan from heat immediately once it reaches the right point. Candy keeps heat, so timing matters.
Letting the Mixture Sit Too Long Before Scooping
The mixture thickens as it cools. If you wait too long, it can become difficult to drop onto parchment.
Prepare the baking sheet ahead of time. Work steadily once the final ingredients are mixed in.
Making Candy on a Humid Day
Humidity can affect sugar candy. It may make the pralines sticky or slow to set.
If the weather is rainy or very humid, it is better to wait for a drier day. Storage also matters.
Variations
Use dark chocolate chips instead of vanilla chocolate chips for a deeper flavor. This creates a richer candy with more chocolate intensity.
Try butterscotch chips for a warm, caramel-like twist. This changes the flavor but keeps the candy sweet and creamy.
Add a pinch of cinnamon or nutmeg for cozy warmth. This is especially nice during the holidays.
Stir in toasted coconut flakes with the pecans for a tropical variation. The coconut adds chew and extra flavor.
Sprinkle a tiny amount of flaky sea salt on top before the pralines set. This creates a salty-sweet contrast.
Use toasted almonds or walnuts instead of pecans. The flavor will change, but the pralines will still be nutty and delicious.
Skip the nuts entirely for a smoother, creamier version. The texture will be softer and less crunchy.
Use coconut milk instead of evaporated milk for a dairy-free-style swap. The texture may be a little softer.
Serving Suggestions
Serve Vanilla Pecan Pralines on a pretty plate for parties. They look charming without extra decoration.
Pack them in cute boxes or bags for gifts. Parchment or wax paper between pieces keeps them neat.
Serve them with coffee or tea. Their sweetness pairs well with something warm and simple.
Crumble them over ice cream for an easy dessert upgrade. The pecans and vanilla candy pieces add crunch and sweetness.
Use them for holiday trays, hostess gifts, or after-dinner treats. They are small but rich, so a little goes a long way.
Keep a few aside for yourself before gifting. These candies tend to disappear quickly.
Storage Tips
Store pralines in an airtight container at room temperature. Place parchment between layers so they do not stick together.
They will stay soft and chewy for up to 1 week. Keep them away from humidity.
Avoid storing them uncovered. Sugar candy can absorb moisture from the air and become sticky.
If they become a little sticky, a quick 10-second microwave warm-up can help. Let them cool again before serving.
Do not store them near heat. Warm temperatures can soften the candy too much.
Freezing Instructions
Vanilla Pecan Pralines can be frozen for up to 2 months. Wrap each praline individually in wax paper.
Place the wrapped pralines in a freezer bag. Remove excess air if possible.
Thaw at room temperature before serving. Keep them wrapped while thawing to protect the texture.
The texture should still be enjoyable after freezing. They may be slightly softer, but the flavor will remain sweet and nutty.
Freezing is helpful if you want to make candy ahead for holidays or gifts. Just thaw before packing or serving.
Make-Ahead Notes
These pralines are a great make-ahead candy because they store well. Make them a day or two before gifting or serving.
Let them cool completely before packaging. Warm candy can create condensation and stickiness.
Use parchment or wax paper between pieces. This keeps them from touching and sticking.
Avoid making them on a humid day if possible. Dry conditions help candy set and store better.
For best presentation, package them after they are fully firm. This helps them hold their shape.
Frequently Asked Questions
Can I Use Fresh Milk Instead of Evaporated Milk?
No, evaporated milk is needed for the right texture. It is thicker and richer than regular milk.
Fresh milk can make the pralines too runny. Use evaporated milk for the best result.
What If I Do Not Have a Candy Thermometer?
You can use the soft-ball stage test. Drop a small amount of the mixture into cold water.
If it forms a soft ball that you can squish between your fingers, the mixture is ready. Watch carefully because timing is important.
Can I Double the Recipe?
It is better not to double this recipe. Candy-making can be finicky, and larger batches may cook unevenly.
Make one batch at a time for best results. This gives you more control over temperature and texture.
Why Are My Pralines Sticky?
Humidity may be the cause. Candy absorbs moisture from the air, especially on rainy or humid days.
Store them in an airtight container and avoid humid conditions when possible. A short microwave warm-up can help if they become sticky.
Why Did My Pralines Turn Hard?
They may have cooked past 240°F. Overcooking sugar can create a harder texture.
Remove the pan from heat as soon as it reaches the target temperature. Use a thermometer for accuracy.
Why Did My Pralines Not Set?
They may not have reached 240°F or the soft-ball stage. The sugar mixture needs to cook long enough to set properly.
Next time, check the temperature or use the cold water test. Proper cooking is key.
Can I Use Different Nuts?
Yes, almonds or walnuts can be used instead of pecans. Toasted nuts add extra flavor.
You can also skip nuts for a smooth version. The texture will be different but still creamy.
Can I Make These Dairy-Free?
You can try coconut milk instead of evaporated milk. The texture may be softer.
Keep in mind that butter and vanilla chips may also need alternatives if you want the whole candy dairy-free. The source note specifically mentions coconut milk as a lighter swap.
Final Thoughts
Delicious Vanilla Pecan Pralines are a sweet little reminder that homemade candy does not have to be complicated to feel special. With sugar, evaporated milk, butter, vanilla chips, vanilla extract, pecans, and marshmallow creme, you can make a rich, creamy candy that tastes like something from a Southern sweet shop.
The process is simple when you take it step by step. Cook the sugar mixture to 240°F, stir in the vanilla chips, add the flavoring, pecans, and marshmallow creme, then drop spoonfuls onto parchment and let them set.
These pralines are perfect for gifts, parties, holidays, dessert trays, or a small treat after a long day. They are buttery, nutty, sweet, soft, and full of vanilla flavor.
Make them on a dry day, store them well, and share them if you are feeling generous. Every bite brings that smooth vanilla sweetness and pecan crunch that makes homemade pralines so easy to love.
Vanilla Pecan Pralines
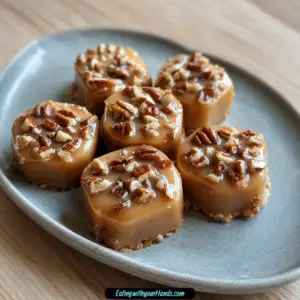
These Vanilla Pecan Pralines are sweet, creamy, and packed with nutty pecan flavor. The candy mixture is cooked with sugar, evaporated milk, and butter, then blended with vanilla chocolate chips, vanilla extract, marshmallow creme, and chopped pecans for a smooth, rich texture. Each spoonful sets into a soft, sweet praline with a classic homemade candy feel. They are perfect for dessert trays, holiday gifting, snack boxes, parties, or anytime you want an old-fashioned sweet treat.
Recipe Details
- Prep Time: 10 minutes
- Cook Time: 20 minutes
- Total Time: 30 minutes
- Course: Dessert
- Cuisine: American
- Servings: 12 pralines
Ingredients
- 4 oz marshmallow creme
- 0.25 cup butter cubed
- 2 cups chopped pecans
- 1 teaspoon vanilla extract
- 7 oz evaporated milk
- 11 oz vanilla chocolate chips
- 2.5 cups granulated sugar
Instructions
Step 1: Start the Candy Base
In a saucepan over medium heat, combine the granulated sugar, evaporated milk, and cubed butter.
Stir constantly as the mixture heats.
Step 2: Cook to Temperature
Continue stirring until the mixture reaches 240°F (115°C) on a candy thermometer.
This helps the pralines set properly once cooled.
Step 3: Add the Vanilla Chocolate Chips
Remove the saucepan from the heat.
Stir in the vanilla chocolate chips until they melt completely into the hot mixture.
Step 4: Mix in the Flavor and Pecans
Add the vanilla extract, chopped pecans, and marshmallow creme.
Mix well until everything is smooth, thick, and evenly combined.
Step 5: Shape the Pralines
Drop spoonfuls of the praline mixture onto parchment paper.
Work carefully while the mixture is still warm and scoopable.
Step 6: Let Set
Allow the pralines to cool at room temperature until firm and fully set.
Serve once they hold their shape.
Notes
Store pralines in an airtight container at room temperature for up to a week.
Serving Suggestions
These vanilla pecan pralines pair well with:
- Hot coffee
- Iced coffee
- Black tea
- Cold milk
- Dessert boards
- Holiday cookie trays
- Vanilla ice cream
- Gift boxes
Storage
How to Store
Keep the pralines in an airtight container at room temperature.
Best Texture Tip
Let the pralines cool completely before stacking so they stay neat and do not stick together.

Fernando is the creator and writer behind the food blog Eating with your Hands. Living and working in cities like Paris, Barcelona, and Berlin, and being married to a Canadian foodie, has given Fernando a passion and interest in food and inspired him to run EWYH.