
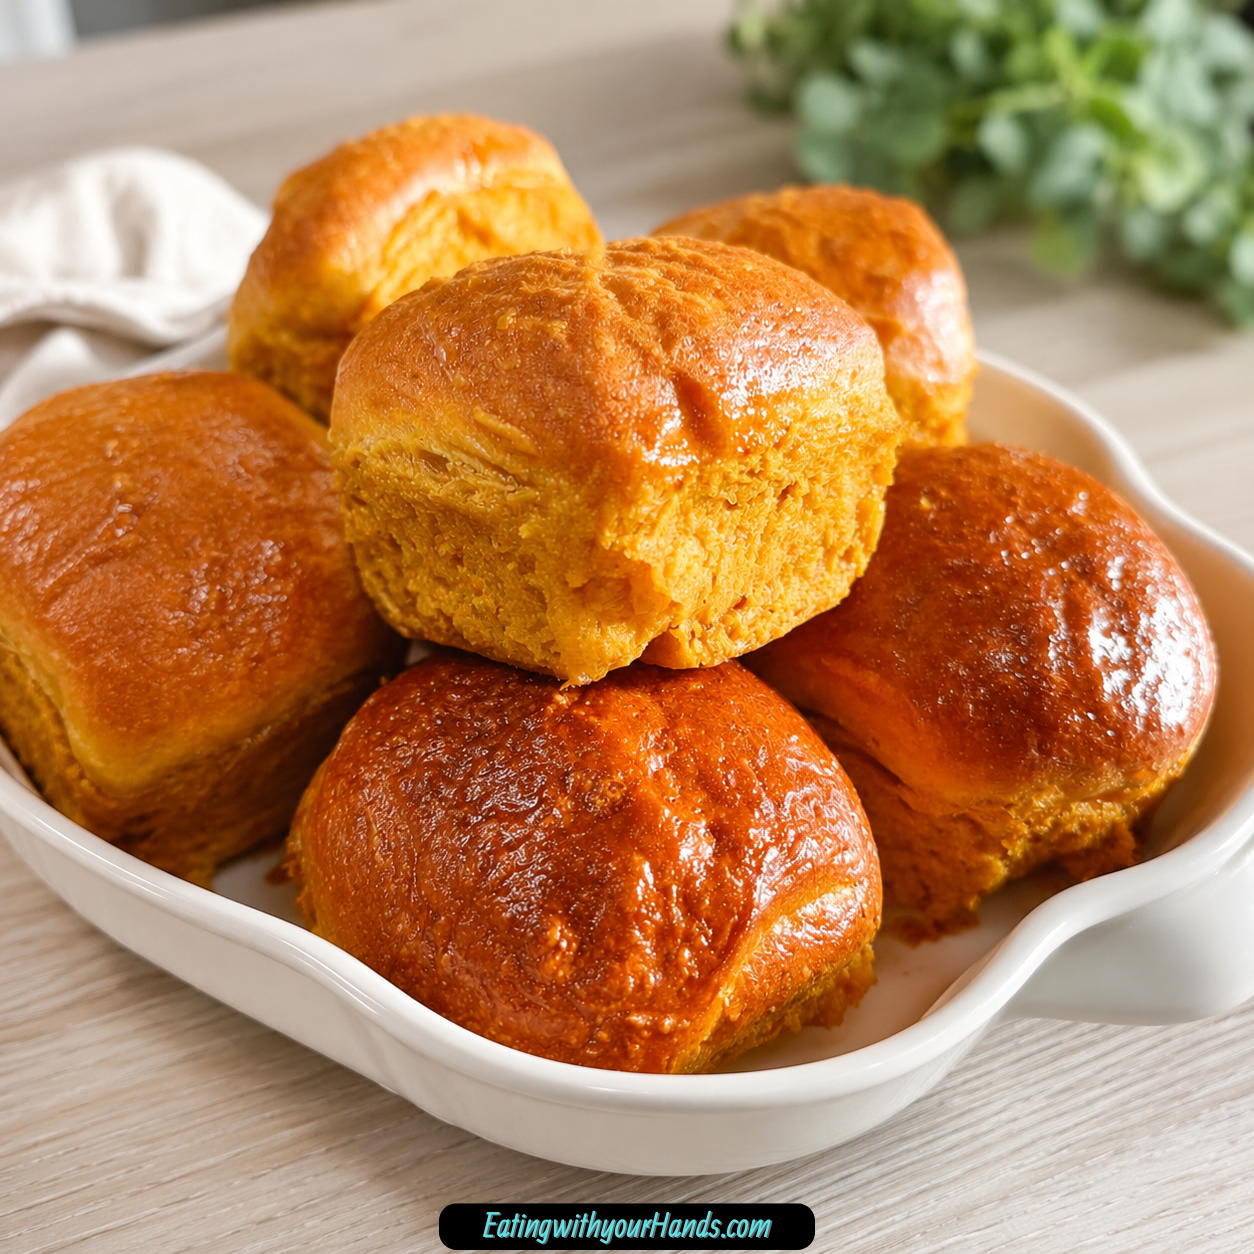
Some recipes earn a permanent place in the kitchen because they are impressive, while others become favorites because they make everyday life feel easier. These easy 2 ingredient sweet potato rolls manage to do both, creating warm homemade bread with almost none of the work normally associated with baking rolls from scratch.
There are no complicated techniques to learn, no yeast to activate, and no long stretch of time spent waiting for dough to rise. All you need is cooked mashed sweet potato, self-rising flour, a mixing bowl, and a few quiet minutes to bring the dough together.
The result is a batch of soft, lightly sweet rolls with a warm golden color and a comforting homemade appearance. They look and taste as though they required far more preparation than they actually did, which makes them especially useful on days when you want something fresh from the oven without turning baking into an all-day project.
These rolls can sit comfortably beside a casual weeknight meal, a bowl of soup, a pot of chili, or a larger holiday spread. They are equally satisfying when enjoyed on their own while still warm, especially with a little butter melting into the tender center.
Table of Contents
- Why This Simple Sweet Potato Roll Recipe Feels So Special
- The Appeal of Baking With Only Two Ingredients
- Recipe Details
- Equipment
- Ingredients
- Understanding the Two Main Ingredients
- What the Dough Should Look and Feel Like
- Directions
- Step 1: Prepare the Mashed Sweet Potatoes
- Step 2: Preheat the Oven
- Step 3: Prepare the Baking Sheet
- Step 4: Measure the Ingredients Carefully
- Step 5: Begin Combining the Dough
- Step 6: Gently Knead Until No Dry Patches Remain
- Step 7: Check and Adjust the Consistency
- Step 8: Divide the Dough Into 12 Portions
- Step 9: Shape Each Portion Into a Roll
- Step 10: Arrange and Inspect the Rolls
- Step 11: Bake Until Puffed and Golden
- Step 12: Let the Rolls Cool Slightly
- Why You Should Avoid Overworking the Dough
- How Sweet Potato Moisture Affects the Recipe
- Homemade Self-Rising Flour Option
- Flavor and Texture of the Finished Rolls
- Optional Savory Variations
- Optional Sweet Variations
- Serving Suggestions
- Storage
- How to Reheat the Rolls
- Helpful Notes for Consistent Results
- Frequently Asked Questions
- Why This Recipe Belongs in a Busy Home Kitchen
- Final Thoughts
- 2 Ingredient Sweet Potato Rolls
Why This Simple Sweet Potato Roll Recipe Feels So Special
There is something deeply comforting about pulling a tray of bread from the oven, even when the recipe itself is incredibly simple. The smell, the warmth, and the sight of golden rolls cooling on the baking sheet can make an ordinary meal feel much more complete.
Traditional homemade rolls often involve a longer list of ingredients and several stages of preparation. These sweet potato rolls offer a much easier path because the dough comes together with only mashed sweet potatoes and self-rising flour.
The sweet potato provides moisture, natural sweetness, color, and body all at once. The self-rising flour supplies the dry structure and the leavening needed to help the rolls puff as they bake.
Because the ingredients already perform several jobs, there is no need to add eggs, milk, yeast, or a long list of extras. That simplicity is the heart of the recipe, and it is also what makes the rolls so approachable for beginner bakers.
The process is forgiving enough for a relaxed afternoon but practical enough for a busy evening. Once the ingredients are mixed and shaped, the oven takes care of the rest.
The Appeal of Baking With Only Two Ingredients
A short ingredient list can be surprisingly freeing, especially when you want to bake but do not want to measure a dozen separate items. With this recipe, there is very little preparation standing between you and a tray of warm rolls.
You do not need to worry about whether the yeast is fresh or whether the liquid is at the correct temperature. You also do not have to plan around rising time, punch down the dough, or wait for a second proof before baking.
Instead, the process follows a simple rhythm of mixing, shaping, and baking. That straightforward method makes the recipe easy to remember and easy to repeat whenever you have cooked sweet potatoes available.
The rolls are also a useful way to turn plain leftover mashed sweet potatoes into something that feels completely different. As long as the potatoes do not contain added butter, spices, or other seasonings, they can become the base of the dough.
This is the kind of recipe that can make homemade bread feel possible even on a day when your energy is limited. It offers the comfort of baking without requiring the schedule or precision of a more traditional yeast-based roll.
Recipe Details
- Yield: 12 rolls
- Oven temperature: 350°F (175°C)
- Baking time: About 20 minutes
- Main method: Mix, shape, and bake
- Rising time: None
- Yeast required: No
Equipment
- Large mixing bowl
- Baking sheet
- Parchment paper or nonstick cooking spray
- Kitchen scale, optional
Ingredients
- 2 cups sweet potatoes, cooked and mashed
- 2 cups self-rising flour
Understanding the Two Main Ingredients
A recipe with only two ingredients leaves very little room for either one to hide. The texture and consistency of both the sweet potato and the flour will directly affect how easily the dough comes together.
Cooked and Mashed Sweet Potatoes
The sweet potatoes should already be fully cooked before they are measured and mixed into the dough. They can be peeled or left unpeeled according to your preference, although the final mash should be smooth enough to blend evenly with the flour.
Roasting peeled and cubed sweet potatoes until they are fork-tender is one option described for preparing them. Once soft, they should be mashed thoroughly so large pieces do not remain in the dough.
Plain leftover mashed sweet potatoes can also work well for this recipe. They should not contain added butter, spices, or other ingredients because those additions could change the moisture level, flavor, and consistency of the rolls.
The mash should feel thick and smooth rather than loose or watery. Sweet potatoes naturally vary in moisture, so one batch may produce a slightly softer dough than another.
If the mashed sweet potatoes seem especially wet, the finished dough may feel stickier. In that case, a small additional sprinkle of flour can help bring it back to a workable consistency.
Self-Rising Flour
Self-rising flour keeps this recipe exceptionally short because it already contains the components needed to help the dough rise in the oven. Store-bought self-rising flour can be measured directly into the bowl with the mashed sweet potatoes.
If self-rising flour is not available, the original recipe provides a simple substitute. For every cup of all-purpose flour, combine 1½ teaspoons of baking powder and ¼ teaspoon of salt.
For the full recipe, that means mixing 2 cups of all-purpose flour with 3 teaspoons of baking powder and ½ teaspoon of salt. Whisk those ingredients together before combining the flour mixture with the sweet potatoes.
The flour should be incorporated only until no dry patches remain. Excessive mixing or kneading can make the texture denser instead of leaving the rolls soft and tender.
What the Dough Should Look and Feel Like
The dough for these rolls will not necessarily behave exactly like a traditional yeast dough. It should be soft, slightly sticky, and cohesive enough to hold its shape when divided and rolled into portions.
A small amount of stickiness is normal because sweet potatoes contain natural moisture. The goal is not to keep adding flour until the dough feels completely dry, as too much flour could make the baked rolls heavy.
When the mixture is ready, there should be no pockets of loose flour at the bottom of the bowl. The dough should come together as one soft mass that can be divided without spreading into a wet, shapeless mixture.
If it feels unusually wet, add only a light sprinkle of flour at a time. If it seems too dry to hold together, the original directions allow for a tiny splash of water.
These adjustments should be made carefully because only a small amount may be needed. The exact consistency can vary depending on how much moisture remains in the cooked sweet potatoes.
Directions
Step 1: Prepare the Mashed Sweet Potatoes
Begin with 2 cups of cooked and mashed sweet potatoes. Make sure they are plain and do not contain butter, spices, milk, or other added ingredients.
The texture should be smooth, thick, and free of large lumps. If the sweet potatoes have been refrigerated, stir or mash them again so the consistency is even before measuring.
If you are preparing the sweet potatoes specifically for this recipe, they may be peeled, cut into cubes, and roasted until fork-tender. Allow them to become soft enough to mash without leaving firm pieces behind.
Once mashed, look closely at the consistency before adding the flour. The sweet potatoes should be moist enough to form dough but not so watery that liquid collects around them.
Step 2: Preheat the Oven
Set the oven to 350°F (175°C) before beginning the dough. Starting with a fully heated oven helps the rolls begin baking evenly as soon as the tray is placed inside.
While the oven heats, position a rack where the rolls can bake evenly. The original recipe does not require any special baking setup beyond a standard baking sheet.
Giving the oven enough time to preheat is important because these rolls bake for only about 20 minutes. Placing them into an oven that is still warming could affect how quickly they puff and brown.
Step 3: Prepare the Baking Sheet
Line a baking sheet with parchment paper before shaping the rolls. If parchment paper is not available, lightly coat the surface with nonstick cooking spray.
The baking sheet does not need a heavy layer of grease. A light coating is enough to provide a little protection against sticking while the rolls bake.
Set the prepared baking sheet near your work area so the shaped portions can be transferred immediately. This keeps the process organized and helps prevent the soft dough from sitting unnecessarily on the counter.
Step 4: Measure the Ingredients Carefully
Measure 2 cups of mashed sweet potatoes and place them in a large mixing bowl. Add 2 cups of self-rising flour directly to the same bowl.
Because the recipe relies on an equal measured amount of each ingredient, careful measuring helps maintain the intended balance. Avoid packing the flour down more firmly than necessary when filling the measuring cup.
If you are using the homemade self-rising flour option, combine the all-purpose flour, baking powder, and salt thoroughly before adding it to the sweet potatoes. This helps distribute the leavening evenly throughout the dough.
Step 5: Begin Combining the Dough
Use your hands or a suitable mixing utensil to begin working the flour into the mashed sweet potatoes. Start slowly so the flour does not scatter out of the bowl.
As the mixture begins to combine, press and fold it gently rather than stirring aggressively. The sweet potatoes will gradually absorb the flour and turn the separate ingredients into a soft dough.
Continue mixing until most of the dry flour has disappeared. Pause occasionally to scrape or gather any flour remaining around the sides and bottom of the bowl.
Step 6: Gently Knead Until No Dry Patches Remain
Once the ingredients have mostly come together, gently knead the mixture inside the bowl. Use light pressure and stop as soon as the dough looks evenly blended.
This is not a dough that needs extended kneading. The goal is simply to eliminate dry flour pockets and create a uniform mixture that holds together.
Overworking the dough can make the rolls denser, so resist the urge to keep kneading after the ingredients are incorporated. A slightly uneven, handmade appearance is perfectly acceptable.
Step 7: Check and Adjust the Consistency
Feel the dough after it has been mixed. It should be soft and slightly sticky, but it should still be capable of holding together when shaped.
If the dough feels excessively wet or difficult to portion, add a small sprinkle of additional flour. Mix gently after each addition so you do not accidentally add more than the dough needs.
If the dough feels dry, crumbly, or unable to form a cohesive ball, add only a tiny splash of water. Work it in carefully and check the texture again before adding anything more.
Sweet potatoes can differ considerably in moisture, which is why the dough may not feel exactly the same every time. Let the condition of the mixture guide these small adjustments rather than adding a large amount of flour or water all at once.
Step 8: Divide the Dough Into 12 Portions
Separate the finished dough into 12 approximately equal pieces. You can estimate the portions by sight or use a kitchen scale if you prefer more uniform rolls.
To divide by sight, begin by separating the dough into a few larger sections before dividing each section again. This can make it easier to create portions that are reasonably close in size.
The pieces do not have to be mathematically identical to bake successfully. However, keeping them similar in size helps them finish baking at roughly the same time.
Step 9: Shape Each Portion Into a Roll
Take one portion of dough and gently roll it between your hands to create a rounded shape. Handle it lightly so the dough does not become compressed.
If the dough sticks slightly to your hands, work carefully rather than coating it with a large amount of extra flour. A soft dough helps preserve the tender texture of the finished rolls.
Place each shaped roll onto the prepared baking sheet as soon as it is formed. Continue until all 12 portions have been shaped and arranged.
The rolls need a little space between them, but they do not require a large amount of room. Leave enough distance for air to circulate and for the rolls to puff slightly as they bake.
Step 10: Arrange and Inspect the Rolls
Before placing the tray into the oven, look over the shaped rolls one final time. Make any small adjustments needed to help them sit upright and maintain a rounded shape.
Do not worry if the surface is not perfectly smooth. A natural, handmade appearance suits this simple recipe and does not affect the flavor.
Check that the portions are distributed evenly across the baking sheet. Avoid crowding all of them into one small area of the tray.
Step 11: Bake Until Puffed and Golden
Transfer the baking sheet to the preheated 350°F (175°C) oven. Bake the rolls for about 20 minutes.
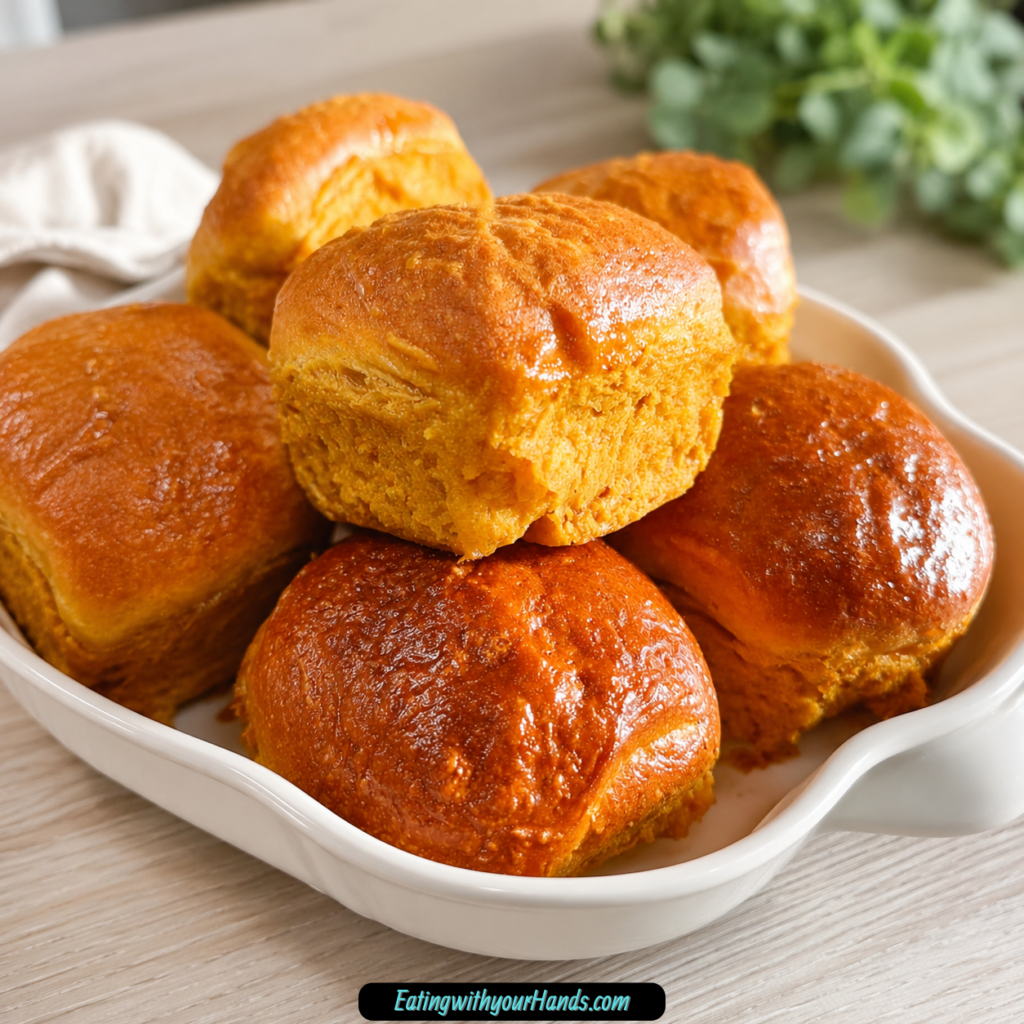
During baking, they should become more puffed and develop a golden-brown color on top. Their warm color will be enhanced by the natural orange tone of the sweet potatoes.
Avoid opening the oven repeatedly while they bake, as this can release heat. Begin checking near the end of the stated baking time.
The rolls are ready when they appear set, puffed, and golden on the surface. Because ovens can behave differently, use the appearance of the rolls together with the approximate 20-minute timing.
Step 12: Let the Rolls Cool Slightly
Remove the baking sheet from the oven and place it on a heat-safe surface. The rolls will be extremely hot immediately after baking, so give them a few minutes to cool.
This brief cooling time also allows the interior to become more settled. The rolls will firm slightly as they cool while remaining soft inside.
Once they are comfortable to handle, serve them while they are still pleasantly warm. Their simple flavor and tender texture make them enjoyable plain or with your preferred accompaniment.
Why You Should Avoid Overworking the Dough
One of the easiest ways to preserve the soft texture of these rolls is to stop mixing at the right time. The dough needs to be combined thoroughly, but it does not benefit from long, forceful kneading.
When flour is worked more than necessary, the finished rolls may become heavier. A gentle hand helps keep the process quick and supports a more tender result.
Mix until the flour is absorbed and the dough can hold together. Once that point is reached, move directly into dividing and shaping the portions.
This is especially helpful for beginner bakers who may assume every bread dough requires extensive kneading. In this recipe, simplicity is not a shortcut to correct later; it is the method that makes the rolls work.
How Sweet Potato Moisture Affects the Recipe
Not every cooked sweet potato contains exactly the same amount of moisture. Some mash into a thick, almost firm consistency, while others become noticeably softer and wetter.
That difference explains why the dough may occasionally need a light sprinkle of flour. The adjustment is not a change to the recipe but a practical response to the natural variation in the main ingredient.
The safest approach is to begin with the listed amounts and mix them completely. Only after seeing the finished consistency should you decide whether a small adjustment is necessary.
Adding too much flour too quickly can remove the softness that makes these rolls appealing. Small additions allow you to correct the dough without changing its character.
A watery mash can also be gently blotted with a paper towel before mixing, as noted in the original guidance. This may help reduce excess surface moisture before the flour is added.
Homemade Self-Rising Flour Option
Running out of self-rising flour does not mean the recipe has to be abandoned. The original recipe includes a substitute made from all-purpose flour, baking powder, and salt.
For each cup of all-purpose flour, use 1½ teaspoons of baking powder and ¼ teaspoon of salt. Since this recipe calls for 2 cups of flour, use 3 teaspoons of baking powder and ½ teaspoon of salt.
Place the ingredients in a bowl and whisk them together thoroughly. Even distribution is important because the baking powder needs to be spread throughout the flour before it is mixed into the sweet potatoes.
Once combined, measure and use the mixture as the self-rising flour in the recipe. The rest of the method remains the same.
Flavor and Texture of the Finished Rolls
These rolls have a mild natural sweetness rather than the flavor of a sugary dessert. The sweet potato gives them a soft warmth that works well with both simple and more flavorful meals.
Their interior should feel tender and comforting, while the outside becomes lightly golden in the oven. They are not intended to copy the exact texture of a yeast-raised dinner roll, but they offer their own appealing softness and simplicity.
The sweet potato also gives the rolls a naturally rich color. That golden-orange tone makes the finished batch look especially inviting when served warm.
Because the base recipe is so simple, the flavor remains adaptable. The rolls can be served beside savory food, included in a brunch spread, or enjoyed with a sweeter topping.
Optional Savory Variations
Once you are comfortable with the basic recipe, the original version suggests several ways to create a more savory roll. These additions are optional and are not required for the standard two-ingredient method.
Shredded cheddar cheese can be added with a pinch of garlic powder for a richer, more savory flavor. The cheese and garlic turn the simple roll into an easy accompaniment for soup or chili.
Finely chopped rosemary or thyme can also be kneaded gently into the dough. These herbs add a more aromatic character without changing the basic preparation method.
For a small amount of warmth, a dash of smoked paprika or cayenne pepper may be included. Use these variations when you want the rolls to play a stronger role beside a savory meal.
Optional Sweet Variations
The mild sweetness of the sweet potato also provides a natural starting point for sweeter variations. A teaspoon of cinnamon and a drizzle of honey can give the rolls a cozy, autumn-inspired flavor.
Chopped pecans or walnuts may be mixed into the dough to introduce a little crunch. A light sprinkle of brown sugar on top before baking can create a sweeter, lightly caramelized surface.
These additions can make the rolls especially appealing with coffee or as part of a breakfast spread. They can also be served beside eggs when you want a balance of sweet and savory flavors.
The original two-ingredient recipe remains the foundation for all of these versions. Additions should be treated as optional ideas rather than necessary parts of the basic dough.
Serving Suggestions
The simplest way to serve these sweet potato rolls is while they are still warm from the oven. Slice or pull one open and add butter so it can melt into the soft center.
They also make a comfortable partner for soup or chili, particularly on a cool day. The mild sweetness provides a pleasant contrast to a warm, savory bowl.
For a holiday meal, arrange the rolls in a basket or on a serving plate and bring them to the table while warm. Their golden color gives them an inviting homemade appearance without requiring a complicated bread recipe.
They can also be included in a brunch spread with other sweet and savory dishes. If you prepare one of the sweeter variations, a little honey or maple syrup can be added when serving.
The rolls are flavorful enough to eat plain, especially when fresh. Their simplicity allows them to fit naturally into many meals without competing with the other food on the table.
Storage
Allow all leftover rolls to cool completely before storing them. Placing warm rolls in a closed container can trap excess moisture.
Once cool, transfer them to an airtight container or a zip-top storage bag. They can be kept at room temperature for about 2 days.
For longer storage, refrigerate the rolls for up to one week. Keep the container tightly closed so they do not dry out.
The rolls can also be frozen for up to 3 months. Wrap each one individually in plastic wrap before placing the wrapped rolls together in a freezer bag.
Individual wrapping makes it easier to remove only the number of rolls you need. Let frozen rolls thaw before reheating them.
How to Reheat the Rolls
To reheat the rolls in the oven, place them in a 350°F (175°C) oven for 5 to 10 minutes. This method is useful when warming several rolls at the same time.
For a faster option, microwave one roll for approximately 15 to 20 seconds. Check the temperature before heating longer because microwave strength can vary.
Reheating should restore some of the warmth and softness they had when freshly baked. Avoid heating them much longer than necessary, as excessive reheating may dry them out.
Helpful Notes for Consistent Results
Use mashed sweet potatoes that are smooth and thick rather than watery. Large lumps can make the dough harder to mix evenly, while excessive moisture can make shaping difficult.
Begin with the exact quantities in the recipe before making any adjustments. Sweet potatoes vary, so small corrections should be based on how the dough actually feels.
Do not continue kneading once the dry flour has disappeared. Gentle mixing is enough to create the dough and helps prevent the rolls from becoming unnecessarily dense.
Try to divide the dough into portions of a similar size. Uniform rolls are more likely to finish baking at the same time.
Allow the rolls to cool briefly before pulling them apart. The interior continues to settle during those first few minutes after leaving the oven.
Frequently Asked Questions
Can I Use Regular All-Purpose Flour?
Yes, but all-purpose flour must be combined with baking powder and salt to replace the self-rising flour. For every cup of all-purpose flour, add 1½ teaspoons of baking powder and ¼ teaspoon of salt.
For this full recipe, combine 2 cups of all-purpose flour with 3 teaspoons of baking powder and ½ teaspoon of salt. Whisk the mixture thoroughly before adding it to the mashed sweet potatoes.
How Should the Mashed Sweet Potatoes Feel?
The mashed sweet potatoes should be smooth, thick, and moist without being watery. Think of a substantial mashed potato texture rather than a loose puree.
If they appear too wet, blotting away a little surface moisture with a paper towel may help. You can also correct the dough later with a small sprinkle of flour if needed.
Can I Use Leftover Mashed Sweet Potatoes?
Yes, plain leftover mashed sweet potatoes are suitable for this recipe. They should not contain added butter, spices, milk, or other ingredients.
Using leftovers can make the preparation even faster because the sweet potatoes are already cooked and mashed. Check their consistency before measuring to make sure they are not unusually wet.
Do These Rolls Need Yeast?
No yeast is used in this recipe. The self-rising flour provides the leavening needed during baking.
That means there is no activation step and no waiting for the dough to rise. Once shaped, the rolls can go directly into the oven.
Do I Need to Knead the Dough?
Only a small amount of gentle kneading is needed to bring the ingredients together. Stop once the flour is fully incorporated and no dry patches remain.
Long or forceful kneading is unnecessary and may create a denser texture. The dough should remain soft and slightly sticky.
Can I Make the Rolls Gluten-Free?
The original recipe suggests using a gluten-free flour blend that already includes baking powder or preparing a gluten-free self-rising mixture. The finished texture may be slightly denser than the standard version.
Because flour blends behave differently, pay close attention to the dough consistency. It should still be soft enough to shape while holding together.
Why Is My Dough Too Sticky?
The mashed sweet potatoes may contain more moisture than usual. Sweet potatoes naturally vary, so this can happen even when the listed measurements are followed.
Add a light sprinkle of flour and mix gently before checking again. Avoid adding a large amount all at once.
Why Is My Dough Too Dry?
The sweet potatoes may be slightly drier, or the flour may have been measured more heavily. A tiny splash of water can help the mixture come together.
Add only a very small amount at a time. The dough should become cohesive without turning wet or loose.
How Do I Know When the Rolls Are Done?
The rolls should look puffed, set, and golden brown on top after about 20 minutes. Their exact appearance may vary slightly depending on the sweet potatoes and the oven.
Use the baking time as a guide while also watching their color and structure. They should no longer look like soft, unbaked dough on the surface.
Why This Recipe Belongs in a Busy Home Kitchen
There are days when the idea of homemade bread sounds wonderful but the process feels unrealistic. This recipe closes that gap by offering the warmth of fresh baking without demanding hours of attention.
The short ingredient list also makes it easier to decide spontaneously to make a batch. If cooked sweet potatoes and self-rising flour are available, most of the work is already done.
It is a useful recipe for beginner bakers because the steps are visible and direct. You can feel the dough change as the ingredients combine, shape each portion by hand, and watch the rolls become golden in the oven.
More experienced cooks may appreciate the recipe for a different reason. It is flexible, efficient, and easy to adapt when a meal needs one more comforting element.
Most importantly, the rolls do not feel like a compromise simply because they are easy. They still bring the warmth, aroma, and satisfaction that make homemade baking so appealing.
Final Thoughts
These easy 2 ingredient sweet potato rolls prove that a homemade recipe does not need to be complicated to feel special. With mashed sweet potatoes and self-rising flour, you can create 12 warm rolls without yeast, rising time, or difficult techniques.
Their lightly sweet flavor, golden color, and soft texture make them suitable for weeknight dinners, holiday meals, brunches, soups, and simple snacks. The recipe is practical enough for a busy day but comforting enough to make the kitchen feel warmer as soon as the tray comes out of the oven.
Once you understand the ideal dough consistency, the entire method becomes easy to repeat. Mix gently, make only small adjustments when needed, shape the dough into 12 portions, and bake at 350°F (175°C) for about 20 minutes.
The best part may be how little effort stands between the first measured ingredient and the first warm roll. Sometimes the recipes we return to most often are not the ones with the longest ingredient lists, but the ones that make something homemade feel wonderfully possible.
2 Ingredient Sweet Potato Rolls
These easy sweet potato rolls are soft, lightly sweet, and wonderfully simple to prepare. With only mashed sweet potatoes and self-rising flour, they are a convenient homemade bread option for busy meals. The dough comes together quickly without yeast or a lengthy rising time, making these golden rolls ideal for weeknight dinners, holiday tables, or a warm snack straight from the oven.
Recipe Details
- Prep Time: 10 minutes
- Cook Time: 20 minutes
- Total Time: 30 minutes
- Course: Bread
- Servings: 12 rolls
Ingredients
- 2 cups self-rising flour
- 2 cups sweet potatoes, cooked and mashed
Instructions
Step 1: Preheat the Oven
Preheat your oven to 350°F (175°C).
Step 2: Prepare the Dough
Add the cooked and mashed sweet potatoes and self-rising flour to a bowl. Mix until the ingredients come together and form a dough.
Step 3: Shape the Rolls
Divide the dough into 12 equal portions. Shape each portion into a roll and arrange them on a baking sheet.
Step 4: Bake Until Golden
Bake the rolls for 20 minutes, or until they are golden brown.
Notes
Allow the rolls to cool slightly before serving.
Keep any leftovers in an airtight container.
Serving Suggestions
- Serve warm alongside soups, stews, or chili.
- Pair with roasted chicken, turkey, or other savory main dishes.
- Enjoy as a simple breakfast or afternoon snack.
- Add them to a holiday bread basket.
- Serve with your favorite bread spread.
Storage
How to Store
Place cooled leftover rolls in an airtight container to help prevent them from drying out.
How to Reheat
Warm the rolls gently before serving until heated through.
How to Freeze
Place completely cooled rolls in a freezer-safe container or bag. Thaw them before reheating and serving.
Best Texture Tip
Let the rolls cool only slightly before enjoying them, as they have their best soft texture while still warm.

Fernando is the creator and writer behind the food blog Eating with your Hands. Living and working in cities like Paris, Barcelona, and Berlin, and being married to a Canadian foodie, has given Fernando a passion and interest in food and inspired him to run EWYH.