
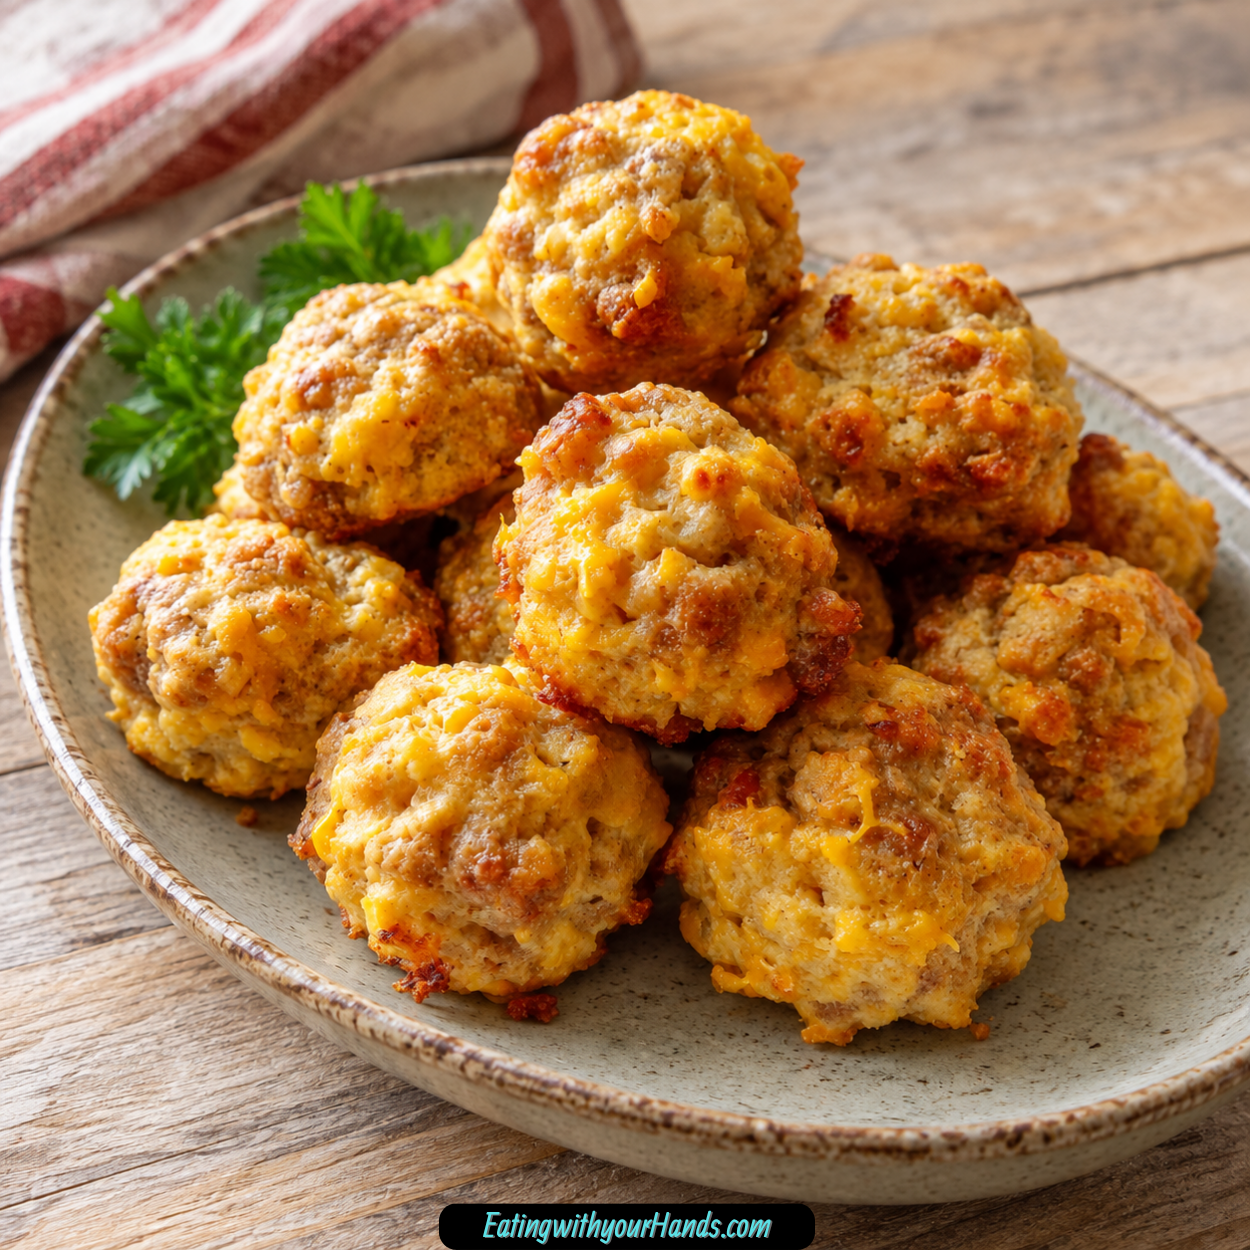

Easy Bisquick Sausage Balls are the kind of party snack that proves the simplest recipes often disappear first. With just Bisquick mix, uncooked sausage, and shredded cheddar cheese, these little golden bites come out savory, cheesy, tender, and dangerously easy to keep eating.
They are the appetizer I think of when time is short but people still need something warm and satisfying. They work for holiday parties, game-day spreads, potlucks, brunch tables, casual gatherings, and those last-minute moments when you realize a snack tray would make everything feel more complete.
There is something wonderfully nostalgic about them. They taste like comfort food in bite-sized form, with the sausage bringing richness, the cheddar bringing salty sharpness, and the Bisquick holding everything together in a soft, biscuit-like texture.
The best part is how forgiving they are. If the mixture feels dry, a little water or milk can help it come together; if it feels sticky, a bit more Bisquick can bring it back into shape.
They are also incredibly practical. You can shape them ahead and refrigerate them, freeze them baked or unbaked, and reheat leftovers when you need a quick snack.
Warm from the oven, they have golden edges and a cheesy, savory center. At room temperature, they still taste good enough to keep guests circling the platter.
This recipe is classic because it does not ask much from you. One bowl, three main ingredients, a baking sheet, and a few minutes of rolling are all it takes.
Whether you serve them with ranch, honey mustard, marinara, or spicy aioli, these Easy Bisquick Sausage Balls always feel like the right thing to put on the table. They are humble, reliable, and exactly the kind of recipe that earns a permanent spot in the appetizer rotation.
Table of Contents
- Why You’ll Love These Easy Bisquick Sausage Balls
- Recipe Details
- Ingredients
- Ingredient Notes
- Optional Swaps, Variations, Add-Ins, and Serving Ideas
- Classic Bisquick Sausage Balls
- Spicy Sausage Balls
- Mild Sausage Balls
- Pepper Jack Sausage Balls
- Colby Cheese Sausage Balls
- Smoky Gouda Sausage Balls
- Feta Sausage Balls
- Jalapeño Sausage Balls
- Herb Sausage Balls
- Breakfast Sausage Balls
- Spinach Sausage Balls
- Sun-Dried Tomato Sausage Balls
- Turkey Sausage Balls
- Chicken Sausage Balls
- Plant-Based Sausage Balls
- Gluten-Free Sausage Balls
- Ranch Dip Sausage Balls
- Honey Mustard Sausage Balls
- Marinara Sausage Balls
- Spicy Aioli Sausage Balls
- Why This Recipe Works
- Directions
- Step 1: Preheat the Oven
- Step 2: Prepare the Baking Sheet
- Step 3: Set Out a Large Mixing Bowl
- Step 4: Add the Bisquick
- Step 5: Add the Sausage
- Step 6: Add the Cheese
- Step 7: Mix the Dough
- Step 8: Adjust if Too Dry
- Step 9: Adjust if Too Sticky
- Step 10: Shape the Sausage Balls
- Step 11: Arrange on the Baking Sheet
- Step 12: Bake Until Golden
- Step 13: Prevent Over-Browning if Needed
- Step 14: Cool Briefly
- Step 15: Serve Warm
- Step 16: Store Leftovers
- Step 17: Make Ahead
- Step 18: Freeze for Later
- Serving Ideas
- Storage
- Freezing
- Make-Ahead
- Helpful Notes for Best Results
- Variations
- Classic Bisquick Sausage Balls
- Spicy Sausage Balls
- Jalapeño Sausage Balls
- Pepper Jack Sausage Balls
- Colby Sausage Balls
- Smoky Gouda Sausage Balls
- Feta Sausage Balls
- Rosemary Sausage Balls
- Thyme Sausage Balls
- Breakfast Sausage Balls
- Spinach Sausage Balls
- Sun-Dried Tomato Sausage Balls
- Turkey Sausage Balls
- Chicken Sausage Balls
- Plant-Based Sausage Balls
- Gluten-Free Sausage Balls
- Troubleshooting
- Frequently Asked Questions
- Why This Recipe Works So Well
- Final Thoughts
- Bisquick Sausage Balls
Why You’ll Love These Easy Bisquick Sausage Balls
These sausage balls are effortless to make. You only need three main ingredients and one bowl.
They are party-friendly and always popular. Their small size makes them easy to grab, dip, and enjoy.
They are freezer-friendly. You can freeze them baked or unbaked for quick snacks later.
They are kid-approved. The cheesy, savory flavor is simple and easy to love.
They are customizable. You can change the cheese, add spice, use herbs, include vegetables, or try different sausage.
They are forgiving. Even if the dough feels a little sticky or dry, small adjustments can still lead to delicious results.
Recipe Details
This recipe bakes at 375°F (190°C). The sausage balls bake for 20 to 25 minutes, until golden-brown and firm to the touch.
The recipe uses 2 cups Bisquick mix. Classic store-bought Bisquick works well.
The sausage should be 1 lb uncooked sausage. Regular pork sausage is classic, but spicy or mild sausage both work.
The cheese is 4 cups shredded cheddar cheese. Sharp cheddar gives the strongest flavor, but Colby or pepper jack can also be used.
The mixture is combined in one large bowl. Hands work well for mixing because the dough needs to come together evenly.
The sausage balls should be rolled into 1-inch balls. This size cooks through properly without drying out.
Place the balls about 1 inch apart on a parchment-lined or lightly greased baking sheet. They do not spread much, but spacing helps them brown evenly.
After baking, let them cool on the baking sheet for about 5 minutes. They firm up as they rest.
Leftovers keep in an airtight container in the refrigerator for 3 to 4 days. Reheat in 15-second microwave bursts or in a 350°F oven for about 10 minutes.
For make-ahead prep, shape the balls and refrigerate them uncooked for up to 24 hours. They can also be frozen baked or unbaked for up to 2 months.
Ingredients
For the Sausage Balls
- 2 cups Bisquick mix
- 1 lb uncooked sausage
- 4 cups shredded cheddar cheese
Optional Swaps, Add-Ins, and Serving Ideas
- Spicy sausage
- Mild sausage
- Colby cheese
- Pepper jack cheese
- Smoky gouda
- Crumbled feta
- Diced jalapeño
- Cayenne
- Fresh rosemary
- Fresh thyme
- Maple syrup
- Breakfast sausage
- Finely chopped spinach
- Sun-dried tomatoes
- Water
- Milk
- Turkey sausage
- Chicken sausage
- Plant-based sausage
- Gluten-free pancake mix
- Ranch
- Honey mustard
- Marinara
- Spicy aioli
- Mayo
- Hot sauce
- Garlic
Ingredient Notes
Bisquick mix gives the sausage balls their structure. It helps bind the sausage and cheese into a soft, biscuit-like bite.
Regular pork sausage is classic. Make sure the sausage is uncooked, because it needs to bake inside the mixture.
Spicy sausage can be used if you want more heat. Mild sausage works if you prefer a softer flavor.
Chicken sausage or turkey sausage can also work. The texture may be leaner, so add a teaspoon of oil if the mixture feels dry.
Plant-based sausage can be used for a vegetarian-style version. Check the seasoning because different brands vary.
Cheddar cheese brings the classic savory flavor. Sharp cheddar gives the strongest punch.
Colby cheese can be used for a milder version. Pepper jack adds spice.
Smoky gouda gives the sausage balls a deeper flavor. Crumbled feta adds a tangy twist.
Freshly grated cheese melts better than pre-shredded cheese. Pre-shredded cheese is convenient, but you may need a splash of water to help bind the dough.
Jalapeño, cayenne, rosemary, thyme, maple syrup, spinach, and sun-dried tomatoes can all change the flavor. Keep any vegetable add-ins finely chopped and pat dry if needed.
Optional Swaps, Variations, Add-Ins, and Serving Ideas
Classic Bisquick Sausage Balls
Make the recipe with Bisquick mix, uncooked sausage, and shredded cheddar cheese. This gives you the traditional cheesy, savory party snack.
Bake until golden-brown and firm. Let them cool briefly before serving.
Spicy Sausage Balls
Use spicy sausage or add a pinch of cayenne. This gives the sausage balls more heat.
You can also add diced jalapeño. Keep the pieces small so they mix evenly.
Mild Sausage Balls
Use mild sausage and cheddar cheese. This keeps the flavor gentle and kid-friendly.
Serve with ranch or honey mustard. These dips keep the flavor familiar.
Pepper Jack Sausage Balls
Swap some or all of the cheddar for pepper jack. This adds spice and a creamier cheese flavor.
This version is great for game day. Serve warm for the best texture.
Colby Cheese Sausage Balls
Use Colby instead of cheddar. The flavor will be milder and softer.
This is a good choice if sharp cheddar feels too strong. The sausage still gives plenty of flavor.
Smoky Gouda Sausage Balls
Swap part of the cheddar for smoky gouda. This gives the bites a deeper, smokier flavor.
Use enough cheddar or another shredded cheese to help the mixture bind. Gouda makes the flavor feel richer.
Feta Sausage Balls
Add crumbled feta for a tangy twist. It changes the classic flavor but adds sharpness.
Use it as a partial cheese swap. Too much feta may make the mixture more crumbly.
Jalapeño Sausage Balls
Add finely diced jalapeño to the mixture. This brings fresh heat and texture.
Use more or less depending on spice preference. Remove seeds for a milder version.
Herb Sausage Balls
Fold in 1 tablespoon fresh rosemary or thyme. This makes the sausage balls feel more holiday-ready.
The herbs add fragrance and freshness. Chop them finely before mixing.
Breakfast Sausage Balls
Use breakfast sausage and add a dash of maple syrup. This creates a sweet-savory bite.
These are great for brunch. Serve warm with coffee or breakfast sides.
Spinach Sausage Balls
Add finely chopped spinach. Pat it dry before mixing so the dough does not become wet.
This variation adds color and a little vegetable boost. Keep the pieces small.
Sun-Dried Tomato Sausage Balls
Add finely chopped sun-dried tomatoes. Pat them dry first.
They bring a savory, slightly tangy flavor. Use a modest amount so the dough still holds together.
Turkey Sausage Balls
Use turkey sausage instead of pork. The result may be slightly less juicy.
If the mixture feels dry, add a teaspoon of oil. You can also use a little water or milk to help bind.
Chicken Sausage Balls
Use chicken sausage for a leaner version. The texture may be lighter and less rich.
Watch the moisture level. Add a small splash of water or milk if needed.
Plant-Based Sausage Balls
Use plant-based sausage. Check the seasoning because some plant-based sausages are already strongly flavored.
Mix gently but thoroughly. Bake until golden and firm.
Gluten-Free Sausage Balls
Use a gluten-free pancake mix instead of Bisquick. The texture may be slightly denser.
They will still be delicious. Keep the same general method.
Ranch Dip Sausage Balls
Serve warm sausage balls with ranch. The creamy dip pairs well with cheddar and sausage.
This is one of the easiest party pairings. It is especially kid-friendly.
Honey Mustard Sausage Balls
Serve with honey mustard for a sweet-savory dip. It balances the richness of the sausage.
This works well for game day or holiday platters. Keep the dip on the side.
Marinara Sausage Balls
Serve with marinara for a warm, savory dipping option. It makes the sausage balls feel almost like a cheesy appetizer bite.
This is a great choice if serving with other party foods. Warm marinara makes them extra cozy.
Spicy Aioli Sausage Balls
Mix mayo, hot sauce, and garlic for a quick spicy aioli. Serve it as a dip.
This adds creamy heat. It is a good choice for adults who like bolder flavor.
Why This Recipe Works
This recipe works because the three main ingredients support each other perfectly. Sausage brings fat, seasoning, and savory flavor; cheese adds richness and saltiness; Bisquick gives structure.
The uncooked sausage is important. As it bakes, it releases moisture and flavor into the dough.
The cheese melts into the mixture and helps keep the inside flavorful. Cheddar also gives the sausage balls their classic taste.
Bisquick absorbs moisture and turns the mixture into a biscuit-like bite. It keeps the sausage balls from falling apart.
Mixing thoroughly prevents dry pockets of Bisquick. The dough should be evenly combined before shaping.
Rolling the balls about 1 inch wide helps them cook evenly. Larger balls take longer to cook through, while tiny ones can dry out.
Parchment paper or a lightly greased baking sheet prevents sticking. Spacing them about 1 inch apart helps with browning.
The 5-minute rest after baking matters. The sausage balls firm up and become easier to handle.
Directions
Step 1: Preheat the Oven
Preheat your oven to 375°F (190°C). Let it heat fully before baking.
This temperature helps the sausage balls cook through while turning golden on the outside. A properly heated oven gives the best texture.
Step 2: Prepare the Baking Sheet
Line a baking sheet with parchment paper. If you do not have parchment, lightly grease the baking sheet.
This helps prevent sticking. It also makes cleanup easier.
Step 3: Set Out a Large Mixing Bowl
Choose a large bowl with enough room for mixing by hand. The mixture is thick, so extra space helps.
A sturdy spoon can be used, but hands make mixing easier. The goal is an evenly combined dough.
Step 4: Add the Bisquick
Add 2 cups Bisquick mix to the bowl. Break up any clumps.
Evenly loose mix helps everything combine better. This prevents dry pockets later.
Step 5: Add the Sausage
Add 1 lb uncooked sausage to the bowl. Break it apart into smaller pieces as you add it.
Smaller pieces mix more easily with the Bisquick and cheese. Use regular, mild, or spicy sausage.
Step 6: Add the Cheese
Add 4 cups shredded cheddar cheese. Sharp cheddar gives the strongest flavor.
If using another cheese, add it now. Make sure the cheese is evenly distributed through the bowl.
Step 7: Mix the Dough
Use clean hands or a sturdy spoon to mix the Bisquick, sausage, and cheese together. Work the mixture until no dry Bisquick pockets remain.
The dough may feel sticky. That is normal for sausage balls.
Step 8: Adjust if Too Dry
If the mixture feels crumbly and will not hold together, add water or milk a tablespoon at a time. Mix after each addition.
Add only enough to help the dough bind. Too much liquid can make the mixture too soft.
Step 9: Adjust if Too Sticky
If the dough feels too wet, sprinkle in a little more Bisquick. Mix until the texture feels easier to shape.
The dough should hold together when pressed. It does not need to feel perfectly smooth.
Step 10: Shape the Sausage Balls
Pinch off small portions of dough and roll into 1-inch balls. Think about the size of a walnut.
Try to keep them similar in size. This helps them bake evenly.
Step 11: Arrange on the Baking Sheet
Place the sausage balls on the prepared baking sheet about 1 inch apart. They will not spread much.
The spacing still matters because airflow helps them brown. Do not crowd the pan too tightly.
Step 12: Bake Until Golden
Bake for 20 to 25 minutes. The sausage balls should be golden-brown and firm to the touch.
There should be no squishy middles. The outside should look set and lightly crisp.
Step 13: Prevent Over-Browning if Needed
If the bottoms brown too quickly, slide a second baking sheet underneath. This insulates the bottom of the pan.
This trick helps prevent overly dark bottoms. It is useful if your baking sheet runs hot.
Step 14: Cool Briefly
Let the sausage balls cool on the baking sheet for about 5 minutes. They will firm as they rest.
They are very hot straight from the oven. Waiting briefly also makes them easier to move.
Step 15: Serve Warm
Serve the sausage balls warm with ranch, honey mustard, marinara, or spicy aioli. They also taste good at room temperature.
Place them on a platter with toothpicks if serving guests. Keep dips nearby.
Step 16: Store Leftovers
Transfer leftovers to an airtight container. Refrigerate for 3 to 4 days.
Reheat in the microwave using 15-second bursts. You can also reheat in a 350°F oven for about 10 minutes.
Step 17: Make Ahead
Shape the sausage balls and refrigerate them uncooked for up to 24 hours. Keep them covered.
Bake when ready. Add a few extra minutes if they are very cold from the refrigerator.
Step 18: Freeze for Later
Freeze baked or unbaked sausage balls on a tray first. Once firm, transfer them to a freezer bag.
Freeze for up to 2 months. Bake frozen balls at 375°F for 25 to 30 minutes without thawing.
Serving Ideas
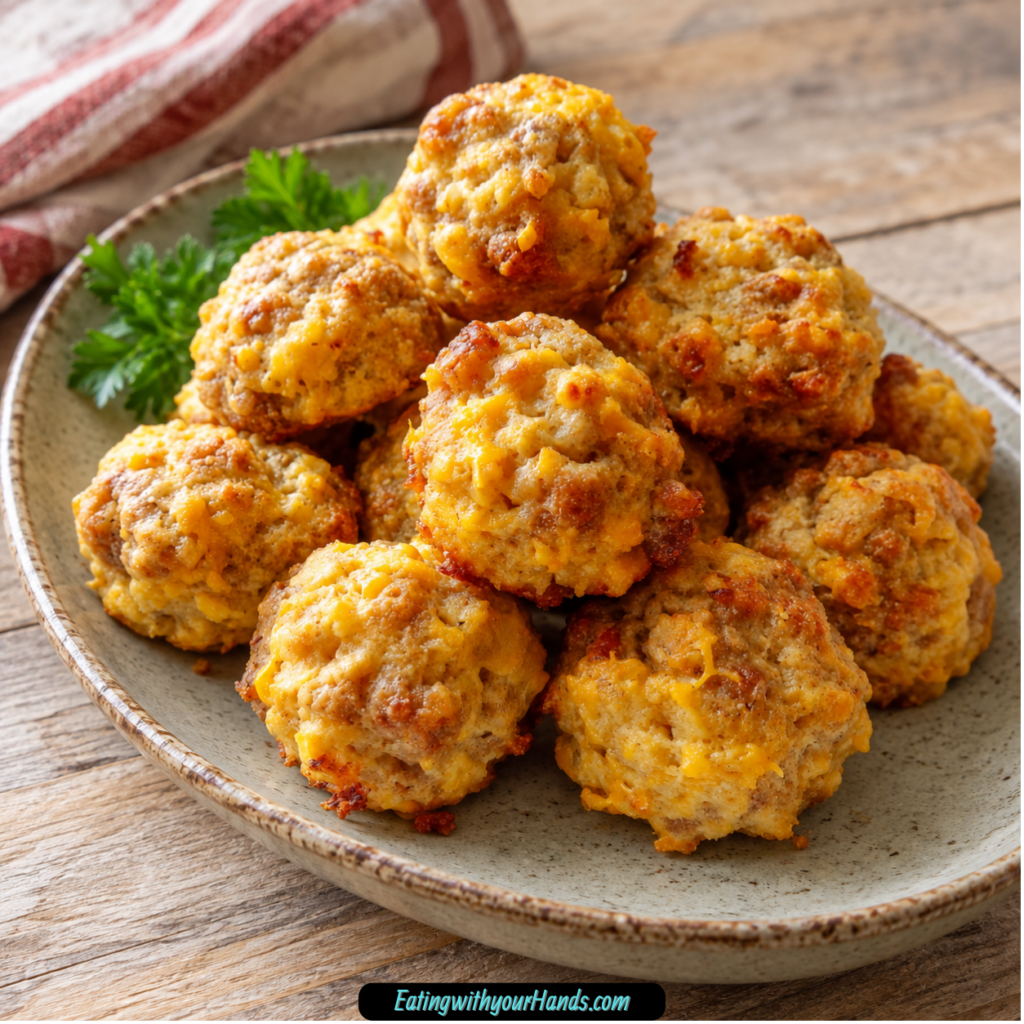
Serve Easy Bisquick Sausage Balls warm from the oven when the cheese is still soft and the outside is golden. They are at their best when fresh and hot.
Ranch is a classic dip. Its creamy flavor works well with sausage and cheddar.
Honey mustard adds sweetness and tang. It is especially good if you like sweet-savory appetizers.
Marinara gives them a cozy, savory dipping option. It works well for party platters.
Spicy aioli adds heat and creaminess. Mix mayo, hot sauce, and garlic for a quick version.
Serve them on game day with other finger foods. Their small size makes them easy to grab.
Add them to holiday appetizer spreads. They are simple, filling, and crowd-friendly.
For brunch, try the breakfast sausage and maple variation. It pairs well with morning dishes.
Storage
Store leftover sausage balls in an airtight container in the refrigerator. They stay tasty for 3 to 4 days.
Let them cool before storing. This helps prevent condensation in the container.
Reheat in the microwave in 15-second bursts. This keeps them from overheating too quickly.
You can also reheat them in a 350°F oven for about 10 minutes. This brings back more of the just-baked texture.
Keep dips separate during storage. Add dips only when serving.
If the sausage balls seem dry after reheating, serve them with a creamy dip. Ranch or aioli helps.
Do not leave leftovers uncovered. They can dry out in the refrigerator.
Freezing
Bisquick sausage balls freeze very well. You can freeze them baked or unbaked.
To freeze, place them on a tray first. Freeze until firm so they do not stick together.
Transfer the frozen balls to a freezer bag. Store for up to 2 months.
Bake frozen unbaked sausage balls at 375°F for 25 to 30 minutes. No thawing is needed.
Baked frozen sausage balls can be reheated until warm. Use the oven for the best texture.
Freezing is perfect for surprise guests, busy mornings, and last-minute appetizers. A freezer bag of sausage balls can save the day.
Label the bag if needed. This makes it easy to track the storage time.
Make-Ahead
You can shape the sausage balls and refrigerate them uncooked for up to 24 hours. This is perfect before parties or holidays.
Keep them covered in the refrigerator until ready to bake. Bake straight from the fridge.
You may need a few extra minutes if they are very cold. Watch for golden color and firm centers.
You can also mix the dough and shape it right away before freezing. Freeze on a tray, then transfer to a bag.
For easiest hosting, make a double batch. Bake one batch fresh and freeze the rest.
If serving at a party, reheat baked sausage balls in the oven before placing them on the platter. They taste best warm.
Keep dips ready in small bowls. This makes serving quick and easy.
Helpful Notes for Best Results
Use uncooked sausage. Pre-cooked sausage will not bind the same way.
Mix until there are no dry Bisquick pockets. Dry spots can make the sausage balls crumbly.
If the dough is too crumbly, add water or milk a tablespoon at a time. Mix after each addition.
If the dough is too sticky, add a little more Bisquick. Do not add too much at once.
Freshly grated cheese melts better. Pre-shredded cheese works, but it may need a splash of water to help the dough bind.
Keep the balls about 1 inch wide. Bigger balls take longer to cook through.
If the bottoms brown too fast, slide a second baking sheet underneath. This helps protect them from direct heat.
Do not overthink the shape. Rustic sausage balls still taste great.
Variations
Classic Bisquick Sausage Balls
Use 2 cups Bisquick mix, 1 lb uncooked sausage, and 4 cups shredded cheddar cheese. This gives the classic savory, cheesy appetizer.
Bake at 375°F until golden-brown and firm. Serve warm with your favorite dip.
Spicy Sausage Balls
Use spicy sausage or add cayenne. This gives the bites extra heat.
Serve with ranch or honey mustard to balance the spice. Keep the size at 1 inch for even baking.
Jalapeño Sausage Balls
Add finely diced jalapeño to the dough. This brings fresh heat and a little texture.
Remove the seeds for less heat. Leave some in if you want more spice.
Pepper Jack Sausage Balls
Swap half the cheddar for pepper jack. This gives a creamy texture and a spicy kick.
This version is great for parties. Serve warm for best flavor.
Colby Sausage Balls
Use Colby cheese instead of cheddar. The flavor becomes milder.
This is a kid-friendly variation. It still bakes up cheesy and savory.
Smoky Gouda Sausage Balls
Use smoky gouda as part of the cheese. The flavor becomes deeper and smokier.
Pair with honey mustard or spicy aioli. The smokiness makes the appetizer feel more grown-up.
Feta Sausage Balls
Add crumbled feta for tang. Use it as part of the cheese amount.
Feta changes the texture slightly. Mix well so the dough holds together.
Rosemary Sausage Balls
Add 1 tablespoon fresh rosemary. Chop it finely before mixing.
This makes the sausage balls feel holiday-ready. Rosemary pairs well with sausage and cheese.
Thyme Sausage Balls
Add 1 tablespoon fresh thyme. It brings earthy flavor.
This variation is simple but fragrant. It works well for holiday appetizer trays.
Breakfast Sausage Balls
Use breakfast sausage and add a dash of maple syrup. This gives a sweet-savory flavor.
Serve for brunch or morning gatherings. They are especially good warm.
Spinach Sausage Balls
Add finely chopped spinach. Pat it dry first.
This gives a little color and vegetable flavor. Keep the pieces small.
Sun-Dried Tomato Sausage Balls
Add finely chopped sun-dried tomatoes. Pat them dry before mixing.
They bring tangy richness. Use a modest amount so the dough stays balanced.
Turkey Sausage Balls
Use turkey sausage instead of pork. Add a teaspoon of oil if the mixture feels dry.
Turkey sausage can be leaner. Watch the texture while mixing.
Chicken Sausage Balls
Use chicken sausage for a lighter variation. The texture may be slightly leaner.
Add water or milk if needed. Mix until the dough holds together.
Plant-Based Sausage Balls
Use plant-based sausage. Check the seasoning and texture before mixing.
This can create a meatless version. Bake until golden and firm.
Gluten-Free Sausage Balls
Swap Bisquick for a gluten-free pancake mix. The texture may be slightly denser.
The flavor still works well. Keep the same shaping and baking method.
Troubleshooting
The Dough Is Too Crumbly
The mixture may need more moisture. Add water or milk a tablespoon at a time until it holds together.
Press firmly while shaping. The dough should form a ball without falling apart.
The Dough Is Too Sticky
Sprinkle in a little more Bisquick. Mix until the dough is easier to handle.
A little stickiness is normal. Do not add too much extra mix.
The Sausage Balls Are Dry
They may have baked too long, or the sausage may have been lean. Use 1-inch balls and watch the bake time.
If using turkey sausage, add a teaspoon of oil if the mixture feels dry. Serve with dip if needed.
The Centers Are Undercooked
The balls may be too large. Keep them around 1 inch.
Bake until firm to the touch and golden-brown. Larger sausage balls need more time.
The Bottoms Are Too Brown
The baking sheet may run hot. Slide a second baking sheet underneath to insulate them.
You can also use parchment paper. Watch closely near the end of baking.
The Cheese Leaked Out
Some cheese may melt out during baking. This is normal.
Make sure the dough is mixed well and shaped firmly. Freshly grated cheese may melt more smoothly.
The Sausage Balls Fell Apart
The mixture may not have been combined enough. Mix until the sausage, cheese, and Bisquick are fully incorporated.
The dough may also have been too dry. Add a little water or milk next time.
They Taste Bland
Use sharp cheddar or spicy sausage for stronger flavor. You can also add herbs, cayenne, or jalapeño.
Make sure the sausage itself is well-seasoned. The sausage drives much of the flavor.
They Are Too Greasy
Different sausage types release different amounts of fat. Let the sausage balls rest briefly after baking.
You can place them on paper towels if needed. Serve warm.
They Lost Texture After Reheating
Use the oven instead of the microwave for best texture. Reheat at 350°F for about 10 minutes.
Microwave in short bursts if using that method. Overheating can make them rubbery.
Frequently Asked Questions
Can I use turkey sausage instead of pork?
Yes, turkey sausage can be used. It may be a little less juicy than pork sausage.
If the mixture feels dry, add a teaspoon of oil. You can also add a little water or milk if needed.
How long do these last in the fridge?
They last 3 to 4 days in an airtight container in the refrigerator. After that, the texture may decline.
Reheat gently before serving. The oven gives the best texture.
Can I make these gluten-free?
Yes, use a gluten-free pancake mix instead of Bisquick. The texture may be slightly denser.
They will still be delicious. Bake until golden-brown and firm.
Why are my sausage balls crumbly?
The dough was likely too dry or not mixed enough. Add water 1 teaspoon at a time until the mixture holds together.
Press the balls firmly when shaping. Make sure there are no dry Bisquick pockets.
Can I prep these ahead?
Yes, shape the sausage balls and refrigerate them uncooked for up to 24 hours. Bake when ready.
You can also freeze unbaked sausage balls for up to 2 months. Bake straight from frozen.
Can I freeze them after baking?
Yes, baked sausage balls can be frozen. Freeze on a tray first, then transfer to a freezer bag.
Store for up to 2 months. Reheat until warm.
What cheese works best?
Sharp cheddar gives the best flavor. Colby or pepper jack can also work well.
Freshly grated cheese melts better than pre-shredded. Pre-shredded cheese may need a splash of water to help bind.
What dips go well with sausage balls?
Ranch, honey mustard, marinara, and spicy aioli all work well. For spicy aioli, mix mayo with hot sauce and garlic.
Serve dips on the side. This keeps the sausage balls easy to grab.
Why This Recipe Works So Well
Easy Bisquick Sausage Balls work so well because they are built around three reliable ingredients. Sausage brings flavor and moisture, cheese adds richness, and Bisquick gives structure.
The mixture bakes into something between a biscuit bite and a savory meatball. That texture is what makes them so snackable.
Using uncooked sausage allows the flavor to bake directly into the dough. The sausage fat helps keep the inside tender.
Cheddar cheese adds saltiness and richness. Sharp cheddar creates the boldest flavor.
Bisquick keeps the recipe simple. It eliminates the need to measure separate dry ingredients.
The 1-inch size matters because it keeps the bake time practical. The centers cook through while the outside turns golden.
The recipe is also flexible. You can add heat, herbs, different cheese, breakfast flavors, vegetables, or a different sausage style.
Most of all, these sausage balls work because they are easy and dependable. They can be made ahead, frozen, reheated, packed for parties, and served with almost any dip.
Final Thoughts
Easy Bisquick Sausage Balls Recipe is made with Bisquick mix, uncooked sausage, and shredded cheddar cheese. The ingredients are mixed in one bowl, shaped into 1-inch balls, baked at 375°F until golden-brown and firm, and cooled briefly before serving.
Serve them warm with ranch, honey mustard, marinara, or spicy aioli, or make a batch ahead for parties, game day, holidays, and freezer-friendly snacks. With their simple three-ingredient base, customizable flavor options, easy storage, make-ahead flexibility, and crowd-pleasing cheesy sausage flavor, these little bites are the kind of recipe that always earns a place on the table.
Bisquick Sausage Balls
Simple, cheesy, savory, and made with only three ingredients, these Bisquick Sausage Balls bring together Bisquick, sausage, and shredded cheddar cheese in a classic bite-sized appetizer or snack. The mixture is shaped into small balls and baked until cooked through, creating warm sausage cheese bites that are easy to serve for parties, game days, holidays, or quick gatherings.
Recipe Details
No prep time, cook time, total time, servings, course, cuisine, or calories were provided.
Ingredients
For the Sausage Balls
- 4 cups shredded cheddar cheese
- 1 lb sausage
- 2 cups Bisquick
Instructions
Step 1: Prepare the Mixture
Add the Bisquick, sausage, and shredded cheddar cheese to a mixing bowl. Work the ingredients together until the sausage, baking mix, and cheese form one evenly combined mixture.
The mixture should hold together well enough to shape. Since the recipe only includes these three ingredients, avoid adding extra liquid, seasoning, or binders.
Step 2: Shape the Sausage Balls
Portion the mixture into small balls. Roll each portion gently so the sausage and cheddar are packed together.
Try to keep the pieces similar in size so they cook evenly. The recipe does not provide an exact yield, so shape them based on your preferred serving size.
Step 3: Arrange for Baking
Place the shaped sausage balls on your prepared baking surface. Leave a little space between them so they can cook evenly.
Because the source does not list a pan, liner, or baking setup, no specific equipment is added here. Keep the method simple and centered on the three provided ingredients.
Step 4: Bake Until Cooked Through
Bake the sausage balls until the sausage is fully cooked and the cheddar cheese has melted into the Bisquick mixture. The recipe does not provide a baking temperature or baking time, so no exact oven setting or duration is added here.
The finished sausage balls should be firm enough to pick up and serve warm. Let them cool slightly before serving if needed.
Serving Suggestions
Serve Bisquick Sausage Balls warm as a simple appetizer, snack, or party bite. The sausage gives them savory flavor, the cheddar cheese adds richness, and the Bisquick helps hold the mixture together.
They work well for casual gatherings, holiday trays, game-day spreads, or quick finger food. Since the recipe does not provide a dipping sauce or topping, no additional serving ingredients are added here.
Storage
How to Store
The recipe does not provide specific storage instructions or storage duration, so no exact storage time is added here.
Ingredient Tip
Use 2 cups Bisquick, 1 lb sausage, and 4 cups shredded cheddar cheese as listed. Keep the ingredient amounts the same so the mixture stays balanced.
Mixing Tip
Combine the sausage, Bisquick, and shredded cheddar thoroughly before shaping. The mixture should be evenly blended so each sausage ball has cheese throughout.
Shaping Tip
Roll the mixture into evenly sized balls. Similar sizing helps them cook more consistently.
Baking Note
The recipe does not include a baking temperature or baking time. For accuracy, no specific oven setting or duration is added.

Fernando is the creator and writer behind the food blog Eating with your Hands. Living and working in cities like Paris, Barcelona, and Berlin, and being married to a Canadian foodie, has given Fernando a passion and interest in food and inspired him to run EWYH.