
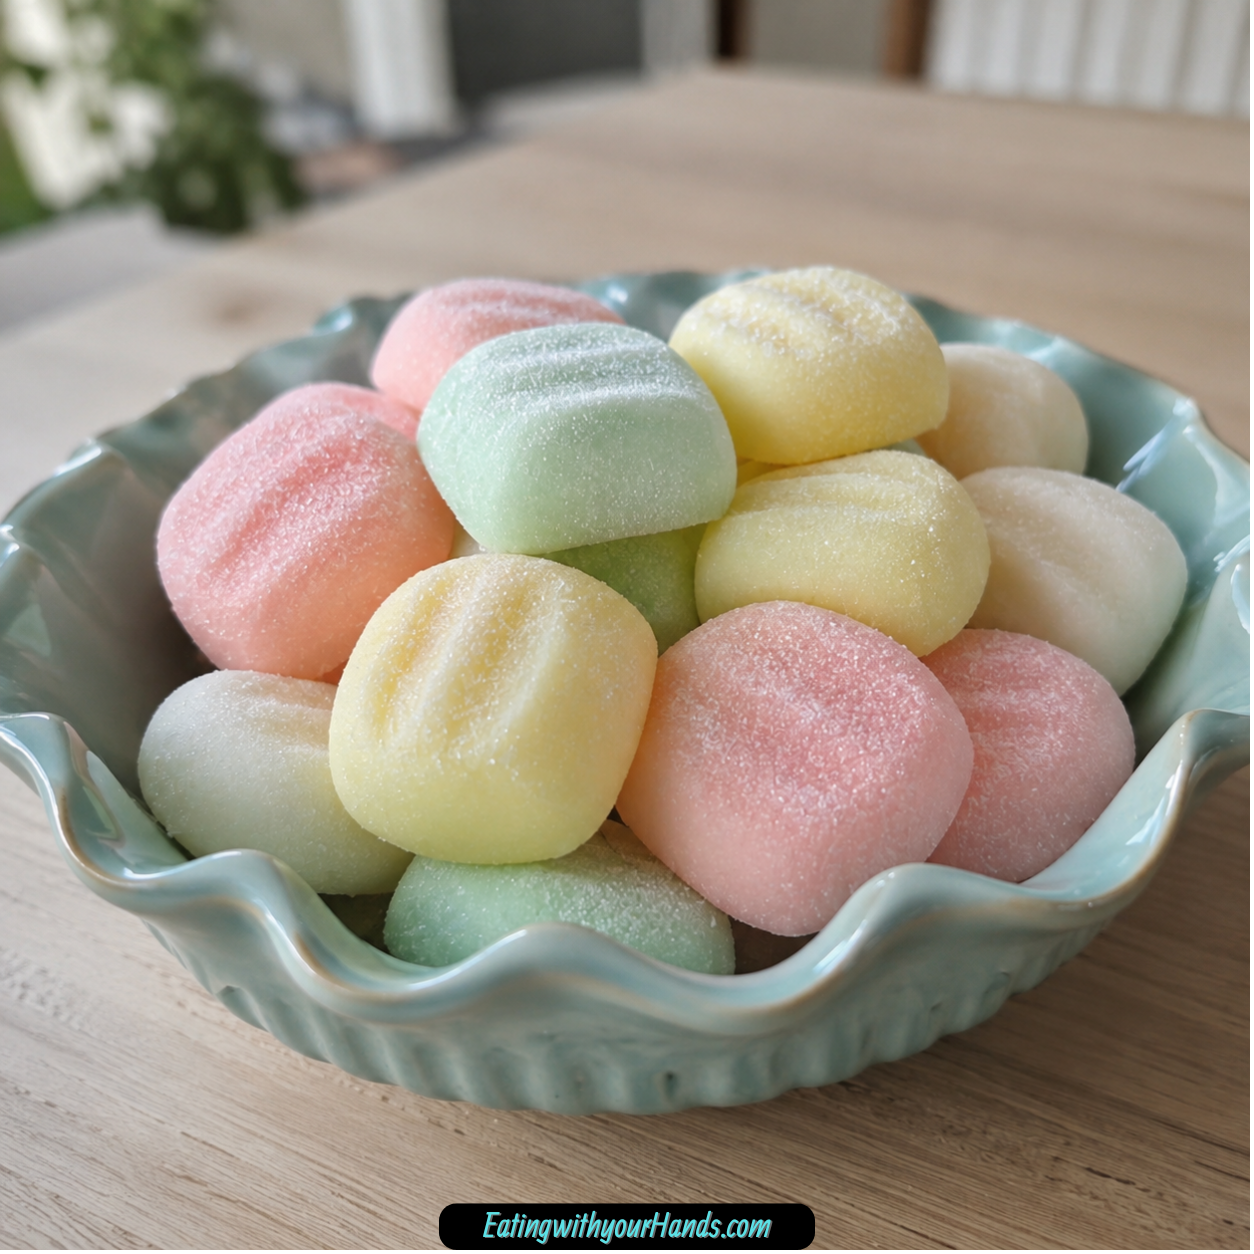
Easy Butter Mints are the kind of little candy that can make a table feel instantly sweeter. They are soft, creamy, delicate, minty, and old-fashioned in the best possible way, the kind of treat that looks charming in a small dish and disappears one piece at a time.
I always think of butter mints as the quiet stars of showers, holidays, family visits, and dessert tables. They are not loud or dramatic, but once you taste that buttery peppermint sweetness melting on your tongue, you understand why people keep reaching for another.
What makes this recipe so special is how simple it is. With softened butter, whipping cream, powdered sugar, peppermint extract, and optional food coloring, you can make a batch of sweet little mints without turning on the oven.
They feel fancy enough for bridal showers, baby showers, weddings, holiday parties, and gifting tins, but the process is wonderfully relaxed. You mix the dough, shape it with your hands, let it firm at room temperature, and end up with pastel little candies that feel homemade, nostalgic, and surprisingly easy.
Table of Contents
- Why You’ll Love This Recipe
- Recipe Details
- Ingredients
- Optional Swaps, Variations, Add-Ins, and Serving Ideas
- Why These Butter Mints Work
- Directions
- Step 1: Start With Softened Butter
- Step 2: Add the Whipping Cream
- Step 3: Mix Until Creamy
- Step 4: Add the First Cup of Powdered Sugar
- Step 5: Add the Second and Third Cups of Powdered Sugar
- Step 6: Stir in the Peppermint Extract
- Step 7: Add Food Coloring if Desired
- Step 8: Add the Remaining Powdered Sugar Gradually
- Step 9: Dust Your Hands With Powdered Sugar
- Step 10: Portion the Dough
- Step 11: Roll Into Balls
- Step 12: Flatten Into Little Discs
- Step 13: Add a Pattern if Desired
- Step 14: Arrange on a Parchment-Lined Tray
- Step 15: Let the Mints Firm at Room Temperature
- Serving Ideas
- Storage
- Reheating
- Freezing
- Make-Ahead
- Helpful Notes for Best Results
- Variations
- Troubleshooting
- Frequently Asked Questions
- Why This Recipe Works So Well
- Final Thoughts
- Butter Mint
Why You’ll Love This Recipe
These butter mints are super easy to make. There is no baking, no candy thermometer, and no complicated technique required.
The ingredient list is minimal. Butter, whipping cream, powdered sugar, peppermint extract, and optional food coloring turn into a soft candy dough that feels much more special than the effort involved.
They are perfect for almost any occasion. Baby showers, weddings, bridal showers, holidays, parties, cookie tins, and dessert tables all make sense for these sweet little mints.
They are totally customizable. You can add food coloring, change the flavor extract, shape them into discs or tiny logs, press patterns on top, or even dip part of them in melted chocolate.
They are make-ahead friendly, too. You can prepare them days before an event, store them at room temperature, or freeze them for later.
Most of all, they feel charming. A small bowl of butter mints has a way of making even a simple gathering feel thoughtful and welcoming.
Recipe Details
This is a no-bake mint recipe. The mints firm at room temperature instead of baking in an oven.
The base begins with 1 stick, or ½ cup, softened unsalted butter and 1 tablespoon whipping cream. These are mashed together until smooth and creamy.
The recipe uses 4 cups powdered sugar, divided. Three cups are added first, about 1 cup at a time, then the final cup is added gradually until the dough is firm enough to handle.
The flavor comes from ½ teaspoon pure peppermint extract. A little peppermint goes a long way, so add extra only slowly if you want a stronger mint flavor.
Food coloring is optional. Use 1–4 drops if you want pastel or brighter colors, and gel coloring works best for bold color without adding too much liquid.
The mints are shaped by hand into small balls, then flattened into little discs. They sit at room temperature for about 1 hour to firm up before serving or storing.
This recipe makes about 24 mints. Store them in an airtight container at room temperature for up to 1 week, or freeze them for up to 3 months.
Ingredients
Butter Mint Dough
1 stick (½ cup) unsalted butter, softened
1 tablespoon whipping cream
4 cups powdered sugar, divided
½ teaspoon pure peppermint extract
Optional Color
1–4 drops food coloring, optional
Ingredient Notes
Softened unsalted butter is the creamy base of the mints. It should be soft enough to blend smoothly but not melted.
Whipping cream gives the mints their dreamy, melt-in-your-mouth texture. Whole milk can work in a pinch, but cream is ideal.
Powdered sugar sweetens the dough and gives it structure. It is divided so the dough can come together gradually instead of turning into a powdered sugar mess.
Pure peppermint extract gives the mints their bright, refreshing flavor. Use pure extract rather than imitation if you want the cleanest taste.
Food coloring is optional, but it makes the mints feel festive. Gel coloring gives bold color without adding much liquid to the dough.
Extra powdered sugar is helpful for dusting your hands while shaping. It keeps the dough from sticking too much.
Optional Swaps, Variations, Add-Ins, and Serving Ideas
Flavor Twists
Peppermint is the classic flavor, but vanilla extract or almond extract can also be used. Use the same amount if swapping from peppermint to one of those flavors.
Orange extract or lemon extract can also be used for a brighter twist. A dash of lemon or orange zest gives the mints a fresh citrus note.
Color Ideas
Food coloring can match the occasion. Try soft pastels for Easter, pink or blue for baby showers, or red and green for Christmas.
Gel food coloring works best for brighter hues. It gives color without thinning the dough too much.
You can also create ombre layers for a fancier touch. Add color slowly, because you can always add more but cannot take it back out.
Shape Ideas
Classic butter mints can be shaped into small discs. You can also roll tiny logs for pillow mints.
For decorative shapes, press the dough into silicone molds. Hearts, stars, and flowers make the mints feel extra special.
A fork can be used to press a simple crisscross pattern on top. The bottom of a glass can help flatten the mints evenly.
Fancy Finishes
After shaping, roll the mints in sparkling sugar for a little crunch. You can also dip half of each mint in melted chocolate for a decadent twist.
These finishes are optional, but they make the mints look more gift-worthy. They are especially nice for dessert tables.
Gift Packaging
Pile the mints into a pretty dish for serving. For gifting, pack them in tiny cellophane bags tied with ribbon or tuck them into a vintage mint tin.
Use parchment between layers if needed. This helps prevent sticking and keeps the mints looking neat.
Why These Butter Mints Work
Butter mints work because they are made from simple ingredients that create a soft candy dough. Butter gives richness, cream adds smoothness, powdered sugar gives body, and peppermint extract brings the signature flavor.
The dough is built gradually, which helps control the texture. Adding powdered sugar in stages makes it easier to stop when the dough is firm but still pliable.
The butter temperature is important. Too cold and it will not blend smoothly; too melted and the dough can become greasy.
The cream helps create the melt-in-your-mouth feeling. Without it, the dough would be drier and less smooth.
Letting the shaped mints sit at room temperature helps them firm. That resting time gives them the soft but stable texture that makes butter mints so lovely.
The recipe is forgiving, too. If the dough is sticky, add powdered sugar; if it is crumbly, add a little cream.
Directions
Step 1: Start With Softened Butter
Place 1 stick, or ½ cup, softened unsalted butter into a large mixing bowl. The butter should be soft enough to press easily but not melted.
Softened butter blends smoothly with the cream and powdered sugar. If the butter is too cold, the dough can turn lumpy.
If you are impatient and the butter is still a little firm, a quick 10-second zap in the microwave can help. Do not let it melt completely, because the goal is soft butter, not liquid butter.
Step 2: Add the Whipping Cream
Add 1 tablespoon whipping cream to the softened butter. The cream helps give the mints their smooth, melt-in-your-mouth texture.
Use a wooden spoon or spatula to begin mashing the butter and cream together. A large bowl gives you extra room for the powdered sugar that comes later.
Keep mixing until the butter and cream look fully combined. There should not be visible lumps of butter sitting in the bowl.
Step 3: Mix Until Creamy
Continue mashing and stirring the butter mixture until it becomes creamy. This step creates the base for the mint dough.
If the butter feels resistant at first, keep working it gently. It will loosen as it blends with the cream.
The mixture should look smooth before the powdered sugar is added. A smooth base makes the finished mints softer and more even.
Step 4: Add the First Cup of Powdered Sugar
Add 1 cup powdered sugar to the butter mixture. Stir until the sugar is fully incorporated.
Adding the powdered sugar one cup at a time helps keep the mixture under control. It also prevents a sugar cloud from covering the counter.
The dough will start to thicken immediately. Keep mixing until no dry sugar remains before adding more.
Step 5: Add the Second and Third Cups of Powdered Sugar
Add the next 2 cups of powdered sugar, one cup at a time. Mix well after each addition.
By the time 3 cups have been added, the mixture should look much thicker. It will start shifting from creamy mixture to candy dough.
If your powdered sugar is clumpy, sift it first. Sifted powdered sugar mixes more easily and helps the dough stay smooth.
Step 6: Stir in the Peppermint Extract
Drizzle in ½ teaspoon pure peppermint extract. Mix until the flavoring is evenly blended through the dough.
Peppermint extract is strong, so the measured amount gives a bright mint flavor without overwhelming the butter base. If you want a stronger mint kick later, add only an extra drop or two at a time.
The dough should smell cool and sweet after the extract is mixed in. This is where it begins to taste like classic butter mints.
Step 7: Add Food Coloring if Desired
If using food coloring, add 1–4 drops now. Start with one drop or two, then mix before deciding whether to add more.
Food coloring is optional, but it turns the mints into pretty party treats. Pastels look lovely for showers, while stronger colors work well for holidays.
Go slowly with the color. You can deepen the shade, but you cannot lighten it once too much has been added.
Step 8: Add the Remaining Powdered Sugar Gradually
Gradually mix in the last cup of powdered sugar. Add only enough until the dough is firm enough to handle without sticking badly to your fingers.
The dough should be thick but pliable. It should feel more like soft candy dough than frosting.
If it feels too dry, add a tiny splash of cream. If it feels too sticky, add a bit more powdered sugar.
Step 9: Dust Your Hands With Powdered Sugar
Dust your palms lightly with powdered sugar before shaping. This acts like an anti-stick shield.
Butter mint dough can be sticky, especially when it is freshly mixed. Powdered sugar on your hands makes shaping much easier.
Keep a little extra powdered sugar nearby as you work. Re-dust your hands whenever the dough starts sticking.
Step 10: Portion the Dough
Pinch off small pieces of dough, about the size of a cherry tomato. Try to keep the pieces similar in size.
Even portions help the mints look neat when served together. They also make the batch feel more polished for gifting.
Do not worry if they are not perfect. Homemade butter mints are meant to feel sweet and handmade.
Step 11: Roll Into Balls
Roll each small piece of dough into a ball between your palms. Work gently so the dough stays smooth.
If the dough sticks too much, add a little powdered sugar to your hands. If it cracks, the dough may need a tiny touch of cream.
The balls should feel soft and squishable. This is what gives the finished mints their tender bite.
Step 12: Flatten Into Little Discs
Gently flatten each dough ball into a little disc using your fingers or the bottom of a glass. Keep the shape small and neat.
The discs should not be paper-thin. A little thickness helps them keep that soft butter mint texture.
If using a glass, press lightly. You want a gentle flattening, not a hard smash.
Step 13: Add a Pattern if Desired
For a fancier look, press a fork gently onto the top of each mint to create a crisscross pattern. This step is optional.
The pattern gives the mints a classic handmade candy look. It also makes them feel more finished on a dessert table.
Press lightly so the mint keeps its shape. Too much pressure can make the disc too thin.
Step 14: Arrange on a Parchment-Lined Tray
Place the shaped mints on a parchment-lined tray. Arrange them so they are not touching.
The parchment keeps the mints from sticking while they firm. Spacing them apart helps each mint dry and set evenly.
If you are making multiple colors, you can group them separately or mix them for a pretty pastel tray. The colors make them look like edible confetti.
Step 15: Let the Mints Firm at Room Temperature
Let the mints sit at room temperature for about 1 hour. This resting time helps them firm up.
Do not rush this step. The mints need time to develop that soft, melt-in-your-mouth texture while still becoming stable enough to pick up.
After about an hour, they should feel firmer on the outside but still tender when bitten. Then they are ready to serve or store.
Serving Ideas
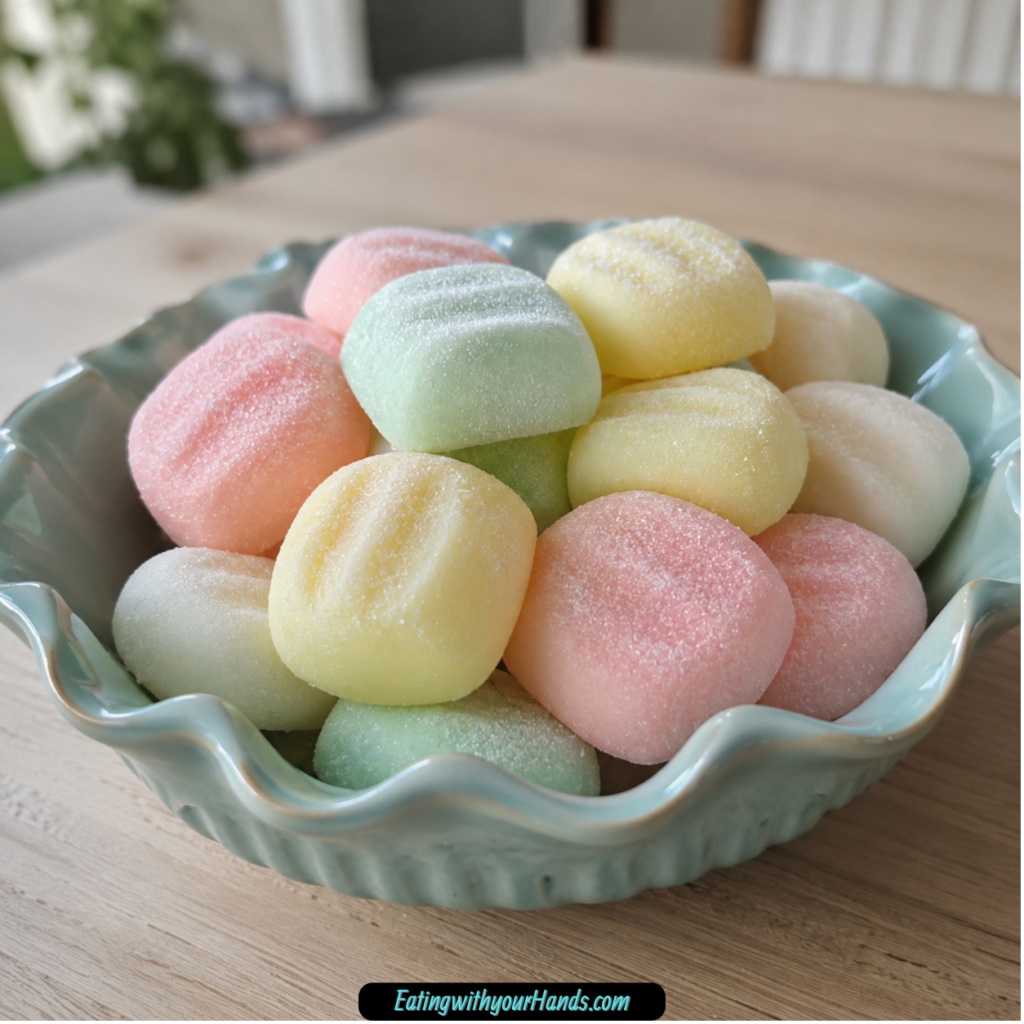
Serve butter mints in a pretty dish on a dessert table. They look especially sweet in soft pastel colors.
They are perfect for baby showers, bridal showers, weddings, holiday parties, and family gatherings. A small bowl of mints feels welcoming and nostalgic.
For gifting, place them in small cellophane bags tied with ribbon. You can also tuck them into a vintage mint tin for a charming old-fashioned touch.
Add them to cookie tins for variety. Their creamy texture is a nice contrast beside cookies, bars, and crunchy candies.
These mints are also wonderful as a simple after-dinner sweet. One or two little pieces are enough to feel like a special finish.
Storage
Store butter mints in an airtight container at room temperature for up to 1 week. Place parchment between layers so they do not stick together.
Avoid the refrigerator if possible. The fridge can make the mints sweat and lose their perfect texture.
Keep the container sealed between servings. This protects the mints from drying out or absorbing unwanted moisture.
Even though they keep well, they often disappear quickly. Their small size makes them very easy to snack on.
Reheating
Butter mints do not need reheating. They are meant to be served at room temperature.
If they have been frozen, thaw them at room temperature for about 1 hour before serving. This brings back their soft texture.
Do not warm them in the microwave or oven. Heat can soften the butter too much and damage the shape.
Freezing
Butter mints can be frozen for up to 3 months. Layer them in a freezer-safe container with parchment between layers.
Make sure the mints are firm before freezing. This helps them keep their shape in storage.
Thaw at room temperature for about 1 hour before serving. Once thawed, they should taste like they were freshly made.
Freezing is helpful when preparing for a party or holiday. You can make them ahead and save yourself last-minute stress.
Make-Ahead
Butter mints are very make-ahead friendly. You can make them up to 3 days early for a party.
Store them in an airtight container at room temperature with parchment between layers. Keep them away from heat and moisture.
The flavor can become even better after the mints sit for a little while. The peppermint has time to settle into the buttery sweetness.
For longer planning, freeze them for up to 3 months. Thaw at room temperature before serving.
Helpful Notes for Best Results
Butter temperature is key. Too cold, and it will not blend smoothly; too melted, and the dough can become greasy.
Use softened butter that holds a slight indent when pressed. This gives the dough the best starting texture.
If your powdered sugar is clumpy, sift it before mixing. Sifting makes the dough smoother and easier to work.
Do not skip dusting your hands with powdered sugar. It keeps the dough from sticking like glue.
Taste as you go if you want a stronger mint flavor. Add an extra drop or two of extract slowly because peppermint is potent.
If the dough is too sticky, sprinkle in a bit more powdered sugar. If it is too crumbly, add a teaspoon of cream to bring it back together.
For dairy-free mints, use plant-based butter and coconut cream. Avoid liquid sweeteners because they can throw off the texture.
Variations
Vanilla Butter Mints
Swap peppermint extract for vanilla extract. Use the same amount.
This gives the mints a classic buttercream-style flavor. It is softer and less refreshing than peppermint.
Almond Butter Mints
Use almond extract instead of peppermint. This creates a nostalgic, delicate flavor.
Almond butter mints feel especially nice for showers and weddings. The flavor is sweet and gentle.
Citrus Butter Mints
Use orange or lemon extract for a brighter version. You can also add a dash of lemon or orange zest.
This gives the mints a fresh, cheerful flavor. It is a fun change from the classic peppermint style.
Pastel Party Mints
Add a drop of food coloring to create pastel mints. Use different colors for baby showers, Easter, or spring parties.
Gel food coloring gives stronger color without adding too much liquid. Start small and build slowly.
Holiday Butter Mints
Use red and green food coloring for Christmas. You can make separate batches or divide one dough into colors.
These look beautiful in holiday tins. They also add color to cookie trays.
Chocolate-Dipped Butter Mints
Dip half of each shaped mint in melted chocolate. Let the chocolate set before storing.
This creates a richer candy-style finish. It is especially nice for gifting.
Sparkling Sugar Butter Mints
Roll shaped mints in sparkling sugar for crunch. This adds texture and a pretty finish.
Use this variation when you want the mints to look extra festive. The sugar makes them sparkle on a dessert table.
Troubleshooting
Why Is My Dough Too Sticky?
The dough may need more powdered sugar. Add it slowly until it is easy to handle.
It should feel like soft Play-Doh, not gum. Dusting your hands with powdered sugar also helps.
Why Is My Dough Too Crumbly?
The dough may need a little more cream. Add a teaspoon of cream and mix gently until it comes back together.
Do not add too much at once. A small amount can make a big difference.
Why Are My Mints Greasy?
The butter may have been too melted. Use softened butter, not liquid butter.
If the dough feels greasy, add powdered sugar gradually until it firms up. Chill is not the main setting method here, so the dough texture matters.
Why Are My Mints Lumpy?
The butter may have been too cold, or the powdered sugar may have been clumpy. Use softened butter and sift powdered sugar if needed.
Mix the butter and cream until fully smooth before adding sugar. A smooth base helps prevent lumps.
Why Did My Color Get Too Bright?
Food coloring can become intense quickly, especially gel coloring. Add only 1 drop at a time.
If the color is too bold, you cannot remove it. Next time, start smaller and mix fully before adding more.
Frequently Asked Questions
How Long Do Butter Mints Last?
Butter mints stay fresh in an airtight container at room temperature for about 1 week. Keep parchment between layers if stacking.
They can also be frozen for up to 3 months. Thaw at room temperature before serving.
Can I Use Salted Butter Instead?
Yes, salted butter can be used. The mints may taste a tiny bit savory.
If you use salted butter, skip any extra salt in the recipe. The main ingredient list uses unsalted butter.
What If I Do Not Have Peppermint Extract?
Vanilla or almond extract work beautifully. Use the same amount.
You can also use orange or lemon extract for a different twist. Each flavor changes the personality of the mints.
Why Is My Dough Too Sticky?
It probably needs a bit more powdered sugar. Add it slowly until the dough is easy to handle.
The texture should be soft and pliable, not sticky like gum. Dust your hands with powdered sugar while shaping.
Can I Make These Ahead for a Party?
Yes, make them up to 3 days early. Store them in an airtight container at room temperature.
They are great for parties because there is no last-minute baking. The flavor also has time to mingle a bit.
Can I Freeze Butter Mints?
Yes, freeze them in a freezer-safe container for up to 3 months. Use parchment between layers.
Thaw at room temperature for about 1 hour before serving. Do not heat them to thaw.
Can I Make Them Dairy-Free?
Yes, use plant-based butter and coconut cream. Avoid liquid sweeteners because they can change the texture.
The final flavor and texture may vary slightly. Keep the dough firm enough to shape.
Why This Recipe Works So Well
Easy Butter Mints work so well because they turn a few simple ingredients into something that feels delicate and special. Butter gives richness, cream softens the texture, powdered sugar creates structure, and peppermint extract gives the bright mint flavor.
The recipe is also flexible. You can adjust the flavor, color, shape, and finish without changing the basic method.
Adding powdered sugar gradually helps control the dough. This keeps it from becoming too stiff too soon or too sticky to shape.
The resting time gives the mints their final texture. They firm at room temperature while staying soft enough to melt in your mouth.
They also work because they are practical for events. You can make them ahead, store them easily, freeze them, or package them beautifully.
Most of all, butter mints work because they feel nostalgic. They are small, sweet, pretty, and quietly charming, the kind of treat that makes people smile before they even take a bite.
Final Thoughts
Easy Butter Mints are proof that a homemade treat does not have to be complicated to feel special. With softened butter, whipping cream, powdered sugar, peppermint extract, and optional color, you can make little candies that look sweet, taste refreshing, and melt beautifully on the tongue.
I love them for showers, weddings, holidays, cookie tins, and quiet little dessert dishes set out when company comes over. They have that old-fashioned charm that makes people remember kitchens, parties, and small bowls of candy passed around after dinner.
Make them plain and white, tint them pastel, shape them into discs, roll them into pillow mints, or dip them in chocolate when you want something extra. However you finish them, these butter mints bring softness, sweetness, and a little bit of nostalgia to every occasion.
Butter Mint
These Butter Mints are smooth, sweet, creamy, and lightly flavored with pure peppermint extract. Made with just a few simple ingredients and optional food coloring, they are an easy no-bake treat for holidays, parties, showers, candy dishes, or any occasion that needs a soft homemade mint.
Recipe Details
- Prep Time: 15 minutes
- Total Time: 15 minutes
- Course: Dessert
- Cuisine: American
- Servings: 24 mints
Ingredients
- ½ teaspoon pure peppermint extract
- 1 tablespoon whipping cream
- 1 stick unsalted butter
- 1-4 drops food coloring optional, for brighter color
- 4 cups powdered sugar, divided plus more for dusting
Instructions
Step 1: Make the Creamy Base
In a mixing bowl, combine the unsalted butter and whipping cream until smooth.
Step 2: Add the First Portion of Powdered Sugar
Gradually add 3 cups of powdered sugar, mixing until fully incorporated.
Step 3: Flavor and Color the Mint Dough
Add the peppermint extract and mix well. If using food coloring, add it now and mix until the desired color is achieved.
Step 4: Firm Up the Dough
Gradually add the remaining 1 cup of powdered sugar, mixing until the dough is firm and easy to handle.
Step 5: Shape the Mints
Roll the dough into small balls and flatten them into mint shapes. Dust with powdered sugar if desired.
Step 6: Let the Mints Set
Let the mints set at room temperature for about 1 hour before serving.
Notes
Store the butter mints in an airtight container at room temperature for up to a week.
You can experiment with different food coloring for a variety of colors.
Serving Suggestions
- Serve in a small candy dish for parties, showers, or holiday gatherings.
- Add to dessert trays with cookies, fudge, or chocolate candies.
- Package in small bags or tins for simple homemade gifts.
- Use different food coloring to match birthdays, weddings, baby showers, or seasonal celebrations.
- Serve after dinner as a sweet, creamy peppermint bite.
Storage
How to Store
Store the butter mints in an airtight container at room temperature for up to a week.
Best Texture Tip
Let the mints set at room temperature for about 1 hour before serving so they hold their shape while staying soft and creamy.
Make-Ahead Tip
These mints are easy to prepare ahead because they can be stored in an airtight container at room temperature for up to a week.

Fernando is the creator and writer behind the food blog Eating with your Hands. Living and working in cities like Paris, Barcelona, and Berlin, and being married to a Canadian foodie, has given Fernando a passion and interest in food and inspired him to run EWYH.