
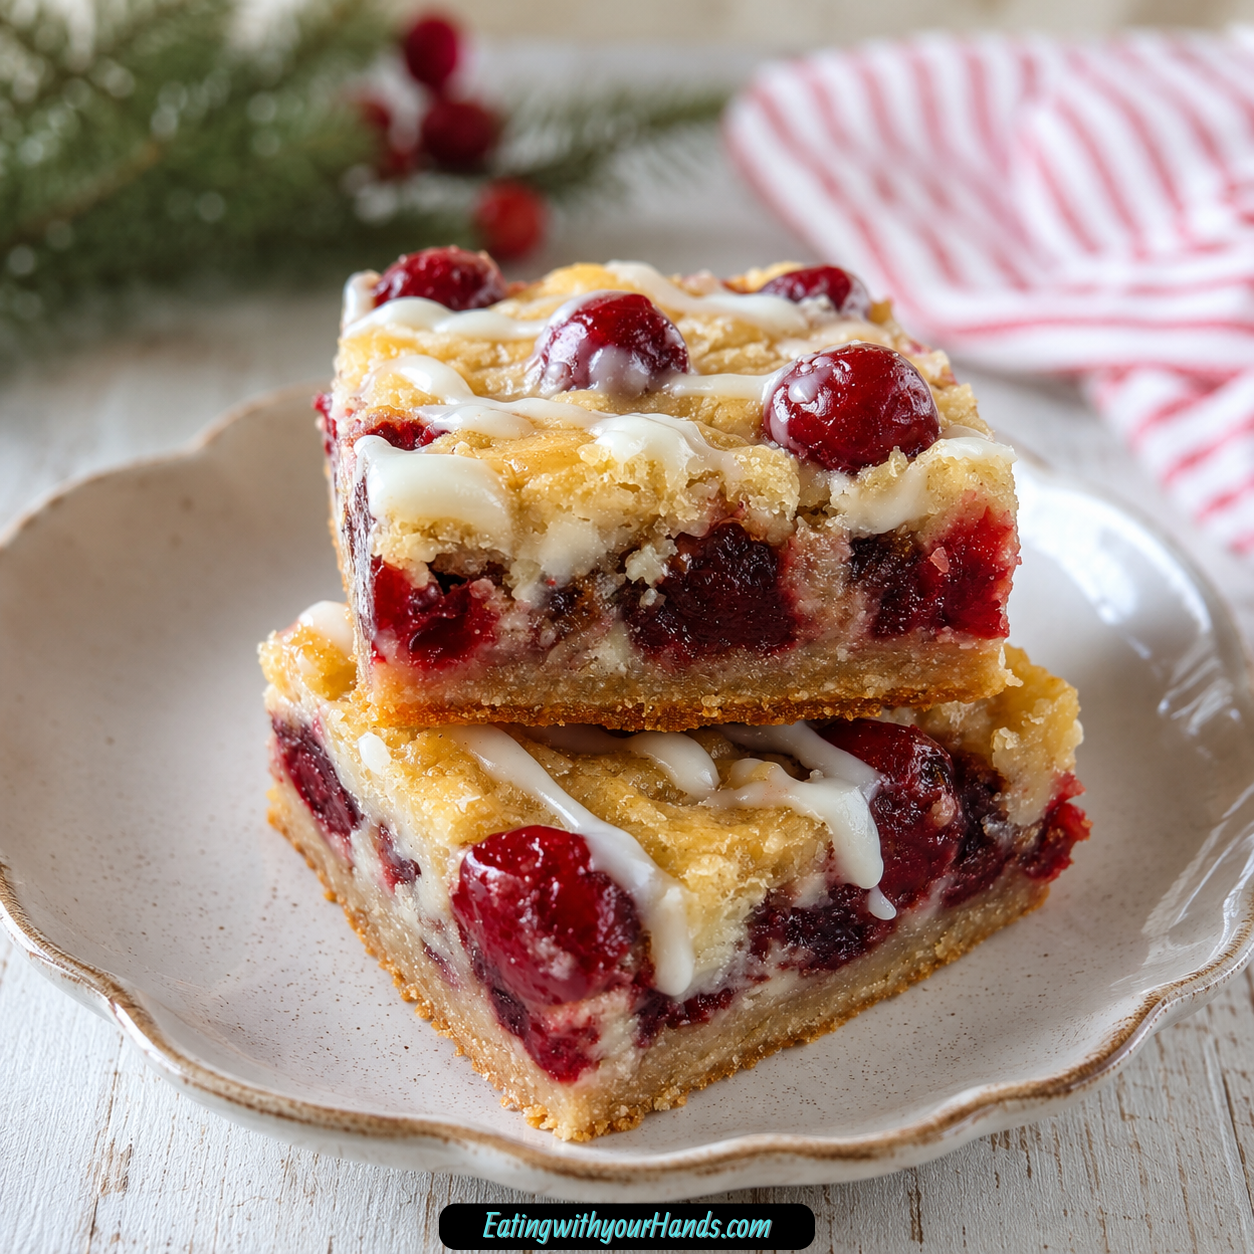
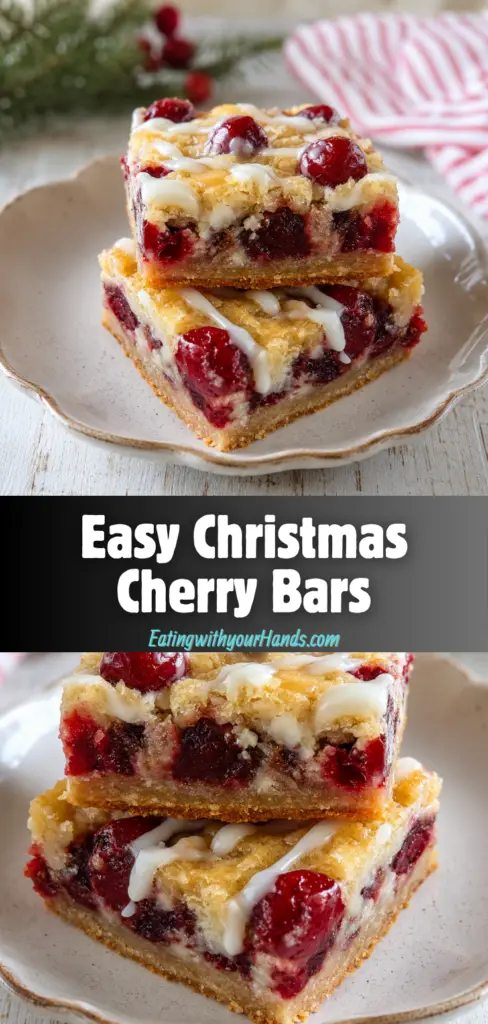
Easy Christmas Cherry Bars are the kind of holiday dessert that looks cheerful the moment it lands on the table. The golden buttery dough, the ruby-red cherry filling, and the optional vanilla glaze all come together in a pan of festive squares that feel simple, nostalgic, and special.
There is something wonderfully comforting about a dessert bar during the holidays. It is easier than pie, less fussy than decorated cookies, and still pretty enough to bring to a cookie exchange, family gathering, or neighbor gift plate.
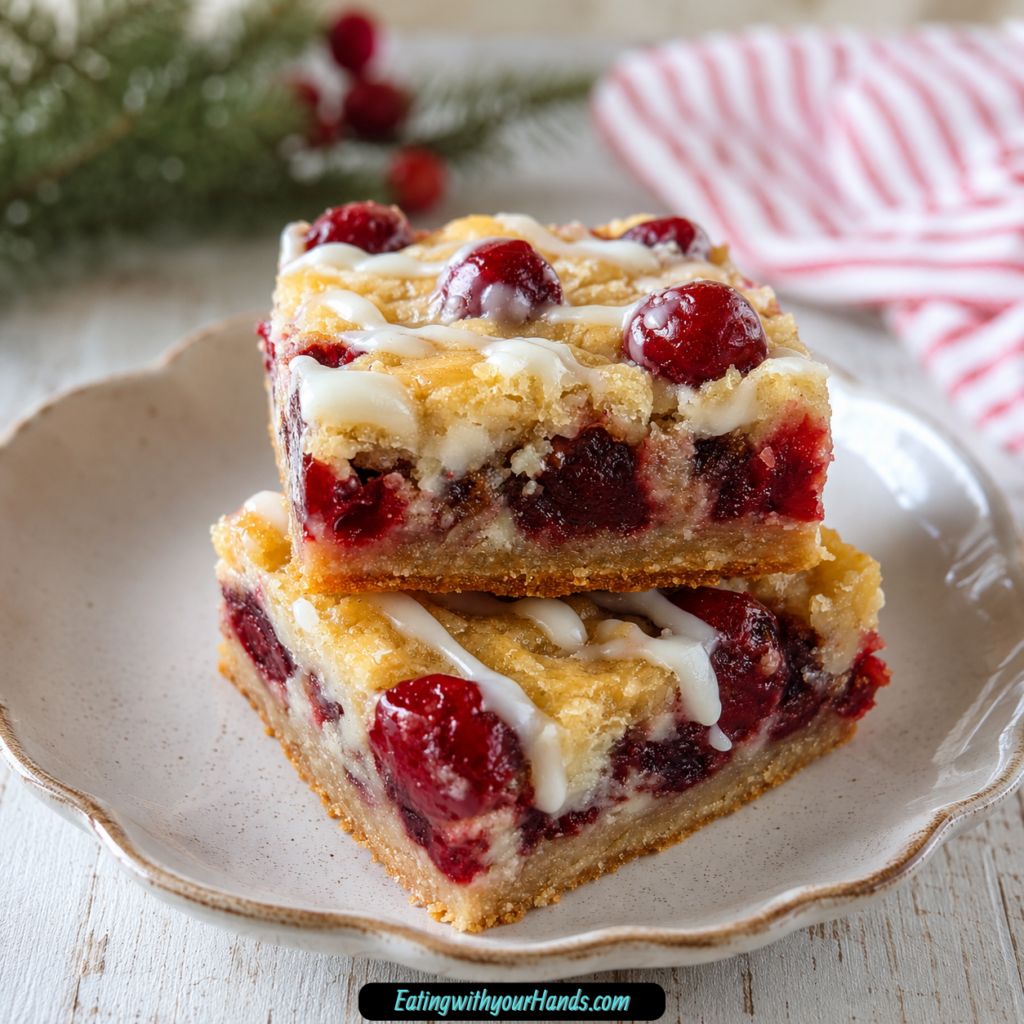
These cherry bars have that homemade charm that makes people reach for them before asking what they are. The bright cherry filling peeks through soft golden crumbles, giving every square a beautiful Christmas color without needing complicated decorating.
The flavor is just as lovable as the look. The buttery base and topping are rich and tender, while the cherry pie filling adds sweetness, brightness, and a jammy fruit layer that keeps each bite from feeling too heavy.
What makes this recipe so practical is how easy it is. You make one dough, press half into the pan, spread cherry pie filling over it, drop the rest of the dough on top, bake until golden, and drizzle with glaze if you want that bakery-style finish.
These bars are sturdy enough to stack, slice, gift, and serve, but still soft enough to feel like a special holiday treat. They are exactly the kind of recipe that becomes part of the season because they taste good, travel well, and bring a little cheer wherever they go.
Table of Contents
- Why You’ll Love Christmas Cherry Bars
- A Holiday Dessert That Feels Homemade and Easy
- Recipe Details
- Ingredients for Christmas Cherry Bars
- Main Ingredients
- Optional Glaze
- Ingredient Notes and Swaps
- Before You Start
- Directions for Easy Christmas Cherry Bars
- Step 1: Preheat the Oven
- Step 2: Grease the Baking Pan
- Step 3: Soften the Butter
- Step 4: Cream the Butter and Sugar
- Step 5: Add the Eggs One at a Time
- Step 6: Mix in the Vanilla
- Step 7: Combine the Flour and Salt
- Step 8: Add the Dry Ingredients to the Wet Ingredients
- Step 9: Avoid Overmixing the Dough
- Step 10: Press Half the Dough Into the Pan
- Step 11: Prepare the Cherry Filling
- Step 12: Spread the Cherry Layer
- Step 13: Add the Remaining Dough on Top
- Step 14: Bake the Bars
- Step 15: Cool the Bars Slightly Before Glazing
- Step 16: Make the Optional Glaze
- Step 17: Drizzle the Glaze
- Step 18: Use a Glaze-Free Finish If Desired
- Step 19: Cool Before Cutting
- Step 20: Slice Into Squares
- Christmas Cherry Bar Variations
- Serving Tips
- Storage Tips
- Freezing Tips
- Make-Ahead Tips
- Helpful Notes for Perfect Christmas Cherry Bars
- Troubleshooting Christmas Cherry Bars
- Frequently Asked Questions About Christmas Cherry Bars
- Final Thoughts
- Christmas Cherry Bars
Why You’ll Love Christmas Cherry Bars
Christmas Cherry Bars are easy to love because they deliver holiday beauty without demanding holiday stress. They look festive, taste buttery and sweet, and come together with familiar ingredients.
The bright cherry layer makes them feel instantly seasonal. That red filling against the golden dough looks cheerful on cookie trays and dessert platters.
They are also much easier than making a pie or rolling out cutout cookies. There is no chilling required in the main method, no shaping individual cookies, and no decorating skills needed.
The dough does double duty as both the base and the crumbly top. That means you do not need to make a separate crust and topping.
The optional glaze makes them look extra pretty. A simple drizzle of powdered sugar, milk, and vanilla turns the bars into something that feels worthy of a holiday party.
They are also make-ahead friendly. In fact, the flavor can become even better after the bars rest and the cherry filling settles into the buttery layers.
A Holiday Dessert That Feels Homemade and Easy
Some holiday recipes require perfect timing, specialty tools, or a long list of steps. These bars keep things much more relaxed.
You start by creaming softened butter and sugar until the mixture is pale and fluffy. That creates the base for a soft, rich dough.
Eggs go in one at a time, followed by vanilla powder or vanilla extract. Then flour and salt are mixed in until the dough becomes thick, almost like cookie dough.
Half of that dough is pressed into a greased 9×13-inch pan. The cherry pie filling is spread over the top, and the remaining dough is dropped in spoonfuls over the cherries.
As the bars bake, the bottom sets into a soft crust, the cherries bubble gently underneath, and the top dough turns golden. The result is a pan of dessert bars that feel festive without being complicated.
Recipe Details
- Recipe Name: Easy Christmas Cherry Bars
- Recipe Style: Holiday dessert bars
- Oven Temperature: 350°F (175°C)
- Pan Size: 9×13-inch baking pan
- Bake Time: 23 to 25 minutes
- Cooling Time Before Cutting: At least 30 minutes, or about 45 minutes for cleaner slices
- Main Filling: 1 can (21 oz) cherry pie filling
- Optional Finish: Vanilla glaze or powdered sugar dusting
- Room Temperature Storage: Airtight container for up to 3 days
- Freezer Storage: Up to 2 months
- Freezer Reheating Option: 300°F oven for 5 minutes
- Make-Ahead Option: Bake up to 48 hours ahead and add glaze before serving
Ingredients for Christmas Cherry Bars
The ingredients for these bars are simple, but each one matters. The butter gives richness, the eggs help structure the dough, the flour creates the base, and the cherry filling brings the holiday color and flavor.
Main Ingredients
You need 1 cup (2 sticks) softened butter. Let the butter sit out for about 30 minutes before using it so it creams smoothly with the sugar.
Room-temperature butter is important for the texture of the dough. Do not melt it, because melted butter can make the bars heavier and less tender.
You need 4 large eggs. Crack them into a separate bowl first so you can avoid getting shells in the batter.
The eggs help create structure and richness. Adding them one at a time helps the batter mix more smoothly.
You need 2 cups sugar. Regular granulated sugar works perfectly.
For extra depth, you can swap 1/4 cup of the sugar with brown sugar. This is optional, but it gives the dough a slightly warmer flavor.
You need 1 teaspoon vanilla powder. You can also use 1 tablespoon vanilla extract if that is what you have.
Vanilla gives the dough a sweet, warm flavor. Vanilla powder creates a more intense flavor, while extract is a convenient substitute.
You need 3 cups all-purpose flour. Spoon the flour into the measuring cup and level it off instead of packing it.
Too much flour can make the bars dry or dense. A lighter measuring method helps keep the texture tender and crumbly.
You need 1 teaspoon salt. Salt balances the sweetness and makes the buttery dough taste more complete.
You need 1 can (21 oz) cherry pie filling. An “extra fruit” style filling is a great choice if you can find it.
The cherry pie filling gives the bars their beautiful red layer and sweet-tart fruit flavor. Its consistency is ideal for this recipe.
Optional Glaze
You need 1 cup powdered sugar. Sift it first to avoid lumps in the glaze.
You need 1/2 cup milk. Whole milk gives the richest glaze, but any kind can work.
You need 1/2 teaspoon vanilla powder. Almond extract can also be used for a festive twist.
The glaze is optional, but it makes the bars look polished. A light drizzle gives the top a pretty holiday finish.
Ingredient Notes and Swaps
For gluten-free bars, swap the flour with your favorite 1:1 gluten-free blend. The texture may be slightly different, but the bars can still work well.
If dairy is an issue, coconut oil can be used instead of butter. Expect the texture to change slightly because coconut oil behaves differently than butter.
For a lower-sugar option, use low-sugar pie filling or reduce the sugar in the dough by 1/4 cup. The bars will still be sweet, especially with the cherry layer.
Before You Start
Before mixing the batter, preheat the oven and prepare the pan. This recipe moves easily once everything is measured and ready.
Softened butter is one of the most important details. It should be soft enough to cream with sugar, but not melted or greasy.
Grease the 9×13-inch baking pan well. Cherry filling can be sticky, and the dough will release much more easily from a properly prepared pan.
Measure the flour carefully. Spoon and level the flour so the dough stays soft instead of overly firm.
If you plan to glaze the bars, sift the powdered sugar before mixing. This helps the glaze turn smooth and prevents little sugar lumps.
Directions for Easy Christmas Cherry Bars
Step 1: Preheat the Oven
Preheat your oven to 350°F, or 175°C. Starting with a fully heated oven helps the bars bake evenly from edge to center.
This also gives the dough a steady baking environment. The bottom layer needs to set while the top turns golden.
Step 2: Grease the Baking Pan
Grease a 9×13-inch baking pan very well. Make sure the corners and sides are coated so the bars do not stick.
You can use butter, a butter wrapper, or whatever method you usually use for greasing a pan. Good coverage makes slicing and serving easier later.
Step 3: Soften the Butter
Use 1 cup, or 2 sticks, of softened butter. The butter should be soft enough to beat smoothly, but not melted.
Letting it sit at room temperature for about 30 minutes is ideal. Avoid microwave shortcuts because unevenly softened butter can affect the dough texture.
Step 4: Cream the Butter and Sugar
Place the softened butter and sugar in a large mixing bowl. Beat them together for 2 to 3 minutes until the mixture looks fluffy and pale.
This step adds lightness to the dough. Scrape down the sides of the bowl so no unmixed butter or sugar stays hidden.
Step 5: Add the Eggs One at a Time
Add the eggs one at a time, beating well after each addition. This helps the batter stay smoother and more evenly mixed.
The batter may look slightly curdled after an egg goes in, especially early on. Do not worry, because it will come together as you continue mixing.
Step 6: Mix in the Vanilla
Add the vanilla powder and mix until just combined. If using vanilla extract instead, add 1 tablespoon.
The vanilla gives the bars their warm, sweet background flavor. Do not overmix after adding it.
Step 7: Combine the Flour and Salt
In a separate bowl, whisk together the all-purpose flour and salt. This distributes the salt evenly through the flour.
Even mixing matters because salt helps balance the sweetness. You do not want one bite to taste salty while another tastes flat.
Step 8: Add the Dry Ingredients to the Wet Ingredients
Gradually add the flour mixture to the butter mixture. Mix on low speed until just combined.
The dough will be thick, similar to cookie dough. That thick texture is exactly what you want.
Step 9: Avoid Overmixing the Dough
Once the flour disappears into the dough, stop mixing. Overmixing can make the bars tougher.
The goal is a tender, buttery texture. A gentle hand after adding flour helps make that happen.
Step 10: Press Half the Dough Into the Pan
Take about half of the dough and press it evenly into the prepared 9×13-inch pan. It may seem thin at first, but spread it as evenly as possible.
Slightly damp fingers can help keep the dough from sticking to your hands. Press gently so the base stays tender.
Step 11: Prepare the Cherry Filling
Open the can of cherry pie filling and stir it briefly if it is very thick. This makes it easier to spread over the dough.
The filling should stay jammy and spoonable. Do not mash the cherries flat.
Step 12: Spread the Cherry Layer
Dollop the cherry pie filling over the dough base. Use a spatula to gently spread it into an even layer.
Leave a small border around the edges if possible. This helps reduce bubbling and sticking along the pan sides.
Step 13: Add the Remaining Dough on Top
Drop spoonfuls of the remaining dough over the cherry layer. Do not worry about covering the cherries completely.
The gaps are part of the charm. They allow the red cherry filling to peek through the golden topping after baking.
Step 14: Bake the Bars
Place the pan in the oven and bake for 23 to 25 minutes. The bars are done when the edges are golden and the top looks set.
A toothpick should come out clean from the dough portions, though cherry streaks are normal. Watch the edges carefully because they show doneness first.
Step 15: Cool the Bars Slightly Before Glazing
Remove the pan from the oven and let the bars cool slightly. They should be warm, not hot, before adding glaze.
If the bars are too hot, the glaze may melt too much. Warm bars let the glaze settle into the nooks without disappearing completely.
Step 16: Make the Optional Glaze
Whisk together the powdered sugar, milk, and vanilla powder until smooth. If you want a thicker glaze, add more powdered sugar.
If you want a thinner glaze, add more milk 1 teaspoon at a time. Adjust slowly so the glaze does not become too runny.
Step 17: Drizzle the Glaze
Use a spoon or piping bag to drizzle the glaze over the warm bars in a zigzag pattern. The glaze should lightly melt into the top.
This step makes the bars look extra festive. It also adds a sweet vanilla finish.
Step 18: Use a Glaze-Free Finish If Desired
If you do not want glaze, leave the bars plain. They are still delicious without it.
You can also dust them with powdered sugar right before serving. That gives them a snowy holiday look.
Step 19: Cool Before Cutting
Let the bars cool for at least 30 minutes before slicing. For the cleanest cuts, let them cool completely in the pan for about 45 minutes.
Hot bars are more likely to crumble. Cooling helps them hold their shape.
Step 20: Slice Into Squares
Use a sharp knife to cut the bars into squares. Wipe the knife clean between cuts for neater pieces.
If the filling is sticky, lightly grease the knife. This makes cutting easier and keeps the edges cleaner.
Christmas Cherry Bar Variations
These bars are easy to customize. The basic dough and layering method work with different fruit fillings, flavor additions, and toppings.
Blueberry, Apple, Raspberry, or Peach Filling
You can swap the cherry pie filling for blueberry, apple, raspberry, or peach pie filling. Each one gives the bars a different personality.
Cherry feels most festive for Christmas, but the other fillings are delicious too. Peach is unexpected but works well if you want something different.
Nutty Cherry Bars
Stir 1/2 cup chopped pecans or almonds into the dough. This adds texture and a nutty flavor.
Pecans make the bars taste richer, while almonds pair beautifully with cherry. Either option adds a pleasant crunch.
Almond Cherry Bars
Add 1/2 teaspoon almond extract with the vanilla. Almond flavor pairs especially well with cherries.
This small addition makes the bars taste a little more bakery-style. Use it alongside vanilla for a deeper flavor.
Chocolate Cherry Bars
Sprinkle chocolate chips over the fruit layer before adding the top dough. As the bars bake, the chocolate melts into little pockets.
Chocolate and cherry are a classic pairing. This version feels a little richer and more dessert-like.
Sparkly Holiday Bars
Before baking, brush the top with milk and sprinkle with coarse sugar. This creates a glittery finish.
The coarse sugar adds a little crunch and sparkle. It is a simple way to make the bars look festive without glaze.
Serving Tips
Christmas Cherry Bars can be served slightly warm or at room temperature. They are soft and cozy when warm, but cleaner and sturdier once fully cooled.
For a holiday tray, let them cool completely and cut into neat squares. Arrange them so the cherry layer shows through the golden top.
If serving chilled bars, microwave each one for about 10 seconds for a fresh-baked feel. This softens the dough and warms the cherry filling.
They are also lovely with coffee, hot cocoa, or tea. Their buttery sweetness makes them perfect for a holiday dessert table or casual afternoon treat.
For a more polished presentation, drizzle with glaze just before serving. This keeps the glaze looking fresh and pretty.
Storage Tips
Store the cooled bars in an airtight container at room temperature for up to 3 days. Keep them covered so they stay tender.
If stacking the bars, place parchment paper between layers. Cherry filling can be sticky and may cling to the bars above it.
The glaze holds up better when added closer to serving time. If making bars for gifting, consider packing them unglazed with a small pouch of glaze mix.
Keep the bars away from heat. Warm storage can make the filling softer and the glaze messier.
Freezing Tips
These bars freeze well, especially without glaze. Wrap individual bars tightly in plastic wrap, then freeze for up to 2 months.
Thaw at room temperature when ready to serve. For a warm treat, heat them briefly in a 300°F oven for 5 minutes.
Add the glaze after thawing for the best appearance. Frozen glaze can turn opaque and less attractive.
Freezing individual bars is helpful during the holidays. You can pull out only what you need for a plate, gift box, or late-night treat.
Make-Ahead Tips
These bars can be baked up to 48 hours ahead. Store them covered at room temperature and add glaze before serving.
They often taste even better on day two as the flavors settle. The cherry filling has time to blend into the buttery dough layers.
If you are making them for a party, bake the bars the day before and slice them once fully cooled. This makes serving day easier.
For gifting, wait to glaze if possible. Unglazed bars are easier to pack and stack.
Helpful Notes for Perfect Christmas Cherry Bars
Do Not Overmix After Adding Flour
Once the flour is added, mix only until the dough comes together. Overmixing can make the bars tough.
A tender dough is what makes these bars taste soft and buttery. Stop as soon as the flour is fully incorporated.
Use Room-Temperature Butter
Softened butter creams properly with sugar. Melted butter does not create the same texture.
Let the butter sit out naturally if you can. Room-temperature butter makes the dough lighter and smoother.
Rotate the Pan If Needed
If your oven has hot spots, rotate the pan halfway through baking. Some ovens brown the back corners faster than the center.
Rotating helps the bars bake evenly. Watch the edges near the end of the baking time.
Spread the Cherry Filling Gently
If the cherry filling clumps, spread it gently with a fork or spatula. Try to cover the base evenly without smashing the cherries.
An even fruit layer gives every square good cherry flavor. It also helps the bars slice more evenly.
Use Low-Sugar Filling If Desired
Low-sugar pie filling can be used if you want a slightly lighter version. You can also reduce the sugar in the dough by 1/4 cup.
Do not remove too much sugar from the dough, because it affects texture. A small reduction works best.
Chill Soft Dough If Needed
If the top layer sinks into the cherry filling, the dough may have been too soft. Next time, chill it for 15 minutes before layering.
Cold dough holds its shape better. This helps the spoonfuls stay visible on top.
Cut With a Clean Knife
Use a sharp knife and wipe it clean between cuts. If the cherry filling is sticky, grease the knife lightly.
This makes the squares neater. It also keeps the red filling from smearing too much.
Troubleshooting Christmas Cherry Bars
Why Are My Bars Dry?
The bars may have baked too long. Pull them out when the edges just turn golden and the top looks set.
Using room-temperature butter instead of melted butter also helps keep the bars tender. Overmixing after adding flour can also make them dry.
Why Did the Top Layer Sink?
The dough may have been too soft when added over the cherry filling. Chilling the dough for 15 minutes before layering can help.
Also make sure you drop the dough in spoonfuls rather than spreading it too aggressively. The top layer should sit lightly over the cherries.
Why Did My Bars Crumble When Cut?
They may not have cooled long enough. Let them cool at least 30 minutes, or closer to 45 minutes for cleaner cuts.
Hot bars are softer and more fragile. Cooling gives the dough time to set.
Why Is My Glaze Too Thin?
The glaze has too much milk. Add more powdered sugar until it thickens.
Add gradually and whisk well. A little powdered sugar can change the consistency quickly.
Why Is My Glaze Too Thick?
The glaze needs more liquid. Add milk 1 teaspoon at a time until it reaches a drizzleable texture.
Do not add too much milk at once. Thin glaze can become runny very quickly.
Frequently Asked Questions About Christmas Cherry Bars
Can I Use Fresh Cherries Instead of Pie Filling?
Yes, but the cherries need to be cooked down first with a bit of sugar and cornstarch to thicken. Fresh cherries on their own will not have the same ready-to-use consistency.
The canned cherry pie filling is easier and works perfectly here. It gives the bars the right texture and saves time.
Can I Make These Ahead of Time?
Yes, these bars can be made ahead. They actually taste even better on day two as the flavors settle.
Bake them up to 48 hours ahead and store them covered at room temperature. Add the glaze before serving for the freshest look.
How Do I Prevent Dry Bars?
Do not overbake them. Remove the pan when the edges just turn golden and the top looks set.
Also use room-temperature butter, not melted butter. Properly softened butter helps keep the dough tender.
Can I Freeze Them Without Glaze?
Yes, freezing unglazed bars is the best option. Wrap individual bars tightly and freeze for up to 2 months.
Add the glaze after thawing. Frozen glaze can become cloudy or opaque.
Why Did My Top Layer Sink Into the Cherries?
The dough was likely too soft. Chill it for 15 minutes before layering next time.
Cold dough holds its shape better over the cherry filling. It also creates a prettier crumbly top.
Can I Use Vanilla Extract Instead of Vanilla Powder?
Yes, use 1 tablespoon vanilla extract in place of 1 teaspoon vanilla powder in the main dough. For the glaze, almond extract can also be used for a festive twist.
Vanilla powder gives a more intense flavor, but extract works well. Use what you have.
Can I Make These Gluten-Free?
Yes, use your favorite 1:1 gluten-free flour blend. The texture may be slightly different, but the method stays the same.
Make sure the blend is designed for baking. That gives the best chance of a tender bar.
Can I Make These Dairy-Free?
Coconut oil can be used instead of butter if dairy is an issue. The texture will be slightly different.
For the glaze, use any milk that works for your needs. The glaze may vary a little depending on the milk used.
Final Thoughts
Easy Christmas Cherry Bars are the kind of holiday recipe that earns a permanent place in the season. They are simple enough for beginners, pretty enough for parties, and comforting enough to feel like something passed down on a well-loved recipe card.
The buttery dough creates both the base and the golden top, while the cherry pie filling adds color, sweetness, and that unmistakable festive look. A vanilla glaze makes them feel extra special, but they are just as good plain or dusted with powdered sugar.
They work for cookie exchanges, potlucks, neighbor gifts, family gatherings, or quiet December afternoons with a warm drink nearby. They are sturdy, cheerful, easy to slice, and even easier to love.
What makes them especially useful is that they can be made ahead, stored well, and frozen without glaze. That kind of flexibility is a gift during the busy holiday season.
Bake them once, and they may become one of those recipes people start asking about every year. With golden crumbles, ruby cherry filling, and a sweet drizzle on top, these Christmas Cherry Bars bring holiday joy in every square.
Christmas Cherry Bars
Christmas Cherry Bars are sweet, buttery dessert bars with a soft cake-like base and a bright cherry pie filling layer. The golden batter and ruby-red cherry center make them especially festive for holiday baking. They are simple to prepare in a 9×13-inch pan and easy to cut into squares for serving. The optional vanilla glaze adds a smooth, sweet finish while the bars are still warm.
Recipe Details
- Prep Time: 15 minutes
- Cook Time: 25 minutes
- Total Time: 40 minutes
- Course: Dessert
- Cuisine: American
- Servings: 12 bars
Ingredients
Optional Glaze
- ½ teaspoon vanilla powder
- 1 cup powdered sugar
- ½ cup milk
Main Ingredients
- 1 can cherry pie filling
- 1 teaspoon vanilla powder
- 1 teaspoon salt
- 3 cups all-purpose flour
- 4 eggs
- 2 cups sugar
- 1 cup softened butter
Instructions
Step 1: Prepare the Oven and Pan
Preheat your oven to 350°F (175°C). Grease a 9×13-inch baking pan so the bars release easily after baking.
Step 2: Cream the Butter and Sugar
In a mixing bowl, cream together the softened butter and sugar until the mixture is light and fluffy.
Step 3: Add the Eggs and Vanilla
Beat in the eggs one at a time, mixing well after each addition. Stir in the vanilla powder until combined.
Step 4: Add the Dry Ingredients
In a separate bowl, combine the all-purpose flour and salt. Gradually add the dry mixture to the creamed mixture, mixing until the batter comes together.
Step 5: Layer the Batter and Cherry Filling
Spread half of the batter evenly into the prepared baking pan. Spoon the cherry pie filling over the batter, then drop the remaining batter by spoonfuls over the cherry layer.
Step 6: Bake the Bars
Bake for 25 minutes, or until the bars are golden brown.
Step 7: Add the Optional Glaze
If using the glaze, mix the powdered sugar, milk, and vanilla powder until smooth. Drizzle the glaze over the warm bars.
Notes
Let the bars cool before cutting them into squares.
Serving Suggestions
- Hot coffee
- Cold milk
- Vanilla ice cream
- Whipped cream
- Christmas cookie trays
- Holiday dessert boards
- Hot cocoa
Storage
How to Store
Store the cooled bars in an airtight container. Keep them covered so the texture stays soft and the cherry layer does not dry out.
How to Reheat
These bars can be served at room temperature or gently warmed before serving. If glazed, warm them carefully so the glaze does not melt too much.
Best Texture Tip
Let the bars cool before slicing so the cherry filling settles and the squares hold their shape cleanly.

Fernando is the creator and writer behind the food blog Eating with your Hands. Living and working in cities like Paris, Barcelona, and Berlin, and being married to a Canadian foodie, has given Fernando a passion and interest in food and inspired him to run EWYH.