
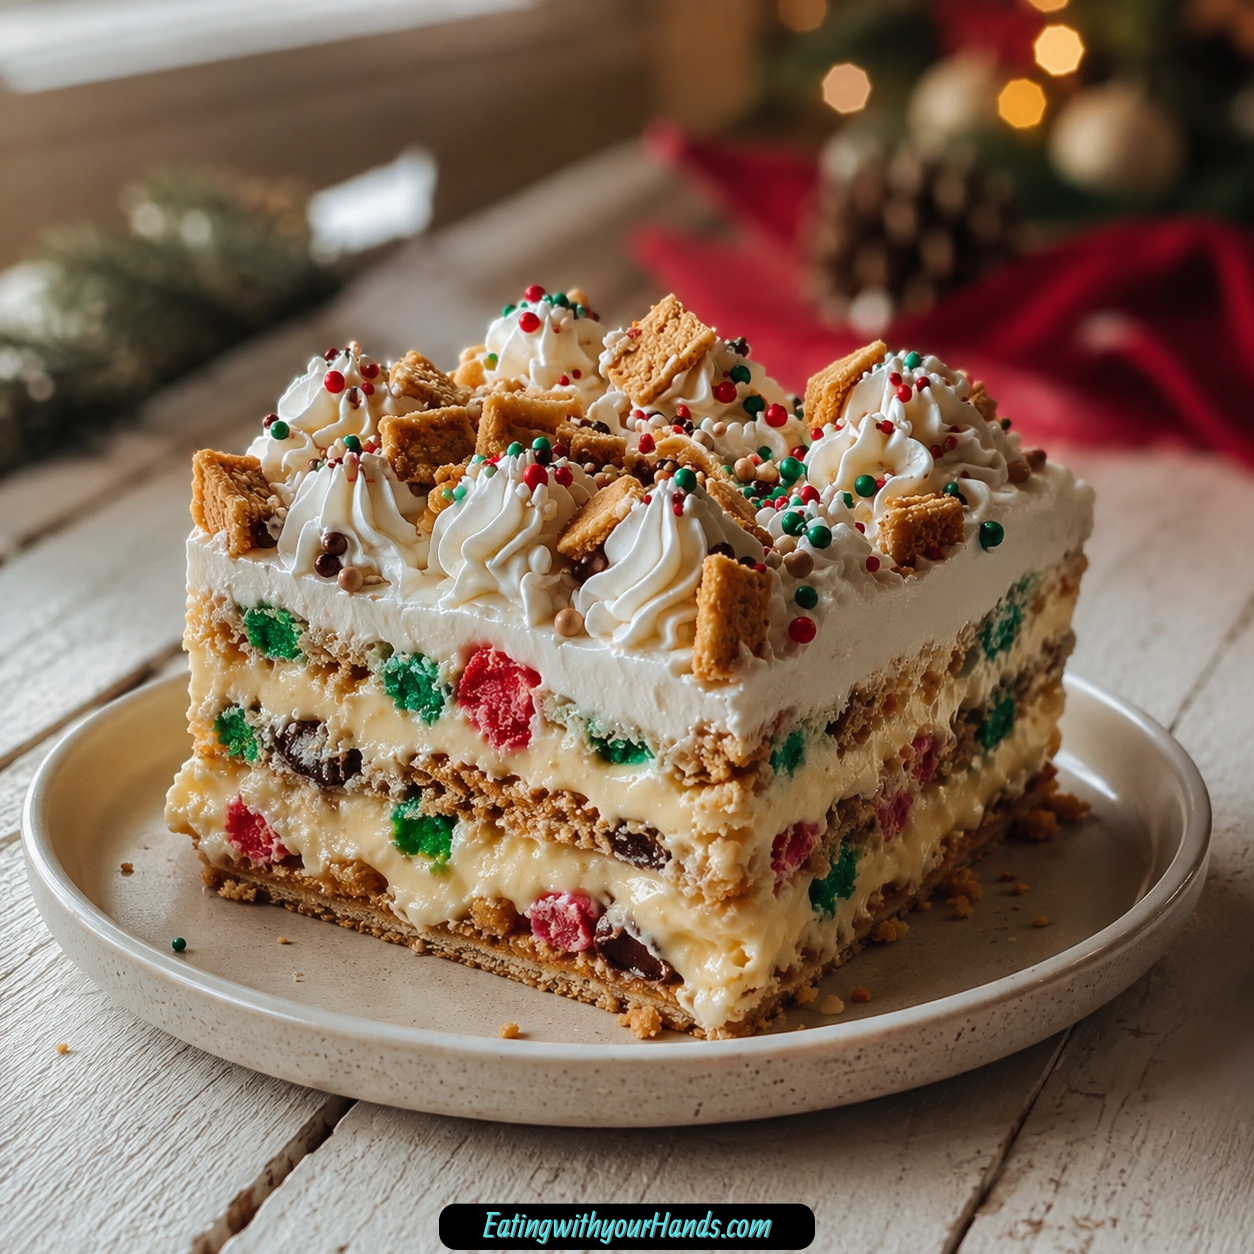
Easy Christmas Cookie Lasagna is the kind of holiday dessert that feels playful, creamy, colorful, and made for sharing. It layers a buttery Christmas cookie crust, a fluffy cheesecake-style filling, a sweet vanilla pudding layer with crushed cookies, a soft whipped topping finish, and festive garnishes that make every square look ready for a celebration.
This dessert carries the feeling of a busy holiday kitchen without asking you to spend hours baking. It has the sweetness of Christmas cookies, the smoothness of cheesecake, and the nostalgic comfort of pudding all stacked together in one chilled, sliceable treat.
The best part is how easy it is to bring together. You crush the cookies, mix them with melted butter, press them into a pan, build the creamy layers, decorate the top, and let the refrigerator do the rest.
It is the kind of dessert that fits the joyful chaos of the season. There can be laughter in the kitchen, sprinkles on the counter, crushed cookies waiting in little bowls, and one big 9×13 inch dish turning into something everyone wants a piece of.
Easy Christmas Cookie Lasagna is especially helpful when you want a make-ahead dessert. It needs at least 4 hours to chill, and overnight is even better, which means you can prepare it before guests arrive and focus on the rest of the celebration.
Whether you serve it for a holiday gathering, a cozy night at home, a family dessert table, or a Christmas party, this chilled cookie lasagna brings sweetness, creaminess, and festive color to every bite. It is simple, rich, customizable, and easy to cut into squares for sharing.
Table of Contents
- Why You’ll Love This Easy Christmas Cookie Lasagna
- Recipe Details
- Ingredients
- Ingredient Notes
- Optional Swaps, Variations, Add-Ins, and Serving Ideas
- Chocolate Cookie Christmas Lasagna
- Berry Christmas Cookie Lasagna
- Lighter Christmas Cookie Lasagna
- Almond Milk Pudding Layer
- Peppermint Christmas Cookie Lasagna
- Gluten-Free Christmas Cookie Lasagna
- Pre-Made Whipped Topping Version
- Festive Sprinkle Layer
- Fresh Fruit Finish
- Chocolate Sauce Finish
- Coconut Cream Option
- Graham Cracker Crust Option
- Chocolate Chip Cookie Crust Option
- Why This Recipe Works
- Directions
- Step 1: Set Out the Baking Dish
- Step 2: Prepare the Cookie Crust Ingredients
- Step 3: Crush the Cookies
- Step 4: Check the Crumb Texture
- Step 5: Mix the Crumbs and Butter
- Step 6: Add the Crust to the Dish
- Step 7: Press the Crust Firmly
- Step 8: Smooth the Crust Surface
- Step 9: Soften the Cream Cheese
- Step 10: Beat the Cream Cheese
- Step 11: Add the Sugar
- Step 12: Add the Vanilla
- Step 13: Add the Heavy Cream or Whipped Topping
- Step 14: Check the Cheesecake Layer
- Step 15: Spread the Cheesecake Layer
- Step 16: Prepare a Pudding Bowl
- Step 17: Add the Pudding Mix
- Step 18: Add the Cold Milk
- Step 19: Add Almond Extract If Using
- Step 20: Whisk the Pudding
- Step 21: Fold in Crushed Cookies
- Step 22: Spread the Pudding Layer
- Step 23: Add the Final Whipped Topping
- Step 24: Prepare the Garnishes
- Step 25: Decorate the Top
- Step 26: Cover the Dish
- Step 27: Chill for at Least 4 Hours
- Step 28: Chill Overnight If Possible
- Step 29: Slice into Squares
- Step 30: Plate the Dessert
- Step 31: Add Optional Serving Drizzle
- Step 32: Store Leftovers
- Step 33: Freeze Individual Slices
- Step 34: Thaw Before Serving
- Serving Ideas
- Storage
- Freezing
- Make-Ahead
- Helpful Notes for Best Results
- Variations
- Chocolate Christmas Cookie Lasagna
- Raspberry Christmas Cookie Lasagna
- Strawberry Christmas Cookie Lasagna
- Low-Fat Christmas Cookie Lasagna
- Almond Milk Christmas Cookie Lasagna
- Peppermint Christmas Cookie Lasagna
- Gluten-Free Christmas Cookie Lasagna
- Sprinkle Christmas Cookie Lasagna
- Fresh Fruit Christmas Cookie Lasagna
- Chocolate Sauce Christmas Cookie Lasagna
- Coconut Cream Christmas Cookie Lasagna
- Graham Cracker Cookie Lasagna
- Chocolate Chip Cookie Lasagna
- Troubleshooting
- Frequently Asked Questions
- Why This Recipe Works So Well
- Final Thoughts
- Easy Christmas Cookie Lasagna
Why You’ll Love This Easy Christmas Cookie Lasagna
This Easy Christmas Cookie Lasagna is quick and easy to prepare. It takes only 30 minutes of hands-on time, and no baking is required for the dessert itself.
It has layers of deliciousness. Cookie crust, cheesecake filling, vanilla pudding, crushed cookies, whipped topping, and festive garnishes all come together in one dish.
It is perfect for holiday gatherings. The Christmas cookie flavor and colorful toppings make it a crowd-pleaser for family and friends.
It can be made a day in advance. This gives the layers time to chill, set, and meld together beautifully.
It uses minimal ingredients. That means less stress and more fun in the kitchen during the busiest season of the year.
It is versatile and customizable. You can use different cookies, toppings, extracts, fruit layers, chocolate sauce, sprinkles, mini chocolate chips, or lighter and dairy-free-style swaps.
Recipe Details
Easy Christmas Cookie Lasagna is a chilled layered dessert made in a 9×13 inch baking dish. The prep time is 30 minutes.
The cookie crust is made with 24 pieces Christmas sugar cookies or shortbread cookies. The crumbs are mixed with 6 tablespoons melted unsalted butter and pressed firmly into the dish.
The cheesecake layer uses 8 oz softened cream cheese, ½ cup granulated sugar, 1 teaspoon vanilla extract, and 1 cup heavy cream or whipped topping. This layer is beaten and folded until creamy and fluffy.
The pudding layer uses 1 package instant vanilla pudding mix, 1 ½ cups cold milk, ½ teaspoon optional almond extract, and ½ cup crushed Christmas cookies. The pudding is whisked until thickened, then the crushed cookies are folded in.
The final layer is 2 cups whipped topping. It is spread smoothly over the pudding layer.
The garnish can include crushed Christmas cookies, sprinkles, or mini chocolate chips to taste. Garnishes should be added in a way that makes the top look festive.
The dessert must chill for at least 4 hours. Overnight chilling is even better because the flavors meld and the layers set more cleanly.
Leftovers can be stored in an airtight container in the refrigerator for up to 3 days. Individual slices can be frozen for up to a month and thawed in the refrigerator before serving.
Ingredients
For the Cookie Crust
- 24 pieces Christmas sugar cookies (or shortbread cookies, whichever you prefer)
- 6 tablespoons unsalted butter (melted, for the crust)
For the Cheesecake Layer
- 8 oz cream cheese (softened, helps create that creamy cheesecake layer)
- ½ cup granulated sugar (adds sweetness to the cheesecake)
- 1 teaspoon vanilla extract (for that lovely warm flavor)
- 1 cup heavy cream (or whipped topping, for a light texture)
For the Pudding Layer
- 1 package instant vanilla pudding mix (3.4 oz / 96g)
- 1 ½ cups cold milk (this helps the pudding to set perfectly)
- ½ teaspoon almond extract (optional, but adds a festive touch)
- ½ cup crushed Christmas cookies (for that extra crunchy layer)
For the Final Layer and Garnish
- 2 cups whipped topping (for the final fluffy layer)
- Crushed Christmas cookies, sprinkles, or mini chocolate chips (to taste, for garnishing)
Ingredient Notes
Christmas sugar cookies create the festive crust. Shortbread cookies can be used instead if you prefer their flavor.
The cookies need to be crushed into crumbs. A food processor works well, but a zip-top bag and rolling pin can also be used.
Unsalted butter holds the crust together. It should be melted before mixing with the cookie crumbs.
Cream cheese gives the dessert its cheesecake-style layer. It should be softened so it blends smoothly with sugar and vanilla.
Granulated sugar sweetens the cheesecake layer. It mixes into the cream cheese to create a creamy base.
Vanilla extract adds warmth. It helps the cheesecake layer taste more rounded and familiar.
Heavy cream gives the cheesecake layer a light texture. Whipped topping can be used instead if you want to keep the process easy.
Instant vanilla pudding mix creates the pudding layer. Cold milk helps the pudding set properly.
Almond extract is optional. It adds a festive touch if you want that flavor in the pudding layer.
Crushed Christmas cookies are folded into the pudding layer for extra crunch. This makes the middle layer more textured.
Whipped topping creates the final fluffy layer. Crushed cookies, sprinkles, or mini chocolate chips finish the dessert with holiday color and crunch.
Optional Swaps, Variations, Add-Ins, and Serving Ideas
Chocolate Cookie Christmas Lasagna
Use chocolate sandwich cookies for the crust to make the dessert chocolatey. This changes the base flavor while keeping the same layered structure.
The chocolate crust works well with the cheesecake and vanilla pudding layers. It gives the dessert a richer holiday flavor.
Berry Christmas Cookie Lasagna
Add layers of fresh raspberries or strawberries between the cheesecake and pudding layers. This gives the dessert a berry twist.
The fruit adds color and freshness. It also creates a bright contrast against the creamy layers.
Lighter Christmas Cookie Lasagna
Use low-fat cream cheese and whipped topping for a lighter version. This keeps the dessert creamy while changing the richness.
The texture may be slightly different from the original. It is a simple swap for a lighter-style dessert.
Almond Milk Pudding Layer
Use almond milk instead of regular milk for a dairy-free option. This changes the pudding layer.
The pudding should still be mixed with the instant vanilla pudding mix. Use the same general method and chill the dessert until set.
Peppermint Christmas Cookie Lasagna
Add peppermint extract to the cheesecake layer for a festive minty flavor. This gives the dessert a more holiday-style taste.
Peppermint extract can also be swapped for almond extract if you want a different holiday twist. Use the extract direction that fits your flavor preference.
Gluten-Free Christmas Cookie Lasagna
Use gluten-free cookies for the crust to make this dessert gluten-free. This keeps the layered dessert idea while changing the cookie base.
Make sure the cookies and other ingredients fit gluten-free needs. This helps the finished dessert suit guests with gluten sensitivities.
Pre-Made Whipped Topping Version
Use pre-made whipped topping in place of homemade whipped cream if you are short on time. This keeps the dessert easy.
Pre-made whipped topping also works in the cheesecake layer if you choose that option. It makes assembly faster.
Festive Sprinkle Layer
Add a layer of festive sprinkles for a pop of color. Sprinkles make the dessert look cheerful and holiday-ready.
Use them as a garnish or decorative layer. They bring color without changing the main flavor too much.
Fresh Fruit Finish
Add fresh fruit for color and flavor. Raspberries or strawberries are already listed as a berry twist.
Fresh fruit makes the dessert feel a little brighter. It works well with the creamy cheesecake and pudding layers.
Chocolate Sauce Finish
Serve the squares with a drizzle of chocolate sauce. This adds a lovely touch when plating.
The chocolate makes the dessert feel more decorated. It pairs well with cookies and whipped topping.
Coconut Cream Option
Coconut cream can stand in for whipped topping if you need a dairy-free option. This changes the flavor and texture.
Use it as a listed substitution when making ingredient adjustments. The final dessert will have a different creamy finish.
Graham Cracker Crust Option
Graham crackers can be used for the crust as a substitution mentioned in the ingredient FAQ. This gives the crust a different flavor.
The crumb-and-butter method stays the same. Press the mixture firmly into the pan.
Chocolate Chip Cookie Crust Option
Chocolate chip cookies can also be used for the crust. This makes the base sweeter and more chocolatey.
Use the same crust method. Crush, mix with butter, and press into the dish.
Why This Recipe Works
Easy Christmas Cookie Lasagna works because it layers familiar holiday flavors in a simple chilled dessert. Each layer adds a different texture.
The cookie crust gives the dessert a sweet base. Melted butter helps the crumbs press into a firm layer.
The cheesecake layer is creamy and smooth. Softened cream cheese, sugar, vanilla, and heavy cream or whipped topping make it fluffy and rich.
The pudding layer adds softness and sweetness. Instant vanilla pudding thickens with cold milk and becomes even more festive with optional almond extract and crushed cookies.
The final whipped topping layer makes the dessert light on top. It also creates a smooth surface for sprinkles, mini chocolate chips, or crushed cookies.
Chilling is important. At least 4 hours in the refrigerator allows the layers to set, and overnight chilling helps the flavors blend.
The toppings are added with texture in mind. Crushed cookies, sprinkles, and mini chocolate chips make the dessert look festive and fun.
Directions
Step 1: Set Out the Baking Dish
Start with a 9×13 inch baking dish. This size gives the dessert enough room for the crust, cheesecake layer, pudding layer, whipped topping, and garnish.
Place the dish on a stable surface before beginning. Once the crust is pressed in, the layers will be built directly in the dish.
Step 2: Prepare the Cookie Crust Ingredients
Set out 24 Christmas sugar cookies or shortbread cookies. Choose whichever cookie you prefer for the crust.
Measure 6 tablespoons unsalted butter and melt it. The butter will help hold the cookie crumbs together.
Step 3: Crush the Cookies
Crush the 24 cookies into crumbs. You can use a food processor if you have one.
You can also place the cookies in a zip-top bag and crush them with a rolling pin. Keep crushing until the pieces are small enough to form a crust.
Step 4: Check the Crumb Texture
Look at the cookie crumbs after crushing. They should be fine enough to mix evenly with butter.
A few small pieces are fine, but large chunks can make the crust uneven. Crush more if needed.
Step 5: Mix the Crumbs and Butter
Pour the crushed cookies into a mixing bowl. Add the 6 tablespoons melted unsalted butter.
Stir until the crumbs are fully coated. The mixture should resemble wet sand.
Step 6: Add the Crust to the Dish
Pour the buttery cookie crumb mixture into the bottom of the 9×13 inch baking dish. Spread it across the dish evenly.
Try to reach all corners. A level crust makes the layers look cleaner when sliced.
Step 7: Press the Crust Firmly
Press the cookie mixture firmly into the bottom of the dish. Use your hands, the back of a spoon, or a flat-bottomed tool.
The crust should be compact and even. This helps it hold together when the dessert is cut into squares.
Step 8: Smooth the Crust Surface
Run the back of a spoon over the crust to smooth it. Check for thin spots or loose crumbs.
Press any loose areas back into place. The crust is now ready for the cheesecake layer.
Step 9: Soften the Cream Cheese
Use 8 oz cream cheese, softened. Soft cream cheese blends much more easily than cold cream cheese.
If the cream cheese is too firm, the layer may turn lumpy. Softening helps create a creamy cheesecake texture.
Step 10: Beat the Cream Cheese
Place the softened cream cheese into a clean mixing bowl. Beat it until smooth and creamy.
Take your time with this step. A smooth base helps the whole layer feel silky.
Step 11: Add the Sugar
Add ½ cup granulated sugar to the cream cheese. Beat until the sugar is fully blended in.
The mixture should look creamy. Scrape the sides of the bowl if needed.
Step 12: Add the Vanilla
Add 1 teaspoon vanilla extract. Mix it into the cream cheese and sugar.
The vanilla adds warm flavor to the cheesecake layer. It should be evenly distributed.
Step 13: Add the Heavy Cream or Whipped Topping
Add 1 cup heavy cream or whipped topping. Heavy cream gives the layer a light texture, while whipped topping keeps it easy.
Fold or mix gently until combined and fluffy. Do not overmix.
Step 14: Check the Cheesecake Layer
The cheesecake layer should look smooth, creamy, and light. It should not be runny or full of lumps.
If needed, gently fold again to even out the texture. Keep the mixture soft and fluffy.
Step 15: Spread the Cheesecake Layer
Spoon the cheesecake layer over the cookie crust. Spread it carefully so the crust stays in place.
Use a spatula to smooth it into an even layer. Try to reach the edges of the dish.
Step 16: Prepare a Pudding Bowl
Set out a separate bowl for the pudding layer. This keeps the pudding smooth before it goes over the cheesecake.
Make sure the bowl is large enough for whisking. The pudding will thicken as you mix.
Step 17: Add the Pudding Mix
Add 1 package instant vanilla pudding mix to the bowl. The package size is 3.4 oz / 96g.
This is the base of the pudding layer. It will thicken with cold milk.
Step 18: Add the Cold Milk
Pour in 1 ½ cups cold milk. Cold milk helps the pudding set perfectly.
Do not use warm milk for this step. The pudding needs cold liquid to thicken properly.
Step 19: Add Almond Extract If Using
Add ½ teaspoon almond extract if you want the optional festive touch. This gives the pudding layer a subtle holiday flavor.
If you prefer not to use it, leave it out. The vanilla pudding layer will still be sweet and creamy.
Step 20: Whisk the Pudding
Whisk the pudding mix, cold milk, and optional almond extract together. Keep whisking until the mixture thickens.
This should take just a couple of minutes. The pudding should become smooth and spoonable.
Step 21: Fold in Crushed Cookies
Add ½ cup crushed Christmas cookies to the thickened pudding. Fold them in gently.
These crushed cookies add extra crunch and flavor. They make the pudding layer more festive.
Step 22: Spread the Pudding Layer
Spoon the pudding mixture over the cheesecake layer. Spread it carefully.
Use a spatula to make it even. Try not to pull up the cheesecake layer underneath.
Step 23: Add the Final Whipped Topping
Spread 2 cups whipped topping over the pudding layer. This creates the final fluffy layer.
Smooth it gently across the top. Cover the pudding completely.
Step 24: Prepare the Garnishes
Set out crushed Christmas cookies, sprinkles, or mini chocolate chips. Use them to taste.
These toppings make the dessert look festive. Choose one or combine them.
Step 25: Decorate the Top
Sprinkle the garnish over the whipped topping. Add enough to make the top colorful and cheerful.
Crushed cookies add texture, sprinkles add color, and mini chocolate chips add a chocolatey finish. Use what suits your holiday table.
Step 26: Cover the Dish
Cover the dish with plastic wrap. Make sure the wrap does not press heavily into the topping.
Covering protects the dessert while it chills. It also helps keep the layers fresh.
Step 27: Chill for at Least 4 Hours
Place the covered dish in the refrigerator. Chill for at least 4 hours.
This time lets the layers set. It also allows the flavors to meld beautifully.
Step 28: Chill Overnight If Possible
If you can make it ahead, chill the dessert overnight. Overnight chilling is even better.
The dessert becomes easier to slice after a longer chill. The cookie, cheesecake, pudding, and whipped topping layers settle together.
Step 29: Slice into Squares
When ready to serve, remove the dish from the refrigerator. Cut the Easy Christmas Cookie Lasagna into squares.
Use a clean knife for neater slices. Wipe the knife between cuts if needed.
Step 30: Plate the Dessert
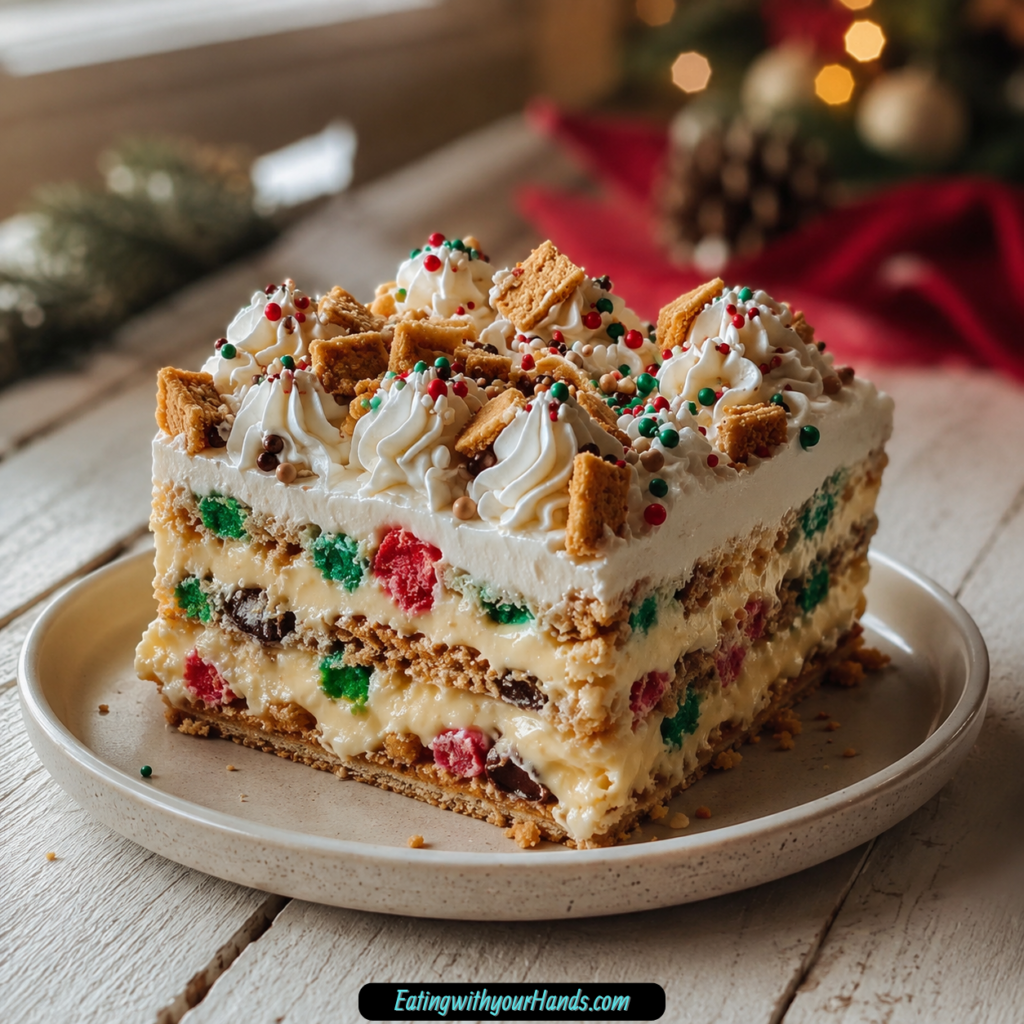
Lift each square carefully and place it on a dessert plate. The layers should show when sliced.
Serve chilled for the best flavor and texture. The dessert is rich, so small servings go a long way.
Step 31: Add Optional Serving Drizzle
If desired, drizzle chocolate sauce over each square. This adds a lovely serving touch.
You can also add a sprinkle of extra crushed cookies on top. This refreshes the garnish before serving.
Step 32: Store Leftovers
Place leftovers in an airtight container. Store them in the refrigerator for up to 3 days.
Keep the dessert chilled. This protects the creamy layers.
Step 33: Freeze Individual Slices
For longer storage, cut the dessert into individual slices. Wrap each piece tightly in plastic wrap.
Place the wrapped slices in an airtight container or freezer bag. Freeze for up to a month.
Step 34: Thaw Before Serving
When ready to enjoy frozen slices, thaw them in the refrigerator overnight. This gives the best texture.
Serve chilled after thawing. Add fresh garnish if desired.
Serving Ideas
Serve Easy Christmas Cookie Lasagna chilled for the best flavor and texture. The layers should be cold, creamy, and set enough to cut into squares.
A drizzle of chocolate sauce over each piece adds a beautiful touch. It also makes the dessert feel a little more dressed up.
Extra crushed cookies can be sprinkled on top right before serving. This gives the squares a fresher crunch and a more festive look.
Sprinkles are perfect for color. Mini chocolate chips add a fun chocolate finish.
This dessert is rich, so small servings go a long way. Cut modest squares for a crowded dessert table, or larger squares for a cozy family night.
Serve it for holiday gatherings, Christmas parties, family celebrations, or quiet nights at home. It is easy to share and cheerful on the plate.
Storage
Store leftovers in an airtight container in the refrigerator for up to 3 days. Keep the dessert chilled because it has creamy layers.
If the garnish softens during storage, add a little fresh garnish before serving again. Crushed cookies, sprinkles, or mini chocolate chips can refresh the top.
Cover the dessert well so it stays fresh. A lid or plastic wrap helps protect the whipped topping layer.
Freezing
Easy Christmas Cookie Lasagna can be frozen in individual slices for up to a month. Wrap each piece tightly in plastic wrap.
Place the wrapped pieces in an airtight container or freezer bag. This helps protect the slices in the freezer.
Thaw the slices in the refrigerator overnight before serving. Serve chilled once thawed.
Make-Ahead
This dessert is perfect for making ahead. You can assemble it up to a day in advance.
Cover it well with plastic wrap or a lid before refrigerating. The flavors meld beautifully as it chills.
Add any garnishes right before serving if you want the freshest look. This is especially helpful for crushed cookies or sprinkles.
Helpful Notes for Best Results
Use softened cream cheese for the cheesecake layer. This helps it beat smoothly with the sugar and vanilla.
Press the cookie crust firmly into the dish. A compact crust helps the dessert slice more neatly.
Whisk the instant pudding mix with cold milk until thickened. This should only take a couple of minutes.
Fold the crushed Christmas cookies into the pudding layer gently. This keeps the pudding smooth while adding crunch.
Chill the dessert for at least 4 hours. Overnight chilling is even better for clean slices and blended flavors.
If you are short on time, pre-made whipped topping works great in place of homemade whipped cream. It keeps the dessert simple.
Gluten-free cookies can be used for the crust if you need a gluten-free dessert. Almond extract can also be swapped for peppermint extract for a holiday twist.
Add festive sprinkles or fresh fruit for a pop of color and flavor. Remember that this dish is rich, so small servings are enough.
Variations
Chocolate Christmas Cookie Lasagna
Use chocolate sandwich cookies for the crust. This makes the dessert chocolatey and rich.
The chocolate flavor works well with the cheesecake and vanilla pudding layers. It is a fun twist for chocolate lovers.
Raspberry Christmas Cookie Lasagna
Add fresh raspberries between the cheesecake and pudding layers. This brings a berry twist.
The raspberries add color and freshness. They make the dessert feel brighter.
Strawberry Christmas Cookie Lasagna
Fresh strawberries can also be layered between the cheesecake and pudding. They add sweetness and color.
This variation works well for a festive dessert table. The fruit contrasts with the creamy layers.
Low-Fat Christmas Cookie Lasagna
Use low-fat cream cheese and whipped topping. This creates a lighter version.
The texture and richness may change slightly. The dessert still keeps its layered holiday style.
Almond Milk Christmas Cookie Lasagna
Use almond milk instead of regular milk for a dairy-free option. This changes the pudding layer.
The dessert also includes other dairy-style ingredients, so choose additional swaps as needed. Almond milk is one listed substitution.
Peppermint Christmas Cookie Lasagna
Add peppermint extract to the cheesecake layer for a festive minty flavor. You can also swap almond extract for peppermint extract.
This variation makes the dessert taste more holiday-inspired. It works well with cookie and chocolate garnishes.
Gluten-Free Christmas Cookie Lasagna
Use gluten-free cookies for the crust. This makes the dessert gluten-free when the rest of the ingredients also fit.
Check labels on all ingredients. This helps keep the dessert safe for gluten-sensitive guests.
Sprinkle Christmas Cookie Lasagna
Add a layer of festive sprinkles or use them as garnish. Sprinkles bring color and holiday fun.
They make the dessert especially cheerful for kids. Add them near serving time for the best look.
Fresh Fruit Christmas Cookie Lasagna
Add fresh fruit for a pop of color and flavor. Raspberries or strawberries are listed options.
Fresh fruit helps balance the richness. It also makes each slice look more colorful.
Chocolate Sauce Christmas Cookie Lasagna
Drizzle chocolate sauce over the plated squares. This adds a lovely touch.
It makes the dessert feel more decorated. It also pairs well with mini chocolate chips.
Coconut Cream Christmas Cookie Lasagna
Use coconut cream in place of whipped topping for a dairy-free option. This changes the flavor and texture.
It is one of the listed ingredient substitutions. Use it according to your needs.
Graham Cracker Cookie Lasagna
Use graham crackers for the crust. This gives the dessert a different flavor.
The crust method stays the same. Crush, mix with melted butter, and press firmly.
Chocolate Chip Cookie Lasagna
Use chocolate chip cookies for the crust. This creates another cookie variation.
It makes the base sweeter and more chocolatey. It is a simple swap.
Troubleshooting
The Crust Falls Apart
Make sure the cookie crumbs are mixed well with the melted butter. The texture should resemble wet sand.
Press the crust firmly into the bottom of the 9×13 inch baking dish. A compact crust holds together better.
The Cheesecake Layer Is Lumpy
Use softened cream cheese. Cold cream cheese is harder to beat smooth.
Beat the cream cheese with the sugar and vanilla until creamy before folding in heavy cream or whipped topping. This helps prevent lumps.
The Cheesecake Layer Is Too Heavy
Fold the heavy cream or whipped topping gently. Overmixing can make the texture less fluffy.
Use whipped topping if you want to keep the layer easy and light. Low-fat cream cheese can also be used for a lighter version.
The Pudding Does Not Thicken
Use cold milk with the instant vanilla pudding mix. Cold milk helps the pudding set properly.
Whisk for a couple of minutes until thickened. Make sure the pudding mix is fully blended.
The Layers Blend Together
Spread each layer carefully. Use a spatula and avoid pressing too hard.
Chilling helps the layers set. Give the dessert at least 4 hours in the refrigerator.
The Dessert Is Too Soft to Slice
Chill it longer. At least 4 hours is required, and overnight is even better.
A fully chilled dessert cuts more cleanly. Use a clean knife when slicing.
The Toppings Get Soft
Add garnishes close to serving time when possible. Crushed cookies stay crunchier that way.
Sprinkles and mini chocolate chips also look freshest when added near serving. If storing leftovers, refresh the top before serving again.
The Dessert Needs to Be Gluten-Free
Use gluten-free cookies for the crust. Check labels on the pudding mix, whipped topping, and garnishes as needed.
This keeps the dessert aligned with gluten-free needs. The main adjustment is the cookie base.
The Dessert Needs a Dairy-Free Direction
Use almond milk instead of regular milk and coconut cream in place of whipped topping. Choose dairy-free ingredient swaps that fit your needs.
Because the dessert includes cream cheese and other creamy ingredients, check each component carefully. The listed substitutions give you a starting point.
Frequently Asked Questions
Can I freeze Easy Christmas Cookie Lasagna?
Yes, Easy Christmas Cookie Lasagna can be frozen. Cut it into individual slices and wrap each piece tightly in plastic wrap.
Place the wrapped pieces in an airtight container or freezer bag. It will keep well for up to a month.
How do I thaw frozen slices?
Thaw frozen slices in the refrigerator overnight before serving. This helps the layers keep the best texture.
Serve the dessert chilled after thawing. Add fresh garnish if needed.
How can I substitute ingredients?
You can substitute ingredients based on what you have on hand. For the crust, any type of cookie works, including chocolate chip cookies or graham crackers.
You can use low-fat cream cheese for a lighter cheesecake layer. For a dairy-free option, almond milk can replace regular milk, and coconut cream can stand in for whipped topping.
How do I make this dessert ahead of time?
Assemble the dessert up to a day in advance. Cover it well with plastic wrap or a lid before refrigerating.
The flavors meld beautifully as it sits. Add garnishes right before serving for a fresh look.
Yes, shortbread cookies can be used instead of Christmas sugar cookies. Use whichever you prefer.
The crust method stays the same. Crush the cookies, mix with melted butter, and press into the dish.
Can I add peppermint flavor?
Yes, peppermint extract can be added to the cheesecake layer for a festive minty flavor. You can also swap almond extract for peppermint extract.
This gives the dessert a stronger holiday taste. Use the peppermint variation if you enjoy mint.
How long do leftovers last?
Leftovers can be stored in an airtight container in the refrigerator for up to 3 days. Keep the dessert chilled.
For longer storage, freeze individual slices for up to a month. Thaw in the refrigerator before serving again.
What toppings work best?
Crushed Christmas cookies, sprinkles, and mini chocolate chips are all listed garnish options. Use them to taste.
Chocolate sauce can also be drizzled over plated squares. Extra crushed cookies add a nice finishing touch.
Why This Recipe Works So Well
Easy Christmas Cookie Lasagna works so well because it turns familiar holiday flavors into a creamy layered dessert. The cookie crust gives sweetness and structure, while the cheesecake layer adds smooth richness.
The pudding layer makes the dessert soft and comforting. Instant vanilla pudding, cold milk, optional almond extract, and crushed Christmas cookies create a creamy middle with extra texture.
The whipped topping layer gives the dessert a light, fluffy finish. It also creates the perfect surface for sprinkles, crushed cookies, or mini chocolate chips.
The refrigerator does the most important work. Four hours of chilling helps the dessert set, while overnight chilling makes it even better.
The recipe is flexible enough for different holiday tables. Chocolate sandwich cookies, berries, low-fat cream cheese, whipped topping, almond milk, peppermint extract, gluten-free cookies, fresh fruit, chocolate sauce, coconut cream, graham crackers, chocolate chip cookies, sprinkles, and mini chocolate chips all give you ways to adapt it.
Most of all, this dessert works because it feels joyful. It is creamy, colorful, easy to make ahead, and built for the kind of holiday table where everyone wants just one more square.
Final Thoughts
Easy Christmas Cookie Lasagna is a chilled no-bake dessert made with a Christmas sugar cookie or shortbread cookie crust, creamy cheesecake layer, vanilla pudding layer with crushed cookies, whipped topping, and festive garnishes. It takes 30 minutes to prepare and chills for at least 4 hours before serving.
Serve it cold in squares with crushed cookies, sprinkles, mini chocolate chips, or a drizzle of chocolate sauce, and store leftovers in the refrigerator for up to 3 days. Whether you make it for a holiday gathering, cozy night at home, family dessert table, or make-ahead Christmas treat, this cookie lasagna brings creamy sweetness and festive comfort to every bite.
Easy Christmas Cookie Lasagna
Creamy, festive, layered, and sweet, this Easy Christmas Cookie Lasagna stacks a buttery Christmas cookie crust with a smooth cheesecake layer, a vanilla pudding layer, whipped topping, and colorful holiday garnishes. It is a chilled American dessert made for slicing into party-ready squares, with crushed cookies, sprinkles, or mini chocolate chips adding a fun Christmas finish.
Recipe Details
- Prep Time: 30 minutes
- Total Time: 30 minutes
- Course: Dessert
- Cuisine: American
- Servings: 12 slices
- Calories: 350 kcal
Equipment
- Mixing bowl
- 9×13-inch baking dish
Ingredients
For the Topping
- 2 cups whipped topping
- to taste none crushed Christmas cookies for garnish
- to taste none sprinkles for garnish
- to taste none mini chocolate chips for garnish
For the Pudding Layer
- 1 package instant vanilla pudding mix 3.4 oz / 96g
- 1 ½ cups cold milk
- ½ teaspoon almond extract optional for festive flavor
- ½ cup crushed Christmas cookies
For the Cheesecake Layer
- 8 oz cream cheese softened
- 1 cup heavy cream or whipped topping
- ½ cup granulated sugar
- 1 teaspoon vanilla extract
For the Cookie Crust
- 24 pieces Christmas sugar cookies or shortbread cookies
- 6 tablespoons unsalted butter melted
Instructions
Step 1: Preheat the Oven and Prepare the Crust Mixture
Preheat your oven to 350°F (175°C). Crush the cookies and mix with melted butter to form the crust.
Step 2: Press the Cookie Crust
Press the cookie mixture into the bottom of a 9×13 inch baking dish. Spread it evenly so it creates the base for the dessert layers.
Step 3: Make the Cheesecake Layer
In a mixing bowl, beat cream cheese, sugar, and vanilla until smooth. Fold in whipped cream.
Step 4: Spread the Cheesecake Layer
Spread the cheesecake layer over the cookie crust. Smooth it gently so it covers the crust evenly.
Step 5: Make the Pudding Layer
In another bowl, whisk together pudding mix, cold milk, and almond extract until thick. Fold in crushed cookies.
Step 6: Add the Pudding Layer
Spread the pudding layer over the cheesecake layer. Keep the layer even so the dessert slices cleanly after chilling.
Step 7: Add the Topping and Garnish
Top with whipped topping and garnish with crushed cookies, sprinkles, or mini chocolate chips.
Step 8: Chill Before Serving
Refrigerate for at least 4 hours before serving.
Notes
- This dessert can be made a day in advance.
- Store leftovers in the refrigerator.
Serving Suggestions
Serve this Easy Christmas Cookie Lasagna chilled after it has refrigerated for at least 4 hours. The cookie crust, cheesecake filling, pudding layer, whipped topping, and festive garnishes make it a sweet layered dessert for Christmas gatherings.
Slice it into 12 pieces for serving. Add crushed Christmas cookies, sprinkles, or mini chocolate chips on top for a colorful holiday finish.
Storage
How to Store
Store leftovers in the refrigerator. The recipe does not provide a specific storage duration, so no exact number of days is added here.
Make-Ahead Tip
This dessert can be made a day in advance. Keep it refrigerated until ready to serve.
Chill Time Tip
Refrigerate for at least 4 hours before serving. This chill time is separate from the listed Total Time, so it is preserved in the Instructions.
Garnish Tip
Top with whipped topping and garnish with crushed cookies, sprinkles, or mini chocolate chips. No exact garnish quantity is provided, so the garnish remains to taste.
Layering Tip
Spread each layer evenly before adding the next one. This helps the cookie crust, cheesecake layer, pudding layer, and whipped topping stay distinct when sliced.

Fernando is the creator and writer behind the food blog Eating with your Hands. Living and working in cities like Paris, Barcelona, and Berlin, and being married to a Canadian foodie, has given Fernando a passion and interest in food and inspired him to run EWYH.
I don’t see anything about repeating the layers in the recipe but the pic shows that you do. Can you explain that process?
Thank you for pointing that out! You are absolutely right—the picture shows a double-layer version. To achieve this look, simply repeat the layering process one more time: after spreading the first layer of cream filling over the bottom crust, place another layer of graham crackers/cookies on top, add the remaining filling, and then finish with the whipped cream and toppings.
We will update the recipe steps to make this clearer. Enjoy baking!