
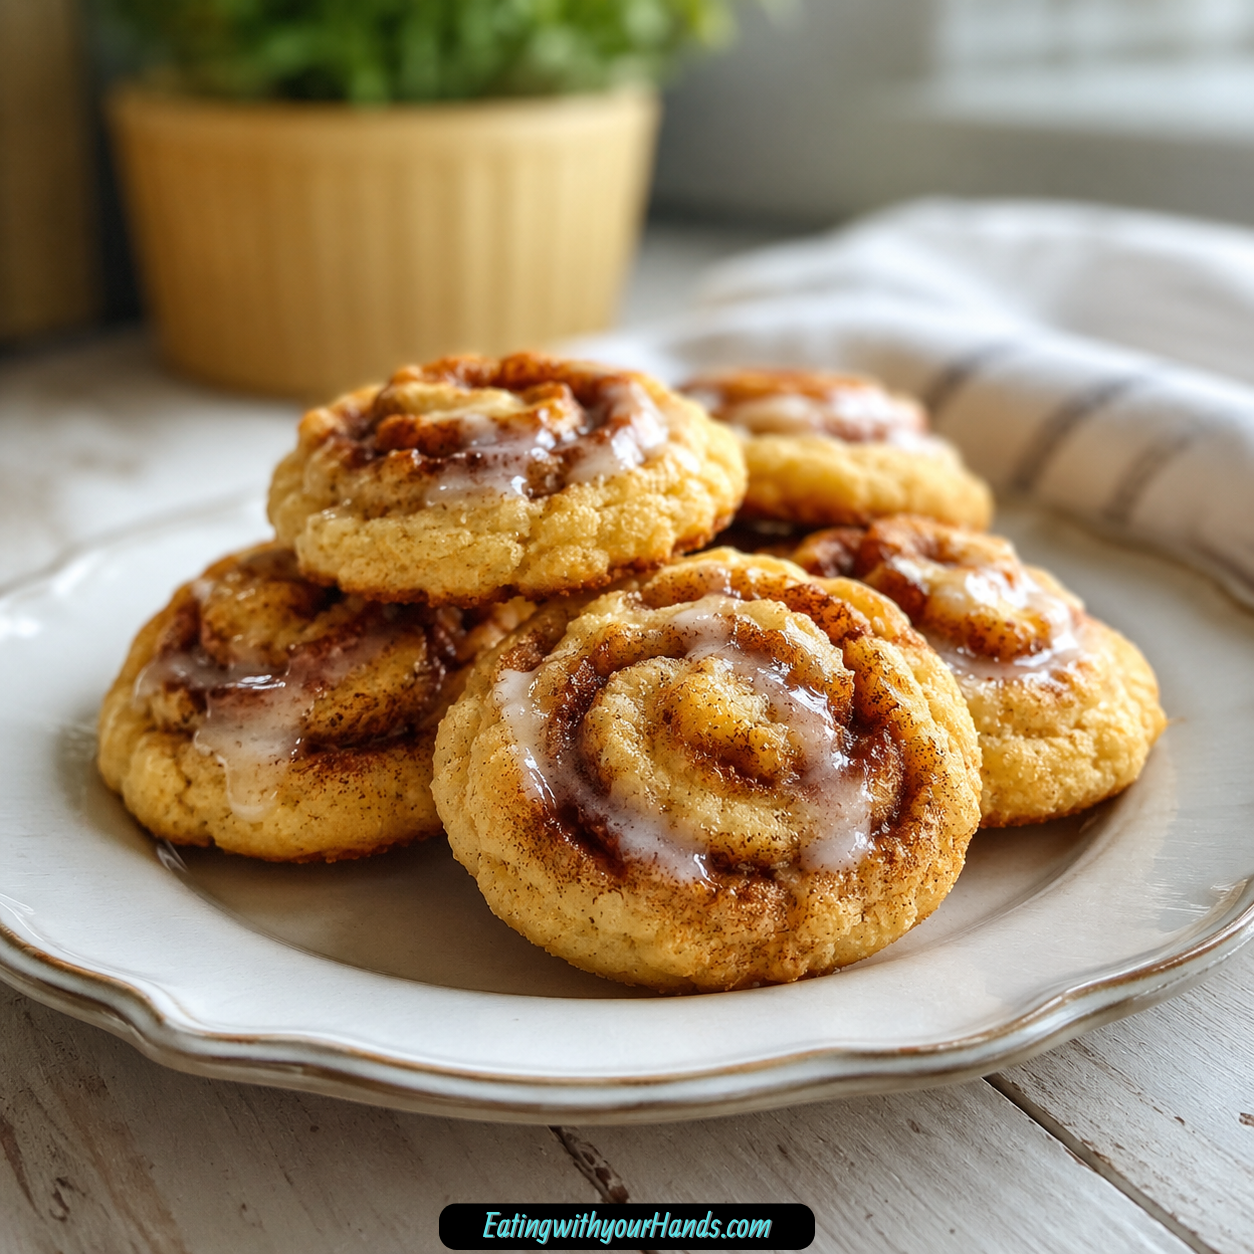

There is something unforgettable about the smell of cinnamon sugar warming in the oven. It has a way of making a kitchen feel softer, cozier, and more welcoming before anyone has even taken a bite.
These Easy Cinnamon Roll Cookies take that same comforting aroma and tuck it into a soft, chewy cookie with a beautiful cinnamon sugar swirl. They taste like a little cinnamon roll, but they do not need yeast, rising time, or a long morning of dough work.
Instead of waiting for dough to proof, you make a simple cookie dough, chill it, roll it into a rectangle, sprinkle it with brown sugar and cinnamon, roll it into a log, slice it, and bake. The result is a tray of sweet little spirals with tender centers, lightly golden edges, and a filling that brings all the cinnamon roll comfort in a bite-sized form.
They are perfect for lazy weekend baking, coffee breaks, lunchbox treats, movie nights, holiday cookie trays, or any afternoon that needs a little cinnamon sweetness. They are also the kind of cookies that make the whole house smell like you worked harder than you actually did.
This recipe is simple, but the little details matter. Softened butter, proper chilling, a 12×8-inch rectangle, a tight roll, ½-inch slices, and a short cooling time all help the cookies hold their shape while staying soft and chewy.
Table of Contents
- Why You’ll Love Cinnamon Roll Cookies
- Recipe Details
- Ingredients
- Optional Additions and Variations
- The Cozy Idea Behind Cinnamon Roll Cookies
- Why Chilling the Dough Matters
- Directions
- Step 1: Gather the Ingredients
- Step 2: Whisk the Dry Ingredients
- Step 3: Cream the Butter and Sugars
- Step 4: Add the Egg
- Step 5: Add the Vanilla Extract
- Step 6: Combine Wet and Dry Ingredients
- Step 7: Shape the Dough Into a Disc
- Step 8: Chill the Dough for 30 Minutes
- Step 9: Mix the Cinnamon Sugar Filling
- Step 10: Prepare the Rolling Surface
- Step 11: Roll the Dough Into a Rectangle
- Step 12: Add the Filling
- Step 13: Roll the Dough Into a Log
- Step 14: Chill the Dough Log
- Step 15: Preheat the Oven
- Step 16: Slice the Cookies
- Step 17: Arrange on Baking Sheets
- Step 18: Bake the Cookies
- Step 19: Cool on the Baking Sheet
- Step 20: Optional Glaze
- Serving Tips
- Storage
- Freezing Baked Cookies
- Freezing the Dough Log
- Helpful Notes for Best Results
- Variations
- Troubleshooting
- Frequently Asked Questions
- Why These Cookies Work for Coffee Breaks and Gatherings
- Why This Recipe Is Easier Than Classic Cinnamon Rolls
- Final Thoughts
- Cinnamon Roll Cookies
Why You’ll Love Cinnamon Roll Cookies
These cookies are easy because they skip the yeast entirely. There is no waiting for dough to rise and no complicated cinnamon roll schedule to manage.
They have that classic cinnamon sugar swirl. Brown sugar and cinnamon create the filling, giving every cookie a warm, sweet spiral through the center.
The texture is soft and chewy with slightly crisp edges. They feel like a mini cinnamon roll, but they are easier to hold, pack, and share.
They smell incredible while baking. Butter, brown sugar, vanilla, and cinnamon fill the kitchen with that cozy bakery-style aroma.
They are useful for almost any occasion. Serve them warm with milk, pack them for snacks, bring them to gatherings, or make them for a quiet coffee break.
They are also flexible. You can add nuts, drizzle glaze, use apples, add cardamom, swap in pumpkin pie spice, make them gluten-free, or adjust the sweetness.
Recipe Details
- Recipe name: Easy Cinnamon Roll Cookies
- Oven temperature: 350°F (175°C)
- First dough chill: 30 minutes
- Dough rectangle size: 12×8 inches
- Second chill after rolling into log: 15 minutes
- Slice thickness: ½ inch
- Yield: About 24 cookies
- Baking time: 10 to 12 minutes
- Cooling time on baking sheet: 5 minutes
- Room temperature storage: Up to 5 days
- Freezer storage: Up to 3 months
- Reheating: Microwave one cookie for 10 seconds, or 15 seconds from thawed freezer storage
Ingredients
For the Cookies
- 2 cups all-purpose flour
- 1 teaspoon baking powder
- 1 teaspoon ground cinnamon
- ½ teaspoon salt
- ½ cup unsalted butter, softened
- ½ cup granulated sugar
- ½ cup brown sugar, packed
- 1 large egg
- 2 teaspoons vanilla extract
For the Filling
- ½ cup brown sugar, packed
- 2 teaspoons ground cinnamon
Optional Additions and Variations
- 1 tablespoon melted butter for extra gooey filling
- Chopped pecans
- Chopped walnuts
- ½ cup powdered sugar
- 1 to 2 tablespoons milk
- A splash of vanilla for glaze
- Finely diced apples, patted dry
- A pinch of cardamom
- Pumpkin pie spice
- 1:1 gluten-free baking blend with xanthan gum
- Vegan butter
- Coconut oil
- Extra ½ teaspoon cinnamon if replacing brown sugar in the filling
- 1 tablespoon molasses for homemade brown sugar
The Cozy Idea Behind Cinnamon Roll Cookies
Cinnamon rolls are loved for a reason. They are soft, sweet, buttery, and full of warm cinnamon filling, but they also take time and planning.
These cookies capture that same feeling in a much simpler form. You still get the swirl, the cinnamon sugar flavor, and the cozy aroma, but the process is closer to making slice-and-bake cookies.
The dough is richer and firmer than a yeasted cinnamon roll dough. That helps it roll into a log, slice cleanly, and bake into little spiral cookies.
The filling is simple: brown sugar and cinnamon. Brown sugar adds moisture and chew, while cinnamon gives the cookies their unmistakable warmth.
Chilling is the quiet helper in this recipe. It keeps the dough manageable, helps the log slice neatly, and prevents the cookies from spreading too much.
The finished cookies are soft in the middle and lightly crisp at the edges. That contrast makes them feel like a cinnamon roll and a cookie at the same time.
Why Chilling the Dough Matters
This recipe uses two short chilling times, and both are important. The first chill happens after the dough is made, and the second happens after the dough is rolled into a log.
The first 30-minute chill makes the dough easier to roll into a 12×8-inch rectangle. Without chilling, the dough may be too soft and sticky.
The second 15-minute chill helps the log firm up before slicing. A cold log holds its round shape better and gives cleaner ½-inch slices.
Chilling also helps prevent spreading in the oven. Soft butter and warm dough can cause the cookies to lose their swirl shape.
These chill times are short enough to keep the recipe easy. They are still worth following because they help the cookies look and bake better.
Directions
Step 1: Gather the Ingredients
Set out the flour, baking powder, cinnamon, salt, unsalted butter, granulated sugar, brown sugar, egg, and vanilla extract. For the filling, keep extra brown sugar and cinnamon nearby.
Having everything measured before mixing makes the process smoother. This is especially helpful because the dough needs to be rolled and chilled.
Make sure the butter is softened but not melted. Soft butter creams well, while melted butter can make the dough too loose.
Step 2: Whisk the Dry Ingredients
In a large bowl, whisk together 2 cups all-purpose flour, 1 teaspoon baking powder, 1 teaspoon ground cinnamon, and ½ teaspoon salt. Mix until the dry ingredients look evenly combined.
The flour should be spooned and leveled instead of scooped directly from the bag. Too much flour can make the cookies dense and dry.
Baking powder gives the dough a little lift. Salt balances the sweetness, and cinnamon begins building the warm flavor right in the dough.
Step 3: Cream the Butter and Sugars
In another bowl, beat ½ cup softened unsalted butter with ½ cup granulated sugar and ½ cup packed brown sugar. Mix until fluffy.
This should take about 2 minutes with a mixer. If mixing by hand with a wooden spoon, it may take closer to 3 minutes.
The butter and sugars should look lighter and smoother when ready. This step helps create a softer cookie texture.
Step 4: Add the Egg
Add 1 large egg to the butter and sugar mixture. Mix until just combined.
The egg helps bind the dough and gives it structure. Do not overbeat after adding it.
Scrape down the sides of the bowl if needed. This keeps the mixture even before the vanilla and dry ingredients go in.
Step 5: Add the Vanilla Extract
Add 2 teaspoons vanilla extract. Mix until the vanilla is evenly blended into the dough.
Vanilla gives the cookies a warm, rounded sweetness. It works beautifully with cinnamon and brown sugar.
Once mixed, the wet ingredients should look smooth and creamy. Now the dry ingredients can be added.
Step 6: Combine Wet and Dry Ingredients
Gradually add the dry ingredients to the wet mixture. Mix until a soft dough forms.
The dough should be soft but not sticky. If it sticks heavily to your fingers, add 1 tablespoon more flour.
Be careful not to add too much flour. Extra flour can make the cookies dry, so add only what is needed to make the dough manageable.
Step 7: Shape the Dough Into a Disc
Gather the dough together and flatten it into a disc. This shape helps it chill evenly and roll out more easily later.
Wrap the dough in plastic wrap. Make sure it is covered well so it does not dry out in the refrigerator.
The dough will firm as it chills. This makes the next step much easier.
Step 8: Chill the Dough for 30 Minutes
Place the wrapped dough in the refrigerator for 30 minutes. Do not skip this step.
Chilled dough rolls more cleanly and is less likely to tear. It also helps prevent the cookies from spreading too much during baking.
Use the chilling time to prepare the filling and clean the work surface. The recipe becomes easier when the next steps are ready.
Step 9: Mix the Cinnamon Sugar Filling
In a small bowl, stir together ½ cup packed brown sugar and 2 teaspoons ground cinnamon. Mix until the cinnamon is evenly distributed through the sugar.
This filling creates the swirl in the cookies. Brown sugar helps make the center soft and flavorful.
For extra gooeyness, you can add 1 tablespoon melted butter to the filling. This is optional, but it makes the swirl richer.
Step 10: Prepare the Rolling Surface
Lightly flour a clean work surface. Use enough flour to prevent sticking, but not so much that the dough becomes dry.
Unwrap the chilled dough and place it on the floured surface. If it feels too firm, let it rest at room temperature for a few minutes.
The dough should be cool but workable. If it cracks slightly, it can be pressed back together.
Step 11: Roll the Dough Into a Rectangle
Roll the dough into a 12×8-inch rectangle. Try to keep the thickness even from edge to edge.
An even rectangle helps the cookies bake consistently. It also makes the swirl look cleaner when sliced.
If the dough sticks to the rolling pin, dust lightly with flour. Keep the edges as straight as you can, but do not worry if the rectangle is not perfect.
Step 12: Add the Filling
Sprinkle the cinnamon brown sugar filling evenly over the rolled dough. Leave a small border around the edges.
The border helps keep the filling from spilling out when the dough is rolled into a log. It also makes sealing the seam easier.
Gently press the filling into the dough so it sticks. Do not press so hard that you flatten the dough too much.
Step 13: Roll the Dough Into a Log
Starting from one long side, roll the dough tightly into a log. Keep the roll snug so the swirl stays defined.
If the dough cracks a little, pinch it back together. This dough is forgiving, so small cracks are not a problem.
Once rolled, pinch the seam tightly to seal. This helps the log stay closed during chilling and slicing.
Step 14: Chill the Dough Log
Wrap the dough log in plastic wrap. Place it in the refrigerator for 15 minutes.
This short chill firms the log so slicing is easier. It also helps the cookies hold their spiral shape in the oven.
Do not skip this second chill if the dough feels soft. It makes a big difference in clean slices.
Step 15: Preheat the Oven
Preheat your oven to 350°F (175°C). Let it fully heat while the log chills.
A fully preheated oven helps the cookies bake evenly. It also helps the edges set before the cookies spread too much.
Line baking sheets with parchment paper. This prevents sticking and makes cleanup easier.
Step 16: Slice the Cookies
Remove the chilled log from the refrigerator. Cut it into ½-inch slices.
You should get about 24 cookies. Use a sharp knife and gentle pressure so the slices do not flatten too much.
If the log softens while slicing, chill it for a few more minutes. Firmer dough cuts more cleanly.
Step 17: Arrange on Baking Sheets
Place the cookie slices 2 inches apart on parchment-lined baking sheets. They will spread a little as they bake.
Make sure the swirl side is facing up. This shows off the cinnamon roll pattern.
Do not crowd the pan. If needed, bake in batches so each cookie has enough space.
Step 18: Bake the Cookies
Bake the cookies at 350°F (175°C) for 10 to 12 minutes. The edges should be just golden.
The centers may still look soft, and that is perfect. They will firm up as they cool.
Avoid overbaking if you want soft, chewy centers. Pull them when the edges are set and lightly golden.
Step 19: Cool on the Baking Sheet
Let the cookies cool on the baking sheet for 5 minutes. They are delicate when they first come out of the oven.
This resting time allows the cookies to set before moving. It also keeps them from breaking apart.
After 5 minutes, transfer them to a wire rack. Let them cool completely if adding glaze.
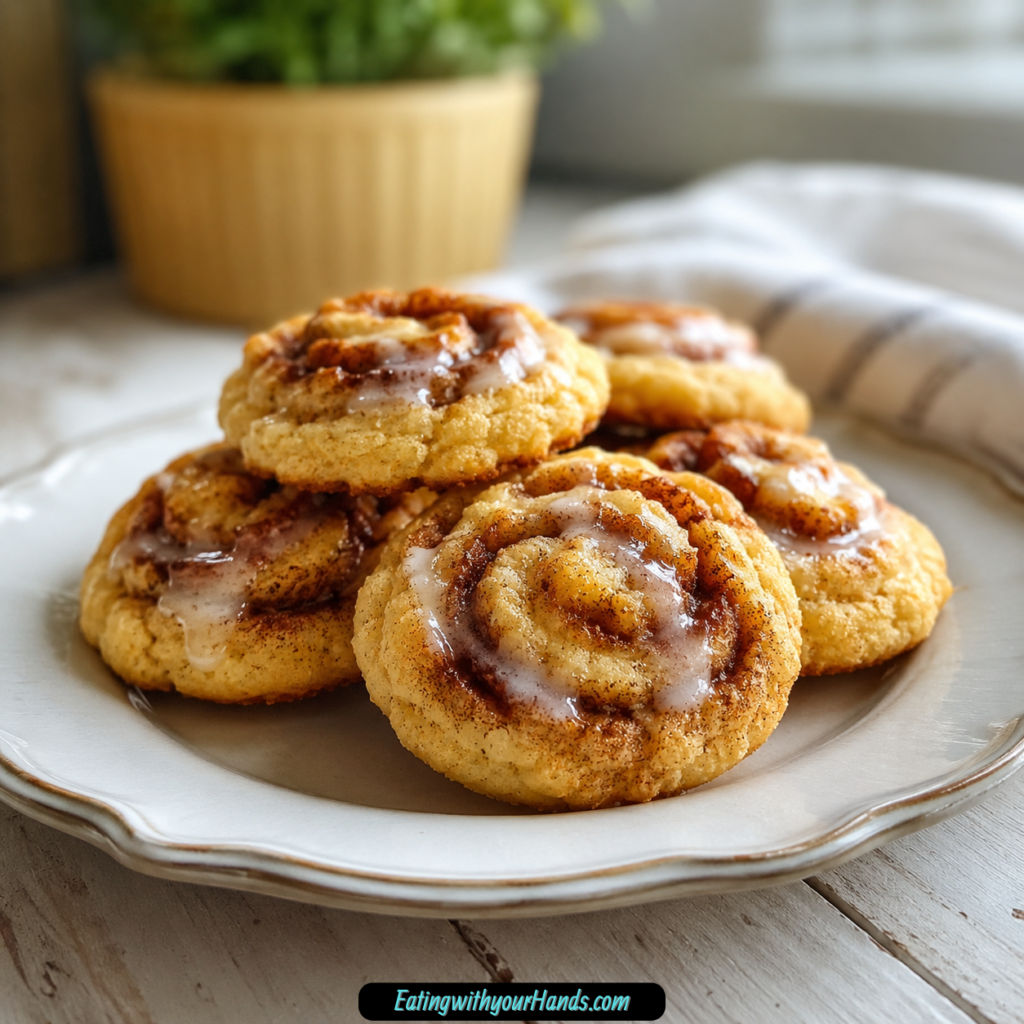
Step 20: Optional Glaze
For a classic cinnamon roll finish, mix ½ cup powdered sugar with 1 to 2 tablespoons milk and a splash of vanilla. Stir until smooth.
Drizzle the glaze over cooled cookies. Do not glaze them while hot, or the glaze may melt too much.
The glaze is optional, but it gives the cookies a bakery-style cinnamon roll look. It also adds extra sweetness.
Serving Tips
These cookies are delicious warm from the oven. The centers are soft, the filling is gooey, and the cinnamon sugar flavor is at its best.
They are also great at room temperature. Once cooled, they firm up enough to pack for lunchboxes, gatherings, or movie-night snacks.
To bring back the fresh-baked feeling, microwave one cookie for 10 seconds. Be careful because the sugar filling can get hot quickly.
Serve them with a cold glass of milk, hot coffee, or tea. The cinnamon flavor pairs especially well with warm drinks.
If serving a platter, add glaze after the cookies cool. This gives them a pretty finished look.
Storage
Let the cookies cool completely before storing. Place them in an airtight container at room temperature.
Add a piece of bread to the container to help keep the cookies soft. The bread helps maintain moisture.
The cookies will stay fresh for up to 5 days at room temperature. Keep the container sealed tightly.
If glazed, let the glaze set before stacking. Place parchment between layers to protect the swirl and topping.
Freezing Baked Cookies
Freeze cooled cookies in a single layer first. Once firm, transfer them to an airtight freezer bag.
Layer parchment paper between cookies to prevent sticking. They can be frozen for up to 3 months.
Thaw at room temperature when ready to eat. You can also microwave one for about 15 seconds to soften it.
Freezing the Dough Log
You can freeze the dough log before slicing. Wrap it tightly so it does not dry out.
When ready to bake, thaw it slightly before cutting. The log should be firm enough to slice but not frozen solid.
Bake as directed once sliced. This gives you fresh cinnamon roll cookies whenever you want them.
Helpful Notes for Best Results
If the dough is too sticky, add 1 tablespoon flour at a time until manageable. The dough should be soft but not gluey.
Do not add too much flour. Too much flour can make the cookies dry and dense.
If the filling leaks during baking, make sure to leave a small border next time. Pinch the seam tightly after rolling the dough into a log.
If the dough cracks while rolling, it may be too cold. Let it sit at room temperature for 5 minutes, then press the cracks back together.
If the cookies spread too much, the butter may have been too soft or the dough may not have chilled enough. Make sure the butter is softened but not melted.
Always chill the dough before slicing. This helps the cookies keep their shape.
Variations
Nutty Cinnamon Roll Cookies
Sprinkle chopped pecans or walnuts over the cinnamon sugar filling before rolling. The nuts add crunch and make the cookies feel extra special.
Press them lightly into the filling so they stay in place. Then roll the dough as directed.
Glazed Cinnamon Roll Cookies
Mix ½ cup powdered sugar with 1 to 2 tablespoons milk and a splash of vanilla. Drizzle over cooled cookies.
This gives the cookies the classic cinnamon roll look. It also adds a sweet finish.
Apple Cinnamon Roll Cookies
Add finely diced apples to the filling. Pat them dry first so they do not add too much moisture.
This variation gives the cookies a fall-inspired apple cinnamon flavor. Keep the pieces small so the log still rolls neatly.
Cardamom Cinnamon Cookies
Add a pinch of cardamom to the dough. It gives the cookies a slightly different warmth.
Use only a small amount. Cardamom can be strong, so a little goes a long way.
Pumpkin Pie Spice Version
Swap half the cinnamon for pumpkin pie spice. This makes the cookies taste a little more autumnal.
The swirl will still feel like cinnamon roll filling, but with a warmer spice blend. This is a simple seasonal twist.
Gluten-Free Version
Use a 1:1 gluten-free baking blend. Make sure it contains xanthan gum for structure.
The texture may be slightly different, but the cookies can still be delicious. Watch the dough texture and baking cues.
Dairy-Free Version
Use vegan butter or coconut oil instead of regular butter. Coconut oil may add a subtle coconut flavor.
The recipe will change slightly in texture depending on the fat used. Keep the dough chilled so it holds its shape.
Less Sweet Version
Reduce the granulated sugar in the dough to ¼ cup. The filling will still keep the cookies sweet.
This option makes the cookie base a little less indulgent. The cinnamon sugar swirl remains the main sweet element.
Troubleshooting
Why Is My Dough Too Sticky?
The dough may be too warm or may need a little more flour. Add 1 tablespoon flour at a time until it becomes manageable.
Chilling also helps. A 30-minute chill makes rolling easier and reduces stickiness.
Why Is My Dough Cracking?
The dough may be too cold. Let it sit at room temperature for about 5 minutes.
If cracks appear while rolling, press them back together gently. The dough is forgiving and does not need to look perfect.
Why Did My Filling Leak Out?
The filling may have been spread too close to the edges. Leave a small border around the dough next time.
Pinch the seam tightly after rolling. A tight seal helps hold the filling inside.
Why Did My Cookies Spread Too Much?
The butter may have been too soft or melted. Use softened butter that is still cool to the touch.
The dough may also need more chilling. Do not skip the 30-minute dough chill or the 15-minute log chill.
Why Are My Cookies Dry?
Too much flour may have been added. Spoon and level the flour instead of scooping directly from the bag.
Overbaking can also dry them out. Bake only until the edges are just golden and the centers still look soft.
Frequently Asked Questions
Can I Freeze These Cookies?
Yes, baked cookies can be frozen in a single layer, then transferred to an airtight bag. They will keep for up to 3 months.
You can also freeze the dough log before slicing. Thaw slightly before cutting and baking.
What If I Don’t Have Brown Sugar for the Filling?
You can use all granulated sugar and add an extra ½ teaspoon cinnamon. The texture will not be quite as chewy, but the cookies will still taste good.
You can also make brown sugar by mixing ½ cup white sugar with 1 tablespoon molasses. This is a closer substitute.
Can I Use Salted Butter Instead of Unsalted?
Yes, salted butter can be used. Reduce the added salt in the dough to ¼ teaspoon.
The cookies may taste slightly saltier, but that can work nicely with the cinnamon sugar filling. Just keep the salt adjustment in mind.
Why Did My Cookies Spread Too Much?
This usually means the butter was too soft or the dough was not chilled enough. Make sure the butter is softened but still cool to the touch.
Do not skip the refrigerator time. Chilling helps the cookies hold their spiral shape.
Can I Add a Glaze?
Yes, a glaze works beautifully. Mix ½ cup powdered sugar with 1 to 2 tablespoons milk and a splash of vanilla, then drizzle over cooled cookies.
This gives the cookies more of a cinnamon roll finish. Let the glaze set before storing.
Can I Make These Gluten-Free?
Yes, use a 1:1 gluten-free baking blend with xanthan gum. The texture may be slightly different.
Keep the dough chilled and watch how it rolls. Gluten-free doughs can vary in feel.
Can I Make Them Dairy-Free?
Yes, use vegan butter or coconut oil instead of regular butter. Coconut oil may add a light coconut flavor.
Keep the dough chilled so it stays easier to roll and slice. The texture may shift slightly depending on the swap.
Why These Cookies Work for Coffee Breaks and Gatherings
Cinnamon Roll Cookies are easy to serve because they are already portioned. Each cookie has the look of a tiny cinnamon roll without the mess of cutting a pan of rolls.
They are also portable once cooled. That makes them good for lunchboxes, office treats, bake sales, and holiday trays.
The cinnamon sugar swirl makes them look special without frosting being required. If you add glaze, they look even more like mini cinnamon rolls.
They are warm and comforting, but not too heavy. One or two cookies can satisfy a sweet craving without feeling like a full breakfast pastry.
They also hold well at room temperature. With proper storage, they stay soft for several days.
Why This Recipe Is Easier Than Classic Cinnamon Rolls
Classic cinnamon rolls usually require yeast, rising time, and more planning. These cookies skip all of that while keeping the cinnamon sugar feeling.
The dough is a cookie dough, not a bread dough. That means it can be mixed, chilled, rolled, sliced, and baked in a much simpler timeline.
You still get the swirl because the dough is rolled into a log. You still get cinnamon sweetness because the filling uses brown sugar and cinnamon.
The texture is different from a fluffy cinnamon roll, but that is the charm. These cookies are soft and chewy, with edges that lightly crisp.
They are the perfect shortcut when you want the flavor of cinnamon rolls in a smaller, snackable form. The result is cozy, easy, and full of cinnamon comfort.
Final Thoughts
Easy Cinnamon Roll Cookies are a sweet little way to bring cinnamon roll comfort into cookie form. With all-purpose flour, baking powder, cinnamon, salt, butter, granulated sugar, brown sugar, egg, vanilla, and a simple brown sugar cinnamon filling, they bake into soft, chewy spirals that smell as good as they taste.
The process is simple but benefits from patience. Chill the dough for 30 minutes, roll it into a 12×8-inch rectangle, add the filling, roll it tightly into a log, chill for 15 minutes, slice into ½-inch cookies, and bake at 350°F (175°C) for 10 to 12 minutes.
Let the cookies rest on the baking sheet for 5 minutes before moving them. This keeps the soft centers intact and helps the cookies finish setting.
Serve them warm, glaze them after cooling, store them with a piece of bread to keep them soft, or freeze them for later. Whether you make them for breakfast-style sweetness, a coffee break, a cookie tray, or a cozy weekend treat, these cinnamon roll cookies deliver all the comfort of cinnamon sugar in a simple, joyful little swirl.
Cinnamon Roll Cookies

These cinnamon roll cookies are soft, chewy, and filled with cozy cinnamon sugar flavor. They take the warm, sweet taste of classic cinnamon rolls and turn it into an easy cookie-style treat. With a buttery cookie dough and a simple brown sugar cinnamon filling, these cookies are perfect for dessert trays, afternoon baking, holiday cookie boxes, or a sweet snack with coffee.
Recipe Details
- Prep Time: 15 minutes
- Cook Time: 12 minutes
- Total Time: 27 minutes
- Course: Cookies, Dessert
- Cuisine: American
- Servings: 24 cookies
Ingredients
For the Filling
- ½ cup brown sugar packed
- 2 teaspoon ground cinnamon
For the Cookies
- 2 cups all-purpose flour
- 1 teaspoon baking powder
- 1 teaspoon ground cinnamon
- ½ teaspoon salt
- ½ cup unsalted butter softened
- ½ cup brown sugar packed
- ½ cup granulated sugar
- 1 large egg
- 2 teaspoon vanilla extract
Instructions
Step 1: Prepare the Baking Sheet
Line a baking sheet with parchment paper. Prepare the oven for baking cookies according to the temperature from your original recipe source, since the provided recipe does not include a specific oven temperature.
Step 2: Mix the Dry Ingredients
In a bowl, whisk together the all-purpose flour, baking powder, ground cinnamon, and salt until evenly combined.
Step 3: Cream the Butter and Sugars
In a separate large bowl, beat the softened unsalted butter, granulated sugar, and packed brown sugar until smooth and creamy.
Step 4: Add the Egg and Vanilla
Mix in the large egg and vanilla extract until fully incorporated.
Step 5: Make the Cookie Dough
Gradually add the dry ingredients to the wet mixture. Mix just until a soft cookie dough forms.
Step 6: Prepare the Cinnamon Sugar Filling
In a small bowl, stir together the packed brown sugar and ground cinnamon until evenly blended.
Step 7: Shape the Cookies
Divide the dough into 24 portions. Add the cinnamon sugar filling to the dough portions, shaping each one so the filling is tucked inside or swirled through the cookie dough.
Place the shaped cookies on the prepared baking sheet with space between each cookie.
Step 8: Bake the Cookies
Bake for 12 minutes, or until the cookies are set around the edges and still soft in the centers.
Step 9: Cool Before Serving
Let the cookies cool briefly on the baking sheet, then transfer them to a wire rack to finish cooling.
Serving Suggestions
- Serve with hot coffee or tea.
- Pair with a glass of cold milk.
- Add to holiday cookie trays.
- Serve with brunch as a sweet baked treat.
- Pack into cookie boxes for gifting.
Storage
How to Store
Store completely cooled cookies in an airtight container at room temperature.
How to Freeze
Place cooled cookies in a freezer-safe airtight container and freeze for longer storage. Thaw before serving.
Best Texture Tip
Do not overbake the cookies. Pull them when the edges are set and the centers are still soft so they stay chewy after cooling.

Fernando is the creator and writer behind the food blog Eating with your Hands. Living and working in cities like Paris, Barcelona, and Berlin, and being married to a Canadian foodie, has given Fernando a passion and interest in food and inspired him to run EWYH.