
A Personal Discovery of the Perfect Keto Snack
There was a moment, one quiet afternoon in late summer, when I found myself yearning for something crunchy—something that could curb the craving for traditional potato chips without steering me off my keto path. I reached into my produce basket and saw a few zucchini waiting patiently for their turn in a recipe. That was the moment I decided to embark on a delicious little experiment. The result? The most incredibly crispy, golden, and flavorful zucchini chips that have since become a staple in my kitchen.
It’s funny how a humble green vegetable can surprise you. Zucchini, often relegated to a side dish or a low-carb noodle replacement, transformed into a chip with just the right amount of crunch. But it wasn’t an overnight success. Over time, I tested, failed, adjusted, and eventually perfected my method. Today, I want to walk you through not just the recipe, but the entire journey—from idea to crispy bite.
Table of Contents
Why Zucchini?
Zucchini is one of those rare vegetables that checks every box for keto living. It’s low in carbs, high in water, versatile, and quick-cooking. But more than that, it’s a blank canvas—ready to absorb any seasoning you throw at it. Whether you’re after something smoky, tangy, or savory, zucchini can deliver. It’s precisely this chameleon-like quality that makes zucchini ideal for chip-making.
In my kitchen, I’ve shredded it for muffins, spiraled it into noodles, layered it in lasagna, and even baked it into breads. Yet nothing quite hits the spot like zucchini sliced paper-thin and transformed into a crispy, salty snack. That’s what makes this recipe so magical—it turns something ordinary into something exceptional.
Choosing the Right Zucchini
Before we even slice, we have to talk about selection. Choose zucchinis that are firm, unblemished, and medium-sized. Larger zucchinis tend to have more seeds and retain more water, which can affect texture. Too small, and you’ll spend a long time slicing.
Look for ones that feel heavy for their size, with glossy skin and a vibrant green hue. I’ve found that organic zucchinis, when available, offer a slightly richer flavor and a better texture once baked.
Tools You’ll Need
To achieve that irresistible crispiness, slicing is key. You’ll want your slices as uniform as possible, no more than 1/8-inch thick.
- Mandolin slicer: This is my go-to. It ensures consistent thickness and saves time.
- Food processor with slicing attachment: If you have one, this is a great alternative.
- Sharp knife (not recommended): Only if you have no other option. It’s difficult to maintain consistency manually.
Consistency is crucial. If your slices vary in thickness, some may burn while others remain chewy.
The Secret to Crispy Chips: Moisture Control
Zucchini is over 90% water. If you toss your slices directly into the oven or air fryer without addressing this, you’ll likely end up with soggy disappointment. The secret is in the prep.
Step 1: Salt and Drain
Lightly salt your zucchini slices and layer them in a colander. Salt draws out excess moisture, setting you up for crisp success. Allow them to sit for about an hour. You’ll be surprised at how much water is released.
Step 2: Pat Dry
After draining, transfer the slices onto a clean tea towel. Cover with another towel and gently press to absorb residual moisture. Don’t skip this step—it makes a world of difference in the final texture.

The Three Methods: Oven, Air Fryer, Dehydrator
Each method has its charm, and I’ve experimented with all three. Let me guide you through the pros and cons of each.
Oven Baked (My Favorite)
This method is the most practical, especially if you want to make a large batch.
Directions
- Preheat your oven to 225°F (about 107°C). Low and slow is the name of the game.
- Line baking sheets with parchment paper. Avoid silicone mats—they trap moisture.
- Arrange slices in a single layer.
- Lightly grease the tops with avocado or coconut oil.
- Season gently. As chips shrink, seasoning intensifies.
- Bake for 60-90 minutes. Check around the 50-minute mark. You’re looking for golden edges and a dry, crisp feel.
Pros: Great for large batches, consistent results
Cons: Takes longer
Air Fryer (Fastest Option)
When you want zucchini chips and you want them now, this is your method.
Directions
- Preheat air fryer to 350°F (about 175°C).
- Arrange slices in a single layer—don’t overcrowd.
- Air fry for 8-10 minutes. Flip halfway through for even crisping.
Pros: Fastest method, ultra-crispy
Cons: Limited capacity, needs constant attention
Dehydrator (Best for Purists)
This method is for the patient soul who prefers the slow rhythm of food preparation.
Directions
- Set dehydrator to 135°F (about 57°C).
- Lay slices in single layers on trays.
- Dehydrate for 8-12 hours. Yes, you read that right.
Pros: Maximum crispiness without burning
Cons: Time-consuming, requires equipment
Flavor Inspirations
This is where things get exciting. Seasoning transforms your chips from basic to brilliant. Here are my personal favorites:
- Smoked Paprika: Adds a savory, smoky flavor reminiscent of Canadian ketchup chips.
- Garlic & Herb: Use a blend of garlic powder, oregano, and thyme.
- Sour Cream & Onion: Look for keto-friendly seasoning shakers for this nostalgic flavor.
- Ranch or Dill Pickle: Both add tang and depth.
When seasoning, remember: less is more. Because the chips shrink, the flavors intensify.
Storage Tips
Once your chips have cooled completely, store them in an airtight container. Add a small silica packet or a piece of paper towel to absorb residual moisture. They’ll stay crisp for several days—though in my house, they rarely last that long.
Avoid storing them warm or in humid conditions. Moisture is the enemy of crispiness.
The First Bite: A Moment of Keto Joy
I’ll never forget the first time I bit into one of my perfectly crisped zucchini chips. It cracked gently between my teeth, releasing that lightly salty, smoky essence. The flavor reminded me of childhood snack sessions but without the carb crash. It was, in a word, delightful.
And while I’ve tried dozens of keto snacks over the years, nothing quite satisfies like these zucchini chips. They’re more than a snack—they’re a reminder that keto doesn’t mean giving up pleasure. It simply means rediscovering it, in new, healthier forms.
Final Thoughts
If you’ve been searching for a snack that’s crunchy, flavorful, low-carb, and endlessly customizable, these zucchini chips are calling your name. The process is meditative, the result is delicious, and the reward is a chip that doesn’t derail your progress.
So the next time you spot a few zucchinis in your fridge and wonder what to do with them, consider turning them into something extraordinary. And as you savor each bite, know that you’ve created more than just a snack—you’ve crafted a keto-friendly comfort food with heart and soul.
Let this be the beginning of many delicious adventures in your kitchen. Happy snacking!
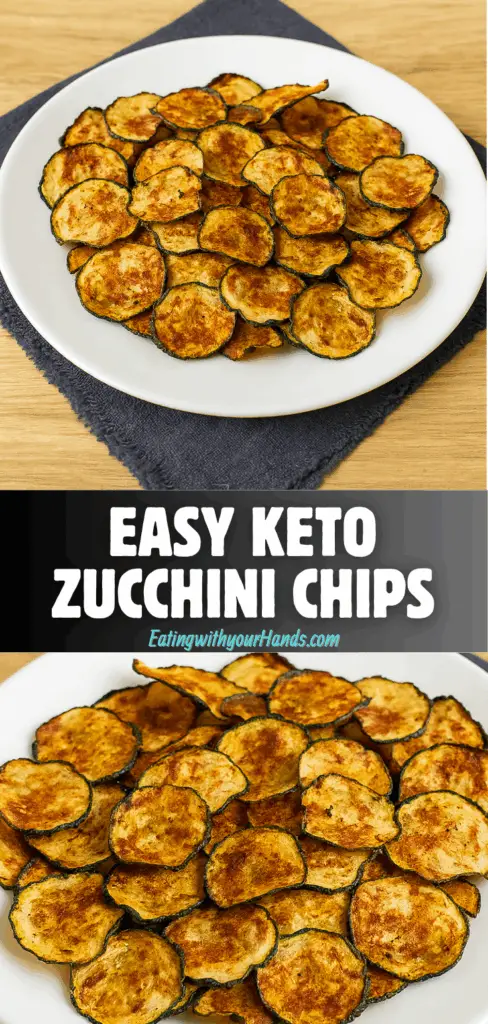
Baked Zucchini Chips RECIPE
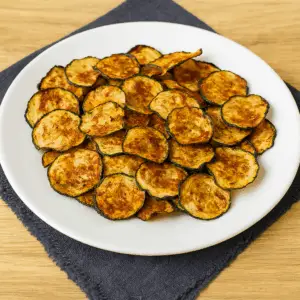
This oven-baked zucchini chips recipe is a great way to enjoy a crunchy, low-carb snack without sacrificing flavor. Whether you’re following a keto lifestyle or just want a healthier alternative to potato chips, these crispy zucchini slices are sure to hit the spot. You can make them in the oven, air fryer, or dehydrator—whichever suits your kitchen setup best.
Servings: 2
Prep Time: 20 minutes
Cook Time: 1 hour 30 minutes
Total Time: 1 hour 50 minutes
Ingredients
- 1 large zucchini (approximately 350 g)
- 1/2 teaspoon salt, divided
- Avocado oil spray (or 1 to 2 teaspoons of your preferred liquid oil)
- 1 teaspoon smoked paprika
- 1/4 teaspoon ground black pepper
- Additional salt to taste
Instructions
- Slice the zucchini into thin, even rounds—about 1/8 inch thick. Using a mandoline or food processor is highly recommended for consistency.
- Layer the zucchini slices in a colander or fine mesh sieve, sprinkling a pinch of salt between each layer. Use about 1/4 teaspoon of the total salt. Let them rest and drain for one hour to help reduce moisture.
- Preheat your oven to 225°F (about 110°C). Line two baking sheets with parchment paper.
- After draining, lay the zucchini rounds out on a clean kitchen towel and gently press another towel over the top to dry them as much as possible.
- Transfer the slices to the prepared baking sheets, placing them close together but without overlapping. Lightly spray or brush them with avocado oil or another liquid oil.
- Mix the smoked paprika, ground pepper, and remaining salt in a small bowl or spice shaker. Sprinkle this seasoning mix evenly over the zucchini slices.
- Bake for 70 to 90 minutes, rotating the pans halfway through cooking. Keep an eye on them—if any chips become crispy before the others, remove those and let the rest continue baking until they’re golden and crisp.
- Once done, sprinkle with a bit more salt if needed and serve right away.
Storage
Keep leftover chips in an airtight container at room temperature for up to three days. If they lose their crunch, you can restore their crispiness by reheating them in a low-temperature oven.
Nutrition Information (per serving)
- Calories: 70
- Carbohydrates: 5.6g
- Fiber: 2g
- Net Carbs: 3.6g
- Protein: 2g
- Fat: 4.7g

Fernando is the creator and writer behind the food blog Eating with your Hands. Living and working in cities like Paris, Barcelona, and Berlin, and being married to a Canadian foodie, has given Fernando a passion and interest in food and inspired him to run EWYH.