
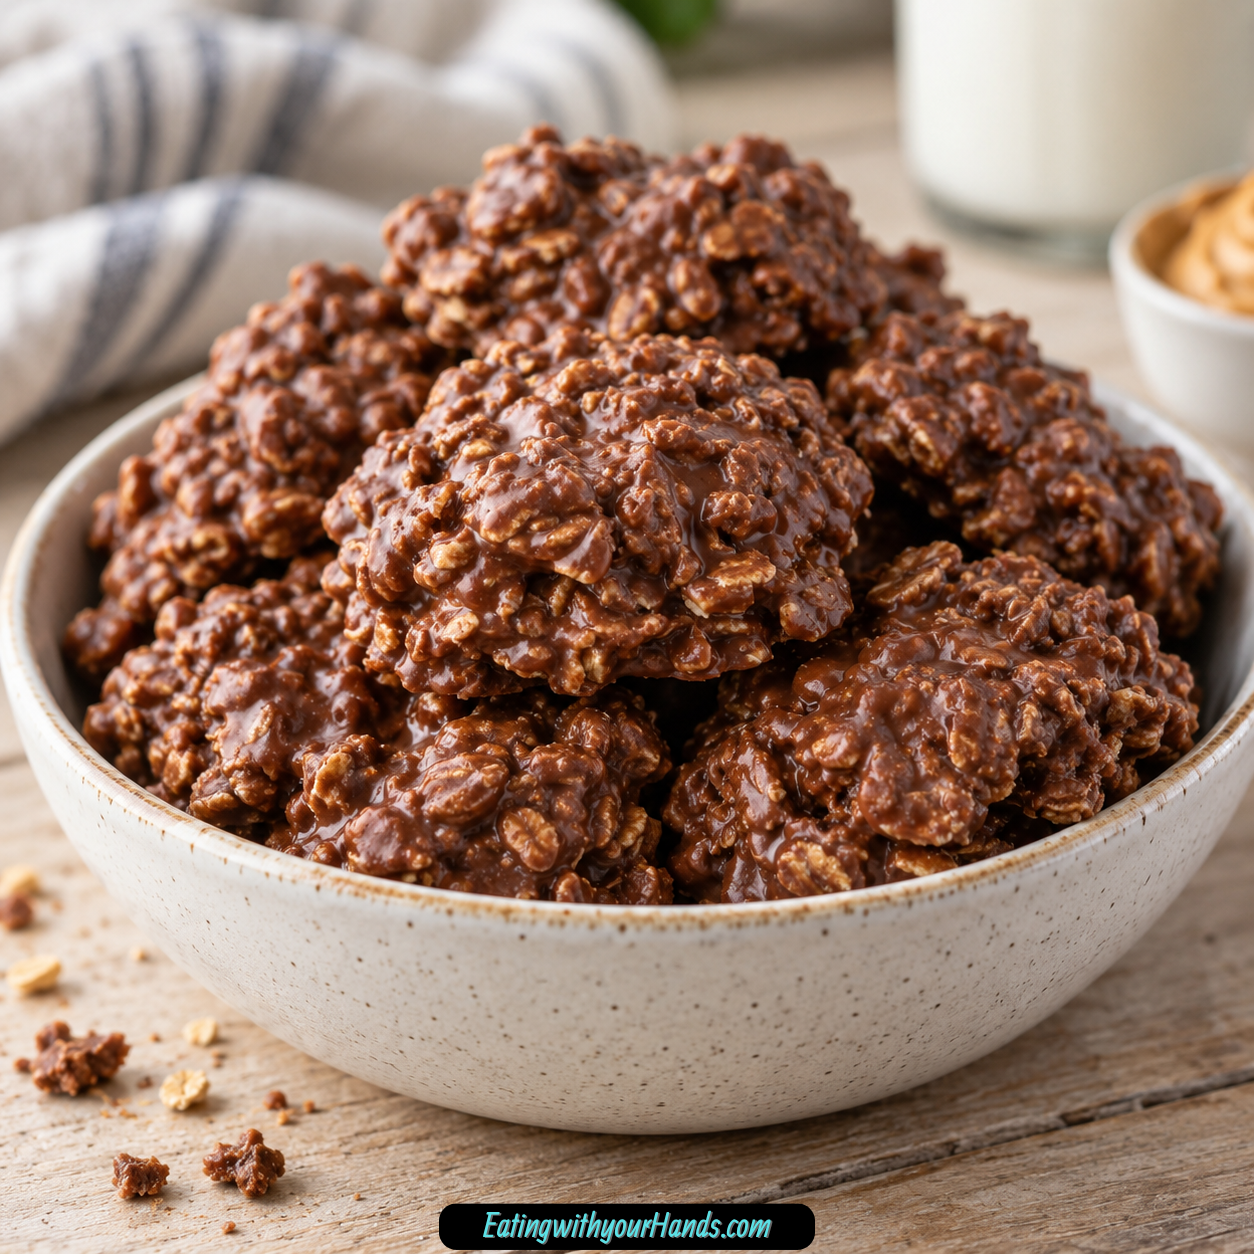
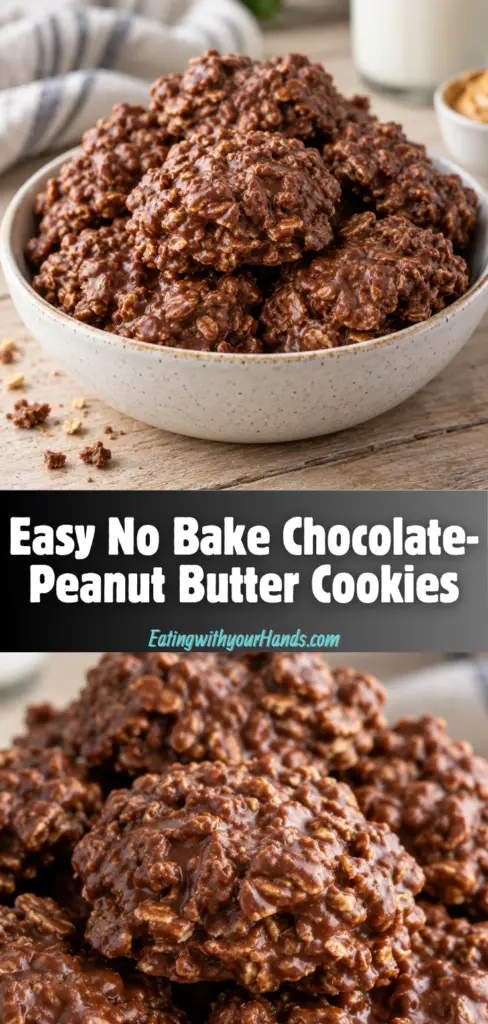
Easy No Bake Chocolate-Peanut Butter Cookies are the kind of sweet little comfort treat that makes dessert feel possible even on the busiest day. They are rich, chewy, chocolatey, peanut buttery, and made without turning on the oven, which is exactly why they feel so wonderfully dependable.
These cookies begin on the stovetop with butter, sugar, milk, and cocoa powder. Once that mixture reaches a rolling boil and cooks for one full minute, it becomes the fudgy chocolate base that helps the cookies set.
Then the peanut butter and vanilla melt into the hot chocolate mixture, turning it smooth, glossy, and deeply fragrant. When that warm mixture is poured over quick oats, every oat becomes coated in chocolate-peanut butter richness.
There is something nostalgic about no-bake cookies. They feel like the kind of treat someone makes when the craving is urgent, the pantry is simple, and everyone is waiting impatiently near the counter.
The texture is soft, chewy, and satisfying. Quick cook oats give the cookies structure, while peanut butter and cocoa make every bite taste like a classic chocolate-peanut butter dessert.
These cookies are especially helpful during warm weather because no oven is required. They are also perfect for busy weeks, lunchbox treats, make-ahead snacks, and quick desserts when you want something sweet without a long baking session.
They are ready in about 20 minutes from start to finish. The only waiting is the cooling time, when the little mounds firm up on wax paper and become ready to lift, store, and enjoy.
Easy No Bake Chocolate-Peanut Butter Cookies are simple, freezer-friendly, kid-loved, adult-loved, and made with familiar ingredients. They are the kind of recipe worth keeping close because they deliver comfort quickly and never feel fussy.
Table of Contents
- Why You’ll Love These Easy No Bake Chocolate-Peanut Butter Cookies
- Recipe Details
- Ingredients
- For the No-Bake Cookies
- Ingredient Notes
- Optional Swaps, Variations, Add-Ins, and Serving Ideas
- Creamy Peanut Butter Cookies
- Crunchy Peanut Butter Cookies
- Dairy-Free No-Bake Cookies
- Espresso Chocolate Peanut Butter Cookies
- Firmer Chilled Cookies
- Softer Room-Temperature Cookies
- Cold Milk Pairing
- Coffee Pairing
- Lunchbox Treat
- Make-Ahead Dessert
- Freezer Treat
- Why This Recipe Works
- Directions
- Step 1: Prepare the Oats
- Step 2: Line the Baking Sheet
- Step 3: Add the Chocolate Base Ingredients to the Saucepan
- Step 4: Whisk Until Melted and Smooth
- Step 5: Bring to a Rolling Boil
- Step 6: Boil for One Full Minute
- Step 7: Remove from Heat
- Step 8: Add Peanut Butter and Vanilla
- Step 9: Pour Over the Oats
- Step 10: Stir Until Evenly Coated
- Step 11: Scoop the Cookies
- Step 12: Let the Cookies Set
- Step 13: Refrigerate for Storage
- Step 14: Serve and Enjoy
- Step 15: Freeze for Longer Storage
- Serving Ideas
- Storage
- Freezing
- Make-Ahead
- Helpful Notes for Best Results
- Variations
- Troubleshooting
- Frequently Asked Questions
- Why This Recipe Works So Well
- Final Thoughts
- Chocolate Peanut Butter No Bake Cookies
Why You’ll Love These Easy No Bake Chocolate-Peanut Butter Cookies
These cookies do not require an oven. That makes them perfect for warm days or any time you want dessert without baking.
They are ready in about 20 minutes from start to finish. The process is quick, simple, and easy to fit into a busy day.
They have rich chocolate and peanut butter flavor. Cocoa powder and peanut butter create that classic combination in every bite.
They have a chewy, satisfying texture from quick oats. The oats help the cookies hold together and give them their familiar no-bake bite.
They are great for make-ahead storage. The cookies keep well in the refrigerator and freeze beautifully.
They are loved by kids and adults alike. The sweet chocolate-peanut butter flavor makes them an easy crowd-pleaser.
Recipe Details
Easy No Bake Chocolate-Peanut Butter Cookies are made on the stovetop. No oven is needed for this recipe.
The total time is about 20 minutes from start to finish. The cookies cool at room temperature until firm to the touch.
The recipe starts by mixing 3 cups quick cook oats with ¼ teaspoon salt in a large mixing bowl. This step keeps the oats ready for the hot chocolate mixture.
The chocolate base is made with 1 stick butter, 1⅔ cups sugar, ½ cup milk, and ¼ cup unsweetened cocoa powder. These ingredients are whisked together in a small saucepan over medium-high heat.
The mixture is stirred continuously until the butter melts and everything is well combined. Then it is brought to a rolling boil.
The rolling boil should last about one full minute. This timing matters because it helps the cookies set properly.
After one minute, the saucepan is removed from the heat immediately. Then 1 cup peanut butter and 2 teaspoons vanilla extract are whisked in while the mixture is still hot.
The hot chocolate-peanut butter mixture is poured over the oats. Everything is stirred thoroughly until every oat is coated evenly.
The cookies are dropped in mounds onto a wax paper-lined baking sheet. A medium cookie scoop or spoon can be used.
The mixture starts to firm as it cools, so it is best to work quickly. Once the cookies are firm to the touch, they can be moved to the refrigerator for storage.
Ingredients
For the No-Bake Cookies
- 1 stick butter – Adds richness and helps the cookies set
- 1⅔ cups sugar – Sweetens and creates the fudgy base
- ½ cup milk – Helps dissolve the sugar and cocoa smoothly
- ¼ cup cocoa powder – Use unsweetened for deep chocolate flavor
- 1 cup peanut butter – Creamy works best for smooth texture
- 2 teaspoons vanilla extract – Enhances the chocolate flavor
- 3 cups quick cook oats – Essential for structure and chew
- ¼ teaspoon salt – Balances the sweetness
Ingredient Notes
Butter adds richness and helps the cookies set. It melts into the sugar, milk, and cocoa to create the stovetop base.
Sugar sweetens the cookies and helps create the fudgy texture. Reducing it slightly is possible, but too little sugar may affect how well the cookies set.
Milk helps dissolve the sugar and cocoa smoothly. It brings moisture to the chocolate base.
Unsweetened cocoa powder gives the cookies deep chocolate flavor. It works with the peanut butter and sugar to create the classic no-bake taste.
Peanut butter adds flavor, richness, and structure. Creamy peanut butter gives the smoothest result.
Crunchy peanut butter can also be used if you like texture. It will make the cookies a little more textured than the creamy version.
Vanilla extract enhances the chocolate flavor. It should be whisked in after the saucepan comes off the heat.
Quick cook oats are essential for structure and chew. Old-fashioned oats do not bind as well and can cause crumbly cookies.
Salt balances the sweetness. It keeps the chocolate and peanut butter from tasting flat.
Optional Swaps, Variations, Add-Ins, and Serving Ideas
Creamy Peanut Butter Cookies
Use creamy peanut butter for the smoothest texture. This is the best choice if you want classic no-bake cookies.
The peanut butter melts easily into the hot chocolate mixture. It makes the cookies smooth, rich, and familiar.
Crunchy Peanut Butter Cookies
Use crunchy peanut butter if you like texture. It adds small peanut pieces throughout the cookies.
The cookies will not be as smooth as the creamy version. They will have a little more bite and crunch.
Dairy-Free No-Bake Cookies
Use plant-based butter and milk for a dairy-free version. This keeps the recipe oven-free and simple.
The texture may vary depending on the products used. Watch the setting time and chill if needed.
Espresso Chocolate Peanut Butter Cookies
Add a pinch of espresso powder for a flavor boost. It deepens the chocolate flavor beautifully.
Use only a pinch so the chocolate remains the main flavor. The peanut butter should still shine through.
Firmer Chilled Cookies
Keep the cookies chilled if you prefer a firmer texture. The refrigerator helps them hold their shape.
This is especially helpful on warm or humid days. Chilled cookies are also easy to pack and store.
Softer Room-Temperature Cookies
Serve the cookies at room temperature if you prefer a softer bite. They should still be fully set before serving.
Room-temperature cookies feel chewy and fudgy. Store them properly after they set.
Cold Milk Pairing
Serve these cookies with a cold glass of milk. The milk balances the richness of the chocolate and peanut butter.
This is a classic pairing for kids and adults. It makes the cookies feel extra comforting.
Coffee Pairing
Pair the cookies with a hot cup of coffee. Coffee works well with chocolate and peanut butter.
This is a great option for an afternoon snack. It also makes the cookies feel a little more grown-up.
Lunchbox Treat
Pack one cookie as a sweet lunchbox treat. The cookies are easy to portion once they are fully set.
Keep them chilled if you want them firmer. Use parchment between layers if packing several.
Make-Ahead Dessert
Make the cookies ahead for busy weeks. They store well in the refrigerator and can also be frozen.
This makes them easy to keep ready for sudden chocolate cravings. They are quick, simple, and dependable.
Freezer Treat
Freeze the cookies for longer storage. Place parchment between layers so they do not stick together.
Frozen cookies are helpful when you want dessert ready for later. Thaw as needed before serving.
Why This Recipe Works
Easy No Bake Chocolate-Peanut Butter Cookies work because the stovetop mixture creates the structure. Butter, sugar, milk, and cocoa powder cook together into a fudgy base.
The rolling boil is the most important step. Boiling for about one full minute helps the cookies set correctly.
Peanut butter and vanilla are added after the pan comes off the heat. The hot mixture melts the peanut butter into a smooth, glossy chocolate base.
Quick oats are the right oat for these cookies. They bind better than old-fashioned oats and create the classic chewy texture.
Salt balances the sweetness. It helps the cookies taste rich instead of overly sugary.
Wax paper gives the cookies a place to set without sticking. A baking sheet makes it easy to move the whole batch if needed.
The recipe also works because it is quick and practical. In about 20 minutes, you can make a tray of chocolate-peanut butter cookies without turning on the oven.
Directions
Step 1: Prepare the Oats
In a large mixing bowl, stir together 3 cups quick cook oats and ¼ teaspoon salt. Set the bowl aside.
This step makes sure the oats are ready when the hot chocolate mixture is done. Once the stovetop mixture is cooked, the process moves quickly.
Step 2: Line the Baking Sheet
Line a baking sheet with wax paper. This gives the cookies a nonstick surface for cooling and setting.
Place the lined baking sheet near your work area. You will need it right after mixing the oats with the chocolate-peanut butter base.
Step 3: Add the Chocolate Base Ingredients to the Saucepan
In a small saucepan, combine 1 stick butter, 1⅔ cups sugar, ½ cup milk, and ¼ cup unsweetened cocoa powder. Place the saucepan over medium-high heat.
These ingredients create the fudgy base. The milk helps dissolve the sugar and cocoa smoothly.
Step 4: Whisk Until Melted and Smooth
Whisk the mixture continuously as it heats. Keep stirring until the butter melts and everything is well combined.
The mixture should become smooth and chocolatey. Do not leave it unattended while it heats.
Step 5: Bring to a Rolling Boil
Continue heating until the mixture reaches a rolling boil. A rolling boil means the bubbling continues even as the mixture is active and hot.
This stage is important for setting the cookies. Watch closely so you can time the boil correctly.
Step 6: Boil for One Full Minute
Let the mixture boil for about one full minute. This is the key timing for proper setting.
Boiling too long can make the cookies dry. Not boiling long enough can make them too soft.
Step 7: Remove from Heat
As soon as the minute is up, remove the saucepan from the heat. Do not keep boiling the mixture.
This helps protect the texture. The chocolate base should be hot enough to melt the peanut butter smoothly.
Step 8: Add Peanut Butter and Vanilla
Whisk in 1 cup peanut butter and 2 teaspoons vanilla extract while the mixture is still hot. Stir until smooth, glossy, and completely combined.
Creamy peanut butter gives the smoothest result. Crunchy peanut butter can be used if you like texture.
Step 9: Pour Over the Oats
Pour the hot chocolate-peanut butter mixture over the prepared oats and salt. Scrape the saucepan so all the mixture goes into the bowl.
The heat begins coating the oats right away. Work carefully but quickly.
Step 10: Stir Until Evenly Coated
Stir thoroughly until every oat is coated evenly. The mixture should look thick, chocolatey, and fully combined.
Do not leave dry patches of oats in the bowl. Even coating helps the cookies hold together.
Step 11: Scoop the Cookies
Using a medium cookie scoop or spoon, drop mounds of the mixture onto the wax paper-lined baking sheet. Keep the portions similar in size.
Work quickly because the mixture begins to firm as it cools. Shape the mounds as neatly as you like.
Step 12: Let the Cookies Set
Let the cookies cool at room temperature until firm to the touch. The setting time may vary depending on the room.
On very humid days, the cookies may take longer to set. Refrigeration helps if they need extra firmness.
Step 13: Refrigerate for Storage
Once the cookies are fully set, transfer them to the refrigerator for storage. Place them in an airtight container.
The refrigerator helps them last longer and stay firmer. This is the best storage method for texture and freshness.
Step 14: Serve and Enjoy
Serve the cookies straight from the fridge or at room temperature. They are delicious either way.
Enjoy them as an easy dessert, afternoon snack, or sweet lunchbox treat. They pair wonderfully with milk or coffee.
Step 15: Freeze for Longer Storage
For longer storage, place the cookies in a freezer-safe container. Use parchment paper between layers to prevent sticking.
Freeze for up to 3 months. Thaw as needed and enjoy when you want a quick chocolate-peanut butter treat.
Serving Ideas
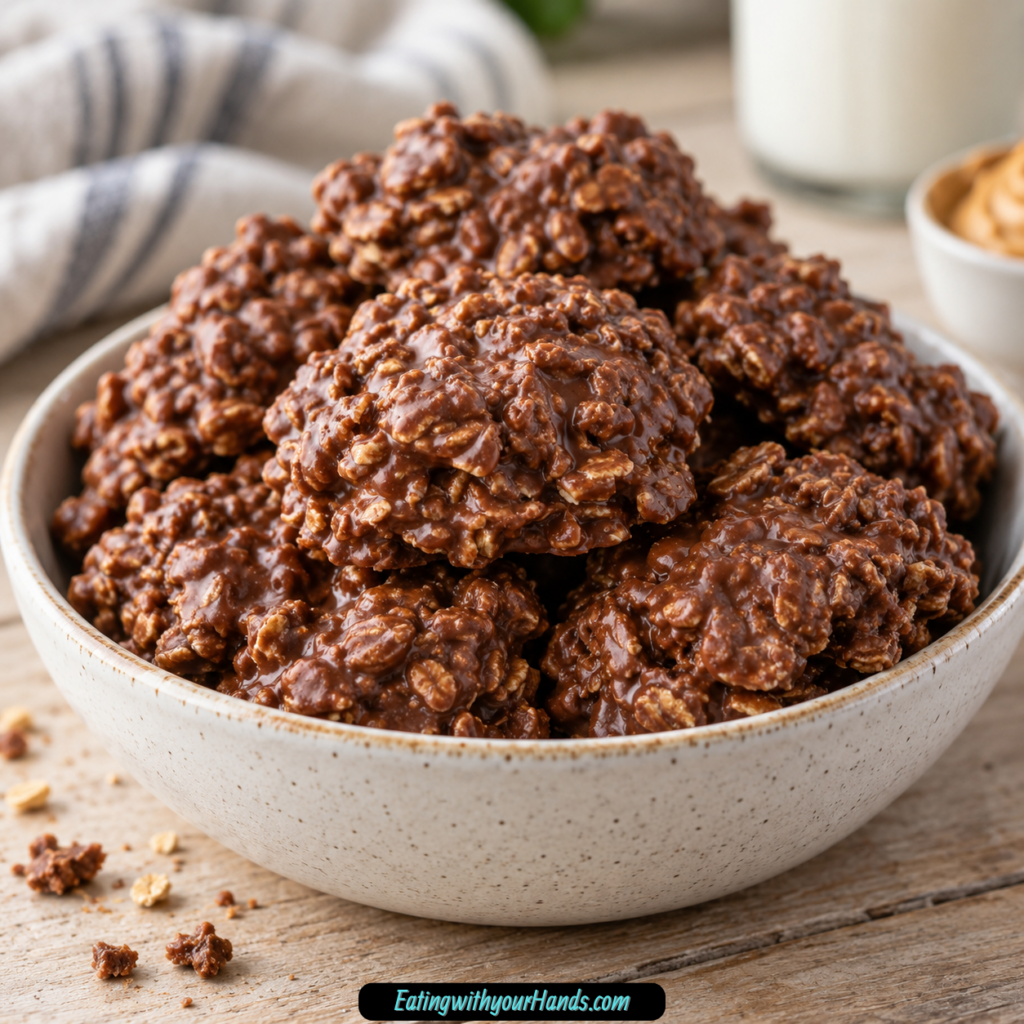
Easy No Bake Chocolate-Peanut Butter Cookies are delicious straight from the refrigerator. Chilled cookies have a firmer texture and hold their shape well.
They are also good at room temperature. This gives them a slightly softer, fudgier bite.
Serve them as an easy dessert after dinner. They are sweet, rich, and satisfying without needing an oven.
They also work as an afternoon snack. One cookie with a drink can feel like a quick little treat.
A cold glass of milk pairs wonderfully with these cookies. Milk balances the chocolate and peanut butter richness.
A hot cup of coffee also works beautifully. The coffee brings out the deep chocolate flavor.
These cookies can be packed as a lunchbox treat once fully set. Keep them firm and separated if needed.
They are also great for make-ahead dessert trays. Store them chilled until ready to serve.
Storage
Store Easy No Bake Chocolate-Peanut Butter Cookies in an airtight container in the refrigerator. They will keep for up to 7 days.
Refrigeration helps them last longer. It also keeps the cookies firmer.
Make sure the cookies are fully set before storing. This helps them hold their shape.
If stacking, place parchment paper between layers. This prevents the cookies from sticking together.
You can serve the cookies cold or let them sit briefly at room temperature. Choose the texture you prefer.
Freezing
These cookies freeze beautifully. Place them in a freezer-safe container with parchment paper between layers.
Freeze for up to 3 months. This makes them a helpful make-ahead treat.
When ready to enjoy, remove only the amount you need. Let them thaw before serving if desired.
Freezing is especially useful when you want quick desserts ready ahead of time. The cookies are easy to portion and store.
Make-Ahead
Easy No Bake Chocolate-Peanut Butter Cookies are a great make-ahead treat. They store well in the refrigerator and freezer.
For short-term storage, keep them in an airtight container in the refrigerator for up to 7 days. This keeps them fresh and firm.
For longer storage, freeze them for up to 3 months. Use parchment between layers so the cookies do not stick.
These cookies are helpful for busy weeks, warm-weather desserts, lunchbox treats, and quick chocolate cravings. Make a batch ahead and enjoy them as needed.
Helpful Notes for Best Results
Boil timing matters. Boiling too long can make the cookies dry, while not boiling long enough can make them too soft.
One full minute is the sweet spot. Start timing once the mixture reaches a rolling boil.
Use quick oats. Old-fashioned oats do not bind as well and can cause crumbly cookies.
Creamy peanut butter gives the smoothest result. Crunchy peanut butter works if you like texture.
On very humid days, cookies may take longer to set. Refrigeration helps them firm up.
A pinch of espresso powder can deepen the chocolate flavor beautifully. Use it as an optional flavor boost.
The mixture begins to firm as it cools. Work quickly when dropping the cookie mounds onto wax paper.
Do not reduce the sugar too much. A slight reduction may work, but too little sugar can affect how well the cookies set.
Variations
Creamy Peanut Butter No-Bake Cookies
Use creamy peanut butter for the smoothest cookie texture. It melts easily into the hot chocolate base.
This version gives the classic no-bake cookie feel. The finished cookies are chewy, soft, and smooth.
Crunchy Peanut Butter No-Bake Cookies
Use crunchy peanut butter if you enjoy extra texture. It adds small peanut pieces to the cookies.
The cookies will have more bite. They still set the same way when the boil timing is right.
Dairy-Free Chocolate Peanut Butter Cookies
Use plant-based butter and plant-based milk. This makes the cookies dairy-free.
The texture may vary depending on the products used. Chill the cookies if they need help setting.
Espresso Chocolate No-Bake Cookies
Add a pinch of espresso powder to deepen the chocolate flavor. It makes the cocoa taste richer.
Use only a small pinch. The cookies should still taste like chocolate and peanut butter.
Firmer Refrigerator Cookies
Store the cookies in the refrigerator if you prefer them firm. Chilling helps the texture stay set.
This is especially useful on warm or humid days. The cookies stay easier to handle.
Softer Room-Temperature Cookies
Serve the cookies at room temperature for a softer texture. Let them set fully first.
This version feels more fudgy. It is perfect when you want a tender bite.
Slightly Less Sweet Cookies
You can slightly reduce the sugar. Do not reduce it too much, because sugar helps the cookies set.
The texture depends on the balance of ingredients. Keep the setting step in mind.
Extra Chocolate Flavor Cookies
Add a pinch of espresso powder for extra chocolate depth. This boosts the cocoa flavor.
The cookies will still be chocolate-peanut butter cookies. The espresso powder simply makes the chocolate taste deeper.
Troubleshooting
The Cookies Did Not Set
The mixture may not have boiled long enough. It needs to boil for about one full minute.
Too much liquid can also make the cookies too soft. Refrigeration can help firm them if needed.
The Cookies Are Dry
The chocolate mixture may have boiled too long. Boiling too long can make no-bake cookies dry.
Time the rolling boil carefully. One full minute is the sweet spot.
The Cookies Are Crumbly
Old-fashioned oats may not bind as well as quick oats. Quick cook oats are best for proper binding and classic texture.
Make sure every oat is coated evenly. Dry oats can make the cookies fall apart.
The Cookies Are Too Soft
They may need more time to set. Humidity can make setting take longer.
Move them to the refrigerator to help them firm. Keep them chilled if you prefer a firmer texture.
The Cookies Are Too Firm
The mixture may have boiled too long. Next time, remove it from the heat after one full minute.
A shorter boil helps keep the cookies chewy. Watch the timing closely.
The Chocolate Mixture Looks Grainy
Make sure the sugar, milk, butter, and cocoa are whisked well while heating. Stir continuously until combined.
Bring it to a proper rolling boil. Then boil for one full minute and remove from heat.
The Peanut Butter Is Not Mixing Smoothly
Add peanut butter while the chocolate mixture is still hot. The heat helps it melt smoothly.
Whisk until glossy and completely combined. Creamy peanut butter gives the smoothest result.
The Cookies Stick to the Surface
Use wax paper on the baking sheet. This helps the cookies release once set.
Let them firm completely before lifting. If needed, chill them first.
The Cookies Stick Together in Storage
Place parchment paper between layers. This prevents sticking in the refrigerator or freezer.
Make sure the cookies are fully set before stacking. Store them in an airtight container.
The Cookies Need to Be Dairy-Free
Use plant-based butter and milk. This creates a dairy-free version.
The setting may vary slightly. Refrigerate if needed to help them firm.
Frequently Asked Questions
They may not have boiled long enough. The chocolate base needs to reach a rolling boil and cook for about one full minute.
The mixture may also have too much liquid. Refrigerating the cookies can help if they are too soft.
Can I use old-fashioned oats instead of quick oats?
Quick oats are best for proper binding and classic texture. Old-fashioned oats do not bind as well.
Using old-fashioned oats can make the cookies crumbly. Quick cook oats are essential for structure and chew.
They can set at room temperature. However, they last longer and stay firmer when refrigerated.
Once fully set, transfer them to the refrigerator for storage. Keep them in an airtight container.
Can I make these dairy-free?
Yes, substitute plant-based butter and milk. This creates a dairy-free version.
The texture may vary depending on the products used. Chill the cookies if they need help setting.
Can I reduce the sugar?
You can slightly reduce the sugar. However, too little sugar may affect how well the cookies set.
The sugar helps create the fudgy base. Keep the balance in mind if adjusting.
Can I use crunchy peanut butter?
Yes, crunchy peanut butter works if you like texture. Creamy peanut butter gives the smoothest result.
Crunchy peanut butter adds small peanut pieces. The cookies will have a little extra bite.
Store the cookies in an airtight container in the refrigerator for up to 7 days. They stay firmer when chilled.
For longer storage, freeze them for up to 3 months. Use parchment between layers.
Serve them with a cold glass of milk or a hot cup of coffee. Both pair wonderfully with the chocolate and peanut butter flavor.
They also work as an easy dessert, afternoon snack, or sweet lunchbox treat. Serve chilled or at room temperature.
Why This Recipe Works So Well
Easy No Bake Chocolate-Peanut Butter Cookies work so well because they rely on one simple but important stovetop method. Butter, sugar, milk, and cocoa powder are cooked into a chocolate base that helps the cookies set.
The one-minute boil matters more than anything else. Too little boiling can leave the cookies too soft, while too much can make them dry.
Peanut butter melts into the hot chocolate base and gives the cookies flavor, richness, and body. Creamy peanut butter makes the texture smoother, while crunchy peanut butter adds texture.
Vanilla extract enhances the chocolate flavor. It makes the cookies taste more rounded.
Quick oats create the chewy structure. They absorb the chocolate-peanut butter mixture and bind the cookies together.
Salt balances all the sweetness. Without it, the cookies can taste too sugary.
The wax paper-lined baking sheet gives the cookies a clean place to set. Dropping the mixture quickly helps shape them before they firm.
The recipe also works because it is practical. No oven, about 20 minutes, familiar ingredients, easy storage, and freezer-friendly results make it a dependable treat.
Most of all, these cookies work because they taste like comfort. They are chocolatey, peanut buttery, chewy, fudgy, and simple enough to make whenever a sweet craving hits.
Final Thoughts
Easy No Bake Chocolate-Peanut Butter Cookies are chewy, fudgy no-bake cookies made with butter, sugar, milk, unsweetened cocoa powder, peanut butter, vanilla extract, quick cook oats, and salt. The chocolate base is boiled for about one full minute, whisked with peanut butter and vanilla, poured over oats, dropped onto wax paper, and cooled until firm.
Serve them chilled for a firmer bite or at room temperature for a softer texture. With their 20-minute timing, no-oven method, rich chocolate-peanut butter flavor, refrigerator storage, freezer-friendly convenience, and kid-and-adult appeal, these cookies are a classic quick dessert worth making again and again.
Chocolate Peanut Butter No Bake Cookies
Rich, chewy, chocolatey, and packed with classic peanut butter flavor, these Chocolate Peanut Butter No Bake Cookies come together with butter, sugar, milk, cocoa powder, peanut butter, vanilla, quick cook oats, and salt. They are simple pantry-style cookies that set without baking, making them an easy sweet treat for quick desserts, make-ahead snacks, or chocolate peanut butter cravings.
Recipe Details
- Prep Time: 10 minutes
- Cook Time: 10 minutes
- Total Time: 20 minutes
- Servings: 20 cookies
- Calories: 190 kcal
Ingredients
For the No-Bake Cookies
- 1 stick butter
- 1⅔ cups granulated sugar
- ½ cup milk
- ¼ cup cocoa powder
- 1 cup peanut butter
- 2 teaspoons vanilla extract
- 3 cups quick cook oats
- ¼ teaspoon salt
Instructions
Step 1: Prepare the Oats
In a large bowl, combine quick cook oats and salt. Set aside while you make the chocolate peanut butter mixture.
Step 2: Start the Chocolate Mixture
In a saucepan over medium-high heat, whisk butter, sugar, milk, and cocoa together. Keep whisking so the mixture heats evenly.
Step 3: Boil for One Minute
Bring mixture to a rolling boil and boil for exactly 1 minute. Remove from heat once the full minute is complete.
Step 4: Add Peanut Butter and Vanilla
Stir in peanut butter and vanilla until smooth. Mix until the peanut butter blends fully into the hot chocolate mixture.
Step 5: Combine with the Oats
Pour mixture over oats and stir until fully combined. Make sure the oats are evenly coated so the cookies bind properly.
Step 6: Shape the Cookies
Drop spoonfuls onto a wax paper-lined baking sheet. Space them apart so they can set cleanly.
Step 7: Cool and Refrigerate
Let cool at room temperature until set, then refrigerate.
Notes
- Use quick cook oats for best texture and binding.
- Boiling the mixture for one full minute is essential for cookies to set properly.
- Allow cookies to cool fully before refrigeration to maintain shape.
- Store in the refrigerator up to 7 days or freeze for longer storage.
Serving Suggestions
Serve these Chocolate Peanut Butter No Bake Cookies after they have cooled at room temperature and set. The cocoa powder, peanut butter, vanilla, butter, sugar, milk, and quick cook oats create a chewy cookie with a rich chocolate peanut butter flavor.
These cookies work well for lunchbox treats, dessert trays, quick snacks, potlucks, or make-ahead sweets. Let them set fully before serving so each cookie holds its shape.
Storage
How to Store
Store the cookies in the refrigerator up to 7 days. Let them cool fully before refrigeration to maintain their shape.
Freezer Tip
Freeze for longer storage, exactly as noted. The recipe does not provide a specific freezer duration or thawing method, so no extra details are added here.
Best Texture Tip
Use quick cook oats for best texture and binding. They help the chocolate peanut butter mixture hold together once the cookies set.
Boiling Tip
Boil the mixture for exactly 1 full minute after it reaches a rolling boil. This step is essential for the cookies to set properly.
Cooling Tip
Allow the cookies to cool at room temperature until set before refrigerating. This helps them keep their shape and texture.

Fernando is the creator and writer behind the food blog Eating with your Hands. Living and working in cities like Paris, Barcelona, and Berlin, and being married to a Canadian foodie, has given Fernando a passion and interest in food and inspired him to run EWYH.