
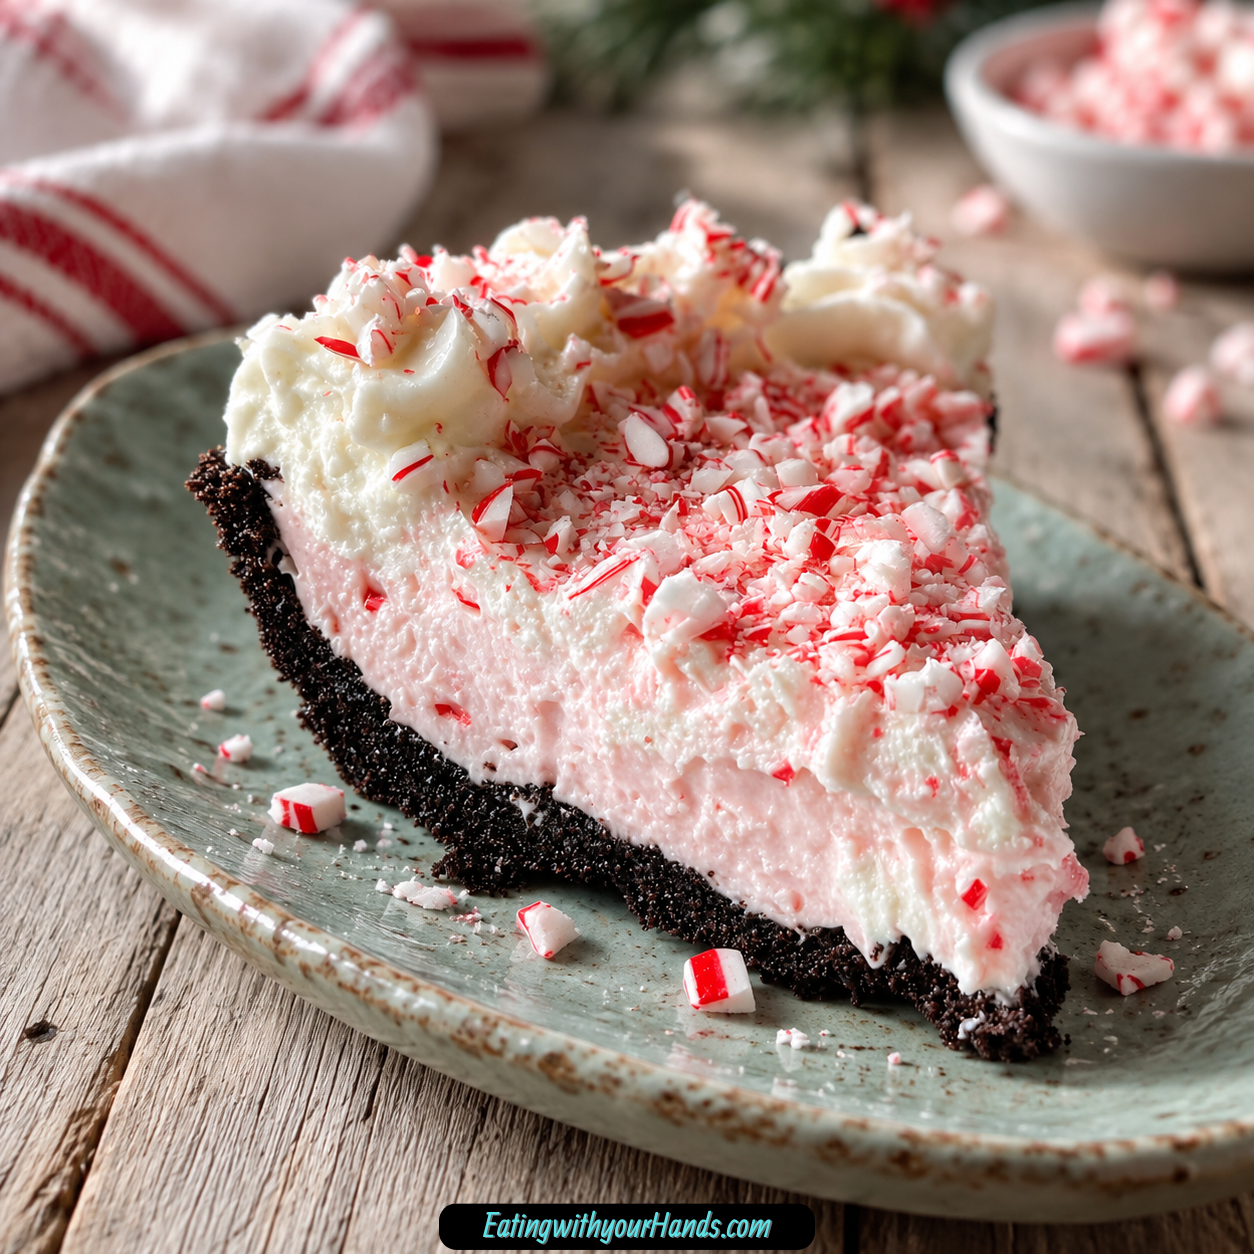

Easy No-Bake Christmas Peppermint Pie Recipe is the kind of holiday dessert that feels festive, creamy, cool, and completely manageable even when the season is moving too fast. It has a chocolate cookie crust, a fluffy peppermint cream cheese filling, crushed candy canes, and just enough holiday sparkle to make it look like it took far more effort than it did.
This pie is made for busy Christmas moments. It is the dessert to make when the oven is already full, when gifts still need wrapping, when guests are arriving soon, or when you simply want something sweet and seasonal without adding one more complicated task to the day.
The flavor is classic holiday comfort. Chocolate and peppermint come together in a cool, creamy filling that tastes fresh, sweet, and just minty enough.
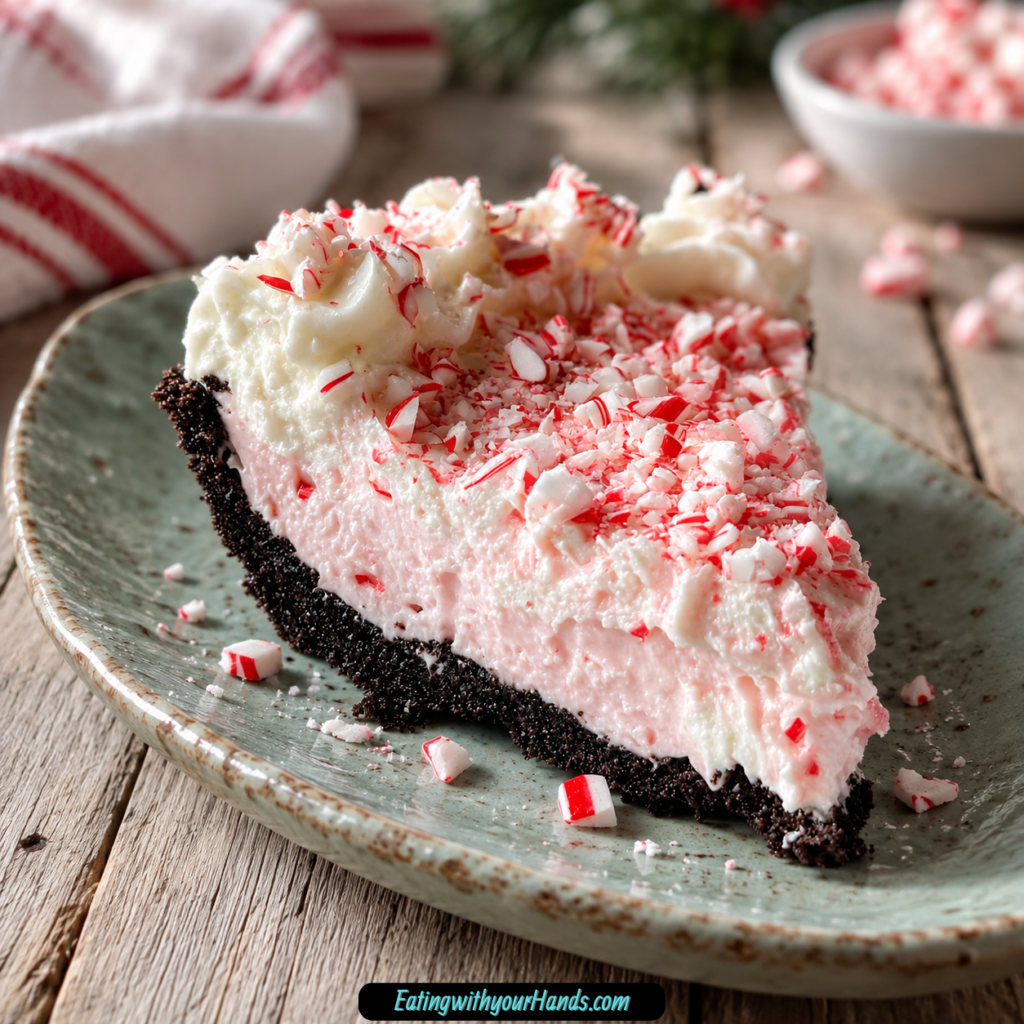
The texture is just as good as the flavor. The crust is firm and chocolatey, the filling is light and smooth, and the crushed candy canes bring little bits of crunch in every slice.
What makes this pie especially useful is that it is made ahead. You mix, fill, chill, and let the refrigerator handle the setting time.
It takes about 15 minutes to prepare, then it needs at least 4 hours in the refrigerator. Overnight chilling is even better because the filling becomes firmer and the flavors settle together.
The red swirl is optional, but it gives the pie a cheerful Christmas look. A few drops of red food coloring can turn the filling into a soft peppermint-pink swirl without making the process difficult.
Easy No-Bake Christmas Peppermint Pie is creamy, minty, pretty, and low-stress. It is a holiday lifesaver for potlucks, Christmas parties, family dinners, or any December night that needs a little peppermint magic.
Table of Contents
- Why You’ll Love This No-Bake Christmas Peppermint Pie
- Recipe Details
- Ingredients
- Ingredient Notes
- Optional Swaps, Variations, Add-Ins, and Serving Ideas
- Classic No-Bake Christmas Peppermint Pie
- Oreo Peppermint Pie
- Graham Cracker Peppermint Pie
- White Chocolate Cookie Crust Pie
- Chocolate Ganache Drizzle Pie
- Peppermint Bark Pie
- Mint Oreo Peppermint Pie
- Mini Christmas Peppermint Pies
- Homemade Chocolate Cookie Crust
- Gluten-Free Peppermint Pie
- Less Sweet Peppermint Pie
- Why This Recipe Works
- Directions
- Step 1: Soften the Cream Cheese
- Step 2: Prepare the Crust
- Step 3: Crush the Candy Canes
- Step 4: Beat the Cream Cheese
- Step 5: Add Powdered Sugar Carefully
- Step 6: Add Peppermint Extract
- Step 7: Fold in Half the Whipped Topping
- Step 8: Fold in the Remaining Whipped Topping
- Step 9: Add Optional Red Food Coloring
- Step 10: Add Crushed Candy Canes
- Step 11: Fill the Crust
- Step 12: Add the Topping
- Step 13: Chill the Pie
- Step 14: Speed-Chill if Needed
- Step 15: Slice Cleanly
- Step 16: Serve Chilled
- Step 17: Store Leftovers
- Step 18: Freeze if Needed
- Serving Ideas
- Storage
- Freezing
- Make-Ahead
- Helpful Notes for Best Results
- Variations
- Classic No-Bake Christmas Peppermint Pie
- Oreo Crust Peppermint Pie
- Graham Cracker Crust Peppermint Pie
- White Chocolate Cookie Crust Peppermint Pie
- Chocolate Ganache Peppermint Pie
- Peppermint Bark Pie
- Mint Oreo Pie
- Mini Peppermint Pies
- Homemade Chocolate Cookie Crust Pie
- Gluten-Free Peppermint Pie
- Less Sweet Peppermint Pie
- Candy Cane Powder Peppermint Pie
- Troubleshooting
- Frequently Asked Questions
- Why This Recipe Works So Well
- Final Thoughts
- No-Bake Christmas Peppermint Pie
Why You’ll Love This No-Bake Christmas Peppermint Pie
This pie does not require the oven. It is perfect when oven space is already taken.
It comes together quickly. The prep takes about 15 minutes before chilling.
It is festive without being fussy. Crushed candy canes and a pink swirl make it look party-ready.
It is make-ahead friendly. The pie tastes even better after chilling.
It has a classic holiday flavor. Peppermint and chocolate make every slice feel like Christmas.
It is easy to customize. Use different crusts, add ganache, fold in peppermint bark, or make mini pies.
Recipe Details
This is a no-bake pie made with a pre-made chocolate cookie crust. Oreo crust is a great choice, and graham cracker crust can also work.
The filling uses 1 package (8 oz) softened cream cheese. The cream cheese should sit at room temperature for at least 30 minutes before mixing.
The filling is sweetened with 1 cup powdered sugar. If the powdered sugar is clumpy, sift it first.
The peppermint flavor comes from 1 teaspoon peppermint extract. Use peppermint extract, not mint extract.
The filling is lightened with 2 cups thawed whipped topping. Cool Whip works well, and homemade whipped cream can be used if stabilized.
A few drops of red food coloring are optional. They create a festive swirl if lightly mixed.
The pie uses ½ cup crushed candy canes, plus extra for topping. Save the final sprinkle for close to serving if making the pie ahead.
The pie needs to chill for at least 4 hours. Overnight chilling gives the best texture.
The pie can be speed-chilled in the freezer for 1 to 2 hours if needed. Do not forget it in the freezer.
Ingredients
For the Pie
- 1 pre-made chocolate cookie crust
- 1 package (8 oz) cream cheese, softened
- 1 cup powdered sugar
- 1 teaspoon peppermint extract
- 2 cups whipped topping
- A few drops red food coloring, optional
- ½ cup crushed candy canes
Optional Swaps, Add-Ins, and Finishes
- Oreo crust
- Graham cracker crust
- Vanilla cookie crust
- White chocolate cookie crust
- Extra crushed candy canes
- Chocolate chips
- Splash of cream
- Peppermint bark chunks
- Mint Oreos
- Homemade whipped cream
- 1 tablespoon powdered sugar per cup of homemade whipped cream
- Gluten-free cookie crust
- Gluten-free candy canes
- ¾ cup powdered sugar
- 1 ½ cups crushed Oreos
- 5 tablespoon melted butter
- ½ teaspoon mint extract
- ½ teaspoon vanilla extract
- 2 extra candy canes
Ingredient Notes
A chocolate cookie crust gives the pie its classic chocolate-peppermint base. Oreo crust is especially good because the chocolate flavor works beautifully with peppermint.
A graham cracker crust can also be used. It will taste less chocolatey, but still sweet and creamy.
Cream cheese gives the filling body and tang. It must be softened so the filling becomes smooth instead of lumpy.
Powdered sugar sweetens the filling and blends easily. Sift it if it has lumps.
Peppermint extract gives the pie its holiday flavor. It is stronger and more Christmas-like than mint extract.
Whipped topping makes the filling light and fluffy. It should be thawed before folding into the cream cheese mixture.
Red food coloring is optional. A few drops can create a pretty pink swirl without changing the flavor.
Crushed candy canes add sweetness, peppermint flavor, crunch, and festive color. They can bleed color slightly into the filling, and that is part of the charm.
Extra candy cane topping makes the pie look freshly finished. Add it close to serving time if possible.
Optional Swaps, Variations, Add-Ins, and Serving Ideas
Classic No-Bake Christmas Peppermint Pie
Use a chocolate cookie crust, softened cream cheese, powdered sugar, peppermint extract, whipped topping, red food coloring, and crushed candy canes. This gives the full festive no-bake version.
Chill the pie until firm before slicing. Serve straight from the refrigerator.
Oreo Peppermint Pie
Use an Oreo crust for a deeper chocolate flavor. The chocolate cookie base pairs perfectly with the peppermint filling.
This is the strongest chocolate-peppermint version. Add extra crushed candy canes on top.
Graham Cracker Peppermint Pie
Use a graham cracker crust instead of chocolate cookie crust. The flavor becomes softer and sweeter.
This version is still festive. It works well if you want less chocolate.
White Chocolate Cookie Crust Pie
Use a vanilla or white chocolate cookie crust. This gives the pie a snowy look and a lighter flavor.
The peppermint filling stands out more. The pie looks especially pretty for holiday tables.
Chocolate Ganache Drizzle Pie
Melt chocolate chips with a splash of cream and drizzle over the chilled pie. This adds a glossy chocolate finish.
Use thin zigzags for a fancy look. Add the drizzle after the pie has chilled.
Peppermint Bark Pie
Fold chopped peppermint bark into the filling instead of candy canes. This adds chocolatey peppermint pieces throughout.
The texture becomes richer. Keep the pieces small enough to slice cleanly.
Mint Oreo Peppermint Pie
Use mint Oreos for the crust or mix chopped mint Oreos into the filling. This doubles down on the cool mint flavor.
The flavor will be stronger. Use it if you love extra mint.
Mini Christmas Peppermint Pies
Make individual servings in muffin tins with mini cookie crusts. These are perfect for holiday parties.
Chill until set before removing or serving. Add candy cane topping right before serving.
Homemade Chocolate Cookie Crust
Make a homemade crust with 1 ½ cups crushed Oreos and 5 tablespoons melted butter. Press into a pie dish, bake at 350°F for 8 minutes, and cool completely before filling.
This gives a homemade option while keeping the filling no-bake. The crust must be fully cooled.
Gluten-Free Peppermint Pie
Use a gluten-free cookie crust and gluten-free candy canes. Check labels carefully.
The method stays the same. Chill well before slicing.
Less Sweet Peppermint Pie
Reduce the powdered sugar to ¾ cup. The candy canes add sweetness too.
This makes the filling a little less sweet. Keep the peppermint extract the same.
Why This Recipe Works
This recipe works because the filling is built on softened cream cheese. It gives the pie enough structure to slice after chilling.
Powdered sugar blends smoothly into the cream cheese. It sweetens without making the filling grainy.
Peppermint extract gives a strong holiday flavor with a small amount. Using too much can make the filling taste too sharp.
Whipped topping lightens the filling. Folding it gently keeps the texture airy instead of dense.
The chocolate cookie crust gives contrast. It balances the cool peppermint with a rich cookie base.
Candy canes add crunch, color, and extra peppermint flavor. Saving some for the top makes the pie look festive.
Chilling is essential. The pie needs at least 4 hours to set properly.
Overnight chilling makes the texture even better. The filling firms and the flavors blend.
Directions
Step 1: Soften the Cream Cheese
Take the 8 oz package of cream cheese out of the refrigerator at least 30 minutes before mixing. It should be soft enough to beat smoothly.
Cold cream cheese can create lumps in the filling. If you forget, microwave it in 5-second bursts without letting it melt.
Step 2: Prepare the Crust
Set the pre-made chocolate cookie crust on a flat surface. Keep it ready before mixing the filling.
If using a homemade crust, make sure it is completely cooled before filling. Warm crust can soften the filling.
Step 3: Crush the Candy Canes
Place the candy canes in a bag and crush them with a rolling pin. Measure ½ cup crushed candy canes for the filling.
Crush a little extra for topping. Keep the topping separate if making the pie ahead.
Step 4: Beat the Cream Cheese
Place the softened cream cheese in a large bowl. Beat with a hand mixer or stand mixer until completely smooth.
This takes about 1 to 2 minutes. Scrape down the sides of the bowl so everything mixes evenly.
Step 5: Add Powdered Sugar Carefully
Add 1 cup powdered sugar to the bowl. Start mixing on low speed.
Mixing slowly prevents powdered sugar from flying everywhere. Once it begins to blend, increase to medium.
Step 6: Add Peppermint Extract
Add 1 teaspoon peppermint extract to the cream cheese mixture. Beat until creamy and fully combined.
Taste carefully if desired. The flavor should be minty but not overwhelming.
Step 7: Fold in Half the Whipped Topping
Add half of the 2 cups whipped topping to the cream cheese mixture. Fold gently with a spatula.
Use slow motions instead of hard stirring. This keeps the filling light.
Step 8: Fold in the Remaining Whipped Topping
Add the rest of the whipped topping. Fold again until just combined.
Do not overmix. Too much stirring can make the filling dense.
Step 9: Add Optional Red Food Coloring
Add a few drops of red food coloring if using. Swirl lightly with a knife.
Do not overmix unless you want the entire filling to turn solid pink. A soft swirl looks more festive.
Step 10: Add Crushed Candy Canes
Gently fold in the ½ cup crushed candy canes. Save some extra candy cane pieces for topping.
The candy canes may bleed color into the filling. That is normal and festive.
Step 11: Fill the Crust
Scoop the peppermint filling into the prepared cookie crust. Spread it evenly with a spatula.
Smooth the top. You can use the back of a spoon to create soft swirls.
Step 12: Add the Topping
Sprinkle extra crushed candy canes over the top. Press them in lightly so they stick.
If making the pie ahead, save the final candy cane sprinkle until closer to serving. It can get sticky after day one.
Step 13: Chill the Pie
Place the pie in the refrigerator for at least 4 hours. Overnight is even better.
The filling needs time to set. Do not slice too early.
Step 14: Speed-Chill if Needed
If you are short on time, place the pie in the freezer for 1 to 2 hours. Keep an eye on it.
This can help it set faster. Do not forget it, or it may freeze too firm.
Step 15: Slice Cleanly
Dip a sharp knife in hot water and wipe it dry. Slice the chilled pie.
Repeat between cuts for cleaner slices. Cold filling cuts best.
Step 16: Serve Chilled
Serve the pie straight from the refrigerator. The filling should be cool, creamy, and firm.
Add extra crushed candy cane right before serving if desired. This keeps the topping fresh.
Step 17: Store Leftovers
Cover leftover pie tightly with plastic wrap or place slices in an airtight container. Refrigerate for up to 3 days.
The flavor gets even better as it sits. The candy cane topping may become sticky after the first day.
Step 18: Freeze if Needed
Wrap the whole pie or individual slices tightly in plastic, then foil. Freeze for up to 1 month.
Thaw overnight in the refrigerator before serving. The texture may be slightly different, more like ice cream cake, but still delicious.
Serving Ideas
Serve this pie chilled. Straight from the refrigerator gives the cleanest slices and best texture.
Use a hot-water knife for neat cuts. Wipe the knife dry before slicing.
Add extra crushed candy cane right before serving. This makes the pie look freshly finished.
Drizzle with chocolate ganache for a richer holiday dessert. Chocolate chips and a splash of cream make the drizzle.
Serve the pie at Christmas parties, potlucks, holiday dinners, or winter gatherings. It fits beautifully on a dessert table.
Make mini pies for individual servings. They are easy for guests to grab.
Pair slices with hot cocoa if desired. The cool pie and warm drink feel festive together.
Serve as a make-ahead dessert when the oven is busy. It saves time and space.
Storage
Store the pie covered in the refrigerator. It keeps well for up to 3 days.
Use plastic wrap or an airtight container. Keep the pie cold until serving.
The flavor can improve after chilling. The peppermint and cream cheese have time to settle together.
The candy cane topping may become sticky after day one. Add the final sprinkle close to serving if making ahead.
If the pie softens at room temperature, return it to the refrigerator. It should be served chilled.
Slices store well in airtight containers. Keep them covered so they do not absorb refrigerator smells.
Do not leave the pie out for long. The cream cheese filling needs to stay cold.
Freezing
This pie can be frozen whole or in slices. Wrap well in plastic wrap, then foil.
Freeze for up to 1 month. Label if needed.
Thaw overnight in the refrigerator before serving. This gives the best texture.
The texture may change slightly after freezing. It can become more like ice cream cake.
Do not add fresh candy cane topping too early if freezing. Add extra topping after thawing for the best look.
Individual slices are convenient for smaller servings. Wrap each slice tightly.
Serve thawed pie cold. Do not thaw at room temperature for long.
Make-Ahead
This pie is a make-ahead dream. It needs at least 4 hours to set, and overnight is even better.
You can make it up to 2 days ahead. Wait to add the final candy cane sprinkle until about an hour before serving.
The filling can be made and added to the crust in advance. Keep the pie covered and refrigerated.
If using ganache, add it after the pie has chilled. This helps the drizzle stay defined.
Mini pies can also be made ahead. Store them chilled until serving.
If using homemade whipped cream, stabilize it with 1 tablespoon powdered sugar per cup. The pie may still be softer, so chill longer.
Make-ahead timing makes this pie especially useful for Christmas. It leaves more room for last-minute cooking, decorating, and hosting.
Helpful Notes for Best Results
Cream cheese must be soft. Cold cream cheese creates lumpy filling.
Use peppermint extract, not mint extract. Peppermint tastes more holiday-like and stronger.
Do not overmix after adding whipped topping. Gentle folding keeps the filling fluffy.
Thaw whipped topping before using. Frozen topping will not fold smoothly.
If using homemade whipped cream, stabilize it with powdered sugar. Use 1 tablespoon powdered sugar per cup.
If the filling seems too runny, chill it for 15 minutes before adding it to the crust. This helps it firm.
For a less sweet pie, reduce powdered sugar to ¾ cup. The candy canes add sweetness.
Use gluten-free cookie crust and gluten-free candy canes if needed. Always check labels.
Variations
Classic No-Bake Christmas Peppermint Pie
Use chocolate cookie crust, cream cheese, powdered sugar, peppermint extract, whipped topping, optional red food coloring, and crushed candy canes. This is the full festive version.
Chill at least 4 hours. Serve cold.
Oreo Crust Peppermint Pie
Use an Oreo crust for the strongest chocolate flavor. It pairs beautifully with peppermint.
Add candy cane topping right before serving. This keeps it crunchy.
Graham Cracker Crust Peppermint Pie
Use a graham cracker crust instead of chocolate cookie crust. The pie will taste sweeter and less chocolatey.
This is a good option if you want a lighter crust flavor. The filling remains the same.
White Chocolate Cookie Crust Peppermint Pie
Use a vanilla or white chocolate cookie crust. This creates a snowy holiday look.
The peppermint flavor becomes the main focus. Add red swirl for color.
Chocolate Ganache Peppermint Pie
Melt chocolate chips with a splash of cream. Drizzle over the chilled pie.
This adds a rich chocolate finish. Use zigzags for a pretty look.
Peppermint Bark Pie
Fold chopped peppermint bark into the filling instead of crushed candy canes. This adds chocolatey peppermint bites.
Keep the pieces small. This helps with slicing.
Mint Oreo Pie
Use mint Oreos in the crust or mix them into the filling. This makes the pie extra minty.
The flavor will be stronger. Use this version for serious mint lovers.
Mini Peppermint Pies
Make individual pies in muffin tins with mini cookie crusts. These are great for holiday parties.
Chill until firm. Top with candy canes before serving.
Homemade Chocolate Cookie Crust Pie
Combine 1 ½ cups crushed Oreos with 5 tablespoons melted butter. Press into a pie dish and bake at 350°F for 8 minutes.
Cool completely before adding filling. The filling remains no-bake.
Gluten-Free Peppermint Pie
Use a gluten-free cookie crust and gluten-free candy canes. Keep the same filling method.
Check labels on all packaged ingredients. Chill well before serving.
Less Sweet Peppermint Pie
Reduce powdered sugar to ¾ cup. Keep the candy canes and peppermint extract.
This makes the filling less sweet. The candy cane topping still adds sweetness.
Candy Cane Powder Peppermint Pie
If you do not have peppermint extract, crush 2 extra candy canes into powder and mix into the filling. The flavor will not be as strong.
You can also use ½ teaspoon mint extract plus ½ teaspoon vanilla for balance. The flavor will be different.
Troubleshooting
The Filling Is Lumpy
The cream cheese was probably too cold. Soften it for at least 30 minutes before beating.
Microwave in 5-second bursts if necessary. Do not let it melt.
The Filling Is Too Dense
The whipped topping may have been stirred too aggressively. Fold gently with a spatula.
Overmixing removes air. The filling should stay fluffy.
The Filling Is Too Runny
Chill the filling for 15 minutes before adding it to the crust. Then spread it into the pie shell.
Make sure the whipped topping was thawed but still cold. Chill the pie fully.
The Pie Did Not Set
It may need more time in the refrigerator. Chill at least 4 hours.
Overnight chilling is best. Do not slice too early.
The Peppermint Flavor Is Too Strong
Peppermint extract is powerful. Use exactly 1 teaspoon.
If it tastes too strong, extra whipped topping can soften the flavor. Next time, measure carefully.
The Pie Tastes Like Toothpaste
Mint extract may have been used instead of peppermint extract. Peppermint is the better choice here.
If using mint extract, balance it with vanilla. Use ½ teaspoon mint extract and ½ teaspoon vanilla.
The Candy Cane Topping Got Sticky
Candy cane pieces can get sticky after sitting. Add the final sprinkle close to serving time.
This is especially helpful when making the pie ahead. The flavor is still good if it softens.
The Red Swirl Turned Solid Pink
The food coloring was mixed too much. Swirl lightly with a knife next time.
Solid pink still looks festive. It just has less swirl effect.
The Crust Got Soft
The pie may have sat too long or been stored loosely. Keep it chilled and covered.
A sturdy chocolate cookie crust helps. Serve cold for the best texture.
The Slices Are Messy
The pie may not be chilled enough. Chill longer before slicing.
Use a sharp knife dipped in hot water and wiped dry. Repeat between cuts.
Frequently Asked Questions
Can I use homemade crust instead of store-bought?
Yes, combine 1 ½ cups crushed Oreos with 5 tablespoons melted butter. Press into a pie dish.
Bake at 350°F for 8 minutes, then cool completely before filling. The crust must be cool.
How far in advance can I make this?
You can make the pie up to 2 days ahead. Keep it covered and chilled.
Wait to add the final candy cane sprinkle until about an hour before serving. This keeps the topping crunchy.
Can I freeze this pie?
Yes, freeze the whole pie or individual slices for up to 1 month. Wrap tightly in plastic and foil.
Thaw overnight in the refrigerator. The texture may become slightly more like ice cream cake.
What if I do not have peppermint extract?
Crush 2 extra candy canes into powder and mix them into the filling. The flavor will be lighter but still tasty.
You can also use ½ teaspoon mint extract plus ½ teaspoon vanilla. The flavor will be different and less traditionally peppermint.
Can I use homemade whipped cream?
Yes, but stabilize it with 1 tablespoon powdered sugar per cup. The pie may be softer than one made with whipped topping.
Chill it longer for the best set. Keep it refrigerated.
Can I make this gluten-free?
Yes, use a gluten-free cookie crust and gluten-free candy canes. Check labels.
The method stays the same. Chill fully before serving.
Can I make this less sweet?
Yes, reduce the powdered sugar to ¾ cup. The candy canes add sweetness too.
Keep the peppermint extract the same. Taste carefully before adjusting.
How do I get clean slices?
Serve the pie very cold. Dip a sharp knife in hot water and wipe it dry before slicing.
Repeat between cuts. This keeps the filling neat.
Why This Recipe Works So Well
Easy No-Bake Christmas Peppermint Pie Recipe works because it uses a creamy filling that sets in the refrigerator. Cream cheese gives body, powdered sugar sweetens, and whipped topping lightens everything.
Peppermint extract gives strong holiday flavor with just a small amount. Crushed candy canes add crunch and color.
The chocolate cookie crust brings contrast. Chocolate and peppermint are a classic holiday pairing.
The optional red swirl makes the pie look festive without extra decorating. A few drops are enough.
The pie needs proper chilling because no oven is used to set the filling. Four hours is the minimum, and overnight is better.
Make-ahead timing makes the recipe practical. You can prepare it before a party and finish it with candy cane topping before serving.
The recipe is also flexible. Crust swaps, ganache, peppermint bark, mint Oreos, mini pies, gluten-free options, and reduced sugar all work.
Most of all, this pie works because it feels joyful and easy. It gives you a cold, creamy, peppermint-chocolate holiday dessert without stress.
Final Thoughts
Easy No-Bake Christmas Peppermint Pie Recipe is made with a pre-made chocolate cookie crust, softened cream cheese, powdered sugar, peppermint extract, whipped topping, optional red food coloring, and crushed candy canes. It takes about 15 minutes to prepare, then chills into a cool, creamy holiday pie with peppermint flavor and a chocolate cookie base.
Serve it chilled with extra crushed candy canes, a chocolate ganache drizzle, peppermint bark pieces, mint Oreos, or clean slices cut with a hot-water knife. With its 4-hour minimum chill time, overnight make-ahead option, 3-day refrigerator storage, 1-month freezer option, and variations like Oreo crust, graham cracker crust, white chocolate cookie crust, mini pies, homemade Oreo crust, gluten-free crust and candy canes, homemade stabilized whipped cream, reduced powdered sugar, and candy cane powder in place of extract, this pie is festive, fast, creamy, and made for holiday dessert tables.
No-Bake Christmas Peppermint Pie

Cool, creamy, festive, and full of peppermint flavor, this No-Bake Christmas Peppermint Pie is made with a pre-made chocolate cookie crust, softened cream cheese, powdered sugar, peppermint extract, whipped topping, crushed candy canes, and optional red food coloring for a pink swirl look. It is a simple holiday dessert with a chocolate crust, fluffy peppermint filling, and a crunchy candy cane finish.
Recipe Details
- Prep Time: 15 minutes
- Total Time: 15 minutes
- Course: Dessert
- Cuisine: American
- Servings: 8 slices
Ingredients
For the Pie
- ½ cup crushed candy canes plus extra for topping
- A few drops red food coloring optional, for a pink swirl look
- 2 cups whipped topping (like Cool Whip)
- 1 teaspoon peppermint extract
- 1 cup powdered sugar
- 1 package (8 oz) cream cheese, softened
- 1 pre-made chocolate cookie crust (Oreo or graham cracker)
Instructions
Step 1: Prepare the Crust
Place the pre-made chocolate cookie crust on your work surface. Use an Oreo or graham cracker crust as listed.
Keep the crust ready while you make the peppermint filling. Since the crust is pre-made, no baking step is needed.
Step 2: Mix the Cream Cheese Base
In a bowl, beat the softened cream cheese until smooth. Add the powdered sugar and peppermint extract, then mix until creamy and evenly combined.
Make sure the cream cheese is softened before mixing. This helps the filling stay smooth instead of lumpy.
Step 3: Fold in the Whipped Topping
Fold the whipped topping into the cream cheese mixture. Mix gently until the filling becomes light, fluffy, and evenly blended.
Use 2 cups whipped topping, such as Cool Whip, as listed. Folding gently helps keep the pie filling airy.
Step 4: Add the Candy Canes
Fold in the crushed candy canes. Stir just enough to distribute them through the peppermint filling.
The crushed candy canes add peppermint crunch and holiday color. Save the extra crushed candy canes for topping the pie.
Step 5: Add the Optional Pink Swirl
If desired, add a few drops of red food coloring for a pink swirl look. Swirl gently so the color shows without fully mixing into one solid shade.
This step is optional. Leave the filling plain if you prefer a simple creamy peppermint pie.
Step 6: Fill the Cookie Crust
Spoon the peppermint filling into the pre-made chocolate cookie crust. Spread it evenly from edge to edge.
Smooth the top so the pie is ready for the final topping. Add extra crushed candy canes over the surface.
Step 7: Set and Serve
Chill the pie until it is firm enough to slice. The recipe does not provide a specific chilling time, so no exact chill duration is added here.
Slice into 8 pieces and serve cold. Keep the pie chilled until serving so the filling holds its shape.
Serving Suggestions
Serve No-Bake Christmas Peppermint Pie cold, sliced into 8 pieces. The chocolate cookie crust, peppermint cream cheese filling, whipped topping, and crushed candy canes make it a festive dessert for Christmas parties, holiday dinners, dessert tables, or simple seasonal treats.
Use the optional red food coloring if you want a pink swirl look. For a cleaner white peppermint pie, leave the food coloring out and finish with extra crushed candy canes on top.
For the neatest slices, chill the pie until it is firm enough to cut. The recipe does not give an exact chill time, so no specific number of hours is added.
Storage
How to Store
The recipe does not provide specific storage instructions or storage duration, so no exact storage time is added here. Keep the pie chilled until serving so the filling stays firm.
Crust Tip
Use 1 pre-made chocolate cookie crust, either Oreo or graham cracker. Since the crust is pre-made, no baking step is included.
Cream Cheese Tip
Use 1 package (8 oz) softened cream cheese. Softened cream cheese blends more smoothly with the powdered sugar and peppermint extract.
Whipped Topping Tip
Fold in 2 cups whipped topping gently. This keeps the filling light and creamy.
Peppermint Tip
Use 1 teaspoon peppermint extract and ½ cup crushed candy canes. Add extra crushed candy canes on top for a festive finish.
Color Tip
Add a few drops red food coloring only if you want a pink swirl look. Swirl gently instead of fully mixing if you want visible color ribbons.
Chilling Note
The recipe gives a 15-minute total time but does not provide a specific chilling time. For accuracy, no exact chill duration is added.

Fernando is the creator and writer behind the food blog Eating with your Hands. Living and working in cities like Paris, Barcelona, and Berlin, and being married to a Canadian foodie, has given Fernando a passion and interest in food and inspired him to run EWYH.