
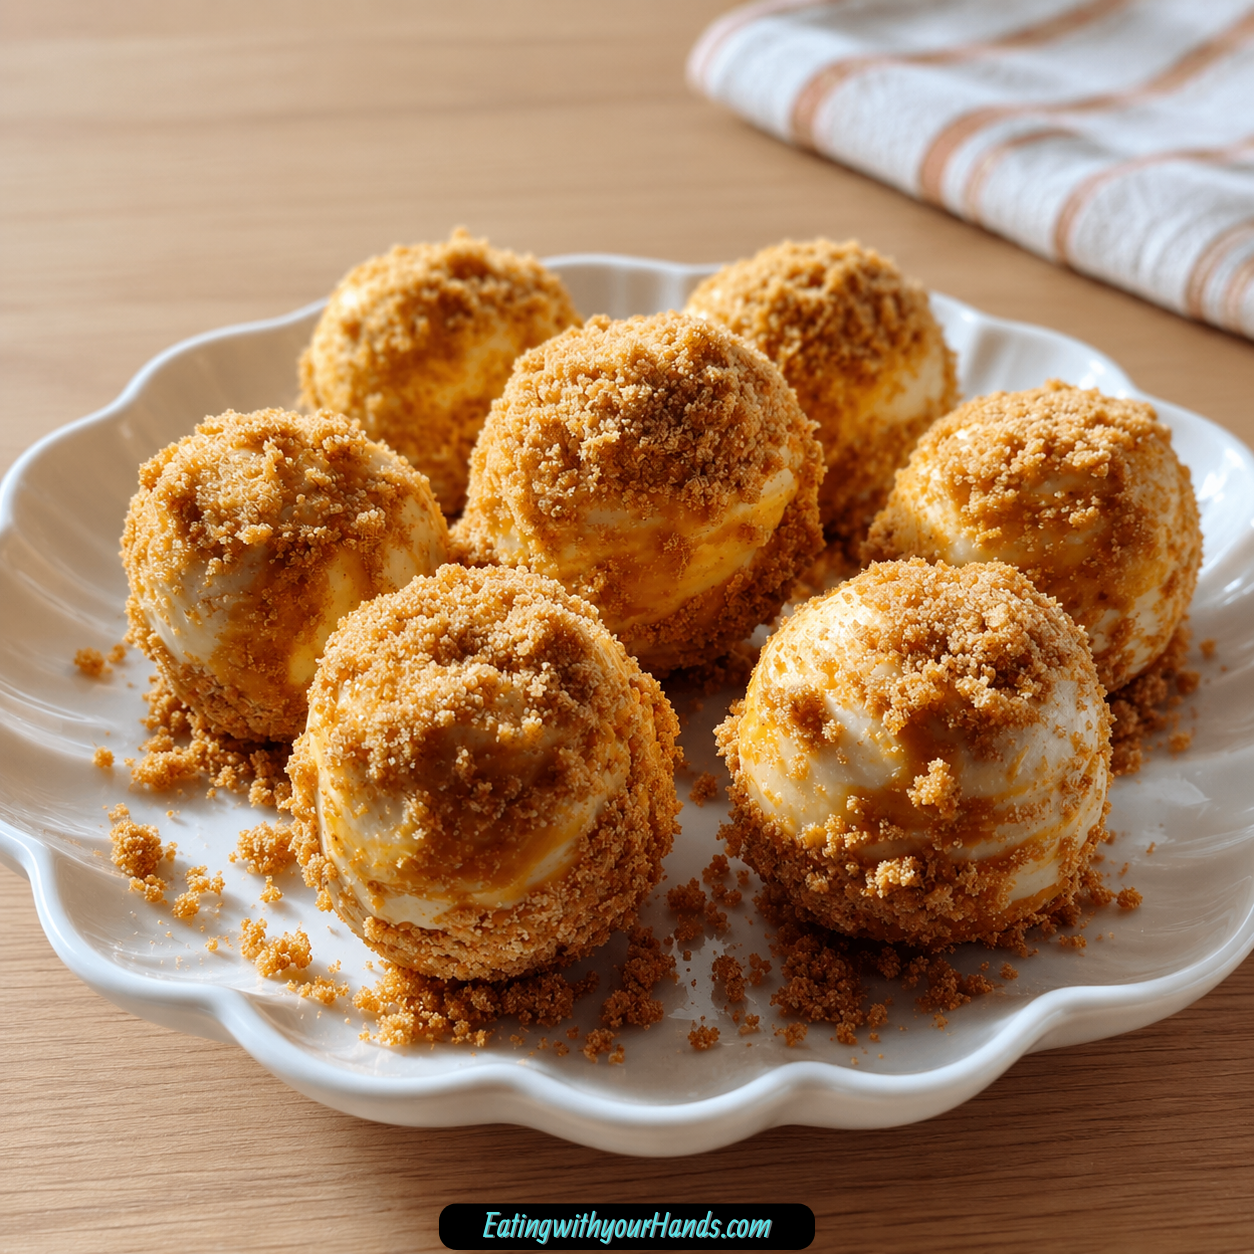
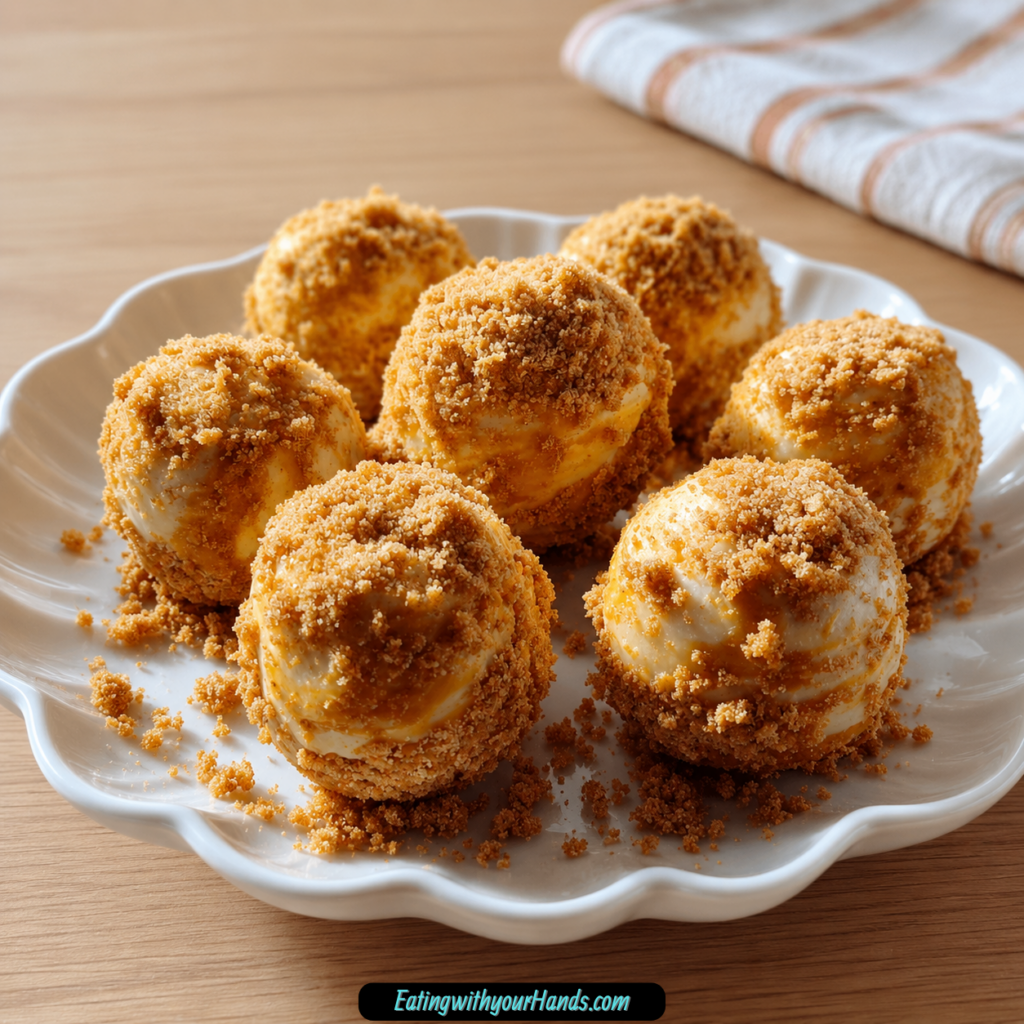
No Bake Pumpkin Cheesecake Balls are the kind of fall treat that feels almost too easy for how good they taste. They are creamy, lightly spiced, sweet, soft, and rolled in graham cracker crumbs for that cozy cheesecake-meets-pumpkin-pie feeling.
This is the dessert I think about when the craving for something sweet shows up, but the oven feels like too much work. The whole recipe comes together with a bowl, a spoon or mixer, a little chilling time, and a tray of bite-sized pumpkin cheesecake treats ready to share.
The first time I made something like this, it came from that familiar leftover-pumpkin moment. A little pumpkin puree was sitting in the kitchen, and instead of turning it into a baked dessert, it became something simpler, creamier, and far easier.
These little cheesecake balls taste like pumpkin pie and cheesecake rolled into one small bite. The cream cheese gives them richness, the pumpkin puree adds fall flavor, and the pumpkin pie spice brings the warm cinnamon-nutmeg-clove feeling everyone expects from pumpkin season.
The graham cracker coating is what ties everything together. It gives the outside a crumbly, slightly crisp texture that makes each bite feel more like cheesecake.
They are perfect for potlucks, holiday trays, late-night cravings, cozy weekends, or unexpected guests. They look cute, taste festive, and require no baking at all.
Table of Contents
- What Are No Bake Pumpkin Cheesecake Balls?
- Why You’ll Love No Bake Pumpkin Cheesecake Balls
- Recipe Details
- Ingredients You’ll Need
- A Closer Look at the Ingredients
- The Flavor Behind These No Bake Treats
- Directions
- Step 1: Gather the Ingredients and Tools
- Step 2: Soften the Cream Cheese
- Step 3: Check the Pumpkin Puree
- Step 4: Loosen the Cream Cheese
- Step 5: Add the Pumpkin Puree
- Step 6: Add the Powdered Sugar
- Step 7: Add the Vanilla Extract
- Step 8: Add the Pumpkin Pie Spice
- Step 9: Mix Until Smooth
- Step 10: Decide Whether to Chill Before Rolling
- Step 11: Prepare the Graham Cracker Crumbs
- Step 12: Prepare the Tray
- Step 13: Scoop the Filling
- Step 14: Roll Into 1-Inch Balls
- Step 15: Coat in Graham Cracker Crumbs
- Step 16: Place on the Tray
- Step 17: Chill the Cheesecake Balls
- Step 18: Check Before Serving
- Step 19: Garnish If Desired
- Step 20: Serve Cold
- Helpful Tips for the Best No Bake Pumpkin Cheesecake Balls
- Common Mistakes
- Variations
- Serving Suggestions
- Storage Tips
- Freezing Instructions
- Make-Ahead Notes
- Frequently Asked Questions
- Can I Freeze These Cheesecake Balls?
- What If I Do Not Have Pumpkin Pie Spice?
- Can I Use Pumpkin Pie Filling Instead of Pumpkin Puree?
- How Do I Keep the Balls from Sticking to My Hands?
- Can I Make These Ahead of Time?
- What Can I Use Instead of Graham Cracker Crumbs?
- What Should I Do If the Mixture Is Too Sticky?
- Can I Make These Dairy-Free?
- Final Thoughts
- No Bake Pumpkin Cheesecake Balls
What Are No Bake Pumpkin Cheesecake Balls?
No Bake Pumpkin Cheesecake Balls are small, chilled dessert bites made with cream cheese, pumpkin puree, powdered sugar, vanilla extract, pumpkin pie spice, and graham cracker crumbs. The filling is mixed until smooth, shaped into balls, rolled in crumbs, and chilled until firm.
They are similar in flavor to pumpkin cheesecake, but they are much easier to make. There is no crust to bake, no springform pan, and no oven time.
The texture is creamy and soft inside. The outside is coated in graham cracker crumbs, which adds the classic cheesecake crust flavor in a simple way.
They are bite-sized, portable, and easy to serve. This makes them especially useful for parties, fall gatherings, and make-ahead dessert trays.
Why You’ll Love No Bake Pumpkin Cheesecake Balls
These treats require no oven. You mix, roll, coat, and chill.
They are full of pumpkin spice flavor. The pumpkin puree and pumpkin pie spice make every bite taste like fall.
They are creamy and rich. Softened cream cheese creates a smooth cheesecake-style base.
They are easy to serve. Bite-sized desserts are perfect for parties, sharing, or quick snacking.
They are customizable. You can change the coating, add chocolate, add nuts, drizzle glaze, or fold in small mix-ins.
They can be made ahead. In fact, they taste even better after chilling for a few hours or overnight.
Recipe Details
- Recipe name: No Bake Pumpkin Cheesecake Balls
- Recipe style: No-bake chilled dessert bites
- Main flavor: Pumpkin cheesecake with graham cracker coating
- Prep style: Mix, roll, coat, and chill
- Mixing time: About 30 seconds with a hand mixer, or longer by hand
- Ball size: About 1 inch
- Portion size: About 1 tablespoon of filling per ball
- Main chill time: At least 1 hour
- Optional pre-roll chill: 15 minutes if filling is too soft
- Best served: Cold from the refrigerator
- Refrigerator storage: Up to 3 days in an airtight container
- Freezer storage: Up to 2 months
- Freezing method: Freeze in a single layer first, then transfer to an airtight container or freezer bag
- Important pumpkin note: Use plain pumpkin puree, not pumpkin pie filling
- Sticky hands tip: Rinse hands with cold water and shake off excess before rolling
- Dairy-free option: Use block-style vegan cream cheese
- Low-sugar option: Reduce powdered sugar to ¾ cup and add a splash of maple syrup
Ingredients You’ll Need
For the Pumpkin Cheesecake Balls
- 8 oz cream cheese, softened
- ½ cup pumpkin puree
- 1 cup powdered sugar
- 1 teaspoon vanilla extract
- 1 teaspoon pumpkin pie spice
- 1 cup graham cracker crumbs
A Closer Look at the Ingredients
Cream cheese is the base of the filling. It should be softened so it blends smoothly and gives the cheesecake balls a creamy texture.
Pumpkin puree adds the pumpkin flavor. Use plain pumpkin puree, not pumpkin pie filling, because pie filling already contains added sugar and spices.
Powdered sugar sweetens the filling and keeps the texture smooth. It dissolves easily, which prevents graininess.
Vanilla extract makes the filling taste more like dessert. It softens the tang of the cream cheese and rounds out the pumpkin flavor.
Pumpkin pie spice gives the balls their warm seasonal flavor. If you do not have it, you can make a simple version with cinnamon, nutmeg, and a pinch of cloves.
Graham cracker crumbs are used for rolling. They create a crumbly coating that gives each bite a cheesecake crust feeling.
Each ingredient is simple, but the combination feels special. Creamy filling, spiced pumpkin, and graham cracker crumbs create a dessert that tastes much more complete than the short ingredient list suggests.
The Flavor Behind These No Bake Treats
These pumpkin cheesecake balls work because they balance creaminess, sweetness, spice, and texture. The cream cheese gives the filling body, while the pumpkin puree adds earthy sweetness and fall flavor.
Powdered sugar keeps the mixture sweet and smooth. It is different from granulated sugar because it blends into the cream cheese without leaving a gritty texture.
Vanilla extract adds a dessert-style warmth. It helps the pumpkin and cream cheese taste more rounded.
Pumpkin pie spice is what makes the flavor feel cozy. Without it, the filling would taste like sweet pumpkin cream cheese, but with it, the flavor becomes more like pumpkin pie.
The graham cracker coating brings the final cheesecake effect. It adds texture and makes the bites easier to pick up and serve.
Directions
Step 1: Gather the Ingredients and Tools
Start by gathering the softened cream cheese, pumpkin puree, powdered sugar, vanilla extract, pumpkin pie spice, and graham cracker crumbs. You will also need a large mixing bowl, spatula, hand mixer if using one, spoon or small cookie scoop, tray or plate, and parchment paper if desired.
A larger bowl is helpful because the filling can spread around while mixing. It also gives you enough space to blend everything without making a mess.
Make sure the cream cheese is softened before beginning. This is one of the most important steps for a smooth filling.
Step 2: Soften the Cream Cheese
Let the cream cheese sit on the counter for about 30 minutes before mixing. Softened cream cheese blends easily and prevents lumps.
If you forget to soften it ahead of time, microwave it in 10-second bursts. Be careful not to melt it.
The cream cheese should feel soft when pressed but should not be runny. Melted cream cheese can make the filling too loose.
Step 3: Check the Pumpkin Puree
Measure ½ cup pumpkin puree. Make sure it is plain pumpkin puree, not pumpkin pie filling.
If the pumpkin puree looks watery, blot it gently with a paper towel. Extra moisture can make the mixture sticky and harder to roll.
Do not skip this check if your puree seems loose. A thicker filling will be much easier to shape.
Step 4: Loosen the Cream Cheese
Place the softened cream cheese in a large bowl. Stir it briefly with a spatula to loosen it.
This makes it easier to combine with the pumpkin and sugar. It also helps prevent the cream cheese from sticking in one solid block while mixing.
If using a hand mixer, you can beat it briefly before adding the other ingredients. The goal is a smooth base.
Step 5: Add the Pumpkin Puree
Add the ½ cup pumpkin puree to the bowl with the softened cream cheese. Begin mixing gently.
The pumpkin will turn the cream cheese a soft orange color. Scrape the sides of the bowl as needed.
Do not worry if it is not perfectly smooth yet. The powdered sugar, vanilla, and spice will be mixed in next.
Step 6: Add the Powdered Sugar
Add 1 cup powdered sugar to the bowl. Mix slowly at first so it does not puff out of the bowl.
Powdered sugar sweetens the filling and helps create a creamy texture. It also thickens the mixture slightly.
If you want to avoid any tiny lumps, you can sift the powdered sugar before adding it. This is optional.
Step 7: Add the Vanilla Extract
Add 1 teaspoon vanilla extract. Mix it into the filling.
Vanilla gives the dessert a warmer, sweeter flavor. It helps the cream cheese and pumpkin taste more like cheesecake.
A small amount makes a noticeable difference. Stir until fully combined.
Step 8: Add the Pumpkin Pie Spice
Add 1 teaspoon pumpkin pie spice. Mix until the spice is evenly distributed.
The filling should look smooth and evenly colored. You should not see streaks of spice.
If you do not have pumpkin pie spice, use ½ teaspoon cinnamon, ¼ teaspoon nutmeg, and a pinch of cloves. Cinnamon alone can also work if needed.
Step 9: Mix Until Smooth
Use a hand mixer for about 30 seconds, or mix by hand with a sturdy spatula until the filling is completely smooth. You are aiming for a creamy, almost fluffy texture.
No lumps of cream cheese should remain. Scrape down the sides and bottom of the bowl to catch any unmixed spots.
If the mixture looks soft, do not panic. It will firm up in the refrigerator.
Step 10: Decide Whether to Chill Before Rolling
If the filling feels very soft or sticky, chill it for 15 minutes before rolling. This optional step makes shaping much easier.
A short chill helps the cream cheese firm slightly. It also makes the mixture less messy.
If the mixture is already easy to scoop, you can move straight to rolling. Use your judgment based on the texture.
Step 11: Prepare the Graham Cracker Crumbs
Pour 1 cup graham cracker crumbs into a shallow bowl. This makes coating easier.
Store-bought crumbs work well. You can also crush graham crackers yourself if you prefer.
The crumbs should be fine enough to coat the balls evenly. Larger pieces may not stick as smoothly.
Step 12: Prepare the Tray
Line a tray or plate with parchment paper if desired. This helps prevent sticking after the balls are coated.
Place the tray near the bowl of filling and the graham cracker crumbs. Keeping everything close makes the rolling process easier.
You will place each coated ball on the tray before chilling. Make sure the tray fits in your refrigerator.
Step 13: Scoop the Filling
Scoop about 1 tablespoon of the pumpkin cheesecake mixture. A small cookie scoop works well for even portions.
If you do not have a scoop, use a spoon. Try to keep the portions close in size.
Even portions look nicer and chill more consistently. They also make serving easier.
Step 14: Roll Into 1-Inch Balls
Roll each portion between your palms into a 1-inch ball. Work gently so the filling keeps its shape.
If your hands get sticky, rinse them under cold water and shake off the excess. Cold, slightly damp hands make rolling easier.
Do not use too much water. A light rinse is enough.
Step 15: Coat in Graham Cracker Crumbs
Place each ball into the bowl of graham cracker crumbs. Roll it until fully coated.
The crumbs should cover the outside like a soft crust. This makes the balls easier to handle and adds flavor.
If needed, gently press the crumbs onto the outside. Do not flatten the ball.
Step 16: Place on the Tray
Set each coated cheesecake ball on the prepared tray. Leave a little space between them.
Repeat the scooping, rolling, and coating process until all the filling is used. Work steadily but do not rush.
If the filling becomes too soft as you work, chill it again for a few minutes. This helps the texture recover.
Step 17: Chill the Cheesecake Balls
Place the tray in the refrigerator for at least 1 hour. This helps the balls firm up and hold their shape.
The chilling time also improves the flavor. The pumpkin, spice, cream cheese, and vanilla settle together.
Do not skip the chill unless you are comfortable with a softer texture. The best version is served cold.
Step 18: Check Before Serving
After chilling, check that the balls feel firm enough to pick up. They should hold their shape.
If they still feel too soft, chill them longer. A few extra hours or overnight can make them even better.
Once firm, transfer them to a serving plate or airtight container. Handle gently.
Step 19: Garnish If Desired
For serving, you can dust the balls with a little extra pumpkin pie spice or powdered sugar. This adds a pretty finish.
Add garnish right before serving for the best appearance. Powdered sugar can dissolve if it sits too long.
You can also drizzle with chocolate, maple glaze, or use another coating variation. Keep the base recipe the same.
Step 20: Serve Cold
Serve No Bake Pumpkin Cheesecake Balls cold from the refrigerator. They hold their shape better and taste refreshing.
For parties, arrange them on a platter with toothpicks. This makes them easy to grab.
They are creamy, spiced, and bite-sized, so they work well on dessert trays. They also make a sweet snack for cozy nights in.
Helpful Tips for the Best No Bake Pumpkin Cheesecake Balls
Use softened cream cheese. Cold cream cheese can leave lumps in the filling.
Use plain pumpkin puree, not pumpkin pie filling. Pie filling can change the sweetness and texture.
Blot watery pumpkin puree with a paper towel. Extra moisture can make the mixture sticky.
Chill the filling for 15 minutes before rolling if it is too soft. This makes shaping easier.
Rinse your hands with cold water if the mixture sticks. Shake off excess water before rolling.
Do not stack the balls directly in storage. Layer them with parchment paper to prevent sticking.
Common Mistakes
Using Pumpkin Pie Filling
Pumpkin pie filling already has sugar and spices. It can make the recipe too sweet and change the texture.
Use plain pumpkin puree for the best result. This gives you better control over the flavor.
Using Cold Cream Cheese
Cold cream cheese does not mix smoothly. It can leave lumps throughout the filling.
Let it soften for about 30 minutes. Use short microwave bursts only if needed.
Skipping the Chill Time
The balls need time to firm up. If you serve them immediately, they may be too soft.
Chill for at least 1 hour. Longer chilling makes them even easier to handle.
Rolling with Dry, Warm Hands
The filling can stick to warm hands. This makes rolling messy.
Rinse hands with cold water and shake off the excess. This helps the mixture roll more smoothly.
Stacking Without Parchment
The balls can stick together in storage. This is especially true if the coating softens slightly.
Layer them with parchment paper. This keeps them neat.
Variations
Drizzle melted white chocolate or dark chocolate over the chilled balls. Let the chocolate set before serving.
Use finely chopped pecans or walnuts instead of graham cracker crumbs for a nutty coating. This adds crunch and pairs well with pumpkin.
Add a pinch of cayenne pepper to the filling for a small kick. A little goes a long way.
Add extra cinnamon for a warmer spice flavor. This makes the pumpkin flavor feel even cozier.
Make a maple glaze with powdered sugar, a splash of maple syrup, and a dash of cinnamon. Drizzle it over the balls for a fall-style finish.
Use crushed gingersnaps instead of graham cracker crumbs. This makes the coating spicier and more festive.
Use crushed vanilla wafers for a softer, sweeter coating. This is a good option if you want less spice.
Use Oreo crumbs for a chocolate cookie coating. This changes the flavor but still works well.
Fold in mini chocolate chips for extra texture. They add little chocolate bites inside the filling.
Add chopped dried cranberries for a chewy, tart contrast. They make the balls feel more holiday-ready.
Use block-style vegan cream cheese for a dairy-free version. Avoid the spreadable tub style because it may be too soft.
Reduce powdered sugar to ¾ cup and add a splash of maple syrup for a lower-sugar option. The texture may shift slightly, so adjust if needed.
Serving Suggestions
Serve these cheesecake balls straight from the refrigerator. Cold is best for texture.
For parties, arrange them on a platter with toothpicks. This keeps serving clean and easy.
Dust them with extra pumpkin pie spice before serving for a warm, seasonal look. Powdered sugar can also be used.
Add them to holiday dessert trays. Their small size makes them perfect next to cookies, bars, and candy.
Serve them for potlucks, cozy nights in, late-night cravings, or casual gatherings. They look fancy without needing much work.
Pair them with coffee, tea, or hot cider. Their creamy pumpkin flavor works beautifully with warm drinks.
Storage Tips
Store No Bake Pumpkin Cheesecake Balls in an airtight container in the refrigerator for up to 3 days. Keep them cold until ready to serve.
Do not stack them directly on top of each other. Use parchment paper between layers.
The coating may soften slightly over time. They will still taste good, but the freshest texture is best.
Add powdered sugar or spice garnish right before serving. Garnishes can fade or dissolve during storage.
Keep them covered so they do not absorb refrigerator odors. This helps preserve the vanilla and pumpkin spice flavor.
Freezing Instructions
These cheesecake balls freeze well for up to 2 months. Place them in a single layer on a tray and freeze until solid.
Once frozen, transfer them to an airtight container or freezer bag. This prevents them from sticking together.
Thaw in the refrigerator before serving. Do not thaw at room temperature for too long.
The texture should stay creamy after thawing. Serve them cold for the best result.
If garnishing with chocolate drizzle or powdered sugar, add it after thawing if you want the cleanest appearance. This keeps them looking fresh.
Make-Ahead Notes
No Bake Pumpkin Cheesecake Balls are great for making ahead. They taste even better after chilling for a few hours or overnight.
You can prepare them the day before a party. Store them covered in the refrigerator until serving.
For the neatest presentation, add any final drizzle, spice dusting, or powdered sugar right before serving. This keeps the finish clean.
If the filling feels too soft when making ahead, chill it for 15 minutes before rolling. This saves time and reduces mess.
Make sure to store them in a single layer or with parchment between layers. This protects their shape.
Frequently Asked Questions
Can I Freeze These Cheesecake Balls?
Yes, these cheesecake balls freeze very well. Place them in a single layer on a tray and freeze until solid.
Then transfer them to an airtight container or freezer bag. They can be frozen for up to 2 months and thawed in the refrigerator before serving.
What If I Do Not Have Pumpkin Pie Spice?
You can make a simple substitute with ½ teaspoon cinnamon, ¼ teaspoon nutmeg, and a pinch of cloves. This gives the filling a similar warm spice flavor.
You can also use cinnamon by itself. The flavor will be simpler, but still delicious.
Can I Use Pumpkin Pie Filling Instead of Pumpkin Puree?
It is not recommended. Pumpkin pie filling contains added sugar and spices, which can throw off the flavor and texture.
Plain pumpkin puree is the best choice. It lets the cream cheese, powdered sugar, vanilla, and spice stay balanced.
How Do I Keep the Balls from Sticking to My Hands?
Rinse your hands with cold water and shake off the excess before rolling. This makes the filling easier to handle.
If the mixture is still sticky, chill it for 15 minutes before shaping. Cold filling rolls more cleanly.
Can I Make These Ahead of Time?
Yes, these are excellent make-ahead treats. They taste even better after chilling for a few hours or overnight.
Keep them covered in the refrigerator until ready to serve. Add any garnish right before serving.
What Can I Use Instead of Graham Cracker Crumbs?
You can use crushed gingersnaps, vanilla wafers, Oreo crumbs, finely chopped pecans, finely chopped walnuts, or a cinnamon-sugar coating. Each one changes the flavor slightly.
Graham cracker crumbs give the most classic cheesecake-style taste. Gingersnaps make them extra fall-flavored.
What Should I Do If the Mixture Is Too Sticky?
Add 1 tablespoon more powdered sugar or graham cracker crumbs to firm it up. Mix gently and check the texture again.
You can also chill the filling for 15 minutes. Cold filling is much easier to roll.
Can I Make These Dairy-Free?
Yes, use a vegan cream cheese alternative. Choose the block style, not the spreadable tub style.
The block kind is firmer and better for rolling. Softer spreadable versions may make the mixture too loose.
Final Thoughts
Easy No Bake Pumpkin Cheesecake Balls are a simple, creamy, fall-inspired treat that does not require an oven. With cream cheese, pumpkin puree, powdered sugar, vanilla extract, pumpkin pie spice, and graham cracker crumbs, you can make a dessert that tastes like pumpkin cheesecake in bite-sized form.
They are perfect for pumpkin spice season, holiday trays, potlucks, casual snacking, or any moment when you want a sweet treat without baking. The filling is smooth and creamy, the coating gives a graham cracker crunch, and the chilled texture makes them easy to serve.
This recipe is also wonderfully flexible. You can add chocolate drizzle, use nuts, change the cookie coating, add spice, make a maple glaze, fold in mini chocolate chips, include dried cranberries, or try a dairy-free version.
Mix, roll, coat, chill, and enjoy. These little pumpkin cheesecake bites are proof that a no-bake dessert can still feel cozy, festive, and completely satisfying.
No Bake Pumpkin Cheesecake Balls
These No Bake Pumpkin Cheesecake Balls are creamy, sweet, and full of cozy pumpkin spice flavor. Made with softened cream cheese, pumpkin puree, powdered sugar, vanilla, and pumpkin pie spice, each bite has the smooth richness of cheesecake with a festive fall twist. The graham cracker crumb coating gives the outside a lightly sweet, classic cheesecake-style finish. Since there is no baking required, these pumpkin cheesecake balls are perfect for quick desserts, holiday trays, fall parties, or easy make-ahead treats.
Recipe Details
- Prep Time: 20 minutes
- Total Time: 20 minutes
- Course: Dessert
- Cuisine: American
- Servings: 12 balls
Ingredients
- 1 cup graham cracker crumbs for rolling
- 1 teaspoon vanilla extract
- ½ cup pumpkin puree
- 1 teaspoon pumpkin pie spice
- 8 oz cream cheese softened
- 1 cup powdered sugar
Instructions
Step 1: Make the Pumpkin Cheesecake Mixture
In a bowl, mix the cream cheese, pumpkin puree, powdered sugar, vanilla extract, and pumpkin pie spice.
Stir until the mixture is smooth, creamy, and evenly combined.
Step 2: Shape the Balls
Roll the mixture into small balls, about 1-inch in diameter.
Place them on a plate or tray as you work.
Step 3: Coat with Graham Cracker Crumbs
Roll each pumpkin cheesecake ball in the graham cracker crumbs until fully coated.
Make sure the crumbs cover the outside evenly.
Step 4: Chill Before Serving
Refrigerate for at least 1 hour before serving.
This helps the cheesecake balls firm up and hold their shape.
Step 5: Serve
Serve chilled as a creamy no-bake pumpkin dessert.
Notes
Store in the refrigerator for up to 3 days.
Serving Suggestions
These no bake pumpkin cheesecake balls pair well with:
- Hot coffee
- Chai tea
- Apple cider
- Whipped cream
- Caramel drizzle
- Crushed pecans
- Fall dessert trays
- Holiday cookie platters
Storage
How to Store
Store the cheesecake balls in an airtight container in the refrigerator.
Best Texture Tip
Keep them chilled until ready to serve so they stay firm, creamy, and easy to pick up.

Fernando is the creator and writer behind the food blog Eating with your Hands. Living and working in cities like Paris, Barcelona, and Berlin, and being married to a Canadian foodie, has given Fernando a passion and interest in food and inspired him to run EWYH.