
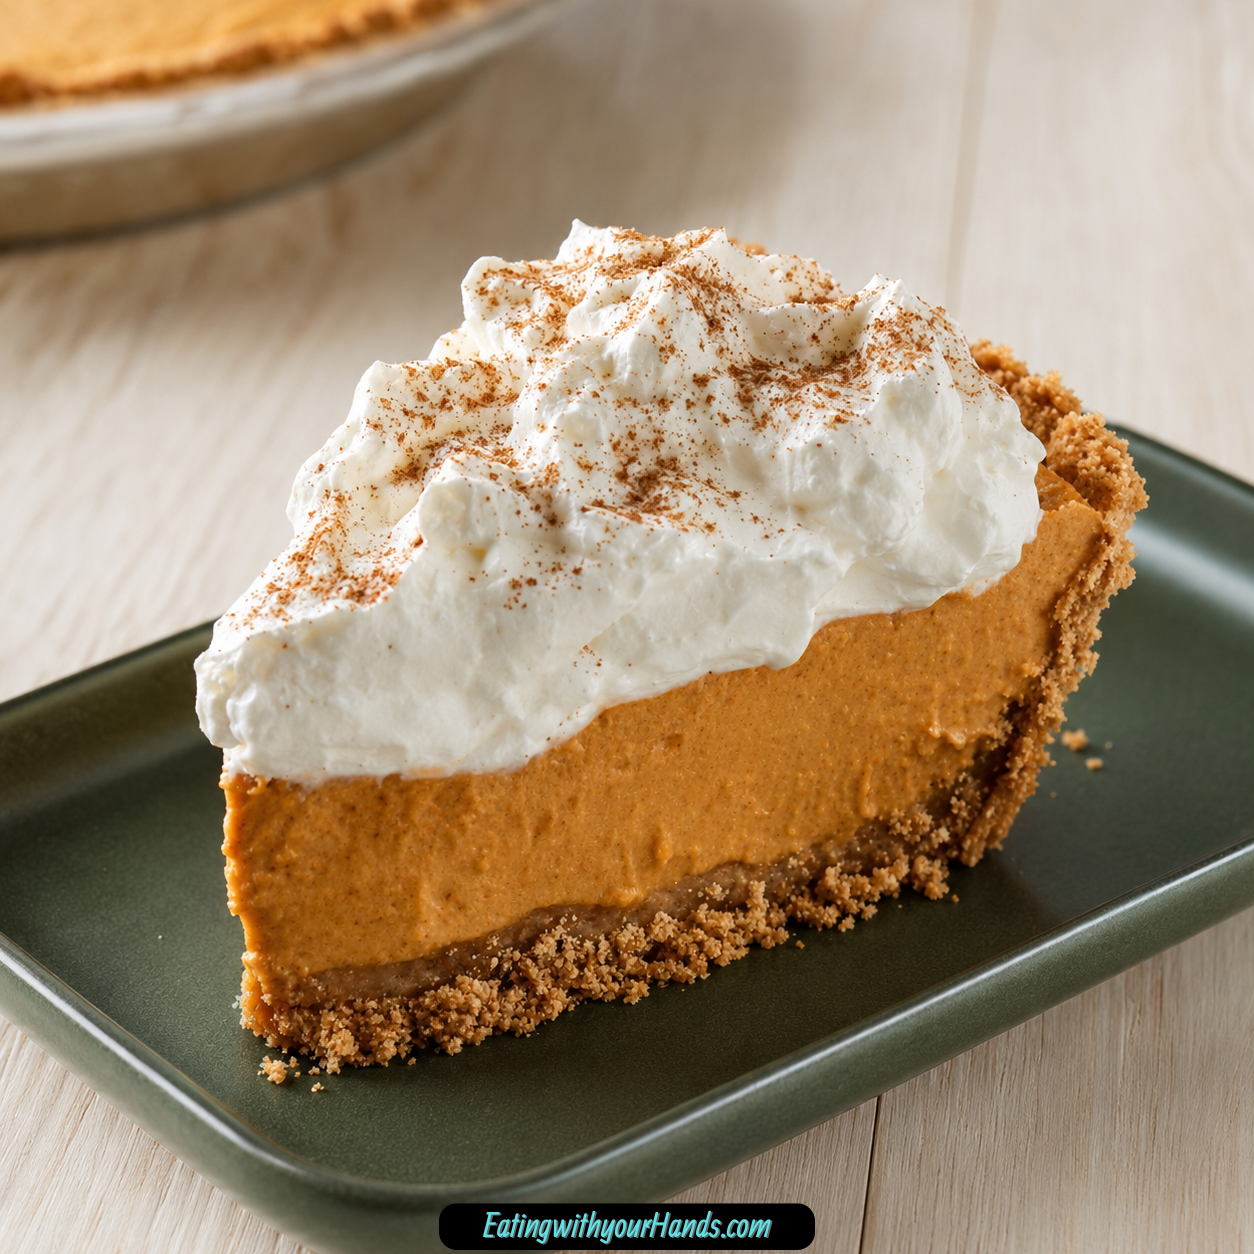
Easy No Bake Pumpkin Pie is the kind of dessert that feels like a small holiday rescue mission. It comes together when the oven is already busy, the kitchen feels crowded, and you still want something creamy, spiced, chilled, and beautiful enough to bring to the table.
This pie has all the cozy pumpkin flavor people expect, but it skips the baking completely. Instead of waiting on a traditional custard pie, you mix a silky pumpkin filling, fold in whipped cream, spoon it into graham cracker crusts, and let the refrigerator do the rest.
What makes this recipe so useful is how calm it feels. On busy holidays, potluck days, or any afternoon when you want pumpkin pie without turning on the oven, this recipe gives you a dessert that tastes special without adding stress.
The filling is smooth and creamy from softened cream cheese, whipped topping, instant vanilla pudding, milk, and canned pumpkin. Cinnamon, pumpkin pie spice, and nutmeg give it that classic fall flavor, while the graham cracker crust adds buttery sweetness and a little crumbly texture.
It is rich but not too heavy, sweet but not overwhelming, and spiced without being too sharp. Served cold from the fridge, it slices neatly after chilling and feels refreshing in the middle of a heavy holiday meal.
This recipe makes two 9-inch pies, which is especially helpful when you are feeding a crowd. One pie can go on the dessert table, and the other can stay tucked away for later, which is a very practical kind of happiness.
Table of Contents
- Why You’ll Love This No Bake Pumpkin Pie
- Recipe Details
- Ingredients You’ll Need
- A Closer Look at the Ingredients
- The Flavor Behind This No Bake Pumpkin Pie
- Directions
- Step 1: Set Up Your Workspace
- Step 2: Make Sure the Cream Cheese Is Soft
- Step 3: Add the Pumpkin to a Large Bowl
- Step 4: Add the Sugar and Cream Cheese
- Step 5: Add the Spices
- Step 6: Mix Until Smooth
- Step 7: Add the Instant Vanilla Pudding Mix
- Step 8: Pour in the Milk
- Step 9: Whisk the Filling
- Step 10: Prepare the Whipped Topping
- Step 11: Fold in the Whipped Cream
- Step 12: Avoid Overmixing
- Step 13: Prepare the Graham Cracker Crusts
- Step 14: Divide the Filling
- Step 15: Smooth the Tops
- Step 16: Chill the Pies
- Step 17: Slice Cold From the Refrigerator
- Step 18: Add Garnishes Before Serving
- Helpful Tips for the Best No Bake Pumpkin Pie
- Common Mistakes
- Delicious Variations
- Serving Suggestions
- Storage Tips
- Freezing Instructions
- Make-Ahead Notes
- Frequently Asked Questions
- Final Thoughts
- No Bake Pumpkin Pie
Why You’ll Love This No Bake Pumpkin Pie
This pie requires no oven. That makes it perfect for Thanksgiving, potlucks, warm kitchens, busy baking days, or any time your oven is already full.
It is quick to prepare. The active work takes about 20 minutes, then the pie chills until the filling becomes sliceable.
It has a creamy, dreamy texture. Cream cheese and whipped cream create a filling that feels like pumpkin pie and cheesecake met in the middle.
It has classic cozy spice. Cinnamon, pumpkin pie spice, and nutmeg bring the familiar warmth people expect from pumpkin desserts.
It keeps well in the refrigerator. Covered leftovers stay good for up to 4 days, so you can enjoy slices throughout the week.
It is flexible. You can make it lighter, gluten-free, extra spiced, maple-flavored, chocolatey, or dairy-free with the swaps provided.
Recipe Details
- Recipe name: Easy No Bake Pumpkin Pie
- Recipe style: No bake pumpkin dessert
- Prep time: About 20 minutes
- Chill time: At least 2 hours
- Best chill option: Overnight for cleaner slices
- Yield: 2 pre-made 9-inch graham cracker pies
- Serving estimate: About 8 slices per pie
- Main texture: Creamy, smooth, chilled, and sliceable
- Main flavor: Pumpkin, cinnamon, pumpkin pie spice, nutmeg, and vanilla pudding
- Crust: Pre-made 9-inch graham cracker crusts
- Storage: Covered in the refrigerator for up to 4 days
- Freezing: Freeze slices for up to 1 month
- Thawing: Thaw overnight in the refrigerator
- Transport tip: Keep chilled in a cooler with ice packs
Ingredients You’ll Need
For the No Bake Pumpkin Pie Filling
- 2 cups canned pumpkin
- ½ cup sugar
- 8 ounces cream cheese, softened
- 2 containers Cool Whip or whipped cream, 8 ounces each
- 1 tablespoon cinnamon
- 2 teaspoons pumpkin pie spice
- 1 teaspoon nutmeg
- 1 box instant vanilla pudding, 3.4 ounces
- 1 cup milk
- 2 pre-made 9-inch graham cracker crusts
A Closer Look at the Ingredients
Canned pumpkin gives the pie its main flavor and smooth body. Use plain pumpkin, not pumpkin pie filling, because the recipe already includes sugar and spices.
Sugar sweetens the filling. The amount keeps the pie dessert-like without hiding the pumpkin and spice.
Softened cream cheese gives the filling richness and structure. It also adds a subtle cheesecake-like creaminess that makes the pie feel more luxurious.
Cool Whip or whipped cream makes the filling light and airy. Cool Whip holds up especially well in the refrigerator, while homemade whipped cream can also be used.
Cinnamon brings warm, familiar pumpkin pie flavor. It is one of the strongest cozy notes in the filling.
Pumpkin pie spice adds more fall flavor. If you do not have it, the original option is to use extra cinnamon with a pinch of cloves and ginger.
Nutmeg adds depth, but it should be used carefully. It is strong, so the recipe uses just enough to give the filling a classic holiday taste.
Instant vanilla pudding helps the filling set. It is the secret to that creamy but sliceable texture.
Milk activates the pudding mix and helps blend the filling. Whole milk makes it extra creamy, but any kind can work.
Pre-made graham cracker crusts keep the recipe easy. They save time and make this pie truly no bake from start to finish.
The Flavor Behind This No Bake Pumpkin Pie
The flavor of this pie is built around creamy pumpkin and warm spice. It tastes familiar, but the chilled texture makes it feel a little lighter than a traditional baked pumpkin pie.
The cream cheese gives the filling a gentle tang and a rich finish. It helps balance the sweetness and makes every slice taste smooth instead of flat.
The whipped topping softens the filling and gives it airiness. Without it, the pie would feel much heavier.
The instant vanilla pudding is important because it helps the filling hold its shape. It also adds a soft vanilla sweetness that works well with pumpkin.
The graham cracker crust gives the pie a buttery, crumbly base. It contrasts beautifully with the creamy filling and keeps the dessert simple.
Directions
Step 1: Set Up Your Workspace
Start by gathering all of your ingredients before you mix the filling. You will need canned pumpkin, sugar, softened cream cheese, Cool Whip or whipped cream, cinnamon, pumpkin pie spice, nutmeg, instant vanilla pudding, milk, and two graham cracker crusts.
You will also need a large mixing bowl, a whisk or hand mixer, a spatula, measuring cups, and measuring spoons. Since this is a no bake recipe, the process moves quickly once you begin.
Having everything ready helps prevent mistakes. It also makes the recipe feel relaxed, which is exactly what a no bake pie should be.
Step 2: Make Sure the Cream Cheese Is Soft
Let the cream cheese sit out for at least an hour before mixing. Soft cream cheese blends into the pumpkin smoothly and helps prevent lumps.
Cold cream cheese can leave little streaks or chunks in the filling. The pie will still taste good, but the texture will not be as silky.
If you forget to soften it, you can microwave it briefly for about 10 seconds. The goal is softened, not melted.
Step 3: Add the Pumpkin to a Large Bowl
Place 2 cups of canned pumpkin into a large mixing bowl. Make sure you are using plain pumpkin, not pumpkin pie filling.
Plain pumpkin allows you to control the sweetness and spices. That matters because this recipe already includes sugar, cinnamon, pumpkin pie spice, and nutmeg.
Use a bowl with enough room for mixing and folding later. The whipped topping will add volume, so extra space is helpful.
Step 4: Add the Sugar and Cream Cheese
Add ½ cup sugar and 8 ounces softened cream cheese to the pumpkin. Begin mixing until the ingredients start to come together.
At first, the mixture may look thick. Keep mixing until the cream cheese begins to disappear into the pumpkin.
This step creates the creamy base of the filling. The smoother it is now, the better the final pie texture will be.
Step 5: Add the Spices
Add 1 tablespoon cinnamon, 2 teaspoons pumpkin pie spice, and 1 teaspoon nutmeg. Mix until the spices are evenly blended into the pumpkin mixture.
The spices should be distributed throughout the filling, not sitting in streaks. Take a little time here so every slice tastes balanced.
This is the moment when the filling starts to smell like fall. The cinnamon and nutmeg make the pumpkin feel warm and dessert-like.
Step 6: Mix Until Smooth
Use a whisk or hand mixer to blend the pumpkin, sugar, cream cheese, and spices until smooth. If you see cream cheese streaks, continue mixing.
A hand mixer can make this step easier, but a whisk can work if the cream cheese is properly softened. The texture should become creamy and cohesive.
Do not rush this step. A smooth base makes the finished pie feel more polished and homemade in the best way.
Step 7: Add the Instant Vanilla Pudding Mix
Sprinkle in the 3.4-ounce box of instant vanilla pudding mix. Add it directly to the pumpkin mixture.
The pudding mix helps thicken the filling and gives the pie that clean-slicing texture after chilling. It also adds a gentle vanilla flavor.
Make sure the pudding is instant pudding. The recipe relies on that quick thickening power.
Step 8: Pour in the Milk
Add 1 cup milk to the bowl. Whole milk makes the filling extra creamy, but any kind can work.
The milk helps activate the pudding mix and loosens the pumpkin mixture enough to blend properly. It also helps the filling become smooth instead of overly thick.
Pour it in slowly if you are whisking by hand. This makes it easier to combine without splashing.
Step 9: Whisk the Filling
Whisk the mixture for about 1 minute. This helps the pudding mix, milk, pumpkin, cream cheese, sugar, and spices come together.
The filling should begin to feel slightly thicker as you mix. It may not look fully set yet, but it will firm up during chilling.
Scrape the sides and bottom of the bowl with a spatula. This ensures no dry pudding mix or cream cheese pockets are hiding there.
Step 10: Prepare the Whipped Topping
Make sure the Cool Whip or whipped cream is thawed if frozen. You need two 8-ounce containers.
The whipped topping should be soft enough to fold into the pumpkin mixture. If it is still frozen, it will not blend smoothly.
Cool Whip holds up well in the refrigerator, which makes it useful for make-ahead desserts. Homemade whipped cream can also work if that is what you prefer.
Step 11: Fold in the Whipped Cream
Add the whipped topping to the pumpkin mixture. Use a spatula to fold it in gently.
Folding means scooping from the bottom of the bowl and turning the mixture over itself. This keeps the filling light instead of deflating it.
Continue folding until no white streaks remain. Stop once the filling looks evenly blended.
Step 12: Avoid Overmixing
Once the whipped topping is incorporated, do not keep stirring aggressively. Overmixing can knock out the airy texture.
The goal is a smooth, fluffy filling that still feels light. It should look creamy, thick, and softly spiced.
If you see a few tiny streaks, fold a little more gently. Do not beat the mixture at this stage.
Step 13: Prepare the Graham Cracker Crusts
Place the two pre-made 9-inch graham cracker crusts on a flat surface. Keep them in their pie tins for easy filling and chilling.
Pre-made crusts are part of what makes this recipe so convenient. They remove the need to bake, cool, or prepare a crust from scratch.
If you prefer, you can use homemade graham cracker crusts. The original recipe works with either option.
Step 14: Divide the Filling
Divide the pumpkin filling evenly between the two graham cracker crusts. Spoon it in carefully so both pies have a similar amount.
Use a spatula to spread the filling toward the edges. Try not to press too hard into the crust.
If you prefer one thicker pie, you can use one deep-dish crust instead of two regular ones. The slices will be extra thick.
Step 15: Smooth the Tops
Use a spatula to smooth the tops of the pies. This gives them a neat finish and makes them easier to garnish later.
The surface does not need to be perfect. A soft, homemade look is part of the charm.
If you plan to add whipped cream, cinnamon, crushed graham crackers, caramel sauce, or chocolate syrup later, a smooth top gives you a nice base.
Step 16: Chill the Pies
Place the pies in the refrigerator for at least 2 hours. This chilling time allows the filling to set.
Do not skip this step. The filling needs time to become firm enough for clean slices.
Overnight chilling is even better. It gives the pie a stronger set and helps the flavors settle.
Step 17: Slice Cold From the Refrigerator
When ready to serve, slice the pie cold straight from the refrigerator. Cold pie holds its shape better than pie that has been sitting out.
Use a sharp knife and wipe it between slices if you want cleaner cuts. The filling should be creamy but sliceable.
If the pie seems too soft, give it more chill time. The refrigerator is what turns the filling into a proper no bake pie.
Step 18: Add Garnishes Before Serving
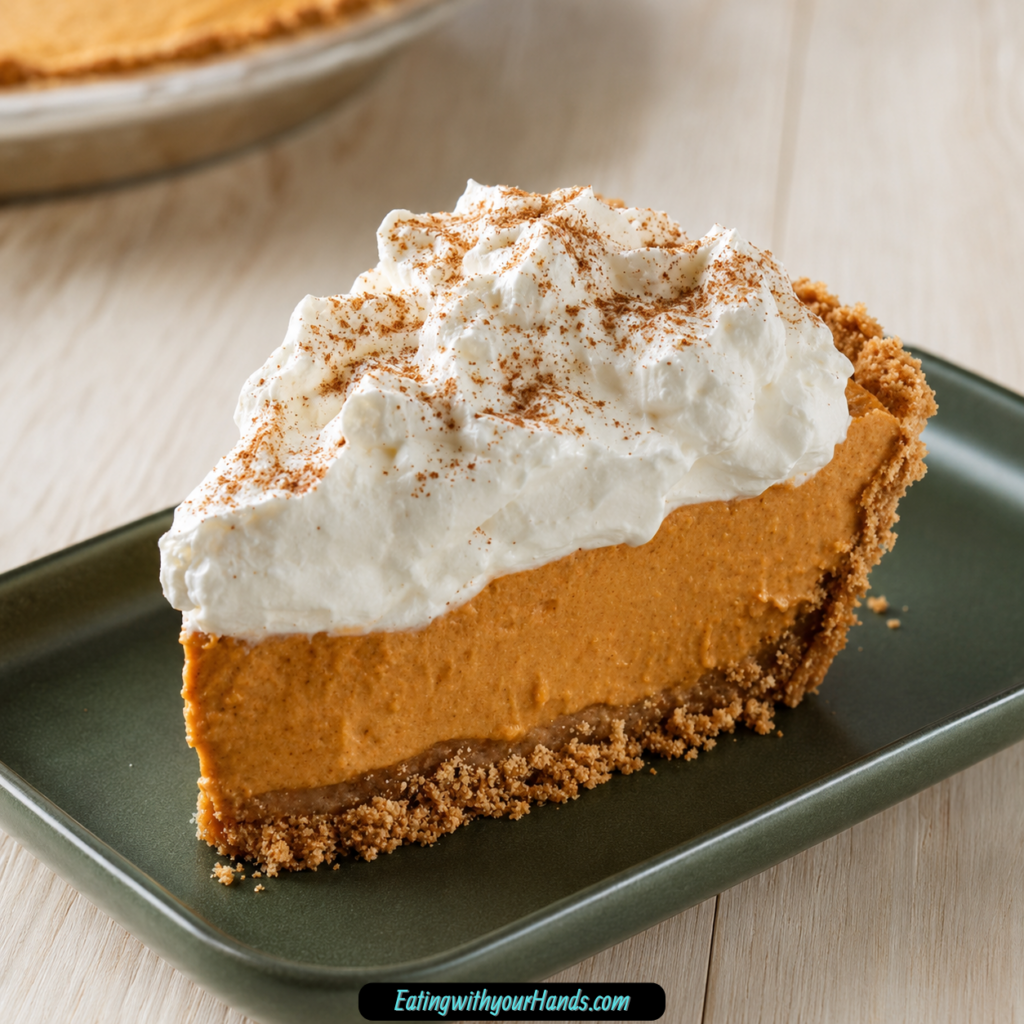
Top each slice with whipped cream if desired. A sprinkle of cinnamon or crushed graham crackers adds a pretty finish.
For a richer presentation, drizzle with caramel sauce or chocolate syrup. These toppings make the pie feel more festive without changing the basic recipe.
Add garnishes close to serving time for the cleanest look. This keeps the toppings fresh and attractive.
Helpful Tips for the Best No Bake Pumpkin Pie
Use plain canned pumpkin, not pumpkin pie filling. The recipe already has sugar and spices, so plain pumpkin keeps the flavor balanced.
Soften the cream cheese completely. This is the most important step for a smooth filling.
Chill the pie for at least 2 hours. Overnight chilling gives the cleanest slices.
Fold the whipped topping gently. This keeps the filling airy and creamy.
Use pre-made graham cracker crusts when you want the easiest version. They are a big reason this recipe is so quick.
Keep the pie cold until serving. The filling holds its shape best straight from the refrigerator.
If transporting the pie, use a cooler with ice packs. This helps prevent the filling from becoming too soft.
Common Mistakes
Using Pumpkin Pie Filling Instead of Plain Pumpkin
Pumpkin pie filling already contains sweeteners and spices. Using it can make the pie too sweet or throw off the flavor balance.
Use plain canned pumpkin for this recipe. That lets the cinnamon, pumpkin pie spice, nutmeg, and sugar work as intended.
Mixing With Cold Cream Cheese
Cold cream cheese is the main reason no bake pie filling turns lumpy. It does not blend smoothly into the pumpkin.
Let it soften at room temperature for at least an hour. If needed, microwave it for about 10 seconds to help it soften.
Skipping the Chill Time
The pie may taste good right away, but it will not slice properly without chilling. The pudding mix and whipped topping need time to set.
Chill for at least 2 hours. If you want the neatest slices, chill overnight.
Overmixing After Adding Whipped Cream
Whipped cream or Cool Whip gives the filling its light texture. Stirring too hard can make the filling less airy.
Fold gently and stop when the mixture is combined. This keeps the pie smooth and fluffy.
Letting the Pie Sit Out Too Long
This pie is meant to be served cold. If it sits too long at room temperature, the filling can soften.
Keep it refrigerated until serving. For parties, return leftovers to the fridge once dessert is finished.
Delicious Variations
Lighter No Bake Pumpkin Pie
Swap the cream cheese for Greek yogurt that has been strained overnight for thickness. Use sugar-free pudding mix for a lighter version.
This variation will be creamy with a slightly tangier flavor. It is a good option if you want a lighter dessert while keeping the pumpkin-spice feeling.
Gluten-Free No Bake Pumpkin Pie
Use a gluten-free graham cracker crust. You can also make your own with gluten-free cookies.
Check labels carefully if using a pre-made crust. Some crusts may include wheat.
Extra Spicy Pumpkin Pie
Increase the cinnamon to 1.5 tablespoons. Add a pinch of black pepper for a warmer, more complex flavor.
The black pepper may sound unusual, but it adds a gentle heat behind the sweetness. Keep it to a pinch so it stays balanced.
Maple Pumpkin Pie
Replace half the sugar with pure maple syrup. Add 1 teaspoon vanilla extract for extra warmth.
This gives the pie a deeper autumn flavor. The maple works beautifully with pumpkin and spice.
Chocolate Pumpkin Pie
Mix ¼ cup cocoa powder into the filling. Use a chocolate graham cracker crust for the base.
Pumpkin and chocolate create a richer variation. It is still creamy and spiced, but with a dessert-like chocolate twist.
Dairy-Free No Bake Pumpkin Pie
Use vegan cream cheese and coconut whipped cream. The spices will still shine through.
This swap keeps the general style of the pie while changing the dairy ingredients. Choose a dairy-free caramel or chocolate topping if garnishing.
Serving Suggestions
Serve the pie cold from the refrigerator. This gives the cleanest slices and the best texture.
Top each slice with a dollop of whipped cream. It adds height, creaminess, and a classic pumpkin pie look.
Sprinkle cinnamon over the top for a simple finish. Crushed graham crackers also work well because they echo the crust.
Drizzle with caramel sauce for a sweeter, richer slice. Chocolate syrup is another option if you want a dessert-style topping.
Serve it after Thanksgiving dinner, at a potluck, or as a quick fall dessert. It is especially helpful when oven space is limited.
One pie serves about 8 slices. Since the recipe makes two pies, it is great for sharing with pumpkin-loving guests.
Storage Tips
Cover leftovers tightly with plastic wrap or foil. Store the pie in the refrigerator for up to 4 days.
The crust may soften slightly as it sits. The filling will stay creamy and flavorful.
Keep the pie cold whenever possible. This helps maintain its sliceable texture.
If you already added toppings, cover the pie carefully so the garnish does not smear too much. Plain slices are easiest to store.
Freezing Instructions
You can freeze slices for up to 1 month. Wrap each slice individually in plastic wrap.
Thaw the slices overnight in the refrigerator before serving. This helps the texture stay creamy.
Freezing whole pies can be done, but slices are more convenient. They thaw faster and are easier to serve one at a time.
For the best appearance, add whipped cream or drizzle toppings after thawing. Fresh garnish looks better than frozen garnish.
Make-Ahead Notes
This pie is excellent for making ahead because it needs chill time anyway. Prepare it the night before and let it set in the refrigerator overnight.
The flavor becomes even better as the spices settle into the creamy pumpkin filling. The slices also come out cleaner after a longer chill.
If making it for a gathering, wait to garnish until just before serving. This keeps the top looking fresh.
For transportation, keep the pie chilled in a cooler with ice packs. A cold pie travels better and holds its shape longer.
Frequently Asked Questions
Can I Use Fresh Pumpkin Instead of Canned?
Yes, you can use fresh pumpkin. Roast or steam it first, then puree it until smooth.
Canned pumpkin is easier and works very well in this recipe. It also keeps the texture consistent.
How Long Does This Pie Last in the Fridge?
The pie lasts about 4 days in the refrigerator if covered well. The filling stays creamy during that time.
The crust may soften slightly as it sits. The flavor still remains delicious.
Can I Freeze Leftovers?
Yes, you can freeze leftovers. Slice the pie first, wrap the pieces tightly, and freeze them for up to 1 month.
Thaw the slices overnight in the refrigerator before serving. This helps preserve the creamy texture.
Why Is My Filling Runny?
The filling may need more chill time. It thickens as it sets in the refrigerator.
If it is still loose after 2 hours, add extra pudding mix 1 tablespoon at a time. Mix carefully and chill again.
Can I Use Homemade Whipped Cream?
Yes, homemade whipped cream can be used. Cool Whip holds up better in the refrigerator, but homemade whipped cream works too.
If using homemade whipped cream, fold gently. You want to keep the filling light.
Can I Use One Deep-Dish Crust?
Yes, you can use one deep-dish crust instead of two regular crusts. The slices will be extra thick.
This is a good shortcut if you want one larger pie. Just remember it may need a strong chill to slice neatly.
Can I Make This Pie Dairy-Free?
Yes, use vegan cream cheese and coconut whipped cream. The spices and pumpkin will still provide the main flavor.
Choose dairy-free toppings if you plan to garnish. Coconut caramel sauce is one option mentioned in the original information.
How Should I Serve This at a Party?
Serve it cold and keep it chilled until dessert time. If transporting it, place it in a cooler with ice packs.
Add whipped cream, cinnamon, crushed graham crackers, caramel sauce, or chocolate syrup before serving. This makes it look finished and festive.
Final Thoughts
Easy No Bake Pumpkin Pie is exactly the kind of recipe that earns a permanent place in a holiday kitchen. It is creamy, spiced, simple, make-ahead friendly, and completely oven-free.
It gives you the familiar comfort of pumpkin pie without the baking stress. The filling is smooth from cream cheese and whipped topping, sliceable from instant vanilla pudding, and warmly flavored with cinnamon, pumpkin pie spice, and nutmeg.
The graham cracker crust keeps everything easy and adds just enough buttery crunch. With two pies from one batch, it is practical for gatherings, leftovers, and those moments when one pie simply will not be enough.
Make it for Thanksgiving, potlucks, busy weekends, or a quiet fall dessert at home. Once it chills and you take that first creamy slice, it is easy to see why this no bake pumpkin pie becomes a recipe people return to again and again.
No Bake Pumpkin Pie
This No Bake Pumpkin Pie is creamy, smooth, and full of cozy pumpkin spice flavor. It is made with canned pumpkin, softened cream cheese, vanilla pudding, milk, whipped cream, and warm spices, then spooned into pre-made graham cracker crusts for an easy chilled dessert. Since there is no oven required, this recipe is especially helpful for holidays, potlucks, Thanksgiving dessert tables, or busy days when you want a make-ahead pumpkin pie with very little effort.
Recipe Details
- Prep Time: 20 minutes
- Total Time: 20 minutes
- Course: Dessert
- Cuisine: American
- Servings: 8 people
Equipment
- Mixing bowl
- Whisk
Ingredients
- 2 pre-made 9-inch graham cracker crusts
- 1 cup milk
- 1 box instant vanilla pudding 3.4-ounce box
- 1 teaspoon nutmeg
- 2 teaspoons pumpkin pie spice
- 1 tablespoon cinnamon
- 2 containers Cool Whip or other whipped cream 8-ounce containers
- 8 ounces cream cheese softened
- ½ cup sugar
- 2 cups canned pumpkin
Instructions
Step 1: Make the Pumpkin Cream Cheese Base
In a large mixing bowl, combine the canned pumpkin, sugar, softened cream cheese, cinnamon, pumpkin pie spice, and nutmeg.
Mix until the filling looks smooth and creamy.
Step 2: Add the Pudding and Milk
Add the instant vanilla pudding and milk to the pumpkin mixture.
Whisk until everything is fully combined and the mixture begins to thicken.
Step 3: Fold in the Whipped Cream
Gently fold in the Cool Whip or whipped cream.
Continue folding until the filling is evenly blended and light in texture.
Step 4: Fill the Crusts
Divide the pumpkin filling evenly between the two pre-made graham cracker crusts.
Smooth the tops with a spatula.
Step 5: Chill
Refrigerate the pies for at least 2 hours before serving.
This helps the filling firm up and makes the pies easier to slice.
Step 6: Serve
Serve chilled for the best creamy texture and pumpkin spice flavor.
Notes
For a richer flavor, use full-fat cream cheese and whipped cream.
Serve chilled for the best results.
Serving Suggestions
This no bake pumpkin pie pairs well with:
- Whipped cream
- Cinnamon dusting
- Caramel drizzle
- Chopped pecans
- Hot coffee
- Chai tea
- Apple cider
- Thanksgiving dessert trays
Storage
How to Store
Store the pies covered in the refrigerator until ready to serve.
Best Texture Tip
Chill the pies long enough before slicing so the filling sets properly and holds its shape.

Fernando is the creator and writer behind the food blog Eating with your Hands. Living and working in cities like Paris, Barcelona, and Berlin, and being married to a Canadian foodie, has given Fernando a passion and interest in food and inspired him to run EWYH.