
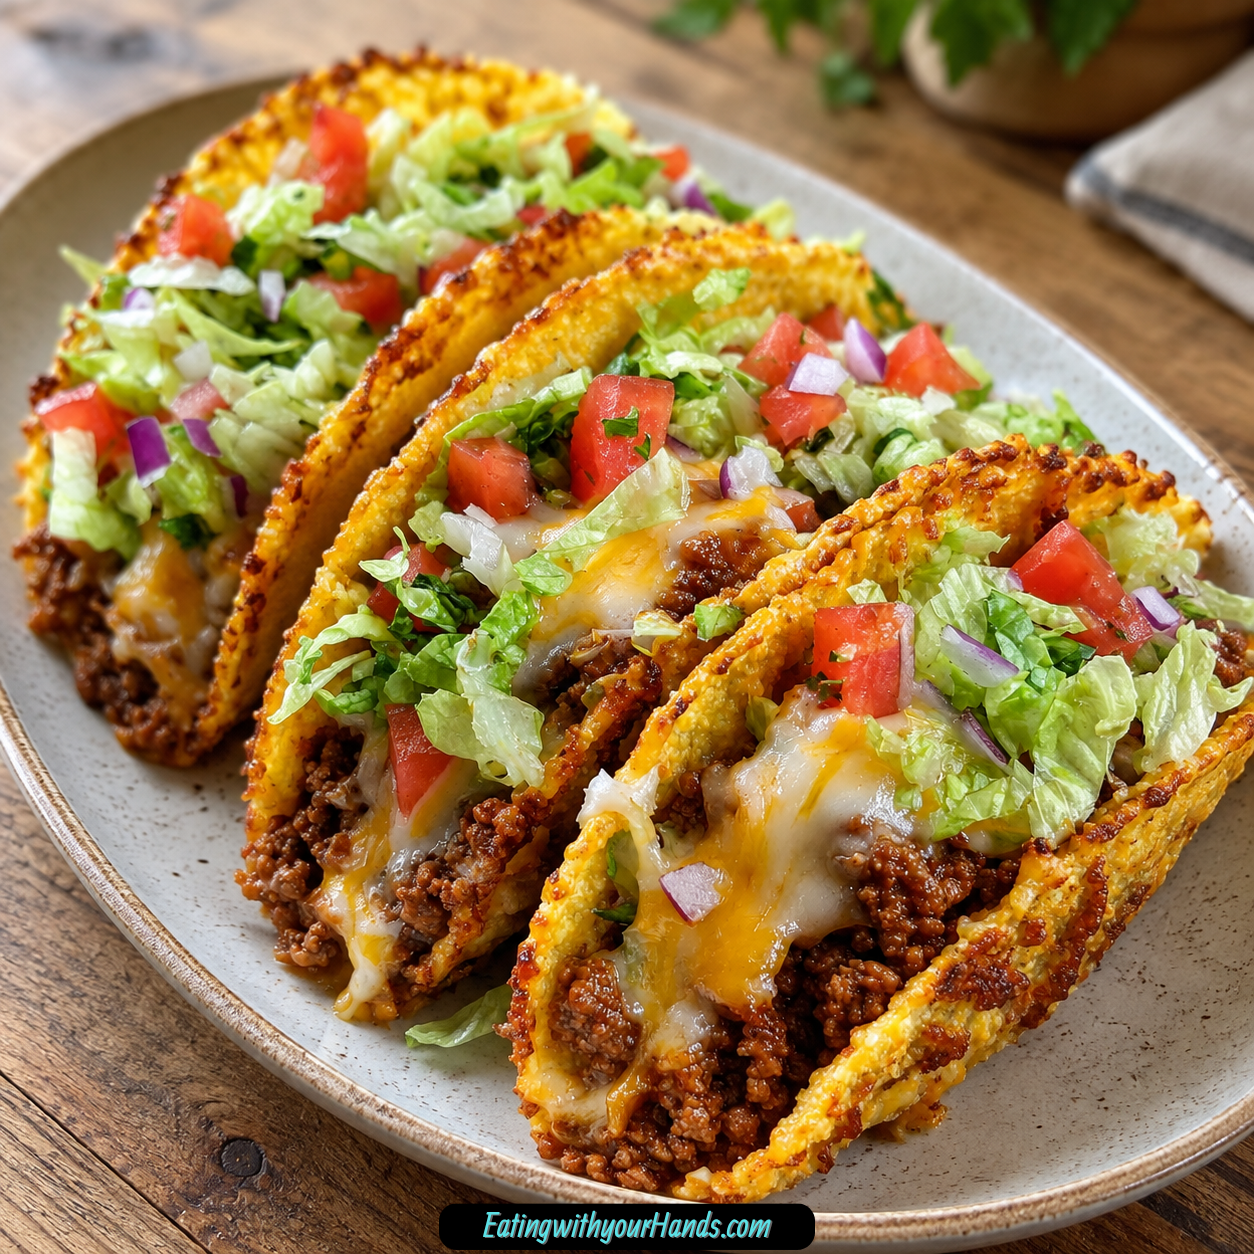
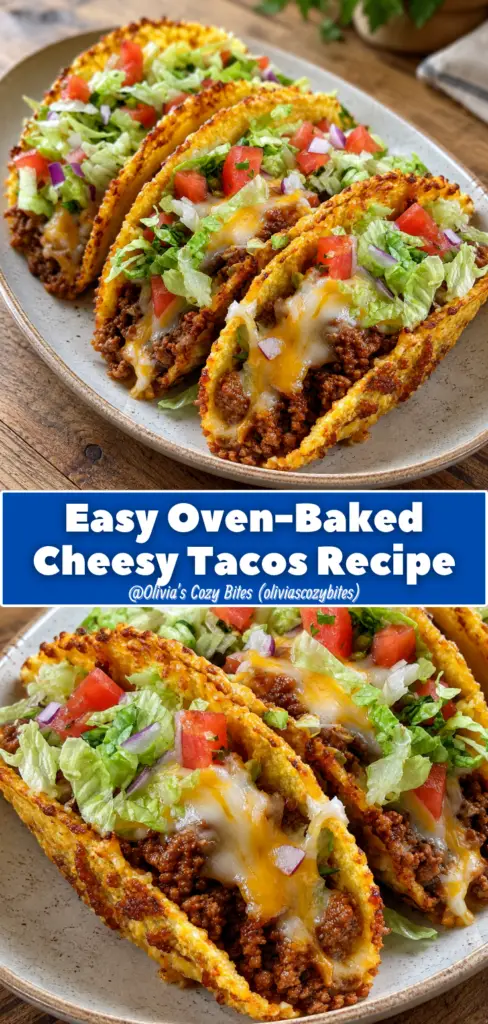
Easy Oven-Baked Cheesy Tacos are the kind of dinner that makes taco night feel smoother, crispier, and a whole lot less chaotic. Instead of filling shells one by one at the table and watching half the toppings fall out, the tacos are filled, covered with cheese, baked until bubbly, and served hot with all the toppings you love.
This recipe is built for busy nights when everyone wants something familiar and satisfying, but you still need dinner to move quickly. In about 30 minutes, you get crisp taco shells, savory beef filling, melted cheese, cool lettuce, juicy tomatoes, red onion, and all the creamy, spicy, crunchy toppings your table can handle.
The real magic happens in the oven. The taco shells become warm and crisp, the cheese melts down into the seasoned filling, and every bite feels more held together than a regular build-your-own taco.
The filling starts with ground beef, onion, garlic, taco seasoning, and tomato sauce or salsa. It is simple, flavorful, and thick enough to sit inside the shells without making them soggy.
The cheese is generous because that is the whole point of baked tacos. A blend of cheddar and Monterey Jack gives a great melt, while a pre-shredded Mexican blend works beautifully on a busy night.
Once the tacos come out of the oven, the fresh toppings bring everything to life. Shredded lettuce adds crunch, tomatoes add brightness, red onion gives bite, and sour cream, guacamole, jalapeños, hot sauce, or pickled onions let every person finish their plate exactly how they like it.
These tacos are practical, family-friendly, customizable, and fun to serve. They work for weeknight dinners, game day spreads, casual gatherings, and those nights when a pile of cheesy tacos feels like the only correct answer.
They are also great for leftovers if you store the filling separately. Use the extra taco meat for more baked tacos, nachos, quesadillas, stuffed bell peppers, or an easy taco mac situation the next day.
Table of Contents
- Why You’ll Love These Oven-Baked Cheesy Tacos
- Recipe Details
- Ingredients
- For the Filling
- For Assembly
- For Toppings
- Optional Swaps and Add-Ins
- Ingredient Notes
- Optional Swaps, Variations, Add-Ins, and Serving Ideas
- Classic Oven-Baked Cheesy Tacos
- Mild Family-Friendly Tacos
- Salsa Beef Tacos
- Turkey Baked Tacos
- Ground Chicken Tacos
- Rotisserie Chicken Tacos
- Black Bean Tacos
- Lentil Tacos
- Roasted Corn Vegetarian Tacos
- Extra Cheesy Tacos
- Breakfast Baked Tacos
- Bell Pepper Tacos
- Zucchini Tacos
- Spicy Baked Tacos
- Soft Tortilla Baked Tacos
- Topping Bar Tacos
- Cilantro-Lime Rice Serving
- Refried Beans Serving
- Chips and Salsa Serving
- Why This Recipe Works
- Directions
- Step 1: Preheat the Oven
- Step 2: Prepare the Baking Sheet
- Step 3: Brown the Ground Beef
- Step 4: Add Onion and Garlic
- Step 5: Season the Filling
- Step 6: Add Tomato Sauce or Salsa
- Step 7: Simmer the Filling
- Step 8: Taste and Adjust
- Step 9: Warm the Shells If Desired
- Step 10: Fill the Taco Shells
- Step 11: Add the Cheese
- Step 12: Bake the Tacos
- Step 13: Cool Briefly
- Step 14: Add Lettuce and Tomatoes
- Step 15: Add Red Onion and Cilantro
- Step 16: Finish With Sauces and Extras
- Step 17: Serve Immediately
- Step 18: Store the Leftovers Properly
- Serving Ideas
- Storage
- Freezing
- Make-Ahead
- Helpful Notes for Best Results
- Variations
- Classic Oven-Baked Cheesy Tacos
- Beef and Salsa Tacos
- Mild Kid-Friendly Tacos
- Ground Turkey Tacos
- Ground Chicken Tacos
- Rotisserie Chicken Tacos
- Black Bean Tacos
- Lentil Tacos
- Roasted Corn Tacos
- Extra Cheesy Tacos
- Breakfast Oven-Baked Tacos
- Bell Pepper Beef Tacos
- Zucchini Beef Tacos
- Dairy-Free Tacos
- Gluten-Free Tacos
- Soft Tortilla Baked Tacos
- Troubleshooting
- Frequently Asked Questions
- Can I use soft tortillas instead of hard shells?
- What if I do not have taco seasoning?
- Can I assemble these ahead of time?
- How do I keep the shells from breaking?
- Can I make these vegetarian?
- Can I use chicken instead of beef?
- How long does the filling last?
- Can I freeze the taco filling?
- How should I reheat assembled tacos?
- What should I serve with oven-baked tacos?
- Why This Recipe Works So Well
- Final Thoughts
- Oven-Baked Cheesy Tacos
Why You’ll Love These Oven-Baked Cheesy Tacos
These tacos are crisp, cheesy, and easy to serve. Baking helps the shells stay crunchy while the cheese melts into the filling.
They are ready in about 30 minutes. That makes them perfect for busy weeknights, game days, or last-minute dinners.
They are customizable for everyone. Each person can add sour cream, guacamole, jalapeños, hot sauce, cilantro, or extra toppings.
They are less messy than regular tacos. The filling and cheese bake together, helping everything stay tucked inside the shell.
They are great for leftovers. The filling reheats well and can be used for lunches or other easy meals.
They are flexible. Ground beef, turkey, chicken, black beans, lentils, shredded chicken, breakfast fillings, and extra vegetables can all work.
Recipe Details
These oven-baked cheesy tacos bake at 375°F (190°C). The assembled tacos bake for 10 to 12 minutes, or until the cheese is bubbly and golden.
The recipe makes 8 hard taco shells. Stand-and-stuff shells work especially well, but regular hard shells can also be used.
The filling uses 1 lb (450 g) ground beef. An 80/20 blend gives flavor, while lean ground beef also works.
Turkey or chicken can be used instead of beef. The flavor will change, but the method stays simple.
The filling also includes 1 small finely diced onion, 2 cloves minced garlic, 1 packet taco seasoning, and ⅔ cup tomato sauce or salsa. Tomato sauce keeps the flavor mellow, while salsa adds more kick.
If using homemade taco seasoning, use 2 tablespoons. Another option is to mix 1 tablespoon chili powder, 1 teaspoon cumin, 1 teaspoon paprika, ½ teaspoon garlic powder, and a pinch of salt.
The tacos are topped with 2 cups shredded cheese before baking. Cheddar and Monterey Jack give maximum meltiness, while a pre-shredded Mexican blend is helpful on busy nights.
The fresh toppings include 1 cup shredded lettuce, ½ cup diced tomatoes, ¼ cup diced red onion, and 2 tablespoons chopped cilantro if desired. Sour cream, guacamole, jalapeño slices, hot sauce, and pickled onions are all optional.
Leftover filling can be stored in the refrigerator for 3 to 4 days. It can also be frozen for up to 3 months.
Ingredients
For the Filling
- 1 lb (450 g) ground beef
- 1 small onion, finely diced
- 2 cloves garlic, minced
- 1 packet taco seasoning
- ⅔ cup tomato sauce or salsa
- Salt and pepper, to taste
For Assembly
- 8 hard taco shells
- 2 cups shredded cheese
For Toppings
- 1 cup shredded lettuce
- ½ cup diced tomatoes
- ¼ cup diced red onion
- 2 tablespoons chopped cilantro, optional
- Sour cream, optional
- Guacamole, optional
- Jalapeño slices, optional
- Hot sauce, optional
Optional Swaps and Add-Ins
- Lean ground beef
- Ground turkey
- Ground chicken
- Shredded rotisserie chicken
- Sautéed ground chicken
- 2 tablespoons homemade taco seasoning
- Cheddar cheese
- Monterey Jack cheese
- Pre-shredded Mexican blend
- Corn taco shells
- Flour taco shells
- Cherry tomatoes
- Pickled onions
- Black beans
- Lentils
- Roasted corn
- Cream cheese
- Scrambled eggs
- Crumbled bacon
- Cilantro-lime rice
- Refried beans
- Tortilla chips and salsa
- Pre-cooked taco meat
- Vegan cheese shreds
- Diced bell peppers
- Diced zucchini
- Mild salsa
- Diced jalapeños
- Cayenne
- Soft tortillas
Ingredient Notes
Ground beef creates a savory, hearty taco filling. An 80/20 blend gives more flavor, while lean beef works if you prefer a lighter filling.
Ground turkey or ground chicken can be used instead of beef. These options make the tacos taste a little different but still work well with taco seasoning.
Finely diced onion blends into the filling. Yellow or white onion both work.
Garlic gives the meat mixture a deeper flavor. Two minced cloves are enough to make the filling taste more complete.
Taco seasoning adds the main taco flavor. Store-bought is convenient, and homemade taco seasoning works if you prefer it.
Tomato sauce keeps the filling mellow and saucy. Salsa adds more flavor and a little kick.
Salt and pepper should be added to taste. Season after the taco seasoning and sauce are mixed in so you do not overdo it.
Hard taco shells are best for the crispy baked texture. Stand-and-stuff shells are especially easy to arrange on a baking sheet.
Shredded cheese melts over the filling and helps hold the tacos together. Cheddar and Monterey Jack make a great combination.
Shredded lettuce adds cool crunch after baking. Iceberg and romaine both work.
Diced tomatoes add freshness and color. Cherry tomatoes can be chopped small if that is what you have.
Red onion adds a sharp bite. If you want to tame the flavor, soak the diced red onion in cold water for 5 minutes.
Cilantro is optional. Use it if you love the flavor, and skip it if you do not.
Sour cream, guacamole, jalapeños, hot sauce, and pickled onions let everyone customize their tacos. Set them out in bowls for an easy topping bar.
Optional Swaps, Variations, Add-Ins, and Serving Ideas
Classic Oven-Baked Cheesy Tacos
Make the tacos with ground beef, onion, garlic, taco seasoning, tomato sauce or salsa, hard taco shells, shredded cheese, lettuce, tomatoes, red onion, and your favorite toppings. This gives you the full crispy, cheesy baked taco experience.
Serve the tacos right after baking. They are best when the shells are hot and crisp.
Mild Family-Friendly Tacos
Use tomato sauce instead of salsa and choose a mild taco seasoning. This keeps the filling gentle for kids or anyone who prefers less spice.
Serve hot sauce and jalapeños on the side. That way, heat lovers can customize their own tacos.
Salsa Beef Tacos
Use salsa instead of tomato sauce in the filling. It adds extra flavor and a little more kick.
Choose mild, medium, or hot salsa depending on your taste. Let the filling simmer briefly so it does not make the shells soggy.
Turkey Baked Tacos
Swap the beef for ground turkey. It creates a lighter filling.
Season well and use salsa if you want more moisture. Turkey can be a little leaner than beef.
Ground Chicken Tacos
Use sautéed ground chicken instead of beef. The seasoning and sauce keep the filling flavorful.
Add a little extra salsa if needed. This keeps the filling juicy.
Rotisserie Chicken Tacos
Use shredded rotisserie chicken for a shortcut. Mix it with taco seasoning and salsa before filling the shells.
This can make dinner faster. It is a great option when you need food on the table quickly.
Black Bean Tacos
Use black beans instead of beef for a vegetarian filling. Season them well and add a splash of lime juice if desired.
Black beans make the tacos hearty. They also pair well with cheese and salsa.
Lentil Tacos
Use lentils as a meatless filling. Season them with taco seasoning and add sauce to keep them moist.
Lentils give the tacos a hearty texture. They work well with roasted corn or extra vegetables.
Roasted Corn Vegetarian Tacos
Add roasted corn to black beans or lentils. The corn brings sweetness and texture.
This variation feels colorful and filling. It is great with guacamole.
Extra Cheesy Tacos
Mix cream cheese into the beef filling. This makes the inside extra creamy.
You can also layer cheese under and over the filling. This creates double meltiness.
Breakfast Baked Tacos
Fill the shells with scrambled eggs, cheese, and crumbled bacon. Bake until the cheese melts.
This makes a fun taco brunch. Add salsa, hot sauce, or sour cream after baking.
Bell Pepper Tacos
Add diced bell peppers with the onion. They soften into the filling and add color.
This is an easy way to sneak in extra vegetables. Kids may barely notice them.
Zucchini Tacos
Add diced zucchini with the onion. It softens into the filling and adds moisture.
Cook it until tender before seasoning the meat. This keeps the texture pleasant.
Spicy Baked Tacos
Add diced jalapeños to the filling or a pinch of cayenne. You can also use hot salsa.
Serve with sour cream or guacamole to balance the heat. Let everyone choose their spice level.
Soft Tortilla Baked Tacos
Use soft tortillas instead of hard shells. Wrap them around the filling like enchiladas, seam-side down.
You will lose the crunch, but the result is still delicious. Bake until the cheese melts.
Topping Bar Tacos
Set up bowls of lettuce, tomatoes, red onion, cilantro, sour cream, guacamole, jalapeños, hot sauce, and pickled onions. Let everyone finish their own tacos.
This is perfect for families and parties. It keeps dinner fun and flexible.
Cilantro-Lime Rice Serving
Serve the tacos with cilantro-lime rice. It turns the meal into a bigger dinner.
The rice pairs well with salsa and cheese. It is simple and filling.
Refried Beans Serving
Add refried beans on the side. They make the plate heartier.
Beans also work well for scooping with chips. Serve with salsa for an easy side.
Chips and Salsa Serving
Serve with tortilla chips and salsa. It is quick, simple, and perfect for game day.
This side keeps the meal casual. It also gives everyone something to snack on while the tacos cool.
Why This Recipe Works
Oven-baked cheesy tacos work because the oven does two helpful things at once. It crisps the shells and melts the cheese into the filling.
The beef filling is cooked first, so the taco shells do not need a long bake. This keeps them crisp instead of dried out.
Simmering the filling with tomato sauce or salsa reduces extra liquid. A thicker filling helps prevent soggy shells.
Cheese acts like a delicious binder. As it melts, it hugs the meat and helps the tacos hold together.
Baking the tacos upright makes them easier to serve. The shells warm evenly and keep their shape.
Fresh toppings go on after baking. Lettuce, tomatoes, red onion, cilantro, sour cream, guacamole, and hot sauce stay cool and bright.
This recipe is also flexible because the filling can change. Beef, turkey, chicken, beans, lentils, breakfast eggs, or vegetables can all fit inside the same baked taco method.
It works especially well for families because everyone can customize the final toppings. One baking sheet can serve different tastes without extra work.
Directions
Step 1: Preheat the Oven
Preheat your oven to 375°F (190°C). Let it heat fully while you make the filling.
A properly heated oven helps the taco shells crisp and the cheese melt evenly. This step sets up the whole recipe.
Step 2: Prepare the Baking Sheet
Set out a baking sheet for the taco shells. If using stand-and-stuff shells, arrange them upright.
If using regular hard shells, place them close together so they support each other. This helps prevent tipping.
Step 3: Brown the Ground Beef
Place a skillet over medium heat and add 1 lb (450 g) ground beef. Break it up with a wooden spoon as it cooks.
Cook for about 5 to 6 minutes, until the beef is no longer pink. Drain excess fat if needed.
Step 4: Add Onion and Garlic
Add 1 finely diced small onion and 2 minced garlic cloves to the skillet. Stir them into the beef.
Cook for about 3 minutes, until the onion softens and turns translucent. The filling should smell savory and warm.
Step 5: Season the Filling
Sprinkle in 1 packet taco seasoning. Stir well so the seasoning coats the beef evenly.
If using homemade taco seasoning, add 2 tablespoons. Make sure it is fully mixed into the meat.
Step 6: Add Tomato Sauce or Salsa
Pour in ⅔ cup tomato sauce or salsa. Stir until the beef mixture becomes saucy.
Tomato sauce keeps the flavor mild. Salsa adds a little more kick and texture.
Step 7: Simmer the Filling
Let the filling simmer for 2 to 3 minutes. Stir occasionally while the liquid reduces slightly.
The filling should be moist but not watery. This helps protect the taco shells from sogginess.
Step 8: Taste and Adjust
Taste the filling and add salt and pepper as needed. Taco seasoning and salsa can vary, so season carefully.
This is your chance to adjust flavor before filling the shells. Add a little more spice if desired.
Step 9: Warm the Shells If Desired
For extra protection against breaking, warm the taco shells in the oven for 2 minutes before filling. This makes them slightly sturdier.
Handle them gently because they can be fragile. Keep them upright on the baking sheet.
Step 10: Fill the Taco Shells
Spoon the beef filling evenly into the 8 hard taco shells. Do not overstuff them.
Leave a little space at the top for cheese. That melted cheese is part of what makes these tacos work so well.
Step 11: Add the Cheese
Top the filling with 2 cups shredded cheese. Use cheddar and Monterey Jack, or use a pre-shredded Mexican blend.
Be generous, but keep the cheese mostly inside the shells. Press it down lightly so it clings to the filling as it melts.
Step 12: Bake the Tacos
Bake the filled tacos at 375°F (190°C) for 10 to 12 minutes. The cheese should be melted, bubbly, and lightly golden.
Watch them near the end of baking. The shell edges can brown quickly.
Step 13: Cool Briefly
Remove the tacos from the oven and let them cool for about 1 minute. The shells and cheese will be very hot.
This brief rest makes them easier to handle. It also keeps the toppings from wilting immediately.
Step 14: Add Lettuce and Tomatoes
Top the baked tacos with 1 cup shredded lettuce and ½ cup diced tomatoes. Add the fresh toppings after baking so they stay crisp.
Use iceberg or romaine for crunch. Cherry tomatoes can be chopped small if using them.
Step 15: Add Red Onion and Cilantro
Sprinkle ¼ cup diced red onion over the tacos. Add 2 tablespoons chopped cilantro if desired.
If you want milder red onion, soak it in cold water for 5 minutes first. Drain before using.
Step 16: Finish With Sauces and Extras
Add sour cream, guacamole, jalapeño slices, hot sauce, or pickled onions if desired. Let everyone finish their tacos the way they like.
This is the fun part of the meal. Keep the toppings in small bowls if serving family-style.
Step 17: Serve Immediately
Serve the tacos right away while the shells are crisp and the cheese is melted. Add napkins because tacos are still joyfully messy.
Pair with cilantro-lime rice, refried beans, or chips and salsa. Enjoy while hot.
Step 18: Store the Leftovers Properly
Store leftover filling and toppings separately in airtight containers. The filling keeps in the refrigerator for 3 to 4 days.
For assembled tacos, reheat in a 350°F oven for 5 to 7 minutes. Avoid the microwave if you want the shells to stay crisp.
Serving Ideas
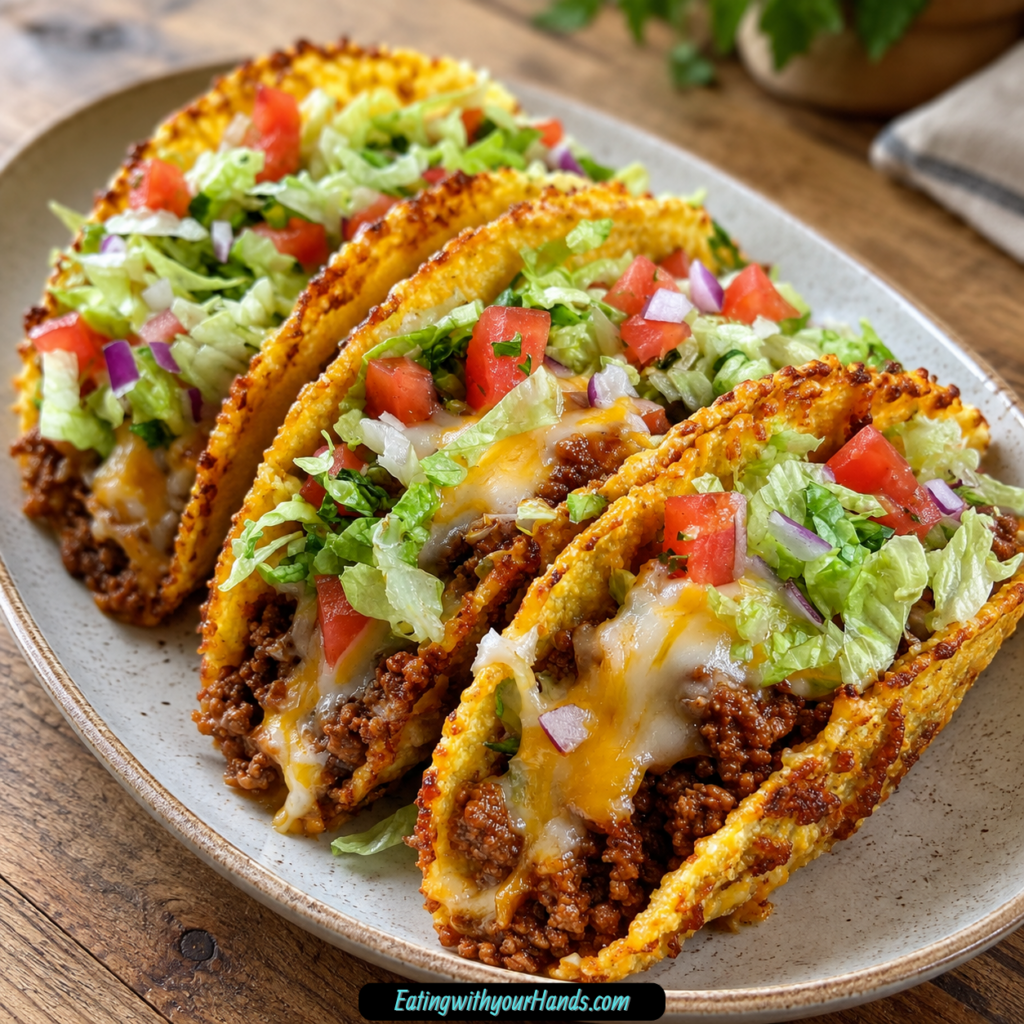
Serve these oven-baked cheesy tacos hot from the oven. The shells are crispiest and the cheese is stretchiest right after baking.
Set up a topping bar for easy serving. Put shredded lettuce, diced tomatoes, red onion, cilantro, sour cream, guacamole, jalapeños, hot sauce, and pickled onions in small bowls.
Kids love building their own tacos. Adults do too, especially when there are spicy toppings and creamy sauces.
Serve with cilantro-lime rice if you want a full dinner plate. The rice makes the meal more filling.
Refried beans are another easy side. They pair naturally with tacos and help stretch the meal.
Tortilla chips and salsa keep things simple. This works especially well for game day or casual gatherings.
For a party, bake a few batches and keep toppings ready. The tacos are easy to grab and fun to customize.
Serve immediately for the best texture. Once fresh toppings sit too long, the shells can soften.
Storage
For the best leftovers, store the filling separately from the shells and toppings. This keeps everything from getting soggy.
The cooked filling keeps in an airtight container in the refrigerator for 3 to 4 days. Reheat it before filling fresh shells.
Store lettuce, tomatoes, red onion, and other toppings in their own containers. Fresh toppings stay better when separated.
Hard taco shells should be stored dry. Fill and bake fresh when possible.
If you have assembled tacos left, place them in the refrigerator and reheat in the oven. They will be best if eaten soon.
Avoid microwaving assembled tacos if you want crunch. The microwave softens the shells.
Use leftover filling for nachos, quesadillas, stuffed bell peppers, or taco mac. It is too useful to waste.
Freezing
The cooked beef filling freezes beautifully. Portion it into freezer bags and squeeze out the air.
Freeze for up to 3 months. Thaw overnight in the refrigerator before reheating.
Reheat the filling in a skillet over medium heat. Add a splash of water or salsa to keep it moist.
Do not freeze assembled tacos with lettuce, tomatoes, or sour cream. The toppings will not thaw well.
For freezer meal planning, freeze only the filling. Keep shells, cheese, and toppings fresh for assembly.
This makes future taco nights much faster. Once the filling is thawed, you only need to fill, cheese, and bake.
Make-Ahead
You can assemble the tacos ahead of time without toppings. Fill the shells and refrigerate for up to 2 hours before baking.
Add 2 to 3 extra minutes to the bake time because the tacos will be cold. Bake until the cheese melts and the shells crisp.
For longer make-ahead prep, make only the filling. Store it in the refrigerator for 3 to 4 days or freeze it for up to 3 months.
Chop toppings ahead and store them separately. Keep lettuce dry and tomatoes covered.
The fastest version uses pre-cooked taco meat or rotisserie chicken. Mix with seasoning and salsa, then fill and bake.
If using chicken, add a little extra salsa to keep it juicy. This helps the filling stay moist during baking.
Helpful Notes for Best Results
Drain excess fat from the beef if needed. Too much grease can make the shells soften.
Simmer the filling for a few minutes after adding sauce. This reduces excess liquid.
Do not overstuff the shells. Leave room for cheese so the tacos bake neatly.
Nestle regular shells close together on the pan. They support each other and are less likely to break.
Warm shells in the oven for 2 minutes before filling if they seem fragile. This can help prevent cracking.
Use enough cheese to cover the filling. The melted cheese helps hold everything together.
Add fresh toppings after baking. Lettuce and tomatoes should stay cool and crisp.
For mild tacos, use half the seasoning or mild salsa. For spicy tacos, add jalapeños or cayenne.
Variations
Classic Oven-Baked Cheesy Tacos
Use ground beef, onion, garlic, taco seasoning, tomato sauce or salsa, hard taco shells, shredded cheese, lettuce, tomatoes, red onion, cilantro, sour cream, guacamole, jalapeños, and hot sauce. This gives you the full classic baked taco experience.
Bake until the cheese is bubbly and golden. Serve immediately.
Beef and Salsa Tacos
Use salsa instead of tomato sauce in the filling. This adds more texture and flavor.
Choose mild, medium, or hot salsa depending on your taste. Simmer until the filling thickens slightly.
Mild Kid-Friendly Tacos
Use tomato sauce and a mild seasoning approach. You can use half the taco seasoning if needed.
Keep hot sauce and jalapeños on the side. Everyone can adjust their own plate.
Ground Turkey Tacos
Use ground turkey instead of beef. Add salsa to keep the filling juicy.
This variation is lighter but still flavorful. Season well before filling the shells.
Ground Chicken Tacos
Use sautéed ground chicken. Mix with taco seasoning and tomato sauce or salsa.
Add an extra splash of salsa if the filling seems dry. Chicken works well with melted cheese.
Rotisserie Chicken Tacos
Use shredded rotisserie chicken for a shortcut. Mix it with seasoning and salsa before filling the shells.
This can make dinner ready much faster. It is great for busy nights.
Black Bean Tacos
Use black beans instead of beef. Season them well and add sauce to keep them moist.
This is a simple vegetarian option. Add roasted corn for sweetness.
Lentil Tacos
Use lentils as the filling. Stir in taco seasoning and tomato sauce or salsa.
Lentils make the tacos hearty. They work well with cheese and guacamole.
Roasted Corn Tacos
Add roasted corn to black beans, lentils, chicken, or beef. It gives sweetness and texture.
Corn makes the filling more colorful. It is especially good with cilantro.
Extra Cheesy Tacos
Mix cream cheese into the beef filling. This makes the center creamy and rich.
You can also add cheese under the filling and over the filling. This creates double melt.
Breakfast Oven-Baked Tacos
Fill shells with scrambled eggs, cheese, and crumbled bacon. Bake until the cheese melts.
Serve for brunch with salsa and hot sauce. It is a fun twist.
Bell Pepper Beef Tacos
Add diced bell peppers with the onion. They soften into the filling.
This adds extra vegetables without much effort. It also brings color.
Zucchini Beef Tacos
Add diced zucchini with the onion. Cook until softened before seasoning.
Zucchini blends into the filling nicely. It is a helpful veggie boost.
Dairy-Free Tacos
Skip the cheese or use vegan shreds. The filling still has plenty of flavor.
Top with salsa, guacamole, lettuce, tomatoes, and hot sauce. Serve immediately.
Gluten-Free Tacos
Use corn taco shells and check labels if needed. Swap the seasoning packet for homemade seasoning if avoiding hidden gluten.
The homemade blend can include chili powder, cumin, paprika, garlic powder, and salt. Taste and adjust.
Soft Tortilla Baked Tacos
Use soft tortillas instead of hard shells. Wrap them around the filling like enchiladas and place them seam-side down.
Bake until the cheese melts. The result will be soft instead of crunchy.
Troubleshooting
The Shells Broke
The shells may have been too fragile or handled too roughly. Nestle them close together so they support each other.
Warm them in the oven for 2 minutes before filling for extra insurance. Handle gently.
The Shells Got Soggy
The filling may have been too wet. Simmer it for 2 to 3 minutes after adding the tomato sauce or salsa.
Do not add cold, wet toppings before baking. Fresh toppings go on after the tacos come out of the oven.
The Filling Fell Out
The shells may be overfilled. Leave room at the top for cheese.
The melted cheese helps hold the filling in place. Press it down lightly before baking.
The Cheese Did Not Melt Enough
The tacos may need another minute or two in the oven. Bake until the cheese is bubbly.
Use a good melting cheese like cheddar, Monterey Jack, or Mexican blend. Pre-shredded cheese works for convenience.
The Edges Burned
The tacos may have baked too long. Watch them closely after 10 minutes.
Oven temperatures can vary. Remove them when the cheese is melted and the shells are crisp.
The Filling Tastes Bland
Add more salt, pepper, taco seasoning, salsa, or hot sauce. Taste before filling the shells.
A little extra garlic or jalapeño can also help. Adjust gently.
The Filling Is Too Spicy
Use sour cream or guacamole on top. They help cool the heat.
Next time, use mild salsa or half the seasoning. Skip jalapeños and cayenne.
The Red Onion Is Too Sharp
Soak diced red onion in cold water for 5 minutes. Drain before using.
This tames the bite while keeping the crunch. It works well for taco toppings.
Leftover Tacos Turned Soft
Reheat them in a 350°F oven for 5 to 7 minutes. This helps crisp the shells again.
Avoid microwaving if possible. It makes the shells soggy.
The Filling Is Dry After Reheating
Warm it in a skillet with a splash of water or salsa. Stir often.
This brings the filling back to a saucy texture. It should be ready in about 5 minutes.
Frequently Asked Questions
Can I use soft tortillas instead of hard shells?
Yes, soft tortillas can be used. Wrap them around the filling like enchiladas, place them seam-side down, and bake until the cheese melts.
You will lose the crisp taco shell texture. The result will still be delicious.
What if I do not have taco seasoning?
Mix 1 tablespoon chili powder, 1 teaspoon cumin, 1 teaspoon paprika, ½ teaspoon garlic powder, and a pinch of salt. Taste and adjust as you go.
You can use 2 tablespoons homemade taco seasoning if you have it ready. Either option works.
Can I assemble these ahead of time?
Yes, fill the shells without fresh toppings and refrigerate for up to 2 hours before baking. Add 2 to 3 extra minutes to the bake time.
Bake until the cheese is melted and bubbly. Add toppings after baking.
How do I keep the shells from breaking?
Nestle the shells close together on the pan so they support each other. Stand-and-stuff shells also work well.
For extra insurance, warm the shells in the oven for 2 minutes before filling. This helps make them easier to handle.
Can I make these vegetarian?
Yes, use black beans, lentils, or sautéed mushrooms instead of beef. Increase the seasoning as needed.
A splash of lime juice can add brightness. Add cheese and toppings as usual.
Can I use chicken instead of beef?
Yes, use shredded rotisserie chicken or sautéed ground chicken. Add extra salsa to keep the filling juicy.
Season well and bake with cheese. Chicken makes a great variation.
How long does the filling last?
The filling keeps in the refrigerator for 3 to 4 days. Store it in an airtight container.
Reheat in a skillet with a splash of water or salsa. Use it for tacos, nachos, quesadillas, or stuffed peppers.
Can I freeze the taco filling?
Yes, the cooked filling freezes well for up to 3 months. Portion into freezer bags and squeeze out the air.
Thaw overnight in the refrigerator before reheating. Add a splash of water or salsa if needed.
How should I reheat assembled tacos?
Reheat assembled tacos in a 350°F oven for 5 to 7 minutes. This helps crisp the shells.
Avoid the microwave if you want crunch. Microwaving makes them soft.
What should I serve with oven-baked tacos?
Serve them with cilantro-lime rice, refried beans, tortilla chips, and salsa. A topping bar also makes the meal fun.
For a casual dinner, the tacos can stand alone. Add cold drinks and napkins.
Why This Recipe Works So Well
This Easy Oven-Baked Cheesy Tacos Recipe works because it takes everything people love about tacos and makes the process easier. The shells stay upright, the filling gets warm, and the cheese melts into every bite.
Cooking the filling first gives the beef time to brown and absorb flavor. Onion, garlic, seasoning, and tomato sauce or salsa create a simple but satisfying base.
Simmering the filling keeps the texture right. Too much liquid would soften the shells, so reducing it slightly matters.
Baking the shells makes them crisp and warm. It also melts the cheese into the filling, which helps the tacos hold together better.
Adding toppings after baking protects the fresh crunch. Lettuce, tomatoes, red onion, cilantro, sour cream, guacamole, jalapeños, hot sauce, and pickled onions all taste best when added at the end.
The recipe is also flexible. Beef, turkey, chicken, black beans, lentils, roasted corn, cream cheese, breakfast eggs, bacon, bell peppers, zucchini, dairy-free cheese, soft tortillas, and homemade seasoning can all fit.
Storage is practical too. The filling keeps well in the refrigerator and freezer, making future dinners easier.
Most of all, this recipe works because it keeps taco night fun while reducing the usual mess. Crispy shells, melted cheese, flavorful filling, and a table full of toppings make dinner feel easy and happy.
Final Thoughts
Easy Oven-Baked Cheesy Tacos are made with ground beef, onion, garlic, taco seasoning, tomato sauce or salsa, hard taco shells, shredded cheese, and fresh toppings like lettuce, tomatoes, red onion, cilantro, sour cream, guacamole, jalapeños, and hot sauce. The filling is cooked until savory and thick, spooned into shells, topped with cheese, and baked until crisp and bubbly.
Serve them hot with a topping bar, cilantro-lime rice, refried beans, tortilla chips, or salsa. With their 30-minute timing, crispy baked shells, gooey cheese, flexible filling options, freezer-friendly taco meat, and family-friendly serving style, these tacos are a dependable weeknight dinner that turns simple ingredients into something everyone can get excited about.
Oven-Baked Cheesy Tacos
Crunchy, cheesy, hearty, and easy to customize, these Oven-Baked Cheesy Tacos are filled with seasoned ground beef, onion, garlic, tomato sauce or salsa, and plenty of melted cheese. Finished with lettuce, tomatoes, red onion, cilantro, sour cream, guacamole, jalapeño slices, hot sauce, or any favorite toppings, they make a simple Mexican-style dinner for 4 people.
Recipe Details
- Prep Time: 15 minutes
- Cook Time: 15 minutes
- Total Time: 30 minutes
- Course: Dinner
- Cuisine: Mexican
- Servings: 4 people
Ingredients
For Toppings
- hot sauce optional
- jalapeño slices optional
- guacamole optional
- sour cream optional
- 2 tablespoons chopped cilantro optional
- ¼ cup diced red onion
- ½ cup diced tomatoes
- 1 cup shredded lettuce
For Assembly
- 2 cups shredded cheese cheddar, Monterey Jack, or Mexican blend
- 8 hard taco shells
For the Filling
- salt & pepper to taste
- ⅔ cup tomato sauce or salsa
- 1 packet taco seasoning or homemade mix
- 2 cloves garlic minced
- 1 small onion finely diced
- 1 lb ground beef 450 g
Instructions
Step 1: Preheat the Oven
Preheat the oven to 375°F (190°C). Let it heat fully while the taco filling is prepared.
Starting with a hot oven helps the filled taco shells warm quickly and lets the cheese melt evenly over the beef.
Step 2: Brown the Ground Beef
In a skillet over medium heat, cook the ground beef until browned. Drain the excess fat once the beef is cooked.
This keeps the taco filling hearty without becoming greasy. Break up the beef as it cooks so it will fit easily inside the hard taco shells.
Step 3: Add the Onion and Garlic
Add the finely diced onion and minced garlic to the skillet. Cook until softened.
The onion and garlic blend into the beef and give the filling a savory base before the taco seasoning and sauce are added.
Step 4: Season the Filling
Stir in the taco seasoning, tomato sauce or salsa, salt, and pepper. Simmer for 2-3 minutes.
Use either a taco seasoning packet or a homemade mix as listed. The tomato sauce or salsa helps the beef mixture stay moist and flavorful inside the shells.
Step 5: Fill the Taco Shells
Fill each hard taco shell with the beef mixture. Top the filling with shredded cheese.
Use cheddar, Monterey Jack, or Mexican blend cheese as written. Try to divide the filling and cheese evenly among the 8 taco shells.
Step 6: Bake Until Cheesy
Place the filled tacos on a baking sheet. Bake for 10-12 minutes, or until the cheese is melted.
The shells should be warm and the cheese should be soft and melted over the beef. Remove the tacos from the oven once the cheese is ready.
Step 7: Add Toppings and Serve
Top the baked tacos with shredded lettuce, diced tomatoes, diced red onion, cilantro, and any optional toppings. Use sour cream, guacamole, jalapeño slices, or hot sauce if desired.
Serve immediately so the taco shells stay crisp and the cheese stays warm.
Notes
- Customize with your favorite toppings.
- Add beans for extra protein if desired.
Serving Suggestions
Serve Oven-Baked Cheesy Tacos immediately after baking, while the cheese is melted and the taco shells are still crisp. The seasoned ground beef, tomato sauce or salsa, garlic, onion, and shredded cheese create a warm filling that pairs well with fresh toppings.
Use shredded lettuce, diced tomatoes, red onion, and chopped cilantro for the listed fresh toppings. Add sour cream, guacamole, jalapeño slices, or hot sauce if you want extra creaminess, heat, or flavor.
This recipe makes 4 servings with 8 hard taco shells. You can also customize the tacos with favorite toppings or add beans for extra protein as noted, without changing the basic baked taco method.
Storage
How to Store
The recipe does not provide specific storage instructions or storage duration, so no exact storage time is added here.
Filling Tip
Cook the ground beef until browned, then drain the excess fat before adding the onion and garlic. This helps keep the taco filling from becoming oily.
Seasoning Tip
Use 1 packet taco seasoning or a homemade mix. Simmer the seasoning with tomato sauce or salsa for 2-3 minutes so the filling becomes flavorful and moist.
Cheese Tip
Use cheddar, Monterey Jack, or Mexican blend cheese as listed. Add the cheese before baking so it melts over the beef filling.
Baking Tip
Bake the filled tacos at 375°F (190°C) for 10-12 minutes. They are ready when the cheese is melted.
Topping Tip
Add lettuce, tomatoes, red onion, cilantro, and optional toppings after the tacos come out of the oven. This keeps the toppings fresh and the shells crisp.

Fernando is the creator and writer behind the food blog Eating with your Hands. Living and working in cities like Paris, Barcelona, and Berlin, and being married to a Canadian foodie, has given Fernando a passion and interest in food and inspired him to run EWYH.