
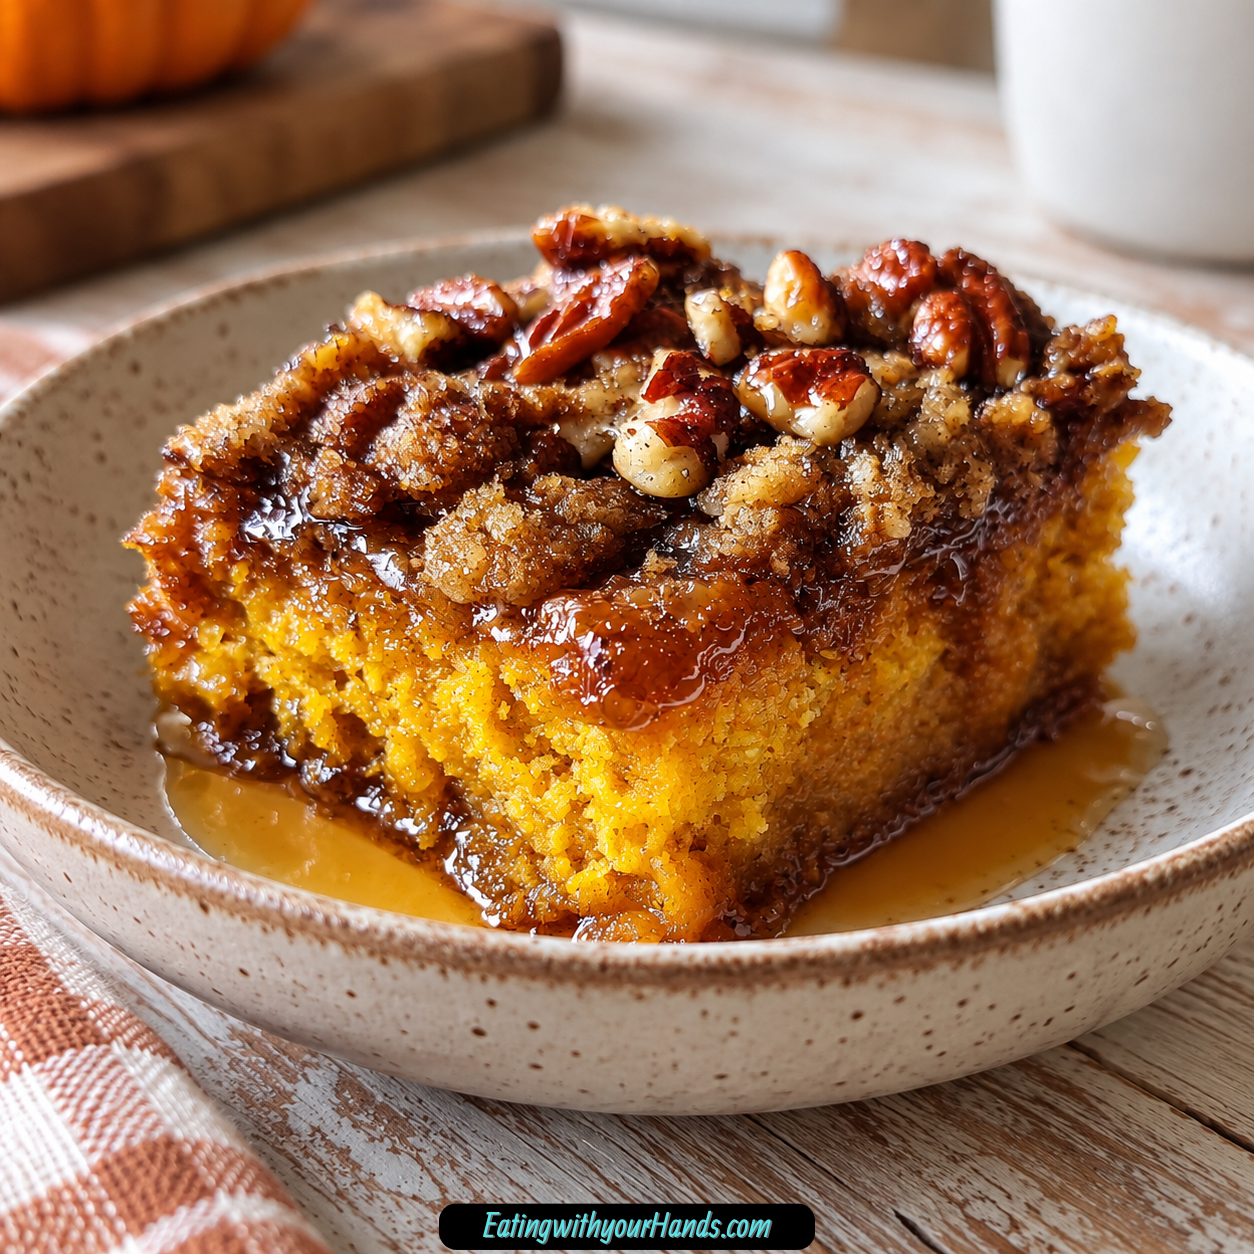

There is something about pumpkin baking that can change the feeling of an entire kitchen. The moment warm spice begins drifting through the room, an ordinary afternoon starts to feel a little more like fall, even before the dessert has finished baking.
That is exactly why this Easy Pumpkin Dump Cake has stayed in my dessert rotation for years. It gives me all the cozy pumpkin flavor I want, but it never demands the kind of careful preparation that makes a last-minute dessert feel impossible.
The first time I had it was after the birth of my second baby, when my neighbor brought over a pan. I still remember taking that first bite and realizing how unexpectedly good the contrast was between the soft, warmly spiced pumpkin layer and the crisp, buttery topping.
It immediately became one of those recipes I wanted to keep. Since then, I have served it at Thanksgiving potlucks, made it for casual weeknight desserts, and turned to it whenever I wanted something that tasted as though far more work had gone into it than actually had.
The name “dump cake” almost undersells what comes out of the oven. This dessert lands somewhere between pumpkin pie and coffee cake, with a custard-like pumpkin base underneath a golden topping made from dry cake mix, nuts, and melted butter.
The method is wonderfully uncomplicated. You stir together the pumpkin mixture, pour it into the baking dish, scatter the cake mix and pecans over the top, drizzle everything with butter, and let the oven handle the transformation.
No mixer is required. There is no creaming butter, no folding egg whites, and no complicated assembly that makes you wonder whether dessert is really worth the trouble.
What you get instead is a warm fall dessert with familiar pumpkin spice flavor, crunchy nuts, buttery cake topping, and a soft center that sets as it cools. Served slightly warm with vanilla ice cream, it has the kind of comforting contrast that makes people come back for another piece.
Table of Contents
- Why Easy Pumpkin Dump Cake Earns a Place in Fall Baking
- Ingredients for Easy Pumpkin Dump Cake
- A Closer Look at the Pumpkin Layer
- Why the Topping Is So Different from Regular Cake
- Equipment You’ll Need
- How to Make Easy Pumpkin Dump Cake
- Step 1: Preheat the Oven
- Step 2: Bring the Eggs Toward Room Temperature
- Step 3: Whisk the Eggs First
- Step 4: Mix the Pumpkin Filling
- Step 5: Pour the Pumpkin Mixture Into the Baking Dish
- Step 6: Sprinkle the Dry Cake Mix Over the Pumpkin
- Step 7: Add the Chopped Pecans
- Step 8: Melt and Slightly Cool the Butter
- Step 9: Drizzle the Butter Evenly
- Step 10: Bake for 50–60 Minutes
- Step 11: Check for Doneness Carefully
- Step 12: Add Optional Extra Browning
- Step 13: Cool for at Least 30 Minutes
- Step 14: Serve Slightly Warm
- Tips for the Best Pumpkin Dump Cake
- Cake Mix Substitutions
- Nut-Free Topping Ideas
- Evaporated Milk and What to Use Instead
- Pumpkin Spice Alternatives
- How to Store Easy Pumpkin Dump Cake
- How to Reheat Pumpkin Dump Cake
- Can I Make This With Fresh Pumpkin?
- Why Is My Pumpkin Dump Cake Soggy in the Middle?
- Why Didn’t the Topping Get Crispy?
- Can I Make a Gluten-Free Pumpkin Dump Cake?
- Can I Halve the Recipe?
- Nutrition Information
- A Fall Dessert I Keep Coming Back To
- Irresistible Easy Pumpkin Dump Cake Recipe
Why Easy Pumpkin Dump Cake Earns a Place in Fall Baking
Some desserts are worth making because they are impressive projects. This one is worth making because it delivers that same sense of indulgence without turning your kitchen into a full afternoon of measuring, mixing, chilling, and cleaning.
The actual hands-on work takes about 10 minutes. Once the layers are assembled in a 9×13-inch baking dish, most of the process happens inside the oven.
That makes this dessert especially useful during busy seasons. From September through December, I like having these ingredients around because the recipe can move from pantry staples to a warm dessert with very little planning.
It also has the kind of flavor people immediately associate with fall. Pumpkin puree and pumpkin pie spice form the center of the dessert, while pecans add crunch and melted butter helps the cake mix bake into a rich topping.
The texture is equally important. The bottom stays soft and creamy, almost like pumpkin pie filling, while the top turns golden and crisp.
That contrast is what makes a spoonful or slice so satisfying. You are not getting one uniform cake texture from top to bottom; every serving has a softer pumpkin layer underneath and a more substantial topping above it.
The recipe is flexible, too. Yellow cake mix is the classic choice, but spice cake mix, white cake mix, or even a gluten-free vanilla cake mix can take its place.
Pecans can become walnuts, toasted coconut flakes, rolled oats with brown sugar, or crushed graham crackers. Those variations let the basic recipe stay familiar while shifting the topping according to what you have or what your family prefers.
Ingredients for Easy Pumpkin Dump Cake
The easiest way to think about the recipe is in two layers. The pumpkin mixture forms the soft base, while the cake mix, nuts, and butter create the crisp topping.
For the Pumpkin Layer
- 1 can (15 oz) pure pumpkin puree
- 1 cup granulated sugar
- 3 large eggs at room temperature
- 1 can (12 oz) evaporated milk
- 1 tablespoon pumpkin pie spice
- ¼ teaspoon salt
If pumpkin pie spice is unavailable, one suggested option is:
- 2 teaspoons cinnamon
- 1 teaspoon nutmeg
Pure pumpkin puree is important here. Pumpkin pie mix is already sweetened and spiced, so it is not used in place of the plain puree.
The evaporated milk is also specific. It is not the same as sweetened condensed milk, which is much thicker and sweeter and would change the balance of the dessert significantly.
For the Crispy Topping
- 1 box (15.25 oz) yellow or golden cake mix
- 1 cup chopped pecans
- ½ cup (1 stick) melted butter
The dry cake mix goes directly over the pumpkin layer. It is not prepared according to the box directions, and it is not stirred into the pumpkin filling.
The pecans are scattered over the cake mix, and then the melted butter is drizzled across the surface. As the dessert bakes, those separate topping ingredients form the golden layer that gives dump cake its characteristic texture.
A Closer Look at the Pumpkin Layer
The pumpkin portion is remarkably simple considering how rich the finished dessert tastes. Pumpkin puree, sugar, eggs, evaporated milk, spice, and salt are stirred together until combined.
The eggs work best when they are not refrigerator-cold. Letting them sit at room temperature for about 30 minutes helps them blend more smoothly into the pumpkin mixture.
Whisking the eggs first before combining them with everything else is another useful technique. It helps prevent stubborn pieces of egg from lingering in the batter and makes the mixture more uniform.
The finished pumpkin mixture will be thin, closer to pancake batter than cake batter. That is exactly what you want because this layer bakes into a soft, set filling rather than a traditional fluffy cake crumb.
Gentle mixing matters as well. Stir only until everything is combined rather than aggressively beating the mixture for a long time.
A few small lumps are not a problem. The goal is a smooth-enough filling without overworking it.
Why the Topping Is So Different from Regular Cake
The cake mix is used dry, which is part of what makes this dessert so effortless. Instead of mixing the boxed cake mix with eggs and liquid in a separate bowl, you scatter it directly across the pumpkin layer.
The melted butter supplies the moisture needed for that topping to change in the oven. As it bakes, the dry mix absorbs butter and moisture from below, creating a golden, slightly crisp surface.
The nuts add another level of texture. Chopped pecans are the standard choice, but walnuts can also be used.
Toasting the pecans first is an optional step that intensifies their flavor. Spread them on a baking sheet at 350°F for 5–7 minutes, just until they become fragrant.
Equipment You’ll Need
This recipe does not require an elaborate setup. The main tools are simple and familiar:
- One bowl
- One spoon
- One 9×13-inch baking dish
A glass 9×13-inch baking dish is one preferred option for even baking. The FAQ also notes that a metal pan can produce a crisper topping.
Beyond those basics, a fine mesh sieve is optional if you want to distribute the dry cake mix more evenly. Your hands can also do the job perfectly well.
How to Make Easy Pumpkin Dump Cake
The method is built around layers, and keeping those layers separate is essential. The pumpkin base gets mixed first, then the dry cake mix, nuts, and butter are added on top without stirring them into the filling.
Step 1: Preheat the Oven
Set the oven to 350°F (175°C). Giving the oven time to reach the correct temperature before the casserole goes in helps the pumpkin layer and topping begin baking consistently from the start.
Prepare a 9×13-inch baking dish as well. The recipe calls for pouring the pumpkin mixture into a greased baking dish before adding the topping.
Having the pan ready means you can move directly from mixing to assembly. This is a particularly simple recipe, so a little preparation keeps the whole process feeling effortless.
Step 2: Bring the Eggs Toward Room Temperature
If possible, let the 3 large eggs sit on the counter for about 30 minutes before baking. Eggs that are not refrigerator-cold blend more smoothly into the pumpkin mixture.
This small step is not complicated, but it can make the filling easier to combine. Very cold eggs may cause the mixture to look less uniform.
Once they have warmed slightly, crack them into your mixing bowl. Whisk them before adding the other pumpkin-layer ingredients.
Step 3: Whisk the Eggs First
Whisk the eggs until they are broken up and reasonably smooth. Starting with the eggs helps avoid stubborn streaks or lumps once the pumpkin and milk are added.
There is no need to beat them until foamy. You simply want the yolks and whites well combined before moving on.
This step supports the silky texture of the finished pumpkin layer. Once the eggs are ready, the rest of the filling ingredients can join them in the same bowl.
Step 4: Mix the Pumpkin Filling
Add 1 can (15 oz) pure pumpkin puree, 1 cup granulated sugar, 1 can (12 oz) evaporated milk, 1 tablespoon pumpkin pie spice, and ¼ teaspoon salt to the whisked eggs. Stir everything together until the ingredients are evenly combined.
If you do not have pumpkin pie spice, you can use the suggested alternative of 2 teaspoons cinnamon plus 1 teaspoon nutmeg. Keep the overall mixture gentle rather than beating it aggressively.
The consistency will be relatively thin, similar to pancake batter. Do not try to thicken it or add anything else; that loose texture is correct for the pumpkin layer.
Step 5: Pour the Pumpkin Mixture Into the Baking Dish
Pour the mixed pumpkin filling into the greased 9×13-inch baking dish. Spread it gently if necessary so the liquid sits evenly across the bottom.
This layer forms the soft, pie-like portion of the finished dessert. Try not to splash it too high up the sides of the dish as you pour.
Once the filling is level, you are ready to begin the dump-cake topping. From this point forward, the layers should remain separate.
Step 6: Sprinkle the Dry Cake Mix Over the Pumpkin
Open the 15.25 oz box of yellow or golden cake mix and sprinkle it evenly over the pumpkin mixture. Cover the surface as consistently as possible so one part of the dessert does not end up with a much thicker dry layer than another.
A fine mesh sieve can help distribute the cake mix and break up larger clumps. If you do not want to use one, sprinkle it carefully with your hands.
Most importantly, do not stir the cake mix into the pumpkin. The layers need to stay distinct for the characteristic dump-cake texture to form.
Step 7: Add the Chopped Pecans
Scatter 1 cup chopped pecans over the dry cake mix. Think of them as the crunchy layer that sits between and within the buttery cake topping.
If you toasted the pecans first, let them reach the fragrant stage at 350°F for 5–7 minutes before using them. Toasting is optional, but it gives the nuts a more pronounced flavor.
Spread the pecans across the surface rather than concentrating them in one section. That way, most servings get some of the nutty crunch.
Step 8: Melt and Slightly Cool the Butter
Melt ½ cup, or 1 stick, butter completely. After melting, allow it to cool slightly rather than pouring it over the cake mix while it is piping hot.
Very hot butter can make the cake mix clump unevenly. Slight cooling gives you more control over the final drizzle.
The butter should still remain fully liquid. Once it is ready, you can begin distributing it over the topping.
Step 9: Drizzle the Butter Evenly
Pour the melted butter back and forth across the cake mix and pecans. A zigzag motion helps reach more of the surface instead of creating a few heavily saturated areas.
Look over the pan once all the butter has been added. If there are obvious large dry patches of cake mix, direct a little more of the available butter toward those areas as you drizzle.
Do not press the topping down and do not stir. Leaving the layers loose allows the surface to bake into the crisp texture you want.
Step 10: Bake for 50–60 Minutes
Place the assembled dessert into the 350°F (175°C) oven and bake for 50–60 minutes. During this time, the pumpkin layer sets while the cake mix, nuts, and butter become golden on top.
Several visual signs help tell you when it is ready. The edges should be bubbling, the topping should look golden brown, and the center should jiggle only slightly when the pan is gently nudged.
You can also insert a toothpick into the center. It should come out with moist crumbs but not wet batter.
Step 11: Check for Doneness Carefully
If the center still looks distinctly wet rather than softly set, it needs more baking time. The surface should be deeply golden rather than pale and powdery.
The FAQ suggests that if your oven tends to run cool, an additional 10 minutes may be needed. The 9×13-inch pan size is important because it allows the dessert to bake at the intended depth.
Avoid judging the cake solely by the pumpkin layer while it is still very hot. Like pumpkin pie, the center continues settling during the cooling period.
Step 12: Add Optional Extra Browning
If the topping has baked through but still lacks the level of crispness you want, an optional 1–2 minute broil is suggested. Watch the pan continuously because the topping can darken rapidly under the broiler.
This step is not necessary for every batch. It is simply an option when you want a little more crunch and color on the surface.
Remove the dessert as soon as the top reaches the level of browning you prefer. Do not leave it unattended during this stage.
Step 13: Cool for at Least 30 Minutes
Once the dump cake comes out of the oven, let it cool for at least 30 minutes before cutting. This is one of the most important steps if you want slices that hold their shape.
The pumpkin layer is still very soft immediately after baking. Cooling gives it enough time to set so it behaves more like pumpkin pie and less like loose pudding.
That wait can feel long when the kitchen smells like warm pumpkin spice and butter. Still, the texture improves noticeably when the dessert gets that resting time.
Step 14: Serve Slightly Warm
After the cake has rested, cut it into portions and serve it slightly warm. A scoop of vanilla ice cream is the suggested finishing touch.
The warmth of the pumpkin layer begins softening the ice cream, while the cool creaminess contrasts with the crisp topping. It is a particularly cozy way to serve the dessert during fall.
If you prefer it cold, that works too. One favorite way to eat leftovers is straight from the refrigerator, where the pumpkin layer becomes firmer and takes on an almost pumpkin-cheesecake-like feel.

Tips for the Best Pumpkin Dump Cake
The recipe is forgiving, but the small details make the contrast between filling and topping much better. Most of the best tips come down to temperature, mixing, and patience.
Use Eggs That Are Not Fridge-Cold
Leaving the eggs out for about 30 minutes before mixing helps them blend more smoothly. Room-temperature eggs incorporate into the pumpkin and evaporated milk more easily than very cold ones.
Whisking them first adds another layer of insurance against uneven bits. Together, these two habits help keep the pumpkin portion smooth.
Mix Gently
Once the pumpkin filling ingredients are in the bowl, stir only until combined. There is no benefit to aggressively beating the mixture.
Overmixing can work against the silky texture you want. Small lumps are acceptable and do not need to be chased out with excessive stirring.
Toast the Pecans If You Want More Flavor
Spread the pecans on a baking sheet and toast them at 350°F for 5–7 minutes until fragrant. This optional step gives them a stronger presence in the topping.
Let them cool enough to handle before scattering them over the cake mix. The rest of the assembly stays exactly the same.
Do Not Pour Piping-Hot Butter Over the Cake Mix
Melt the butter completely, then let it cool slightly. Butter that is extremely hot can create uneven clumps in the dry cake mix.
You still want it liquid enough to drizzle. The slight cooling is simply about improving control rather than letting it solidify.
Give the Dessert the Full Cooling Time
The 30-minute cooling period is part of the recipe, not an inconvenience to skip. It gives the pumpkin layer time to firm enough for cleaner servings.
If appearance does not matter and you prefer a softer scoop, the dessert will still taste good. But for pieces that resemble neat slices rather than pumpkin pudding, patience makes the difference.
Add a Little Sea Salt if Desired
An optional finishing idea is to sprinkle a little sea salt over the top after baking. The salt creates a stronger sweet-and-salty contrast with the buttery cake topping.
No exact amount is specified, so use it only according to preference. It is a finishing touch rather than part of the core recipe.
Cake Mix Substitutions
Yellow or golden cake mix is the standard choice, but several alternatives are suggested. Spice cake mix gives the topping a stronger autumn profile because it brings additional cinnamon and nutmeg flavors.
White cake mix can also be used. Its flavor is somewhat milder, but it still creates the same general topping structure.
A gluten-free vanilla cake mix is another option. A gluten-free yellow or spice cake mix can also replace the regular cake mix when making a gluten-free version.
Nut-Free Topping Ideas
If pecans are not appropriate or simply are not your favorite, the topping can move in several different directions. Toasted coconut flakes are one alternative that still gives the surface noticeable texture.
Another option is rolled oats mixed with 1 tablespoon brown sugar. That combination can provide crunch without using nuts.
Crushed graham crackers are also suggested as a topping variation. They give the dessert a flavor combination reminiscent of pumpkin pie with a cheesecake-style crust.
Walnuts are the simplest nut-for-nut swap. Use them when you still want a chopped nut topping but do not have pecans.
Evaporated Milk and What to Use Instead
Evaporated milk and sweetened condensed milk should not be treated as interchangeable. Evaporated milk is unsweetened, while sweetened condensed milk is thick and very sweet.
Using sweetened condensed milk would make the dessert much sweeter than intended. The pumpkin filling is built around the 12 oz can of evaporated milk in the ingredient list.
If evaporated milk is unavailable, one substitution provided is to simmer 2 ¼ cups regular milk until it reduces to 1 cup. That homemade reduced milk can then be used when you need an alternative.
A lighter variation is also mentioned using 1% evaporated milk. In that version, the sugar can be reduced to ¾ cup if desired.
Pumpkin Spice Alternatives
The simplest alternative to the 1 tablespoon pumpkin pie spice is 2 teaspoons cinnamon plus 1 teaspoon nutmeg. This combination is given directly alongside the main ingredient list.
A second, more detailed spice blend is also suggested:
- 2 teaspoons cinnamon
- 1 teaspoon nutmeg
- ½ teaspoon ginger
- ¼ teaspoon cloves or allspice
Chai spice mix has also been used as an alternative when other spices were unavailable. That creates a different interpretation of the fall flavor while preserving the basic pumpkin dessert structure.
How to Store Easy Pumpkin Dump Cake
This dessert can be handled in several ways depending on how soon you plan to serve it. It can also be prepared before a gathering, which is useful because the flavors have time to settle together as it sits.
Room Temperature
If you plan to serve the cake within 24 hours, cover the pan tightly with foil and keep it at room temperature. The topping can stay surprisingly crisp this way.
One additional technique is placing a paper towel between the cake and the foil. The idea is to absorb condensation so the top does not become soggy.
Refrigerator
For longer storage, cover the cake tightly and refrigerate it for up to 4 days. Chilling causes the pumpkin layer to become firmer and more custard-like.
The topping will soften somewhat because of the humidity in the refrigerator. Reheating in the oven can help bring back some of the original texture.
Freezer
Cool the dessert before freezing it. Cut it into individual portions, wrap each piece in plastic wrap, then wrap again in foil.
Frozen portions can be kept for 2–3 months. When you want one, thaw it overnight in the refrigerator.
Another suggested approach is freezing some topping separately using cake mix, nuts, and butter. That topping can then be sprinkled on before reheating when you want a fresher-baked texture.
How to Reheat Pumpkin Dump Cake
For the best balance of warm pumpkin filling and revived topping, place individual slices on a baking sheet. Heat them at 350°F for 10–12 minutes.
That gentle oven reheating gives the topping a better chance of becoming crisp again. It also warms the pumpkin layer without turning the whole slice overly soft.
When speed matters, microwave an individual portion for 30 seconds. The dessert will warm quickly, but the topping will lose some of its crunch.
Both approaches work, so the choice depends on whether convenience or topping texture matters more at that moment. Cold slices straight from the refrigerator are also a perfectly enjoyable option.
Can I Make This With Fresh Pumpkin?
Yes. Homemade pumpkin puree can replace the canned pumpkin, but it contains more water and needs extra preparation.
Strain the fresh puree through cheesecloth first to remove excess moisture. About 2 cups of thick puree are used in place of one 15 oz can.
Roasting the pumpkin first is also suggested because it concentrates the flavor. The important part is ending up with a thick puree rather than a watery one.
Why Is My Pumpkin Dump Cake Soggy in the Middle?
A soft center is expected, but a genuinely wet center can point to a few issues. The oven temperature may have been too low, the dessert may have been cut before completing its 30-minute cooling period, or the baking dish may have been smaller than the specified 9×13-inch size.
Using an oven thermometer is suggested if you suspect your oven temperature is inaccurate. A larger or smaller discrepancy in actual oven heat can affect how fully the pumpkin layer sets.
If your oven runs cool, bake the cake for an additional 10 minutes when necessary. Look for a deep golden top, bubbling edges, and only a slight jiggle in the center.
Why Didn’t the Topping Get Crispy?
Uneven butter distribution is one possible cause. Taking time to drizzle the melted butter across the entire surface helps more of the dry cake mix turn crisp.
Pressing down the layers can also work against the texture. Leave the topping loose rather than compressing it into the pumpkin filling.
The baking pan can influence the surface as well. Although a glass Pyrex is a preferred option for even baking, the FAQ notes that metal pans create crisper tops.
For additional browning, broil the baked cake for 1–2 minutes while watching it closely. This is a quick finishing step rather than a replacement for the full bake.
Can I Make a Gluten-Free Pumpkin Dump Cake?
Yes. Replace the regular boxed mix with a gluten-free yellow or spice cake mix.
A gluten-free vanilla cake mix has also been used successfully. The resulting texture may be slightly more crumbly while still preserving the general character of the dessert.
If making the full recipe gluten-free, check the spices as well. Some premixed spice products may contain wheat as an anti-caking ingredient, so labels should be reviewed.
Can I Halve the Recipe?
Yes. For a half batch, use an 8×8-inch pan instead of the 9×13-inch baking dish.
Bake the smaller version for 40–45 minutes. The ingredients divide evenly except for the eggs.
For the eggs, use 1 whole egg plus 1 yolk. Keep the same layered approach and do not stir the dry topping into the pumpkin filling.
Nutrition Information
The nutrition information is estimated per serving, with one serving described as approximately a 3×3-inch square. Specific brands, particularly the cake mix and the amount of pecans used in a portion, can affect the final values.
Per serving:
- Calories: 320
- Fat: 15g
- Saturated fat: 6g
- Carbohydrates: 42g
- Sugars: 25g
- Protein: 4g
- Fiber: 2g
- Sodium: 280mg
A lighter variation mentioned uses 1% evaporated milk and reduces the granulated sugar from 1 cup to ¾ cup. The standard version, however, uses the full ingredient amounts listed above.
A Fall Dessert I Keep Coming Back To
I still think about the first pan of pumpkin dump cake my neighbor brought me after my second baby was born. At that point, it was simply a comforting dessert someone had thoughtfully carried into my house, but one bite was enough to make me want to know exactly how something so easy could taste so satisfying.
Years later, that combination still does it for me. The pumpkin layer stays soft and warmly spiced, while the top becomes buttery and golden with little pockets of pecan crunch.
It is also one of those desserts that seems to fit almost anywhere during fall. I can bring it to a Thanksgiving potluck, bake it on an ordinary weeknight, or make it ahead when I know I will want dessert waiting the next day.
And despite how uncomplicated it is, it never feels like a compromise. The simplicity is actually part of what makes it useful: one bowl, one spoon, one baking dish, a few pantry ingredients, and enough oven time to turn everything into something warm and cozy.
Serve it slightly warm with vanilla ice cream, enjoy a cold piece straight from the refrigerator, change the pecans to walnuts, try a spice cake mix, or make one of the nut-free topping variations. However you serve it, the heart of Easy Pumpkin Dump Cake stays the same—a soft pumpkin filling underneath a crisp, buttery topping that tastes like fall without asking you to spend all day baking.
Irresistible Easy Pumpkin Dump Cake Recipe

Warm, buttery, spiced, and wonderfully simple, this Irresistible Easy Pumpkin Dump Cake layers creamy pumpkin filling with dry cake mix, chopped pecans, and melted butter for an effortless fall dessert. With minimal prep and a rich pumpkin flavor, it is an easy American sweet to bake for autumn gatherings, holidays, or casual family desserts.
Recipe Details
- Prep Time: 10 minutes
- Total Time: 1 hour 10 minutes
- Course: Dessert
- Cuisine: American
- Servings: 12 servings
- Calories: 320 kcal
Ingredients
For the Pumpkin Layer
- ¼ teaspoon salt
- 1 tablespoon pumpkin pie spice or substitute with cinnamon and nutmeg
- 1 can 12 oz evaporated milk
- 3 eggs
- 1 cup sugar
- 1 can 15 oz pure pumpkin
For the Topping
- ½ cup melted butter
- 1 cup chopped pecans
- 1 box 15.25 oz golden or yellow cake mix
Instructions
Step 1: Preheat the Oven
Preheat the oven to 350°F (175°C).
Prepare a greased 9×13-inch baking dish and set it aside while you make the pumpkin layer.
Step 2: Mix the Pumpkin Filling
In a bowl, combine the pure pumpkin, sugar, eggs, evaporated milk, pumpkin pie spice, and salt.
Mix until the ingredients are evenly blended and the filling has a smooth consistency.
Step 3: Fill the Baking Dish
Pour the pumpkin mixture into the prepared 9×13-inch baking dish.
Spread it into an even layer so the cake mix and toppings can be distributed consistently over the surface.
Step 4: Add the Dry Cake Mix
Sprinkle the dry golden or yellow cake mix evenly over the pumpkin layer.
Do not mix the cake mix into the pumpkin filling. Keep it as a separate layer across the top.
Step 5: Add the Pecans
Scatter the chopped pecans evenly over the dry cake mix.
Try to distribute them from edge to edge so each serving gets some of the nutty topping.
Step 6: Drizzle with Butter
Drizzle the melted butter evenly over the pecans and cake mix.
Cover as much of the surface as possible so the topping can bake into a rich, buttery layer.
Step 7: Bake
Bake for 50–60 minutes, or until the dump cake is golden brown and set.
Use the appearance and set texture as the final doneness cues before removing it from the oven.
Step 8: Cool Before Serving
Remove the baking dish from the oven and allow the cake to cool before serving.
Once cooled enough to portion, divide into 12 servings.
Notes
- Use pure pumpkin, not pumpkin pie mix.
- Evaporated milk is different from sweetened condensed milk.
- Substitute pumpkin pie spice with cinnamon and nutmeg if needed.
Serving Suggestions
Serve Irresistible Easy Pumpkin Dump Cake after it has cooled enough to set. The soft pumpkin layer contrasts with the buttery cake mix topping and chopped pecans, creating a dessert with both creamy and lightly crisp textures.
This recipe makes 12 servings, making it a practical choice for fall gatherings, holiday meals, potlucks, or family dessert tables.
Use pure pumpkin rather than pumpkin pie mix so the recipe stays consistent with the listed ingredients. If pumpkin pie spice is unavailable, cinnamon and nutmeg can be used as the listed substitute.
Storage
How to Store
The recipe does not provide a specific storage method or storage duration, so no exact storage time is added here.
Pumpkin Tip
Use one 15 oz can pure pumpkin. Do not substitute pumpkin pie mix, as noted.
Milk Tip
Use one 12 oz can evaporated milk. The recipe specifically notes that evaporated milk is different from sweetened condensed milk.
Spice Tip
Use 1 tablespoon pumpkin pie spice. Cinnamon and nutmeg can be used as a substitute if needed, but no exact amounts are provided for that substitution.
Cake Mix Tip
Use one 15.25 oz box golden or yellow cake mix. Sprinkle it dry over the pumpkin layer rather than mixing it into the filling.
Pecan Tip
Use 1 cup chopped pecans and distribute them evenly over the dry cake mix.
Butter Tip
Use ½ cup melted butter and drizzle it over the topping before baking.
Baking Tip
Bake at 350°F (175°C) for 50–60 minutes, until golden brown and set.
Cooling Tip
Let the dump cake cool before serving so the pumpkin layer has time to settle.

Fernando is the creator and writer behind the food blog Eating with your Hands. Living and working in cities like Paris, Barcelona, and Berlin, and being married to a Canadian foodie, has given Fernando a passion and interest in food and inspired him to run EWYH.