
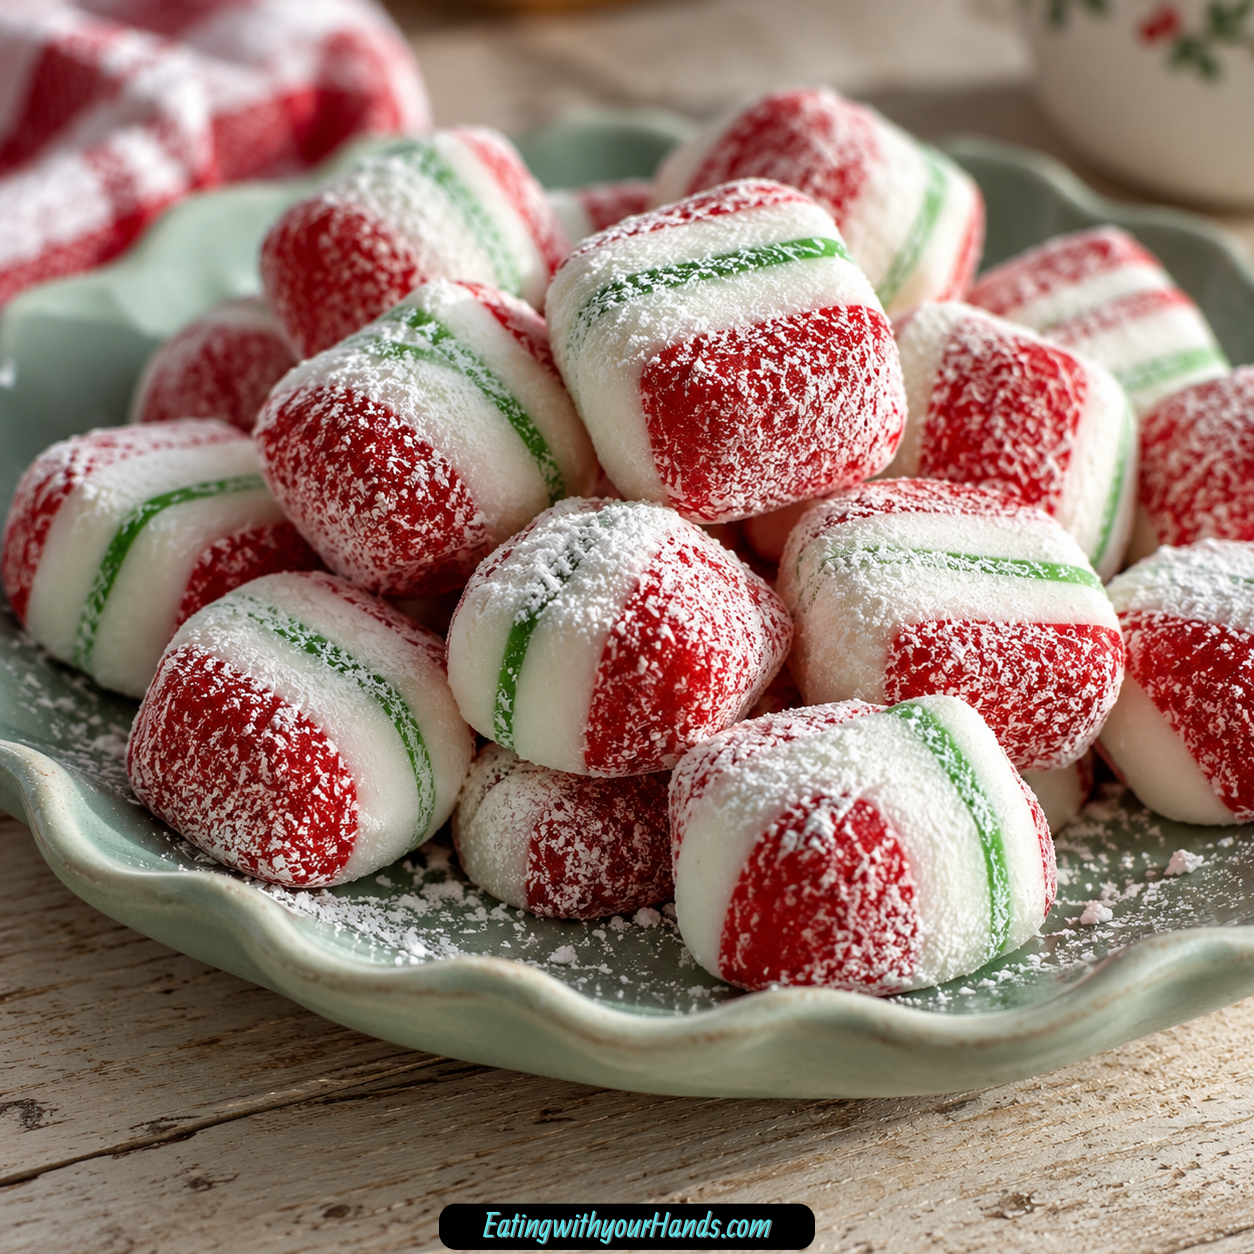
Easy Soft Christmas Peppermints Recipe is the kind of holiday candy that feels like it belongs on a December kitchen counter, tucked between cookie tins, ribbon, wrapping paper, and mugs of something warm. These little minty candies are soft, sweet, cheerful, and wonderfully simple, with that cool peppermint flavor that instantly makes the season feel brighter.
They are made with powdered sugar, sweetened condensed milk, peppermint extract, gel food coloring, and a little granulated sugar for coating. That short ingredient list turns into a soft candy dough that can be tinted red and green, rolled into small pieces, coated in sugar, and left to firm slightly.
The recipe is no-bake, which makes it especially friendly for busy holiday days. There is no oven temperature to watch, no cookie sheets rotating in and out, and no risk of overbaking.
These candies are also perfect for little helpers. The dough feels a lot like edible playdough, so kids can help roll, flatten, decorate, and sneak tiny bites along the way.
The peppermint flavor is cool and festive without being complicated. It tastes like the kind of old-fashioned Christmas candy that shows up in pretty tins and disappears faster than anyone expects.
They also make lovely homemade gifts. Stack them between layers of parchment paper, tuck them into cellophane bags or little tins, add ribbon, and suddenly a simple candy becomes a thoughtful holiday treat.
What makes these soft peppermints so special is how forgiving they are. If the dough is too sticky, a little powdered sugar helps; if it is too dry, a touch of sweetened condensed milk brings it back.
Easy Soft Christmas Peppermints are simple, colorful, nostalgic, and giftable. They are the kind of candy that makes the kitchen feel festive with very little effort.
Table of Contents
- Why You’ll Love These Soft Christmas Peppermints
- Recipe Details
- Ingredients
- Ingredient Notes
- Optional Swaps, Variations, Colors, and Gift Ideas
- Classic Soft Christmas Peppermints
- Red and Green Peppermint Candies
- Vanilla Soft Christmas Candies
- Almond Soft Christmas Candies
- Naturally Colored Red Candies
- Naturally Colored Green Candies
- Sprinkle-Coated Peppermints
- Colored Sugar Peppermints
- Crushed Candy Cane Peppermints
- White Chocolate-Dipped Peppermints
- Vegan Soft Peppermints
- Less Sweet Peppermints
- Why This Recipe Works
- Directions
- Step 1: Prepare the Workspace
- Step 2: Measure the Powdered Sugar
- Step 3: Add the Sweetened Condensed Milk
- Step 4: Add the Peppermint Extract
- Step 5: Begin Mixing the Dough
- Step 6: Knead Until Smooth
- Step 7: Fix Dry Dough if Needed
- Step 8: Fix Sticky Dough if Needed
- Step 9: Divide the Dough
- Step 10: Add Red Gel Coloring
- Step 11: Add Green Gel Coloring
- Step 12: Portion the Candy Dough
- Step 13: Roll Into Balls
- Step 14: Coat in Granulated Sugar
- Step 15: Flatten the Candies
- Step 16: Let the Candies Firm
- Step 17: Serve or Package
- Step 18: Store Properly
- Serving Ideas
- Storage
- Freezing
- Make-Ahead
- Helpful Notes for Best Results
- Variations
- Classic Soft Christmas Peppermints
- Vanilla Soft Christmas Candies
- Almond Soft Christmas Candies
- Naturally Red Soft Candies
- Naturally Green Soft Candies
- Sprinkle-Coated Christmas Peppermints
- Colored Sugar Peppermints
- Crushed Candy Cane Peppermints
- White Chocolate-Dipped Peppermints
- Vegan Soft Christmas Peppermints
- Less-Sweet Peppermints
- Liquid Food Coloring Version
- Troubleshooting
- Frequently Asked Questions
- Why This Recipe Works So Well
- Final Thoughts
- Soft Christmas Peppermints
Why You’ll Love These Soft Christmas Peppermints
These candies are completely no-bake. You only mix, color, roll, coat, and let them firm.
They use a very short ingredient list. Powdered sugar, sweetened condensed milk, peppermint extract, food coloring, and granulated sugar are all you need.
They are fun for kids and adults. The dough is soft, moldable, and easy to shape.
They make beautiful holiday gifts. Pack them in tins or cellophane bags with parchment between layers.
They are easy to customize. Change the extract, color, coating, or chocolate finish.
They are forgiving. Sticky dough and dry dough can both be adjusted.
Recipe Details
This recipe uses 3 ¾ cups powdered sugar. Keep extra powdered sugar nearby for dusting your hands and workspace.
The binder is ⅓ cup sweetened condensed milk. It turns the powdered sugar into a soft candy dough.
The flavor is ½ teaspoon peppermint extract. Use a good peppermint extract because it carries the whole candy.
The colors are red and green gel food coloring. Gel coloring gives bright color without adding too much moisture.
The coating is granulated sugar. Use a small bowlful for rolling the candies.
The dough should feel like firm Play-Doh. It should be pliable but not sticky.
The candies are rolled into teaspoon-sized balls. Then they are coated in granulated sugar and gently flattened.
After shaping, let the candies sit out for about 1 hour. They will firm slightly while staying soft and chewy inside.
Store them in an airtight container with parchment between layers. They stay soft for about 2 weeks.
Ingredients
For the Soft Christmas Peppermints
- 3 ¾ cups powdered sugar
- ⅓ cup sweetened condensed milk
- ½ teaspoon peppermint extract
- Red and green gel food coloring
- Granulated sugar
Optional Swaps, Colors, Coatings, and Finishes
- Extra powdered sugar for dusting
- Vanilla extract
- Almond extract
- Beet powder
- Matcha powder
- Spinach powder
- Colored sugar
- Sprinkles
- Crushed candy canes
- White chocolate
- Coconut condensed milk
- Tiny splash of water
- Pinch of salt
- Evaporated milk
- Sugar
- Liquid food coloring
Ingredient Notes
Powdered sugar forms the body of the candy. It gives the dough sweetness and structure.
Extra powdered sugar is helpful during shaping. Dust your hands and counter with it whenever the dough feels sticky.
Sweetened condensed milk brings the dough together. It adds sweetness, moisture, and that soft candy texture.
Peppermint extract gives the candies their holiday flavor. Since the recipe is so simple, the peppermint should taste clean and bright.
Gel food coloring is best for red and green candies. It adds strong color without making the dough too wet.
Liquid food coloring can be used carefully, but it adds moisture. Keep extra powdered sugar nearby if using it.
Granulated sugar gives the outside a light crunch. It also keeps the candies from sticking together.
White chocolate can be used for dipping. It makes the candies look more polished and adds a creamy coating.
Coconut condensed milk can be used for a vegan-style swap. The texture may become slightly softer.
A pinch of salt can balance sweetness if needed. It is especially useful if you prefer a less sweet candy.
Optional Swaps, Variations, Colors, and Gift Ideas
Classic Soft Christmas Peppermints
Use powdered sugar, sweetened condensed milk, peppermint extract, red and green gel food coloring, and granulated sugar. This gives the full soft peppermint candy version.
Let the candies sit out for about 1 hour after shaping. They will firm slightly while staying soft.
Red and Green Peppermint Candies
Divide the dough into two portions and tint one red and one green. This gives the candies a traditional Christmas look.
Start with a small amount of gel coloring. You can always add more.
Vanilla Soft Christmas Candies
Use vanilla extract instead of peppermint extract. This creates a softer, sugar-cookie-style flavor.
The candies will no longer have the same minty finish. They will still be sweet and festive.
Almond Soft Christmas Candies
Use almond extract for a nostalgic, marzipan-style twist. The flavor becomes warmer and nuttier.
Use carefully because almond extract can be strong. Mix well.
Naturally Colored Red Candies
Use beet powder for red coloring. Add a tiny bit at a time.
Natural powders can be stronger than expected. They can also affect texture, so add slowly.
Naturally Colored Green Candies
Use matcha or spinach powder for green coloring. Add only a small amount at first.
The flavor may change slightly. Mix until evenly colored.
Sprinkle-Coated Peppermints
Roll the candies in sprinkles before flattening. This adds color and texture.
Use small sprinkles so they stick well. Press gently after coating.
Colored Sugar Peppermints
Roll the candies in colored sugar instead of plain granulated sugar. This makes them sparkle.
Colored sugar is great for gift tins. It also adds a little crunch.
Crushed Candy Cane Peppermints
Roll the candies in crushed candy canes before flattening. This adds extra peppermint crunch.
Use small crushed pieces. Large pieces can make the candies harder to shape.
White Chocolate-Dipped Peppermints
Melt white chocolate and dip half of each candy. Let the chocolate set before storing.
This gives the candies a two-tone look. Add a little drizzle if you want a fancier finish.
Vegan Soft Peppermints
Use coconut condensed milk instead of regular sweetened condensed milk. The flavor will be slightly different.
The texture may be softer. Add powdered sugar as needed.
Less Sweet Peppermints
Cut the powdered sugar by ¼ cup and add a pinch of salt. This balances the sweetness.
The dough texture may need slight adjustment. Add powdered sugar or condensed milk as needed.
Why This Recipe Works
This recipe works because powdered sugar and sweetened condensed milk create a soft, moldable candy dough. There is no cooking required.
Peppermint extract adds strong flavor with only a small amount. That makes the candies taste festive without extra ingredients.
Gel food coloring keeps the dough vibrant without making it too wet. This is important because the dough needs to hold shape.
Granulated sugar coats the outside and gives the candies their classic texture. It also helps prevent sticking.
Letting the candies rest for about 1 hour helps them firm slightly. They hold their shape better but stay soft inside.
The dough is easy to adjust. Powdered sugar fixes stickiness, while a little condensed milk or water helps dry dough come together.
The recipe is also flexible. Different extracts, colors, coatings, and chocolate finishes can all work.
Most of all, these candies work because they are simple enough to become a tradition. They invite hands-on shaping, decorating, gifting, and sharing.
Directions
Step 1: Prepare the Workspace
Clear a counter or work surface. Set out a large mixing bowl, spoon, parchment-lined tray, and small bowl of granulated sugar.
Keep extra powdered sugar nearby. It will help with sticky hands and surfaces.
Step 2: Measure the Powdered Sugar
Add 3 ¾ cups powdered sugar to a large mixing bowl. Use a bigger bowl than you think you need.
Powdered sugar can drift when stirred. A large bowl keeps the mixing easier.
Step 3: Add the Sweetened Condensed Milk
Pour in ⅓ cup sweetened condensed milk. Add it directly to the powdered sugar.
The mixture will look dry at first. That is normal.
Step 4: Add the Peppermint Extract
Add ½ teaspoon peppermint extract. This gives the candies their cool holiday flavor.
Mix carefully so the peppermint spreads evenly. A little extract goes a long way.
Step 5: Begin Mixing the Dough
Stir with a sturdy spoon until the mixture starts to clump. It may look crumbly at first.
Keep pressing and mixing. The dough will gradually begin to come together.
Step 6: Knead Until Smooth
Use clean hands to knead the dough until it becomes smooth and slightly stiff. It should feel like firm Play-Doh.
If it sticks badly to your fingers, dust your hands with powdered sugar. Keep kneading until it holds together when pinched.
Step 7: Fix Dry Dough if Needed
If the dough is dry and cracking, add 1 teaspoon sweetened condensed milk. Knead again.
A tiny splash of water can also help if needed. Add very little so the dough does not become sticky.
Step 8: Fix Sticky Dough if Needed
If the dough is too sticky, add a little powdered sugar. Dust the surface and your hands as needed.
The dough should be pliable but not wet. It should roll easily.
Step 9: Divide the Dough
Split the dough into two equal portions. Place each portion on the prepared workspace.
Cover the dough pieces with a damp towel when not working with them. This keeps them from drying out.
Step 10: Add Red Gel Coloring
Add a few drops of red gel food coloring to one portion. Knead until the color is evenly mixed.
Start with a small amount. You can add more if you want a deeper color.
Step 11: Add Green Gel Coloring
Add a few drops of green gel food coloring to the second portion. Knead until evenly colored.
Wear gloves if you want to avoid stained hands. Gel color can be strong.
Step 12: Portion the Candy Dough
Pinch off small teaspoon-sized pieces of dough. Keep the pieces similar in size.
Smaller candies are easier to roll and coat. They also look nice for gifting.
Step 13: Roll Into Balls
Roll each piece between your palms to form a small ball. Dust your fingers with powdered sugar if the dough sticks.
The candies do not need to be perfect. Homemade shapes are part of their charm.
Step 14: Coat in Granulated Sugar
Roll each candy ball in granulated sugar until coated all over. The sugar adds a light crunch.
Shake off excess sugar gently. Place the coated balls on the parchment-lined tray.
Step 15: Flatten the Candies
Gently flatten each candy with a fork or the bottom of a glass. This creates a classic peppermint shape.
If the fork sticks, dust it with sugar first. Press lightly so the candies keep some thickness.
Step 16: Let the Candies Firm
Let the candies sit out for about 1 hour. They will firm slightly while staying soft and chewy inside.
Do not cover them tightly during this short firming time. Let the surface set.
Step 17: Serve or Package
Serve the candies at room temperature. If they have been chilled, let them sit out for about 10 minutes first.
Pack them in tins or cellophane bags with parchment between layers. Tie with ribbon for gifting.
Step 18: Store Properly
Store the candies in an airtight container with parchment between layers. They stay soft and chewy for about 2 weeks.
For longer storage, freeze flat on a tray and transfer to a sealed bag. Thaw at room temperature before serving.
Serving Ideas
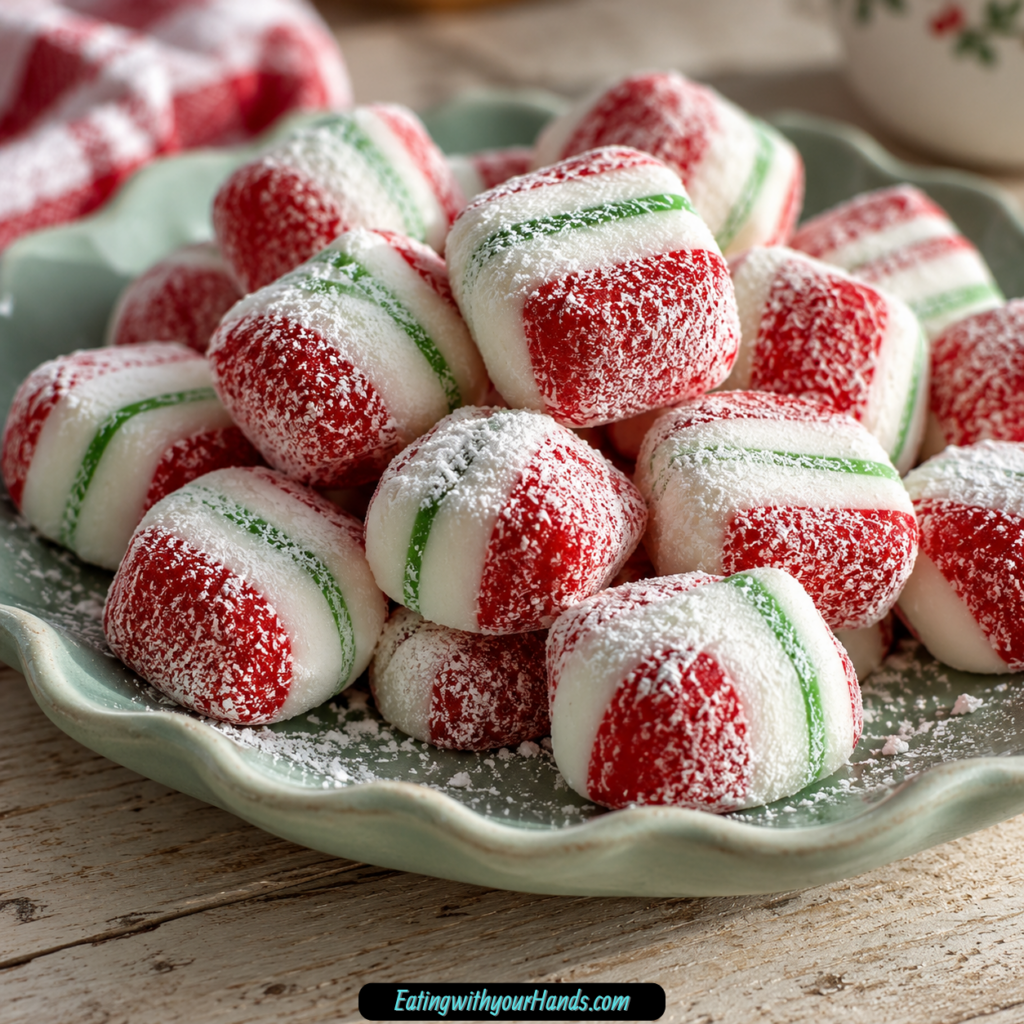
Serve Soft Christmas Peppermints at room temperature. The texture is best when they are not too cold.
Add them to holiday candy trays. Their red and green colors make the platter feel festive.
Pack them in small cellophane bags with ribbon. They make easy homemade gifts.
Layer them in cookie tins with parchment between layers. This keeps them from sticking.
Place them in small bowls around a dessert table. They are easy to grab after dinner.
Use them for stocking stuffers. They are sweet, colorful, and homemade.
Serve them after a holiday meal as a light minty bite. The cool peppermint flavor feels refreshing.
Keep a few hidden for yourself before gifting. They disappear quickly.
Storage
Store the candies in an airtight container. Place parchment paper between layers.
They stay soft and chewy for about 2 weeks at room temperature. Keep the container sealed.
If the candies have been refrigerated, let them sit out for about 10 minutes before serving. The peppermint flavor tastes best at room temperature.
Avoid leaving them uncovered. They can dry out on the surface.
Keep them away from heat. Warm conditions can make them sticky.
For gifting, use parchment between stacked layers. This keeps colors and sugar coatings neat.
A sealed tin or container works well. Cellophane bags also work for smaller gift portions.
Freezing
Freeze the candies flat on a tray first. This prevents them from sticking together.
Once firm, transfer them to a sealed freezer bag. They can keep for up to 3 months.
Thaw at room temperature before serving. Do not microwave them.
Microwaving can turn them into peppermint puddles. Gentle thawing is best.
Freeze in small portions if gifting later. This makes it easy to thaw only what you need.
Use parchment between layers if freezing in a container. This protects the candies.
Let them come to room temperature before packaging for gifts. This prevents moisture from collecting inside bags.
Make-Ahead
These soft peppermints are perfect for making ahead. They keep well for about 2 weeks in an airtight container.
Make them several days before gifting. The texture stays soft when stored properly.
If you need a longer make-ahead option, freeze them. Thaw at room temperature before serving or packaging.
Do not package them while damp or too cold. Let them settle at room temperature first.
You can prepare gift bags, tins, and parchment while the candies firm. Once set, they are ready to layer.
Make-ahead candies are useful during busy holiday weeks. They give you a homemade treat without last-minute baking.
They also travel well when packed with parchment. Keep them sealed until serving.
Helpful Notes for Best Results
Use gel food coloring for the brightest colors. Liquid coloring can make the dough sticky.
Start with a little color. Add more only if needed.
Dust your hands and workspace with powdered sugar whenever the dough sticks. This is the easiest non-stick trick.
Keep unused dough covered with a damp towel. It can dry out while you shape the candies.
If the dough is too dry, add 1 teaspoon sweetened condensed milk. Knead until smooth.
If the dough is too sweet for your taste, reduce powdered sugar by ¼ cup and add a pinch of salt. This helps balance the flavor.
Use coconut condensed milk for a vegan swap. The texture may be softer.
Imperfect candies still taste wonderful. They do not need to look identical.
Variations
Classic Soft Christmas Peppermints
Use powdered sugar, sweetened condensed milk, peppermint extract, red and green gel coloring, and granulated sugar. This gives the full soft holiday candy.
Let the candies firm for about 1 hour. Store airtight.
Vanilla Soft Christmas Candies
Use vanilla extract instead of peppermint extract. The flavor becomes softer and more like a sweet vanilla candy.
These are still festive if colored red and green. Coat in granulated sugar.
Almond Soft Christmas Candies
Use almond extract for a marzipan-style flavor. It makes the candies taste nostalgic and slightly nutty.
Use carefully because almond extract is bold. Mix evenly.
Naturally Red Soft Candies
Use beet powder for red coloring. Add a tiny bit at a time.
The shade will depend on the amount used. The flavor may change slightly.
Naturally Green Soft Candies
Use matcha or spinach powder for green coloring. Add slowly.
Natural color powders can be strong. Mix well before adding more.
Sprinkle-Coated Christmas Peppermints
Roll the candy balls in sprinkles before flattening. This adds color and a playful crunch.
Small sprinkles work best. Press lightly so they stick.
Colored Sugar Peppermints
Roll the dough balls in colored sugar instead of plain granulated sugar. This makes the candies sparkle.
Use red, green, or mixed holiday colors. Let them firm before storing.
Crushed Candy Cane Peppermints
Roll the candies in crushed candy canes. This gives extra peppermint flavor and crunch.
Crush the pieces small. Large shards can be sharp or hard to press.
White Chocolate-Dipped Peppermints
Dip half of each candy in melted white chocolate. Let the chocolate set fully.
For a fancy finish, drizzle extra chocolate over the top. Store with parchment between layers.
Vegan Soft Christmas Peppermints
Use coconut condensed milk instead of regular sweetened condensed milk. The texture may be slightly softer.
Add powdered sugar if needed to firm the dough. Shape as usual.
Less-Sweet Peppermints
Reduce the powdered sugar by ¼ cup and add a pinch of salt. This softens the sweetness.
The dough may need a tiny adjustment. Add powdered sugar or condensed milk if needed.
Liquid Food Coloring Version
Use liquid food coloring only if needed. Start with one or two drops.
Liquid dye adds moisture. Add extra powdered sugar if the dough becomes sticky.
Troubleshooting
The Dough Is Too Dry
Add 1 teaspoon sweetened condensed milk and knead again. A tiny splash of water can also help.
The dough should feel like firm Play-Doh. It should bend without cracking.
The Dough Is Too Sticky
Dust your hands and workspace with powdered sugar. Knead in a little more powdered sugar if needed.
Do not add too much at once. The dough should stay soft.
The Color Is Too Pale
Use gel food coloring for stronger color. Add a little more and knead well.
Start small, then build gradually. Too much color can stain hands.
The Dough Got Too Wet After Coloring
Liquid food coloring or too much gel may have added moisture. Knead in powdered sugar.
Let the dough rest briefly if needed. Then shape as usual.
The Candies Are Cracking When Flattened
The dough may be too dry. Add a small amount of condensed milk and knead.
Also flatten gently. Pressing too hard can cause cracks.
The Fork Is Sticking
Dust the fork with granulated sugar or powdered sugar. Then press gently.
You can also use the bottom of a glass. Keep it lightly sugared.
The Candies Are Not Firming
They may need more time to sit uncovered. Let them rest longer at room temperature.
If the dough was too wet, add more powdered sugar next time. Keep storage airtight after they set.
The Candies Taste Too Sweet
Reduce powdered sugar by ¼ cup next time and add a pinch of salt. This balances the flavor.
You can also try a chocolate-dipped version for contrast. White chocolate makes them richer.
The Candies Are Sticking Together
Layer them with parchment paper. Store in an airtight container.
Make sure they have firmed slightly before stacking. Give them about 1 hour.
The Frozen Candies Became Wet After Thawing
They may have thawed in a warm or humid place. Thaw at room temperature and keep them uncovered briefly if needed.
Do not microwave. Let moisture settle before packaging.
Frequently Asked Questions
Can I freeze these candies?
Yes, freeze them flat on a tray first so they do not stick together. Then transfer them to a sealed bag.
They keep for up to 3 months. Thaw at room temperature and do not microwave.
How long do they last at room temperature?
Stored in an airtight container with parchment between layers, they stay soft and delicious for about 2 weeks. Keep the container sealed.
They may disappear long before that. The texture stays best when protected from air.
Can I use liquid food coloring instead of gel?
Yes, but use it carefully. Liquid dyes add moisture and can make the dough sticky.
Start with a drop or two. Keep extra powdered sugar nearby to adjust the dough.
What is the best substitute for sweetened condensed milk?
Coconut condensed milk works well for a vegan version. The texture may be slightly softer.
In a pinch, evaporated milk mixed with a bit of sugar can be used, though the texture may also be softer. Adjust with powdered sugar if needed.
Can I use a different extract?
Yes, vanilla extract creates a classic sweet flavor, and almond extract gives a nostalgic marzipan-style twist. Peppermint gives the most traditional holiday taste.
Use strong extracts carefully. Mix well.
How do I package these for gifts?
Layer them in tins or cellophane bags with parchment between layers. Tie with ribbon for a festive finish.
Make sure the candies have firmed first. This prevents sticking.
Why is my dough crumbly?
It may need more moisture. Add 1 teaspoon sweetened condensed milk and knead until smooth.
The dough should hold together when pinched. It should not fall apart.
Can kids help make these?
Yes, this is a very kid-friendly candy. Kids can help roll, coat, flatten, and decorate.
The dough is no-bake and moldable. Supervision is still helpful because food coloring can stain.
Why This Recipe Works So Well
Easy Soft Christmas Peppermints Recipe works because the ingredients are simple and balanced. Powdered sugar creates the structure, while sweetened condensed milk turns it into a soft candy dough.
Peppermint extract brings the holiday flavor. It is strong enough that only a small amount is needed.
Gel food coloring makes the candies bright without watering down the dough. That helps the candies keep their shape.
Granulated sugar on the outside gives a classic crunch. It also keeps the candies from feeling too sticky.
The dough is easy to adjust. Powdered sugar fixes stickiness, while condensed milk or a tiny bit of water fixes dryness.
Letting the candies rest helps them firm. They become easier to handle while staying soft inside.
The recipe also works well for gifting. The candies are pretty, sturdy, and easy to layer with parchment.
Most of all, these soft peppermints work because they bring instant holiday feeling with almost no stress. They are sweet, minty, colorful, and simple enough to make every year.
Final Thoughts
Easy Soft Christmas Peppermints Recipe is made with powdered sugar, sweetened condensed milk, peppermint extract, red and green gel food coloring, and granulated sugar for coating. The dough is mixed, tinted, rolled, coated, flattened, and left to firm slightly into soft, chewy peppermint candies.
Serve them at room temperature, package them in tins or cellophane bags, layer them with parchment paper, or freeze them for later holiday gifting. With their no-bake method, 1-hour firming time, 2-week room-temperature storage, 3-month freezer option, and variations like vanilla extract, almond extract, beet powder, matcha, spinach powder, colored sugar, sprinkles, crushed candy canes, white chocolate dipping, coconut condensed milk, reduced powdered sugar, salt, and liquid food coloring, these candies are festive, nostalgic, and wonderfully easy to make.
Soft Christmas Peppermints
Sweet, soft, minty, and colored for the holidays, these Soft Christmas Peppermints are made with powdered sugar, sweetened condensed milk, peppermint extract, red and green food coloring, and a granulated sugar coating. They are simple festive candies with a tender texture and classic peppermint flavor.
Recipe Details
- Course: Dessert
Ingredients
For the Soft Christmas Peppermints
- granulated sugar for coating
- red and green food coloring gel preferred
- ½ teaspoon peppermint extract
- ⅓ cup sweetened condensed milk
- 3 ¾ cups powdered sugar plus extra for dusting
Instructions
Step 1: Make the Peppermint Candy Mixture
In a bowl, combine the powdered sugar, sweetened condensed milk, and peppermint extract. Mix until a soft candy dough forms.
Use 3 ¾ cups powdered sugar as listed, plus extra for dusting. The mixture should come together into a workable dough-like texture.
Step 2: Divide the Candy Dough
Divide the peppermint mixture into portions for coloring. Keep the portions separate so the red and green colors stay distinct.
The recipe uses red and green food coloring, with gel preferred. Add the coloring gradually so you can control the holiday color.
Step 3: Tint the Peppermint Dough
Color one portion with red food coloring and another portion with green food coloring. Knead or mix gently until the color is evenly distributed.
Use extra powdered sugar for dusting if the dough becomes sticky while shaping. Keep the surface lightly dusted so the candy is easier to handle.
Step 4: Shape the Candies
Shape the peppermint dough into small candies. You can form simple rounds, small mints, or festive pieces using the colored dough.
Work gently so the soft texture stays smooth. Keep the pieces similar in size so they look even when served.
Step 5: Coat with Sugar
Roll or coat the shaped peppermint candies in granulated sugar. Cover the outside lightly and evenly.
The granulated sugar gives the candies a sweet coating and a finished look. Place the coated pieces on a prepared surface to set.
Step 6: Let Set Before Serving
Let the candies rest until they are firm enough to handle. The recipe does not provide a specific setting time, so no exact time is added here.
Serve once the Soft Christmas Peppermints hold their shape. Keep them dusted or coated so they do not stick together.
Serving Suggestions
Serve Soft Christmas Peppermints as a festive dessert candy for holiday trays, Christmas treat boxes, party bowls, or edible gifts. The peppermint extract gives them a cool mint flavor, while the red and green coloring makes them bright and seasonal.
Use gel food coloring if possible, as listed, for stronger red and green color. Coat the candies in granulated sugar for a simple sparkling finish.
Since the recipe does not provide servings, portion the candies based on the size you shape them. Smaller pieces work well for candy dishes and gifting.
Storage
How to Store
The recipe does not provide specific storage instructions or storage duration, so no exact storage time is added here.
Powdered Sugar Tip
Use 3 ¾ cups powdered sugar plus extra for dusting. The extra powdered sugar helps prevent sticking while shaping the candies.
Peppermint Tip
Use ½ teaspoon peppermint extract. This gives the candies their classic peppermint flavor.
Coloring Tip
Use red and green food coloring, with gel preferred. Add the coloring gradually and mix until the dough reaches the color you want.
Coating Tip
Use granulated sugar for coating. Roll each shaped candy lightly so the outside gets an even sugar finish.
Setting Note
The recipe does not provide a specific drying or setting time, so no exact time is added. Let the candies rest until they are firm enough to handle.

Fernando is the creator and writer behind the food blog Eating with your Hands. Living and working in cities like Paris, Barcelona, and Berlin, and being married to a Canadian foodie, has given Fernando a passion and interest in food and inspired him to run EWYH.