
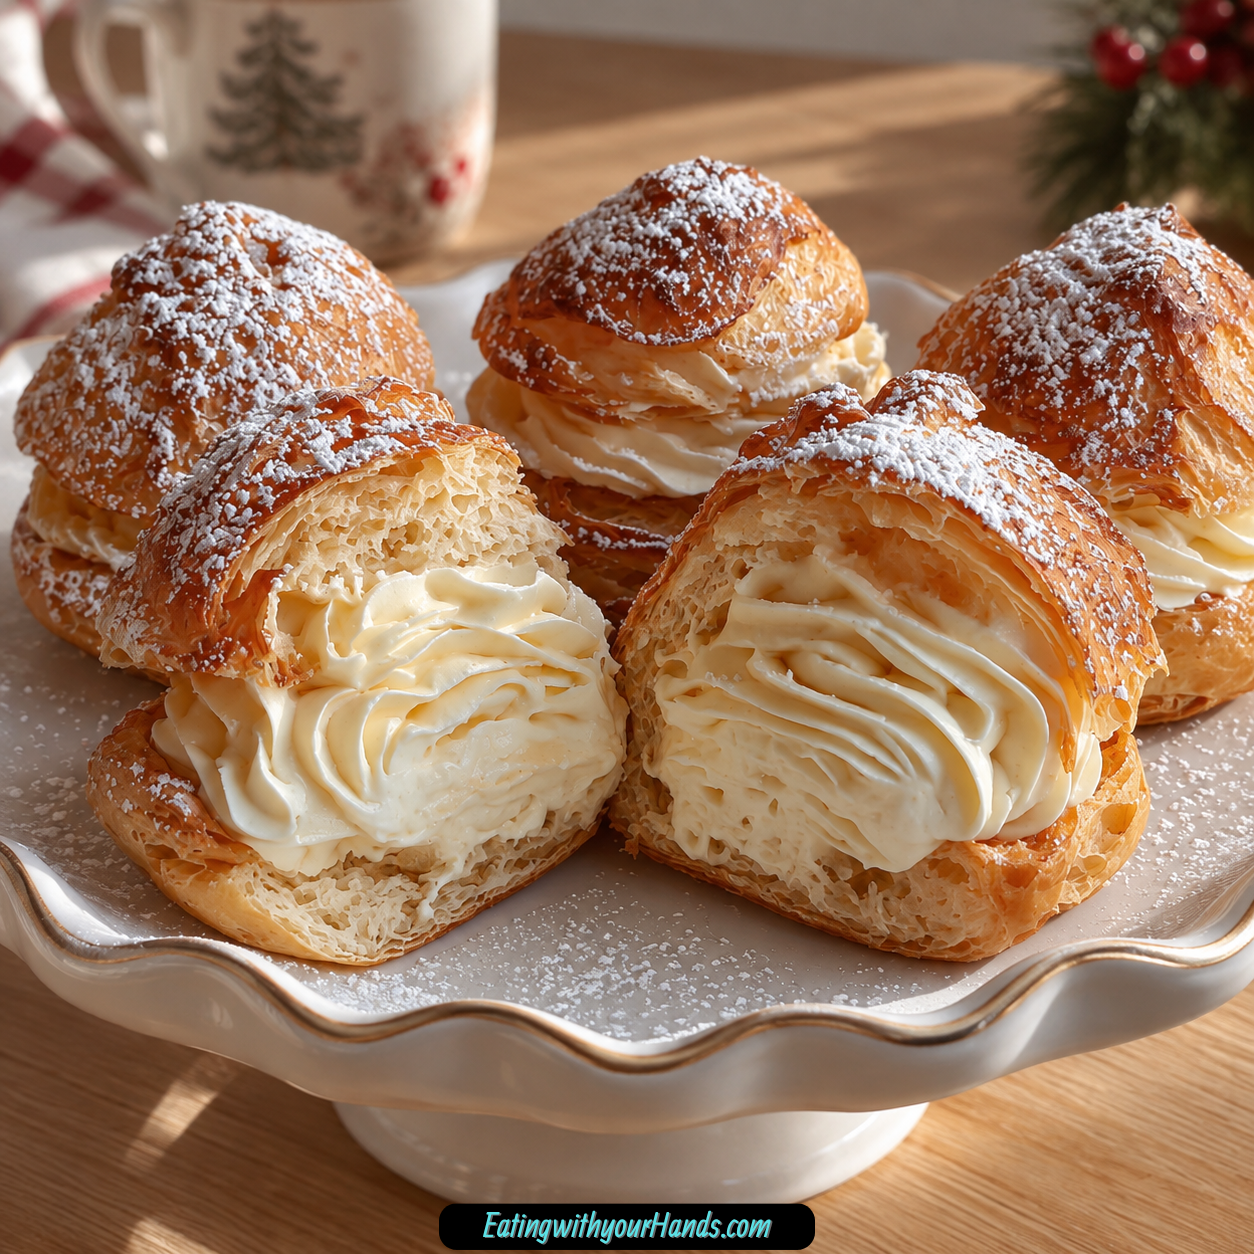
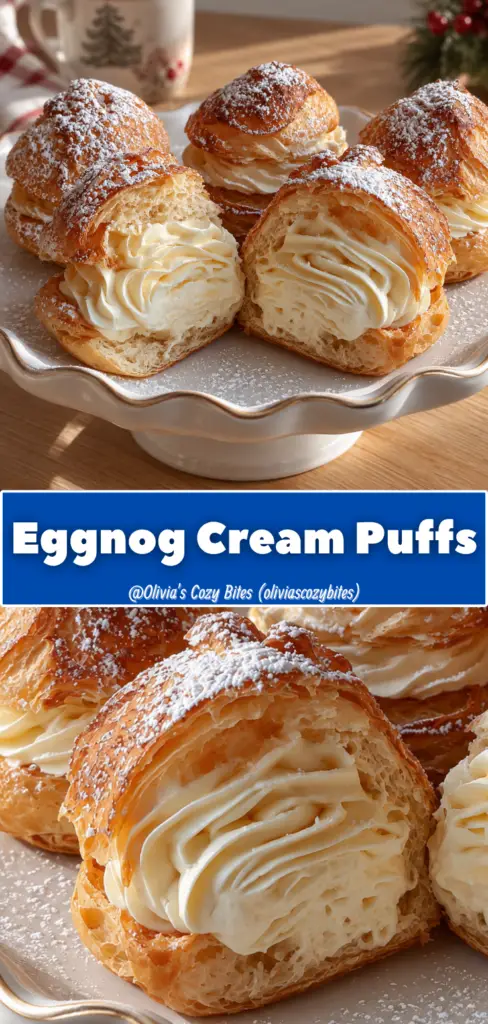
Eggnog Cream Puffs are the kind of holiday dessert that feels delicate, joyful, and wonderfully nostalgic all at once. They begin with light golden cream puff shells flavored with nutmeg, then they are filled with fluffy eggnog whipped cream and finished with a soft dusting of confectioners’ sugar.
These little puffs feel like something made for a festive platter. They are airy enough to feel elegant, creamy enough to feel indulgent, and full of that cozy eggnog flavor that belongs with winter gatherings, family celebrations, and quiet nights when the kitchen feels warm.
There is a special kind of magic in making cream puffs from simple ingredients. Water, butter, salt, flour, nutmeg, and eggs turn into soft, hollow shells that rise beautifully in the oven.
The filling brings the holiday personality. Heavy whipping cream is beaten until fluffy, then sweetened with confectioners’ sugar and flavored with eggnog, vanilla extract, and a little more nutmeg.
Once the cooled puffs are sliced and filled, they look like tiny snow-dusted pastries. They are sweet without being heavy, festive without being complicated, and charming enough to impress both kids and adults.
Eggnog Cream Puffs are perfect for holiday parties, dessert trays, cozy family nights, or gatherings where you want something a little different from cookies and cakes. They feel homemade, thoughtful, and celebratory.
They are also freezer-friendly if you prepare the shells ahead. The unfilled cream puff shells can be frozen for up to a month, then filled with eggnog whipped cream before serving.
Serve them chilled on a festive platter with cocoa, coffee, or any warm drink you love. Every bite gives you crisp pastry, creamy filling, sweet eggnog flavor, and a little sparkle of powdered sugar on top.
Table of Contents
- Why You’ll Love These Eggnog Cream Puffs
- Recipe Details
- Ingredients
- For the Cream Puff Shells
- For the Eggnog Whipped Cream
- For Finishing
- Optional Variations and Add-Ins
- Optional Serving Ideas
- Ingredient Notes
- Optional Swaps, Variations, Add-Ins, and Serving Ideas
- Classic Eggnog Cream Puffs
- Chocolate Cream Puff Shells
- Pumpkin Spice Cream Puffs
- Gluten-Free Eggnog Cream Puffs
- Dairy-Free Eggnog Cream Puffs
- Adult Eggnog Cream Puffs
- Lighter Eggnog Filling
- Peppermint Cream Puffs
- Cinnamon Cream Puffs
- Chocolate Whipped Cream Puffs
- Egg Substitute Cream Puffs
- Nut-Free Holiday Dessert
- Cocoa Pairing
- Coffee Pairing
- Festive Platter Serving
- Why This Recipe Works
- Directions
- Step 1: Preheat the Oven
- Step 2: Prepare the Baking Sheet
- Step 3: Start the Dough Base
- Step 4: Bring to a Rolling Boil
- Step 5: Add Flour and Nutmeg
- Step 6: Stir Into a Smooth Ball
- Step 7: Let the Dough Rest
- Step 8: Add the First Egg
- Step 9: Add the Remaining Eggs
- Step 10: Portion the Dough
- Step 11: Bake the Cream Puffs
- Step 12: Cool the Shells
- Step 13: Start the Eggnog Whipped Cream
- Step 14: Whip to Soft Peaks
- Step 15: Add Sugar, Eggnog, Vanilla, and Nutmeg
- Step 16: Slice the Cream Puffs
- Step 17: Fill the Puffs
- Step 18: Dust and Serve
- Serving Ideas
- Storage
- Freezing
- Make-Ahead
- Helpful Notes for Best Results
- Variations
- Classic Eggnog Cream Puffs
- Chocolate Eggnog Cream Puffs
- Pumpkin Spice Eggnog Cream Puffs
- Gluten-Free Eggnog Cream Puffs
- Dairy-Free Eggnog Cream Puffs
- Adult Eggnog Cream Puffs
- Lighter Eggnog Cream Puffs
- Peppermint Crunch Cream Puffs
- Cinnamon Cream Puffs
- Chocolate Cream Puffs
- Applesauce Egg Substitute Version
- Silken Tofu Egg Substitute Version
- Nut-Free Cream Puffs
- Troubleshooting
- Frequently Asked Questions
- Why This Recipe Works So Well
- Final Thoughts
- Eggnog Cream Puffs
Why You’ll Love These Eggnog Cream Puffs
These cream puffs have a quick prep time of just 20 minutes. That makes them helpful for busy holiday schedules when you want a dessert that still feels special.
They use minimal ingredients. Water, butter, salt, flour, nutmeg, eggs, cream, confectioners’ sugar, eggnog, and vanilla create the full dessert.
They are family-friendly and festive. Kids love the soft cream filling, and adults love the delicate pastry and eggnog flavor.
They are freezer-friendly when made ahead. The unfilled shells can be frozen for up to a month.
They capture the flavor of the holiday season. Eggnog, vanilla, nutmeg, and powdered sugar make each puff feel cozy and sweet.
They are perfect for gatherings. Serve them at parties, celebrations, or cozy nights in with loved ones.
Recipe Details
Eggnog Cream Puffs bake at 400°F (200°C). The baking time is about 20 to 25 minutes.
The prep time is about 20 minutes. The cream puffs are baked first, cooled, then filled with eggnog whipped cream.
The baking sheet should be lined with parchment paper. This helps prevent sticking and makes cleanup easier.
The dough begins with 1 cup water, ½ cup cubed butter, and ⅛ teaspoon salt. These are brought to a rolling boil in a medium saucepan.
The dry ingredients for the dough include 1 cup all-purpose flour and ¾ teaspoon ground nutmeg. The flour can be sifted before measuring for best results.
The eggs are 4 large eggs at room temperature. Room temperature eggs help create the right airy texture.
After the flour and nutmeg are stirred into the boiling mixture, the dough should pull away from the sides of the pan and form a smooth ball. Then it rests for about 5 minutes before the eggs are added.
The dough is dropped onto the prepared baking sheet by rounded tablespoons. Aim for about 12 puffs per batch.
The eggnog filling uses 1 ½ cups heavy whipping cream, 1 ½ cups sifted confectioners’ sugar, ¼ cup eggnog, 1 teaspoon vanilla extract, and ⅛ teaspoon ground nutmeg. The cream should be whipped to stiff peaks.
Additional confectioners’ sugar is used for dusting. This gives the cream puffs a festive, snowy finish.
Ingredients
For the Cream Puff Shells
- 1 cup water
- ½ cup butter, cubed
- ⅛ teaspoon salt
- 1 cup all-purpose flour
- ¾ teaspoon ground nutmeg
- 4 large eggs, room temperature
For the Eggnog Whipped Cream
- 1 ½ cups heavy whipping cream
- 1 ½ cups confectioners’ sugar
- ¼ cup eggnog
- 1 teaspoon vanilla extract
- ⅛ teaspoon ground nutmeg
For Finishing
- Additional confectioners’ sugar for dusting
Optional Variations and Add-Ins
- Cocoa powder
- Pumpkin puree
- Pumpkin pie spice
- Gluten-free all-purpose flour blend
- Coconut cream
- Brandy
- Rum
- Half-and-half
- Unsweetened applesauce
- Silken tofu
- Crushed peppermint candies
- Peppermint flavor
- Cinnamon flavor
- Chocolate flavor
Optional Serving Ideas
- Warm cocoa
- Coffee
- Festive dessert platter
- Chilled holiday dessert tray
Ingredient Notes
Water is the first part of the cream puff dough. It helps create the steam that makes the puffs rise in the oven.
Butter adds richness to the shells. Cubing it helps it melt evenly in the saucepan.
Salt balances the dough. Even a small amount helps the pastry taste complete.
All-purpose flour gives the cream puffs their structure. Sifting before measuring can help with the best result.
Ground nutmeg adds holiday warmth to the pastry. Freshly grated nutmeg can make the flavor even more special.
Room temperature eggs help the dough become smooth and glossy. Adding them one at a time helps the dough absorb each egg properly.
Heavy whipping cream makes the filling light and fluffy. A high-fat cream gives a richer taste.
Confectioners’ sugar sweetens the whipped cream and blends smoothly. Sifting it helps avoid lumps.
Eggnog gives the filling its festive flavor. Use your favorite brand or homemade eggnog for a personal touch.
Vanilla extract rounds out the filling. Pure vanilla gives the best flavor.
Additional nutmeg in the filling strengthens the holiday flavor. It works beautifully with the eggnog and cream.
Confectioners’ sugar for dusting makes the finished cream puffs look snowy and sweet. It is a simple finishing touch that adds charm.
Optional Swaps, Variations, Add-Ins, and Serving Ideas
Classic Eggnog Cream Puffs
Make the cream puffs with water, butter, salt, flour, nutmeg, eggs, heavy cream, confectioners’ sugar, eggnog, vanilla, and powdered sugar. This gives the dessert its light pastry shell and fluffy eggnog filling.
Serve chilled after filling. Dust with additional confectioners’ sugar just before serving.
Chocolate Cream Puff Shells
Add cocoa powder to the cream puff dough for a chocolate twist. This changes the pastry flavor while keeping the eggnog filling festive.
The chocolate note pairs well with whipped cream and nutmeg. Dust with confectioners’ sugar for contrast.
Pumpkin Spice Cream Puffs
Substitute half the eggnog with pumpkin puree and add pumpkin pie spice. This creates a pumpkin spice filling.
The result is still creamy but warmer and more autumn-inspired. It works beautifully for holiday gatherings.
Gluten-Free Eggnog Cream Puffs
Use a gluten-free all-purpose flour blend. This makes the cream puffs suitable for gluten-free needs.
The texture may vary slightly. Follow the same dough method and bake until puffed and golden.
Dairy-Free Eggnog Cream Puffs
Use coconut cream instead of heavy cream. This gives the filling a dairy-free direction.
The flavor will be different, but the filling can still be rich. Use it when you want a dairy-free version.
Adult Eggnog Cream Puffs
Add a splash of brandy or rum to the whipped cream. This gives the filling an adult holiday flavor.
Use a light hand so the cream still tastes balanced. The eggnog and nutmeg should remain the main flavors.
Lighter Eggnog Filling
Use half-and-half instead of heavy cream for a lighter option. The texture may not be as fluffy and rich.
This version changes the filling but keeps the eggnog flavor. Chill well before serving.
Peppermint Cream Puffs
Add crushed peppermint candies to the whipped cream for festive crunch. Peppermint flavor can also be used for a holiday twist.
This variation gives the cream puffs a brighter, minty finish. Add peppermint gently so it does not overpower the eggnog.
Cinnamon Cream Puffs
Use cinnamon flavor in the whipped cream. This gives the filling a warmer spice profile.
Cinnamon works nicely with eggnog and nutmeg. It makes the dessert feel even cozier.
Chocolate Whipped Cream Puffs
Adjust the whipped cream with chocolate flavor for a different filling. This gives the puffs a dessert-shop feeling.
Chocolate pairs well with nutmeg and powdered sugar. Serve chilled for the best texture.
Egg Substitute Cream Puffs
For egg substitutions, each egg can be replaced with ¼ cup unsweetened applesauce or ¼ cup silken tofu. This changes the dough and final texture.
Use this option if you need an egg-free direction. The result may not rise or feel exactly the same as the classic version.
Nut-Free Holiday Dessert
These cream puffs are nut-free as written. That makes them a helpful choice for gatherings.
Always check ingredient labels if serving guests with allergies. The recipe itself does not include nuts.
Cocoa Pairing
Serve the cream puffs with warm cocoa. The cool eggnog cream and warm drink make a cozy holiday pairing.
This is especially lovely for family nights. The flavors feel sweet and festive together.
Coffee Pairing
Serve with coffee for an easy dessert pairing. The coffee balances the sweetness of the filling.
This works well after dinner or at a holiday brunch. The cream puffs feel elegant beside a warm mug.
Festive Platter Serving
Arrange the cream puffs on a festive platter. Dust them with confectioners’ sugar right before serving.
The powdered sugar gives them a snowy look. This makes them beautiful for parties.
Why This Recipe Works
Eggnog Cream Puffs work because they combine airy pastry with a rich seasonal filling. The shells are light and hollow, while the whipped cream filling is sweet, fluffy, and full of eggnog flavor.
The dough begins by boiling water, butter, and salt. This creates the hot base needed for the flour to form a smooth dough.
Adding flour and nutmeg all at once helps the dough come together quickly. Stirring vigorously helps it pull away from the sides of the pan.
Letting the dough rest for about 5 minutes is important. It cools slightly before the eggs are added.
Eggs are added one at a time so the dough can absorb them properly. The mixture becomes glossy and smooth as each egg is beaten in.
Baking at 400°F (200°C) helps the puffs rise and turn golden. The heat creates the airy texture that makes cream puffs special.
The filling works because cold heavy cream whips into a fluffy base. Confectioners’ sugar sweetens it smoothly, while eggnog and nutmeg make it festive.
Slicing cooled puffs before filling keeps the whipped cream from melting. Dusting with confectioners’ sugar gives the finished dessert a beautiful holiday look.
Directions
Step 1: Preheat the Oven
Preheat your oven to 400°F (200°C). Let it heat fully before the cream puffs go in.
A properly heated oven helps the cream puffs rise and bake evenly. This step also helps them become golden and airy.
Step 2: Prepare the Baking Sheet
Line a baking sheet with parchment paper. This prevents sticking and makes cleanup easier.
Set the prepared baking sheet near your workspace. Once the dough is ready, you will want to portion it quickly.
Step 3: Start the Dough Base
In a medium saucepan, combine 1 cup water, ½ cup cubed butter, and ⅛ teaspoon salt. Place the pan over medium heat.
Let the butter melt into the water as the mixture heats. Stir occasionally so the butter melts evenly.
Step 4: Bring to a Rolling Boil
Bring the water, butter, and salt mixture to a rolling boil. It should be bubbling steadily.
This hot mixture is what helps the flour cook into a proper cream puff dough. Be ready to add the flour as soon as it boils.
Step 5: Add Flour and Nutmeg
Add 1 cup all-purpose flour and ¾ teaspoon ground nutmeg all at once. Stir immediately with a wooden spoon.
The mixture will thicken quickly. Keep stirring so the flour absorbs the liquid evenly.
Step 6: Stir Into a Smooth Ball
Continue stirring vigorously until the dough pulls away from the sides of the pan. It should form a smooth ball.
This step builds the structure of the cream puff dough. Remove the pan from the heat once the dough comes together.
Step 7: Let the Dough Rest
Let the dough stand for about 5 minutes. This allows it to cool slightly before the eggs are added.
The rest is important because eggs should not go into dough that is too hot. A short wait helps protect the texture.
Step 8: Add the First Egg
Add 1 large room temperature egg to the dough. Beat well until it is fully incorporated.
The dough may look separated at first. Keep beating, and it will come back together.
Step 9: Add the Remaining Eggs
Add the remaining 3 eggs one at a time. Beat well after each addition.
The dough should become glossy and smooth. This shiny texture is exactly what you want for cream puffs.
Step 10: Portion the Dough
Use a rounded tablespoon to drop spoonfuls of dough onto the parchment-lined baking sheet. Leave space between each puff.
Aim for about 12 puffs per batch. The puffs need room to expand in the oven.
Step 11: Bake the Cream Puffs
Bake the cream puffs for 20 to 25 minutes. They should become puffed and golden brown.
Do not remove them too early. The shells need enough time to bake through and hold their shape.
Step 12: Cool the Shells
Carefully remove the baked cream puffs from the oven. Transfer them to wire racks to cool.
The shells need to cool completely before filling. Warm shells can melt the whipped cream.
Step 13: Start the Eggnog Whipped Cream
Pour 1 ½ cups heavy whipping cream into a large mixing bowl. For best results, use cold cream.
Cold cream whips more easily. A cold bowl and cold beaters can also help.
Step 14: Whip to Soft Peaks
Beat the cream with an electric mixer until soft peaks form. The cream should begin to hold shape but still look soft.
Do not rush this step. Building the cream slowly helps create a fluffy filling.
Step 15: Add Sugar, Eggnog, Vanilla, and Nutmeg
Gradually add 1 ½ cups sifted confectioners’ sugar, ¼ cup eggnog, 1 teaspoon vanilla extract, and ⅛ teaspoon ground nutmeg. Continue whipping.
Beat until stiff peaks form. The filling should be light, fluffy, sweet, and stable enough to spoon into the puffs.
Step 16: Slice the Cream Puffs
Once the shells are completely cool, carefully slice each cream puff in half. A slightly rustic cut is fine.
Keep the tops and bottoms matched if possible. This makes assembly easier.
Step 17: Fill the Puffs
Spoon the eggnog whipped cream generously onto the bottom half of each puff. Replace the top halves gently.
Do not press too hard. The shells are delicate and should stay light.
Step 18: Dust and Serve
Dust the filled cream puffs with additional confectioners’ sugar. Serve chilled on a festive platter.
Keep them refrigerated until serving. They taste best when the filling is cool and fluffy.
Serving Ideas
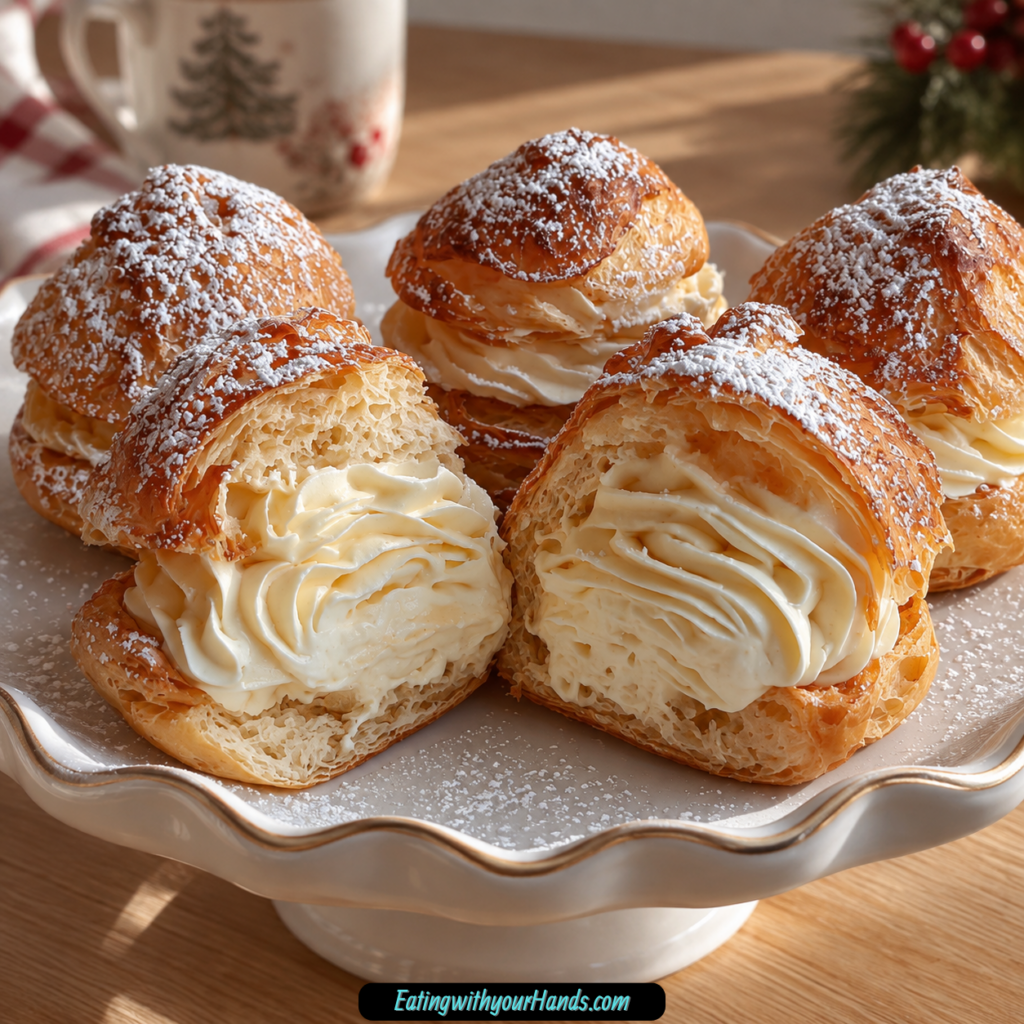
Eggnog Cream Puffs are best enjoyed chilled. The cool filling keeps its fluffy texture, and the pastry stays delicate.
Arrange them on a festive platter before serving. A dusting of confectioners’ sugar gives them a sweet holiday look.
Pair them with warm cocoa for a cozy dessert moment. The creamy filling and warm drink feel perfect together.
Coffee is another lovely pairing. Its warmth balances the sweet eggnog whipped cream.
Serve them at holiday parties, family gatherings, dessert buffets, or cozy nights in. They look elegant but still feel playful.
If making them for guests, fill them shortly before serving when possible. This keeps the shells at their best.
Add crushed peppermint candies to the filling for a festive crunch if desired. This turns them into an even brighter holiday treat.
For an adult version, add brandy or rum to the whipped cream. Serve carefully and clearly if sharing with guests.
Storage
Store leftover filled Eggnog Cream Puffs in an airtight container in the refrigerator. They will keep for up to 2 days.
They are best enjoyed fresh. The shells can soften once filled and chilled.
Keep the puffs cold until serving. This protects the whipped cream filling.
If stacking is necessary, do it gently. The filled puffs are delicate.
Dust with additional confectioners’ sugar close to serving for the prettiest look. Powdered sugar can absorb moisture as it sits.
Do not leave filled cream puffs at room temperature for too long. They are meant to be kept chilled.
Freezing
The unfilled cream puff shells can be frozen for up to 1 month. Freeze only the shells, then fill them with whipped cream before serving.
Let the baked shells cool completely before freezing. This helps protect their texture.
Place them in a freezer-safe container or bag. Handle them gently so they do not crush.
Thaw the shells before filling. Once thawed, add the eggnog whipped cream and dust with confectioners’ sugar.
Freezing the filled puffs is not the best option because the whipped cream texture can change. Preparing the shells ahead is the better make-ahead method.
This makes holiday prep much easier. You can bake the shells in advance, then fill them closer to the celebration.
Make-Ahead
Eggnog Cream Puffs can be partially made ahead. The unfilled shells can be baked and frozen for up to 1 month.
Prepare the eggnog whipped cream closer to serving time for the freshest texture. Keep it chilled until ready to use.
If assembling a few hours ahead, store the filled puffs in the refrigerator. Serve within 2 days.
Dust with confectioners’ sugar just before serving if possible. This keeps the finish looking snowy and fresh.
For a party, you can set the shells, filling, and powdered sugar ready in stages. Assemble the puffs before placing them on the dessert table.
This recipe is especially helpful for holiday hosting because the shells can be prepared ahead. That gives you more time to enjoy the gathering.
Helpful Notes for Best Results
Use room temperature eggs for the cream puff dough. They blend more smoothly and help create a better airy texture.
Let the dough rest for about 5 minutes before adding the eggs. This keeps the eggs from hitting dough that is too hot.
Add the eggs one at a time. Beat well after each addition so the dough becomes smooth and glossy.
Do not underbake the shells. They should be puffed and golden brown.
Cool the shells completely before filling. Warm shells can melt the whipped cream.
Use cold heavy whipping cream for the filling. Cold cream whips better.
Chill the mixing bowl and beaters for stronger whipped cream results. This helps the cream reach stiff peaks.
Sift the confectioners’ sugar before adding it to the whipped cream. This helps avoid lumps.
Variations
Classic Eggnog Cream Puffs
Use water, butter, salt, flour, nutmeg, eggs, heavy whipping cream, confectioners’ sugar, eggnog, vanilla, and more nutmeg. This creates the festive cream puff flavor.
Dust with confectioners’ sugar before serving. Keep chilled until ready to enjoy.
Chocolate Eggnog Cream Puffs
Add cocoa powder to the cream puff dough. This gives the pastry a chocolate twist.
The chocolate shell pairs well with eggnog whipped cream. Finish with powdered sugar.
Pumpkin Spice Eggnog Cream Puffs
Substitute half the eggnog with pumpkin puree and add pumpkin pie spice. This creates a pumpkin spice filling.
The flavor becomes warmer and more autumn-inspired. It is a festive variation for the holiday season.
Gluten-Free Eggnog Cream Puffs
Use a gluten-free all-purpose flour blend. This makes the shells gluten-free friendly.
The final texture may vary slightly. Bake until puffed and golden.
Dairy-Free Eggnog Cream Puffs
Use coconut cream instead of heavy cream. The filling will have a different flavor but can still be creamy.
Use dairy-free ingredients as needed. Chill well before filling.
Adult Eggnog Cream Puffs
Add a splash of brandy or rum to the whipped cream. This gives the filling a holiday cocktail-style warmth.
Use a small amount so the cream stays balanced. Serve clearly if guests are sharing them.
Lighter Eggnog Cream Puffs
Use half-and-half instead of heavy cream in the whipped cream. The filling may be less rich and less fluffy.
This option gives a lighter direction. Keep it cold for the best texture.
Peppermint Crunch Cream Puffs
Add crushed peppermint candies to the whipped cream. This gives the filling a festive crunch.
Peppermint also pairs well with eggnog and vanilla. Add gently so the texture stays fluffy.
Cinnamon Cream Puffs
Flavor the whipped cream with cinnamon. This gives the filling a warmer spice note.
Cinnamon works beautifully with nutmeg. It makes the puffs taste extra cozy.
Chocolate Cream Puffs
Adjust the whipped cream with chocolate flavor. This gives the filling a dessert-like richness.
Chocolate and eggnog make a sweet holiday pairing. Chill before serving.
Applesauce Egg Substitute Version
Use ¼ cup unsweetened applesauce per egg if substituting eggs. The texture may change.
Cream puff dough depends on eggs for its airy structure. Expect a different final result.
Silken Tofu Egg Substitute Version
Use ¼ cup silken tofu per egg for a vegan option. The texture may differ from the classic dough.
Blend the silken tofu smoothly before using. This helps it mix into the dough.
Nut-Free Cream Puffs
These cream puffs are nut-free as written. They are a good choice for gatherings.
Always check ingredient labels if needed. This helps keep the dessert suitable for guests.
Troubleshooting
The Cream Puffs Did Not Rise
The oven may not have been fully preheated, or the dough may not have been beaten enough after adding the eggs. Make sure the oven reaches 400°F (200°C).
Beat each egg in completely before adding the next. The dough should be glossy and smooth.
The Dough Looks Separated
This can happen when eggs are first added. Keep beating after each egg.
The dough should come back together. By the end, it should look shiny and smooth.
The Cream Puffs Are Too Dense
The dough may have been too wet or underbaked. Bake until the puffs are golden brown.
Let the dough rest for about 5 minutes before adding eggs. Add eggs one at a time and beat well.
The Shells Collapsed
The shells may have been removed too early. They need enough time to set in the oven.
Bake for 20 to 25 minutes until puffed and golden. Cool on wire racks.
The Garlic-Like Bitter Note Appeared
The dough may have cooked too aggressively or browned in the saucepan. Keep the saucepan mixture controlled and stir well after adding flour.
Cream puff dough should form a smooth ball without scorching. Remove from heat once it pulls from the pan.
The Whipped Cream Is Too Soft
The cream may not have been whipped long enough. Continue beating until stiff peaks form.
Use cold heavy whipping cream. A cold bowl and beaters can help.
The Whipped Cream Has Lumps
The confectioners’ sugar may not have been sifted. Sift it before adding.
Add the sugar gradually while whipping. This helps the filling stay smooth.
The Filling Is Too Sweet
Use slightly less confectioners’ sugar next time. The sweetness can be adjusted to taste.
The nutmeg and eggnog still bring holiday flavor. Dust lightly with sugar if the filling is already sweet.
The Shells Got Soggy
The cream puffs may have been filled too far ahead. Filled puffs are best enjoyed fresh or within 2 days.
For make-ahead prep, freeze the unfilled shells. Fill them closer to serving.
The Puffs Are Hard to Slice
Use a sharp knife and cut gently. Make sure the shells are fully cooled before slicing.
Rustic edges are fine. The filling and powdered sugar make them look beautiful.
Frequently Asked Questions
Can I freeze Eggnog Cream Puffs?
Yes, the unfilled cream puff shells can be frozen for up to 1 month. Fill them with whipped cream before serving.
Let the shells cool completely before freezing. Thaw them before adding the filling.
How do I substitute the eggs?
Each egg can be substituted with ¼ cup unsweetened applesauce or ¼ cup silken tofu for a vegan option. The texture and rise may be different from the classic version.
Cream puff dough depends heavily on eggs, so the final result may change. Mix carefully and bake until set.
Can I use a different flavor of whipped cream?
Yes, you can experiment with peppermint, cinnamon, or chocolate flavors. Adjust the extracts and spices in the whipped cream.
Keep the filling balanced so the eggnog flavor still comes through. Chill before serving.
Do I need to preheat the oven?
Yes, the oven should be preheated to 400°F (200°C). This helps the cream puffs rise properly.
Line the baking sheet with parchment paper before portioning the dough. This prevents sticking.
Can I make the shells ahead of time?
Yes, the unfilled shells can be made ahead and frozen for up to 1 month. Fill them after thawing.
This is the best make-ahead option. The filled puffs are best fresh or refrigerated for up to 2 days.
Can I make these dairy-free?
Yes, coconut cream can be used instead of heavy cream for a dairy-free filling direction. The flavor and texture will change.
Use other dairy-free ingredients as needed. Chill well before filling.
What should I serve with Eggnog Cream Puffs?
Serve them chilled on a festive platter. They pair well with warm cocoa or coffee.
Dust with confectioners’ sugar before serving. This gives them a sweet holiday finish.
Are these cream puffs nut-free?
Yes, these cream puffs are nut-free as written. They are a good choice for gatherings.
Always check ingredient labels if serving people with allergies. This helps keep the dessert safe for guests.
Why This Recipe Works So Well
Eggnog Cream Puffs work so well because they combine a classic airy pastry shell with a festive whipped cream filling. The shell is light and golden, while the filling is cold, fluffy, sweet, and full of eggnog flavor.
The dough begins with water, butter, and salt brought to a rolling boil. This creates the hot base that helps the flour form a smooth dough.
All-purpose flour and nutmeg are added at once. Stirring vigorously helps the dough pull away from the pan and form a ball.
Resting the dough for 5 minutes matters. It cools the dough slightly so the eggs can be mixed in properly.
Adding the eggs one at a time creates the right texture. The dough becomes glossy, smooth, and ready to puff in the oven.
The 400°F (200°C) oven gives the cream puffs the heat they need. They bake for 20 to 25 minutes until puffed and golden.
The filling works because heavy whipping cream becomes fluffy when beaten to peaks. Confectioners’ sugar sweetens it smoothly, while eggnog, vanilla, and nutmeg make it taste festive.
Cooling the shells before filling keeps the whipped cream stable. Slicing, filling, replacing the tops, and dusting with sugar creates a beautiful holiday dessert.
The recipe is flexible too. Cocoa powder, pumpkin puree, pumpkin pie spice, gluten-free flour blend, coconut cream, brandy, rum, half-and-half, applesauce, silken tofu, peppermint candies, peppermint, cinnamon, chocolate, cocoa, coffee, and festive platters all give these cream puffs different ways to fit your table.
Most of all, these cream puffs work because they feel joyful. They are light, creamy, nostalgic, beautiful, holiday-ready, freezer-friendly when unfilled, and sweet enough to make any gathering feel a little more magical.
Final Thoughts
Eggnog Cream Puffs are festive holiday pastries made with water, butter, salt, all-purpose flour, nutmeg, eggs, heavy whipping cream, confectioners’ sugar, eggnog, vanilla extract, and a final dusting of powdered sugar. The dough is cooked on the stovetop, beaten with eggs, baked until golden, cooled, filled with eggnog whipped cream, and finished with a snowy topping.
Serve them chilled on a festive platter with warm cocoa or coffee for a sweet holiday treat. With their 20-minute prep time, airy shells, creamy eggnog filling, make-ahead freezer option for unfilled shells, nut-free ingredient list, and festive flavor, these Eggnog Cream Puffs are a beautiful dessert for parties, gatherings, and cozy nights with loved ones.
Eggnog Cream Puffs
Light, golden, festive, and filled with sweet eggnog whipped cream, these Eggnog Cream Puffs bring a holiday twist to a classic French-style dessert. The cream puff shells are flavored with nutmeg, baked until golden brown, filled with a creamy eggnog filling, and finished with a delicate dusting of confectioners’ sugar.
Recipe Details
- Prep Time: 20 minutes
- Cook Time: 25 minutes
- Total Time: 45 minutes
- Course: Dessert
- Cuisine: French
- Servings: 12 puffs
Equipment
- Baking sheet
- Parchment paper
- mixing bowls
- electric mixer
Ingredients
For Assembly
- Additional confectioners’ sugar for dusting
For the Eggnog Whipped Cream
- ⅛ teaspoon ground nutmeg
- 1 teaspoon vanilla extract
- ¼ cup eggnog
- 1 ½ cups confectioners’ sugar
- 1 ½ cups heavy whipping cream
For the Cream Puff Shells
- 4 large eggs, room temperature
- ¾ teaspoon ground nutmeg
- 1 cup all-purpose flour
- ⅛ teaspoon salt
- ½ cup butter, cubed
- 1 cup water
Instructions
Step 1: Prepare the Oven and Baking Sheet
Preheat the oven to 400°F (200°C). Line a baking sheet with parchment paper so the cream puff dough has a prepared surface for baking.
Having the baking sheet ready first helps you move quickly once the dough is mixed. Cream puff dough is best shaped and baked soon after it comes together.
Step 2: Cook the Dough Base
In a saucepan, bring the water, cubed butter, and salt to a boil. Add the all-purpose flour and ground nutmeg all at once, then stir until the mixture forms a smooth ball.
Remove the saucepan from the heat and let the dough stand for 5 minutes. This short rest helps the dough cool slightly before the eggs are added.
Step 3: Add the Eggs
Add the room-temperature eggs one at a time, beating well after each addition. Continue beating until the dough becomes smooth and shiny.
The dough may look separated at first after each egg, but it will come back together as you beat it. Keep mixing until the texture looks glossy and even.
Step 4: Shape the Cream Puffs
Drop the dough by rounded tablespoonfuls onto the prepared baking sheet. Leave enough room between each mound so the puffs can expand as they bake.
Try to keep the portions similar in size. This helps all 12 puffs bake more evenly.
Step 5: Bake Until Golden
Bake for 20-25 minutes, or until the cream puffs are golden brown. Once baked, remove them to wire racks to cool.
Let the shells cool before filling them. Filling warm puffs can soften the whipped cream too quickly.
Step 6: Whip the Cream Filling
For the eggnog whipped cream, beat the heavy whipping cream until soft peaks form. Gradually add the confectioners’ sugar, eggnog, vanilla extract, and ground nutmeg.
Continue beating until stiff peaks form. The filling should be thick enough to hold inside the cream puffs once they are split.
Step 7: Fill the Cream Puffs
Split the cooled cream puffs in half. Fill each one with the eggnog whipped cream, then replace the tops.
Work gently so the shells stay intact. The filling should sit generously inside each puff without weighing it down too much.
Step 8: Dust and Serve
Dust the filled cream puffs with additional confectioners’ sugar. Serve chilled as directed.
Notes
- Store cream puffs in the refrigerator.
- Serve chilled.
Serving Suggestions
Serve Eggnog Cream Puffs chilled, after the shells have been filled with the eggnog whipped cream and dusted with confectioners’ sugar. The light cream puff shells, sweet filling, vanilla, eggnog, and nutmeg make them a festive dessert for holiday tables or winter gatherings.
Dust with additional confectioners’ sugar right before serving so the tops look soft and finished. The chilled filling gives each puff a creamy center that contrasts with the golden shell.
This recipe makes 12 puffs, making it easy to serve as individual desserts. Keep them refrigerated until you are ready to bring them out.
Storage
How to Store
Store the cream puffs in the refrigerator. Serve them chilled.
Shell Tip
Bake the cream puff shells at 400°F (200°C) for 20-25 minutes, or until golden brown. Let them cool on wire racks before filling.
Dough Tip
After adding the flour and nutmeg to the boiling water, butter, and salt, stir until a smooth ball forms. Let the dough stand for 5 minutes before adding the eggs.
Egg Tip
Add the eggs one at a time and beat well after each addition. Continue beating until the mixture is smooth and shiny.
Filling Tip
Beat the heavy whipping cream to soft peaks before adding the confectioners’ sugar, eggnog, vanilla extract, and nutmeg. Continue beating until stiff peaks form.
Serving Tip
Split the cream puffs, fill them with the eggnog whipped cream, replace the tops, and dust with confectioners’ sugar before serving chilled.

Fernando is the creator and writer behind the food blog Eating with your Hands. Living and working in cities like Paris, Barcelona, and Berlin, and being married to a Canadian foodie, has given Fernando a passion and interest in food and inspired him to run EWYH.