

There are certain holiday traditions that announce themselves before you even see them. For me, one of those moments is when the smell of butter, vanilla, and freshly baked cookies begins drifting through the house and suddenly December feels exactly the way it is supposed to.
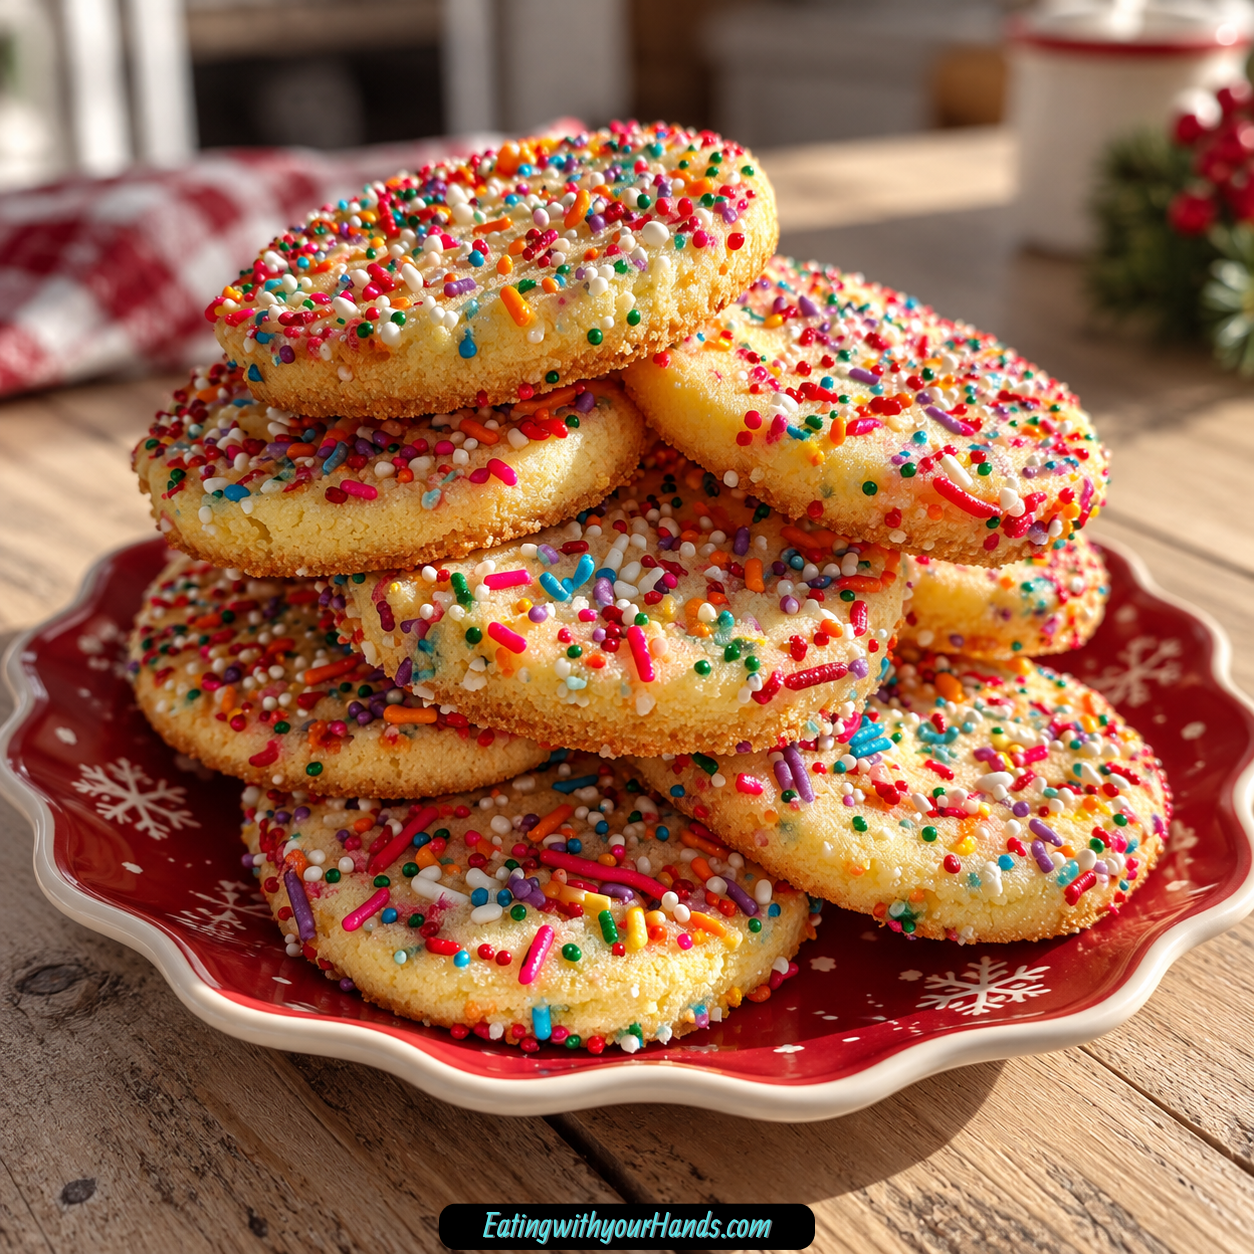
These Festive Stacked Christmas Sprinkle Cookies have become part of that feeling in my kitchen. They are bright, soft, buttery cookies filled with colorful Christmas sprinkles, rolled in sparkling sugar, and made to look especially cheerful when piled high on a holiday plate.
I first made them because I needed something that could look impressive at a neighborhood cookie exchange without turning into an all-day decorating project. I wanted a cookie that would instantly look festive but would not require piping bags, carefully mixed frosting colors, or hours spent decorating one cookie at a time.
The sprinkles solved that problem beautifully. Mixed right into the dough, they give every cookie its own scattered pattern of Christmas color, so the decoration happens at the same time as the baking.
Then there is the colored sugar on the outside. Rolling each portion of dough through sparkling sugar before baking adds another layer of holiday brightness and gives the cookies the playful appearance of tiny wrapped presents.
What started as a practical cookie-exchange recipe eventually became one of my favorite December traditions. My kids especially love helping with the rolling stage, when plain balls of dough suddenly become sparkly enough to look ready for a Christmas dessert table.
That hands-on part is one of the reasons I keep coming back to this recipe. It is simple enough for everyone to participate in, but the finished cookies still have enough charm to feel special when stacked high for a party.
Their texture is just as important as their appearance. The edges set gently in the oven while the centers stay slightly soft, giving each cookie that tender bite that becomes even better once it finishes cooling.
Vanilla forms the main flavor, while optional almond extract brings in another warm bakery note. The cookie itself stays simple enough that the sprinkles and colored sugar can provide the visual excitement without competing with an overly complicated flavor profile.
Table of Contents
- Why Festive Stacked Christmas Sprinkle Cookies Work So Well
- Ingredients for Stacked Christmas Sprinkle Cookies
- Choosing the Sprinkles
- Vanilla and Almond Flavor
- Equipment Needed
- How to Make Festive Stacked Christmas Sprinkle Cookies
- Step 1: Preheat the Oven
- Step 2: Line the Baking Sheets
- Step 3: Combine the Dry Ingredients
- Step 4: Cream the Butter and Sugar
- Step 5: Add the Egg
- Step 6: Add Vanilla and Almond Extract
- Step 7: Gradually Add the Dry Ingredients
- Step 8: Check the Dough Consistency
- Step 9: Fold in the Christmas Sprinkles
- Step 10: Chill the Dough if It Is Too Sticky
- Step 11: Portion the Dough
- Step 12: Roll Into Balls
- Step 13: Roll in Colored Sugar
- Step 14: Arrange the Dough on the Baking Sheets
- Step 15: Bake for 10–12 Minutes
- Step 16: Rotate the Pan if Necessary
- Step 17: Cool on the Baking Sheet for 5 Minutes
- Step 18: Transfer to a Wire Rack
- The Secret to Keeping the Centers Soft
- Why Softened Butter Matters
- Making the Cookies Without a Mixer
- Ingredient Substitutions
- Variations for Christmas Sprinkle Cookies
- How to Present Stacked Christmas Sprinkle Cookies
- Serving Suggestions
- Storing Stacked Christmas Sprinkle Cookies
- Freezing the Baked Cookies
- Freezing the Cookie Dough
- Preventing Sprinkle Colors From Bleeding
- Frequently Asked Questions
- Nutritional Information
- A Cookie That Turned Into a December Tradition
- Festive Stacked Christmas Sprinkle Cookies
- Recipe Details
- Ingredients
- Instructions
- Step 1: Prepare the Oven and Baking Sheets
- Step 2: Combine the Dry Ingredients
- Step 3: Cream the Butter and Sugar
- Step 4: Add the Egg and Extracts
- Step 5: Finish the Dough
- Step 6: Fold in the Christmas Sprinkles
- Step 7: Shape and Coat the Cookies
- Step 8: Arrange on the Baking Sheets
- Step 9: Bake
- Step 10: Cool
- Notes
- Serving Suggestions
- Storage
Why Festive Stacked Christmas Sprinkle Cookies Work So Well
Holiday baking often seems to divide into two categories: very simple cookies that look plain, and beautiful cookies that require hours of decoration. These Christmas Sprinkle Cookies sit comfortably between those two extremes.
They are straightforward to mix and shape, but the sprinkles do almost all of the decorative work for you. Red, green, white, metallic, or multicolored holiday sprinkles can turn an uncomplicated butter cookie into something instantly festive.
The dough is also approachable. You cream butter and sugar, add the egg and extracts, combine that mixture with flour, baking powder, and salt, and then gently fold in the sprinkles.
From there, each cookie is portioned, rolled, coated in colored sugar, and baked. There are no complicated shapes to preserve and no frosting that needs time to dry.
The recipe is flexible enough to leave Christmas behind once the season changes. Swap the sprinkles for pastels at Easter, hearts for Valentine’s Day, or school colors for game day, and the basic cookie easily becomes part of another celebration.
That adaptability is one of the most practical things about the recipe. Once you understand the dough, you can keep the same technique and simply let the decorations change with the occasion.
Ingredients for Stacked Christmas Sprinkle Cookies
The ingredient list is pleasantly familiar, with butter, sugar, flour, egg, and vanilla doing most of the structural work. Sprinkles and colored sugar are what transform the basic dough into a festive holiday cookie.
- 1 ½ cups all-purpose flour, spooned and leveled
- 1 cup unsalted butter, softened, or 2 sticks
- ¾ cup granulated sugar
- 1 large egg, room temperature
- 1 teaspoon pure vanilla extract
- ½ teaspoon almond extract, optional
- ½ teaspoon baking powder
- ¼ teaspoon fine sea salt
- 1 cup Christmas sprinkles
- 2 tablespoons colored sugar, for rolling
The flour should be spooned and leveled rather than packed tightly into the measuring cup. Keeping the measurement accurate helps preserve the intended soft texture.
The 1 cup of softened unsalted butter gives the cookies their rich base. It needs to be soft enough to cream easily with the sugar but not so warm that the dough becomes loose before baking.
Granulated sugar sweetens the dough, while the colored sugar used for rolling adds another decorative layer outside each cookie. The two forms of sugar serve different purposes, so both remain part of the recipe.
Choosing the Sprinkles
The recipe uses 1 cup Christmas sprinkles. A mixture of jimmies and nonpareils is a favorite combination because the different shapes create plenty of color throughout the dough.
Sprinkle brands can behave differently during baking. If you want sharply defined colors, choose varieties labeled “non-bleeding” or “bake-stable.”
This is especially useful when using strong reds, greens, or other colors that may streak into pale cookie dough. Gentle mixing after the sprinkles go in also reduces the chance of excessive color bleeding.
The cookies do not need every piece to look identical. In fact, the slightly random distribution of colorful bits is part of what gives them their cheerful homemade appearance.
Vanilla and Almond Flavor
The main flavoring is 1 teaspoon pure vanilla extract. It gives the butter cookie base a familiar sweetness that works well with the festive sprinkles.
The ½ teaspoon almond extract is optional. When included, it creates a slightly more bakery-like flavor and adds another layer without overwhelming the vanilla.
If almond extract is unavailable, simply use all vanilla. Another option is ¼ teaspoon maple extract when you want a warmer variation.
The important thing is not to complicate the dough unnecessarily. The cookie is meant to remain buttery and simple enough for the decorations to shine.
Equipment Needed
The recipe uses a short list of common baking tools:
- Large mixing bowl
- Hand mixer or sturdy wooden spoon
- Baking sheets
- Parchment paper
- Cookie scoop or tablespoon
The detailed mixing method also uses a medium bowl for the dry ingredients. That allows the flour, baking powder, and salt to be combined before they meet the butter mixture.
A hand mixer makes the creaming stage fast, but a wooden spoon is completely acceptable. Mixing by hand simply requires a little more time and effort.
Parchment paper keeps the cookies from sticking and makes cleanup easier. It also gives the dough balls a clean baking surface without the need to grease the sheets.
How to Make Festive Stacked Christmas Sprinkle Cookies
The method is simple, but the texture depends on a few details: properly softened butter, gentle mixing after the flour goes in, and taking the cookies out while the centers still look slightly soft.
Step 1: Preheat the Oven
Set the oven to 350°F (175°C). Allow it to come fully to temperature before placing the first tray of cookies inside.
Starting with a properly heated oven helps the cookies begin setting as soon as they go in. That gives you more predictable edges and centers.
While the oven heats, arrange your workspace so the dry ingredients, softened butter, egg, extracts, sprinkles, and colored sugar are ready to go.
Step 2: Line the Baking Sheets
Cover the baking sheets with parchment paper. There is no need to grease the pans when using parchment.
The parchment prevents sticking and makes transferring the cookies after baking much easier. It also keeps cleanup pleasantly simple once the final tray is finished.
Set the prepared baking sheets aside while you make the dough. Having them ready now means you can begin portioning immediately after the dough is mixed.
Step 3: Combine the Dry Ingredients
In a medium bowl, add 1 ½ cups all-purpose flour, ½ teaspoon baking powder, and ¼ teaspoon fine sea salt. Whisk them together thoroughly.
One playful guideline is to give the mixture about 15 whisks. The goal is simply to distribute the baking powder and salt evenly through the flour.
Set the dry mixture aside once it looks uniform. It will be added gradually to the butter mixture later.
Step 4: Cream the Butter and Sugar
Place 1 cup softened unsalted butter and ¾ cup granulated sugar in the large mixing bowl. Beat them together until the mixture becomes light and fluffy.
With a hand mixer, this takes about 2 minutes. You are looking for a texture that appears noticeably lighter and almost whipped compared with the butter at the beginning.
This stage is worth completing properly. The butter and sugar should feel cohesive and airy before the egg and flavorings are introduced.
Step 5: Add the Egg
Add 1 large room-temperature egg to the creamed butter mixture. Mix only until it is incorporated.
Using a room-temperature egg helps it blend more smoothly with the softened butter. There is no need to continue beating once the mixture looks combined.
Keep the mixing controlled rather than aggressive. The longer creaming work has already been done during the butter-and-sugar stage.
Step 6: Add Vanilla and Almond Extract
Pour in 1 teaspoon pure vanilla extract. If using the optional almond extract, add ½ teaspoon as well.
Mix just until the flavorings disappear into the butter mixture. Avoid extended beating at this point.
The vanilla provides the main flavor foundation. Almond extract is simply an optional accent that makes the cookies taste a little more distinctive.
Step 7: Gradually Add the Dry Ingredients
Begin adding the flour mixture to the wet ingredients in portions. If using a mixer, keep the speed low.
Continue only until the dry ingredients have been incorporated. The dough should come together into a soft but recognizable cookie dough.
Do not keep mixing after that point in an attempt to make it overly smooth. Gentle handling helps preserve the tender texture of the cookies.
Step 8: Check the Dough Consistency
At this point, the dough should be slightly soft. It needs to be soft enough to scoop but firm enough to roll into balls.
If the dough feels easy to handle, continue directly to the sprinkles. If it is extremely soft or sticky, you can chill it later before shaping.
Avoid adding extra flour simply because the dough does not feel stiff. The recipe is designed around a softer consistency.
Step 9: Fold in the Christmas Sprinkles
Add 1 cup Christmas sprinkles to the dough. Use a spatula to fold them in gently.
Keep folding only until the colors are reasonably distributed. Overmixing after adding the sprinkles can cause some varieties to bleed into the dough.
The goal is a cookie where colorful pieces appear throughout each portion. The pattern does not need to be perfectly even.
Step 10: Chill the Dough if It Is Too Sticky
If the dough feels too soft to scoop and roll comfortably, place it in the refrigerator for 15–20 minutes. This short chill firms the butter enough to make shaping easier.
Do not assume every batch automatically needs chilling. Use this step only when the dough texture requires it.
Once the dough is easier to handle, remove it from the refrigerator and begin portioning. It should still feel soft rather than hard.
Step 11: Portion the Dough
Use a tablespoon or cookie scoop to portion the dough. Try to keep the scoops relatively consistent so the cookies bake at a similar rate.
You do not need a scale or exact weight because no individual cookie weight is specified. Simply use the same scoop or spoon throughout the batch.
Place each measured portion briefly in your hand before rolling. The dough should be soft enough to smooth without sticking excessively.
Step 12: Roll Into Balls
Roll each portion gently between your palms until it forms a smooth ball. Avoid compressing it more than necessary.
This shaping step gives the cookies a neat appearance before baking. It also makes the colored-sugar coating easier to apply evenly.
Continue until you have enough dough balls for the first baking sheet. Leave the remaining dough in the bowl while you finish coating each portion.
Step 13: Roll in Colored Sugar
Place the 2 tablespoons colored sugar in a small area where the dough balls can be coated. Roll each ball through the sugar until the outside has a light sparkling layer.
This extra coating gives the cookies another decorative element beyond the sprinkles folded inside. The sugar becomes especially noticeable once the cookies are stacked together for serving.
The coating does not need to be thick. A light, even sparkle is enough.
Step 14: Arrange the Dough on the Baking Sheets
Place the coated dough balls onto the parchment-lined sheets. Leave about 2 inches between each cookie.
The spacing gives the dough room to spread as it bakes. Avoid crowding the sheet even if that means baking another batch.
Try to keep similar-sized dough balls on the same tray. This makes it easier to judge when the entire batch has finished baking.
Step 15: Bake for 10–12 Minutes
Bake the cookies at 350°F (175°C) for 10–12 minutes. Watch for the edges to become set and just begin turning golden.
The centers may still look slightly underdone when the cookies are ready to come out. That appearance is intentional.
Do not keep baking simply because the middle seems soft. The cookies continue setting after they leave the oven.
Step 16: Rotate the Pan if Necessary
If your oven has noticeable hot spots, rotate the baking sheet halfway through the baking time. This helps different areas of the tray brown more evenly.
Not every oven needs this adjustment. Use it if you already know one side tends to cook faster than the other.
Continue watching the edges as the most useful visual cue. A slight golden tone is enough.
Step 17: Cool on the Baking Sheet for 5 Minutes
Remove the tray from the oven and leave the cookies on the baking sheet for 5 minutes. This resting period allows the soft centers to firm enough for handling.
Trying to move them immediately can lead to breakage because they are still delicate when hot. Five minutes gives them time to gain structure without becoming hard.
You will notice the cookies settling slightly as they cool. That is part of the final texture development.
Step 18: Transfer to a Wire Rack
After 5 minutes, carefully move the cookies to a wire rack. Let them continue cooling there.
As they cool completely, the edges remain set while the centers become soft and tender rather than raw. This is the texture you are aiming for.
Repeat the shaping and baking process with the remaining dough. Allow each tray its own 5-minute rest before moving the cookies.

The Secret to Keeping the Centers Soft
The easiest way to overbake these cookies is to wait until the centers look completely firm in the oven. By that stage, the final cookies can become drier than intended.
Take them out when the edges are set but the middles still look a little soft. Residual heat from the baking sheet continues cooking them during the 5-minute rest.
That timing creates a cookie that feels baked around the edges but still has a tender center. It is the most important visual cue in the recipe.
Do not rely on deep browning as your sign of doneness. Only the beginning of a golden edge is needed.
Why Softened Butter Matters
Softened butter creams properly with the sugar and creates the correct dough consistency. Butter that is too cold will be difficult to beat into a light mixture.
Butter that is too warm can make the dough excessively soft. If that happens, the 15–20 minute chilling option becomes especially useful before scooping.
The best starting texture is butter soft enough to mix easily but still holding its shape. That gives you the most control during the creaming stage.
Making the Cookies Without a Mixer
A hand mixer is convenient, but it is not required. A sturdy wooden spoon can handle the entire recipe.
Cream the butter and sugar by hand for about 5 minutes. It takes more effort than the roughly 2 minutes required with a mixer, but the goal remains the same: a lighter, fluffier mixture.
Continue with the egg, vanilla, optional almond extract, and dry ingredients as directed. Keep the mixing gentle once the flour is introduced.
This makes the recipe accessible even when you do not want to pull out extra appliances. The cookies still rely on the same ingredients and timing.
Ingredient Substitutions
The basic recipe is flexible enough to support a few practical changes. Keep the main measurements accurate even when swapping one ingredient for another.
Almond Extract
If you do not have almond extract, use all vanilla. The cookies will still have a familiar buttery vanilla flavor.
Another option is ¼ teaspoon maple extract. This gives the dough a warmer flavor variation.
Salted Butter
Salted butter can replace unsalted butter. If you use it, reduce the added salt by half.
This keeps the salt level from becoming stronger than intended. The rest of the method stays the same.
Dairy-Free Butter
For a dairy-free version, use plant-based butter sticks rather than soft tub-style spread. The stick form is the recommended substitution for maintaining a more comparable baking texture.
Use the same quantity as the butter in the main recipe. Continue with the regular creaming and mixing method.
Gluten-Free Flour
A cup-for-cup gluten-free flour blend can replace the all-purpose flour. Use it in the same quantity.
The recipe does not specify other changes for this variation. Follow the remaining instructions as written and use the same doneness cues.
Variations for Christmas Sprinkle Cookies
Changing the sprinkles or flavoring is an easy way to make the same cookie feel completely different. The buttery base stays familiar while the decoration shifts with the occasion.
Citrus Sprinkle Cookies
Replace the almond extract with orange zest. The citrus adds brightness against the sweetness of the dough and sprinkles.
No exact amount of orange zest is specified. Add it according to preference rather than assigning an invented measurement.
Winter Wonderland Cookies
Use white and silver sprinkles instead of the traditional Christmas color mixture. This creates a snowy appearance while keeping the same cookie base.
The colored sugar can continue adding sparkle around the outside. The finished cookies take on a quieter winter look rather than the brighter red-and-green style.
Chocolate Sprinkle Cookies
Fold mini chocolate chips into the dough along with the sprinkles. The chocolate adds another layer of sweetness without replacing the colorful decorations.
No exact amount is provided for the chocolate chips. Add them only according to preference.
Year-Round Sprinkle Cookies
The easiest variation is simply changing the sprinkle colors. Hearts can work for Valentine’s Day, while pastel sprinkles can move the recipe into Easter.
School colors can turn the cookies into a game-day treat. The baking method remains unchanged regardless of the celebration.
How to Present Stacked Christmas Sprinkle Cookies
These cookies were made for a simple presentation that still feels abundant. Stack them high on a pretty plate or cake stand so the sprinkle-filled edges and sparkling sugar are visible from different angles.
A tall arrangement makes an especially cheerful holiday centerpiece. Because every cookie carries its own colorful pattern, the stack naturally looks decorative without extra garnishes.
For parties, a vintage cake stand is a favorite serving option. Guests can easily take one cookie while the remaining stack still looks full and festive.
The same presentation works beautifully for a neighborhood cookie exchange. What originally began as a quick-but-impressive cookie idea still fits that setting perfectly.
Serving Suggestions
The cookies can be enjoyed at room temperature, but they are especially cozy when still a little warm. A steaming mug of cocoa is a favorite accompaniment.
When the cookies are warm, the texture remains especially soft. The colorful sprinkles also stand out beautifully against the pale buttery crumb.
At a holiday party, arrange them in stacks rather than laying every cookie flat. That gives the dessert table more height and shows off the color from several directions.
Of course, a few can always be set aside before the platter reaches the party. Some are meant for Santa, and some inevitably become the baker’s reward.
Storing Stacked Christmas Sprinkle Cookies
Allow the cookies to cool completely before moving them into storage. Place them in an airtight container at room temperature.
They stay soft and enjoyable for up to 5 days. The recipe notes that the sprinkles help maintain the moist texture during storage.
Keep the container sealed between servings. This helps protect the cookies from drying out.
There is no need to refrigerate them for the stated storage period. Room-temperature airtight storage is the method provided.
Freezing the Baked Cookies
Fully baked cookies can be frozen for up to 2 months. Cool them completely before placing them into freezer storage.
When you want to serve them, thaw the cookies at room temperature. No additional reheating instructions are required.
This makes the recipe convenient for holiday preparation when several desserts need to be made ahead. A frozen batch can wait until closer to the gathering rather than competing for baking time at the last minute.
Freezing the Cookie Dough
The unbaked dough can also be frozen. Scoop the dough into balls and place them on a baking sheet.
Freeze the shaped portions until solid, which takes about 1 hour. Once frozen, transfer the dough balls to a freezer bag.
The frozen dough can be stored for up to 2 months. This lets you keep ready-to-bake cookie portions available without baking an entire batch at once.
When you are ready to bake them, add a couple of extra minutes to the normal baking time. Use the same visual cues: set edges and centers that still look slightly soft.
Preventing Sprinkle Colors From Bleeding
Some sprinkles release their color more readily than others when mixed into wet dough and exposed to oven heat. Choosing a “non-bleeding” or “bake-stable” variety can help keep the colors cleaner.
Technique matters too. Fold the sprinkles gently into the finished dough instead of stirring them aggressively.
Once the colors appear evenly distributed, stop mixing. Additional stirring can drag pigment through the dough and create streaks.
Color bleeding does not necessarily affect the flavor, but it can change the appearance. If crisp holiday colors matter to you, both the sprinkle choice and gentle folding are worth attention.
Frequently Asked Questions
Can I freeze the dough for later?
Yes. Scoop the dough into individual balls and arrange them on a baking sheet.
Freeze them until solid, about 1 hour, then transfer them to a freezer bag. The frozen cookie dough will keep for up to 2 months.
When baking from frozen, add a couple of extra minutes to the normal baking time. Still watch the cookies rather than relying only on the clock.
Store them in an airtight container at room temperature for up to 5 days. They remain soft during that period.
In many households, they may disappear much sooner than that. But 5 days is the stated storage window when they are properly sealed.
Why did my sprinkles bleed into the dough?
Some sprinkle brands bleed more than others during baking. Look for options labeled “non-bleeding” or “bake-stable.”
Overmixing can also make the issue more noticeable. Fold the sprinkles gently and stop as soon as they are distributed.
Yes. Use a sturdy wooden spoon instead.
Creaming the butter and sugar by hand takes about 5 minutes compared with about 2 minutes using a hand mixer. Continue until the mixture becomes light and fluffy before adding the other ingredients.
What should I do if the dough is too sticky?
Chill the dough for 15–20 minutes. This firms the butter enough to make scooping and rolling easier.
Do not automatically add extra flour. A slightly soft dough is normal for this recipe.
Remove them when the edges are set but the centers still look slightly soft. They will finish setting during the 5-minute rest on the baking sheet.
If you wait until the entire cookie looks completely firm in the oven, you risk baking away the soft-center texture. Timing matters more than deep browning.
Can I use other sprinkle colors?
Absolutely. The same dough can be used with different sprinkle combinations for other occasions.
Use pastels for Easter, hearts for Valentine’s Day, school colors for game day, or white and silver for a winter theme. The baking method stays the same.
Nutritional Information
Each cookie contains approximately 120 calories.
The number is an estimate because sprinkle brands and other ingredient choices can vary. Cookie size can also affect the final value.
No additional nutrition figures are specified. The recipe is meant to be enjoyed as a festive holiday treat.
A Cookie That Turned Into a December Tradition
I originally needed these cookies for something very practical: a neighborhood cookie exchange where I wanted to bring a treat that looked festive without requiring hours of work. I had no idea that the simple combination of soft butter cookies, Christmas sprinkles, and sparkling sugar would become something my family would look forward to making every December.
Now, the baking itself has become part of the fun. My kids help roll the dough between their hands and coat the balls in colored sugar, usually paying close attention to which ones end up with the most sparkle.
There is something joyful about a recipe that does not demand perfection. One cookie may have mostly red sprinkles, another may be covered in green and white, and another may emerge with an entirely different pattern.
When they are stacked together, those differences are what make the platter look so cheerful. Every layer shows another scatter of color, and the pile starts looking almost like a collection of little edible Christmas ornaments.
I also appreciate that the recipe leaves room to evolve. The same cookies can become snowy with white and silver sprinkles, playful with mini chocolate chips, citrusy with orange zest, or completely transformed for another holiday simply by changing the colors.
Yet the Christmas version is still the one that feels most connected to home. It belongs to those December afternoons when the kitchen smells like butter and vanilla, the baking sheets keep moving in and out of the oven, and everyone seems to wander through looking for a cookie that is cool enough to steal.
Stacked high on a plate beside a mug of cocoa, these cookies do not need intricate frosting or elaborate decorations to feel festive. Their soft centers, lightly golden edges, sparkling sugar, and bright holiday sprinkles already carry all the cheer they need.
And that is probably why they have lasted as one of my favorite holiday recipes. They began as an easy answer to a cookie exchange, but somewhere along the way, they became one of those small traditions that makes December feel complete.
Festive Stacked Christmas Sprinkle Cookies

Buttery, colorful, and loaded with holiday cheer, these Festive Stacked Christmas Sprinkle Cookies are soft-centered treats filled with Christmas sprinkles and finished with a sparkling colored sugar coating. Vanilla, optional almond extract, and plenty of festive sprinkles give these easy cookies a bright holiday look and a classic sweet flavor.
Recipe Details
- Prep Time: 15 minutes
- Cook Time: 12 minutes
- Total Time: 27 minutes
- Course: Dessert
- Cuisine: American
- Servings: 24 cookies
- Calories: 120 kcal
Ingredients
For the Cookie Dough
- 1 cup Christmas-themed sprinkles nonpareils, jimmies, or a mix
- ½ teaspoon almond extract optional
- 1 teaspoon vanilla extract
- 1 large egg
- ¾ cup granulated sugar
- 1 cup unsalted butter softened
- ¼ teaspoon salt
- ½ teaspoon baking powder
- 1 ½ cups all-purpose flour
For the Garnish
- 2 tablespoons colored sugar for garnish
Instructions
Step 1: Prepare the Oven and Baking Sheets
Preheat the oven to 350°F (175°C).
Line baking sheets with parchment paper and set them aside while you prepare the cookie dough.
Step 2: Combine the Dry Ingredients
In a medium bowl, whisk together the all-purpose flour, baking powder, and salt.
Mix until the dry ingredients are evenly combined, then set the bowl aside.
Step 3: Cream the Butter and Sugar
In a large bowl, beat the softened unsalted butter with the granulated sugar.
Continue mixing until the mixture becomes creamy and well blended.
Step 4: Add the Egg and Extracts
Beat in the large egg and vanilla extract.
Add the almond extract if using, then mix until the wet ingredients are evenly incorporated.
Step 5: Finish the Dough
Gradually add the dry ingredient mixture to the butter mixture.
Mix only until the dough comes together and no streaks of dry flour remain.
Step 6: Fold in the Christmas Sprinkles
Add the Christmas-themed sprinkles to the dough.
Use nonpareils, jimmies, or a mix as listed, folding gently until the sprinkles are distributed throughout.
Step 7: Shape and Coat the Cookies
Scoop the dough into small balls.
Roll each dough ball in the colored sugar so the outside gets a festive sparkling coating.
Step 8: Arrange on the Baking Sheets
Place the coated dough balls on the prepared baking sheets.
Space them evenly so they have room to bake without crowding each other.
Step 9: Bake
Bake for 10–12 minutes, or until the edges are lightly golden.
For softer cookies, slightly underbake them as noted.
Step 10: Cool
Let the cookies cool on the baking sheets for 5 minutes.
Transfer them to a wire rack to finish cooling before serving or storing.
Notes
- Store cookies in an airtight container for up to 5 days.
- For softer cookies, slightly underbake.
- Customize sprinkles for different occasions.
Serving Suggestions
Serve Festive Stacked Christmas Sprinkle Cookies after they have cooled enough to hold their shape. The buttery cookie base, vanilla flavor, optional almond extract, colorful sprinkles, and colored sugar coating make them especially festive for Christmas dessert trays, parties, cookie exchanges, or holiday treat boxes.
This recipe makes 24 cookies, making it easy to prepare a generous batch for sharing. Nonpareils, jimmies, or a combination can be used depending on the look and texture you prefer.
For softer cookies, take them from the oven slightly earlier within the recommended baking range. You can also switch the sprinkles to match other celebrations while keeping the same cookie base.
Storage
How to Store
Store the cookies in an airtight container for up to 5 days.
Butter Tip
Use 1 cup softened unsalted butter. Beat it with the granulated sugar until creamy before adding the egg and extracts.
Extract Tip
Use 1 teaspoon vanilla extract. Add ½ teaspoon almond extract only if desired.
Sprinkle Tip
Use 1 cup Christmas-themed sprinkles. Nonpareils, jimmies, or a mix can be used.
Colored Sugar Tip
Use 2 tablespoons colored sugar for garnish. Roll the shaped dough balls in the sugar before placing them on the baking sheets.
Baking Tip
Bake at 350°F (175°C) for 10–12 minutes, until the edges are lightly golden.
Soft Cookie Tip
For a softer texture, slightly underbake the cookies within the recommended baking range.
Cooling Tip
Cool the cookies on the baking sheets for 5 minutes before transferring them to a wire rack.

Fernando is the creator and writer behind the food blog Eating with your Hands. Living and working in cities like Paris, Barcelona, and Berlin, and being married to a Canadian foodie, has given Fernando a passion and interest in food and inspired him to run EWYH.