
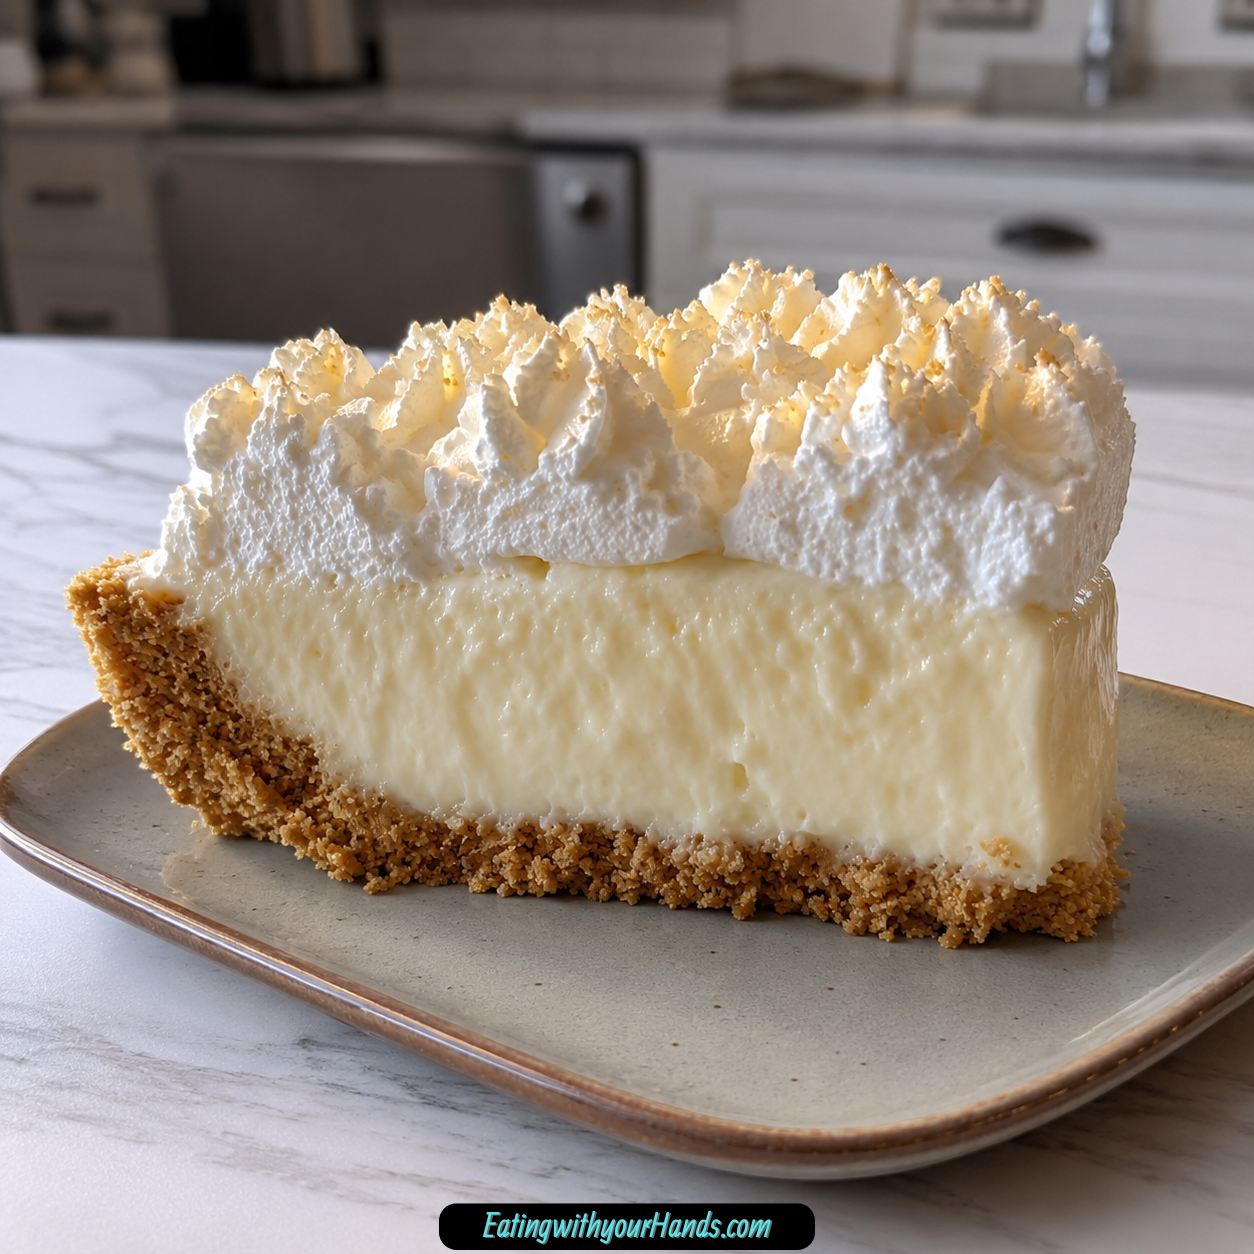
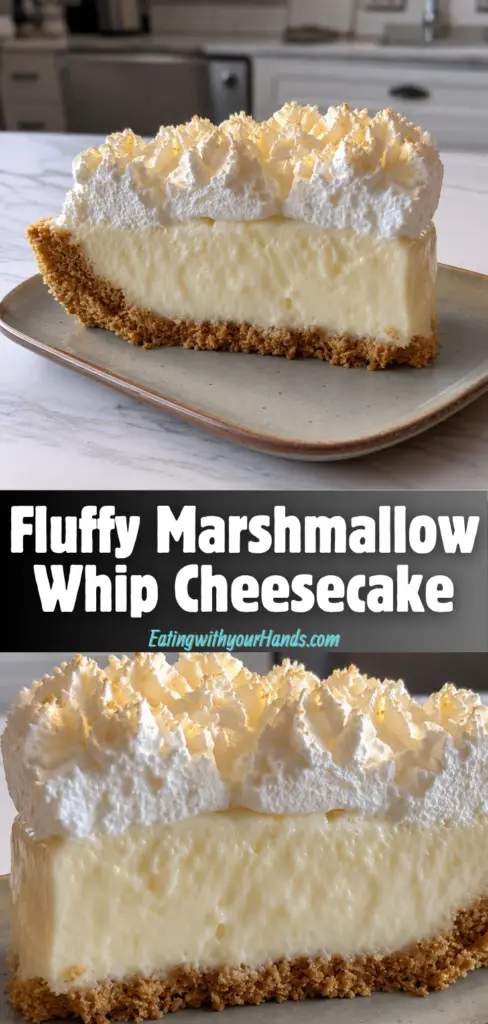
Some desserts feel like they were made for the moments when you need something sweet, beautiful, and easy without turning the whole kitchen upside down. Fluffy Marshmallow Whip Cheesecake is exactly that kind of recipe, with a creamy no-bake filling, a soft marshmallow sweetness, a ready-to-use graham cracker crust, and a cloud-like texture that feels light but still satisfying.
This cheesecake is the dessert I imagine when the weather is warm, the oven feels like too much effort, and there is still a potluck, backyard barbecue, holiday table, or family dinner waiting for something special. It comes together quickly, but after a good chill in the refrigerator, it slices like a dessert that took much more work.
The filling is made with softened cream cheese, marshmallow creme, vanilla extract, and thawed whipped topping. That simple combination creates a texture that is smooth, fluffy, sweet, and gently tangy from the cream cheese.
The graham cracker crust keeps everything classic and easy. It gives the cheesecake a lightly crisp, buttery-style base that balances the marshmallow filling beautifully.
What I love most about this no-bake cheesecake is how forgiving it feels. You do not need a water bath, you do not need to worry about cracks, and you do not need to heat the oven.
The hardest part is waiting while it chills. But once the filling sets, every slice feels cool, airy, creamy, and sweet in the easiest possible way.
Table of Contents
- What Is Marshmallow Whip Cheesecake?
- Why You’ll Love This Marshmallow Whip Cheesecake
- Recipe Details
- Ingredients You’ll Need
- A Closer Look at the Ingredients
- The Texture Behind This No-Bake Cheesecake
- Directions
- Step 1: Gather the Ingredients and Tools
- Step 2: Soften the Cream Cheese
- Step 3: Prepare the Whipped Topping
- Step 4: Beat the Cream Cheese
- Step 5: Add the Marshmallow Creme
- Step 6: Add the Vanilla Extract
- Step 7: Scrape the Bowl Again
- Step 8: Add the Whipped Topping
- Step 9: Fold Until Smooth
- Step 10: Taste and Check Texture
- Step 11: Prepare the Graham Cracker Crust
- Step 12: Add the Filling to the Crust
- Step 13: Smooth the Top
- Step 14: Cover the Cheesecake
- Step 15: Chill for at Least 4 Hours
- Step 16: Prepare the Garnish
- Step 17: Slice with a Hot Knife
- Step 18: Serve Cold
- Helpful Tips for the Best Marshmallow Whip Cheesecake
- Common Mistakes
- Variations
- Serving Suggestions
- Storage Tips
- Freezing Instructions
- Make-Ahead Notes
- Frequently Asked Questions
- Can I Freeze Marshmallow Whip Cheesecake?
- What If I Cannot Find Marshmallow Creme?
- How Many Does This Cheesecake Serve?
- Can I Use Homemade Whipped Cream Instead of Whipped Topping?
- Why Did My Filling Turn Out Runny?
- Can I Make It Firmer?
- Can I Make It More Marshmallowy?
- What Crust Can I Use Besides Graham Cracker?
- Final Thoughts
- Marshmallow Whip Cheesecake
What Is Marshmallow Whip Cheesecake?
Marshmallow Whip Cheesecake is a no-bake cheesecake made with cream cheese, marshmallow creme, vanilla extract, whipped topping, and a graham cracker crust. It is mixed, spread into the crust, chilled until firm, and served cold.
Unlike a baked cheesecake, this version does not use eggs and does not need oven time. The structure comes from softened cream cheese, marshmallow creme, and whipped topping setting together in the refrigerator.
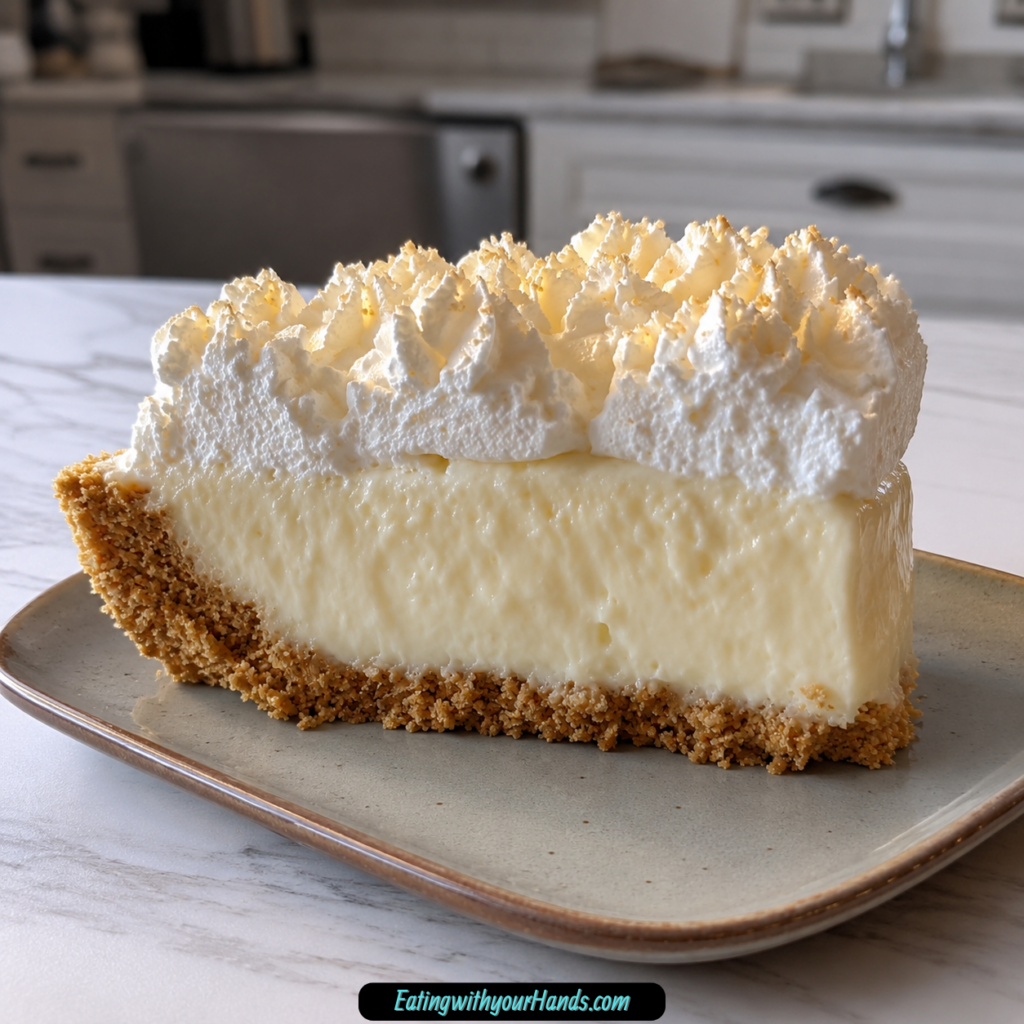
The texture is lighter than a dense baked cheesecake. It is creamy, fluffy, and almost mousse-like, with enough richness to still feel like cheesecake.
It is a great dessert for hot days, last-minute gatherings, and beginner bakers. It looks pretty, tastes sweet and comforting, and requires only a handful of simple ingredients.
Why You’ll Love This Marshmallow Whip Cheesecake
This recipe does not require an oven. That makes it perfect for summer days or busy moments when baking feels like too much.
It comes together quickly. The filling can be prepared in about 15-20 minutes before chilling.
It has a light, cloud-like texture. The whipped topping keeps the filling airy while the cream cheese gives it body.
It is kid-approved and family-friendly. The marshmallow creme gives it a sweet flavor that feels playful and fun.
It is easy to customize. You can change the crust, add fruit, swirl in jam, drizzle chocolate, or try different extracts.
It can be made ahead. Chilling for at least 4 hours, or overnight, gives it the best sliceable texture.
Recipe Details
- Recipe name: Fluffy Marshmallow Whip Cheesecake
- Recipe style: No-bake cheesecake
- Prep time: About 15-20 minutes
- Chill time: At least 4 hours
- Best chill option: Overnight for the cleanest slices
- Crust: 9-inch graham cracker crust
- Main filling ingredients: Cream cheese, marshmallow creme, vanilla extract, and whipped topping
- Texture: Light, fluffy, creamy, and sliceable after chilling
- Best served: Cold from the refrigerator
- Serving size: 8 decent-sized slices, or up to 10 smaller slices
- Storage: Covered in the refrigerator for up to 3 days
- Freezer storage: Individual slices can be frozen up to 1 month
- Clean slicing tip: Use a sharp knife dipped in hot water and wiped dry
- Homemade whipped cream option: 1 cup heavy cream whipped with 1 tablespoon powdered sugar to stiff peaks
- Marshmallow creme substitute: Melt about 2 cups mini marshmallows with 1 tablespoon corn syrup
Ingredients You’ll Need
For the Filling
- 1 block (8 oz) cream cheese, softened
- 1 jar (7 oz) marshmallow creme
- 1 teaspoon vanilla extract
- 1 tub (8 oz) whipped topping, thawed
For the Crust and Garnish
- 1 9-inch graham cracker crust
- Whipped cream or extra whipped topping
A Closer Look at the Ingredients
Cream cheese is the base of this no-bake cheesecake filling. It needs to be softened so it blends smoothly and does not leave small lumps in the finished dessert.
Marshmallow creme gives the cheesecake its sweet, fluffy flavor. It makes the filling taste playful, soft, and lighter than a traditional cheesecake.
Vanilla extract adds a gentle background flavor. It helps the cream cheese and marshmallow creme taste more rounded.
Thawed whipped topping gives the filling its airy texture. It should be folded in gently so the cheesecake stays fluffy.
A 9-inch graham cracker crust makes the recipe fast and simple. A store-bought crust saves time, but a homemade graham cracker crust can also be used if you prefer.
Whipped cream or extra whipped topping is optional for garnish. It adds height, softness, and a pretty finish right before serving.
Fresh berries, chocolate sauce, crushed graham crackers, or other toppings can also be added if desired. The base recipe stays simple, but the finished cheesecake can be dressed up easily.
The Texture Behind This No-Bake Cheesecake
The best part of this cheesecake is the texture. It is smooth from the cream cheese, sweet from the marshmallow creme, and light from the whipped topping.
The filling should not be dense or heavy. When mixed correctly, it feels creamy but airy, almost like a cheesecake mousse.
Softened cream cheese is the first key to that texture. If the cream cheese is still cold, tiny lumps can remain no matter how long you mix.
Gentle folding is the second key. Once the whipped topping goes in, heavy stirring can knock out the air and make the filling denser.
The final key is chilling. The cheesecake needs at least 4 hours in the refrigerator so the filling can firm into a sliceable texture.
Directions
Step 1: Gather the Ingredients and Tools
Start by gathering the softened cream cheese, marshmallow creme, vanilla extract, thawed whipped topping, graham cracker crust, and optional whipped cream or extra whipped topping for garnish. You will also need a large mixing bowl, electric mixer, spatula, and refrigerator space.
A sharp knife will be helpful later for slicing. If you want clean slices, have hot water and a towel ready before serving.
This recipe is simple, but the texture depends on mixing and chilling properly. Having everything ready helps the process stay smooth.
Step 2: Soften the Cream Cheese
Make sure the 8 oz block of cream cheese is softened before you begin. Room-temperature cream cheese blends much more smoothly than cold cream cheese.
You can leave it on the counter for about an hour. If you are short on time, use short 10-second microwave bursts, but do not let it melt.
Softened cream cheese should press easily with a spoon. It should not be icy, firm, or liquid.
Step 3: Prepare the Whipped Topping
Make sure the 8 oz tub of whipped topping is thawed. It should be soft enough to fold into the filling without clumps.
Do not use it frozen. Frozen whipped topping will not blend properly and can make the filling uneven.
Keep it cold until you are ready to fold it in. Cold whipped topping helps the filling stay fluffy.
Step 4: Beat the Cream Cheese
Place the softened cream cheese in a large mixing bowl. Beat it with an electric mixer until completely smooth.
Scrape down the sides and bottom of the bowl halfway through mixing. Small pockets of unmixed cream cheese can hide there.
The cream cheese should look silky and creamy before you add anything else. This step is important for a lump-free cheesecake.
Step 5: Add the Marshmallow Creme
Add the 7 oz jar of marshmallow creme to the bowl with the cream cheese. Use a spatula to scrape out as much as possible.
Marshmallow creme can be sticky, so work slowly. A lightly sprayed spoon or spatula can help it release more easily.
Beat the cream cheese and marshmallow creme together until the mixture looks smooth, fluffy, and evenly combined. There should be no streaks of plain cream cheese.
Step 6: Add the Vanilla Extract
Add 1 teaspoon vanilla extract to the filling. Mix until blended.
Vanilla gives the filling a soft, sweet aroma. It also helps the marshmallow and cream cheese taste more complete.
Do not overmix after adding the vanilla. Just mix until it disappears into the filling.
Step 7: Scrape the Bowl Again
Stop the mixer and scrape down the sides and bottom of the bowl with a spatula. This helps catch any cream cheese that may not have mixed in.
Scraping is a small step, but it makes the final filling smoother. It prevents surprise lumps in an otherwise fluffy cheesecake.
After scraping, mix briefly one more time. The base should be smooth before the whipped topping is added.
Step 8: Add the Whipped Topping
Add the thawed whipped topping to the bowl. Do not beat it aggressively with the mixer.
Use a spatula to gently fold it into the cream cheese and marshmallow mixture. Fold from the bottom of the bowl upward.
The goal is to keep the filling airy. Gentle folding protects the light texture.
Step 9: Fold Until Smooth
Continue folding until no white streaks remain. The filling should look soft, fluffy, and evenly blended.
Do not overmix. Too much stirring can make the filling heavier and less cloud-like.
The finished filling should hold soft shape on the spatula. It should look creamy but light.
Step 10: Taste and Check Texture
Taste a small spoonful if desired. The filling should be sweet, creamy, marshmallowy, and lightly tangy.
If you prefer a firmer texture, the notes suggest adding an extra ½ cup whipped topping. If you prefer extra marshmallow flavor, a 10 oz jar of fluff can be used instead.
The base recipe uses 7 oz marshmallow creme and 8 oz whipped topping. Stick with that for the classic version.
Step 11: Prepare the Graham Cracker Crust
Place the 9-inch graham cracker crust on a flat surface. If using a store-bought crust, keep it in the pie tin.
Check that the crust is not cracked too badly before filling. Small cracks are fine because the filling will help hold everything together.
If using a homemade crust, make sure it is fully ready before adding the filling. The crust should be cool and firm.
Step 12: Add the Filling to the Crust
Spoon the marshmallow cheesecake filling into the graham cracker crust. Add it gradually so it spreads evenly.
Use a spatula to guide the filling toward the edges. Be gentle so you do not break the crust.
Make sure the filling reaches the sides of the crust. This gives the cheesecake a full, even shape.
Step 13: Smooth the Top
Use a spatula to smooth the top of the cheesecake. Try to make the surface even.
A smooth top helps the cheesecake look clean after chilling. It also makes it easier to garnish later.
Do not worry if it is not perfectly flat. A few soft swirls can make it look homemade and pretty.
Step 14: Cover the Cheesecake
Cover the cheesecake carefully before chilling. Use the crust lid, plastic wrap, or another gentle cover.
Try not to press the cover directly into the filling. This protects the smooth surface.
Covering also keeps the cheesecake from absorbing refrigerator odors. It helps the flavor stay clean and sweet.
Step 15: Chill for at Least 4 Hours
Place the cheesecake in the refrigerator for at least 4 hours. This is when the filling firms and becomes sliceable.
Do not rush this step. If you cut too soon, the filling may slump on the plate.
Overnight chilling is even better. It gives the cleanest slices and the most stable texture.
Step 16: Prepare the Garnish
Right before serving, prepare whipped cream or extra whipped topping if using. You can add swirls, dollops, or a simple border.
A sprinkle of crushed graham crackers can make the cheesecake look finished. Fresh berries or chocolate sauce can also dress it up.
Keep garnishes fresh by adding them shortly before serving. This gives the best appearance.
Step 17: Slice with a Hot Knife
For clean slices, dip a sharp knife in hot water and dry it quickly. Cut through the chilled cheesecake.
Wipe the knife between slices. This keeps the edges neat.
The cheesecake should be cold when sliced. Cold filling holds its shape much better.
Step 18: Serve Cold
Serve the cheesecake straight from the refrigerator. The texture is best when cold.
If it sits out at a party, it may soften. It will still taste good, but the slices may become messier.
Keep it chilled until serving time if transporting it to a potluck. A cooler is helpful for warm days.
Helpful Tips for the Best Marshmallow Whip Cheesecake
Use fully softened cream cheese. Cold cream cheese can leave tiny lumps in the filling.
Scrape the bowl while mixing. This prevents hidden pockets of unmixed cream cheese.
Fold the whipped topping gently. Stirring too hard can make the filling dense.
Chill for the full 4 hours. Overnight is even better if you want clean slices.
Use a hot knife for slicing. This helps create smooth edges.
Keep the cheesecake cold until serving. It holds its shape best when chilled.
Common Mistakes
Using Cold Cream Cheese
Cold cream cheese is difficult to beat smooth. It can leave small lumps throughout the filling.
Let it soften properly before mixing. This makes the cheesecake silky.
Overmixing the Whipped Topping
Whipped topping gives the filling its fluffy texture. Overmixing can knock out the air.
Fold gently with a spatula. Stop as soon as the mixture is evenly blended.
Not Chilling Long Enough
The cheesecake needs time to set. Cutting it too early can make it slump.
Chill for at least 4 hours. Overnight gives the best texture.
Skipping the Bowl Scrape
Cream cheese can hide along the sides and bottom of the bowl. If you do not scrape, the filling may not be fully smooth.
Pause and scrape during mixing. This small step makes a big difference.
Letting It Sit Out Too Long
This cheesecake softens as it warms. It should be served cold for the best structure.
Keep it refrigerated until ready to serve. For potlucks, keep it cool during transport.
Variations
Swap the vanilla extract for almond extract or coconut extract. Use just ½ teaspoon for either one because those flavors can be stronger.
Add lemon zest to the filling for a bright kick. It gives the cheesecake a fresher flavor.
Use an Oreo crumb crust instead of graham cracker crust. This gives the dessert a chocolate-cookie base.
Try a crushed pretzel crust for a sweet-salty twist. The saltiness works well with the marshmallow filling.
Layer sliced strawberries over the crust before adding the filling. This creates a fruit layer under the cheesecake.
Swirl raspberry jam into the filling for a berry ribbon. Do not overmix if you want visible swirls.
Fold in mini chocolate chips for a chocolate twist. They add texture and sweetness.
Drizzle the finished cheesecake with melted chocolate. This makes the dessert look more dramatic.
Top with fresh berries right before serving. They add color and freshness.
Serving Suggestions
Serve Marshmallow Whip Cheesecake cold from the refrigerator. This keeps the filling firm and sliceable.
Add whipped cream or extra whipped topping right before serving. It makes the cheesecake look taller and softer.
Fresh berries are a beautiful topping. They balance the sweetness and add color.
Chocolate sauce is another easy finish. A thin drizzle makes the cheesecake feel more dessert-table ready.
Crushed graham crackers can be sprinkled on top. They echo the crust and add a little texture.
This cheesecake works well for backyard barbecues, summer potlucks, holiday treats, or casual weeknight desserts. It feels easy but still special.
Storage Tips
Cover leftovers tightly with plastic wrap or place slices in an airtight container. Store in the refrigerator for up to 3 days.
Keep the cheesecake cold whenever possible. The filling holds best when chilled.
If it has been sitting out, return it to the refrigerator as soon as serving is finished. This helps preserve texture.
Do not store it uncovered. The filling can dry slightly or absorb refrigerator odors.
If topped with fresh berries, the topping may soften over time. For best results, add fresh toppings only before serving.
Freezing Instructions
Marshmallow Whip Cheesecake can be frozen for up to 1 month. Individual slices freeze especially well for easy serving later.
Wrap each slice tightly in plastic wrap, then foil. This protects the texture and flavor.
Thaw slices in the refrigerator overnight. The texture may be slightly less fluffy after freezing, but it will still taste good.
Do not thaw at room temperature for too long. Keeping it cold helps the filling hold together.
Add fresh garnish after thawing. Whipped cream, berries, and chocolate drizzle are best added right before serving.
Make-Ahead Notes
This cheesecake is a great make-ahead dessert because it needs chilling time. Make it at least 4 hours before serving.
Overnight chilling is even better. The filling becomes more stable, and slicing is easier.
You can make the whole cheesecake the day before a party. Keep it covered in the refrigerator.
Wait to add whipped cream, berries, or chocolate drizzle until serving time. Fresh garnishes look best.
For transporting, keep the cheesecake cold in a cooler or insulated bag. This helps prevent it from becoming too soft.
Frequently Asked Questions
Can I Freeze Marshmallow Whip Cheesecake?
Yes, Marshmallow Whip Cheesecake can be frozen. Wrap individual slices tightly in plastic wrap, then foil.
Freeze for up to 1 month. Thaw in the refrigerator overnight before serving.
What If I Cannot Find Marshmallow Creme?
You can melt about 2 cups mini marshmallows with 1 tablespoon corn syrup. Microwave in 30-second bursts, stirring between each one.
Let the mixture cool slightly before mixing it with the cream cheese. It will not be exactly the same, but it will still be sweet and sticky.
How Many Does This Cheesecake Serve?
This recipe makes about 8 decent-sized slices. If serving smaller portions or offering it with other desserts, you can stretch it to about 10 slices.
For a crowd, making two cheesecakes is a smart idea. This dessert tends to disappear quickly.
Can I Use Homemade Whipped Cream Instead of Whipped Topping?
Yes, homemade whipped cream can be used. Whip 1 cup heavy cream with 1 tablespoon powdered sugar until stiff peaks form.
Fold it into the filling just like the thawed whipped topping. It will be richer and less sweet.
Why Did My Filling Turn Out Runny?
The filling may be runny if the cream cheese was not beaten smooth, the whipped topping was overmixed, or the cheesecake did not chill long enough. Each step affects the final texture.
Next time, beat the cream cheese until completely smooth, fold gently, and chill for the full 4 hours. If it is still loose before serving, place it in the freezer for 30 minutes.
Can I Make It Firmer?
Yes, you can add an extra ½ cup whipped topping for a firmer texture. This helps the filling hold shape.
Chilling overnight also makes the cheesecake firmer. The longer chill gives the filling more time to set.
Can I Make It More Marshmallowy?
Yes, use a 10 oz jar of marshmallow fluff instead of the 7 oz jar. This gives the filling more marshmallow flavor.
The sweetness and texture may change slightly. It will still fit the same no-bake idea.
What Crust Can I Use Besides Graham Cracker?
You can use an Oreo crumb crust for a chocolate version. A crushed pretzel crust gives a sweet-salty flavor.
You can also make your own graham cracker crust with crushed crackers and melted butter if you prefer homemade. The store-bought crust is the fastest option.
Final Thoughts
Fluffy Marshmallow Whip Cheesecake is a no-bake dessert that proves simple recipes can still feel impressive. With softened cream cheese, marshmallow creme, vanilla extract, whipped topping, and a graham cracker crust, you get a cool, creamy cheesecake that tastes sweet, airy, and comforting.
It is perfect for warm days, potlucks, backyard barbecues, holiday tables, or any moment when you need a dessert that does not require the oven. The filling comes together quickly, and the refrigerator does the rest.
This recipe is also easy to make your own. You can add fruit, jam, chocolate, different extracts, Oreo crust, pretzel crust, homemade whipped cream, or extra marshmallow flavor.
Serve it cold, slice it with a hot knife, and enjoy every fluffy bite. It is sweet, simple, and just special enough to make an ordinary day feel like dessert was absolutely necessary.
Marshmallow Whip Cheesecake
This Marshmallow Whip Cheesecake is a light, creamy, no-bake dessert made with softened cream cheese, marshmallow creme, vanilla extract, whipped topping, and a graham cracker crust. The filling turns fluffy and smooth, giving each slice a sweet marshmallow flavor with a soft cheesecake-style texture. Since it only needs mixing and chilling, this easy cheesecake is perfect for holidays, potlucks, summer desserts, family gatherings, or anytime you want a simple make-ahead treat without turning on the oven.
Recipe Details
- Prep Time: 15 minutes
- Chilling Time: 4 hours
- Total Time: 15 minutes
- Servings: 8 slices
Ingredients
For the Crust and Garnish
- whipped cream or topping optional, for garnish
- 1 graham cracker crust 9-inch
For the Filling
- 1 teaspoon vanilla extract
- 1 tub whipped topping thawed, like Cool Whip, 8 oz
- 1 jar marshmallow creme or fluff, 7 oz
- 1 block cream cheese softened, 8 oz
Instructions
Step 1: Beat the Cream Cheese
Add the softened cream cheese to a bowl.
Beat until smooth and creamy with no large lumps remaining.
Step 2: Add the Marshmallow Creme
Add the marshmallow creme and vanilla extract.
Mix until fully combined and smooth.
Step 3: Fold in the Whipped Topping
Gently fold in the thawed whipped topping.
Continue folding until no streaks remain and the filling looks light and fluffy.
Step 4: Fill the Crust
Spread the marshmallow cheesecake filling evenly into the graham cracker crust.
Smooth the top with a spatula.
Step 5: Chill Until Set
Refrigerate for at least 4 hours, or until the cheesecake is firm enough to slice.
Step 6: Garnish and Serve
Top with extra whipped cream or topping before serving if desired.
Slice and serve chilled.
Notes
For best results, make sure your cream cheese is fully softened to avoid lumps. You can use homemade whipped cream instead of whipped topping if preferred.
Serving Suggestions
This marshmallow whip cheesecake pairs well with:
- Fresh strawberries
- Blueberry sauce
- Chocolate drizzle
- Crushed graham crackers
- Hot coffee
- Iced coffee
- Whipped cream
- Fresh raspberries
Storage
How to Store
Store the cheesecake covered in the refrigerator.
Best Texture Tip
Keep the cheesecake chilled until ready to serve so the filling stays firm, fluffy, and easy to slice.

Fernando is the creator and writer behind the food blog Eating with your Hands. Living and working in cities like Paris, Barcelona, and Berlin, and being married to a Canadian foodie, has given Fernando a passion and interest in food and inspired him to run EWYH.