
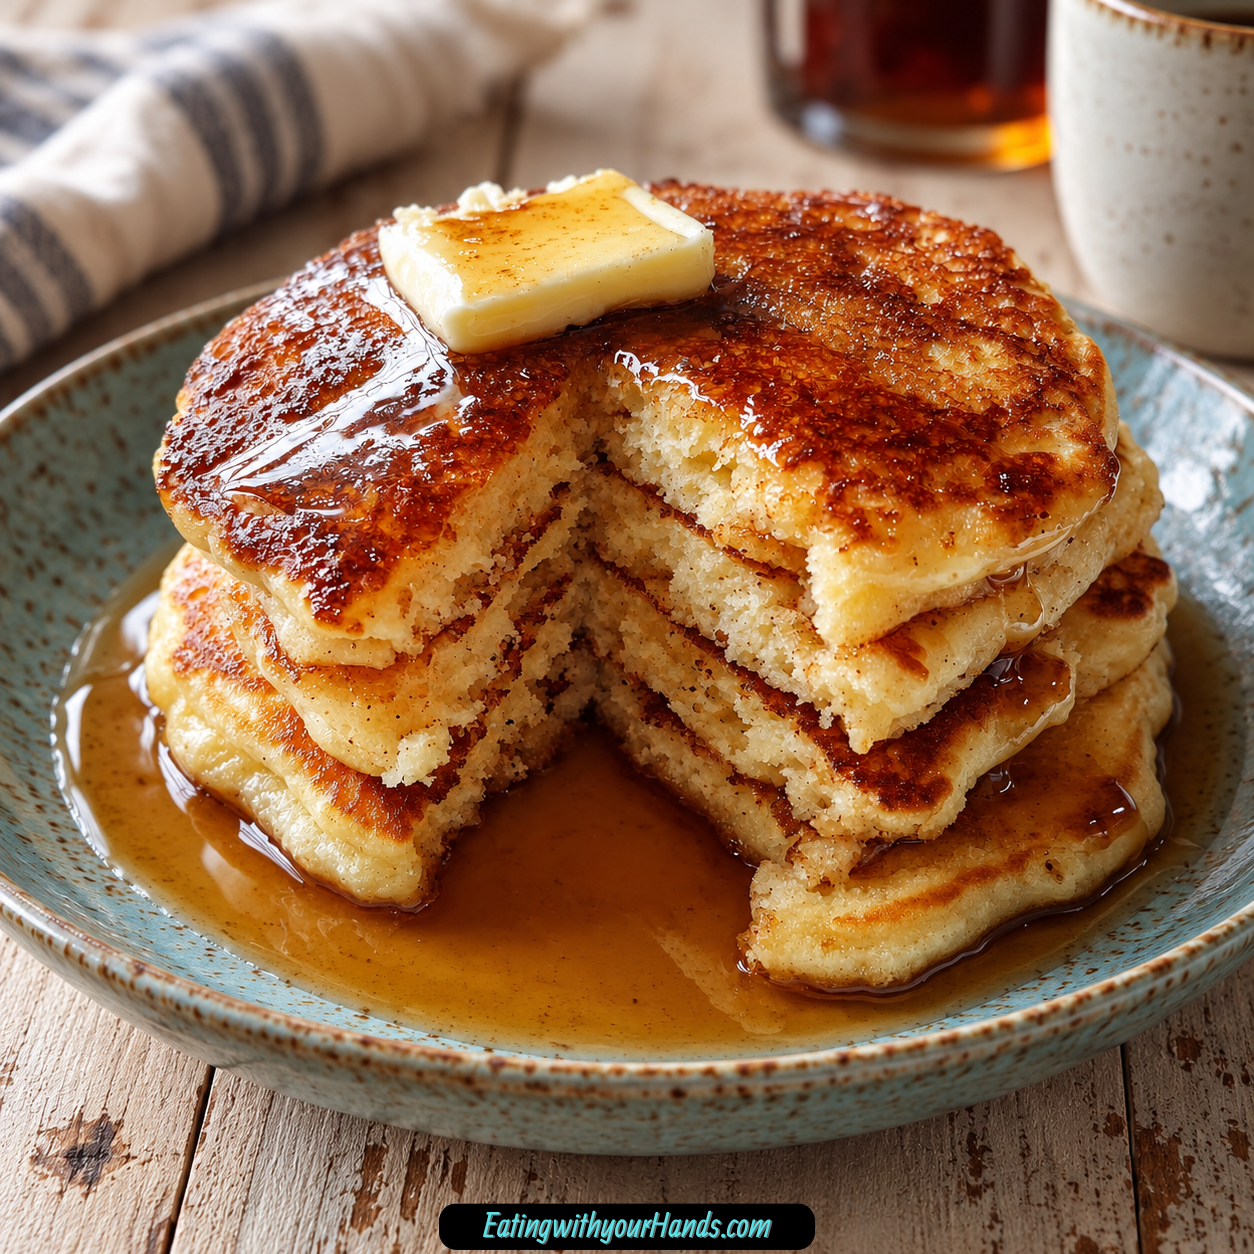

Some breakfasts wake you up because they are quick and practical. Others wake up the whole house before anyone even gets to the table, and these Vanilla Cinnamon Buttermilk Pancakes have always belonged to that second category for me.
The first sign is the smell. Butter hits the warm griddle, cinnamon begins to bloom in the batter, and vanilla drifts through the kitchen until even the sleepiest person suddenly wants to know when breakfast will be ready.
That aroma takes me straight back to my grandma’s kitchen. Weekend mornings at her house often meant tall stacks of pancakes soaked with syrup, and she was the one who taught me that a little real vanilla and just enough cinnamon could turn a basic pancake into something that felt much warmer and more memorable.
I spent years trying to recreate the exact texture I remembered. There were batches that came out too flat, a few that browned long before the centers finished cooking, and more than one first pancake that quietly became the cook’s snack.
Eventually, I figured out the little details that matter most. Cold buttermilk, a room-temperature egg, slightly cooled melted butter, gentle mixing, medium-low heat, and a willingness to wait for the bubbles all work together to create the fluffy result I wanted.
Now these pancakes are part of my own family’s Sunday routine. My toddler even calls them “happy cakes” because he does a little dance when the stack reaches the table, which is a pretty convincing endorsement as far as I am concerned.
What I love is that the flavor never feels overdone. Cinnamon and vanilla are present in every bite, but the pancakes are not aggressively sweet, so there is still plenty of room for maple syrup, fruit, butter, yogurt, or whatever else sounds good that morning.
The texture is just as important. The centers stay soft and tender, while the outside develops those lightly golden edges that make a hot pancake especially satisfying.
And because the recipe comes together quickly, it does not have to be saved for a slow brunch. Even on sleepy mornings, the batter can be mixed and the griddle heated fast enough that breakfast still feels comforting without turning into a project.
Table of Contents
- Why Vanilla Cinnamon Buttermilk Pancakes Work So Well
- Ingredients for Vanilla Cinnamon Buttermilk Pancakes
- Homemade Buttermilk Substitute
- Equipment You’ll Need
- How to Make Vanilla Cinnamon Buttermilk Pancakes
- Step 1: Measure the Flour Correctly
- Step 2: Combine the Dry Ingredients
- Step 3: Prepare the Egg
- Step 4: Measure the Buttermilk
- Step 5: Cool the Melted Butter Slightly
- Step 6: Add the Butter and Vanilla
- Step 7: Pour Wet Ingredients Into Dry
- Step 8: Stop Before the Batter Is Perfectly Smooth
- Step 9: Let the Batter Rest if You Have Time
- Step 10: Heat the Skillet Slowly
- Step 11: Test the Heat
- Step 12: Add a Small Amount of Butter
- Step 13: Portion the Batter
- Step 14: Watch the Surface for Bubbles
- Step 15: Flip Once
- Step 16: Cook the Second Side
- Step 17: Adjust the Pan Between Batches
- Step 18: Butter Lightly Again
- Step 19: Repeat Until the Batter Is Used
- Step 20: Serve While Warm
- The Most Important Fluffy Pancake Rule
- Managing Griddle Temperature
- Vanilla Cinnamon Pancake Variations
- Serving Vanilla Cinnamon Buttermilk Pancakes
- Whipped Cinnamon Butter
- Fresh Fruit Toppings
- Yogurt Drizzle
- Build the Stack in Layers
- How to Store Leftover Pancakes
- How to Freeze Pancakes
- Reheating Pancakes in the Toaster
- Reheating Pancakes in the Oven
- Reheating Pancakes in a Skillet
- Microwave Reheating
- Making Pancake Batter Ahead
- Frequently Asked Questions
- Nutritional Information
- The Sunday Pancakes That Still Take Me Back to Grandma’s Kitchen
- Fluffy Vanilla Cinnamon Buttermilk Pancakes
Why Vanilla Cinnamon Buttermilk Pancakes Work So Well
The first reason is the buttermilk. Its tang works with both baking soda and baking powder to help create the fluffy texture that makes these pancakes feel almost cloud-like.
The recipe uses both leaveners rather than relying on only one. That combination is something I have come to trust whenever I want the pancakes to rise well without becoming heavy.
Cinnamon and vanilla provide the flavor. The cinnamon adds warmth, while the vanilla softens and rounds everything out.
The sugar level stays modest at only 1 tablespoon in the batter. That means the pancakes themselves remain balanced instead of becoming dessert before any toppings go on.
The cooking method also matters. Medium-low heat gives the centers enough time to cook before the outside becomes too dark.
When the pan is too hot, the pancakes can look beautifully browned on the outside while remaining underdone in the middle. The slower approach creates a much more even result.
Ingredients for Vanilla Cinnamon Buttermilk Pancakes
The ingredient list is simple, but preparing each item correctly helps the batter come together properly.
Dry Ingredients
- 1 cup all-purpose flour, spooned and leveled
- 1 tablespoon sugar
- 1 teaspoon baking powder
- ½ teaspoon baking soda
- ½ teaspoon ground cinnamon
- ¼ teaspoon salt
Granulated sugar is the usual choice, although brown sugar can be used when you want a little caramel-like flavor.
The flour should be spooned into the measuring cup and leveled rather than scooped directly from the bag. Packing too much flour into the cup can make the batter heavier.
Make sure the baking powder is still fresh. Old baking powder is one of the possible reasons pancakes fail to rise as expected.
Wet Ingredients
- 1 cup buttermilk, cold from the refrigerator
- 1 large egg, room temperature
- 2 tablespoons melted butter, cooled slightly
- 1 teaspoon vanilla extract
Shake the buttermilk carton before measuring.
The egg should be at room temperature. If you forgot to take it out in advance, place it in warm water for about 5 minutes.
The melted butter needs a moment to cool before it goes into the wet mixture. Butter that is still very hot can begin cooking the egg, which is definitely not the texture we are aiming for.
Homemade Buttermilk Substitute
If you do not have buttermilk, there is an easy substitute.
Place 1 tablespoon lemon juice or white vinegar in a measuring cup. Add regular milk until the liquid reaches the 1-cup mark.
Let the mixture sit for 5 minutes. It should thicken slightly and become tangy before you use it in the batter.
It will not taste exactly the same as real buttermilk, but it works well enough when the refrigerator is empty and pancake cravings refuse to wait.
Equipment You’ll Need
You only need basic kitchen tools:
- 2 mixing bowls
- Whisk
- Nonstick skillet or griddle
- Measuring cups and spoons
- Spatula
A cast-iron skillet is another favorite because it gives the pancakes beautifully golden surfaces.
A ¼-cup measuring cup is useful when you want evenly sized pancakes. Freehand circles work just as well when perfectly round pancakes are not the priority.
A fork can substitute for the whisk if necessary. It takes a little more effort, but the recipe does not depend on specialized equipment.
How to Make Vanilla Cinnamon Buttermilk Pancakes
The biggest rule is simple: treat the batter gently. You want the ingredients combined, not beaten into a perfectly smooth mixture.
Step 1: Measure the Flour Correctly
Start with 1 cup all-purpose flour.
Spoon the flour into the measuring cup instead of digging the cup directly into the container. Level the top without pressing the flour down.
This helps prevent accidentally adding too much flour. Extra flour can make the batter thick and the pancakes denser than intended.
Step 2: Combine the Dry Ingredients
Place the measured flour into your larger mixing bowl.
Add 1 tablespoon sugar, 1 teaspoon baking powder, ½ teaspoon baking soda, ½ teaspoon ground cinnamon, and ¼ teaspoon salt.
Whisk the mixture for about 30 seconds.
Take enough time to break up obvious clumps and distribute the cinnamon and leaveners evenly. You do not want concentrated pockets of spice or baking powder hiding in the batter.
Step 3: Prepare the Egg
If your egg is still cold from the refrigerator, place it in warm water for about 5 minutes.
A room-temperature egg blends more easily with the other wet ingredients.
Crack it into a small bowl first if you want to avoid accidentally dropping shell fragments into the main mixture.
Then transfer it to the second mixing bowl.
Step 4: Measure the Buttermilk
Pour 1 cup cold buttermilk into the bowl with the egg.
Shake the buttermilk carton before measuring.
Although the egg is at room temperature, the buttermilk itself is used cold from the refrigerator.
This is one of the small preparation details that became part of the method after many batches.
Step 5: Cool the Melted Butter Slightly
Melt 2 tablespoons butter.
Then give it enough time to cool slightly before adding it to the egg mixture.
You do not want the butter hot enough to cook pieces of the egg on contact.
Use the cooling time to finish measuring the remaining ingredients so you are not adding unnecessary waiting to breakfast.
Step 6: Add the Butter and Vanilla
Pour the slightly cooled melted butter into the buttermilk and egg.
Add 1 teaspoon vanilla extract.
Whisk until the wet mixture looks creamy and evenly combined.
The vanilla aroma should already be noticeable. Once cinnamon enters the picture during cooking, the kitchen will smell even more inviting.
Step 7: Pour Wet Ingredients Into Dry
Pour the wet mixture into the bowl containing the flour mixture.
Switch from vigorous whisking to a gentler motion.
Use a spatula and begin folding the ingredients together.
Scrape from the bottom of the bowl so dry flour does not remain hidden underneath.
Step 8: Stop Before the Batter Is Perfectly Smooth
Fold only until most of the flour has disappeared.
A few small lumps and even a couple light flour streaks are completely acceptable.
Do not keep mixing just because the batter does not resemble smooth cake batter.
Overmixing is one of the fastest ways to lose the tender, fluffy texture.
Think of the batter as something delicate rather than something that needs to be beaten into submission.
Step 9: Let the Batter Rest if You Have Time
If breakfast can wait another 5 minutes, let the batter rest before cooking.
This optional pause allows the flour time to hydrate and gives the baking powder a chance to begin working.
You can use those minutes to brew coffee or finish setting out toppings.
If you are trying to keep the whole breakfast as fast as possible, you can continue directly to the griddle.
Step 10: Heat the Skillet Slowly
Place your skillet or griddle over medium-low heat.
Do not rush and turn it up to high.
Medium-low gives the pancakes time to cook through while gradually developing a golden exterior.
A pan that is too hot can burn the surface before the middle finishes.
Step 11: Test the Heat
Drop a few small drops of water onto the heated cooking surface.
They should dance on the pan rather than disappearing immediately.
If they vanish almost instantly, the surface is likely too hot.
Lower the heat before cooking the first pancake.
The first one can always act as your test pancake while you fine-tune the temperature.
Step 12: Add a Small Amount of Butter
Add about ½ teaspoon butter for each pancake.
Swirl it lightly over the cooking area.
You only need enough to create a gentle sizzle and help develop the golden surface.
Too much butter can produce lacy, uneven edges rather than a clean pancake shape.
Step 13: Portion the Batter
Pour about ¼ cup batter onto the griddle for each pancake.
You can also estimate palm-sized rounds if exact circles do not matter.
Give each pancake enough space so you can slide the spatula underneath later without running into another pancake.
Once the batter hits the pan, leave it alone.
Constant poking or moving interferes with the bubbles and the structure forming underneath.
Step 14: Watch the Surface for Bubbles
Cook the first side for about 2–3 minutes.
Small bubbles should begin appearing across the surface.
Some will rise and pop like tiny volcanoes.
At the same time, watch the edges.
They should gradually change from shiny and wet to more matte and set.
Those two signs together tell you much more than the clock alone.
Step 15: Flip Once
When the bubbles are active and the edges look set, slide a thin-edged spatula underneath.
Flip the pancake in one confident motion.
Avoid flipping repeatedly.
One clean flip gives the second side time to brown without repeatedly disturbing the pancake.
Step 16: Cook the Second Side
Cook for another 1–2 minutes.
The underside should become golden brown.
Because the second side is working with a pancake that is already mostly set, it generally needs less time than the first.
If the color becomes dark very quickly, lower the heat immediately.
Step 17: Adjust the Pan Between Batches
Pay attention to how the first pancake turns out.
If it browned in less than 2 minutes, reduce the heat.
If it stayed pale for a very long time, adjust slightly upward.
The cooking surface can also become hotter as you continue, so temperature control is not always a one-time decision.
Think of each batch as a chance to keep the griddle in the sweet spot.
Step 18: Butter Lightly Again
Before pouring the next pancake, add another small amount of butter if the surface needs it.
About ½ teaspoon per pancake is the suggested amount.
Avoid letting large pools of butter build up.
A light coating gives you the pleasant sizzle and golden edges without making the pancakes greasy.
Step 19: Repeat Until the Batter Is Used
Continue portioning, waiting for bubbles, flipping once, and cooking the second side.
Do not speed up the process by raising the heat.
Consistent medium-low cooking produces more reliable pancakes than trying to finish the batch as quickly as possible.
Stack the finished pancakes as they come off the griddle.
Step 20: Serve While Warm
Serve the pancakes while they are warm and tender.
Maple syrup is a classic choice, but fruit, cinnamon butter, yogurt, or other toppings can turn the stack into something completely different.
The pancakes are especially good while the edges still have a little golden firmness and the centers are soft enough to absorb whatever you pour over them.

The Most Important Fluffy Pancake Rule
Lumpy batter is not a mistake.
Once the wet and dry ingredients meet, overmixing is a much bigger problem than leaving a few lumps behind.
Smooth batter may look beautiful in the bowl, but excessive stirring can lead to pancakes that feel dense rather than airy.
A helpful visual is to imagine folding a cloud. Be gentle, stop early, and trust that the small lumps will take care of themselves during cooking.
Managing Griddle Temperature
Medium-low is the target.
If the outside is turning brown before 2 minutes have passed, the pan is too hot.
Lower the heat and give the surface a moment to settle.
If butter begins smoking when it goes into the pan, the temperature is far beyond what these pancakes need.
Wipe the pan if necessary, lower the heat, and start again.
The first pancake is allowed to be imperfect. In my kitchen, it simply becomes the chef’s snack while I adjust the griddle for the rest.
Vanilla Cinnamon Pancake Variations
The base batter is flexible enough to support several variations without losing the vanilla-cinnamon character.
Blueberry Vanilla Cinnamon Pancakes
Fold in ½ cup fresh or frozen blueberries immediately before cooking.
Mix gently so the berries are distributed without turning the entire batter purple.
As they cook, the blueberries create soft, jammy pockets inside the pancakes.
The fruit pairs naturally with the cinnamon and vanilla.
Oat Flour Pancakes
Replace half of the all-purpose flour with oat flour.
The pancakes will become slightly denser and develop a nuttier flavor.
This version is described as especially satisfying and more filling through the morning.
Keep the remaining method the same.
Cinnamon Crunch Pancakes
After pouring the batter onto the skillet, sprinkle the surface with a mixture of cinnamon sugar and chopped pecans.
The sugar caramelizes as the pancake cooks.
The pecans add crunch against the tender center.
No exact quantity for this topping mixture is specified, so add according to preference.
Chocolate Chip Pancakes
Chocolate chips can be added to the batter when you want a sweeter variation.
No exact amount is given.
Fold them in gently rather than heavily stirring the finished batter.
Banana Pancakes
Add ¼ cup mashed banana per batch.
The vanilla and cinnamon both pair naturally with the banana.
Keep the remaining cooking method the same.
Peanut Butter Variation
A swirl of peanut butter can be added to the batter.
No exact amount is specified.
The idea is to add a little peanut flavor while keeping the original pancake base recognizable.
Serving Vanilla Cinnamon Buttermilk Pancakes
Classic maple syrup is one of the simplest options.
Grade B maple syrup is the preferred suggestion when available because of its deeper, caramel-like character.
Warm the syrup slightly before serving if you want it to pour more easily.
The pancakes are tender enough to soak it up quickly, especially when the stack is still warm.
Whipped Cinnamon Butter
For an especially cozy topping, combine:
- 2 tablespoons softened butter
- 1 teaspoon cinnamon
- 1 tablespoon honey
Mix them together and place a dollop over hot pancakes.
The butter melts into the surface and carries the honey and cinnamon into every bite.
Fresh Fruit Toppings
Bananas and strawberries are everyday favorites.
During summer, ripe peaches and blueberries are another option.
Pile the fruit directly over the stack or tuck pieces between the pancakes.
The fresh texture contrasts nicely with the warm, soft centers.
Yogurt Drizzle
Greek yogurt can be thinned with a splash of milk and vanilla.
This creates a tangier alternative to syrup.
No exact quantity is provided for the milk or vanilla, so adjust until the yogurt reaches the consistency you prefer.
Drizzle it over the stack rather than pouring on a heavy layer.
Build the Stack in Layers
Instead of putting every topping only on the top pancake, layer them between pancakes.
This creates a stack where the bottom pancake absorbs more syrup and flavor while the upper layers keep more of their golden texture.
Fruit, cinnamon butter, yogurt, syrup, and even whipped cream can all become layers.
The result is essentially a breakfast version of a layered dessert, which is never a bad thing on a relaxed weekend.
How to Store Leftover Pancakes
Let the pancakes cool before storing them.
Place parchment paper between each pancake so the stack does not stick together.
Transfer them to an airtight container.
Refrigerate for about 2 days.
Keep syrup and other wet toppings separate during storage.
Storing already-syrup-covered pancakes is a reliable way to end up with a soggy stack.
How to Freeze Pancakes
Arrange cooled pancakes in a single layer on a baking sheet.
Freeze until solid, about 1 hour.
Once firm, transfer them to a freezer bag.
Squeeze out as much air as possible.
They can be frozen for up to 2 months.
If stacking them in the bag, use parchment between the layers to make individual pancakes easier to remove later.
Reheating Pancakes in the Toaster
The toaster is the favorite reheating method.
Frozen pancakes can go directly into the toaster on medium.
They generally need about 1½ cycles.
Watch them closely.
When you start smelling warm cinnamon, they are usually close to ready.
This method brings back some crispness at the edges while keeping the interior tender.
Reheating Pancakes in the Oven
For several pancakes at once, preheat the oven to 350°F.
Arrange the pancakes on a baking sheet.
Spritz them lightly with water to help prevent drying.
Warm for 5–8 minutes.
This is a practical choice when reheating breakfast for more than one person.
Reheating Pancakes in a Skillet
Place the pancakes in a dry skillet.
Warm for 1–2 minutes per side.
This restores some of the golden exterior.
Extra butter is optional if you want a richer reheated pancake.
Microwave Reheating
When speed matters most, microwave a pancake for about 20 seconds.
The texture will not be quite as crisp as the toaster method, but it works when breakfast needs to happen immediately.
Keep the reheating brief rather than overheating the pancake.
Making Pancake Batter Ahead
The batter can be partially prepared the night before.
Mix everything except the baking soda, then cover and refrigerate overnight.
In the morning, stir in the baking soda immediately before cooking.
This timing matters because baking soda begins reacting once it encounters liquid.
Adding it fresh in the morning helps preserve the bubbles needed for maximum fluffiness.
Frequently Asked Questions
Can I use regular milk instead of buttermilk?
Yes.
Add 1 tablespoon lemon juice or white vinegar to a measuring cup.
Then pour in regular milk until the total reaches 1 cup.
Let it sit for 5 minutes until it thickens slightly and develops some tang.
Use this mixture in place of the buttermilk.
Why are my pancakes dense?
Overmixing is one of the most common causes.
The batter should remain lumpy rather than perfectly smooth.
Old baking powder can also interfere with the rise.
Check its date if the pancakes repeatedly come out flat.
Using too little baking soda is another possible issue.
Finally, a skillet that is too hot can cause the pancakes to puff initially and then collapse.
Can I make the batter ahead?
Yes, with one adjustment.
Prepare the mixture without the baking soda and refrigerate it overnight.
Add the baking soda immediately before cooking in the morning.
This keeps its reaction fresher.
Why do my pancakes burn before the centers cook?
The cooking surface is too hot.
Medium-low heat is the target.
If the pan smokes when the butter is added, lower the heat before trying another pancake.
The exterior needs time to turn golden while the center cooks through.
Can I freeze the pancakes?
Yes.
Freeze cooled pancakes in a single layer first, then transfer them to a freezer bag once solid.
Use parchment between layers.
They can stay frozen for up to 2 months.
Reheat directly from frozen in a toaster when you want the quickest crisp-edged result.
Can I use brown sugar?
Yes.
Brown sugar can replace the granulated sugar and brings additional caramel-like flavor.
Keep the quantity at 1 tablespoon.
How do I know when to flip?
Watch for bubbles appearing and popping across the surface.
The edges should also look matte rather than shiny and wet.
This usually happens after about 2–3 minutes over medium-low heat.
Flip once and cook another 1–2 minutes.
Nutritional Information
The nutrition values are estimates per pancake.
The serving size is 1 pancake, about 4 inches across.
Per pancake:
- Calories: 150
- Sugar: 4g
- Sodium: 220mg
- Fat: 6g
- Saturated fat: 3g
- Carbohydrates: 20g
- Fiber: 1g
- Protein: 4g
- Cholesterol: 40mg
Exact values can change with ingredient choices and toppings.
Using whole wheat flour is noted as increasing fiber, while almond milk instead of buttermilk can reduce calories somewhat, although it also changes the signature buttermilk tang.
Maple syrup, whipped butter, fruit, yogurt, and other toppings will also affect the final nutrition.
The Sunday Pancakes That Still Take Me Back to Grandma’s Kitchen
Even after making these pancakes countless times, the part I look forward to most is still the moment the cinnamon and vanilla begin warming on the griddle. That smell reaches the kitchen before the stack is ready, and somehow it makes everyone appear at the table without being called.
It is the same feeling I remember from my grandma’s house. Back then, I was mostly interested in how quickly I could pour syrup over the tallest stack possible, but now I understand how much of the memory came from the ritual around the pancakes too.
She taught me the little things. Measure carefully, use real vanilla, do not rush the batter, and give the pancakes enough time to tell you when they are ready to flip.
Years of my own trial and error added a few lessons. Cool the butter before it meets the egg, leave those batter lumps alone, keep the skillet at medium-low, and never assume the first pancake has to look perfect.
Now those lessons show up every Sunday in my own kitchen. My family recognizes the smell before breakfast is ready, and my toddler’s “happy cake” dance has become one of those tiny things I know I will remember later.
Some mornings we keep the stack simple with maple syrup. Other times there are blueberries, banana, cinnamon butter, fresh fruit, or enough toppings between the layers that breakfast starts looking like dessert.
But underneath all those variations is the same pancake I was trying to recreate for years: soft and fluffy in the middle, golden around the edges, lightly tangy from buttermilk, and warm with vanilla and cinnamon.
That is why this recipe has lasted. It is quick enough for a regular morning but tied to enough good memories that it never feels ordinary.
And when the first imperfect pancake comes off the griddle, I no longer see it as a mistake. I eat it standing at the stove, call it the chef’s snack, adjust the heat if necessary, and keep flipping until there is a warm stack waiting for everyone else.
Fluffy Vanilla Cinnamon Buttermilk Pancakes

Soft, fluffy, and warmly scented with cinnamon and vanilla, these buttermilk pancakes make an easy American breakfast with a tender texture and simple homemade flavor. The batter comes together quickly, and each pancake cooks until golden with light, airy centers.
Recipe Details
- Prep Time: 5 minutes
- Cook Time: 10 minutes
- Total Time: 15 minutes
- Course: Breakfast
- Cuisine: American
- Servings: 6 pancakes
- Calories: 150 kcal
Ingredients
For the Pancake Batter
- 1 teaspoon vanilla extract
- 2 tablespoons melted butter plus more for cooking
- 1 large egg
- 1 cup buttermilk
- ¼ teaspoon salt
- ½ teaspoon ground cinnamon
- ½ teaspoon baking soda
- 1 teaspoon baking powder
- 1 tablespoon sugar
- 1 cup all-purpose flour
Instructions
Step 1: Combine the Dry Ingredients
In a bowl, mix the all-purpose flour, sugar, baking powder, baking soda, ground cinnamon, and salt.
Stir until the dry ingredients are evenly blended.
Step 2: Mix the Wet Ingredients
In another bowl, whisk together the buttermilk, egg, melted butter, and vanilla extract.
Continue whisking until the mixture is smooth and well combined.
Step 3: Make the Batter
Pour the wet ingredients into the dry ingredients.
Stir only until combined. Avoid overmixing the batter so the pancakes stay fluffy.
Step 4: Heat the Pan
Place a pan over medium heat.
Lightly grease the cooking surface with butter.
Step 5: Portion the Pancakes
Pour ¼ cup batter into the pan for each pancake.
Keep the portions consistent so the pancakes cook at a similar rate.
Step 6: Cook the First Side
Cook until bubbles begin to form on the surface.
Wait until the pancake is ready to flip rather than moving it too early.
Step 7: Flip and Finish
Flip the pancake and continue cooking until golden brown.
Repeat with the remaining batter, adding more butter for cooking as needed.
Step 8: Serve Warm
Serve the pancakes warm once cooked.
This recipe makes 6 pancakes.
Notes
- Do not overmix the batter to keep pancakes fluffy.
- Adjust cinnamon to taste.
Serving Suggestions
Serve Fluffy Vanilla Cinnamon Buttermilk Pancakes warm while their centers are soft and the surfaces are freshly golden. The vanilla, cinnamon, buttermilk, and butter create a simple breakfast with warm, comforting flavor.
This recipe makes 6 pancakes, with ¼ cup batter used for each one. Keep the heat at medium and lightly grease the pan with butter before cooking each batch as needed.
If you prefer a stronger or lighter cinnamon flavor, adjust the cinnamon to taste as noted.
Storage
How to Store
The recipe does not provide a specific storage method or storage duration, so no exact storage time is added here.
Flour Tip
Use 1 cup all-purpose flour as the base of the pancake batter.
Leavening Tip
Use 1 teaspoon baking powder and ½ teaspoon baking soda to help create the fluffy texture.
Cinnamon Tip
Use ½ teaspoon ground cinnamon and adjust the amount to taste if desired.
Buttermilk Tip
Use 1 cup buttermilk and whisk it with the egg, melted butter, and vanilla before combining it with the dry ingredients.
Butter Tip
Use 2 tablespoons melted butter in the batter, plus additional butter for cooking.
Mixing Tip
Stir the wet and dry ingredients only until combined. Do not overmix.
Portioning Tip
Use ¼ cup batter for each pancake.
Cooking Tip
Cook over medium heat until bubbles form, then flip and continue cooking until golden brown.

Fernando is the creator and writer behind the food blog Eating with your Hands. Living and working in cities like Paris, Barcelona, and Berlin, and being married to a Canadian foodie, has given Fernando a passion and interest in food and inspired him to run EWYH.