
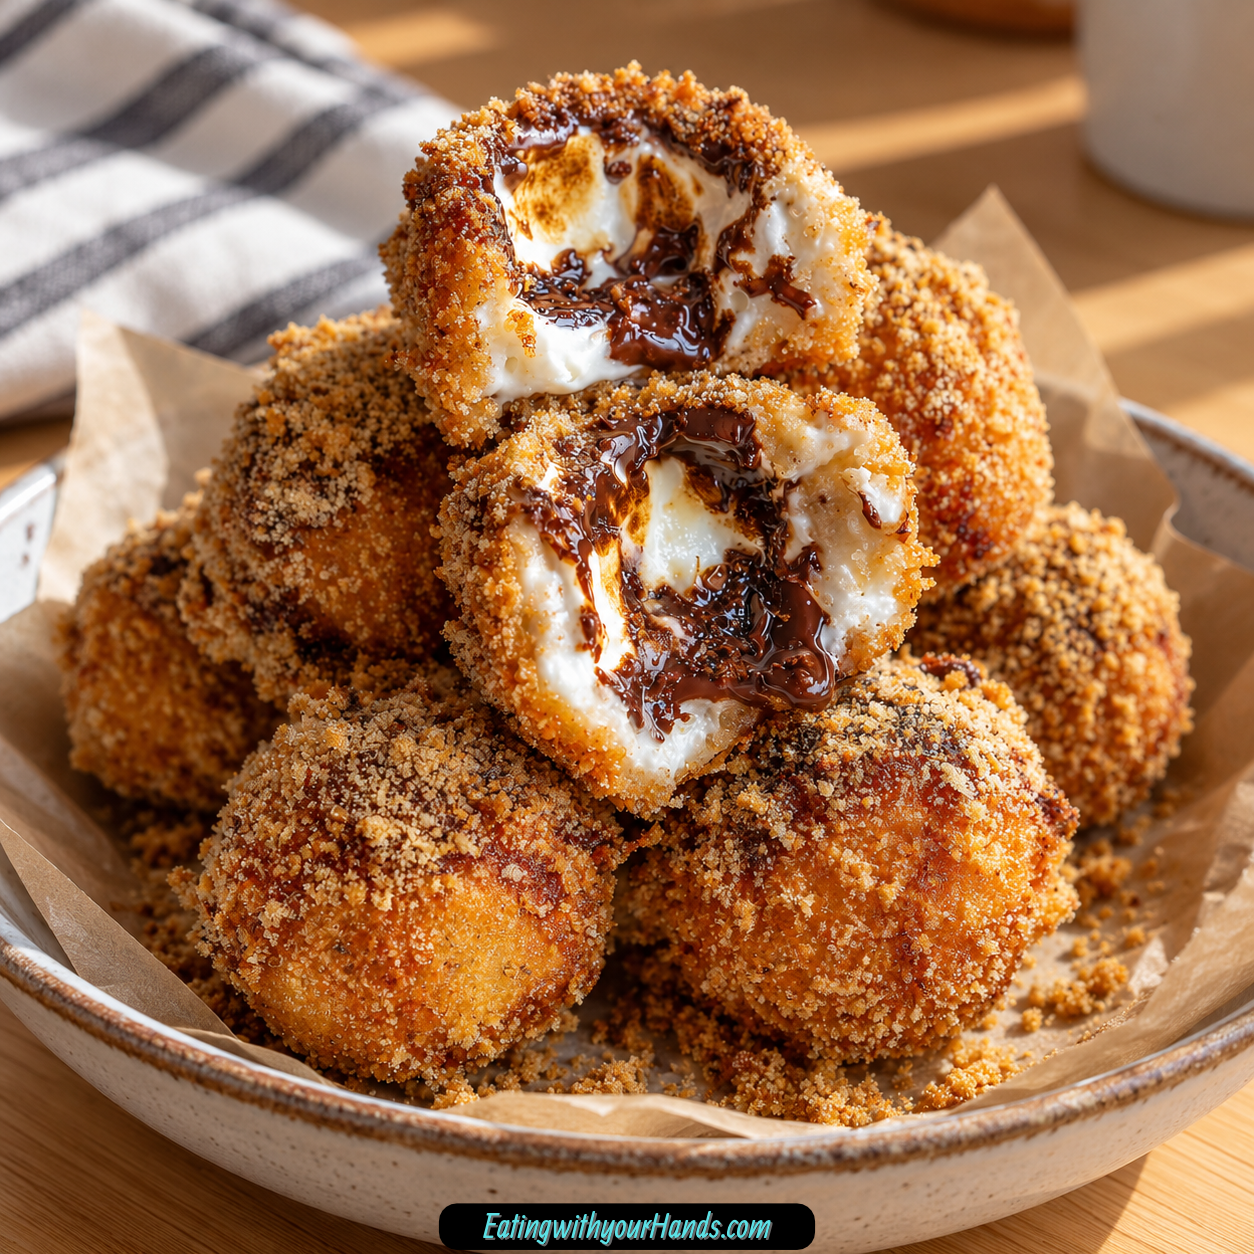
There are certain desserts that carry an entire season inside one bite, and Fried S’mores Bombs do exactly that for me. They bring back the feeling of warm summer nights, toasted marshmallows, melted chocolate, sticky fingers, and the kind of laughter that always seems louder around a campfire.
I wanted to capture all of that familiar s’mores comfort without needing a fire pit, skewers, or perfect marshmallow-roasting weather. The result was a little fried pocket with a golden graham cracker crust, soft biscuit dough, and a molten center that combines chocolate and marshmallow in the most dramatic way.
The first time I served these at a family barbecue, I thought the kids would be the ones most excited. They were, but the adults were not exactly standing back politely either.
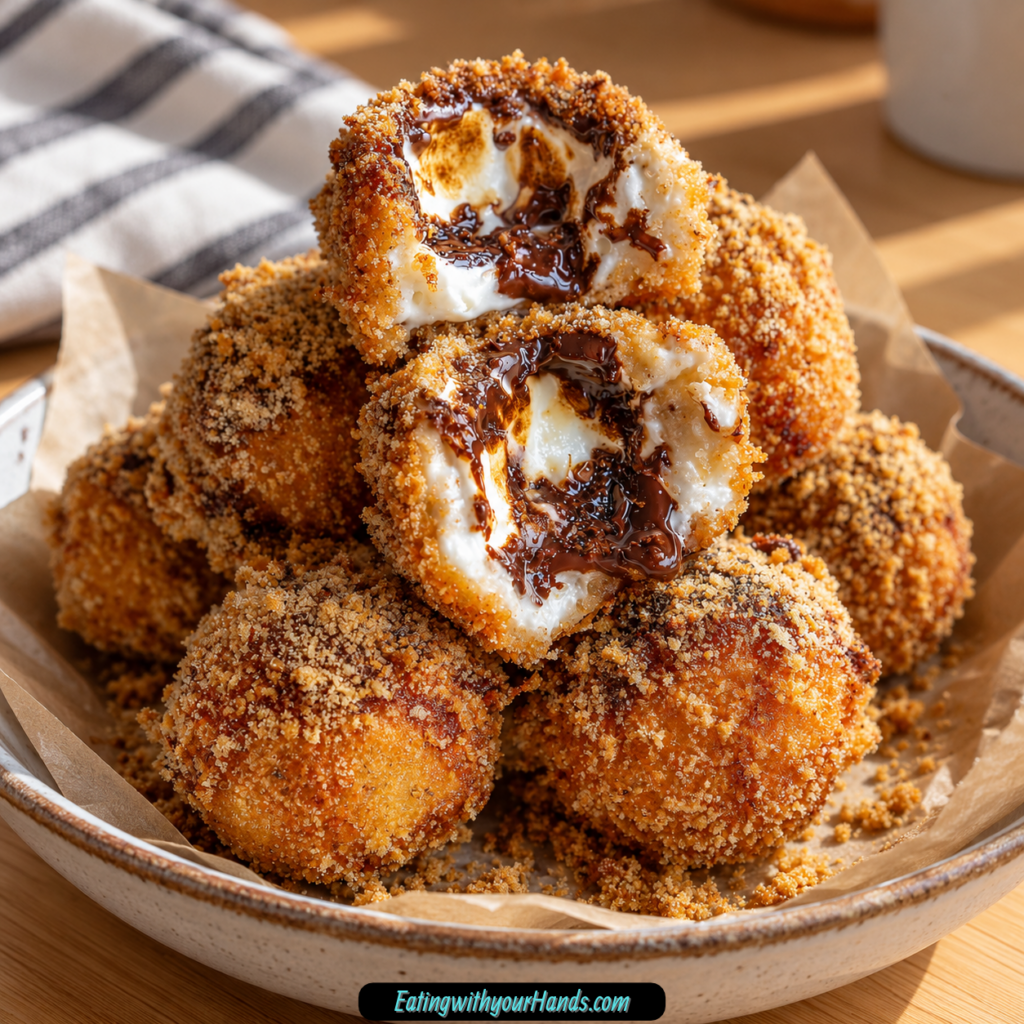
There is something impossible to resist about breaking through the crisp exterior and watching warm marshmallow stretch from the center. The chocolate softens into the filling at the same time, so every bite feels like classic s’mores turned into a much more indulgent handheld dessert.
The refrigerated biscuit dough is what makes the whole recipe surprisingly manageable. Instead of mixing and proofing dough, you start with eight ready-made biscuits, flatten them, fill them, seal them, coat them, and fry.
That shortcut makes these especially useful when a sweet craving arrives without much warning. They look like the kind of dessert that should require more work than they actually do.
The contrast is what keeps me making them. The outside is crisp and golden, the dough underneath stays soft, and the middle is gooey enough to make every warm piece feel like its own little dessert event.
And despite the playful name, there is nothing complicated about the process once you know the rhythm. Seal carefully, keep the oil at 375°F, work in small batches, and serve while the center is still warm.
Table of Contents
- Why You’ll Love These Fried S’mores Bombs
- Ingredients for Fried S’mores Bombs
- Why Refrigerated Biscuit Dough Works So Well
- Why Mini Marshmallows Are Essential
- Semisweet Chocolate Keeps the Filling Balanced
- The Graham Cracker Coating Makes It Taste Like S’mores
- Choosing the Frying Oil
- Equipment You’ll Need
- Why Oil Temperature Matters So Much
- How to Make Fried S’mores Bombs
- Step 1: Separate the Biscuit Dough
- Step 2: Flatten Each Biscuit
- Step 3: Add the Chocolate
- Step 4: Add the Mini Marshmallows
- Step 5: Bring the Dough Together
- Step 6: Reinforce the Seal
- Step 7: Heat the Oil
- Step 8: Prepare the Egg Coating
- Step 9: Coat With Graham Cracker Crumbs
- Step 10: Double-Coat for Extra Crunch if Desired
- Step 11: Fry in Small Batches
- Step 12: Fry Until Golden
- Step 13: Check the Oil Between Batches
- Step 14: Drain Thoroughly
- Step 15: Wait Before Taking the First Bite
- Step 16: Serve Immediately
- How to Prevent Marshmallow Leaks
- Why Small Batches Fry Better
- Why the Thermometer Is Worth Using
- Dark Chocolate Variation
- Chopped Chocolate Bar Variation
- Cinnamon Cereal Coating
- Vegetable Oil or Peanut Oil
- Baking Instead of Frying
- Vanilla Ice Cream Serving Idea
- Chocolate Sauce for Serving
- Fresh Berry Pairing
- Build-Your-Own Dip Station
- Make-Ahead Preparation
- Storage
- Reheating in an Air Fryer
- Reheating in the Oven
- Frequently Asked Questions
- Fried S’mores Bombs Nutrition Facts
- The Campfire Feeling Without the Campfire
- Fried S’mores Bombs Recipe
Why You’ll Love These Fried S’mores Bombs
The texture is probably the first reason people remember them. The graham cracker coating gives a crisp first bite, followed by soft biscuit dough and a melted chocolate-marshmallow center.
They also deliver all the nostalgic flavors of s’mores without needing an actual campfire. Chocolate, marshmallow, graham cracker, and warm dough create that same sweet combination in a completely different form.
The refrigerated biscuit dough keeps preparation simple. Even kids can help flatten, fill, and seal the dough, while an adult handles the hot oil.
These are also excellent party food. They are small enough to pick up by hand, dramatic enough to get attention, and familiar enough that nobody needs convincing to try one.
The recipe welcomes a few easy substitutions too. Dark chocolate, chopped chocolate bars, vegetable oil, peanut oil, or a different crunchy coating can all change the final dessert without changing its basic appeal.
Most importantly, they are meant to be eaten warm. That first bite of crisp shell and molten center is exactly what makes Fried S’mores Bombs worth the frying.
Ingredients for Fried S’mores Bombs
The ingredient list is short and intentionally practical. Most of the work comes from assembling the filling properly and keeping the frying temperature steady.
- 1 tube refrigerated biscuit dough, 8 count
- 1 large egg, beaten
- ¼ cup semisweet chocolate chips
- 1 ½ cups mini marshmallows
- Canola oil for frying, enough for about a 2-inch depth, approximately 4 cups
- ½ cup finely ground graham cracker crumbs, from about 4 full sheets
Flaky refrigerated biscuit dough works especially well. The layers create a soft, tender shell around the filling once fried.
Mini marshmallows are strongly preferred. Their smaller size makes the center easier to seal and reduces the chance of filling bursting through the dough.
Why Refrigerated Biscuit Dough Works So Well
The dough is the shortcut that turns this from a complicated fried pastry into something you can reasonably make for a party or spontaneous dessert. Each biscuit becomes its own wrapper, so portioning is already done for you.
The flaky style works especially nicely because it stays soft under the crisp coating. Once fried, the dough creates a tender barrier around the chocolate and marshmallow.
Do not flatten the biscuits too thin. You need enough thickness to hold the filling without tearing.
A roughly 3-inch circle is the target. That gives you enough room in the center for chocolate and marshmallows while leaving an edge wide enough to seal.
Why Mini Marshmallows Are Essential
Mini marshmallows fit inside the dough much more safely than large ones. They melt quickly, distribute more evenly, and are less likely to force their way through the seam.
Each dough circle gets a small handful, roughly 8–10 minis. That is enough to create the stretchy center without overstuffing the bomb.
Large marshmallows take up too much space. As they expand and melt, they can burst through the dough and leak into the oil.
The smaller size also works better with the chocolate chips. Both fillings soften at roughly the same time during frying.
Semisweet Chocolate Keeps the Filling Balanced
The recipe uses ¼ cup semisweet chocolate chips. Mini chips are especially convenient because they melt quickly inside the small dough pockets.
About 5–6 chocolate chips per bomb creates a noticeable chocolate center without making sealing difficult. The filling still leaves room for the marshmallows to melt properly.
Dark chocolate can replace semisweet when you prefer a deeper, less sweet flavor. Chopped chocolate bars also work as long as the pieces are small enough to fit comfortably.
The goal is a molten center, not a huge chunk of unmelted chocolate. Small pieces make that easier to achieve.
The Graham Cracker Coating Makes It Taste Like S’mores
Half a cup finely ground graham cracker crumbs forms the outer coating. Crushing them until they resemble sand gives the most even coverage.
Large pieces can fall away in the oil. Fine crumbs stick more reliably to the egg-coated dough.
The coating brings the classic graham cracker flavor directly into the first bite. It also adds another layer of crunch over the fried biscuit dough.
Press the crumbs gently onto the surface before frying. They should adhere without being packed too heavily.
Choosing the Frying Oil
Canola oil is the preferred choice for this recipe. You need enough to create about a 2-inch depth in the pot, which comes to approximately 4 cups.
Vegetable oil can replace canola. Peanut oil is another workable option.
The important part is maintaining the correct temperature rather than focusing only on the type of oil. A steady 375°F gives you the best chance of a crisp exterior and melted center.
Too-cool oil encourages the dough to absorb more grease. Oil that is too hot can brown the crust before the inside has time to soften.
Equipment You’ll Need
A deep fryer or heavy-bottomed pot is essential for safe, controlled frying. A Dutch oven works especially well because it can hold enough oil with plenty of room above the surface.
A candy thermometer is one of the most important tools in the entire recipe. You want to know when the oil reaches 375°F and whether it stays there between batches.
You will also need a slotted spoon for removing the bombs from the oil. Paper towels or a cooling rack set over paper towels help drain excess oil afterward.
A rolling pin is optional. Clean hands work perfectly well for flattening the biscuit dough.
Why Oil Temperature Matters So Much
The ideal frying temperature is 375°F. That number is what allows the outside to brown while the center heats quickly enough to melt.
When the oil is cooler, the dough spends longer submerged before developing color. That can leave the finished bombs heavier and greasier.
When the oil is too hot, the graham coating and dough can brown before the marshmallows and chocolate become fully molten. The outside looks finished while the inside is still behind.
Check the thermometer between batches. Adding cold dough temporarily lowers the temperature, so give the oil a moment to recover when necessary.
How to Make Fried S’mores Bombs
The method is straightforward, but careful sealing and temperature control make the difference between a gooey center inside the dough and a marshmallow leak in the frying oil. Prepare all eight bombs first, then coat and fry in small batches.
Step 1: Separate the Biscuit Dough
Open the tube of refrigerated biscuit dough and separate all eight biscuits. Place them on a clean work surface with enough space between them to flatten comfortably.
Keep the dough cool while you work. If it becomes overly warm and sticky, sealing can become more difficult.
Handle each biscuit gently. You want to keep enough structure in the dough to wrap around the filling.
Step 2: Flatten Each Biscuit
Press one biscuit between your palms or use a rolling pin to create a circle about 3 inches across. Repeat with the remaining pieces.
Do not roll the dough paper-thin. A little thickness is important because the wrapper needs to survive filling, coating, and hot oil.
Try to make the center relatively even. Thin spots are more likely to tear once the marshmallow begins expanding.
Step 3: Add the Chocolate
Place about 5–6 chocolate chips in the center of each dough circle. Keep the chocolate away from the outer edge.
Leaving a clean border gives you room to pinch the dough closed. Chocolate caught in the seam can interfere with a secure seal.
Mini chips are especially useful here. They stay compact and soften quickly.
Step 4: Add the Mini Marshmallows
Place a small handful of mini marshmallows over the chocolate, roughly 8–10 per bomb. Keep the filling centered rather than spreading it across the entire dough circle.
Resist the temptation to overfill. Too much marshmallow makes the dough harder to close and increases the risk of leaking.
The filling should look generous but still leave enough dough around the edge to pull together. Think of the wrapper as a small stuffed pocket rather than a fully packed pouch.
Step 5: Bring the Dough Together
Lift the outer edges of the dough toward the center. Bring them together as though you were closing a tiny calzone or purse.
Pinch the seam firmly. Rotate the dough as you work so every section is completely sealed.
Look closely for thin gaps or tiny openings. Marshmallow can escape through surprisingly small weak spots once it melts.
Step 6: Reinforce the Seal
If the dough feels dry or refuses to stick, lightly dampen your fingertips with water. Use that moisture only along stubborn areas of the seam.
Pinch again until the dough holds securely. Smooth the joined area gently so there are no obvious openings.
This step is worth taking seriously. A strong seal protects both the filling and the frying oil from leaking marshmallow.
Step 7: Heat the Oil
Pour enough canola oil into a deep fryer or heavy-bottomed pot to reach approximately 2 inches deep. Heat until the thermometer reads exactly 375°F.
Watch the temperature carefully as it climbs. Do not leave a pot of heating oil unattended.
Keep the burner adjusted so the temperature stays as steady as possible. You will need to check it again once each batch comes out.
Step 8: Prepare the Egg Coating
Beat 1 large egg until the white and yolk are completely blended. You should not see obvious streaks.
Place the beaten egg in a shallow bowl or dish. This becomes the adhesive layer for the graham cracker crumbs.
A smooth egg wash creates more even coverage. Poorly beaten egg can make the crumb layer patchy.
Step 9: Coat With Graham Cracker Crumbs
Place the ½ cup finely ground graham cracker crumbs in a separate shallow dish. Dip one sealed bomb into the beaten egg, coating the entire surface.
Immediately roll the bomb through the graham crumbs. Press gently so the fine crumbs adhere.
Repeat with the remaining pieces as you are ready to fry them. Keep the coating even rather than building a thick, heavy shell.
Step 10: Double-Coat for Extra Crunch if Desired
For a heavier graham cracker crust, give the bomb a quick second coating. Dip it again and add another light layer of crumbs.
Keep the second layer controlled. You want extra crunch without creating a thick coating that overwhelms the dough.
This step is optional. A single coating is enough for the standard version.
Step 11: Fry in Small Batches
Carefully lower 2–3 bombs into the 375°F oil. Do not crowd the pot.
Frying small batches helps the temperature stay stable. It also gives each bomb enough room to move without sticking to another one.
Use the slotted spoon carefully when placing them into the oil. Avoid dropping them from a height.
Step 12: Fry Until Golden
Fry the bombs for about 2–3 minutes. Watch them puff and turn evenly golden.
Some pieces may naturally rotate or flip themselves as they fry. That movement is fine as long as all surfaces get time in the hot oil.
The finished bombs should be evenly browned and floating near the surface. Use appearance as well as the timer.
Step 13: Check the Oil Between Batches
Remove the finished batch with a slotted spoon. Before adding more bombs, check the thermometer again.
Wait for the oil to return to 375°F if it has dropped. Starting the next batch too soon can create inconsistent texture.
Repeat until all eight bombs are fried. Keep the pan comfortably uncrowded throughout.
Step 14: Drain Thoroughly
Transfer each fried bomb to paper towels or a cooling rack set over paper towels. Let excess oil drip away.
A cooling rack keeps the bottoms elevated so steam does not soften the crust. Paper towels underneath catch the oil.
Give the bombs a brief moment to settle. They will still be extremely hot inside.
Step 15: Wait Before Taking the First Bite
Allow each bomb to rest for about 30 seconds before eating. The outside cools quickly, but the marshmallow and chocolate center can remain much hotter.
Do not assume the filling is safe just because the crust feels manageable. Molten marshmallow can burn badly.
That short pause also allows the filling to settle slightly inside. The center will still be warm, stretchy, and runny.
Step 16: Serve Immediately
Pile the warm bombs onto a platter and serve right away. The best texture happens when the graham crust is crisp and the center is still melted.
Have napkins nearby. Warm chocolate and marshmallow may ooze once the bombs are bitten open.
These are meant to be messy in the best possible way. The dramatic center is part of the fun.
How to Prevent Marshmallow Leaks
The first rule is to use mini marshmallows. Large marshmallows expand too aggressively for the small amount of dough surrounding them.
The second rule is to leave a clean edge around the filling. If chocolate or marshmallow gets trapped in the seam, the dough may not bond properly.
Pinch more firmly than you think necessary. Go around the entire seam twice if needed.
A little water on your fingertips can help dry dough stick. Use only enough to encourage the seam to close.
Why Small Batches Fry Better
Adding too many cold bombs at once lowers the oil temperature. That leads to slower frying and a softer, greasier exterior.
Two or three at a time gives the oil more stability. It also makes each piece easier to monitor.
Crowding can cause the bombs to bump or stick together. If one opens, melted filling can spread onto another piece.
Small batches take slightly longer overall, but the texture is much more reliable. This is one of those places where patience is worth it.
Why the Thermometer Is Worth Using
Guessing oil temperature is difficult. The surface may look calm or active without telling you exactly how hot the oil is.
A candy thermometer removes that uncertainty. You can see whether the oil is actually at 375°F before the dough goes in.
It is also useful between batches. The temperature naturally changes as food is added and removed.
Consistent frying temperature creates consistent color and texture. That makes the thermometer one of the most useful tools in the recipe.
Dark Chocolate Variation
Dark chocolate can replace the semisweet chips. It gives the center a deeper, slightly less sweet flavor.
Use small chips or finely chopped pieces so the chocolate melts during the short frying time. Large chunks may stay firm in the middle.
The darker flavor works especially well with the sweet marshmallows. It creates a stronger contrast without changing the method.
Keep the same amount of chocolate. The filling should remain compact enough to seal.
Chopped Chocolate Bar Variation
A chopped chocolate bar can replace the chips. Cut the chocolate into small pieces so it fits neatly inside each dough circle.
Distribute the pieces evenly among the eight bombs. Keep them away from the sealing edge.
Chopped chocolate can create irregular pockets of melted chocolate. That makes the center feel a little more rustic.
The frying process stays exactly the same. Small pieces are still the key.
Cinnamon Cereal Coating
Crushed cinnamon toast cereal can replace graham crackers when necessary. Crush it finely enough to form an even coating.
The cinnamon flavor changes the dessert but still works naturally with chocolate and marshmallow. The finished exterior becomes slightly more spiced.
Apply the cereal crumbs after the egg wash. Press gently to help them adhere.
Treat this as a variation rather than an identical replacement. The classic graham cracker flavor will naturally be different.
Vegetable Oil or Peanut Oil
Vegetable oil can replace canola oil. Peanut oil also works for frying.
Use enough to maintain the same approximate 2-inch depth. The method still depends on oil surrounding the bombs evenly.
Heat whichever oil you choose to 375°F. Temperature remains the most important factor.
Keep monitoring between batches. Changing oil does not change the need for careful control.
Baking Instead of Frying
The bombs can be baked when frying is not preferred. Heat the oven to 375°F.
Arrange the assembled bombs for baking and cook for about 12–15 minutes. Look for a golden exterior.
The baked version will not become as crisp as the fried one. The center can still become warm and gooey.
Watch carefully for marshmallow leaks. A weak seam can still open as the filling expands under heat.
Vanilla Ice Cream Serving Idea
Place one warm Fried S’mores Bomb over a scoop of vanilla ice cream. The hot-cold contrast makes the dessert feel especially indulgent.
As the bomb is cut open, the warm chocolate and marshmallow begin softening the ice cream beneath it. That creates a sauce-like effect without adding anything complicated.
Serve immediately. The temperature contrast is strongest in the first few minutes.
A small portion is plenty. The bomb is already rich before the ice cream is added.
Chocolate Sauce for Serving
A drizzle of chocolate sauce gives the dessert even more chocolate flavor. It can go over the bombs or onto the plate.
Use it lightly if you want the graham cracker coating to remain crisp. Too much sauce can soften the exterior.
Chocolate sauce also works well beside vanilla ice cream. The whole plate becomes a more elaborate version of the campfire dessert.
Serve warm bombs with the sauce ready. There is no need to let them cool completely.
Fresh Berry Pairing
Fresh strawberries and raspberries add a tart, juicy contrast. Their brightness cuts through the fried dough, chocolate, and marshmallow.
Arrange the fruit around the platter instead of inside the bombs. That preserves the original filling.
This is especially nice for summer parties. The berries make the dessert feel fresher without competing with the s’mores flavor.
Guests can alternate between warm bombs and cool fruit. The contrast keeps the plate from feeling too heavy.
Build-Your-Own Dip Station
A simple dipping station can make the dessert even more interactive. Melted Nutella, caramel sauce, and berry coulis all work as options.
Set the sauces in small bowls beside the warm bombs. Let everyone choose their own combination.
This works especially well at parties. The bombs become the base while the dips create different flavors from bite to bite.
Keep napkins close. Warm fillings plus dipping sauces can get deliciously messy.
Make-Ahead Preparation
The bombs can be assembled up to 2 hours before frying. Keep them chilled until you are ready to cook.
Seal each piece carefully before refrigerating. A weak seam does not improve with time.
Wait to fry until shortly before serving. Fresh frying gives you the crisp exterior and molten center that define the dessert.
Do not cook them hours ahead if you can avoid it. The crust gradually softens as it sits.
Storage
Cool leftover bombs completely before placing them in an airtight container. Keep them for about 1 day.
The texture will soften during storage. They are much better fresh from the fryer.
Store only once the center has cooled. Trapping steam in a closed container can make the crust even softer.
Short-term storage is practical, but fresh service is the ideal. This dessert is really designed around that just-fried moment.
Reheating in an Air Fryer
Set the air fryer to 350°F. Reheat the bombs for about 3 minutes.
This method helps restore some of the original crispness. The marshmallow center also softens again as it warms.
Check before eating because the interior can become very hot. Give the filling a brief moment before biting.
Serve immediately after reheating. The restored crispness fades as the bomb cools.
Reheating in the Oven
Heat the oven to 375°F. Warm the bombs for about 5 minutes.
Watch them closely near the end. The goal is to heat the center without overbrowning the crust.
The oven works well when an air fryer is not available. It gives a much better texture than leaving the bombs cold.
Serve as soon as the centers are warmed. Marshmallows that have firmed during storage will soften again.
Frequently Asked Questions
Can I Bake Fried S’mores Bombs Instead?
Yes. Bake them at 375°F for about 12–15 minutes.
They will not become as crisp as the fried version. Watch carefully for any filling that tries to escape.
How Do I Stop the Marshmallows From Leaking?
Use mini marshmallows rather than large ones. They fit much more safely inside the dough.
Pinch the seams extremely well. Damp fingertips can help seal stubborn edges.
Can I Make Them Ahead?
Yes. Assemble the bombs up to 2 hours before frying.
Keep them chilled until you are ready. Fry shortly before serving for the best texture.
Why Won’t My Graham Cracker Crumbs Stick?
Make sure the egg is beaten thoroughly. A smooth egg coating gives the crumbs something to grip.
Press the crumbs gently into the dough. A second light egg-and-crumb coating can be used for extra coverage.
Can I Use Regular Marshmallows?
Mini marshmallows are strongly preferred. Large marshmallows are more likely to expand and burst through the seam.
If that is all you have, smaller pieces are easier to contain. Keep the filling modest.
Can I Use a Different Chocolate?
Yes. Dark chocolate or chopped chocolate bars both work.
Keep the pieces small. They need to melt during a short frying time.
Can I Use Another Frying Oil?
Yes. Vegetable or peanut oil can replace canola.
Maintain a 2-inch depth and keep the oil at 375°F. Temperature control matters more than the specific oil.
Are Fried S’mores Bombs Safe for Nut Allergies?
That depends on the biscuit dough and other packaged ingredients you use. Check all labels carefully.
Different brands may be made or processed differently. Ingredient labels are the safest way to verify suitability.
Fried S’mores Bombs Nutrition Facts
One bomb contains approximately 220 calories. It also provides about 11g fat, including 3g saturated fat.
Each bomb has around 28g carbohydrates and 12g sugar. Protein is approximately 3g, and sodium is around 280mg.
These values are based on making 8 bombs from the listed ingredients. Biscuit brand, chocolate amount, graham cracker coating, and oil absorption can change the final numbers.
Different substitutions will also alter the nutritional profile. Dark chocolate, alternate coatings, or different biscuit doughs can all create small differences.
The Campfire Feeling Without the Campfire
What I love most about this dessert is that the first bite immediately feels familiar. Chocolate, marshmallow, and graham cracker already have such a strong connection to summer nights that the flavor does half the storytelling for me.
The fried dough changes that memory without erasing it. Instead of crisp graham crackers sandwiching the filling, you get a warm, soft wrapper surrounded by a crunchy graham crust.
That first family barbecue proved how fun the combination could be. I remember watching everyone break the bombs open just to see how far the marshmallow would stretch.
The kids turned it into a competition almost immediately. The adults pretended they were only tasting one and then somehow kept returning to the platter.
That reaction is probably why I have made them so many times since. Fried S’mores Bombs are simple enough to feel casual but dramatic enough to make people gather around the plate.
I also like that most of the work happens before the frying starts. Once the dough is filled and sealed, the rest becomes a steady rhythm of coating, frying, draining, and repeating.
The oil temperature is the only part I refuse to guess about. Keeping it at 375°F gives me the crisp crust I want without sacrificing the soft, molten center.
And I never rush the first bite anymore. Thirty seconds can feel surprisingly long when warm chocolate and marshmallow are waiting, but it is much better than discovering just how hot melted marshmallow can be.
Serve them alone and they already feel complete. Put one over vanilla ice cream or add berries and dipping sauces, and suddenly the same little bomb becomes a full party dessert.
That is why Fried S’mores Bombs have earned a permanent place in my warm-weather dessert rotation. They carry all the nostalgia of classic s’mores, add a crisp fried shell and dramatic gooey center, and somehow make everyone around the table feel like a kid for a few minutes again.
Fried S’mores Bombs Recipe

Crispy on the outside and gooey in the center, these Fried S’mores Bombs wrap chocolate and mini marshmallows inside biscuit dough before coating each piece in graham cracker crumbs. Fried until golden, they bring all the familiar flavors of s’mores into a warm, playful dessert that is best enjoyed right away.
Recipe Details
- Prep Time: 15 minutes
- Cook Time: 10 minutes
- Total Time: 25 minutes
- Course: Dessert
- Cuisine: American
- Servings: 8 bombs
- Calories: 220 kcal
Ingredients
For the S’mores Bombs
- 1 tube refrigerated biscuit dough
- ¼ cup semisweet chocolate chips
- 1 ½ cups mini marshmallows
For Coating and Frying
- 1 large egg beaten
- ½ cup finely ground graham cracker crumbs from 4 sheets of graham cracker
- Canola oil for frying
Instructions
Step 1: Heat the Oil
Heat the canola oil in a deep fryer or large pot to 375°F (190°C).
Keep the oil at this temperature while preparing the filled biscuit dough.
Step 2: Separate the Dough
Separate the refrigerated biscuit dough into individual pieces.
Lay the pieces out so each one is ready to flatten and fill.
Step 3: Add the Filling
Flatten each biscuit piece.
Place a few semisweet chocolate chips and mini marshmallows in the center.
Step 4: Seal the Bombs
Fold the dough over the filling.
Pinch and seal the edges tightly so the chocolate and marshmallows stay enclosed during frying.
Step 5: Coat with Egg and Graham Crackers
Dip each sealed bomb into the beaten egg.
Roll or press it into the finely ground graham cracker crumbs until evenly coated.
Step 6: Fry Until Golden
Carefully place the coated bombs into the hot oil.
Fry for 2–3 minutes, until golden brown.
Step 7: Drain
Remove the fried bombs from the oil.
Place them on paper towels to drain away excess oil.
Step 8: Serve Warm
Serve the Fried S’mores Bombs while still warm.
Enjoy immediately for the best crispy exterior and gooey center.
Notes
- Work quickly when sealing dough to prevent marshmallows from melting.
- Use a thermometer to maintain oil temperature.
- Serve immediately for best texture.
Serving Suggestions
Serve Fried S’mores Bombs right after frying while the biscuit coating is crisp and the chocolate-marshmallow center is still warm. The graham cracker coating gives every bite the classic s’mores flavor while adding extra texture to the outside.
This recipe makes 8 bombs, making it easy to portion for a small dessert or share while they are fresh.
For the best results, keep the oil at 375°F (190°C) throughout frying and serve the finished bombs immediately.
Storage
These Fried S’mores Bombs are best served immediately for the freshest texture.
Biscuit Dough Tip
Use 1 tube refrigerated biscuit dough and separate it into individual pieces before filling.
Chocolate Tip
Use ¼ cup semisweet chocolate chips.
Place a few chips in the center of each flattened biscuit.
Marshmallow Tip
Use 1 ½ cups mini marshmallows.
Work quickly while sealing the dough to help keep the marshmallows enclosed.
Graham Cracker Tip
Use ½ cup finely ground graham cracker crumbs made from 4 sheets of graham cracker.
Coat each egg-dipped bomb evenly before frying.
Oil Tip
Use canola oil for frying and heat it to 375°F (190°C).
Use a thermometer to help maintain the correct temperature.
Frying Tip
Fry each bomb for 2–3 minutes, until golden brown.
Draining Tip
Place the fried bombs on paper towels after removing them from the oil.
Serving Tip
Serve warm immediately for the best texture.

Fernando is the creator and writer behind the food blog Eating with your Hands. Living and working in cities like Paris, Barcelona, and Berlin, and being married to a Canadian foodie, has given Fernando a passion and interest in food and inspired him to run EWYH.