
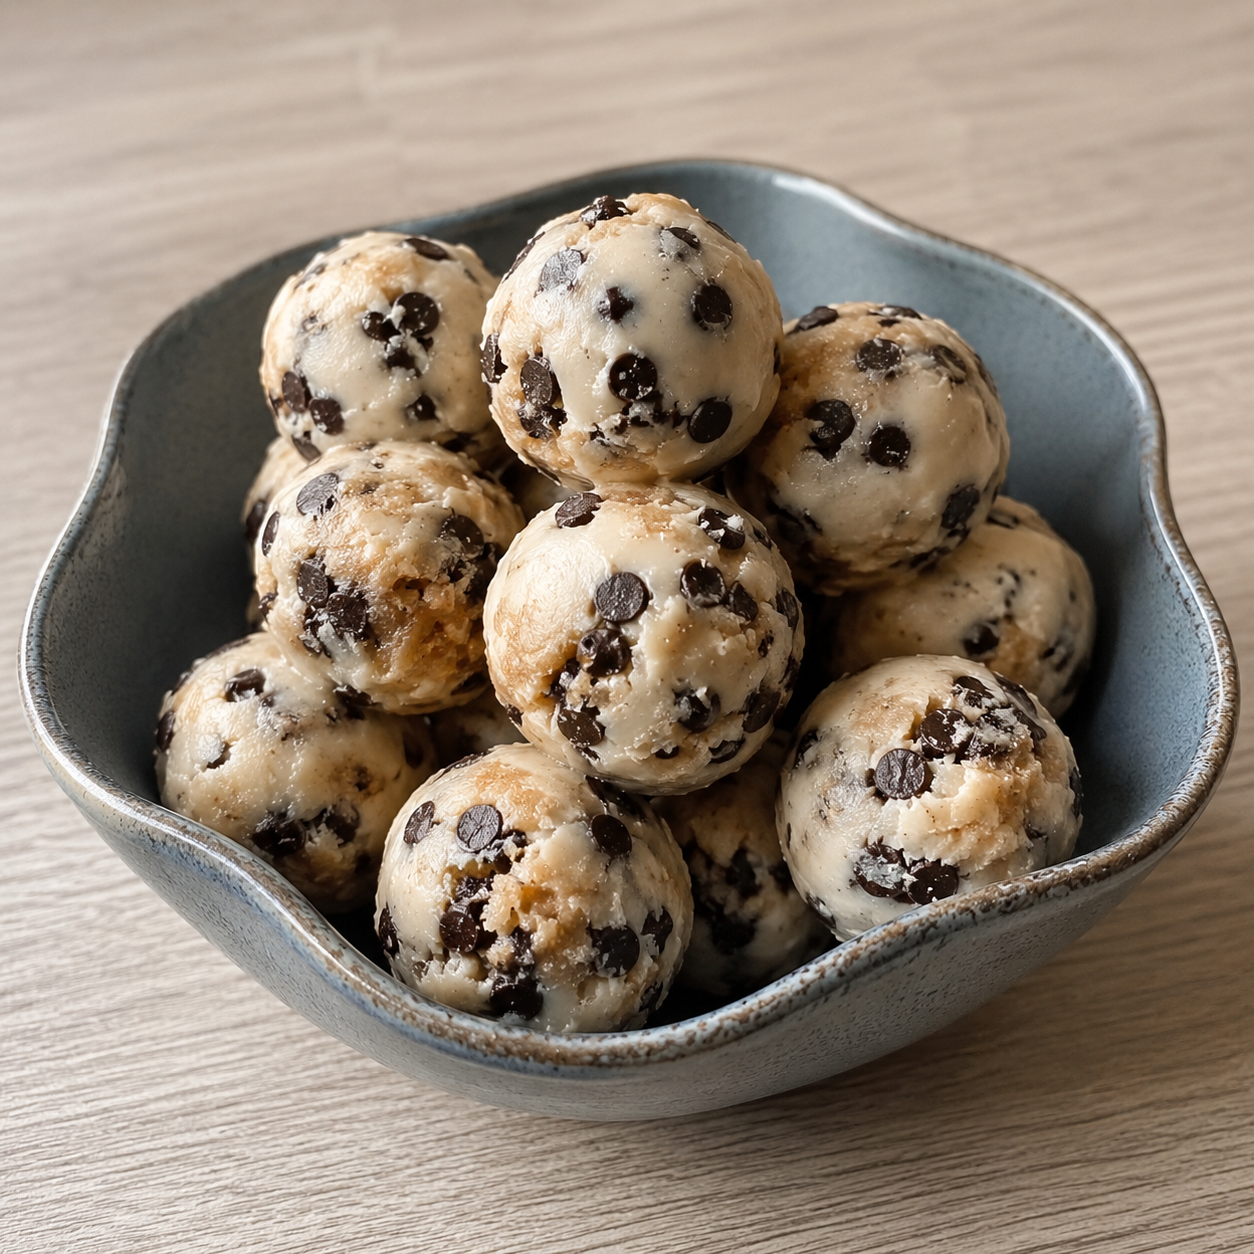
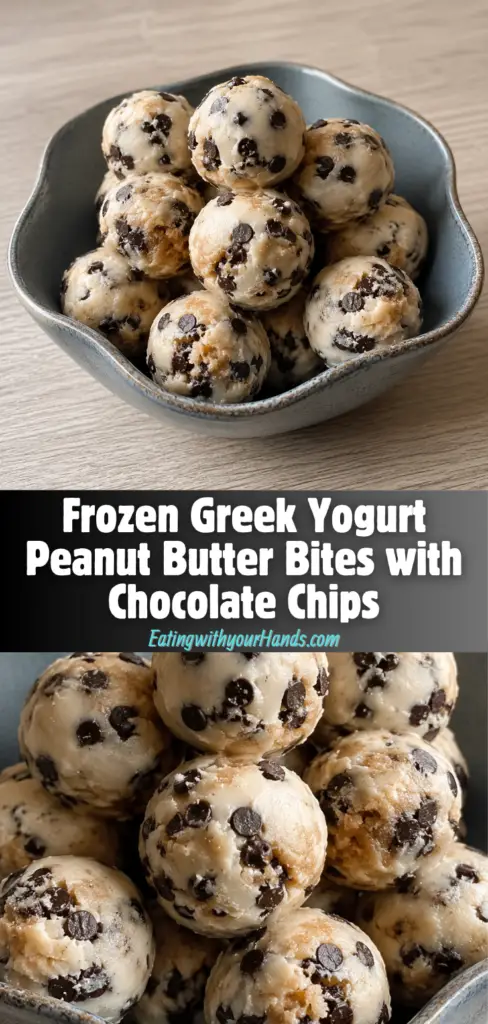
There is something wonderfully comforting about a snack that feels simple, cold, creamy, and just sweet enough to make an ordinary day feel a little softer. These Frozen Greek Yogurt Peanut Butter Bites with Chocolate Chips are the kind of treat that reminds you how much joy can come from a few familiar ingredients mixed together in one bowl.
I always think of recipes like this as the quiet little treasures of a kitchen. They do not require turning on the oven, watching a timer anxiously, or making a sink full of dishes. Instead, they come together with plain Greek yogurt, creamy peanut butter, a touch of honey or maple syrup, vanilla, a pinch of salt, and tiny chocolate chips scattered throughout like little sweet surprises.
The beauty of these bites is that they feel both nostalgic and practical. They have the creamy richness of peanut butter, the cool tang of Greek yogurt, and the playful sweetness of chocolate chips, all frozen into small, satisfying portions.
They are the kind of snack you can make on a relaxed afternoon, tuck into the freezer, and reach for later when you want something refreshing but still cozy. Every bite is cold and creamy at first, then nutty, lightly sweet, and dotted with chocolate.
Table of Contents
- What Are Frozen Greek Yogurt Peanut Butter Bites with Chocolate Chips?
- Why This Recipe Feels So Special
- Prep Time, Cook Time, Total Time, and Servings
- Why You’ll Love These Frozen Greek Yogurt Peanut Butter Bites
- Ingredients You’ll Need
- Ingredient Notes
- Directions
- Step 1: Prepare a Clean Workspace
- Step 2: Gather All of the Ingredients
- Step 3: Add the Greek Yogurt and Peanut Butter to a Bowl
- Step 4: Add the Sweetener, Vanilla, and Salt
- Step 5: Mix Until Smooth and Creamy
- Step 6: Check the Texture Before Adding Chocolate Chips
- Step 7: Fold in the Mini Chocolate Chips
- Step 8: Prepare the Mold or Ice Cube Tray
- Step 9: Spoon the Mixture Into the Compartments
- Step 10: Press the Mixture Down Gently
- Step 11: Move the Mold to the Freezer Carefully
- Step 12: Freeze Until Completely Solid
- Step 13: Remove the Frozen Bites From the Mold
- Step 14: Serve or Store Right Away
- Pro Tips for the Best Texture
- Variations
- Serving Tips
- Storage Tips
- Common Mistakes to Avoid
- Helpful Notes
- Frequently Asked Questions
- Final Thoughts
- Frozen Greek Yogurt Peanut Butter Bites with Chocolate Chips
What Are Frozen Greek Yogurt Peanut Butter Bites with Chocolate Chips?
Frozen Greek Yogurt Peanut Butter Bites with Chocolate Chips are small freezer treats made by mixing Greek yogurt with creamy peanut butter, honey or maple syrup, vanilla extract, salt, and mini chocolate chips. The mixture is spooned into a silicone mold or ice cube tray, frozen until solid, and then enjoyed straight from the freezer.
They are creamy, lightly sweet, and rich without feeling complicated. The Greek yogurt gives them a smooth, tangy base, while the peanut butter adds depth, body, and that familiar nutty flavor people often associate with comforting snacks.
The mini chocolate chips add texture and sweetness in small bursts. Because they are folded into the mixture rather than melted, each bite has tiny pockets of chocolate that make the frozen yogurt base feel more like a treat.
These bites are especially nice because they do not require any cooking. You simply mix, portion, freeze, and enjoy.
Why This Recipe Feels So Special
Some recipes become favorites because they are impressive, elaborate, or perfect for a big gathering. Others become favorites because they quietly fit into real life, and this is one of those recipes.
These Frozen Greek Yogurt Peanut Butter Bites with Chocolate Chips are simple enough to make on a busy day, but they still feel homemade and thoughtful. They are the kind of snack that can be prepared in just a few minutes, then stored away for those moments when you want something cold, creamy, and satisfying.
The flavor also has a familiar warmth, even though the bites are frozen. Peanut butter has a way of making a recipe feel comforting, while Greek yogurt keeps the texture creamy and refreshing.
The chocolate chips make the bites feel fun without overwhelming the balance. They bring just enough sweetness and texture to make every piece feel like a small dessert.
Prep Time, Cook Time, Total Time, and Servings
Prep Time: 10 minutes
Cook Time: 0 minutes
Total Time: 10 minutes
Servings: 4 bites
This recipe is wonderfully low-effort because the hands-on time is only about 10 minutes. The freezer does the rest of the work, turning the creamy mixture into firm, chilled bites.
Although the total active time is short, the bites do need at least 2 hours in the freezer to become completely solid. Once they are frozen, they are ready to enjoy immediately or save for later.
Why You’ll Love These Frozen Greek Yogurt Peanut Butter Bites
You will love this recipe if you enjoy snacks that are easy, creamy, and refreshing. It gives you the feeling of having a sweet frozen treat without needing a complicated process.
These bites are quick to prepare, and the ingredient list is short and familiar. You do not need special cooking skills, and you do not need to bake, boil, or sauté anything.
They are also convenient because they can be made ahead of time. Once stored in the freezer, they are ready whenever you want a small snack, a cool afternoon pick-me-up, or a simple treat to share.
They are especially nice for kids’ snacks, casual gatherings, or those quiet moments when you want something sweet but not too heavy. Because each bite is portioned, they are easy to serve and easy to store.
Ingredients You’ll Need
2 cups plain Greek yogurt: Choose a full-fat version for creaminess and protein.
½ cup creamy peanut butter: Opt for natural peanut butter without added sugars for a healthier option.
3 tablespoons honey (or maple syrup for a vegan option): Sweetens the bites naturally; adjust to taste.
1 teaspoon vanilla extract: Enhances the overall flavor with warm, sweet notes.
¼ cup mini chocolate chips: Look for dark chocolate chips for a richer flavor.
1 pinch salt: Balances the sweetness and elevates flavors.
Ingredient Notes
The plain Greek yogurt forms the creamy foundation of this recipe. It gives the bites their cool, smooth texture and adds a light tang that balances the richness of the peanut butter.
A full-fat Greek yogurt will create the creamiest result. If you prefer a thicker and richer frozen bite, full-fat yogurt is a great choice because it helps the mixture feel more satisfying.
Creamy peanut butter blends easily into the yogurt and gives the bites their signature nutty flavor. Natural peanut butter without added sugars is a good option if you want to keep the sweetness controlled and let the honey or maple syrup do the sweetening.
Honey adds a gentle sweetness that pairs beautifully with peanut butter. If you want a vegan-friendly option, maple syrup can be used instead, and it will still give the bites a pleasant sweetness.
Vanilla extract may seem like a small ingredient, but it adds warmth and rounds out the flavor. It makes the mixture taste more complete and helps the yogurt, peanut butter, and sweetener come together.
Mini chocolate chips work especially well because they distribute evenly throughout the mixture. Their smaller size means you get little bits of chocolate in each bite without overpowering the creamy base.
The pinch of salt is important because it keeps the sweetness from tasting flat. It also helps bring out the peanut butter flavor and makes the chocolate taste a little richer.
Directions
Step 1: Prepare a Clean Workspace
Start by clearing a small space on your countertop so you can work comfortably. Since this recipe comes together quickly, it helps to have everything in front of you before you begin mixing.
Place your mixing bowl, measuring cups, measuring spoons, spatula or whisk, and silicone mold or ice cube tray nearby. This keeps the process smooth and prevents you from stopping halfway through to search for a tool.
Make sure the mold or tray you plan to use is clean and dry. Any extra moisture inside the compartments can affect the way the bites freeze and release later.
Step 2: Gather All of the Ingredients
Set out the plain Greek yogurt, creamy peanut butter, honey or maple syrup, vanilla extract, mini chocolate chips, and salt. Having every ingredient ready makes the recipe feel easy and organized.
Measure 2 cups of plain Greek yogurt and place it near your mixing bowl. Then measure ½ cup of creamy peanut butter and set it aside so it is ready to blend into the yogurt.
Next, measure 3 tablespoons of honey or maple syrup, depending on which sweetener you are using. Measure 1 teaspoon of vanilla extract, ¼ cup of mini chocolate chips, and have 1 pinch of salt ready as well.
Step 3: Add the Greek Yogurt and Peanut Butter to a Bowl
In a medium mixing bowl, add the plain Greek yogurt first. The yogurt is the base, so adding it before the peanut butter makes it easier to start blending the mixture.
Spoon in the creamy peanut butter over the yogurt. Try to scrape the measuring cup well so you get the full amount into the bowl.
The peanut butter may sit heavily on top of the yogurt at first, and that is completely normal. As you mix, it will slowly soften into the yogurt and create a smooth, creamy texture.
Step 4: Add the Sweetener, Vanilla, and Salt
Pour the honey or maple syrup into the bowl with the yogurt and peanut butter. This will add just enough sweetness to make the bites taste like a treat.
Add the vanilla extract next. Even though it is only 1 teaspoon, it gives the mixture a warmer and more rounded flavor.
Sprinkle in the pinch of salt. The salt may seem small, but it helps balance the sweetness and lifts the peanut butter flavor so the bites taste fuller.
Step 5: Mix Until Smooth and Creamy
Use a spatula or whisk to begin combining the ingredients. At first, the mixture may look streaky, with visible swirls of peanut butter and yogurt.
Keep stirring until the peanut butter is fully blended into the Greek yogurt. Take your time here because a smooth mixture will create a better texture once the bites are frozen.
Scrape the sides and bottom of the bowl as you mix. Peanut butter can cling to the bowl, so scraping ensures every bit gets incorporated evenly.
The mixture should look creamy and consistent when it is ready. There should be no large lumps of peanut butter or unmixed yogurt remaining.
Step 6: Check the Texture Before Adding Chocolate Chips
Before folding in the chocolate chips, pause and look at the mixture closely. It should be thick, smooth, and spoonable.
If you see small streaks of peanut butter, keep mixing for a little longer. A well-blended base will freeze more evenly and taste better in every bite.
This is also the best moment to make sure the sweetness feels right for you. The recipe uses 3 tablespoons of honey or maple syrup, but the sweetness can be adjusted to taste.
Step 7: Fold in the Mini Chocolate Chips
Add the ¼ cup of mini chocolate chips to the bowl. Use a spatula to gently fold them into the yogurt and peanut butter mixture.
Try not to stir too aggressively at this point. Gentle folding helps distribute the chocolate chips evenly without overworking the mixture.
Make sure the chips are spread throughout the bowl, not gathered in one area. This way, each frozen bite will have little pieces of chocolate inside.
Step 8: Prepare the Mold or Ice Cube Tray
Place your silicone mold or ice cube tray on a flat surface. If the tray is flexible, you may want to set it on a small baking sheet or plate before filling it.
This makes it easier to move the filled mold into the freezer without spilling. A stable base is especially helpful because the mixture is soft before freezing.
You do not need to fill every compartment unless your mold size requires it. The goal is to portion the mixture into bite-sized servings that can freeze solid and release easily.
Step 9: Spoon the Mixture Into the Compartments
Use a spoon or a small cookie scoop to transfer the mixture into the mold or tray. Fill each compartment about three-quarters full.
Leaving a little space at the top helps prevent overflow and gives the bites a cleaner shape. If you overfill the mold, the mixture may spread or freeze unevenly around the edges.
A small cookie scoop is useful if you want the bites to look more even. It helps portion the mixture neatly and makes the process faster.
Step 10: Press the Mixture Down Gently
After filling each compartment, use the back of a spoon to press the mixture down lightly. This helps remove air pockets and encourages the bites to hold their shape.
Do not press too hard, especially if you are using a flexible silicone mold. A gentle press is enough to settle the mixture into the corners.
Smooth the tops as much as you like. They do not need to be perfect, but a flatter top will make the frozen bites easier to stack or store later.
Step 11: Move the Mold to the Freezer Carefully
Once the mold or tray is filled, carefully transfer it to the freezer. Keep it level so the mixture stays in place.
If you placed the mold on a baking sheet or plate, carry the entire setup together. This makes it much easier to avoid spills and uneven shapes.
Choose a flat spot in the freezer where the mold can sit undisturbed. The bites need time to freeze completely, so avoid placing them somewhere they may tilt or get bumped.
Step 12: Freeze Until Completely Solid
Let the bites freeze for at least 2 hours. They should feel firm and solid before you try to remove them from the mold.
If they still feel soft in the center, give them more time. Removing them too early can cause them to bend, smear, or lose their shape.
Freezing time can vary slightly depending on the size of your mold or tray. Smaller compartments may firm up faster, while larger ones may need a little longer.
Step 13: Remove the Frozen Bites From the Mold
Once the bites are fully frozen, take the mold or tray out of the freezer. If you are using a silicone mold, gently press from the bottom of each compartment to release the bites.
If you are using an ice cube tray, you may need to twist it slightly or let it sit for a brief moment before releasing the bites. Be careful not to let them soften too much.
The bites should pop out cleanly when they are fully frozen. If they resist, give the mold a gentle push from underneath rather than forcing them out.
Step 14: Serve or Store Right Away
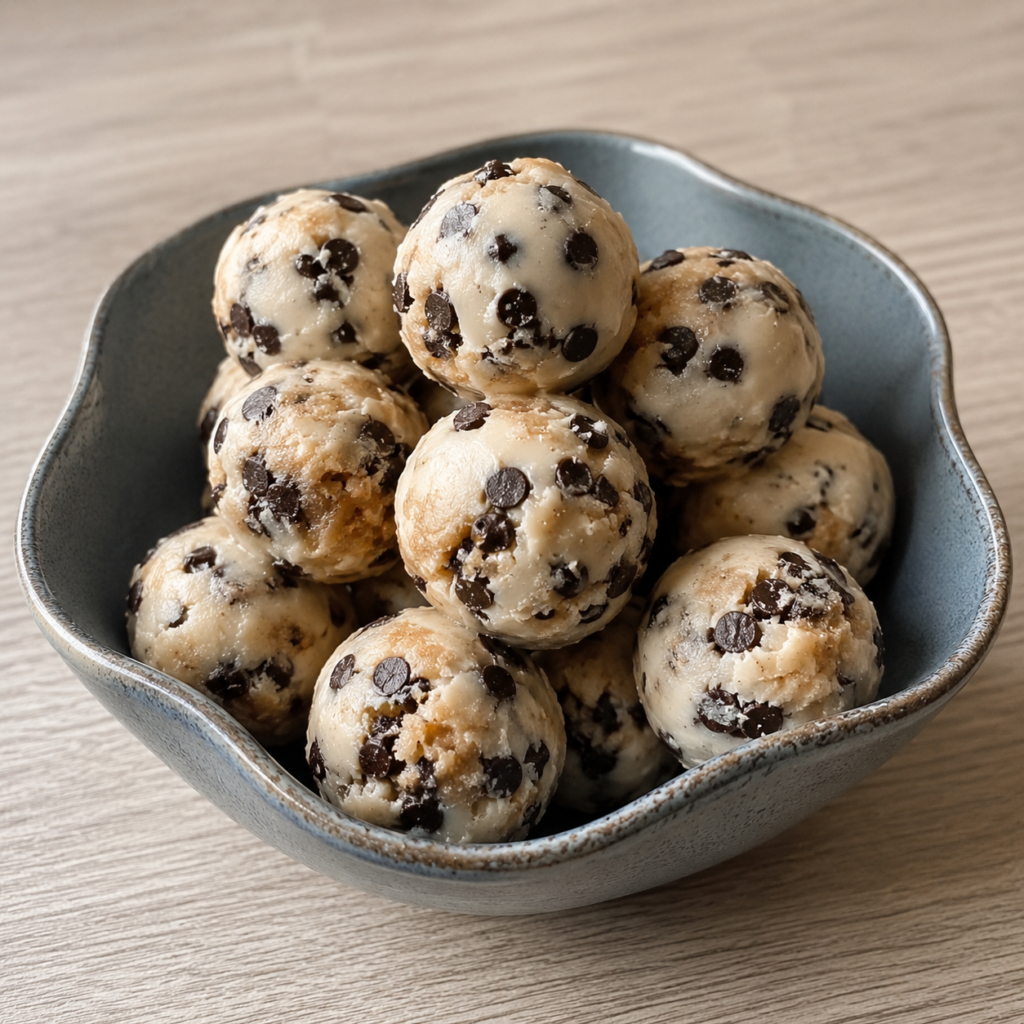
You can enjoy the Frozen Greek Yogurt Peanut Butter Bites immediately after removing them from the mold. They are best served straight from the freezer while they are firm, cold, and creamy.
If you are not eating them right away, place them in an airtight container and return them to the freezer. This helps protect their texture and keeps them fresh for later.
If the bites begin sticking together in the container, place small pieces of parchment paper between layers. This makes it easier to remove one or two at a time whenever you want a snack.
Pro Tips for the Best Texture
Make sure the yogurt and peanut butter mixture is completely smooth before freezing. Any lumps in the base can become more noticeable once frozen.
Use mini chocolate chips rather than larger ones if possible. Their small size makes them easier to distribute evenly and gives each bite a better balance of creamy texture and chocolate.
Fill the mold only about three-quarters full. This helps the bites freeze into neat portions and prevents the mixture from overflowing.
Let the bites freeze long enough to become fully solid. If you remove them too soon, they may be too soft to hold their shape.
Variations
You can add a tablespoon of cocoa powder to the mixture if you want a chocolate-flavored twist. This gives the yogurt and peanut butter base a deeper flavor while still keeping the recipe simple.
Chopped nuts or seeds can be folded in for extra crunch and nutrition. They add texture and make the bites feel a little more hearty.
You can also try different nut butters, such as almond butter or cashew butter. Each one will give the bites a slightly different flavor while keeping the same basic structure.
For a vegan-friendly option, substitute the Greek yogurt with dairy-free yogurt and use maple syrup instead of honey. This keeps the recipe flexible while still maintaining the creamy frozen bite idea.
A pinch of cinnamon or nutmeg can also be added for a warm, seasonal flavor. This small change can make the bites feel especially cozy, even though they are served frozen.
Serving Tips
Serve these Frozen Greek Yogurt Peanut Butter Bites straight from the freezer. They are meant to be enjoyed cold, firm, and refreshing.
They pair beautifully with fresh fruit if you want to make the snack feel a little more complete. A drizzle of honey can also add an extra touch of sweetness when serving.
Because the bites are small, they are easy to offer as a quick afternoon snack. They also work well for casual gatherings, kids’ snacks, or a simple treat after a meal.
Let them sit out only briefly before eating. Since they are made with yogurt, they will soften as they warm up.
Storage Tips
Store the bites in an airtight container in the freezer for up to one month. Keeping them sealed helps prevent freezer burn and protects their flavor.
If the bites stick together, layer them with parchment paper. This makes it easier to separate them without breaking or softening the whole batch.
Try to return any uneaten bites to the freezer quickly. They are best when kept frozen until the moment you are ready to enjoy them.
Common Mistakes to Avoid
One common mistake is not mixing the ingredients thoroughly enough. If the peanut butter is not fully blended into the yogurt, the bites may freeze with uneven texture and flavor.
Another mistake is overfilling the mold. Filling each compartment about three-quarters full gives the bites room to settle and helps them keep a clean shape.
Do not remove the bites from the freezer before they are fully solid. If they are still soft, they may fall apart or lose their shape when you try to pop them out.
Be careful not to add too much honey or syrup. Too much sweetener can make the bites overly sweet and may affect the balance of the peanut butter and yogurt.
Helpful Notes
For a nut-free option, substitute the peanut butter with sunflower seed butter. This keeps the creamy texture while changing the base flavor.
You can add chia seeds for an extra boost of fiber and omega-3s. Fold them in with the chocolate chips so they are evenly distributed.
For the creamiest result, use full-fat Greek yogurt. It gives the bites a richer texture and helps them feel more satisfying.
Store leftovers in a separate airtight container to help avoid freezer burn. This keeps the bites tasting fresh and ready for quick snacking.
Frequently Asked Questions
Can This Recipe Be Frozen?
Yes, these Frozen Greek Yogurt Peanut Butter Bites are meant to be frozen. Freezing is what gives them their firm bite-sized shape and refreshing texture.
They can be stored in the freezer for up to one month. This makes them a convenient snack to prepare ahead of time.
Can the Ingredients Be Substituted?
Yes, the ingredients can be adjusted while keeping the same basic recipe idea. Creamy peanut butter can be replaced with another nut or seed butter of your choice.
For a vegan option, use maple syrup instead of honey. You can also use dairy-free yogurt if needed.
How Should Leftovers Be Stored?
Store leftover bites in an airtight container in the freezer. This helps maintain their texture and protects them from freezer burn.
If they begin to stick together, add parchment paper between the layers. That makes it easier to grab one bite at a time.
Can This Recipe Be Made Ahead?
Yes, this recipe is perfect for making ahead. Once the bites are frozen, they are ready whenever you need a quick snack.
You can prepare them in advance and keep them stored in the freezer. They are especially helpful for busy days when you want something simple and satisfying.
Final Thoughts
These Frozen Greek Yogurt Peanut Butter Bites with Chocolate Chips are proof that a recipe does not have to be complicated to feel special. With only a few familiar ingredients and a little freezer time, you can make a creamy, chocolaty snack that feels both refreshing and comforting.
They are easy enough for beginners, flexible enough for small variations, and convenient enough to keep on hand for later. Whether you enjoy them on a warm afternoon, share them with family, or tuck them away for quick snacks during the week, they bring a small moment of sweetness to the day.
Sometimes the simplest recipes are the ones that stay with us the longest. These little frozen bites are creamy, nutty, cool, and sweet in just the right way, making them a treat worth keeping in your freezer again and again.
Frozen Greek Yogurt Peanut Butter Bites with Chocolate Chips
These frozen Greek yogurt peanut butter bites are a creamy, refreshing snack made with plain Greek yogurt, smooth peanut butter, natural sweetener, and mini chocolate chips. They come together quickly and make a simple wholesome treat to keep in the freezer.
Recipe Information
- Prep Time: 10 minutes
- Total Time: 10 minutes
- Course: Snack
- Cuisine: American
- Servings: 4 bites
- Calories: 150 kcal
Ingredients
For the Bites
- ¼ cup mini chocolate chips
Adds little bursts of chocolate in every frozen bite. - 1 teaspoon vanilla extract
Gives the mixture a warm, lightly sweet flavor. - 2 cups plain Greek yogurt
Creates a thick, tangy, creamy base with a protein boost. - 1 pinch salt
Balances the sweetness and helps the flavors stand out. - ½ cup creamy peanut butter
Adds rich nutty flavor and a smooth, satisfying texture. - 3 tablespoons honey or maple syrup for a vegan option
Naturally sweetens the mixture and helps everything blend together.
Instructions
- Add the plain Greek yogurt, creamy peanut butter, honey or maple syrup, vanilla extract, and salt to a mixing bowl.
- Stir until the mixture is smooth, creamy, and fully combined.
- Gently fold in the mini chocolate chips until they are evenly spread throughout the mixture.
- Spoon the mixture into a silicone mold or an ice cube tray.
- Freeze for at least 2 hours, or until the bites are firm and fully set.
- Remove the frozen bites from the mold and enjoy them straight from the freezer.
Notes
- You can customize these bites with chopped nuts, shredded coconut, crushed graham crackers, or other small mix-ins.
- Store the bites in an airtight freezer-safe container.
- Let them sit at room temperature for a few minutes if they are too firm right out of the freezer.

Fernando is the creator and writer behind the food blog Eating with your Hands. Living and working in cities like Paris, Barcelona, and Berlin, and being married to a Canadian foodie, has given Fernando a passion and interest in food and inspired him to run EWYH.