
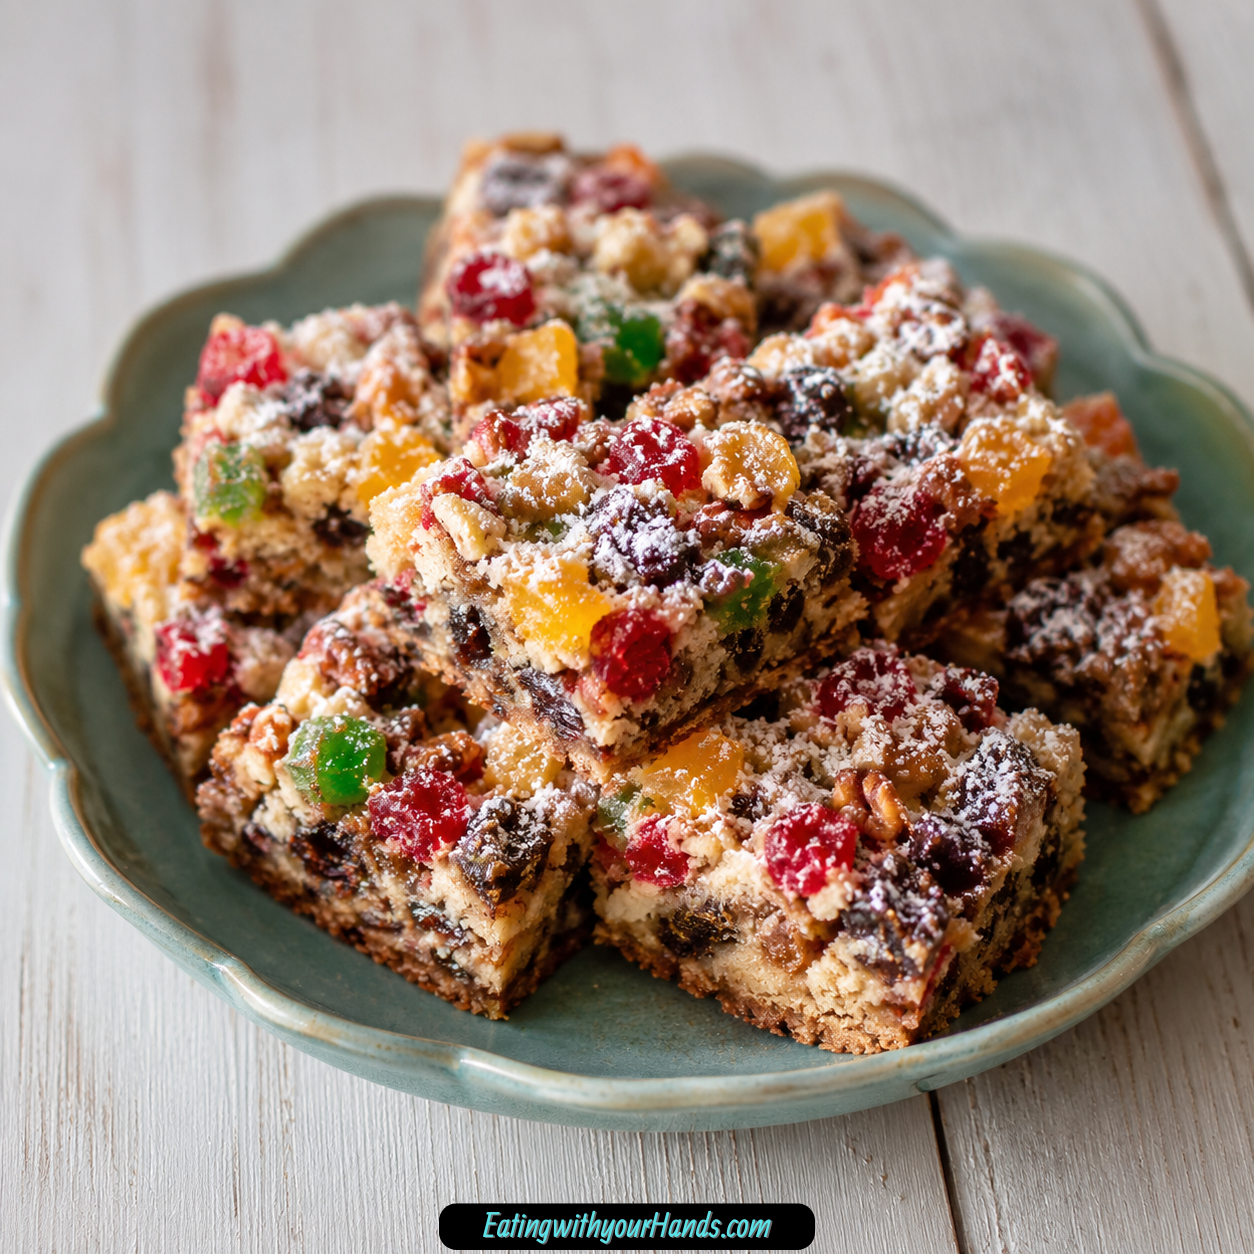
There is a certain kind of dessert that looks like it was made for a holiday table before anyone even takes a bite. These Fruit Cake 7-Layer Bars have that colorful, cheerful, festive quality, with bright candied fruit, chewy coconut, crunchy nuts, and two kinds of chocolate layered over a buttery graham cracker crust.
They take the familiar flavor idea of classic fruit cake and turn it into something easier, softer, chewier, and more approachable. Instead of a dense loaf that needs slicing and long planning, these bars bake in a 9×13-inch pan and come out rich, gooey, golden at the edges, and ready to cut into shareable squares.
This is the kind of treat that feels right at cookie exchanges, holiday potlucks, dessert trays, and family gatherings. It has enough color to stand out, enough sweetness to feel indulgent, and enough texture to keep every bite interesting.
I love the way this recipe gives fruit cake flavors a new form. The buttery crumb base, sweetened condensed milk, candied mixed fruit, coconut, pecans or walnuts, semi-sweet chocolate chips, and white chocolate chips all come together in layers that look beautiful and taste nostalgic without feeling heavy or dry.
Table of Contents
- Why You’ll Love Fruit Cake 7-Layer Bars
- Recipe Details
- Ingredients
- Optional Substitutions and Additions
- The Holiday Charm Behind These Layered Bars
- Why These Bars Are Easier Than Traditional Fruit Cake
- Directions
- Step 1: Preheat the Oven
- Step 2: Prepare the Baking Pan
- Step 3: Make the Graham Cracker Crumbs
- Step 4: Combine the Crumbs and Melted Butter
- Step 5: Press the Crust Into the Pan
- Step 6: Add the Sweetened Condensed Milk
- Step 7: Layer the Candied Mixed Fruit
- Step 8: Add the Shredded Coconut
- Step 9: Add the Chopped Nuts
- Step 10: Add the Semi-Sweet Chocolate Chips
- Step 11: Add the White Chocolate Chips
- Step 12: Check the Layers Before Baking
- Step 13: Bake the Bars
- Step 14: Let the Bars Cool Completely
- Step 15: Lift the Bars From the Pan
- Step 16: Cut Into Squares
- Serving Ideas
- Storage
- Freezing
- Make-Ahead Tips
- Helpful Notes for Best Results
- Flavor Variations
- Troubleshooting
- Frequently Asked Questions
- Why These Bars Are Perfect for Cookie Exchanges
- Why These Bars Work for Holiday Gifting
- Final Thoughts
- Fruit Cake 7-Layer Bars
Why You’ll Love Fruit Cake 7-Layer Bars
These bars are quick and easy compared with many holiday desserts. The prep is simple, the layers are built directly in the pan, and the baking time is only 25 to 30 minutes.
They are festive without being fussy. Candied mixed fruit gives the bars bright holiday color, while coconut, nuts, and chocolate make them feel rich and special.
The recipe is also make-ahead friendly. The bars keep well in the refrigerator, and the original notes say they actually taste better after a day as the flavors meld together.
No mixer is required. Everything comes together by hand, which makes the recipe feel relaxed and easy to manage during a busy baking season.
They are great for gifting because they can be sliced and packed into holiday tins or boxes. Once fully cooled and cut, the bars are sturdy enough for cookie trays and sharing.
They are also crowd-pleasing, even for people who are unsure about traditional fruit cake. The chewy bar texture, chocolate layers, and graham cracker crust make the flavor feel familiar and inviting.
Recipe Details
- Recipe name: Fruit Cake 7-Layer Bars
- Oven temperature: 350°F (175°C)
- Pan size: 9×13-inch baking pan
- Baking time: 25 to 30 minutes
- Cooling time: 1 to 2 hours in the pan
- Faster cooling option: About 1 hour in the fridge
- Main method: Layer and bake
- Mixer required: No
- Room temperature storage: Up to 4 days
- Refrigerator storage: Up to 10 days
- Freezer storage: Up to 3 months
- Make-ahead note: Bars taste better after a day as the flavors meld together
Ingredients
- 1½ cups graham cracker crumbs
- ½ cup unsalted butter, melted
- 1 (14 oz) can sweetened condensed milk
- 1 cup candied mixed fruit
- 1 cup shredded coconut
- 1 cup chopped pecans or walnuts
- 1 cup semi-sweet chocolate chips
- ½ cup white chocolate chips
Optional Substitutions and Additions
- Chopped dried fruit, such as apricots or cranberries, instead of candied fruit
- Sunflower seeds instead of nuts
- Crushed pretzels instead of nuts
- Extra chocolate chips
- A swirl of Nutella before baking
- Toasted coconut
- Powdered sugar for dusting
The Holiday Charm Behind These Layered Bars
Fruit cake has a long-standing place on holiday dessert tables, but not everyone wants the traditional version. These bars keep the colorful fruit and rich festive feeling while changing the texture into something chewy, gooey, and easy to love.
The graham cracker crust gives the bars a buttery foundation. It holds the layers together and adds a familiar sweetness that makes the recipe feel more like a dessert bar than a classic fruit cake.
Sweetened condensed milk is the glue that brings the layers together. It bakes into the crust, fruit, coconut, nuts, and chocolate, creating that rich, gooey texture people expect from layered bars.
The candied mixed fruit gives the bars their holiday personality. The original recipe describes it as typically including red and green cherries, pineapple, and sometimes citrus peel.
Coconut adds chewiness and a touch of golden color once baked. Pecans or walnuts add crunch, while semi-sweet chocolate and white chocolate bring richness, contrast, and a more modern dessert feel.
Why These Bars Are Easier Than Traditional Fruit Cake
Traditional fruit cake can sometimes feel like a serious baking project. These bars are much more casual, which is part of their appeal.
You do not need a mixer, a complicated batter, or a long resting time before baking. The ingredients are layered in a pan, baked until the edges are golden and the center is set, then cooled before slicing.
The result is also less heavy than many traditional fruit cakes. These bars are sweet and rich, but the graham crust, coconut, nuts, and chocolate create a more varied texture.
They are especially good for people who like the idea of fruit cake flavors but prefer dessert bars. Each square has a little fruit, a little chocolate, a little coconut, a little crunch, and a buttery base.
That combination makes them approachable for potlucks and cookie swaps. People can pick up one small square and get the full festive flavor without committing to a large slice of cake.
Directions
Step 1: Preheat the Oven
Set your oven to 350°F (175°C). Let it fully preheat before placing the pan inside.
A properly heated oven helps the crust set and allows the layers to bake evenly. Since the bars only bake for 25 to 30 minutes, starting with the correct temperature matters.
While the oven heats, gather all of the ingredients. This makes the layering process smooth and prevents you from forgetting any part of the recipe.
Step 2: Prepare the Baking Pan
Line a 9×13-inch baking pan with parchment paper or lightly grease it. Parchment paper is especially helpful because it makes the bars easier to remove after cooling.
If using parchment, leave a little overhang on the sides. This gives you something to hold when lifting the cooled bars out of the pan.
If you choose to grease the pan instead, coat the bottom and sides lightly. The goal is to help the bars release cleanly once they are set.
Step 3: Make the Graham Cracker Crumbs
Measure 1½ cups graham cracker crumbs. This is about 10 full sheets of graham crackers, finely crushed.
The crumbs should be small and even so they can combine smoothly with the melted butter. Large pieces may make the crust uneven.
If crushing the crackers yourself, make sure they are fine enough to press into a solid layer. A more even crumb makes a better crust.
Step 4: Combine the Crumbs and Melted Butter
Place the graham cracker crumbs in a medium mixing bowl. Add ½ cup melted unsalted butter.
Stir until all of the crumbs are moistened. The mixture should resemble wet sand.
This texture is important because it means the butter has coated the crumbs evenly. If some crumbs are still dry, keep stirring until the mixture looks consistent.
Step 5: Press the Crust Into the Pan
Pour the buttered graham cracker crumbs into the prepared 9×13-inch pan. Spread them across the bottom.
Press the crumbs firmly and evenly into a solid crust layer. The original notes recommend using a flat-bottomed cup or measuring cup to compact the crust.
Take your time here because a well-pressed crust helps the bars hold together. Make sure the corners and edges are packed as evenly as the center.
Step 6: Add the Sweetened Condensed Milk
Open the 1 (14 oz) can of sweetened condensed milk. Pour it evenly over the graham cracker crust.
Use the back of a spoon or a spatula to spread the condensed milk across the surface. Try to cover all corners so the bars bake evenly.
The condensed milk creates the gooey layer that holds everything together. It also adds richness and sweetness to the bars.
Step 7: Layer the Candied Mixed Fruit
Sprinkle 1 cup candied mixed fruit evenly over the condensed milk layer. Aim for good distribution so every square has a pop of fruit.
The fruit gives the bars their classic holiday color. It also brings the fruit cake inspiration into the recipe.
Do not pile the fruit in one spot. Spread it from corner to corner so the bars taste balanced after cutting.
Step 8: Add the Shredded Coconut
Sprinkle 1 cup shredded coconut evenly over the fruit layer. Use sweetened or unsweetened coconut depending on your preference.
The coconut adds chewiness and sweetness. It also develops a little golden color as the bars bake.
Try to scatter it lightly and evenly. An even layer helps every bite have some coconut texture.
Step 9: Add the Chopped Nuts
Scatter 1 cup chopped pecans or walnuts over the coconut. Either nut works according to the recipe.
The nuts add crunch and help balance the sweetness of the condensed milk, candied fruit, coconut, and chocolate. Toasting the nuts first is optional, but the original recipe notes that it can add depth of flavor.
Make sure the nuts are spread evenly across the pan. This keeps the texture consistent from one bar to another.
Step 10: Add the Semi-Sweet Chocolate Chips
Sprinkle 1 cup semi-sweet chocolate chips over the nut layer. These chips add a rich, melty chocolate layer.
Semi-sweet chocolate helps balance the sweetness of the other ingredients. It gives the bars a deeper flavor and makes them feel more indulgent.
Scatter the chips across the whole pan rather than concentrating them in the center. This ensures each cut square gets some chocolate.
Step 11: Add the White Chocolate Chips
Sprinkle ½ cup white chocolate chips over the top. These add creamy sweetness and a bright color contrast.
The white chocolate chips make the bars look more festive. They also create a sweet contrast against the semi-sweet chocolate.
Distribute them evenly so the top of the bars looks balanced. The final layer should look colorful, textured, and full.
Step 12: Check the Layers Before Baking
Before placing the pan in the oven, look over the surface. Make sure the fruit, coconut, nuts, semi-sweet chocolate chips, and white chocolate chips are evenly spread.
If one area looks bare, gently add or shift toppings so the layers are more balanced. This helps every piece taste complete.
Do not press the top layers down too hard. The sweetened condensed milk will help bind everything as the bars bake.
Step 13: Bake the Bars
Place the pan in the preheated 350°F (175°C) oven. Bake for 25 to 30 minutes.
The bars are ready when the edges are golden brown and the center is set. The surface should look baked, but not dry.
Do not overbake. The original recipe notes that the bars will firm up as they cool, so they do not need to be baked until hard.
Step 14: Let the Bars Cool Completely
Remove the pan from the oven and let the bars cool fully in the pan. This may take 1 to 2 hours.
Cooling is essential because the bars need time to firm. If you cut them too soon, the layers may not hold together cleanly.
You can speed up the cooling process by placing the pan in the fridge for about an hour. This is especially helpful if you want cleaner slices.
Step 15: Lift the Bars From the Pan
Once the bars are completely cool, lift them out using the parchment paper if you lined the pan. Move them to a cutting board.
If you greased the pan instead of using parchment, cut them directly in the pan. Work carefully so the pieces release neatly.
The bars should feel firm enough to handle. If they still seem too soft, give them more cooling time.
Step 16: Cut Into Squares
Use a sharp knife to cut the bars into squares. For cleaner edges, chill the bars first and wipe the knife between cuts.
Clean cuts make the bars look better for gift boxes, cookie trays, and dessert platters. This is especially helpful because the layers are rich and sticky.
If you prefer a more casual look, simple square cuts are perfectly fine. These bars are naturally colorful and appealing even without perfect edges.
Serving Ideas
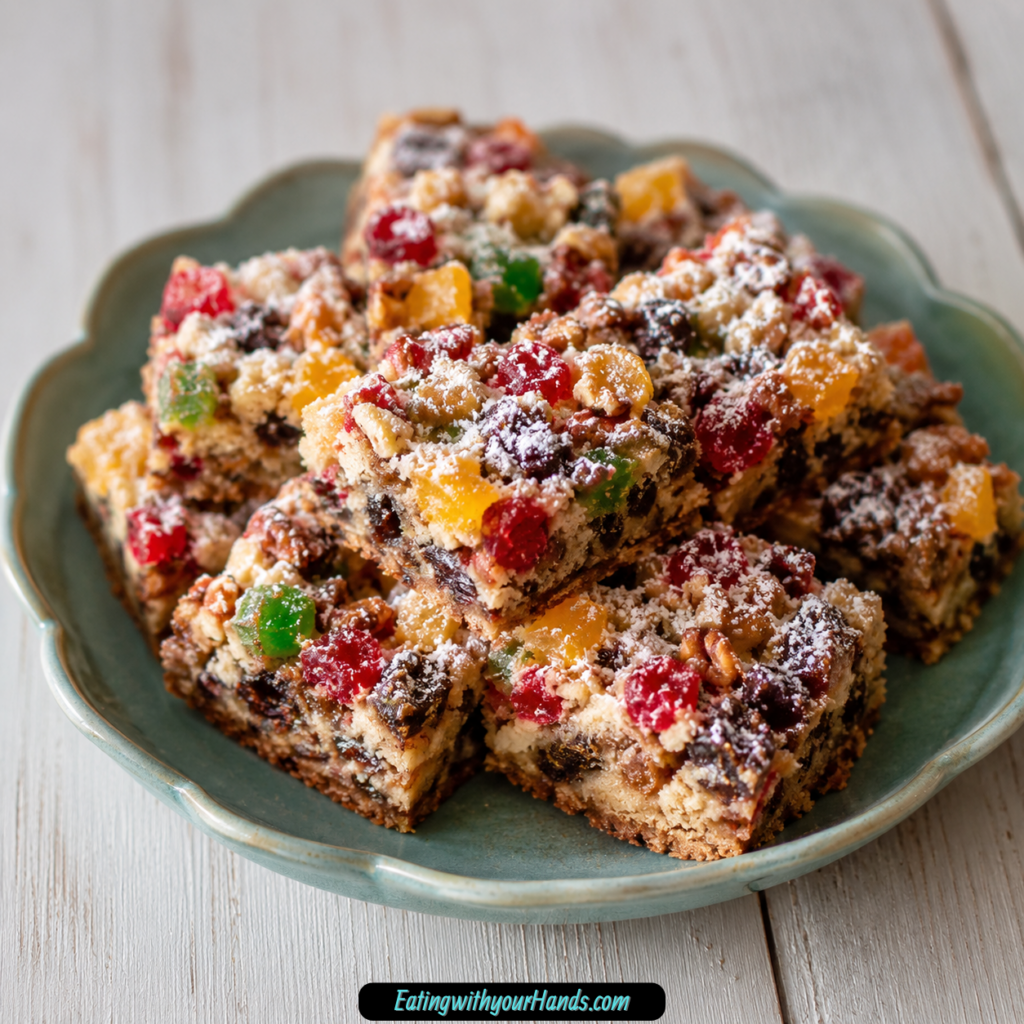
Serve these Fruit Cake 7-Layer Bars on a holiday dessert tray with cookies and fudge. Their bright fruit and chocolate layers make them stand out beautifully.
They also pair well with coffee, tea, or hot cocoa. The richness of the bars works nicely with a warm drink.
For a snowy holiday effect, dust the cooled bars with powdered sugar. This adds a decorative finish without changing the recipe.
They are also excellent for cookie exchanges. Because they are cut into squares, they are easy to portion, pack, and share.
For family desserts, serve them straight from a platter after dinner. They are sweet, chewy, and satisfying enough to feel special in small portions.
Storage
Store the bars in an airtight container at room temperature for up to 4 days. Make sure they are fully cooled before storing.
For longer freshness, keep them in the refrigerator for up to 10 days. Let them come to room temperature before serving for the best texture.
Refrigeration helps the bars stay set and makes them easier to cut cleanly. It is also useful for make-ahead holiday baking.
If stacking the bars, place parchment between layers. This helps prevent sticking and keeps the tops neater.
Freezing
These bars can be frozen for up to 3 months. Freeze them in a single layer first, then transfer them to a freezer-safe container.
Freezing in a single layer helps the pieces keep their shape. Once firm, they can be stacked with parchment between layers.
Let frozen bars thaw before serving. For the best texture, allow them to come to room temperature after thawing.
Make-Ahead Tips
These bars are ideal for making ahead. The original recipe notes that they actually taste better after a day as the flavors meld together.
This makes them especially useful for busy holiday events. You can bake them the day before, chill them, and slice them when ready.
Make-ahead desserts are valuable when the kitchen schedule is full. These bars give you a festive dessert that can be finished before the party or gathering begins.
Helpful Notes for Best Results
Press the graham cracker crust firmly and evenly. A compact crust gives the bars a stronger base and makes them easier to slice.
Use a flat-bottomed cup or measuring cup to press the crumbs into the pan. This helps create an even layer from edge to edge.
Do not use fresh fruit in place of candied fruit. Fresh fruit contains too much moisture and can make the bars soggy.
If candied fruit is not available, chopped dried fruit such as apricots or cranberries can be used. This keeps the fruit layer chewy rather than wet.
For a nut-free option, skip the nuts or substitute sunflower seeds or crushed pretzels. These alternatives can still provide texture.
If you love chocolate, add more chips or swirl in a bit of Nutella before baking. This creates a richer chocolate version.
Toast the coconut beforehand if you want added flavor and crunch. This is optional but can make the coconut layer more noticeable.
Flavor Variations
Dried Fruit Variation
If candied fruit is unavailable, use chopped dried fruit such as apricots or cranberries. This keeps the fruit layer sweet and chewy.
Do not use fresh fruit. The moisture from fresh fruit can make the bars soggy.
Nut-Free Version
For a nut-free option, skip the pecans or walnuts. You can also use sunflower seeds or crushed pretzels for texture.
Crushed pretzels add a salty crunch. Sunflower seeds keep the bars crunchy while avoiding nuts.
Extra Chocolate Version
For a more chocolate-heavy bar, add extra chocolate chips. You can increase the chocolate flavor while keeping the same layered method.
The recipe also suggests swirling in a bit of Nutella before baking. This creates a richer, more indulgent variation.
Toasted Coconut Version
Toast the coconut beforehand for extra flavor and crunch. This gives the coconut layer a slightly deeper taste.
Use this option if you want the coconut to stand out more. It adds another layer of texture to the bars.
Troubleshooting
Why Are My Bars Too Soft?
The bars may not have cooled long enough. They need to cool fully in the pan, which can take 1 to 2 hours.
You can chill them in the fridge for about an hour to help them set faster. The bars firm up as they cool.
Why Are My Bars Soggy?
Fresh fruit may have been used instead of candied or dried fruit. Fresh fruit has too much moisture and can make the bars soggy.
Stick with candied mixed fruit or chopped dried fruit. These options keep the texture chewy and stable.
Why Is My Crust Falling Apart?
The crust may not have been pressed firmly enough. The graham cracker crumbs and melted butter should be compacted into a solid layer.
Use a flat-bottomed cup or measuring cup to press the crust evenly. This helps it hold together after baking.
Why Are My Cuts Messy?
The bars may still be too warm, or the knife may be sticky. Chill the bars first and wipe the knife clean between cuts.
This creates neater edges. It is especially helpful when preparing bars for gifts or dessert trays.
Frequently Asked Questions
Can I Use Fresh Fruit Instead of Candied Fruit?
No, fresh fruit has too much moisture and will make the bars soggy. Use dried or candied varieties instead.
Candied mixed fruit is the main ingredient for the classic version. Chopped dried fruit such as apricots or cranberries can be used if candied fruit is not available.
Do I Need to Refrigerate These Bars?
Not necessarily, but refrigeration helps them set better and keeps them fresh longer. It is especially helpful for make-ahead prep.
At room temperature, the bars keep for up to 4 days. In the refrigerator, they keep for up to 10 days.
Can I Use Gluten-Free Graham Crackers?
Yes, you can use your favorite gluten-free graham crackers. This makes the crust suitable for dietary needs.
Use the same amount of crumbs. The method for mixing with melted butter and pressing into the pan stays the same.
What Is the Best Way to Cut These Bars Cleanly?
Chill the bars first and use a sharp knife. Wipe the knife clean between cuts.
This helps create neat edges. It is especially useful because the layers are gooey and rich.
Are These Bars Overly Sweet?
They are sweet, but the nuts and graham cracker crust help balance the flavor. The semi-sweet chocolate also adds contrast.
If you want to reduce the sweetness, use unsweetened coconut. This is one of the suggestions from the original recipe.
Can I Make These Bars Ahead?
Yes, these bars are make-ahead friendly. They actually taste better after a day as the flavors meld together.
Store them in the refrigerator if preparing ahead. Let them come to room temperature before serving for the best texture.
Can I Freeze Fruit Cake 7-Layer Bars?
Yes, they can be frozen for up to 3 months. Freeze in a single layer first, then transfer to a freezer-safe container.
Thaw before serving. Allow them to come to room temperature for the best texture.
Why These Bars Are Perfect for Cookie Exchanges
Cookie exchanges need desserts that are easy to portion, easy to pack, and interesting enough to stand out. These bars fit that purpose beautifully.
They bring color from the candied fruit, richness from chocolate, chewiness from coconut, and crunch from nuts. That variety makes them feel more special than a plain bar.
They also do not require individual shaping. Everything bakes in one pan and is cut after cooling.
That makes them practical when you need many servings without spending hours on decoration. The layers create their own festive look.
Why These Bars Work for Holiday Gifting
These bars are sturdy enough to pack once fully cooled and cut. They can be placed in holiday tins, boxes, or dessert containers.
Their colors make them especially gift-friendly. Red and green candied fruit, white chocolate chips, coconut, and chocolate all create a festive appearance.
Because they keep well in the fridge, they are easy to prepare before a busy event. This helps reduce last-minute baking stress.
They also taste better after a day, which is a gift-giving advantage. You can make them in advance and let the flavors settle before sharing.
Final Thoughts
Fruit Cake 7-Layer Bars are a festive, chewy, colorful way to enjoy the flavors of fruit cake in a more approachable dessert bar form. They take the richness of holiday fruit, coconut, nuts, chocolate, and sweetened condensed milk and layer it over a buttery graham cracker crust.
The method is simple and practical. Press the graham cracker crust into a 9×13-inch pan, pour over the condensed milk, layer the fruit, coconut, nuts, semi-sweet chocolate chips, and white chocolate chips, then bake at 350°F (175°C) for 25 to 30 minutes.
Once cooled completely, the bars become sliceable, giftable, and ready for dessert trays. They can be stored at room temperature, refrigerated, or frozen, which makes them ideal for holiday planning.
They are nostalgic without feeling old-fashioned, sweet without being one-note, and colorful without needing decoration. Whether you are baking for a cookie exchange, potluck, family gathering, or holiday tin, these bars bring a cheerful, chewy, fruit-filled finish to the season.
Fruit Cake 7-Layer Bars
These festive fruit cake bars combine a buttery graham cracker crust with sweet condensed milk, candied fruit, coconut, chocolate, and crunchy nuts. Each layer adds a different texture, creating a chewy, rich dessert with plenty of holiday flavor. They are easy to assemble and make a colorful addition to Christmas parties, cookie exchanges, dessert trays, or homemade gift boxes.
Recipe Details
- Prep Time: 15 minutes
- Cook Time: 30 minutes
- Total Time: 45 minutes
- Servings: 16 bars
- Calories: 320 kcal
Ingredients
- 1½ cups graham cracker crumbs
- ½ cup unsalted butter melted
- 1 14 oz can sweetened condensed milk
- 1 cup shredded coconut
- 1 cup chopped pecans or walnuts
- 1 cup candied mixed fruit cherries, pineapple, etc.
- 1 cup semi-sweet chocolate chips
- ½ cup white chocolate chips
Instructions
Step 1: Prepare the Pan
Preheat the oven to 350°F (175°C). Line a 9×13-inch baking pan with parchment paper or lightly grease it.
Step 2: Make the Graham Cracker Crust
Combine the graham cracker crumbs and melted unsalted butter in a bowl.
Press the mixture firmly and evenly into the bottom of the prepared pan.
Step 3: Add the Sweetened Condensed Milk
Pour the sweetened condensed milk evenly over the graham cracker crust.
Step 4: Layer the Candied Fruit
Distribute the candied mixed fruit evenly over the condensed milk layer.
Step 5: Add the Coconut and Nuts
Sprinkle the shredded coconut evenly over the fruit, followed by the chopped pecans or walnuts.
Step 6: Add the Chocolate Layers
Scatter the semi-sweet chocolate chips over the nuts.
Finish by sprinkling the white chocolate chips evenly across the top.
Step 7: Bake the Bars
Bake for 25-30 minutes, or until the edges are golden and the center is set.
Step 8: Cool and Slice
Let the bars cool completely in the pan before cutting them into 16 bars.
Notes
Press the graham cracker crust firmly into the pan so the bars hold together more easily when sliced.
Chilling the baked bars can improve the flavor and help produce cleaner cuts.
Dried fruit may be substituted when candied fruit is unavailable.
For a nut-free variation, omit the nuts or replace them with sunflower seeds.
Serving Suggestions
- Add the bars to a Christmas dessert platter.
- Serve them at cookie swaps or holiday parties.
- Package individual pieces in gift boxes or treat bags.
- Pair with hot coffee, tea, or cocoa.
- Cut them into smaller squares for a bite-sized dessert tray.
Storage
How to Store
Once completely cooled, place the bars in an airtight container. Separate stacked layers as needed to prevent sticking.
How to Refrigerate
Refrigerate the bars for a firmer texture, cleaner slices, and enhanced flavor.
How to Freeze
Place fully cooled bars in a freezer-safe airtight container, separating the layers as needed. Thaw before serving.
Best Texture Tip
Wait until the bars are completely cool before slicing. For the neatest edges, chill them first and cut with a clean, sharp knife.

Fernando is the creator and writer behind the food blog Eating with your Hands. Living and working in cities like Paris, Barcelona, and Berlin, and being married to a Canadian foodie, has given Fernando a passion and interest in food and inspired him to run EWYH.