

There is a certain kind of comfort that only homemade bread can bring into a house. It does not arrive loudly, and it does not need anything fancy to make itself known.
It begins quietly with flour in a bowl, warm water, a little yeast, a pinch of salt, and the slow promise of time. Then comes the garlic, the fresh herbs, and that first earthy scent that tells you this loaf is going to be more than plain bread.
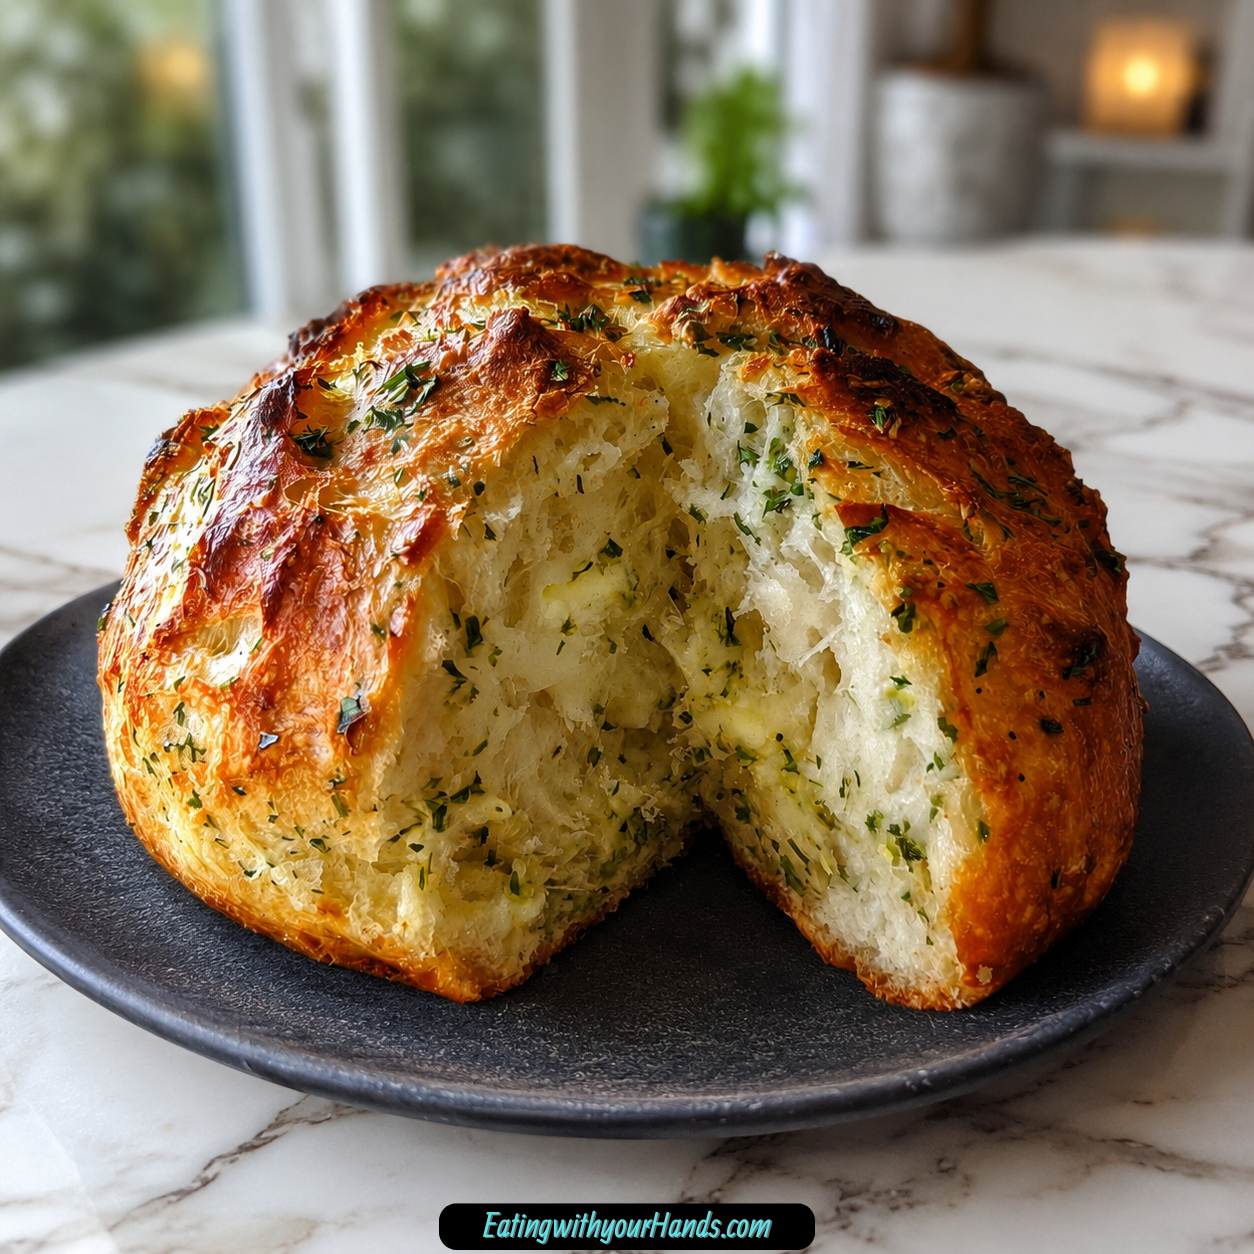
Garlic Herb Dutch Oven Bread is the kind of recipe that makes a kitchen feel lived in. It fills the room with the smell of rosemary, thyme, garlic, and warm crust, the kind of aroma that makes people wander in before dinner is ready just to ask what is baking.
This bread is rustic, simple, and deeply satisfying. The Dutch oven creates a crisp, golden crust while the inside stays soft, airy, and tender.
What I love most about this loaf is that it feels special without requiring complicated skill. You do not need to be a professional baker to make it, and you do not need a long list of unusual ingredients.
You only need patience, a bowl, a Dutch oven, and a little faith in the dough. By the time the bread comes out of the oven, beautifully browned and fragrant, it feels like something you made with your whole heart.
Table of Contents
- What Is Garlic Herb Dutch Oven Bread?
- Why This Garlic Herb Dutch Oven Bread Feels So Special
- Recipe Overview
- Why You’ll Love Garlic Herb Dutch Oven Bread
- Ingredients You’ll Need
- Ingredient Notes
- Directions
- Step 1: Gather and Measure the Ingredients
- Step 2: Prepare the Garlic and Herbs
- Step 3: Combine the Dry Ingredients
- Step 4: Add the Warm Water
- Step 5: Add the Garlic and Herbs
- Step 6: Mix Until a Shaggy Dough Forms
- Step 7: Check the Dough Texture
- Step 8: Cover the Dough
- Step 9: Let the Dough Rise for 12 to 18 Hours
- Step 10: Look for Signs the Dough Is Ready
- Step 11: Preheat the Dutch Oven
- Step 12: Flour the Work Surface
- Step 13: Turn Out the Dough
- Step 14: Shape the Dough Into a Round
- Step 15: Let the Shaped Dough Rest
- Step 16: Carefully Remove the Hot Dutch Oven
- Step 17: Transfer the Dough Into the Dutch Oven
- Step 18: Cover and Bake for 30 Minutes
- Step 19: Remove the Lid
- Step 20: Bake Uncovered for 15 Minutes
- Step 21: Remove the Bread From the Dutch Oven
- Step 22: Let the Bread Cool
- Pro Tips for the Best Garlic Herb Dutch Oven Bread
- Variations
- Serving Suggestions
- Storage Tips
- Freezing Instructions
- Make-Ahead Instructions
- Common Mistakes to Avoid
- Helpful Notes
- Frequently Asked Questions
- Final Thoughts
- Garlic Herb Dutch Oven Bread
What Is Garlic Herb Dutch Oven Bread?
Garlic Herb Dutch Oven Bread is a homemade rustic bread made with all-purpose flour, salt, instant yeast, warm water, minced garlic, fresh herbs, and olive oil. It is baked inside a hot Dutch oven, which helps create a crusty outside and a soft, airy interior.
The Dutch oven works almost like a small bread oven. When the dough is placed inside the hot pot and covered with the lid, steam builds around the loaf.
That steam helps the bread rise beautifully and keeps the inside tender while the crust begins to form. Once the lid is removed, the top browns and becomes crisp.
This bread is flavored with fresh garlic and herbs like rosemary and thyme. The result is savory, fragrant, and perfect for serving with soups, stews, salads, pasta, brunch spreads, or simply butter and olive oil.
It is the kind of bread that looks impressive on the table but is surprisingly approachable. The dough does most of the work while it rests for 12 to 18 hours.
Why This Garlic Herb Dutch Oven Bread Feels So Special
Some breads are meant to be sliced quietly beside a meal. This one has a way of becoming part of the memory of the meal itself.
The garlic gives it a deep, savory warmth. The herbs add a fresh, earthy aroma that makes the loaf feel homemade in the best possible way.
The crust is one of the best parts. It crackles slightly when you cut into it, giving way to a soft, airy center that is perfect for soaking up sauces, soups, and olive oil.
This is also a bread that invites sharing. A warm loaf on the table changes the feeling of dinner, making even a simple meal seem more generous.
It is cozy enough for a chilly evening and bright enough for a sunny brunch. It can sit beside a bowl of soup, a fresh salad, roasted vegetables, pasta, or a holiday meal.
And because it can be made ahead, it is practical as well as comforting. You can mix the dough the night before and bake it when you are ready for that fresh-bread moment.
Recipe Overview
Prep Time: 15 minutes
Cook Time: 45 minutes
Total Time: 60 minutes, plus rising time
Servings: 8 slices
This bread has a short hands-on prep time, but it needs a long rise. The dough rests for 12 to 18 hours at room temperature, which allows flavor and texture to develop naturally.
After the rise, the dough is shaped, rested briefly, and baked in a preheated Dutch oven. The first 30 minutes are baked with the lid on, and the final 15 minutes are baked uncovered for a golden crust.
Why You’ll Love Garlic Herb Dutch Oven Bread
You will love this recipe because it uses simple pantry ingredients. Flour, salt, yeast, warm water, garlic, herbs, and olive oil come together to create something that feels much more special than the ingredient list suggests.
It is beginner-friendly. The dough is mixed until shaggy, left to rise, shaped into a round, and baked in a Dutch oven.
It does not require advanced kneading or complicated shaping. The long rise helps develop the dough while you do very little.
The flavor is warm and savory. Fresh garlic, rosemary, thyme, and olive oil give the loaf a beautiful homemade aroma.
It is perfect for gatherings. A loaf of warm bread on the table makes family dinners, holiday meals, brunches, and cozy evenings feel more inviting.
It can also be made ahead. Since the dough rises for 12 to 18 hours, you can prepare it the night before and bake it the next day.
Ingredients You’ll Need
For the Bread Dough
3 cups all-purpose flour, preferably unbleached
1 ½ teaspoons salt, sea salt is ideal for flavor
½ teaspoon instant yeast
1 ½ cups warm water, around 110°F
4 cloves garlic, minced
2 tablespoons fresh herbs, rosemary and thyme, chopped
1 tablespoon olive oil, extra virgin olive oil recommended
Ingredient Notes
All-purpose flour creates a soft but sturdy loaf. For best results, use unbleached flour if you have it.
Salt is important for flavor. Sea salt is a lovely choice because it gives the bread a clean, balanced taste.
Instant yeast makes the recipe easy because it can be mixed directly into the dry ingredients. Active dry yeast can also be used, but it requires additional proofing.
Warm water helps activate the yeast. Around 110°F is ideal because it is warm enough to wake up the yeast without being too hot.
Fresh garlic adds bold, savory flavor. Mince it finely so it spreads evenly throughout the dough.
Fresh herbs like rosemary and thyme give the bread its fragrant, rustic character. You can also mix in parsley or basil depending on your preference.
Olive oil adds flavor and a little richness. Extra virgin olive oil gives the loaf a more noticeable taste.
Directions
Step 1: Gather and Measure the Ingredients
Start by gathering your flour, salt, yeast, warm water, garlic, herbs, and olive oil. Having everything ready makes the bread-making process much smoother.
Measure 3 cups of all-purpose flour into a large mixing bowl. If the flour has lumps, stir it lightly with a spoon or whisk to loosen it.
Measure 1 ½ teaspoons salt and ½ teaspoon instant yeast. Keep them ready beside the bowl.
Step 2: Prepare the Garlic and Herbs
Peel 4 cloves of garlic and mince them finely. Smaller pieces distribute better through the dough and give the bread a more even garlic flavor.
Chop 2 tablespoons of fresh herbs. Rosemary and thyme are a beautiful combination because they are earthy, aromatic, and warm.
If the herb pieces are too large, they can create uneven pockets in the dough. A fine chop helps them blend gently into every slice.
Step 3: Combine the Dry Ingredients
In the mixing bowl with the flour, add the salt and instant yeast. Stir gently to combine.
This step helps distribute the yeast and salt before the water is added. Even distribution leads to a more consistent dough.
Do not place all the salt directly on top of the yeast in one concentrated pile. Mixing them into the flour helps everything work together more smoothly.
Step 4: Add the Warm Water
Pour 1 ½ cups warm water into the dry mixture. The water should be around 110°F.
If you do not have a thermometer, the water should feel warm but not hot. Water that is too hot can harm the yeast.
The warm water begins hydrating the flour and waking up the yeast. This is what starts the dough’s slow transformation.
Step 5: Add the Garlic and Herbs
Add the minced garlic and chopped rosemary and thyme to the bowl. Try to sprinkle them across the dough rather than dropping them in one spot.
This makes it easier to mix them evenly. The goal is for the garlic and herbs to be present throughout the loaf.
As soon as they hit the warm dough mixture, you may begin to smell the garlic and herbs. That early aroma is a hint of what the baked loaf will become.
Step 6: Mix Until a Shaggy Dough Forms
Using a wooden spoon or your hands, mix everything together until a shaggy dough forms. The dough should look rough, sticky, and uneven at this point.
Do not worry if it does not look smooth. Dutch oven bread dough is often sticky and rustic before it rises.
Keep mixing only until there are no large pockets of dry flour. The dough should be cohesive but not perfectly kneaded.
Step 7: Check the Dough Texture
The dough should be slightly sticky but able to hold together. It should not be dry or crumbly.
If it looks too dry, give it a few more turns with the spoon to make sure all the flour is hydrated. Sometimes flour hides at the bottom of the bowl.
If the dough feels sticky, that is normal. A wetter dough helps create an airy bread with a rustic crumb.
Step 8: Cover the Dough
Cover the bowl with a clean kitchen towel or plastic wrap. This helps retain warmth and prevents the surface from drying out.
Make sure the bowl is large enough for the dough to rise. The dough should have room to expand.
The covering does not need to be airtight, but it should protect the dough from drafts and dryness.
Step 9: Let the Dough Rise for 12 to 18 Hours
Let the dough rise at room temperature for 12 to 18 hours. During this time, it should become bubbly and roughly double in size.
This long rise develops flavor and texture. It is one of the reasons the bread tastes more complex than the short ingredient list suggests.
If your kitchen is cool, the dough may rise more slowly. You can place it in a slightly warm oven that is turned off to encourage the rise.
Step 10: Look for Signs the Dough Is Ready
After the long rise, the dough should look puffy and bubbly. It may have a slightly loose, sticky texture.
You should see air pockets on the surface. This means the yeast has done its job.
If the dough has not risen much, it may need more time. A cool kitchen can slow the process, so patience is helpful.
Step 11: Preheat the Dutch Oven
About 30 minutes before baking, place your Dutch oven with its lid inside the oven. Preheat the oven to 450°F.
This step is very important. A hot Dutch oven helps create the crusty exterior that makes this bread so satisfying.
Let the Dutch oven heat fully. It needs time to become hot enough to create steam and support the loaf’s rise.
Step 12: Flour the Work Surface
Lightly flour a clean surface. You do not need a heavy amount of flour, just enough to keep the dough from sticking too much.
The dough will be sticky, so keep extra flour nearby. Use it lightly on your hands as well.
Too much flour can make the loaf dense. Use only what you need to handle the dough.
Step 13: Turn Out the Dough
Gently turn the risen dough out onto the floured surface. Use a spatula if needed to help release it from the bowl.
Try not to crush all the air out of the dough. Those bubbles help create the bread’s soft interior.
The dough may spread a little when it hits the counter. That is normal for this style of bread.
Step 14: Shape the Dough Into a Round
With floured hands, fold the dough over itself a few times to create tension. Shape it into a round ball.
You do not need to knead it heavily. The goal is simply to gather it into a loaf shape.
As you shape, tuck the edges underneath. This helps the top become smoother and more structured.
Step 15: Let the Shaped Dough Rest
Let the shaped dough rest on the counter for 30 minutes, covered with a towel. This short rest allows the dough to relax before baking.
During this time, the Dutch oven continues to heat. The dough also settles into its final shape.
Keep it covered so the surface does not dry out. A dry surface can affect the way the loaf expands in the oven.
Step 16: Carefully Remove the Hot Dutch Oven
Once the oven and Dutch oven are fully preheated, carefully remove the Dutch oven using oven mitts. It will be extremely hot.
Place it on a heat-safe surface. Remove the lid carefully and keep your hands protected.
This is the moment where safety matters most. The pot and lid hold a lot of heat.
Step 17: Transfer the Dough Into the Dutch Oven
Carefully place the shaped dough into the hot Dutch oven. If the dough sticks to the counter, use a spatula to help lift it.
Try to place it in the center of the pot. It does not need to look perfect.
The heat of the Dutch oven will immediately begin helping the dough rise and form its crust.
Step 18: Cover and Bake for 30 Minutes
Place the lid back on the Dutch oven and return it to the oven. Bake covered for 30 minutes.
The lid traps steam inside the pot. This steam helps the bread expand and keeps the inside soft.
During this stage, the loaf develops structure. The crust begins forming, but it will not fully brown until the lid comes off.
Step 19: Remove the Lid
After 30 minutes, carefully remove the lid from the Dutch oven. Use oven mitts and be mindful of the steam.
The bread should look risen and pale golden. The final uncovered bake will deepen the color.
Removing the lid allows moisture to escape and lets the crust become crisp.
Step 20: Bake Uncovered for 15 Minutes
Continue baking for an additional 15 minutes uncovered. The top should become golden brown.
The crust should look firm and beautifully colored. The garlic and herbs will smell warm and savory.
If you prefer a darker crust, you can let it bake a little longer, but keep a close eye on it.
Step 21: Remove the Bread From the Dutch Oven
Once baked, carefully remove the Dutch oven from the oven. Transfer the bread to a wire rack.
Use caution, as both the pot and bread will be very hot. A spatula or tongs can help lift the loaf.
The bottom should feel firm, and the crust should look rustic and crisp.
Step 22: Let the Bread Cool
Let the bread cool for at least 30 minutes before slicing. This may be the hardest part of the recipe because the smell is so tempting.
Cooling allows the interior texture to set. If you cut too early, the inside may seem gummy.
Once cooled slightly, slice with a serrated knife. Enjoy the crisp crust and soft, fragrant center.

Pro Tips for the Best Garlic Herb Dutch Oven Bread
Let the dough rise for the full 12 to 18 hours. This gives the bread better flavor and texture.
Use warm water, not hot water. Hot water can damage the yeast and affect the rise.
Preheat the Dutch oven fully. This is key for getting a crisp crust.
Do not slice the bread immediately after baking. Letting it cool helps the inside finish setting.
Use fresh herbs if possible. They give the bread a brighter, more aromatic flavor.
Use fresh yeast. If your yeast is expired, the dough may not rise well.
Variations
Cheesy Garlic Herb Dutch Oven Bread
Add grated Parmesan or cheddar to the dough for a cheesy twist. Parmesan adds a salty, nutty flavor, while cheddar gives a richer, more comforting taste.
You can also sprinkle a little cheese on top before baking. Just keep an eye on it during the uncovered baking stage so it does not overbrown.
Mediterranean Garlic Herb Bread
Add sun-dried tomatoes or olives to the dough for a Mediterranean flair. These ingredients bring bold flavor and a little extra texture.
Sun-dried tomatoes add sweetness and depth. Olives add a briny, savory note.
Seasonal Herb Bread
Use different herbs depending on the season. Sage can be lovely in the fall, while basil feels fresh in the summer.
Rosemary and thyme are classic choices, but this recipe is flexible. Choose herbs that match the meal you are serving.
Whole Wheat Dutch Oven Bread
Try using whole wheat flour for a heartier loaf. The texture may be denser, but the flavor will be deeper.
You can also use a combination of all-purpose and whole wheat flour. This gives you a balance between softness and hearty flavor.
Gluten-Free Version
Use a gluten-free flour blend if needed. The texture may differ from the original, but it can still create a satisfying loaf.
Make sure the gluten-free blend is suitable for bread baking. Different blends behave differently.
Seeded Garlic Herb Bread
Top the dough with sesame seeds or poppy seeds before baking. This adds texture and visual appeal.
Seeds give the crust a little extra crunch. They also make the loaf look beautiful on the table.
Serving Suggestions
Serve Garlic Herb Dutch Oven Bread warm with butter. The butter melts into the soft interior and makes every slice feel extra comforting.
A drizzle of olive oil is also wonderful. You can serve it with a small dish of olive oil for dipping.
This bread pairs beautifully with soups and stews. The crust holds up well, and the soft center soaks up broth.
It is also delicious with a fresh salad. The savory garlic and herb flavor balances crisp greens nicely.
For a simple appetizer, serve it with garlic herb cream cheese. This adds even more richness and flavor.
You can also enjoy it with your favorite jam for a sweet and savory contrast. It may sound simple, but it is surprisingly satisfying.
Storage Tips
Store leftover bread in an airtight container at room temperature for up to 3 days. Keep it well covered so it does not dry out.
The crust will soften as it sits. To bring back some crispness, reheat slices in the oven for a few minutes.
Avoid refrigerating the bread if possible. Refrigeration can make bread dry out faster.
Freezing Instructions
Garlic Herb Dutch Oven Bread freezes well. Let the bread cool completely before freezing.
Wrap it tightly in plastic wrap, then wrap again in aluminum foil. This helps protect it from freezer burn.
Freeze for up to 3 months. When ready to enjoy, thaw and reheat in the oven for a fresh-baked texture.
You can freeze the whole loaf or individual slices. Slices are convenient when you only want a piece or two.
Make-Ahead Instructions
You can make the dough ahead by mixing it and allowing it to rise overnight. This is one of the easiest ways to enjoy fresh bread the next day.
After the dough has risen for 12 to 18 hours, shape and bake as directed. This makes the recipe perfect for dinner, brunch, or a weekend meal.
You can also bake the loaf ahead and reheat it before serving. A few minutes in the oven will help refresh the crust.
Common Mistakes to Avoid
Not Allowing Enough Rising Time
The dough needs at least 12 hours to rise properly. If you rush this step, the bread may not develop the same flavor or airy texture.
A long rise is what makes this loaf special. Give the yeast time to work.
Skipping the Dutch Oven Preheat
The Dutch oven must be hot before the dough goes in. This helps create steam and a crisp crust.
If the Dutch oven is not preheated, the loaf may not rise as well in the oven. The crust may also be softer.
Using Cold Water
Warm water helps activate the yeast. Cold water slows the process too much.
Use water around 110°F. It should feel warm, not hot.
Slicing Too Soon
Fresh bread needs time to cool before slicing. Cutting too early can make the interior gummy.
Let it rest for at least 30 minutes. The texture will be much better.
Using Old Yeast
Expired yeast may not rise properly. Always check the expiration date before baking.
If your dough does not become bubbly or double in size, old yeast may be the reason.
Adding Too Much Flour While Shaping
The dough is supposed to be sticky. Adding too much flour while shaping can make the bread dense.
Use just enough flour to handle the dough. A light touch is best.
Helpful Notes
For a dairy-free serving option, use olive oil instead of butter. The bread itself is already made with olive oil.
You can add chopped nuts or seeds for extra crunch and nutrition. Keep the amount moderate so the dough can still rise well.
If you do not have fresh herbs, dried herbs can be used. Reduce the amount to 1 tablespoon because dried herbs are more concentrated.
Fresh garlic gives the strongest flavor, but the pieces should be minced finely. This helps prevent large garlic pockets.
Extra virgin olive oil gives the bread a richer taste. It is especially noticeable in a simple recipe like this.
If your kitchen is cool, let the dough rise in a slightly warm oven that has been turned off. This helps encourage yeast activity.
Frequently Asked Questions
Can Garlic Herb Dutch Oven Bread Be Frozen?
Yes, this bread can be frozen. Once it has cooled completely, wrap it tightly in plastic wrap and then in aluminum foil.
It will stay fresh in the freezer for up to 3 months. Thaw and reheat in the oven for the best texture.
Can Ingredients Be Substituted?
Yes, you can substitute all-purpose flour with whole wheat flour or a gluten-free flour blend. The texture may change depending on the flour used.
Fresh herbs can also be replaced with dried herbs. Use less dried herbs because they are more concentrated.
How Should I Store Leftovers?
Store leftover bread in an airtight container at room temperature for up to 3 days. Keep it covered to prevent it from drying out.
To refresh it, warm slices in the oven. This helps bring back some of the crusty texture.
Can This Bread Be Made Ahead?
Yes, the dough can be prepared ahead and left to rise overnight. This makes it easy to bake fresh bread the next day.
You can also bake the loaf ahead of time and reheat it before serving. The bread is best warm, especially with butter or olive oil.
Can I Use Active Dry Yeast Instead of Instant Yeast?
Yes, active dry yeast can be used, but it requires additional proofing. Instant yeast can be mixed directly into the dry ingredients.
If using active dry yeast, proof it according to your usual method before adding it to the dough. This helps ensure it activates properly.
What If My Dough Does Not Rise?
If the dough does not rise, the yeast may be old, the water may have been too hot or too cold, or the room may be too cool. Check that your yeast is fresh and your water is warm.
A cool kitchen can slow the rise. Give the dough more time or place it in a warmer spot.
Why Do I Need a Dutch Oven?
A Dutch oven traps steam while the bread bakes. This helps the loaf rise and creates a crisp crust.
The covered bake gives the inside time to become soft and airy. Removing the lid lets the outside brown beautifully.
Final Thoughts
Garlic Herb Dutch Oven Bread is one of those recipes that reminds you how comforting simple food can be. A bowl of flour, yeast, salt, warm water, garlic, herbs, and olive oil becomes a golden loaf that feels generous and homemade.
It is rustic in the best way. The crust is crisp, the inside is soft, and the flavor is warm with garlic and fresh herbs.
This bread is perfect for sharing. Set it on the table with butter, olive oil, soup, salad, stew, or a cozy dinner, and it immediately makes the meal feel more complete.
The long rise teaches patience, but the actual work is simple. Mix the dough, let it rest, shape it, bake it in a hot Dutch oven, and wait just long enough before slicing.
When the first slice is finally cut, the smell alone makes the effort worthwhile. Garlic Herb Dutch Oven Bread is more than a side dish; it is a warm invitation to gather, slow down, and enjoy something made with care.
Garlic Herb Dutch Oven Bread

This Garlic Herb Dutch Oven Bread is a simple homemade loaf with a crisp golden crust, a soft interior, and savory flavor from fresh garlic, rosemary, thyme, and olive oil. It is easy to prepare with basic ingredients and bakes beautifully in a Dutch oven.
Recipe Information
- Prep Time: 15 minutes
- Cook Time: 45 minutes
- Total Time: 1 hour
- Course: Bread
- Cuisine: American
- Servings: 8 slices
- Calories: 150 kcal
Equipment
- Dutch oven
- Mixing bowl
Ingredients
For the Bread
- 1 ½ cups warm water
Helps bring the dough together and activates the yeast. - 4 cloves garlic, minced
Adds bold savory flavor throughout the bread. - 3 cups all-purpose flour
Forms the base and structure of the loaf. - 1 tablespoon olive oil
Adds a little richness and helps improve the texture. - 2 tablespoons fresh herbs, rosemary and thyme, chopped
Gives the bread fresh, aromatic herb flavor. - ½ teaspoon instant yeast
Helps the dough rise slowly and develop flavor. - 1 ½ teaspoons salt
Enhances the flavor of the bread.
Instructions
- In a mixing bowl, combine the all-purpose flour, salt, and instant yeast.
- Add the warm water, minced garlic, and chopped fresh herbs.
- Mix until a sticky dough forms.
- Cover the bowl and let the dough rise at room temperature for 12 to 18 hours.
- Preheat the oven to 450°F (232°C) with the Dutch oven inside.
- Shape the risen dough into a ball.
- Let the shaped dough rest for 30 minutes.
- Carefully transfer the dough into the hot Dutch oven.
- Cover with the lid and bake for 30 minutes.
- Remove the lid and bake for another 15 minutes, or until the bread is golden brown.
- Let the bread cool before slicing.
Notes
- Use different fresh herbs if you prefer another flavor.
- Letting the dough rise slowly helps develop a better texture and deeper flavor.
- Cool the bread before slicing so the inside sets properly.

Fernando is the creator and writer behind the food blog Eating with your Hands. Living and working in cities like Paris, Barcelona, and Berlin, and being married to a Canadian foodie, has given Fernando a passion and interest in food and inspired him to run EWYH.