
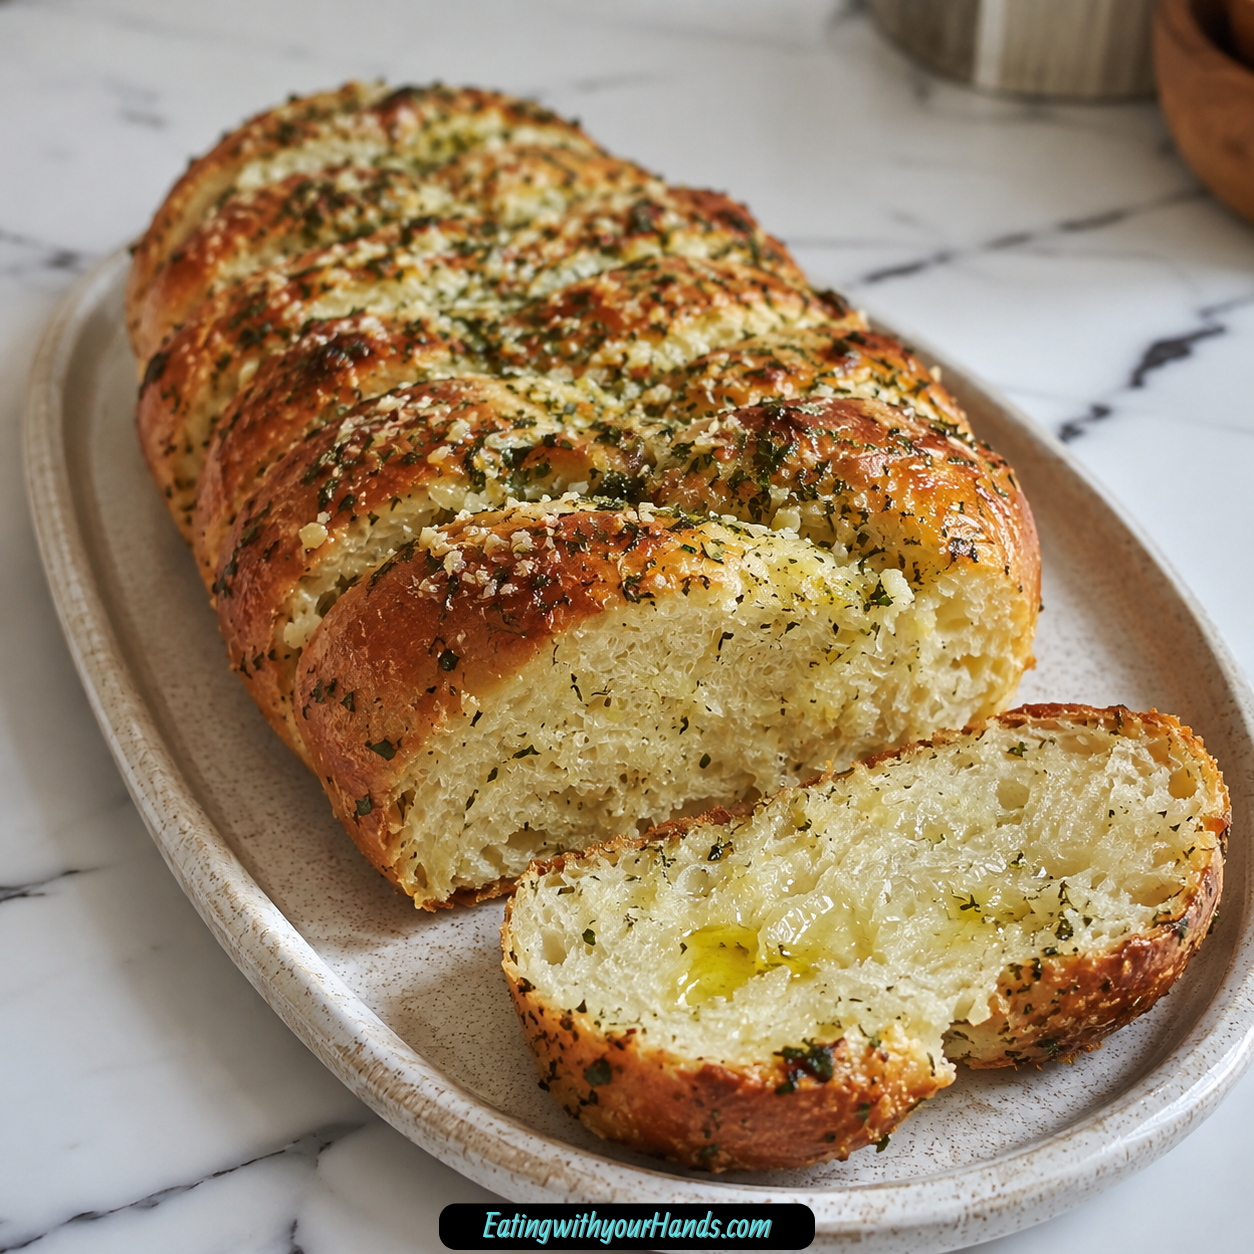
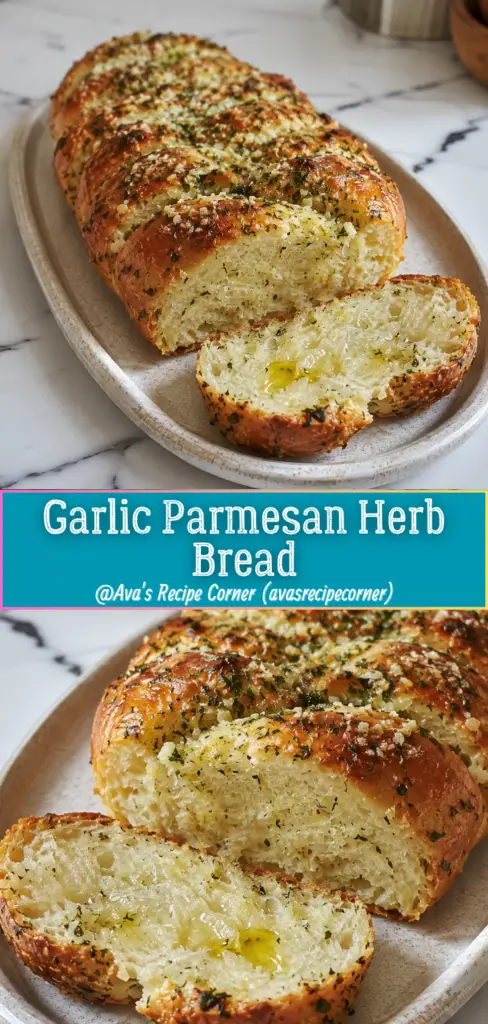
Garlic Parmesan Herb Bread is the kind of homemade bread that makes the kitchen feel instantly warmer. The moment garlic, butter, olive oil, herbs, and Parmesan begin to bake into the dough, the whole house fills with the kind of savory aroma that makes people wander in before the loaf is even out of the oven.
This bread is rustic, golden, fragrant, and wonderfully simple. It starts with a basic yeast dough made from warm water, sugar, instant dry yeast, salt, flour, basil, oregano, and rosemary, then finishes with a garlicky Parmesan topping enriched with butter and olive oil.
The result is a tender homemade loaf with a crisp, flavorful top and a soft interior made for tearing, slicing, dunking, and sharing. It tastes like the kind of bread that belongs beside pasta, soup, salad, or a cozy dinner table where nobody is in a hurry.
What makes it especially lovable is that it does not need a bread machine or complicated shaping. A bowl, your hands, a short knead, a one-hour rise, and a hot oven are enough to create a loaf that feels special.
Whether you serve it with spaghetti, dip it into tomato soup, toast leftovers for breakfast, turn stale pieces into croutons, or sneak a warm slice late at night, this bread delivers everything garlic bread should be: buttery, herby, cheesy, and deeply comforting.
Table of Contents
- Why You’ll Love Garlic Parmesan Herb Bread
- Recipe Details
- Ingredients
- Optional Variations and Swaps
- The Comfort of Garlic Parmesan Herb Bread
- Why the Yeast Step Matters
- Why Kneading Makes the Bread Better
- Directions
- Step 1: Warm the Water
- Step 2: Add Sugar and Yeast
- Step 3: Check for Foam
- Step 4: Add Salt, Flour, and Herbs
- Step 5: Mix the Dough
- Step 6: Prepare the Work Surface
- Step 7: Knead the Dough
- Step 8: Test the Dough Texture
- Step 9: Grease a Bowl
- Step 10: Cover and Let Rise
- Step 11: Prepare the Baking Sheet
- Step 12: Punch Down the Dough
- Step 13: Shape the Loaf
- Step 14: Prepare the Garlic
- Step 15: Make the Parmesan Garlic Topping
- Step 16: Spread the Topping
- Step 17: Drizzle With Olive Oil
- Step 18: Preheat the Oven
- Step 19: Bake the Bread
- Step 20: Check for Doneness
- Step 21: Cool Before Slicing
- Serving Tips
- Storage
- Reheating
- Freezing
- Stale Bread Tip
- Helpful Notes for Best Results
- Variations
- Troubleshooting
- Frequently Asked Questions
- Why This Bread Is Perfect With Dinner
- Why This Recipe Works So Well
- Final Thoughts
- Garlic Parmesan Herb Bread
Why You’ll Love Garlic Parmesan Herb Bread
This bread smells incredible while it bakes. Garlic, Parmesan, rosemary, basil, oregano, butter, and olive oil create a warm, savory aroma that fills the kitchen.
It does not require a bread machine. The dough is mixed in a bowl, kneaded by hand for about 5 minutes, and shaped into a rustic loaf.
It uses simple pantry staples. Warm water, sugar, yeast, salt, flour, dried herbs, garlic, Parmesan, butter, and olive oil come together beautifully.
It is versatile at the table. Serve it with pasta, soups, salads, breakfast ricotta, or turn leftovers into croutons or grilled cheese.
The topping is full of flavor. Chopped garlic, grated Parmesan, butter, and olive oil bake into the top for a crisp, golden finish.
It is easy to customize. You can use fresh herbs, add cheese inside, make it spicy, use everything bagel seasoning, or try a vegan version.
Recipe Details
- Recipe name: Garlic Parmesan Herb Bread
- Dough style: Rustic homemade yeast bread
- Water temperature: 100°F to 110°F
- Yeast proofing time: 5 minutes for instant dry yeast
- Kneading time: About 5 minutes
- First rise time: 1 hour
- Oven temperature: 375°F (190°C)
- Baking time: 25 to 30 minutes
- Cooling time before slicing: At least 10 minutes
- Room temperature storage: 2 to 3 days
- Reheating temperature: 350°F
- Reheating time: 10 minutes wrapped in foil
- Freezer tip: Slice before freezing
- Doneness cue: Crispy golden top and hollow sound when the bottom is tapped
Ingredients
Dough Ingredients
- 1 cup warm water (100°F to 110°F)
- 1 tablespoon granulated sugar
- 1 tablespoon instant dry yeast
- 1 teaspoon salt
- 2 to 2 ½ cups all-purpose flour
Herb and Topping Ingredients
- 6 cloves garlic, finely chopped
- ⅓ cup grated Parmesan cheese
- 1 teaspoon dried basil
- 1 teaspoon dried oregano
- 2 teaspoons dried rosemary
- 1 tablespoon butter
- 2 tablespoons olive oil
Optional Variations and Swaps
- Honey instead of granulated sugar
- Kosher salt, with a pinch extra
- 1 tablespoon fresh rosemary instead of dried rosemary
- 2 tablespoons chopped fresh basil, oregano, and rosemary
- Extra Parmesan
- Mozzarella
- 1:1 gluten-free flour blend
- 1 teaspoon xanthan gum
- ½ teaspoon red pepper flakes
- Everything bagel seasoning
- Ricotta for serving
- Garlic butter for reheating
- Olive oil in place of butter for vegan version
- Nutritional yeast in place of Parmesan for vegan version
- 1 ½ teaspoons garlic powder instead of fresh garlic
- 1 tablespoon Italian seasoning instead of individual dried herbs
- Olive oil, salt, and herbs for croutons
The Comfort of Garlic Parmesan Herb Bread
There is something deeply satisfying about baking bread at home. It asks for a little patience, but not perfection, and it rewards you with a loaf that feels warm, fragrant, and personal.
This Garlic Parmesan Herb Bread is especially comforting because the flavors are familiar. Garlic, herbs, Parmesan, butter, and olive oil all bring savory warmth that tastes good with almost anything.
The dough itself is simple and soft. It is not a complicated artisan loaf, but it still gives you that homemade bread satisfaction.
The herbs are mixed into the dough, which means their flavor runs through the entire loaf. Basil and oregano bring classic savory notes, while rosemary gives the bread a stronger herbal aroma.
The garlic topping is bold but balanced. Six cloves may sound like a lot, but the garlic mellows as it bakes into the butter, Parmesan, and olive oil.
The finished loaf feels rustic and generous. It is the kind of bread you can slice neatly or tear apart at the table.
Why the Yeast Step Matters
The yeast step sets the entire loaf in motion. Warm water, sugar, and yeast are stirred together and left for 5 minutes so the yeast can wake up.
The water should be 100°F to 110°F. It should feel warm, not hot.
If the water is too hot, it can damage the yeast. If it is too cool, the yeast may not activate well.
The sugar gives the yeast something to feed on. It is not there to make the bread sweet.
After 5 minutes, the mixture should look foamy. That foam is a sign that the yeast is active.
If nothing happens, the yeast may be expired or the water temperature may have been wrong. It is better to start over than bake a flat loaf.
Why Kneading Makes the Bread Better
Kneading helps turn the shaggy dough into something smooth and elastic. This recipe only needs about 5 minutes of kneading.
At first, the dough may look messy and uneven. That is completely normal.
As you knead, it becomes smoother and more flexible. It should eventually bounce back when gently poked.
If the dough feels sticky, flour your hands lightly instead of dumping in too much flour. Too much flour can make the bread heavy.
Wet hands can also help with sticky dough. This keeps the texture lighter.
The goal is a dough that is soft, elastic, and workable. It does not need to look perfect.
Directions
Step 1: Warm the Water
Measure 1 cup warm water. The temperature should be between 100°F and 110°F.
The water should feel warm like a baby bottle, not hot. Hot water can kill the yeast.
If you do not have a thermometer, use water that feels gently warm to the touch. Avoid steaming or very hot water.
Step 2: Add Sugar and Yeast
In a large mixing bowl, stir together the warm water, 1 tablespoon granulated sugar, and 1 tablespoon instant dry yeast. Mix until the sugar begins to dissolve.
The sugar helps wake up the yeast. It supports the rise but does not make the bread taste sweet.
Let the bowl sit undisturbed for 5 minutes. This gives the yeast time to foam.
Step 3: Check for Foam
After 5 minutes, look at the surface of the mixture. It should be foamy, like the top of a latte.
Foam means the yeast is active and ready. If the mixture stays flat, the yeast may be old.
If nothing happens, start again with fresh yeast and properly warm water. This prevents disappointment later.
Step 4: Add Salt, Flour, and Herbs
Add 1 teaspoon salt, 2 cups all-purpose flour, 1 teaspoon dried basil, 1 teaspoon dried oregano, and 2 teaspoons dried rosemary to the yeast mixture.
Rub the dried basil and oregano between your fingers before adding if desired. This helps wake up their aroma.
Crush the dried rosemary lightly so the texture is not too sharp. This makes the herbs more pleasant in the finished bread.
Step 5: Mix the Dough
Stir with a wooden spoon until the dough starts coming together. It will look shaggy and rough.
If the dough sticks to the bowl like glue, add more flour 1 tablespoon at a time. Do not add too much at once.
The dough should hold together but still feel soft. It is better to keep it slightly tacky than too dry.
Step 6: Prepare the Work Surface
Lightly flour a clean surface. Turn the dough out onto the floured surface.
Keep a little extra flour nearby. You may need it for your hands or the counter.
Avoid heavily flouring the surface. Too much flour can make the loaf dense.
Step 7: Knead the Dough
Knead the dough for about 5 minutes. Push it away with the heel of your hand, fold it back, and turn it as you work.
The dough should become smoother and more elastic. It should feel alive and flexible under your hands.
If it sticks too much, lightly flour your hands. Try not to bury the dough in extra flour.
Step 8: Test the Dough Texture
Gently poke the dough after kneading. It should bounce back slightly.
That bounce is a sign that the dough has developed enough structure. It does not need to be perfectly smooth.
If it still feels very loose, knead for another minute. If it feels dry and stiff, you may have added too much flour.
Step 9: Grease a Bowl
Lightly grease a clean bowl. Place the kneaded dough into the bowl.
Turn the dough once so the surface gets lightly coated. This helps prevent drying.
A greased bowl makes the dough easier to remove after rising. It also protects the texture.
Step 10: Cover and Let Rise
Cover the bowl with a damp towel. Let the dough rise for 1 hour.
Choose a warm, comfortable spot if possible. A sunny area can help the dough rise faster.
The dough should roughly double in size. Avoid uncovering it repeatedly while it rises.
Step 11: Prepare the Baking Sheet
Line a baking sheet with parchment paper. This keeps the bread from sticking and makes cleanup easy.
Set the prepared sheet near your work area. You will transfer the shaped loaf onto it.
Parchment is helpful because the topping can melt and crisp around the loaf. It protects the pan.
Step 12: Punch Down the Dough
After the rise, gently punch down the dough. This releases excess air.
The dough will deflate, and that is normal. It is ready to shape.
Turn it out onto a lightly floured surface. Handle it gently but confidently.
Step 13: Shape the Loaf
Shape the dough into a rustic oval or round loaf. It does not need to look perfect.
If the dough resists shaping or keeps springing back, let it rest for 10 minutes. Resting relaxes the gluten.
Place the shaped loaf onto the parchment-lined baking sheet. Adjust the shape as needed.
Step 14: Prepare the Garlic
Finely chop 6 cloves garlic. Smash the cloves first with the flat side of a knife if you want the peels to slip off more easily.
Small garlic pieces are best. They spread more evenly across the loaf.
Avoid leaving large chunks. Large pieces can burn or taste too sharp.
Step 15: Make the Parmesan Garlic Topping
In a small bowl, mix the chopped garlic, ⅓ cup grated Parmesan cheese, and 1 tablespoon butter. Stir until it forms a thick, flavorful mixture.
Use freshly grated Parmesan if possible. It melts better than the shelf-stable shaker style.
The butter adds richness and helps the topping spread. It also encourages browning.
Step 16: Spread the Topping
Spread the garlic Parmesan butter mixture over the shaped dough. Cover the top generously.
Try to get the mixture into the little uneven spots on the loaf. Those places will bake into flavorful bites.
Do not worry if the topping looks rustic. This bread is meant to feel homemade.
Step 17: Drizzle With Olive Oil
Drizzle 2 tablespoons olive oil over the topped loaf. The oil helps create crispness and richness.
It also helps the garlic and Parmesan bake into the surface. The top should look glossy and well coated.
Do not skip the olive oil. Butter brings flavor, while olive oil helps the topping crisp.
Step 18: Preheat the Oven
Preheat the oven to 375°F (190°C). Let it fully heat before baking.
The bread needs steady heat to rise and brown properly. A fully preheated oven gives the best crust.
Place the baking sheet near the oven so the shaped loaf is ready. Once the oven is hot, bake right away.
Step 19: Bake the Bread
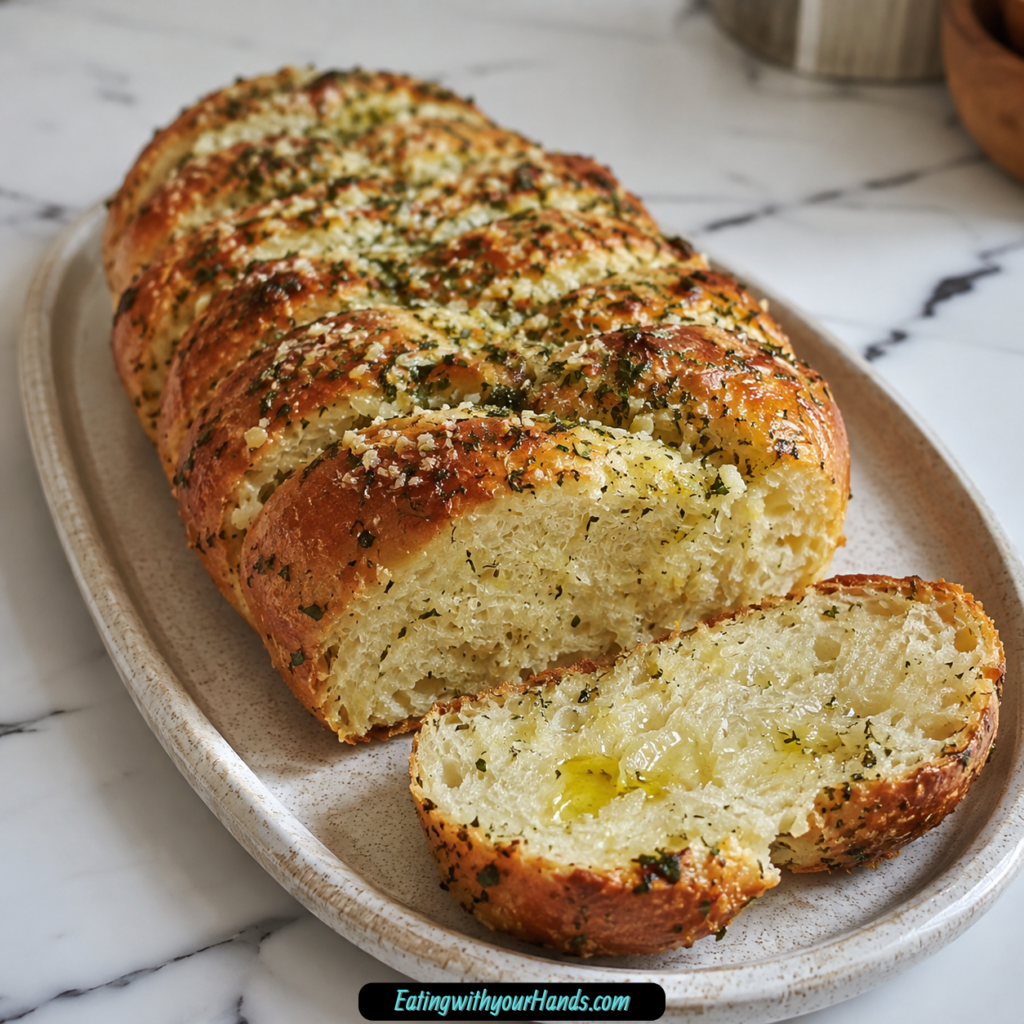
Bake the loaf for 25 to 30 minutes. The top should become crispy and golden.
The garlic should smell fragrant, the Parmesan should look lightly melted and browned, and the loaf should feel set.
Check the bread near the end of the baking time. Garlic and cheese can darken quickly.
Step 20: Check for Doneness
Tap the bottom of the loaf carefully. It should sound hollow when done.
The top should be golden and crisp. The bread should feel light for its size.
If it needs more time, bake a few minutes longer. Watch the topping so it does not over-brown.
Step 21: Cool Before Slicing
Let the bread cool for at least 10 minutes before slicing. This step is important.
Cutting too soon can make the crumb gummy. The bread needs a little time to settle.
The smell will make waiting difficult, but the texture will be better. After 10 minutes, slice or tear and serve.
Serving Tips
Serve Garlic Parmesan Herb Bread warm, when the Parmesan is still soft and the garlic topping is fragrant. This is when the bread tastes its best.
It is wonderful with pasta. The bread can soak up sauce and add a buttery garlic bite to the meal.
It is also delicious with soup. Tear off pieces and dunk them into tomato soup, creamy soup, or a hearty stew.
For breakfast, toast a slice and spread it with ricotta. It feels simple but slightly fancy.
It also works as a side for salads, roasted vegetables, or a casual dinner board. The flavor is bold enough to stand on its own.
Storage
Let the bread cool completely before storing. Warm bread can trap steam and become soggy.
Place it in an airtight container or ziplock bag. Store at room temperature for 2 to 3 days.
The topping may soften slightly as it sits. Reheating helps bring back some of the crispness.
Keep the bread sealed so it does not dry out. Slice only what you need if possible.
Reheating
Wrap slices in foil and warm them at 350°F for 10 minutes. This gently heats the bread without drying it out.
You can also toast slices for a quick crisp-up. This is especially good for leftovers.
For extra indulgence, brush the bread with a little extra garlic butter before reheating. It brings back the fresh-baked flavor.
Do not overheat the bread. Warm it just until fragrant and slightly crisp.
Freezing
Slice the bread before freezing. This makes it easy to thaw or toast only what you need.
Wrap individual slices in parchment, then place them in a freezer bag. This helps prevent sticking.
Toast slices straight from frozen when a garlic bread craving hits. The texture comes back well with heat.
Freezing is a great way to save leftovers. It also makes future soups and pasta nights easier.
Stale Bread Tip
If the bread becomes stale, turn it into croutons. Cut it into cubes.
Toss the cubes with olive oil, salt, and herbs. Bake at 375°F until golden.
These croutons are excellent on salads or soups. The garlic Parmesan flavor makes them especially good.
Stale bread does not need to be wasted. It becomes something useful and delicious.
Helpful Notes for Best Results
Use yeast that is not expired. Old yeast may not foam and can lead to flat bread.
If the yeast mixture does not foam, start over. It is better to lose 5 minutes than an entire loaf.
If the dough is sticky, wet your hands instead of adding too much flour. This keeps the bread lighter.
Cool the bread for at least 10 minutes before slicing. This prevents a gummy crumb.
Freshly grated Parmesan melts better than the shaker-can kind. It gives the topping better texture.
Crush dried rosemary lightly before adding it. This avoids a pine-needle texture.
Variations
Fresh Herb Garlic Bread
Swap the dried herbs for fresh herbs. Use 2 tablespoons chopped fresh basil, oregano, and rosemary.
Fresh herbs make the bread taste brighter. They also give the loaf a fresh, garden-style aroma.
Chop the herbs finely so they distribute well. Add them to the dough as directed.
Fresh Rosemary Version
Use 1 tablespoon fresh rosemary instead of 2 teaspoons dried rosemary. Chop it well.
Fresh rosemary has a softer texture than dried. It still brings strong herbal flavor.
This version is especially fragrant. It works beautifully with Parmesan and garlic.
Cheese-Stuffed Herb Bread
Before shaping the loaf, roll out the dough. Sprinkle with extra Parmesan or mozzarella.
Roll it up like a jelly roll, then shape it into a loaf. This creates hidden pockets of melted cheese.
Bake as directed with the garlic Parmesan topping. Let it cool before slicing so the cheese settles.
Spicy Garlic Parmesan Bread
Add ½ teaspoon red pepper flakes to the garlic butter topping. This gives the bread a gentle kick.
The heat works well with garlic and Parmesan. It makes the loaf feel a little bolder.
Use less if you prefer mild bread. The topping should still taste savory and balanced.
Everything Bagel Garlic Bread
Sprinkle everything bagel seasoning over the top before baking. It adds crunch, salt, and extra flavor.
This variation is great if you like bold toppings. It makes the bread even more snackable.
Be mindful of saltiness. Parmesan and seasoning both bring salt.
Gluten-Free Garlic Parmesan Herb Bread
Use a 1:1 gluten-free flour blend. Add 1 teaspoon xanthan gum for structure.
The dough texture may be different from wheat dough. Handle it gently and follow the same rise and bake cues.
Bob’s Red Mill is mentioned as a preferred gluten-free blend. Use a blend meant for baking.
Vegan Garlic Herb Bread
Swap the butter for olive oil. Use nutritional yeast instead of Parmesan.
The flavor will be different but still savory and satisfying. Garlic, herbs, and olive oil carry the bread well.
Use the same dough process. Check that the rest of the ingredients fit your needs.
Garlic Powder Version
If you only have garlic powder, use 1 ½ teaspoons instead of fresh garlic. Mix it into the dough for even flavor.
The flavor will be smoother and less punchy than fresh garlic. It still works well.
This option is convenient when fresh garlic is not available. The bread will still smell wonderful.
Italian Seasoning Version
If you do not have the individual herbs, use 1 tablespoon Italian seasoning. This is a simple shortcut.
Italian seasoning gives the dough a blended herb flavor. It works well with garlic and Parmesan.
Use it in place of basil, oregano, and rosemary. The bread remains savory and fragrant.
Troubleshooting
Why Did My Yeast Not Foam?
The yeast may be expired, or the water may have been too hot or too cold. Use water between 100°F and 110°F.
Sugar helps activate the yeast, so make sure it is included. Wait the full 5 minutes before judging.
If nothing happens, start again. Bread needs active yeast to rise properly.
Why Is My Dough Too Sticky?
Sticky dough may need a little more flour, but add it carefully. Add only 1 tablespoon at a time if needed.
You can also wet your hands while kneading. This keeps the dough workable without making it heavy.
Humidity can affect flour needs. The recipe allows 2 to 2 ½ cups flour for this reason.
Why Is My Bread Dense?
Too much flour can make bread dense. Add flour gradually and stop when the dough is workable.
Old yeast can also prevent proper rise. Make sure the yeast foams before adding flour.
The dough also needs enough rise time. Let it rest for 1 hour until doubled.
Why Is the Crumb Gummy?
The bread may have been sliced too soon. Let it cool for at least 10 minutes before cutting.
It may also need a few more minutes in the oven. The bottom should sound hollow when tapped.
A gummy crumb can happen when steam has not settled. Cooling helps finish the texture.
Why Did the Garlic Burn?
The garlic may have been chopped too large, or the bread may have baked too long. Finely chopped garlic bakes more evenly.
Keep an eye on the loaf near the end of baking. Garlic can darken quickly.
If your oven runs hot, check earlier. The bread should be golden, not scorched.
Why Did My Topping Slide Off?
The dough surface may have been too loose or oily before topping. Spread the garlic Parmesan mixture evenly and gently.
Do not overload one area with topping. Spread it across the loaf.
A rustic topping is fine. Some melted cheese and oil around the edges can become crispy and delicious.
Frequently Asked Questions
Can I Use Active Dry Yeast Instead of Instant?
Yes, active dry yeast can be used. Activate it in the warm water and sugar first.
Let it sit for 10 minutes until foamy. Instant yeast is faster, but both can work.
What If I Only Have Garlic Powder?
Use 1 ½ teaspoons garlic powder instead of fresh garlic. Mix it into the dough for even flavor.
The bread will still taste garlicky. Fresh garlic gives a stronger topping flavor, but powder is a useful substitute.
Can I Freeze the Unbaked Dough?
Yes, after the first rise, shape the loaf and wrap it tightly in plastic. Freeze it.
Thaw overnight in the refrigerator before topping and baking. Add the garlic Parmesan topping after thawing.
Can I Use Italian Seasoning?
Yes, use 1 tablespoon Italian seasoning instead of the dried basil, oregano, and rosemary. It is an easy shortcut.
The flavor will still be savory and herb-filled. It works well with the garlic Parmesan topping.
Can I Make This Bread Vegan?
Yes, use olive oil instead of butter and nutritional yeast instead of Parmesan. The flavor will be different but still delicious.
Keep the garlic and herbs. They provide most of the savory character.
How Do I Know When the Bread Is Done?
The top should be crispy and golden, and the bottom should sound hollow when tapped. Bake for 25 to 30 minutes at 375°F (190°C).
If the top is browning but the bread is not done, watch carefully and continue briefly. The loaf should feel baked through.
Can I Use Fresh Herbs?
Yes, use 2 tablespoons chopped fresh basil, oregano, and rosemary. Fresh herbs give a brighter flavor.
For rosemary alone, use 1 tablespoon fresh rosemary. Chop it finely before adding.
How Should I Reheat Leftovers?
Wrap slices in foil and warm at 350°F for 10 minutes. You can also toast slices.
For extra flavor, brush with a little garlic butter before reheating. This makes leftovers taste fresh again.
Why This Bread Is Perfect With Dinner
Garlic Parmesan Herb Bread belongs beside comfort meals. It is flavorful enough to make simple dinners feel complete.
With pasta, it catches sauce beautifully. With soup, it becomes the perfect dunking bread.
With salad, it adds a warm savory side. With grilled cheese, it turns leftovers into something bold and rich.
It can also be served as an appetizer. Tear pieces from the loaf and serve them warm.
Because the loaf is rustic, it does not need to be perfect. Its charm is in the golden topping, soft crumb, and homemade look.
Why This Recipe Works So Well
This recipe works because the dough is simple and the topping is bold. The bread itself is soft, lightly herbed, and easy to shape.
The yeast gives lift, while the warm water and sugar activate it. Flour and salt create the dough structure.
Basil, oregano, and rosemary flavor the dough from the inside. Garlic, Parmesan, butter, and olive oil flavor the outside.
Butter adds richness to the topping, and olive oil helps it crisp. Parmesan melts and browns over the surface.
The bread bakes at 375°F (190°C), hot enough to brown the top while giving the inside time to cook. The hollow tap test confirms doneness.
Final Thoughts
Garlic Parmesan Herb Bread is a warm, savory homemade loaf made with simple ingredients and big flavor. With warm water, sugar, instant dry yeast, salt, flour, basil, oregano, rosemary, garlic, Parmesan, butter, and olive oil, it bakes into a golden loaf that smells incredible and tastes comforting.
The process is approachable. Wake up the yeast for 5 minutes, mix the dough, knead for about 5 minutes, let it rise for 1 hour, shape it into a rustic loaf, spread on the garlic Parmesan topping, drizzle with olive oil, and bake at 375°F (190°C) for 25 to 30 minutes.
Let the bread cool for at least 10 minutes before slicing so the crumb stays soft instead of gummy. Then serve it warm with pasta, soup, salad, ricotta, or anything that needs a buttery, garlicky side.
Store leftovers for 2 to 3 days, reheat slices at 350°F for 10 minutes, freeze slices for future cravings, or turn stale bread into croutons. However you serve it, this garlic Parmesan herb bread brings warmth, fragrance, and golden homemade comfort to the table.
Garlic Parmesan Herb Bread
This garlic Parmesan herb bread is soft inside, golden on the outside, and full of savory Italian-inspired flavor. Basil, oregano, rosemary, fresh garlic, Parmesan, butter, and olive oil give the loaf a warm, aromatic finish. It is a flavorful bread for serving with pasta, soup, salad, or any cozy dinner that needs a homemade side with plenty of garlic and herbs.
Recipe Details
- Prep Time: 15 minutes
- Cook Time: 30 minutes
- Total Time: 45 minutes
- Course: Bread
- Cuisine: Italian
- Servings: 8 slices
Equipment
- Mixing bowl
- Baking sheet
Ingredients
Herb and Topping Ingredients
- 6 cloves garlic finely chopped
- ⅓ cup parmesan cheese grated
- 1 tablespoon butter split for topping
- 2 tablespoons olive oil
- 1 teaspoon dried basil
- 1 teaspoon dried oregano
- 2 teaspoons dried rosemary
Dough Ingredients
- 1 cup warm water about 100-110°F
- 1 tablespoon granulated sugar
- 1 tablespoon instant dry yeast
- 1 teaspoon salt
- 2 to 2½ cups all-purpose flour
Instructions
Step 1: Activate the Yeast
In a mixing bowl, combine the warm water, granulated sugar, and instant dry yeast.
Let the mixture sit for 5 minutes, or until foamy.
Step 2: Mix the Dough
Add the salt, 2 cups of all-purpose flour, dried basil, dried oregano, and dried rosemary.
Mix until a dough forms.
Step 3: Knead Until Smooth
Turn the dough out onto a floured surface.
Knead for 5 minutes, adding more flour if needed, until the dough becomes smooth and elastic.
Step 4: Let the Dough Rise
Place the dough in a greased bowl, cover it, and let it rise for 1 hour, or until doubled in size.
Step 5: Shape the Loaf
Preheat the oven to 375°F (190°C).
Punch down the risen dough, then shape it into a loaf.
Step 6: Add the Garlic Parmesan Topping
Place the shaped loaf on a baking sheet.
Mix the finely chopped garlic, grated parmesan cheese, and butter, then spread the mixture over the dough.
Step 7: Drizzle and Bake
Drizzle the loaf with olive oil.
Bake for 25-30 minutes, or until golden brown.
Notes
Let the bread cool slightly before slicing for the best texture.
Serving Suggestions
- Serve with pasta and marinara sauce.
- Pair with tomato soup or creamy vegetable soup.
- Use as a side for lasagna or baked ziti.
- Serve warm with a simple green salad.
- Slice and enjoy with extra butter or olive oil.
Storage
How to Store
Let the bread cool completely, then wrap it well or place it in an airtight container.
How to Reheat
Warm slices gently in the oven until heated through. This helps bring back some of the fresh-baked texture.
How to Freeze
Freeze the cooled bread in a freezer-safe container or wrap. Thaw before reheating and serving.
Best Texture Tip
Let the loaf cool slightly before slicing so the inside sets properly while still staying soft and warm.

Fernando is the creator and writer behind the food blog Eating with your Hands. Living and working in cities like Paris, Barcelona, and Berlin, and being married to a Canadian foodie, has given Fernando a passion and interest in food and inspired him to run EWYH.