
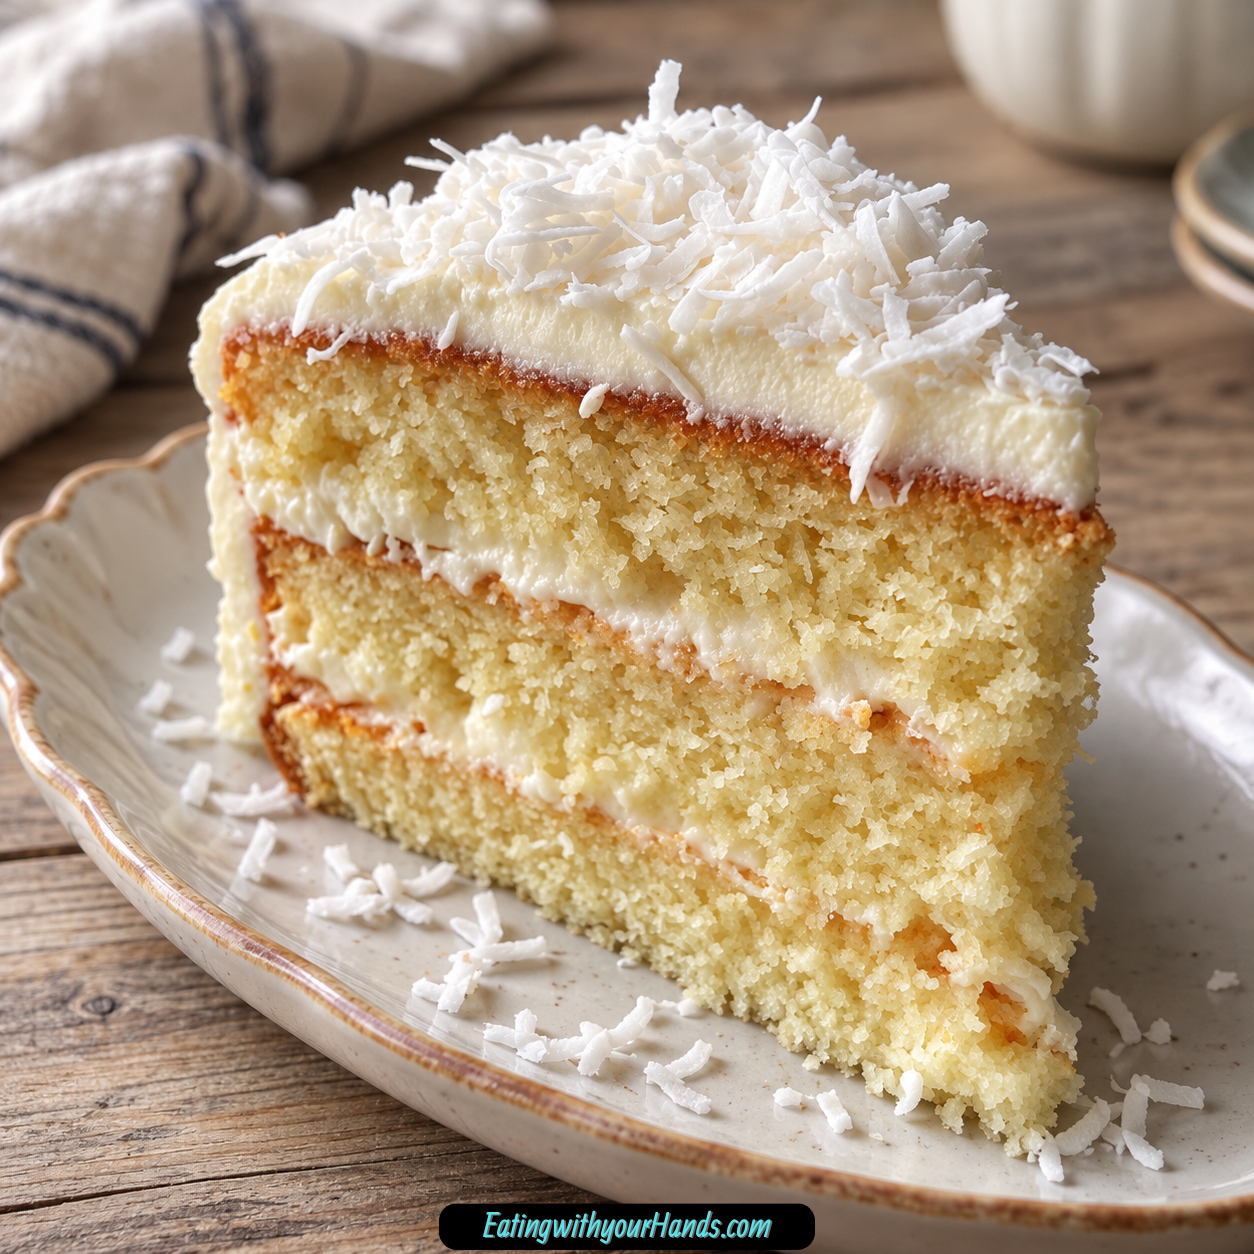
Some cakes are made for quiet afternoons, while others seem to bring an entire celebration into the room the moment they appear. Heavenly Coconut Cloud Cake belongs to that second category, with its tender coconut-filled crumb, billowy cream cheese frosting, and delicate tropical fragrance that makes an ordinary gathering feel a little more special.
I have always associated coconut desserts with warm afternoons, family vacations, and the kind of sweetness that seems to linger long after the last bite. The first time I baked this cake, the scent of vanilla and toasted coconut filled my kitchen and brought back memories of childhood trips to Hawaii.
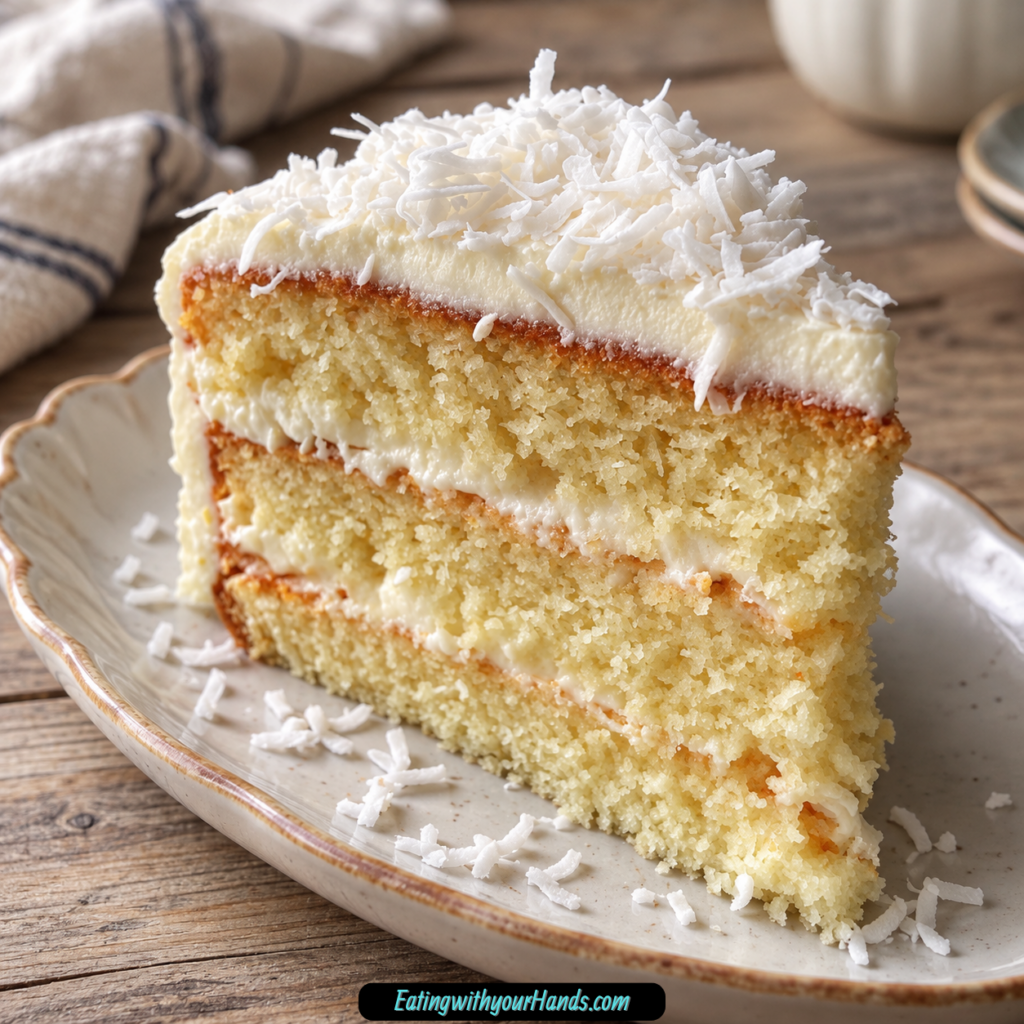
What I love most about this cake is the contrast between its soft interior and its luxurious frosting. The cake itself is light and tender, while the cream cheese and whipped cream topping creates a smooth, airy finish that almost melts against the coconut crumb.
There is something particularly comforting about a dessert that tastes rich without feeling overly heavy. Full-fat coconut milk contributes moisture, sweetened shredded coconut adds texture, and the combination of cream cheese and whipped cream brings everything together.
The coconut flavor is layered rather than overwhelming. Coconut milk and shredded coconut form the foundation, while coconut extract in the frosting gives the finished dessert its unmistakable tropical character.
I still remember my grandmother’s belief that the best cakes should make people stop talking for a moment and enjoy what they are tasting. This is exactly the kind of dessert that makes me understand what she meant.
Whether you’re preparing a birthday cake, bringing dessert to a potluck, or simply celebrating the arrival of a peaceful weekend, Heavenly Coconut Cloud Cake feels right at home. It is beautiful enough for a special occasion but approachable enough to make whenever the craving for coconut strikes.
Table of Contents
- Why You’ll Love This Heavenly Coconut Cloud Cake
- What Makes Coconut Cloud Cake Special?
- Recipe Overview
- Ingredients for Heavenly Coconut Cloud Cake
- Understanding the Cake Ingredients
- The Secret to the Fluffy Cream Cheese Frosting
- Equipment You’ll Need
- How to Make Heavenly Coconut Cloud Cake
- Step 1: Prepare the Oven and Cake Pan
- Step 2: Combine the Dry Ingredients
- Step 3: Cream the Butter and Sugar
- Step 4: Add the Eggs One at a Time
- Step 5: Prepare the Coconut Milk
- Step 6: Alternate the Flour Mixture and Coconut Milk
- Step 7: Fold in the Shredded Coconut
- Step 8: Transfer the Batter to the Pan
- Step 9: Bake the Coconut Cake
- Step 10: Check for a Tender, Fully Baked Center
- Step 11: Cool in the Pan
- Step 12: Transfer to a Wire Rack
- Step 13: Beat the Cream Cheese
- Step 14: Whip the Heavy Cream
- Step 15: Fold the Frosting Components Together
- Step 16: Frost the Completely Cooled Cake
- Step 17: Finish With Coconut Garnish
- Step 18: Chill Before Slicing
- Tips for the Perfect Coconut Cloud Cake
- Delicious Coconut Cloud Cake Variations
- How to Serve Heavenly Coconut Cloud Cake
- How to Store Coconut Cloud Cake
- Can You Freeze Coconut Cloud Cake?
- Making Coconut Cloud Cake Ahead of Time
- Troubleshooting Common Coconut Cloud Cake Problems
- Frequently Asked Questions
- Can I Substitute Coconut Flour for All-Purpose Flour?
- How Long Will the Frosted Cake Keep?
- Can I Turn This Recipe Into Cupcakes?
- Why Did My Cream Cheese Frosting Turn Watery?
- Can I Skip the Coconut Extract?
- Do I Need to Toast the Shredded Coconut?
- Can I Make a Dairy-Free Version?
- Can I Add Pineapple?
- How Should I Slice the Cake Neatly?
- Nutritional Information
- What Makes This Cake Worth Baking Again?
- Final Thoughts
- Heavenly Coconut Cloud Cake
- Recipe Details
- Ingredients
- Instructions
- Step 1: Prepare the Oven and Cake Pan
- Step 2: Combine the Flour and Coconut Milk
- Step 3: Add the Butter and Coconut
- Step 4: Transfer the Batter
- Step 5: Bake the Coconut Cake
- Step 6: Cool Completely
- Step 7: Whip the Cream Cheese Frosting
- Step 8: Add the Coconut and Vanilla Extracts
- Step 9: Frost the Cooled Cake
- Step 10: Chill and Serve
- Notes
- Serving Suggestions
- Storage
Why You’ll Love This Heavenly Coconut Cloud Cake
Coconut cakes can vary from dense and intensely sweet to delicate and airy, but this one brings together the qualities I enjoy most. Its tender texture, generous coconut flavor, and light whipped frosting make it memorable without demanding complicated decorating techniques.
- Soft, cloud-like texture: Creamed butter and sugar create a light cake base, while coconut milk helps keep the crumb moist.
- Wonderful tropical flavor: Coconut milk, shredded coconut, and coconut extract contribute different layers of coconut sweetness.
- Creamy whipped frosting: Softened cream cheese and cold heavy whipping cream create a rich yet fluffy topping.
- Simple preparation: The batter follows familiar mixing steps, and the frosting comes together with an electric mixer.
- Perfect for celebrations: Serve it at birthday parties, potlucks, book clubs, holiday gatherings, or casual family dinners.
- Easy to customize: Pineapple, citrus zest, gluten-free flour, and dairy-free alternatives offer different ways to enjoy the cake.
- Convenient storage: Refrigerated leftovers can be enjoyed for several days, and portions may also be frozen.
The cake feels especially inviting when decorated with toasted coconut. A few golden flakes scattered over the white frosting give it a lovely homemade finish without requiring elaborate piping.
What Makes Coconut Cloud Cake Special?
The defining quality of this dessert is the way its layers of texture work together. The cake has enough structure to hold its shape, yet the crumb remains delicate and moist rather than heavy.
Coconut milk plays an important role in creating that tenderness. Its richness works with the softened butter and eggs, giving the cake a soft interior that pairs beautifully with the frosting.
Sweetened shredded coconut contributes a slightly chewy texture throughout the crumb. Those small pieces provide little reminders of coconut flavor in every slice.
The frosting is equally important to the final result. Instead of relying only on a dense cream cheese mixture, it incorporates whipped heavy cream to produce a lighter, more billowy finish.
Coconut extract intensifies the tropical flavor, while vanilla adds warmth. Together, they make the frosting taste like a natural extension of the cake rather than an unrelated topping.
The finished dessert is particularly lovely when served slightly chilled. The frosting becomes firm enough to hold its swirls, while the cake remains moist and tender underneath.
Recipe Overview
| Detail | Information |
|---|---|
| Recipe | Heavenly Coconut Cloud Cake |
| Oven Temperature | 350°F (175°C) |
| Baking Pan | 9-inch round cake pan |
| Baking Time | Approximately 25–30 minutes, checking from 25 minutes |
| Pan Cooling Time | 10 minutes |
| Additional Cooling | Cool completely on a wire rack |
| Optional Frosting Set | Refrigerate for 30 minutes |
| Recommended Chilling Before Clean Slicing | At least 1 hour |
| Refrigerator Storage | Up to 5 days |
| Freezer Storage | Up to 3 months |
| Cupcake Variation | Approximately 18 cupcakes, baked 18–22 minutes |
The oven time can vary slightly depending on the baking pan and oven. Begin checking after 25 minutes and look for a golden top, edges beginning to pull away, and a toothpick with a few moist crumbs rather than wet batter.
The finished cake should be completely cool before frosting. Warm cake can soften the whipped cream mixture and make the topping difficult to spread neatly.
Ingredients for Heavenly Coconut Cloud Cake
For the Coconut Cake
- 2 cups all-purpose flour, spooned and leveled
- 1 cup full-fat coconut milk, shaken well before opening
- ½ cup unsalted butter, softened
- 1 cup sweetened shredded coconut, plus extra for garnish
- 1 ¼ cups granulated sugar
- 3 large eggs, at room temperature
- 2 teaspoons baking powder
- ½ teaspoon salt
For the Cloud-Like Cream Cheese Frosting
- 8 oz cream cheese, softened, block style
- 1 cup heavy whipping cream, very cold
- ½ cup powdered sugar, sifted
- 1 teaspoon coconut extract
- 1 teaspoon vanilla extract
Optional Variations and Decorations
- Extra toasted coconut for garnish
- ½ cup crushed pineapple, thoroughly drained
- 2 teaspoons citrus zest, combining lemon and lime if desired
- 1:1 gluten-free flour blend
- ¼ teaspoon xanthan gum, if the gluten-free blend does not contain it
- Coconut oil for a dairy-free cake variation
- Full-fat coconut milk for dairy-free adaptations
- Solid coconut cream from two refrigerated cans for dairy-free frosting
- Coconut rum, as an optional adult flavor variation
- Toasted macadamia nuts, as an optional garnish
The classic recipe uses all-purpose flour, butter, eggs, coconut milk, and shredded coconut for the cake. Its frosting combines cream cheese and heavy whipping cream with powdered sugar and two extracts.
The optional ingredients are alternatives rather than additions required for the standard version. Keeping the classic recipe simple allows the coconut flavor and soft texture to remain the focus.
Understanding the Cake Ingredients
Full-Fat Coconut Milk
Coconut milk gives this cake much of its characteristic richness and tropical flavor. Full-fat coconut milk is preferred because it helps create the moist, tender crumb that makes the dessert feel so soft.
Shake the can thoroughly before opening it. Coconut milk can separate while sitting, and blending the contents helps the correct consistency carry through the batter.
Using an old or poorly stored ingredient can affect both flavor and texture. I always check the coconut milk before beginning because its quality matters in a cake where coconut is the star.
Sweetened Shredded Coconut
Sweetened shredded coconut adds texture and reinforces the flavor of the coconut milk. Its small pieces become part of the cake crumb, providing gentle chewiness without overwhelming the tender structure.
The recipe uses 1 cup in the batter, with additional coconut reserved for decoration. Toasting some coconut is an optional way to develop a deeper, warmer flavor.
For an especially fragrant garnish, toasted coconut makes a beautiful finishing touch. Its light golden color also contrasts nicely with the pale frosting.
Softened Unsalted Butter
The cake begins with ½ cup softened unsalted butter. Butter needs to be soft enough to cream with the sugar, but it should not be completely melted.
Leaving the butter at room temperature for approximately 30 minutes helps prepare it for mixing. The butter should yield gently when pressed.
Creaming butter with sugar is an important step in achieving the light texture of this cake. Rushing through it can affect the finished crumb.
Granulated Sugar
The cake uses 1¼ cups granulated sugar. The sugar provides sweetness and works with the butter during creaming to help create a lighter mixture.
Beating the butter and sugar together for approximately 3 minutes allows the mixture to become pale and fluffy. This step contributes to the soft, delicate texture associated with Coconut Cloud Cake.
Eggs
Three large eggs give the batter structure and richness. Room-temperature eggs blend more readily into the creamed butter and sugar than eggs taken directly from the refrigerator.
Add them one at a time and mix after each addition. This gradual incorporation helps keep the batter balanced before the remaining ingredients are added.
Flour, Baking Powder, and Salt
All-purpose flour provides the framework that allows the cake to rise and hold together. Spoon the flour into the measuring cup and level it rather than packing it down.
Two teaspoons of baking powder contribute lift, while ½ teaspoon salt balances the sweetness. Fresh baking powder is especially important because an expired product can lead to a disappointing, dense cake.
The Secret to the Fluffy Cream Cheese Frosting
The frosting is what gives Heavenly Coconut Cloud Cake its especially soft, cloud-like finish. It combines the familiar tang of cream cheese with whipped cream for a texture that feels rich and airy at the same time.
Block-style cream cheese is recommended because it creates a thicker, more stable base than spreadable varieties. Soften the cream cheese enough to beat it smooth before combining it with the whipped cream.
Heavy whipping cream should be very cold when whipped. A chilled bowl and cold beaters can make this stage easier, especially in a warm kitchen.
The powdered sugar should be sifted before mixing to avoid lumps. Coconut extract and vanilla extract provide the final flavor, with the coconut extract giving the frosting its stronger tropical character.
The whipped cream is beaten until it holds stiff peaks, then carefully folded into the smooth cream cheese. Gentle folding preserves the airy texture rather than flattening the mixture into a dense frosting.
For this cake, the frosting does not need elaborate decorations. Soft swirls and a scattering of toasted coconut are enough to create a beautiful presentation.
Equipment You’ll Need
A cake this pretty might look as though it requires specialty equipment, but most of the tools are familiar to home bakers. The essentials are a pan, mixing bowls, a mixer, a spatula, measuring tools, and a cooling rack.
- 9-inch round cake pan
- One large mixing bowl
- One medium mixing bowl
- Additional bowl for whipping cream
- Electric hand mixer or stand mixer
- Rubber spatula
- Measuring cups and spoons
- Wire cooling rack
- Rotating cake stand, optional
- Butter knife or frosting spatula for decorating
A round nonstick pan with tall sides works well for the cake. Greasing and lightly flouring the pan helps prevent sticking.
The electric mixer is particularly useful when creaming the butter and sugar and whipping the heavy cream. Although mixing by hand is possible, the electric mixer makes those steps more convenient.
A rotating cake stand can make frosting easier, but it is not essential. A regular serving plate and a butter knife can still produce a lovely homemade cake.
How to Make Heavenly Coconut Cloud Cake
The process begins with a simple butter cake batter and ends with a light cream cheese frosting. Taking care with ingredient temperatures, gentle mixing, and complete cooling helps preserve the cake’s delicate texture.
Step 1: Prepare the Oven and Cake Pan
Preheat your oven to 350°F (175°C) and place the oven rack in the middle position. Allow the oven to reach the full baking temperature before putting the cake inside.
Grease a 9-inch round cake pan generously, then dust it lightly with flour. Tap out the extra flour so the cake can release cleanly without a heavy coating.
Step 2: Combine the Dry Ingredients
Measure 2 cups all-purpose flour into a medium mixing bowl. Add 2 teaspoons baking powder and ½ teaspoon salt, then whisk until evenly combined.
Mixing the dry ingredients separately helps distribute the baking powder throughout the flour. Set this bowl aside while you prepare the butter and sugar mixture.
Step 3: Cream the Butter and Sugar
Place ½ cup softened unsalted butter and 1¼ cups granulated sugar in a large mixing bowl. Beat with an electric mixer for approximately 3 minutes, until the mixture becomes light and fluffy.
Do not rush this stage because it helps create the cake’s airy texture. The butter should be soft enough to incorporate smoothly without appearing melted or oily.
Step 4: Add the Eggs One at a Time
Add the first room-temperature egg to the butter mixture and beat until incorporated. Repeat with the second and third eggs, mixing after each addition.
Adding the eggs gradually helps the batter stay more uniform. Avoid beating longer than necessary once the eggs are combined.
Step 5: Prepare the Coconut Milk
Shake the coconut milk can well before opening, then measure 1 cup full-fat coconut milk. Keep it nearby so it can be incorporated gradually during the next stage.
The coconut milk provides moisture and contributes the main coconut flavor. Its consistency may vary slightly, which is why thoroughly shaking the can matters.
Step 6: Alternate the Flour Mixture and Coconut Milk
With the mixer running on low speed, add the flour mixture in three additions, alternating with the coconut milk. Work gently and allow the ingredients to combine between additions.
If the batter looks slightly curdled while the coconut milk is being incorporated, continue with the dry ingredients rather than immediately adding more flour. The mixture should become smoother as everything comes together.
Step 7: Fold in the Shredded Coconut
Add 1 cup sweetened shredded coconut to the batter. Use a rubber spatula to fold it through gently until the coconut is distributed.
Avoid vigorous stirring during this stage. The aim is to preserve the light texture developed earlier while incorporating the coconut evenly.
Step 8: Transfer the Batter to the Pan
Pour the completed batter into the prepared 9-inch round cake pan. Use the spatula to spread it evenly and smooth the top.
Make sure the batter reaches the edges of the pan without leaving large gaps. A level surface helps the cake bake more evenly.
Step 9: Bake the Coconut Cake
Place the pan on the middle rack of the preheated oven and begin checking after approximately 25 minutes. Depending on the oven, the cake may need another 3–5 minutes.
Look for a lightly golden top and edges that are beginning to pull away from the pan. These visual clues help indicate that the cake is approaching the proper level of doneness.
Step 10: Check for a Tender, Fully Baked Center
Insert a toothpick into the center of the cake. A few moist crumbs are desirable, but wet batter means the cake requires more baking time.
The goal is a tender crumb rather than an overbaked, dry cake. Remove it once the center is set and the toothpick indicates the cake is ready.
Step 11: Cool in the Pan
Place the cake pan on a heat-safe surface or cooling rack and allow the cake to rest for 10 minutes. This gives the tender structure time to settle before handling.
Trying to remove the cake immediately can cause it to crumble. A short rest helps protect the shape of the finished cake.
Step 12: Transfer to a Wire Rack
Carefully remove the cake from the pan and place it on a wire rack. Allow it to cool completely before beginning the frosting process.
This step is essential because warm cake can cause whipped cream frosting to soften and slide. Even a beautifully whipped frosting will struggle to hold its shape against a warm surface.
Step 13: Beat the Cream Cheese
Place 8 oz softened block-style cream cheese in a mixing bowl. Beat until the mixture becomes smooth and free from visible lumps.
A smooth cream cheese base makes the finished frosting more pleasant. Take care to work out any lumps before folding in the whipped cream.
Step 14: Whip the Heavy Cream
Pour 1 cup very cold heavy whipping cream into a separate bowl and whip until soft peaks form. Add ½ cup sifted powdered sugar, 1 teaspoon coconut extract, and 1 teaspoon vanilla extract gradually while continuing to whip.
Continue until the cream holds stiff peaks. The mixture should maintain its shape when the beaters are lifted.
Step 15: Fold the Frosting Components Together
Gently fold the whipped cream mixture into the softened cream cheese. Use broad, careful motions rather than beating aggressively.
The frosting should remain light, fluffy, and able to hold its shape. Overmixing can reduce the airy consistency that gives this cake its cloud-like finish.
Step 16: Frost the Completely Cooled Cake
Place the cooled cake on a serving plate or cake stand. Spread the frosting over the surface, creating soft swirls with a spatula or butter knife.
Work gently so the frosting retains its volume. There is no need to create perfectly straight edges or an elaborate decorative pattern.
Step 17: Finish With Coconut Garnish
Sprinkle extra shredded coconut over the frosted cake. Toasted coconut provides an especially fragrant and attractive finish.
For a toasted garnish, spread coconut on a baking sheet and toast at 350°F for 3–5 minutes, tossing occasionally until lightly golden. Allow it to cool before sprinkling over the frosting.
Step 18: Chill Before Slicing
If your kitchen is warm, refrigerate the frosted cake for approximately 30 minutes to help the frosting set. For especially clean slices, allow at least 1 hour of chilling before cutting.
The frosting becomes firmer while the cake remains tender underneath. This combination makes the dessert easier to serve without losing its delicate texture.
Tips for the Perfect Coconut Cloud Cake
Use Room-Temperature Ingredients for the Batter
Butter and eggs blend more smoothly when they are not refrigerator-cold. Allowing them to come closer to room temperature helps prevent uneven mixing.
The butter should yield gently when pressed without becoming melted. Properly softened butter is particularly important during the creaming stage.
Check the Baking Powder
Fresh baking powder supports the soft, airy texture that gives this cake its name. Old baking powder may not provide the lift needed for a tender result.
If you’re unsure about its freshness, test a small amount with hot water before baking. A vigorous bubbling reaction indicates that the baking powder is active.
Toast the Coconut for Deeper Flavor
Toasting shredded coconut creates a warmer, more pronounced coconut flavor. Spread it on a baking sheet and toast at 350°F for approximately 3–5 minutes, tossing occasionally.
Watch closely because coconut can change color quickly. Remove it once it becomes lightly golden rather than deeply browned.
Avoid Overbaking
A cake baked too long can lose the tenderness that makes this recipe special. Begin checking at 25 minutes instead of waiting for a completely dry toothpick.
A few moist crumbs are appropriate when the center is set. Wet batter, however, indicates that more baking is needed.
Keep the Frosting Cold
The whipped cream frosting is sensitive to warmth. Cold heavy cream and a cool mixing environment help it reach and maintain the desired texture.
If the kitchen is warm, chilling the frosted cake before serving can help. A brief rest in the refrigerator makes decorating and slicing easier.
Delicious Coconut Cloud Cake Variations
Gluten-Free Coconut Cloud Cake
Replace the all-purpose flour with a 1:1 gluten-free flour blend. If the blend does not contain xanthan gum, add ¼ teaspoon to help support the cake’s structure.
The resulting texture may differ slightly from the traditional flour version. The coconut flavor and whipped frosting remain the main features of the dessert.
Dairy-Free Coconut Cloud Cake
Use coconut oil instead of butter in the cake and adapt the frosting with chilled coconut cream. For the coconut cream frosting, refrigerate two cans of full-fat coconut cream overnight and use the solid portion for whipping.
Full-fat coconut milk can also be used in the dairy-free adaptation. This variation changes the frosting and cake textures, but it maintains the tropical coconut character.
Pineapple Coconut Cloud Cake
Fold ½ cup thoroughly drained crushed pineapple into the cake batter for a tropical twist. Removing excess moisture is important so the fruit does not make the cake overly wet.
The pineapple adds a fruity note that pairs beautifully with coconut. This variation has the familiar appeal of a piña colada-inspired dessert.
Lemon-Lime Coconut Cloud Cake
Replace the vanilla extract with 2 teaspoons citrus zest for a brighter flavor variation. A combination of lemon and lime zest works particularly well.
The citrus gives the coconut a refreshing contrast. This version is especially appealing for summer parties and warm-weather celebrations.
Coconut Rum Variation
For an adults-only flavor variation, coconut rum can be considered when coconut extract is unavailable. A little additional vanilla is another option, although neither provides exactly the same flavor as coconut extract.
The extract remains the preferred choice for the classic cake. It concentrates the coconut flavor without changing the overall character of the frosting.
Toasted Macadamia Nut Garnish
Toasted macadamia nuts offer another garnish option when you want more texture. Their rich, nutty character complements the coconut and creamy frosting.
Scatter them over the decorated cake along with the coconut if desired. Keep the garnish light enough that the airy frosting remains the focus.
How to Serve Heavenly Coconut Cloud Cake
Serve Slightly Chilled
This cake is particularly lovely when the frosting has had time to firm in the refrigerator. The chilled topping holds its shape while the tender cake remains soft underneath.
Remove the cake from the refrigerator approximately 15 minutes before slicing. That short rest takes away some of the coldness without allowing the frosting to become overly soft.
Use a Warm Knife for Clean Slices
Dip a sharp knife in hot water before cutting the cake. Wipe the blade between cuts to keep the edges of each slice neat.
This is especially helpful when the cake has a generous layer of cream cheese frosting. A clean blade moves through the frosting without dragging it across the crumb.
Make It the Centerpiece of a Celebration
The pale frosting and coconut garnish create a naturally elegant presentation. Place the cake on a serving plate or rotating cake stand and let the simple texture speak for itself.
It looks beautiful at birthday parties, potlucks, book clubs, and family gatherings. The familiar coconut flavor makes it feel comforting even when the presentation is special.
Enjoy It as a Weekend Dessert
Not every lovely cake needs a formal occasion. A slice of Coconut Cloud Cake can turn an ordinary weekend afternoon into a small celebration.
The combination of vanilla, coconut, and whipped frosting feels particularly comforting when enjoyed slowly. Sometimes that is all a good homemade dessert needs to accomplish.
How to Store Coconut Cloud Cake
Because the frosting contains cream cheese and whipped cream, the finished cake should be stored in the refrigerator. Cover the remaining cake tightly with plastic wrap or transfer slices to an airtight container.
Properly covered, the cake can be refrigerated for up to 5 days. The coconut helps the cake retain moisture, making refrigerated leftovers enjoyable.
If you’re storing individual slices, place parchment paper between them to reduce sticking. This is particularly helpful when the frosting is soft or generously applied.
When serving refrigerated leftovers, allow the cake to rest briefly outside the refrigerator. Approximately 10–15 minutes can help soften the frosting slightly before eating.
Can You Freeze Coconut Cloud Cake?
Yes, Coconut Cloud Cake can be frozen for up to 3 months. Store the cake or individual slices carefully so the frosting and soft crumb are protected.
Thaw frozen cake overnight in the refrigerator before serving. The texture is at its best when the cake has thawed fully and the frosting has softened slightly.
The frosting may need a little refreshing after freezing and thawing. A gentle adjustment to the frosting’s appearance can help restore its decorative finish.
Although freezing is convenient, I prefer this dessert when it is freshly made. The coconut flavor seems brightest, and the frosting has its loveliest texture before extended storage.
Making Coconut Cloud Cake Ahead of Time
This cake can be prepared ahead for birthdays, potlucks, or gatherings when you want dessert ready before guests arrive. The most important requirement is allowing the baked cake to cool completely before frosting.
Once frosted, refrigerate the cake so the whipped cream mixture can set. A minimum of 1 hour of chilling also helps produce cleaner slices.
For the best presentation, add toasted coconut after it has cooled. Keep the finished cake refrigerated until close to serving time.
Making the cake ahead gives you more time to focus on the gathering itself. It is especially nice to bring out a finished dessert without needing to decorate it at the last moment.
Troubleshooting Common Coconut Cloud Cake Problems
Why Did My Cake Turn Out Dense?
Cold butter or eggs can make the batter more difficult to combine smoothly. Using properly softened butter and room-temperature eggs helps create a lighter mixture.
Creaming the butter and sugar for approximately 3 minutes is also important. That stage helps develop the airy texture before the remaining ingredients are added.
Why Does My Batter Look Curdled?
The batter may appear slightly separated while the coconut milk is being incorporated. This can happen during the mixing process and does not necessarily mean the cake is ruined.
Continue incorporating the remaining dry ingredients gently. The batter should become more uniform as the mixture comes together.
Why Is My Cake Dry?
Overbaking is one possible cause of a dry crumb. Begin checking after 25 minutes, looking for a set center and a toothpick with a few moist crumbs.
Do not keep baking simply to make the toothpick completely dry. That can take the cake beyond its ideal tender texture.
Why Did My Frosting Become Runny?
Warm ingredients, overmixing, or a hot kitchen can cause the frosting to lose its structure. The whipped cream should be cold, and the cream cheese should be smooth before the components are folded together.
If the frosting becomes too soft, place the bowl in the freezer for approximately 15 minutes, then carefully rewhip as needed. Chilling may help restore a more workable consistency.
Why Is My Frosting Lumpy?
Cream cheese that has not been softened adequately can remain lumpy after mixing. Beat the cream cheese until smooth before combining it with the other frosting ingredients.
Sifting the powdered sugar also helps prevent small dry lumps. These two details make the final frosting feel much smoother.
Why Is the Frosting Sliding Off the Cake?
The cake may still be warm, or the frosting may be too soft. Allow the cake to cool completely before applying any frosting.
Refrigerate the decorated cake to help the frosting set. Chilling for at least 1 hour is especially useful when clean slices are important.
Frequently Asked Questions
Can I Substitute Coconut Flour for All-Purpose Flour?
Coconut flour cannot be substituted directly for the all-purpose flour in this cake. It absorbs liquid differently and can produce a much denser result.
For a gluten-free alternative, use a 1:1 gluten-free flour blend instead. Add ¼ teaspoon xanthan gum if the blend does not already contain it.
How Long Will the Frosted Cake Keep?
The frosted cake can be refrigerated for up to 5 days when covered properly. Keep it in an airtight container or wrap remaining portions securely.
Allow refrigerated slices to sit briefly before serving if the frosting feels too firm. A short rest helps bring back its softer texture.
Can I Turn This Recipe Into Cupcakes?
Yes, the batter can make approximately 18 cupcakes. Reduce the baking time to 18–22 minutes rather than using the full cake baking time.
An ice cream scoop can help portion the batter evenly. Decorate the cooled cupcakes with frosting swirls and toasted coconut.
Why Did My Cream Cheese Frosting Turn Watery?
The frosting may have been overmixed or exposed to too much warmth. The heavy cream should be very cold, and the whipped mixture should be folded into the cream cheese gently.
Chilling the frosting for approximately 15 minutes in the freezer may help if it becomes overly soft. Avoid continuing to mix aggressively after it reaches the desired texture.
Can I Skip the Coconut Extract?
Yes, but the coconut flavor of the frosting will be less pronounced. The coconut extract is what gives the topping much of its distinctive tropical character.
A little more vanilla or a small amount of coconut rum for adults can be considered as alternatives. The flavor will not be identical to the classic coconut-extract version.
Do I Need to Toast the Shredded Coconut?
Toasting is optional rather than required. The standard cake uses sweetened shredded coconut, with extra coconut added as garnish.
Toasting coconut at 350°F for 3–5 minutes adds a deeper flavor and golden color. Watch carefully and toss occasionally so it browns evenly.
Can I Make a Dairy-Free Version?
Yes, coconut oil can replace the butter, while chilled coconut cream can be used to create a dairy-free frosting. Refrigerate two cans of coconut cream overnight and whip the solid portion.
The resulting cake and frosting will have somewhat different textures. Full-fat coconut ingredients help preserve the rich tropical character.
Can I Add Pineapple?
Yes, ½ cup well-drained crushed pineapple can be folded into the batter. Drain it thoroughly to avoid adding excess moisture.
This gives the cake an additional tropical flavor. It works especially well with coconut frosting.
How Should I Slice the Cake Neatly?
Chill the frosted cake for at least 1 hour before cutting. Use a sharp knife dipped in hot water and wipe the blade between slices.
This helps create cleaner portions without dragging frosting across the cake. Allow approximately 15 minutes outside the refrigerator before serving if desired.
Nutritional Information
The nutritional content of Heavenly Coconut Cloud Cake depends on the brands of coconut milk, butter, cream cheese, whipping cream, and shredded coconut used. Portion size also affects the total calories and nutrients in each slice.
The cake’s richness comes from full-fat coconut milk, butter, eggs, and the cream cheese frosting. Sweetened shredded coconut contributes texture and some fiber.
Variations such as coconut oil, coconut cream frosting, pineapple, or gluten-free flour can change the nutritional profile. The exact values should be calculated using the ingredients and serving sizes actually prepared.
This is a rich dessert intended to be enjoyed and shared. Smaller slices are a convenient way to appreciate the flavor without needing a particularly large serving.
For accurate nutrition information, use a calculator with the specific ingredient brands and quantities. That is more reliable than assuming every coconut cake will have identical nutritional values.
What Makes This Cake Worth Baking Again?
I love recipes that feel connected to memories, and this cake has always carried that quality for me. The fragrance of toasted coconut and vanilla reminds me of childhood vacations, family gatherings, and desserts that made an ordinary table feel welcoming.
Its flavor is distinctive without requiring unusual techniques. The batter follows a familiar mixing process, and the frosting is made with simple ingredients that become something beautiful when combined carefully.
The coconut milk and shredded coconut bring moisture and flavor, while the cream cheese frosting adds a soft finishing layer. Together, they create a dessert that feels indulgent yet wonderfully delicate.
I also appreciate how adaptable the recipe can be. A little pineapple, a bright citrus variation, or a toasted coconut garnish can change the experience while preserving the cake’s central character.
Even without decorations beyond soft frosting swirls and coconut, the finished cake looks inviting. Its simplicity makes it suitable for both relaxed family occasions and celebrations where you want dessert to look special.
The most rewarding part is sharing the first slices. There is always something lovely about watching people discover a cake that tastes as comforting as it looks.
Final Thoughts
Heavenly Coconut Cloud Cake brings together the rich tropical flavor of coconut milk, the delicate texture of sweetened shredded coconut, and a fluffy cream cheese frosting finished with coconut and vanilla extracts. It is a tender, beautiful dessert that turns familiar baking ingredients into something worthy of a celebration.
The classic cake is baked in a 9-inch round pan at 350°F, cooled completely, and covered with softly whipped frosting. Toasted coconut adds a fragrant finish, while optional variations such as pineapple, lemon-lime zest, gluten-free flour, and dairy-free ingredients provide different ways to enjoy the same tropical inspiration.
Whether it appears at a birthday party, book club gathering, holiday table, or an ordinary weekend afternoon, this cake has a way of making the occasion feel sweeter. Every tender slice carries that lovely combination of coconut, vanilla, and creaminess that makes homemade baking so memorable.
Heavenly Coconut Cloud Cake
Delicate coconut flavor, a tender cake base, and a rich, airy cream cheese frosting come together in this Heavenly Coconut Cloud Cake. Made with coconut milk, sweetened shredded coconut, and a creamy topping flavored with coconut and vanilla extracts, this tropical-inspired dessert offers a lovely balance of sweetness, creaminess, and coconut texture.
Recipe Details
- Prep Time: 15 minutes
- Cook Time: 30 minutes
- Total Time: 45 minutes
- Course: Dessert
- Cuisine: American
- Servings: 1 (9-inch) cake
- Calories: 320 kcal
Ingredients
For the Coconut Cake
- 1 cup sweetened shredded coconut
- ½ cup unsalted butter, softened
- 1 cup coconut milk
- 2 cups all-purpose flour
For the Creamy Coconut Frosting
- 1 teaspoon vanilla extract
- 1 teaspoon coconut extract
- 1 cup heavy whipping cream
- 8 oz cream cheese, softened
Optional Garnish
- Extra shredded coconut for decorating, if desired (quantity not specified)
Instructions
Step 1: Prepare the Oven and Cake Pan
Preheat the oven to 350°F (175°C). Grease and flour a 9-inch cake pan, making sure the bottom and sides are evenly coated.
Set the prepared pan aside while you combine the cake ingredients.
Step 2: Combine the Flour and Coconut Milk
Place the all-purpose flour in a bowl and add the coconut milk. Stir until the ingredients form a smooth mixture.
Continue mixing until the flour is incorporated and no obvious dry patches remain.
Step 3: Add the Butter and Coconut
Add the softened unsalted butter and sweetened shredded coconut to the flour mixture.
Mix thoroughly until the butter and coconut are evenly distributed throughout the batter. The shredded coconut adds texture and tropical flavor to the cake.
Step 4: Transfer the Batter
Pour the prepared coconut batter into the greased and floured 9-inch cake pan.
Spread the mixture evenly across the pan so the cake has a level surface before baking.
Step 5: Bake the Coconut Cake
Place the cake in the preheated oven and bake for 25–30 minutes.
Check the center with a toothpick. When the toothpick comes out clean, remove the cake from the oven.
Step 6: Cool Completely
Allow the baked coconut cake to cool completely before preparing it for frosting.
The cake should no longer be warm when the cream cheese topping is added. This helps keep the frosting from softening excessively.
Step 7: Whip the Cream Cheese Frosting
Combine the softened cream cheese and heavy whipping cream. Beat the mixture until it becomes fluffy.
Continue mixing until the ingredients are incorporated and the frosting has a light, creamy consistency.
Step 8: Add the Coconut and Vanilla Extracts
Pour the coconut extract and vanilla extract into the whipped cream cheese mixture.
Beat again until both extracts are evenly blended into the frosting. The coconut extract strengthens the tropical flavor, while the vanilla adds a gentle sweetness to the overall taste.
Step 9: Frost the Cooled Cake
Spread the prepared frosting evenly over the completely cooled coconut cake.
Smooth the frosting across the surface to create a creamy finish. If desired, garnish with extra shredded coconut.
Step 10: Chill and Serve
For a firmer texture, chill the frosted cake before serving.
Slice and enjoy once the frosting has reached your preferred consistency.
Notes
- Toasted coconut option: Toast the shredded coconut for extra crunch.
- Firmer frosting: Chill the cake before serving to help the creamy topping become firmer.
- Cooling reminder: Allow the cake to cool completely before frosting to maintain the topping’s texture.
Serving Suggestions
Serve Heavenly Coconut Cloud Cake as a sweet finish to a family meal, a tropical-inspired dessert for gatherings, or a simple homemade cake for special occasions. Its combination of coconut milk, shredded coconut, and creamy frosting creates a rich coconut flavor with contrasting cake and topping textures.
For a more pronounced coconut finish, use toasted shredded coconut as a garnish. The toasted pieces add a little crunch against the smooth cream cheese frosting, making each slice more interesting.
The cake can also be served chilled when you prefer a firmer frosting. Letting the topping set before slicing can help create a neater presentation, especially when serving the cake at a gathering.
Storage
How to Store
The recipe does not specify an exact storage duration. Because the frosting contains cream cheese and heavy whipping cream, keep the frosted cake refrigerated rather than leaving it at room temperature for extended periods.
Coconut Tip
Use 1 cup sweetened shredded coconut in the cake batter. Toasting the coconut is an optional way to add extra crunch.
Coconut Milk Tip
Mix 1 cup coconut milk with 2 cups all-purpose flour until smooth before incorporating the softened butter and shredded coconut.
Butter Tip
Use ½ cup softened unsalted butter. Mix it into the flour and coconut milk mixture along with the shredded coconut.
Frosting Tip
Beat 8 oz softened cream cheese with 1 cup heavy whipping cream until fluffy. Add 1 teaspoon coconut extract and 1 teaspoon vanilla extract after whipping.
Baking Tip
Bake at 350°F (175°C) for 25–30 minutes, or until a toothpick inserted into the center comes out clean.
Cooling Tip
Allow the cake to cool completely before spreading on the frosting. A fully cooled cake helps preserve the fluffy consistency of the cream cheese topping.
Chilling Tip
Chill the finished cake before serving if you prefer a firmer frosting. Add extra shredded coconut as an optional garnish.

Fernando is the creator and writer behind the food blog Eating with your Hands. Living and working in cities like Paris, Barcelona, and Berlin, and being married to a Canadian foodie, has given Fernando a passion and interest in food and inspired him to run EWYH.