
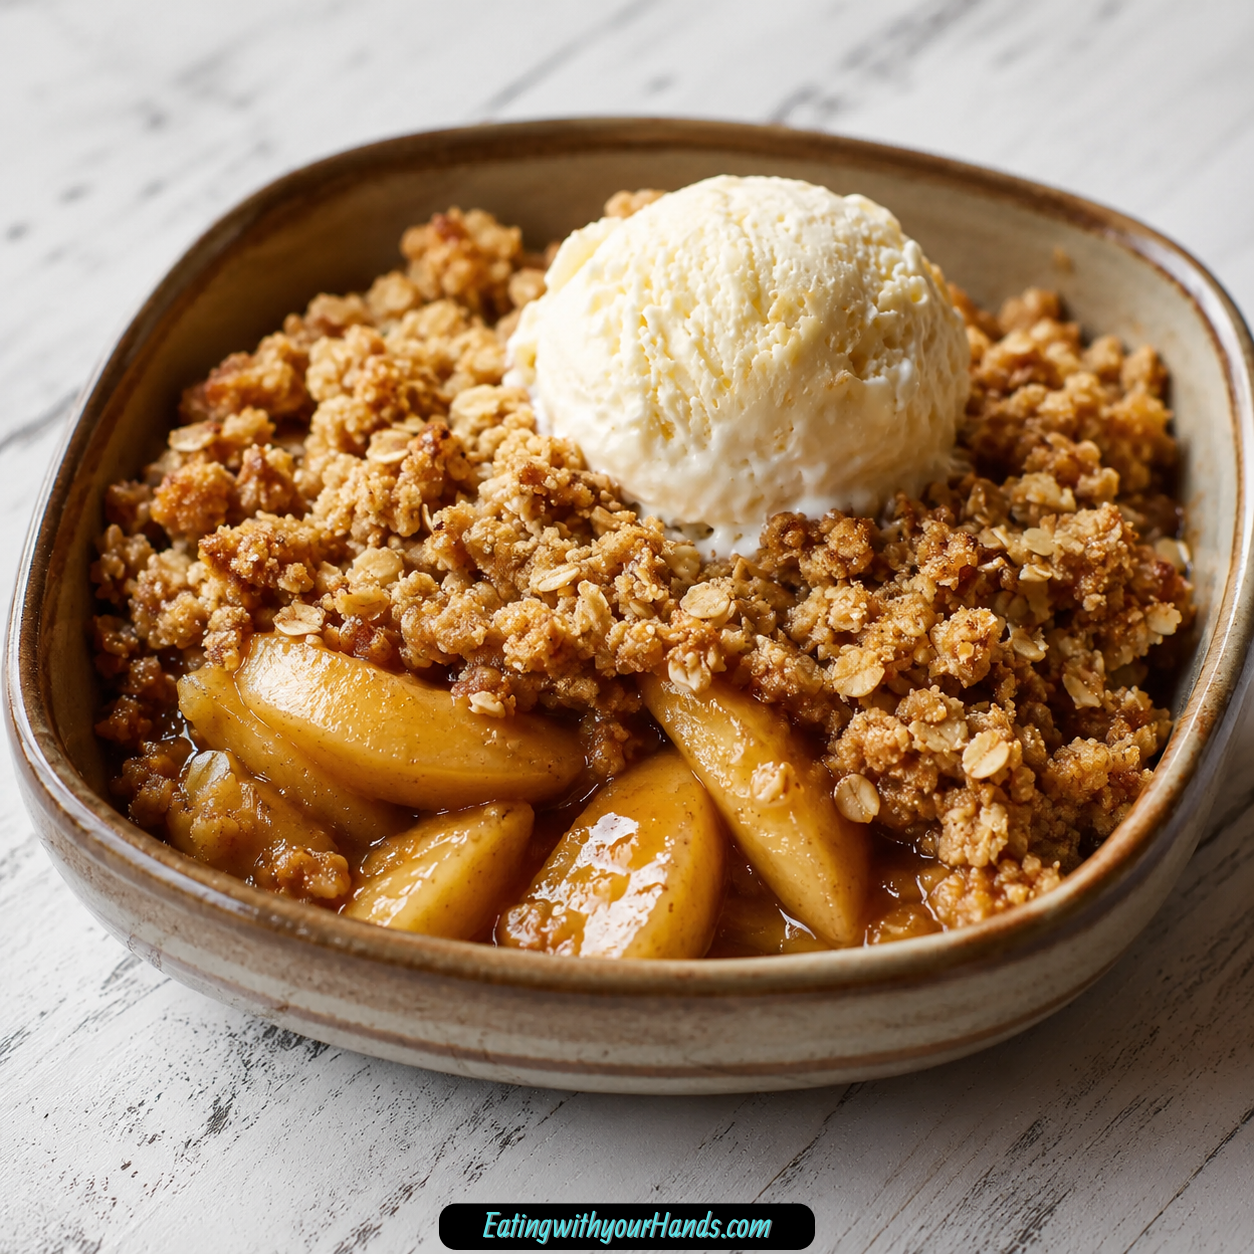
Homemade Apple Crisp is one of those desserts that feels like it belongs in every cozy kitchen. It is warm, simple, cinnamon-scented, and comforting in the way only baked apples under a golden oat topping can be.
There is something deeply familiar about the smell of apples and cinnamon bubbling together in the oven. It has a way of making the whole house feel calmer, softer, and a little more like home.
This dessert reminds me of the kind of afternoon when someone is peeling apples by the sink, the oven is warming, and everyone somehow finds a reason to wander into the kitchen. Even before the crisp is done, the scent alone makes it feel like something good is about to happen.
What makes this Homemade Apple Crisp so special is that it does not try too hard. There is no pie crust to roll, no complicated filling to cook first, and no fancy equipment to pull from the cabinet.
You simply layer sliced apples in a baking dish, mix a brown sugar oat topping, scatter it over the fruit, and bake until the top is golden and the apples are tender. It is the kind of recipe that gives back much more than it asks from you.
Although apple crisp feels especially perfect in fall, it is not limited to one season. Anytime you want a warm, no-fuss dessert that tastes like comfort, this recipe is ready.
Table of Contents
- Why You’ll Love Homemade Apple Crisp
- A No-Fuss Dessert That Always Feels Special
- Recipe Details
- Ingredients for Homemade Apple Crisp
- Apples
- Brown Sugar
- Rolled Oats
- All-Purpose Flour
- Cinnamon
- Butter
- Optional Sugar for Extra Tart Apples
- Before You Start
- Directions for Homemade Apple Crisp
- Step 1: Preheat the Oven
- Step 2: Prepare the Baking Dish
- Step 3: Slice the Apples
- Step 4: Spread the Apples in the Dish
- Step 5: Sweeten Extra Tart Apples If Needed
- Step 6: Add Moisture If the Apples Seem Dry
- Step 7: Mix the Dry Topping Ingredients
- Step 8: Add the Melted Butter
- Step 9: Check the Topping Texture
- Step 10: Sprinkle the Topping Over the Apples
- Step 11: Press the Topping Gently
- Step 12: Bake the Apple Crisp
- Step 13: Check the Apples for Tenderness
- Step 14: Look for Bubbling at the Edges
- Step 15: Cool Slightly Before Serving
- Step 16: Serve Warm
- Serving Suggestions
- Storage Tips
- Reheating Tips
- Freezing Instructions
- Make-Ahead Tips
- Homemade Apple Crisp Variations
- Helpful Notes for Best Results
- Troubleshooting Homemade Apple Crisp
- Frequently Asked Questions
- Final Thoughts
- Homemade Apple Crisp
Why You’ll Love Homemade Apple Crisp
Homemade Apple Crisp is easy to love because it delivers everything people want from a fruit dessert. It is sweet, warm, lightly spiced, soft underneath, crisp on top, and simple enough to make without stress.
The preparation is minimal. You only need to slice the apples, grease the dish, stir together the topping, assemble, and bake.
The ingredient list is built from pantry staples. Brown sugar, rolled oats, flour, cinnamon, and butter turn into a crumbly topping that tastes rich and homemade.
The apples bake into a tender, juicy layer underneath. As they soften, their juices bubble up around the sides and thicken slightly as the crisp rests.
This dessert is also perfect for gatherings. A 9×13-inch baking dish gives you a generous amount, which makes it easy to serve family, friends, or guests.
It is customizable, too. You can add nuts, dried fruit, different apple varieties, or small spice changes while keeping the basic recipe simple.
A No-Fuss Dessert That Always Feels Special
Some desserts require careful timing or delicate technique, but apple crisp is wonderfully forgiving. It is the dessert you can make when you want something homemade without spending the whole day baking.
The base is just sliced apples. They do not need to be arranged perfectly, because they soften and settle as they bake.
The topping is also simple. Brown sugar, oats, flour, cinnamon, and melted butter create a crumbly mixture that spreads easily over the apples.
Once it goes into the oven, the crisp becomes golden and fragrant. The topping turns lightly crunchy, while the apples underneath become soft enough to pierce with a fork.
Letting it rest for about 10 minutes before serving helps the juices settle. That short wait makes each scoop taste even better.
This is the kind of dessert that feels casual and generous. It does not need to look perfect to be loved.
Recipe Details
- Recipe Name: Homemade Apple Crisp
- Recipe Style: Baked apple dessert with oat crumble topping
- Oven Temperature: 350°F (175°C)
- Baking Dish: 9×13-inch baking dish
- Bake Time: 40 to 45 minutes
- Cooling Time Before Serving: About 10 minutes
- Best Served: Warm
- Refrigerator Storage: Tightly covered for up to 4 days
- Reheating in Oven: 300°F for 10 to 15 minutes
- Microwave Reheating: Individual portions for 30 seconds
- Freezer Storage: Baked crisp or unbaked assembled crisp for up to 3 months
- Make-Ahead Option: Assemble ahead and refrigerate up to 24 hours before baking
Ingredients for Homemade Apple Crisp
The beauty of this recipe is in its simplicity. A small list of everyday ingredients creates a dessert that tastes warm, nostalgic, and satisfying.
Apples
You need 6 cups sliced apples. Tart varieties like Granny Smith give the best balance of sweet and sour.
The apples are the heart of the dessert, so choose firm apples that can hold up during baking. The original recipe also notes that Honeycrisp, Braeburn, or Fuji can be mixed in for extra complexity.
Slice the apples evenly so they bake at the same rate. They do not need to be paper-thin, but they should be thin enough to soften in 40 to 45 minutes.
Brown Sugar
You need 1 cup brown sugar. Pack it for extra depth, and use either light or dark brown sugar.
Brown sugar gives the topping a warm sweetness. It also helps the oat mixture bake into a rich, golden crumble.
Light brown sugar gives a gentler flavor, while dark brown sugar adds deeper sweetness. Either one works beautifully here.
Rolled Oats
You need 1 cup rolled oats. Old-fashioned oats add the best texture.
Rolled oats help create that classic apple crisp topping. They bake into a hearty, lightly chewy, lightly crunchy layer.
Quick oats can be used, but the texture will be softer. Rolled oats give the topping more structure and bite.
All-Purpose Flour
You need 1 cup all-purpose flour. The flour helps bind the crumble topping.
It gives the topping body and helps it hold together with the melted butter. Without flour, the topping would be looser and less crumbly.
For a gluten-free option, use a gluten-free all-purpose flour blend. Pair it with certified gluten-free oats if needed.
Cinnamon
You need 1 teaspoon cinnamon. Cinnamon is the classic fall spice that makes apple desserts smell and taste cozy.
The original recipe notes that you can add nutmeg or cloves if you want a slightly different spice profile. Cinnamon alone keeps the flavor classic and familiar.
A little cinnamon goes a long way in this crisp. It blends into the brown sugar and butter, coating the oats and flour with warm flavor.
Butter
You need 1/2 cup unsalted butter, melted. Melted butter adds richness and helps the topping crisp up.
Because the butter is melted, it is easy to stir into the dry topping ingredients. It coats the oats, flour, brown sugar, and cinnamon so they bake into a crumbly layer.
For a dairy-free version, coconut oil or a vegan butter substitute can be used. The texture and flavor may change slightly, but the crisp can still work well.
Optional Sugar for Extra Tart Apples
If your apples are extra tart, you can sprinkle 1 to 2 tablespoons of sugar over the apples before adding the topping. This helps balance sharp fruit.
This step is optional. If your apples are naturally sweet or you prefer a more tart dessert, you can skip it.
Before You Start
Before assembling the crisp, preheat the oven and prepare your baking dish. This recipe comes together quickly, so having the dish ready makes the process smoother.
Lightly grease the 9×13-inch baking dish with butter or nonstick spray. This helps prevent sticky baked apple juices from clinging to the pan.
Slice the apples before mixing the topping. Once the topping is made, assembly takes only a moment.
If your apples seem dry or you want a juicier crisp, remember the note from the original recipe. You can add a splash of apple juice or water over the apples before adding the topping.
Use a medium bowl for the topping. This gives you enough room to stir the dry ingredients and melted butter together until crumbly.
Directions for Homemade Apple Crisp
Step 1: Preheat the Oven
Preheat your oven to 350°F, or 175°C. This gives the oven time to heat properly while you prepare the apples and topping.
A fully preheated oven helps the crisp bake evenly. It also gives the topping a better chance to turn golden while the apples soften underneath.
Step 2: Prepare the Baking Dish
Lightly grease a 9×13-inch baking dish with butter or nonstick spray. Coat the bottom and sides well.
This step helps with serving and cleanup. Apple juices can bubble up as the crisp bakes, and a greased dish keeps the edges from sticking too firmly.
Step 3: Slice the Apples
Prepare 6 cups of sliced apples. Tart apples like Granny Smith are a great choice for balancing the sweetness of the topping.
Try to slice the apples evenly. Even slices bake more consistently and give the finished crisp a better texture.
Step 4: Spread the Apples in the Dish
Place the sliced apples evenly in the bottom of the prepared baking dish. Spread them into a level layer so the topping can cover them properly.
The apples will shrink and soften as they bake. A fairly even layer helps every portion get a good balance of fruit and crumble.
Step 5: Sweeten Extra Tart Apples If Needed
If your apples are very tart, sprinkle 1 to 2 tablespoons of sugar over the top. This is optional and depends on your apples and taste.
Granny Smith apples can be sharp, so a little sugar can soften the flavor. If you like a stronger sweet-tart contrast, leave them as they are.
Step 6: Add Moisture If the Apples Seem Dry
If the apples look dry or you are worried the crisp may need more moisture, add a splash of apple juice or water over the apples. This is especially helpful if the fruit is not very juicy.
Use only a small splash. The goal is to add moisture without making the crisp watery.
Step 7: Mix the Dry Topping Ingredients
In a medium bowl, combine the brown sugar, rolled oats, all-purpose flour, and cinnamon. Stir until the ingredients are evenly mixed.
This dry mixture becomes the crumble topping. Mixing it well before adding butter ensures that the cinnamon and sugar are evenly distributed.
Step 8: Add the Melted Butter
Pour the melted unsalted butter over the oat mixture. Stir until everything is well coated.
The mixture should look crumbly and slightly clumped. The butter helps the topping crisp and brown as it bakes.
Step 9: Check the Topping Texture
Look at the topping before adding it to the apples. It should be moist enough to clump lightly, but still crumbly enough to sprinkle.
If it looks dry in spots, stir a little more to distribute the butter. The oats and flour should be coated so the topping bakes evenly.
Step 10: Sprinkle the Topping Over the Apples
Scatter the oat mixture evenly over the apples in the baking dish. Try to cover the fruit from corner to corner.
An even topping gives every serving the right balance of apples and crumble. It also helps the crisp bake more uniformly.
Step 11: Press the Topping Gently
Press the topping down gently over the apples. Do not pack it tightly, but help it settle enough to stick and bake evenly.
This light press helps the crumble stay in place. It also creates better contact between the apples and topping.
Step 12: Bake the Apple Crisp
Place the baking dish in the preheated oven. Bake for 40 to 45 minutes.
The crisp is done when the topping is golden brown and the apples are tender when pierced with a fork. You may also see bubbling around the sides, which is a very good sign.
Step 13: Check the Apples for Tenderness
Carefully test the apples with a fork near the end of baking. They should be soft and tender, not firm or crunchy.
If the topping is golden but the apples need more time, continue baking for a few minutes. Watch the topping so it does not overbrown.
Step 14: Look for Bubbling at the Edges
Bubbling juices along the sides of the baking dish mean the apples have released their juices and the crisp is hot all the way through. This is exactly what you want.
The bubbling also helps the fruit layer thicken slightly as it cools. It is one of the signs that the crisp is ready.
Step 15: Cool Slightly Before Serving
Remove the crisp from the oven and let it rest for about 10 minutes. This short cooling time allows the juices to settle and thicken.
Serving immediately can make the fruit layer very loose. A brief rest gives you a better scoop and a more balanced texture.
Step 16: Serve Warm
Serve the apple crisp warm for the best flavor and texture. The apples should be soft, the topping golden, and the cinnamon aroma still fresh.
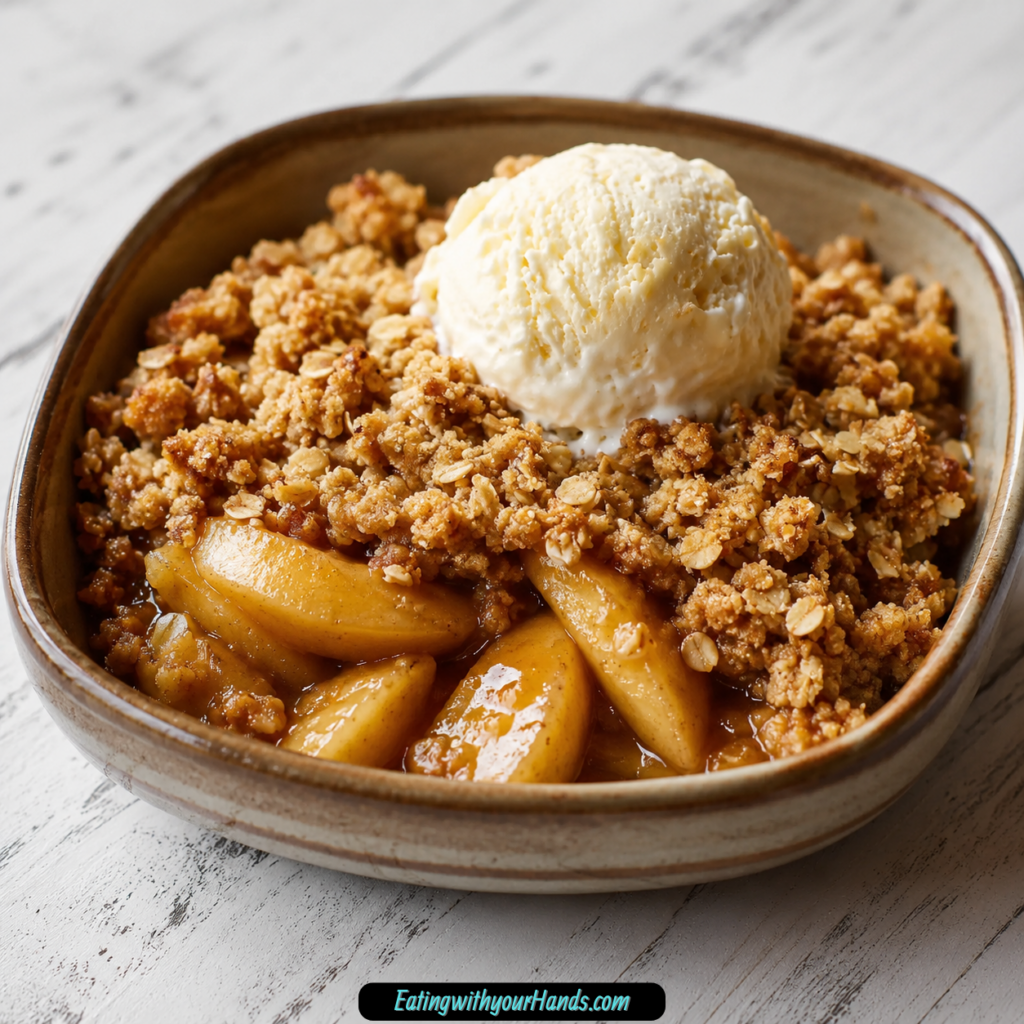
A warm scoop feels especially cozy with a cold topping like vanilla ice cream or a soft spoonful of whipped cream. It is simple, classic, and always satisfying.
Serving Suggestions
Homemade Apple Crisp is best served warm. The topping is at its most fragrant, and the apples are soft, bubbly, and sweet.
Vanilla ice cream is the classic pairing. The cold ice cream melts into the warm apples and oat topping, creating a creamy sauce-like finish.
Whipped cream is another lovely option. It adds lightness and a soft contrast to the crisp topping.
A drizzle of caramel sauce makes the dessert feel more indulgent. It adds extra sweetness and pairs naturally with apples and cinnamon.
This crisp also works well for gatherings because it serves easily from a 9×13-inch dish. You can scoop it into bowls without worrying about perfect slices.
For a casual dessert, serve it straight from the baking dish. Apple crisp is meant to be homey, warm, and generous.
Storage Tips
Store leftovers in the refrigerator, tightly covered, for up to 4 days. Let the crisp cool before covering and refrigerating.
The topping will soften slightly as it sits, but the flavor will still be delicious. Reheating in the oven helps revive some crispness.
Use an airtight container if transferring leftovers from the baking dish. This keeps the apples from drying out and helps preserve the flavor.
Do not leave leftovers uncovered in the refrigerator. The topping and apples can absorb other flavors and lose freshness.
Reheating Tips
To reheat in the oven, place the crisp in a 300°F oven for 10 to 15 minutes. This is the best method for bringing back some texture in the topping.
For individual portions, microwave for 30 seconds. This is quicker, though the topping will be softer than when reheated in the oven.
If reheating from the refrigerator, the apples may need a little extra time to warm through. Stirring is not necessary, but make sure the portion is heated evenly.
Serve reheated crisp with fresh ice cream, whipped cream, or caramel sauce. A warm scoop still tastes cozy even a few days later.
Freezing Instructions
You can freeze the baked crisp or the unbaked assembled version. Wrap it well and freeze for up to 3 months.
Thaw overnight in the refrigerator before reheating or baking. This helps the crisp warm or bake more evenly.
If freezing baked crisp, cool it completely first. Wrapping it while warm can trap steam and affect the texture.
If freezing unbaked assembled crisp, make sure it is well protected from freezer air. A tightly wrapped dish helps preserve the topping and apples.
Make-Ahead Tips
You can assemble the apple crisp ahead of time and refrigerate it for up to 24 hours before baking. This is helpful for gatherings or holiday meals.
Keep it covered in the refrigerator until you are ready to bake. Then bake as directed, watching for the golden topping and tender apples.
If the crisp is cold from the refrigerator, it may need a little extra time. Use the visual signs from the recipe to decide when it is done.
The topping should be golden, and the apples should be tender when pierced with a fork. Bubbling at the edges is also a good sign.
Homemade Apple Crisp Variations
This apple crisp is wonderful as written, but it is also easy to customize. The basic apple-and-oat structure works well with different textures, fruit combinations, and dietary swaps.
Mixed Apple Crisp
Granny Smith is classic, but you can mix in Honeycrisp, Braeburn, or Fuji. This gives the crisp more complexity.
Using more than one apple variety can create a balance of tart, sweet, firm, and juicy textures. It is a simple way to make the flavor more layered.
Nutty Apple Crisp
Stir chopped pecans or walnuts into the topping for added crunch. Nuts make the topping taste richer and more textured.
Pecans add a buttery flavor, while walnuts bring a slightly earthier note. Either one works well with apples and cinnamon.
Spiced Apple Crisp
The recipe uses cinnamon, but you can add nutmeg or cloves. These spices give the crisp a warmer, more fall-inspired flavor.
Use stronger spices lightly. A small amount can change the flavor without overpowering the apples.
Gluten-Free Apple Crisp
Use a gluten-free all-purpose flour blend and certified gluten-free oats. This keeps the topping close to the original texture while making it gluten-free.
The method stays the same. Mix the topping, sprinkle it over the apples, and bake until golden and bubbling.
Dairy-Free Apple Crisp
Swap the melted butter for coconut oil or a vegan butter substitute. This makes the recipe dairy-free.
The flavor and texture may be slightly different, but the topping can still bake into a rich crumble. Use the same amount as the melted butter.
Extra Moist Apple Crisp
If the crisp seems too dry, add a splash of apple juice or water over the apples before topping. This helps increase moisture in the fruit layer.
This is especially helpful if the apples are firm or not very juicy. Use a small amount so the crisp does not become watery.
Helpful Notes for Best Results
Choose Tart, Firm Apples
Granny Smith apples are a classic choice because they balance the sweet topping. Their tart flavor keeps the dessert from tasting too sugary.
Honeycrisp, Braeburn, or Fuji can also be mixed in. This adds more flavor complexity and natural sweetness.
Use Rolled Oats for Texture
Rolled oats create a heartier, crunchier topping. They hold their shape better than quick oats.
Quick oats can be used, but the topping will be softer. For the best texture, old-fashioned rolled oats are ideal.
Do Not Overmix the Topping
Stir the topping until everything is coated and crumbly. Overmixing can make it dense instead of light and textured.
You want the mixture to form little crumbs and clusters. These bake into the best parts of the topping.
Bake Uncovered
Bake the crisp uncovered so the topping can turn golden. Covering it would trap steam and soften the crumble.
If the topping browns too quickly, watch closely and remove the crisp when the apples are tender. The topping should be golden, not pale.
Let It Rest Before Serving
Resting for about 10 minutes helps the juices settle. This makes the crisp easier to scoop.
It also keeps the first serving from being too watery. The filling thickens slightly as it cools.
Reheat in the Oven for Crispness
The oven is the best way to revive the topping after storage. A 300°F oven for 10 to 15 minutes warms the fruit and improves the texture.
The microwave is convenient, but it softens the topping. Use it when speed matters more than crunch.
Troubleshooting Homemade Apple Crisp
Why Is My Apple Crisp Too Dry?
The apples may not have released enough juice, or the topping may have absorbed too much moisture. Next time, add a splash of apple juice or water over the apples before adding the topping.
This can help if your apples are firm or not very juicy. Use only a small splash so the crisp stays balanced.
Why Is My Topping Not Crispy?
The topping may have been overmixed, or the crisp may have been covered while baking. Bake uncovered and mix only until crumbly.
Reheating in the oven can help bring back crispness. The microwave will warm the crisp but keep the topping soft.
Why Are My Apples Still Firm?
The apples may have been sliced too thick, or the crisp may need a little more time in the oven. Test with a fork before removing it from the oven.
The apples should be tender when pierced. If they resist, bake a few more minutes.
Why Is My Crisp Watery?
Very juicy apples can release more liquid than expected. Letting the crisp rest for 10 minutes helps the juices thicken.
If this happens often, use firm apples and avoid adding too much extra liquid. The crisp should bubble, but not become soupy.
Can I Make the Topping More Crunchy?
Use rolled oats, avoid overmixing, and bake uncovered. Adding chopped pecans or walnuts can also increase crunch.
Reheat leftovers in the oven instead of the microwave. This helps the topping regain texture.
Frequently Asked Questions
Can I Use Quick Oats Instead of Rolled Oats?
Yes, quick oats can be used. The texture will be softer.
Rolled oats give the topping a heartier, crunchier texture. They are the better choice if you want classic apple crisp topping.
What Are the Best Apples for Apple Crisp?
Tart, firm apples like Granny Smith are ideal. They balance the sweetness of the brown sugar topping.
You can also use a mix with Honeycrisp and Fuji. Mixing apples adds sweetness and flavor complexity.
Can I Make This Ahead of Time?
Yes, you can assemble the crisp ahead and refrigerate it for up to 24 hours before baking. Keep it covered until ready to bake.
Bake as directed when ready. If the dish is cold from the refrigerator, watch for the topping to turn golden and the apples to become tender.
Can I Halve the Recipe?
Yes, you can halve the recipe. Use an 8×8-inch dish and bake for about 35 to 40 minutes.
Check for the same signs of doneness. The topping should be golden, and the apples should be tender.
How Do I Keep the Topping Crispy?
Bake the crisp uncovered and do not overmix the topping. The topping should be crumbly before it goes over the apples.
For leftovers, reheat in the oven to revive crispness. The microwave is faster but makes the topping softer.
Can I Freeze Apple Crisp?
Yes, you can freeze baked apple crisp or the unbaked assembled version. Wrap it well and freeze for up to 3 months.
Thaw overnight in the refrigerator before reheating or baking. This gives the best texture and most even heating.
Can I Add Nuts?
Yes, chopped pecans or walnuts can be stirred into the topping. They add crunch and flavor.
This is one of the easiest ways to customize the crisp. Add them before sprinkling the topping over the apples.
Can I Make This Dairy-Free?
Yes, use coconut oil or a vegan butter substitute instead of melted butter. The texture will be slightly different.
The topping can still bake into a delicious crumble. Use the same amount as the butter.
Final Thoughts
Homemade Apple Crisp is one of those desserts that never needs to be complicated to be memorable. It is made with sliced apples, brown sugar, rolled oats, flour, cinnamon, and melted butter, yet the result tastes like something deeply comforting and special.
The apples bake until tender, the oat topping turns golden, and the cinnamon fills the kitchen with that familiar warmth people immediately recognize. It is simple food, but it has a way of bringing everyone closer to the table.
This recipe is perfect for cozy nights, family dinners, potlucks, holidays, or any time you want a dessert that feels like a warm hug. It is easy to assemble, freezer-friendly, make-ahead friendly, and flexible enough for different apples, nuts, and dietary swaps.
Serve it warm with vanilla ice cream, whipped cream, or caramel sauce, and it becomes the kind of dessert people quietly go back for seconds of. Even plain, it has everything it needs: tender apples, cinnamon sweetness, and a golden oat crumble.
After one spoonful, it is easy to understand why apple crisp remains such a treasured classic. It is humble, cozy, reliable, and full of the kind of homemade flavor that never goes out of season.
Homemade Apple Crisp

Homemade Apple Crisp is a cozy dessert made with tender sliced apples and a buttery oat topping that bakes until golden and crisp. The apples bring a sweet-tart flavor, while brown sugar, cinnamon, rolled oats, and melted butter create a warm, crumbly topping. This is a simple year-round dessert, especially during apple season when fresh apples are at their best. Serve it warm for a comforting treat that pairs beautifully with ice cream or whipped cream.
Recipe Details
- Prep Time: 10 minutes
- Cook Time: 45 minutes
- Total Time: 55 minutes
- Servings: 6
- Calories: 310 kcal
Ingredients
- ½ cup unsalted butter melted
- 1 teaspoon ground cinnamon
- 1 cup all-purpose flour
- 1 cup rolled oats
- 1 cup brown sugar light or dark
- 6 cups sliced apples preferably Granny Smith
Instructions
Step 1: Preheat the Oven
Preheat the oven to 350°F (175°C) so it is ready for baking the apple crisp.
Step 2: Prepare the Baking Dish
Lightly grease a 9×13 inch baking dish to help prevent sticking.
Step 3: Add the Apples
Spread the sliced apples evenly in the prepared baking dish, making sure they cover the bottom in an even layer.
Step 4: Mix the Dry Topping Ingredients
In a bowl, combine the brown sugar, rolled oats, all-purpose flour, and ground cinnamon.
Step 5: Add the Butter
Pour in the melted unsalted butter and mix until the topping becomes crumbly.
Step 6: Top the Apples
Sprinkle the oat topping evenly over the sliced apples.
Step 7: Bake the Apple Crisp
Bake for 40-45 minutes, until the topping is golden and the apples are tender.
Step 8: Cool Slightly Before Serving
Let the apple crisp cool slightly before serving so the filling can settle and the topping stays pleasantly crisp.
Notes
Use tart apples like Granny Smith for the best flavor.
Serve warm with vanilla ice cream or whipped cream.
To make ahead, refrigerate the assembled unbaked dish for up to 24 hours.
Store leftovers in the fridge up to 4 days; reheat to revive the crisp topping.
Can be frozen before or after baking for up to 3 months.
Serving Suggestions
- Vanilla ice cream
- Whipped cream
- Hot coffee
- Warm apple cider
- Caramel sauce
- Cinnamon tea
- Holiday dessert plates
Storage
How to Store
Store leftovers in the fridge up to 4 days, as noted in the original recipe. Keep the apple crisp covered or in an airtight container.
How to Reheat
Reheat before serving to help revive the crisp topping and warm the apple filling.
How to Freeze
Freeze the apple crisp before or after baking for up to 3 months.
Make-Ahead Tip
To prepare ahead, refrigerate the assembled unbaked dish for up to 24 hours before baking.
Best Texture Tip
For the best texture, serve the apple crisp warm after it has cooled slightly so the topping remains crisp and the apples are tender.

Fernando is the creator and writer behind the food blog Eating with your Hands. Living and working in cities like Paris, Barcelona, and Berlin, and being married to a Canadian foodie, has given Fernando a passion and interest in food and inspired him to run EWYH.