
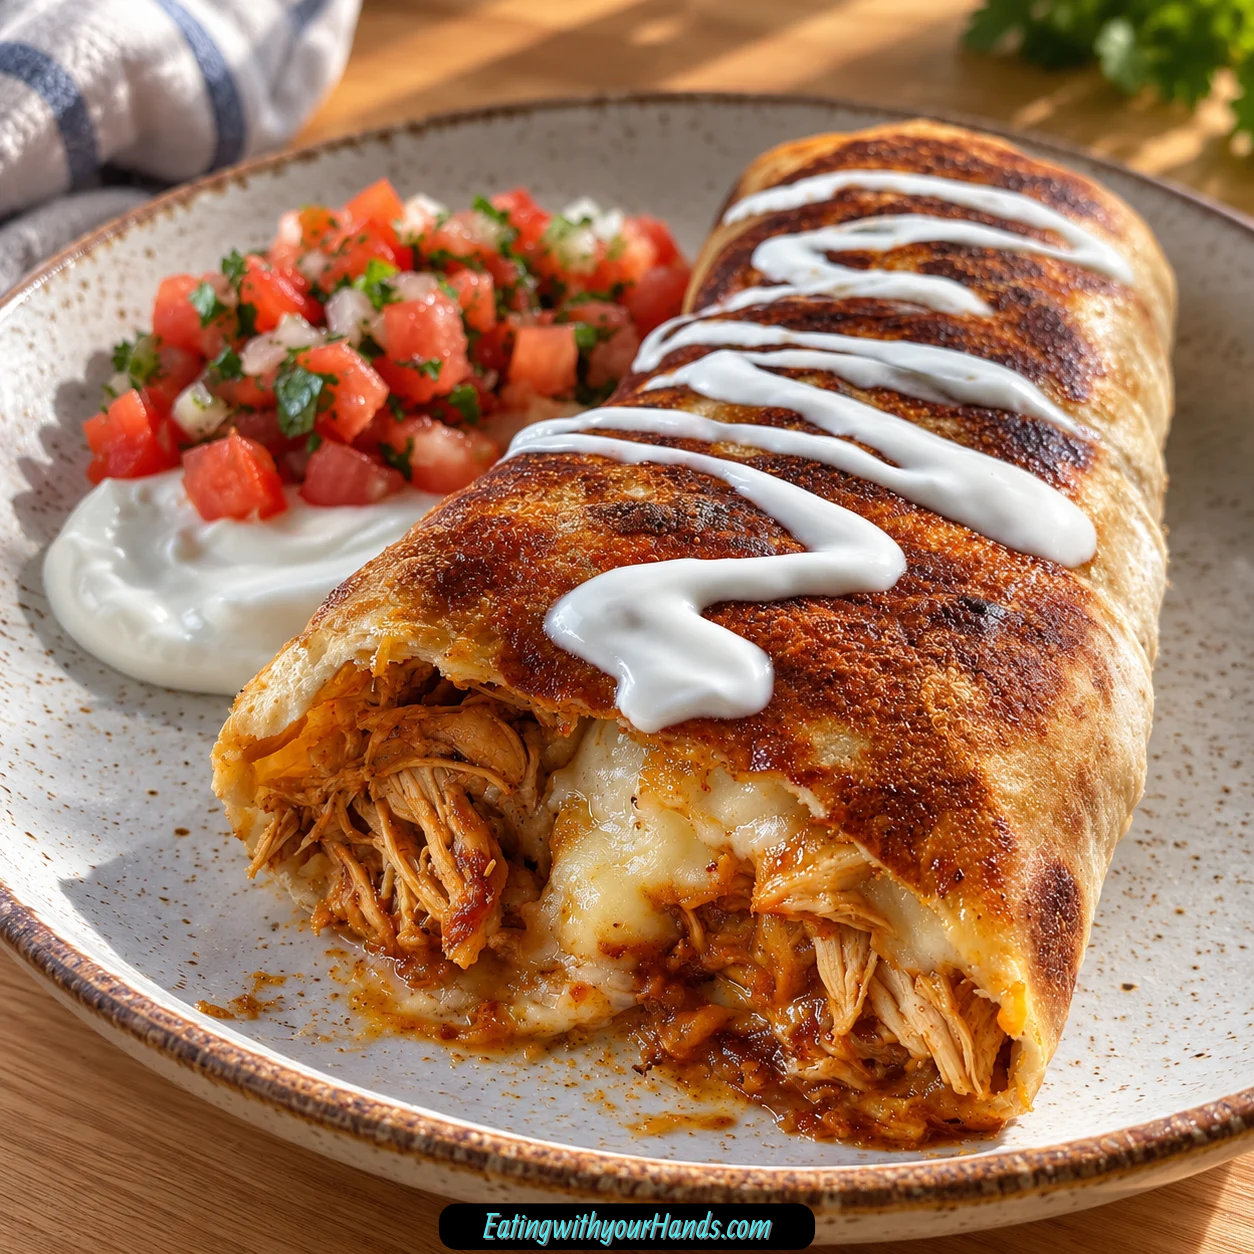
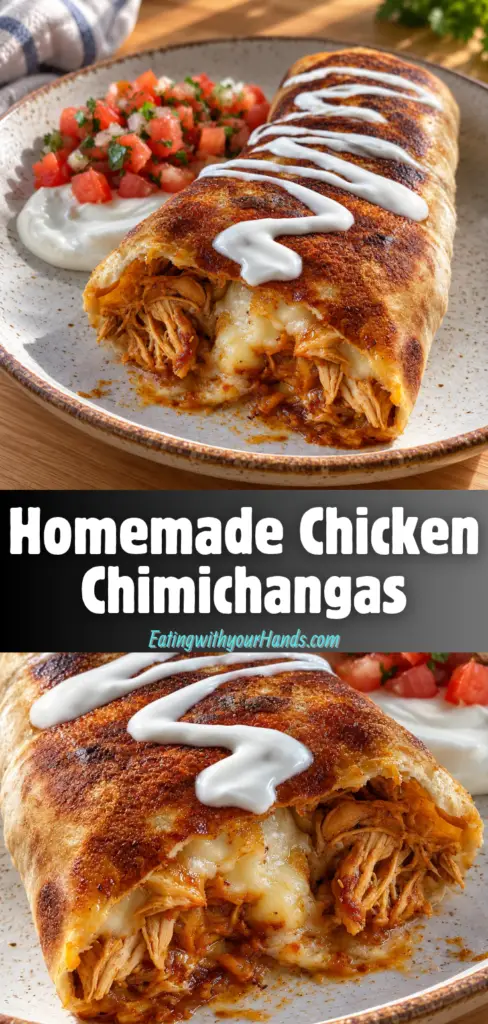
There is something unforgettable about the first bite of a really good chicken chimichanga. The tortilla cracks with that deep golden crunch, then gives way to tender chicken, creamy beans, mild green chiles, warm spices, and melted cheese tucked together inside.
I learned to love homemade chimichangas years ago, when my abuelita showed me how to get that restaurant-style crispness without needing an enormous pot of oil. That little lesson stayed with me, and over time these homemade chicken chimichangas became one of those recipes I could count on whenever I wanted something comforting, cheesy, and exciting enough to make dinner feel special.
What still surprises me is how simple the filling actually is. Salsa, sour cream, refried beans, green chiles, shredded chicken, seasonings, and two cheeses turn into something that tastes far more elaborate once they are wrapped inside a flour tortilla and cooked until crisp.
The smell is part of the experience too. As the cumin, garlic, onion, smoked paprika, oregano, and other seasonings mingle with the chicken and green chiles, the kitchen takes on that warm, savory aroma that seems to announce dinner before anyone has seen the plate.
I have made these often enough that the process now feels almost automatic. Mix the filling, warm the tortillas, fold carefully, fry until golden, and let them rest for a moment before serving.
That last little rest always feels longer than it really is because the melted cheese inside is so tempting. Still, giving each chimichanga a minute before biting in keeps the experience much more pleasant when the filling is piping hot.
Another reason I keep coming back to this recipe is that it gives you two cooking options. Frying delivers the deepest crunch, while baking creates a lighter version that still turns beautifully golden and crisp.
Either way, the spirit of the dish stays the same. You still get that irresistible contrast between crisp tortilla and soft, cheesy chicken filling in every bite.
Table of Contents
- Why You’ll Love These Homemade Chicken Chimichangas
- Ingredients for Homemade Chicken Chimichangas
- Why Refried Beans Belong in the Filling
- Green Chiles Add Tang and Character
- Why Freshly Shredded Cheese Matters
- The Seasoning Blend Gives the Chicken Its Warm Flavor
- Why Burrito-Size Tortillas Work Best
- How to Make Homemade Chicken Chimichangas
- Step 1: Build the Creamy Filling Base
- Step 2: Add the Green Chiles and Seasonings
- Step 3: Fold in the Chicken
- Step 4: Fold in Both Cheeses
- Step 5: Warm the Tortillas
- Step 6: Portion the Filling
- Step 7: Fold and Roll the Chimichangas
- Step 8: Heat the Frying Oil
- Step 9: Fry Seam-Side Down First
- Step 10: Fry the Remaining Side
- Step 11: Drain and Rest
- Baking the Chimichangas Instead of Frying
- How to Keep Chimichangas From Getting Soggy
- Why You Shouldn’t Overfill Them
- Checking the Oil Without a Thermometer
- Black Bean Variation
- Greek Yogurt Variation
- Pepper Jack Variation
- Serving With Mexican Rice
- Serving With Lime Crema
- Serving With Guacamole
- Pickled Red Onions
- Hot Sauce on the Side
- Make-Ahead and Freezing
- Refrigerator Storage
- Reheating in the Oven
- Reheating in the Air Fryer
- Microwave Reheating
- Frequently Asked Questions
- Can I Bake Chicken Chimichangas Instead of Frying Them?
- How Do I Keep Chimichangas From Turning Soggy?
- Can I Freeze Homemade Chimichangas?
- Can I Use Black Beans Instead of Refried Beans?
- Can I Use Greek Yogurt Instead of Sour Cream?
- Can I Use Pepper Jack Cheese?
- Why Should I Fry the Seam Side First?
- How Long Do Leftover Chimichangas Keep?
- Nutritional Information
- The Chimichangas That Still Remind Me of My Abuelita
- Homemade Chicken Chimichangas Recipe
Why You’ll Love These Homemade Chicken Chimichangas
The texture is probably the first thing people notice. A properly cooked tortilla becomes crisp and golden outside while the filling remains creamy, tender, and full of melted cheese.
The flavor is just as satisfying. Salsa and green chiles bring tang and mild heat, refried beans create richness, and the warm seasoning mixture gives the chicken much more personality.
There are two cheeses in the standard filling. Monterrey Jack melts smoothly while sharp cheddar brings a stronger cheese flavor, giving the center more depth than a single-cheese filling would provide.
The recipe is also surprisingly fast. From preparing the filling to cooking the finished chimichangas, dinner can be ready in about 25 minutes.
That makes them practical enough for a busy weeknight. At the same time, the crispy shells and generous filling make them feel festive enough for a family meal or casual gathering.
They are also easy to adjust when necessary. Black beans, Greek yogurt, or pepper jack can step in for some of the standard ingredients without changing the basic chimichanga idea.
And if frying is not what you want that day, the oven method gives you another option. Brush the assembled chimichangas with oil and bake them until golden instead.
Ingredients for Homemade Chicken Chimichangas
The filling combines creamy ingredients, shredded chicken, green chiles, warm seasonings, and two cheeses. Large flour tortillas create enough room to hold everything securely once folded.
- ½ cup salsa
- ½ cup sour cream
- ½ cup refried beans, packed firmly into the measuring cup
- 1 4-ounce can mild chopped green chiles, including the liquid
- 3 cups shredded cooked chicken
- 1 cup freshly shredded Monterrey Jack cheese
- 1 cup freshly shredded sharp cheddar cheese
- 6 burrito-size flour tortillas, 10 inches each
- Chili powder
- Cumin
- Garlic powder
- Onion powder
- Smoked paprika
- Oregano
- Salt
- Vegetable oil, for frying, enough to reach about 1 inch deep in the skillet
Mateo’s medium salsa is one preferred choice when you want a balanced kick. Full-fat sour cream gives the filling its richest texture.
The green chiles should go into the mixture with their liquid rather than being drained. That liquid becomes part of the filling and contributes to the overall flavor.
Why Refried Beans Belong in the Filling
Refried beans bring a creamy, substantial texture that helps bind the other ingredients together. The half cup should be packed firmly when measured.
They blend naturally with sour cream and salsa before the chicken and cheese are added. Starting with these creamy ingredients creates a cohesive base for the filling.
The beans also help give each chimichanga a rich center. Without them, the chicken and cheese would feel much looser inside the tortilla.
Black beans can replace the refried beans when necessary. Mash them slightly first so they create a texture closer to the original filling.
Green Chiles Add Tang and Character
One 4-ounce can of mild chopped green chiles goes directly into the filling. The liquid should be included rather than poured away.
That liquid contributes flavor and moisture. It also helps the creamy base blend more easily with the chicken and seasonings.
Because the chiles are mild, they add character without making the standard version aggressively hot. The result is flavorful enough for both adults and kids.
Their tang also works naturally with salsa and sour cream. Together, those ingredients keep the chicken filling from tasting heavy despite all the cheese.
Why Freshly Shredded Cheese Matters
The filling uses 1 cup freshly shredded Monterrey Jack and 1 cup freshly shredded sharp cheddar. Together, they create both meltiness and a stronger cheese flavor.
Freshly shredded cheese is preferred over packaged pre-shredded cheese. The texture melts more smoothly inside the hot chimichanga.
Monterrey Jack gives the filling that stretchy, gooey quality people expect when they break into the tortilla. Sharp cheddar brings more pronounced flavor beside the chicken and spices.
Pepper jack can replace Monterrey Jack if needed. It will create a hotter and more assertive version of the filling.
The Seasoning Blend Gives the Chicken Its Warm Flavor
Chili powder, cumin, garlic powder, onion powder, smoked paprika, oregano, and salt are stirred into the creamy filling base. Together, they create the warm, aromatic character running through the chicken mixture.
The seasonings should be distributed thoroughly before the shredded chicken is folded in. That keeps the flavor spread evenly instead of leaving strongly seasoned pockets.
Cumin and smoked paprika give the filling deeper, warmer notes. Garlic powder, onion powder, oregano, chili powder, and salt complete the savory profile.
Once those spices hit the wet ingredients, their aroma becomes noticeably stronger. That is the point when the filling begins smelling like the chimichangas are already on their way.
Why Burrito-Size Tortillas Work Best
The recipe uses six 10-inch flour tortillas. Their size gives you enough room for approximately ½ cup filling while still leaving plenty of tortilla for folding.
Smaller tortillas would be much harder to close securely around that amount of filling. The extra surface area matters because the sides need to fold inward before the final roll.
Flour tortillas also become pliable when warmed. That flexibility is important when you want a tight package that does not crack during frying.
If the tortillas feel stiff, microwave them for about 15 seconds before assembly. The brief warming makes folding much easier.
How to Make Homemade Chicken Chimichangas
The process is easiest when you prepare the entire filling first, warm the tortillas second, and then work through assembly before the oil is fully ready. Keeping the filling amount consistent also helps all six chimichangas stay similar in size and cook evenly.
Step 1: Build the Creamy Filling Base
Place the ½ cup salsa, ½ cup sour cream, and ½ cup firmly packed refried beans in a large mixing bowl. Stir until the three ingredients are thoroughly combined.
Take your time smoothing the refried beans into the salsa and sour cream. The mixture should look creamy and relatively uniform before anything else is added.
This creamy base helps hold the shredded chicken, chiles, seasonings, and cheese together. Creating it first also makes later mixing easier.
Step 2: Add the Green Chiles and Seasonings
Pour the entire 4-ounce can of mild chopped green chiles into the bowl, including the liquid. Stir until the chiles are distributed throughout the creamy mixture.
Add the chili powder, cumin, garlic powder, onion powder, smoked paprika, oregano, and salt. Mix thoroughly so the spices are spread evenly through the filling base.
The mixture should smell strongly savory and aromatic at this stage. Make sure no obvious pockets of dry seasoning remain.
This is where the filling develops most of its warm spice character. Once everything is blended, you can begin adding the more substantial ingredients.
Step 3: Fold in the Chicken
Add the 3 cups shredded cooked chicken to the seasoned mixture. Use a spatula or large spoon to fold the chicken through rather than beating everything aggressively.
Continue until the chicken is coated on all sides. You want the creamy mixture clinging to the strands rather than sitting separately at the bottom of the bowl.
Rotisserie chicken works well for this recipe. Its convenience makes the chimichangas especially easy to prepare on a busy evening.
Keep the chicken texture intact as much as possible. Overmixing can make the filling denser than necessary.
Step 4: Fold in Both Cheeses
Add the 1 cup freshly shredded Monterrey Jack and 1 cup freshly shredded sharp cheddar. Fold them gently into the chicken mixture.
Stop once the cheeses look evenly distributed. Leaving the strands relatively intact gives them a chance to melt into distinct gooey pockets during cooking.
The filling should hold together when pressed lightly with a spoon. It should feel cohesive enough to portion into the tortillas without immediately running outward.
Avoid overworking it. Gentle folding keeps the filling lighter and easier to distribute.
Step 5: Warm the Tortillas
Lay out the six 10-inch flour tortillas. If they feel stiff or resistant, warm them briefly in the microwave for about 15 seconds.
The tortillas should become flexible enough to fold without cracking. There is no need to make them hot.
Work with warm tortillas while they are still pliable. This is especially helpful when folding around a generous half cup of filling.
Keep the filling nearby so assembly can happen immediately. Once the tortillas cool, they may stiffen again.
Step 6: Portion the Filling
Place approximately ½ cup of filling slightly below the center of each tortilla. Keep the filling in a compact mound rather than spreading it all the way toward the edges.
Do not add more simply because there appears to be room. Overstuffed chimichangas are much more likely to burst or open while frying.
Try to divide the filling consistently among all six tortillas. Similar-sized chimichangas are easier to cook at the same rate.
Keep enough open tortilla around the mound for folding. The sides and lower flap both need space to cover the filling securely.
Step 7: Fold and Roll the Chimichangas
Fold both sides of the tortilla inward over the filling first. Hold them gently in place.
Bring the bottom flap up and over the filling. Tuck it snugly enough that the filling becomes enclosed.
Roll the tortilla away from you while maintaining gentle tension. Finish with the seam facing downward.
The filling should be completely contained inside. A tight but not overstretched tortilla is the goal.
Step 8: Heat the Frying Oil
Pour vegetable oil into a deep skillet until it reaches roughly 1 inch deep. Heat over medium-high until the oil reaches about 350°F.
If you do not have a thermometer, drop a tiny piece of tortilla into the oil. It should begin sizzling immediately without burning.
The oil needs to be hot enough to crisp the tortilla quickly. Oil that is not ready can make the exterior heavier instead of crisp.
Keep the temperature as steady as possible while cooking. Work in batches rather than trying to fit every chimichanga in at once.
Step 9: Fry Seam-Side Down First
Use tongs to lower the chimichangas carefully into the hot oil with the seam facing downward. This first contact with the oil helps seal the folded tortilla.
Do not overcrowd the skillet. Frying two at a time is perfectly fine when that gives each one enough room.
Cook for about 2–3 minutes on the first side. The tortilla should become a deep golden brown.
Turn carefully once the first side is crisp. Avoid puncturing the tortilla with the tongs.
Step 10: Fry the Remaining Side
Cook the second side for another 2–3 minutes. Watch for the same deep golden color.
The cheese inside will be melting while the exterior crisps. Keep the oil temperature controlled so the shell browns without burning.
Remove each chimichanga once the tortilla is evenly golden. Allow excess oil to drain briefly over the skillet.
Continue with the remaining batches. Give the oil a moment to recover its heat if necessary between rounds.
Step 11: Drain and Rest
Transfer the fried chimichangas to a paper towel-lined plate. Let them sit for about 1 minute.
The paper towels absorb extra surface oil. That helps preserve the crisp shell rather than leaving the tortilla greasy.
The short rest also gives the molten cheese inside a moment to settle. Cutting or biting immediately can release extremely hot filling.
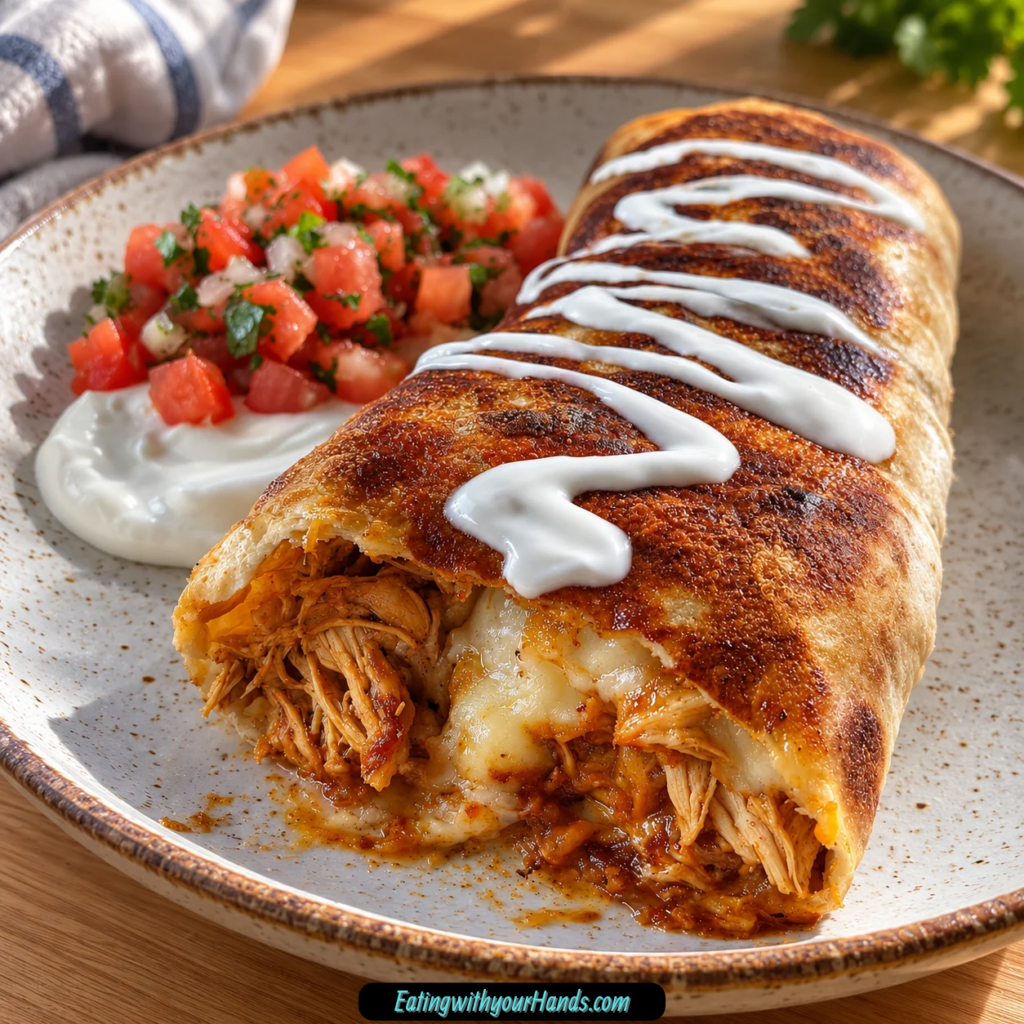
Once that minute has passed, the chimichangas are ready to serve. Bring them to the table while the exterior is still crisp.
Baking the Chimichangas Instead of Frying
The oven method gives you a lighter alternative while keeping the exterior pleasantly crunchy. Preheat the oven to 400°F.
Assemble the chimichangas using the same filling and folding technique. Arrange them for baking and brush the exterior with oil.
Bake for about 20–25 minutes until golden. The crust will not become quite as crisp as the fried version, but it still develops plenty of texture.
Serve them while hot. The same toppings and side dishes work with either cooking method.
How to Keep Chimichangas From Getting Soggy
The filling should be cohesive rather than watery. Starting with properly measured refried beans and not adding unnecessary liquid helps maintain that texture.
Keeping the green chile liquid is part of the intended filling, but the mixture should still hold together once the chicken and cheese are added. A filling that spreads like sauce will be harder to contain.
The seam-side-first frying step is another important detail. It quickly seals the fold and helps the tortilla stay closed.
Finally, drain the chimichangas on paper towels after frying. Removing excess surface oil keeps the shell crisp rather than greasy.
Why You Shouldn’t Overfill Them
About ½ cup filling per tortilla is the target. That amount gives you a generous center while still leaving enough tortilla for a secure roll.
Adding extra filling makes closing the tortilla more difficult. It also increases the chance that cheese or beans will escape into the oil.
A properly filled chimichanga should feel substantial but manageable. You should not have to stretch the tortilla aggressively around the center.
Think of the fold as part of the recipe, not merely presentation. A secure package cooks more evenly and stays crisp.
Checking the Oil Without a Thermometer
A tiny tortilla scrap gives you a simple way to test the oil. Drop it carefully into the skillet once you think the oil is ready.
The piece should bubble immediately. That steady reaction tells you the oil is hot enough to begin crisping the tortilla.
If it sits without much activity, give the oil more time. If it darkens almost immediately, the heat is too aggressive.
The correct temperature makes a noticeable difference in the finished shell. Properly heated oil gives you the golden crunch that makes chimichangas so satisfying.
Black Bean Variation
Black beans can replace the refried beans. Mash them slightly before mixing them with the salsa and sour cream.
This helps create a texture closer to the creamy original filling. Whole black beans would make the center feel more separated.
The flavor will be different, but the chicken, green chiles, cheese, and seasonings remain the same. Fold everything together using the standard method.
Expect a little less of the creamy richness that refried beans provide. The chimichangas will still work beautifully.
Greek Yogurt Variation
Greek yogurt can replace sour cream. It creates a tangier filling while still contributing moisture and creaminess.
Use it in the same stage where the sour cream would normally be mixed with salsa and beans. Stir until the base looks smooth.
The remaining ingredients can stay unchanged. Chicken, cheese, chiles, and seasonings will still create the familiar filling structure.
This variation also changes the nutritional profile somewhat. The finished flavor remains distinctly savory and creamy.
Pepper Jack Variation
Pepper jack can replace Monterrey Jack. It makes the filling noticeably spicier.
Freshly shred it before mixing for the best melting texture. Fold it into the chicken filling with the sharp cheddar.
Because pepper jack has a stronger personality, it may stand out more prominently in the finished chimichanga. That makes it a good choice when you want more heat.
The cooking method does not change. Fry or bake using the same times.
Serving With Mexican Rice
Fluffy Mexican rice is an easy side for these chimichangas. It gives you something soft and comforting beside the crisp tortilla.
The rice also works well with any filling or cheese that escapes onto the plate. It makes the entire meal feel more complete.
Serve the rice hot beside each chimichanga. Keep it separate rather than stuffing it into the tortilla.
The crisp shell should remain the center of attention. The rice simply supports it.
Serving With Lime Crema
Lime crema creates a cool, tangy contrast. Mix sour cream with lime zest and a pinch of salt.
Spoon it over the chimichanga or serve it on the side. Either approach gives you another creamy element beside the crunchy tortilla.
The citrus character works especially well with the green chiles and warm spices. It also lightens the richness of the cheese.
Keep the crema cold until serving. The temperature contrast makes each bite more interesting.
Serving With Guacamole
Chunky guacamole brings fresh avocado richness to the plate. Cilantro can be included generously in the guacamole.
Serve it next to the hot chimichanga rather than inside before frying. This keeps the avocado cool and fresh.
A spoonful beside each bite gives you creamy contrast. It also fits naturally with salsa and the seasoned chicken filling.
Use as much or as little as you like. The chimichanga itself already contains plenty of flavor.
Pickled Red Onions
Pickled red onions provide a sharp, tangy crunch. Their bright flavor cuts through the richness of beans, cheese, and fried tortilla.
Serve them as a topping or on the side. A small amount is enough to change the character of a bite.
Their crisp texture also complements the chimichanga shell. This gives the plate another layer of contrast.
Keep them chilled until serving. Add them only after the chimichangas are cooked.
Hot Sauce on the Side
Hot sauce lets everyone decide how spicy the final meal should be. This is especially useful when serving both kids and adults.
Offer it at the table rather than mixing it into the entire filling. That keeps the standard chimichanga approachable.
A few drops can intensify the green chile and spice flavors. Heat lovers can add as much as they prefer.
This simple serving option avoids the need to make multiple filling batches. One recipe can serve several spice preferences.
Make-Ahead and Freezing
Chimichangas can be assembled ahead for freezing. Prepare the filling, roll the tortillas, and stop before frying.
Wrap each un-fried chimichanga tightly in foil. Freeze for up to 2 months.
There is no need to fry them before freezing. Keeping them uncooked preserves the shell for later cooking.
When ready, they can be fried directly from frozen. Add about 1–2 additional minutes to the cooking time.
Refrigerator Storage
Cooked chimichangas can be stored in an airtight container in the refrigerator. Keep them for up to 3 days.
Allowing the shell to sit in storage will naturally soften it somewhat. The reheating method determines how much crispness you can restore.
Keep any toppings such as guacamole, crema, or pickled onions separate. Add those only after reheating.
The filling remains flavorful during storage. Reheating simply needs to warm the center and revive the exterior.
Reheating in the Oven
Preheat the oven to 375°F. Place the refrigerated chimichangas inside and heat for about 5–7 minutes.
The dry oven heat helps restore the crisp tortilla. This works much better for texture than a microwave.
Check that the filling is hot before serving. The outside may become crisp before the very center is fully warmed.
Add fresh toppings afterward. Guacamole, crema, onions, and hot sauce should not be heated with the chimichanga.
Reheating in the Air Fryer
Set the air fryer to 375°F. Reheat the chimichangas for approximately 5–7 minutes.
The circulating heat helps revive the exterior quickly. Watch toward the end so the tortilla does not become too dark.
Serve as soon as the filling is hot. The air fryer is especially useful when reheating only one or two pieces.
Add toppings after cooking. This preserves the contrast between hot chimichanga and cool accompaniments.
Microwave Reheating
The microwave works when convenience matters most. Heat the chimichanga until the center is warmed through.
Expect a softer tortilla. Microwave heat does not restore the crispness as effectively as an oven or air fryer.
The flavor remains enjoyable even when the texture changes. This can still be useful for a fast lunch.
If crunch is the priority, choose one of the dry-heat methods instead. The exterior will come much closer to freshly cooked.
Frequently Asked Questions
Can I Bake Chicken Chimichangas Instead of Frying Them?
Yes. Brush the assembled chimichangas with oil and bake at 400°F.
Bake for approximately 20–25 minutes until golden. They will be somewhat less crisp than fried chimichangas but will still have a crunchy exterior.
How Do I Keep Chimichangas From Turning Soggy?
Keep the filling from becoming excessively wet. It should be cohesive enough to stay inside the tortilla.
When frying, place the seam side into the oil first. This helps seal the package before you turn it.
Can I Freeze Homemade Chimichangas?
Yes. Assemble them completely but do not fry.
Wrap each one tightly in foil and freeze for up to 2 months. Fry directly from frozen and add about 1–2 minutes to the cooking time.
Can I Use Black Beans Instead of Refried Beans?
Yes. Mash the black beans slightly before adding them.
This creates a texture closer to refried beans. The filling will be a little less creamy but still works well.
Can I Use Greek Yogurt Instead of Sour Cream?
Yes. Greek yogurt creates a tangier version while still giving the filling moisture.
Mix it with the salsa and beans at the beginning. Continue with the remaining ingredients as usual.
Can I Use Pepper Jack Cheese?
Yes. Pepper jack can replace Monterrey Jack.
It brings more heat and a stronger flavor. Freshly shred it before folding it into the filling.
Why Should I Fry the Seam Side First?
The hot oil helps set the folded seam quickly. That makes the chimichanga less likely to open during frying.
Keep the seam underneath during the first 2–3 minutes. Flip only after that side has become golden and secure.
How Long Do Leftover Chimichangas Keep?
Store cooked chimichangas in an airtight container for up to 3 days. Keep toppings separately.
Reheat at 375°F in the oven or air fryer for about 5–7 minutes when you want the crispiest result. Microwave reheating is quicker but creates a softer shell.
Nutritional Information
One homemade chicken chimichanga contains approximately 420 calories. It also provides about 28g protein.
Fat is approximately 22g per chimichanga. Of that amount, around 10g is saturated fat.
The exact values can vary depending on the brands of tortillas, salsa, sour cream, beans, cheese, and chicken used. Frying oil absorption and ingredient substitutions can also change the final nutritional profile.
Black beans, Greek yogurt, pepper jack, baking instead of frying, or different serving portions will naturally alter the numbers. The standard figures are best treated as estimates for the original version.
The Chimichangas That Still Remind Me of My Abuelita
Some recipes stay with me because they taste wonderful, while others stay because they are attached to the person who taught me how to make them. Homemade Chicken Chimichangas belong to both categories.
I still think about my abuelita showing me that I did not need an enormous vat of oil to get the kind of crisp tortilla I loved at restaurants. A deep skillet, enough oil for the tortilla to fry properly, and a little patience were all it took.
That lesson completely changed how I thought about making chimichangas at home. Suddenly they stopped feeling like something that belonged only on a restaurant menu.
Over the years, I have made the filling again and again. The chicken, beans, salsa, sour cream, green chiles, spices, and melted cheese have become familiar enough that the smell alone tells me exactly what dinner is going to feel like.
I still love watching the first chimichanga hit the hot oil. That immediate sizzle tells me the tortilla is on its way to becoming crisp and golden.
Then comes the turn, the second side, and the brief wait on the paper towel-lined plate. It is a simple process, but the transformation always feels satisfying.
Some nights I fry every one because I want the deepest crunch possible. Other times I brush them with oil and bake the batch because that version fits the evening better.
The toppings change too. Mexican rice, lime crema, guacamole, pickled red onions, and hot sauce can turn one batch into a whole table of different flavors.
What never changes is the moment the tortilla breaks open and the melted cheese and chicken filling appear inside. That contrast between crisp shell and creamy center is exactly why I have kept making them for so many years.
These Homemade Chicken Chimichangas still carry a little bit of the kitchen lesson my abuelita gave me, and that makes them more than just another quick dinner. They are crunchy, cheesy, comforting, and familiar in the best possible way—the kind of meal that makes everyone at the table reach for another before the first plate is even completely cleared.
Homemade Chicken Chimichangas Recipe
Crispy on the outside and packed with a creamy, cheesy chicken filling, these Homemade Chicken Chimichangas bring together salsa, refried beans, green chiles, warm spices, and two kinds of cheese. Fried until golden or baked for a lighter option, they make a satisfying Mexican-style main dish with plenty of crunch and flavor.
Recipe Details
- Prep Time: 15 minutes
- Cook Time: 10 minutes
- Total Time: 25 minutes
- Course: Main Dish
- Cuisine: Mexican
- Servings: 6 chimichangas
- Calories: 420 kcal
Ingredients
For the Filling
- ½ cup salsa medium for more heat, like Mateo’s brand
- ½ cup sour cream
- ½ cup refried beans
- 4 oz. can mild chopped green chiles
- 2 teaspoons chili powder
- 1 teaspoon ground cumin
- 1 teaspoon garlic powder
- ½ teaspoon onion powder
- ½ teaspoon smoked paprika
- ½ teaspoon dried oregano
- ½ teaspoon salt
- 3 cups shredded cooked chicken rotisserie works well
- 1 cup freshly shredded Monterrey Jack cheese
- 1 cup freshly shredded sharp cheddar cheese
For Assembly and Frying
- 6 burrito-size flour tortillas
- Vegetable oil if frying
Instructions
Step 1: Make the Seasoned Base
In a large bowl, combine the salsa, sour cream, refried beans, chopped green chiles, chili powder, ground cumin, garlic powder, onion powder, smoked paprika, dried oregano, and salt.
Stir until the mixture is smooth and evenly seasoned.
Step 2: Add the Chicken and Cheese
Add the shredded cooked chicken, freshly shredded Monterrey Jack, and sharp cheddar.
Mix until the chicken is fully coated and the cheeses are evenly distributed throughout the filling.
Step 3: Fill the Tortillas
Divide the chicken mixture evenly among the 6 burrito-size flour tortillas.
Place the filling in the center of each tortilla so there is enough room around the edges for folding.
Step 4: Fold the Chimichangas
Fold the sides of each tortilla inward over the filling.
Roll tightly from the bottom to create a secure burrito shape.
Step 5: Heat the Oil
Heat the vegetable oil in a deep skillet over medium-high heat.
Let the oil get hot before adding the chimichangas.
Step 6: Fry Until Golden
Place the chimichangas seam-side down in the hot oil.
Fry for about 2–3 minutes per side, until golden brown and crisp.
Step 7: Drain
Transfer the fried chimichangas to paper towels.
Let the excess oil drain before serving.
Notes
- For a lighter version, bake at 400°F for 20–25 minutes until crispy.
- Serve with extra salsa, sour cream, or guacamole.
- Use freshly shredded cheese for best melting.
Serving Suggestions
Serve Homemade Chicken Chimichangas hot while the tortillas are still crisp and the cheese filling is warm. Extra salsa, sour cream, or guacamole can be added on the side for dipping or spooning over each serving.
This recipe makes 6 chimichangas and works well with shredded rotisserie chicken for easier preparation. Freshly shredded Monterrey Jack and sharp cheddar give the filling a smooth, melty texture.
For a lighter variation, bake the assembled chimichangas at 400°F for 20–25 minutes until crispy instead of frying.
Storage
Keep leftover chimichangas covered until ready to serve again.
Chicken Tip
Use 3 cups shredded cooked chicken.
Rotisserie chicken works well for an easier preparation.
Salsa Tip
Use ½ cup medium salsa if you want more heat.
Mateo’s brand is one option.
Cheese Tip
Use 1 cup freshly shredded Monterrey Jack cheese and 1 cup freshly shredded sharp cheddar cheese.
Freshly shredded cheese melts especially well in the filling.
Seasoning Tip
Flavor the filling with chili powder, cumin, garlic powder, onion powder, smoked paprika, oregano, and salt.
Tortilla Tip
Use 6 burrito-size flour tortillas.
Fold the sides inward before rolling tightly from the bottom.
Frying Tip
Fry seam-side down over medium-high heat for about 2–3 minutes per side.
Drain on paper towels before serving.
Baking Variation
For a lighter version, bake at 400°F for 20–25 minutes until crispy.
Serving Tip
Serve with extra salsa, sour cream, or guacamole.

Fernando is the creator and writer behind the food blog Eating with your Hands. Living and working in cities like Paris, Barcelona, and Berlin, and being married to a Canadian foodie, has given Fernando a passion and interest in food and inspired him to run EWYH.