
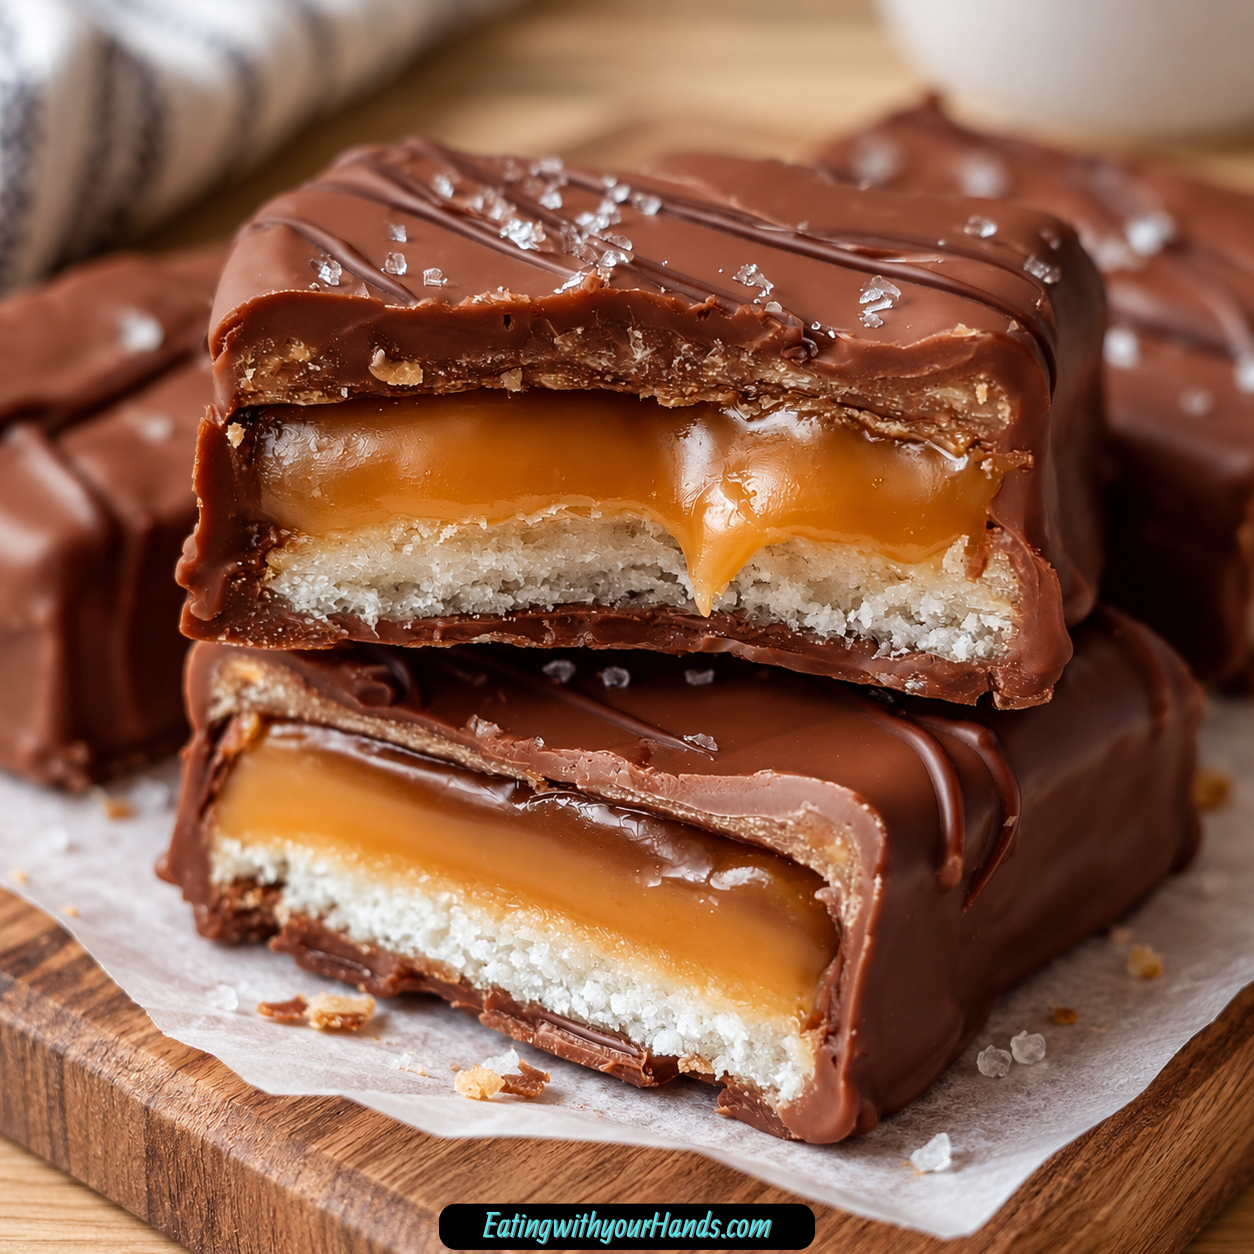
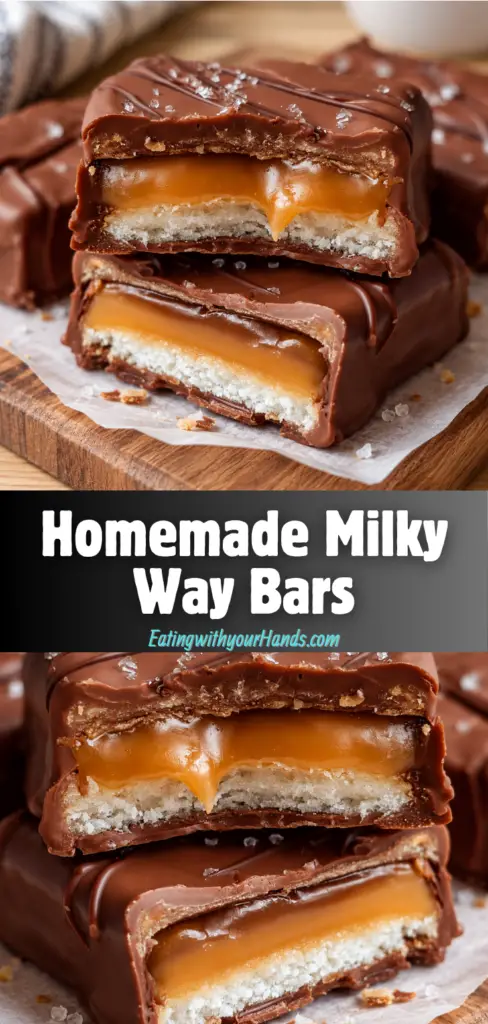
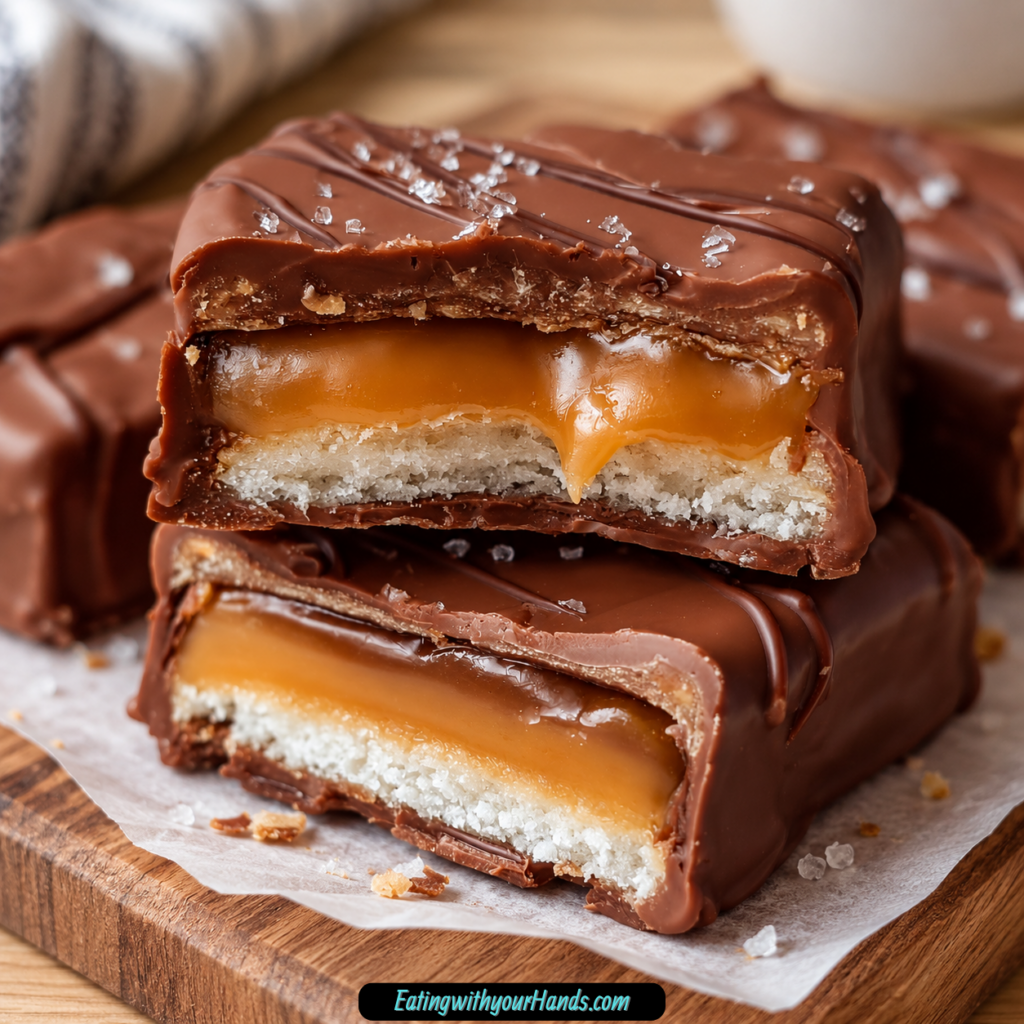
Homemade Milky Way Bars are the kind of no-bake treat that makes the kitchen feel like a tiny candy shop. They have a soft chocolate nougat layer, a gooey caramel center, and a smooth milk chocolate coating that cracks gently when you bite into it.
These bars bring back that classic candy bar feeling, but with the sweetness of making them yourself. There is something especially satisfying about cutting into a chilled slab of nougat and caramel, dipping each piece in chocolate, and watching simple pantry ingredients turn into glossy homemade candy bars.
The layers are what make them so fun. The nougat is fluffy, chocolatey, and creamy, while the caramel is stretchy and soft.
Then the chocolate coating wraps everything together. It gives each bar that finished candy-shop look and keeps the filling tucked inside.
This recipe does not need a candy thermometer, stovetop caramel, or any complicated candy-making tools. The microwave does most of the work, which makes the process approachable even if homemade candy feels intimidating.
The nougat begins with milk chocolate chips, marshmallow fluff, and sweetened condensed milk. That combination creates a soft, chewy, chocolatey base that firms up beautifully in the refrigerator.
The caramel layer is made with soft caramels and heavy cream. It melts into a smooth filling that spreads over the nougat and sets into a gooey center.
The final coating uses milk chocolate chips or melting wafers with a little vegetable oil or coconut oil. That small amount of oil helps the chocolate melt smoothly and coat the bars more easily.
Homemade Milky Way Bars are perfect for holidays, edible gifts, birthday trays, movie nights, bake sales, or those days when a homemade candy bar feels like exactly the right kind of joy. They are sweet, nostalgic, simple, and far easier than they look.
Table of Contents
- Why You’ll Love These Homemade Milky Way Bars
- Recipe Details
- Ingredients
- Ingredient Notes
- Optional Swaps, Variations, Add-Ins, and Serving Ideas
- Classic Homemade Milky Way Bars
- Dark Chocolate Milky Way Bars
- Half Milk, Half Dark Chocolate Bars
- Sea Salt Caramel Bars
- Nutty Homemade Candy Bars
- Graham Cracker Nougat Bars
- Shortbread Cookie Crumble Bars
- Peanut Butter Swirl Bars
- Birthday Cake Candy Bars
- Vanilla Nougat Bars
- Bailey’s Caramel Bars
- Dairy-Free-Style Bars
- Extra Smooth Chocolate Coating
- Chocolate Drizzle Finish
- Why This Recipe Works
- Directions
- Step 1: Prepare the Pan
- Step 2: Melt the Nougat Chocolate
- Step 3: Add Marshmallow Fluff and Condensed Milk
- Step 4: Spread the Nougat Layer
- Step 5: Chill the Nougat
- Step 6: Unwrap the Caramels
- Step 7: Melt the Caramel
- Step 8: Adjust the Caramel if Needed
- Step 9: Spread the Caramel Layer
- Step 10: Chill the Caramel Layer
- Step 11: Melt the Coating Chocolate
- Step 12: Adjust the Chocolate Texture
- Step 13: Lift and Cut the Candy Slab
- Step 14: Dip Each Bar
- Step 15: Place on Parchment
- Step 16: Add Toppings if Using
- Step 17: Let the Bars Set
- Step 18: Store the Bars
- Serving Ideas
- Storage
- Freezing
- Make-Ahead
- Helpful Notes for Best Results
- Variations
- Classic Homemade Milky Way Bars
- Dark Chocolate Milky Way Bars
- Half Milk and Half Dark Bars
- Sea Salt Homemade Bars
- Nutty Candy Bars
- Graham Cracker Nougat Bars
- Shortbread Cookie Nougat Bars
- Peanut Butter Caramel Bars
- Birthday Sprinkle Bars
- Vanilla Nougat Candy Bars
- Bailey’s Caramel Bars
- Coconut Milk Caramel Bars
- Extra Chocolate Drizzle Bars
- Troubleshooting
- Frequently Asked Questions
- Why This Recipe Works So Well
- Final Thoughts
- Homemade Milky Way Bars
Why You’ll Love These Homemade Milky Way Bars
These bars taste like a homemade version of a classic candy bar. The soft nougat, gooey caramel, and chocolate shell create that familiar layered bite.
They use simple ingredients. Chocolate chips, marshmallow fluff, sweetened condensed milk, soft caramels, heavy cream, and oil are easy to find.
They do not require special candy-making equipment. If you can melt, stir, chill, cut, and dip, you can make them.
They are great for gifting. Wrapped individually or tucked into a box, they make sweet homemade treats.
They can be customized. Use dark chocolate, sea salt, toasted nuts, cookie crumbs, peanut butter, sprinkles, or extra flavorings.
They store well. Keep them at room temperature for about a week or freeze them for up to 2 months.
Recipe Details
This recipe is made in an 8×8 inch pan. Line the pan with parchment paper so the chilled layers lift out easily.
The nougat layer uses 2 cups milk chocolate chips, 1 cup marshmallow fluff, and ¼ cup sweetened condensed milk. Marshmallow crème also works.
The nougat is melted, mixed, spread into the pan, and chilled for 30 minutes. This gives it time to firm before the caramel goes on.
The caramel layer uses 1 bag, 11 oz, soft caramels and 2 tablespoons heavy cream. Kraft or Werther’s soft caramels are good options.
The caramel melts in 30-second microwave intervals. Stir between each round until smooth.
Once the nougat has firmed, the caramel is spread over the top and chilled another 30 minutes. This creates clean layers.
The coating uses 3 cups milk chocolate chips or melting wafers and 2 tablespoons vegetable oil or coconut oil. The oil helps the chocolate stay smooth for dipping.
The chilled slab is cut into about 12 bars. Each bar is dipped in melted chocolate with two forks, then set on parchment paper.
The coated bars set in about 1 hour at room temperature. If you are impatient, they can set in about 15 minutes in the refrigerator.
Ingredients
For the Nougat Layer
- 2 cups milk chocolate chips
- 1 cup marshmallow fluff
- ¼ cup sweetened condensed milk
For the Caramel Layer
- 1 bag soft caramels, 11 oz
- 2 tablespoons heavy cream
For the Chocolate Coating
- 3 cups milk chocolate chips
- 2 tablespoons vegetable oil or coconut oil
Optional Add-Ins, Toppings, and Variations
- Dark chocolate
- Melting wafers
- Flaky sea salt
- Chopped toasted almonds
- Chopped toasted pecans
- Crushed graham crackers
- Crushed shortbread cookies
- Warm peanut butter
- Rainbow sprinkles
- ½ teaspoon vanilla
- Bailey’s Irish Cream
- Coconut milk
- Extra vegetable oil
- Extra coconut oil
Ingredient Notes
Milk chocolate chips give the nougat and coating their classic sweet chocolate flavor. Ghirardelli or Guittard can be used if you want a smoother melt.
Marshmallow fluff creates the soft, airy nougat texture. Marshmallow crème works too.
Sweetened condensed milk helps bind the nougat layer. It adds sweetness, creaminess, and chew.
Soft caramels are important for the caramel layer. Use soft caramel candies, not hard candies.
Heavy cream makes the melted caramel smoother and more spreadable. Add an extra tablespoon if the caramel seems too thick.
Milk chocolate chips or melting wafers can be used for the coating. Melting wafers create especially smooth results.
Vegetable oil or coconut oil helps the chocolate melt into a thinner dipping texture. It also helps the coating cover the bars more easily.
Dark chocolate can replace milk chocolate if you prefer a richer, less sweet bar. You can use it in the nougat, the coating, or both.
Flaky sea salt adds a sweet-salty finish. Sprinkle it on right after dipping so it sticks.
Toasted almonds or pecans add crunch. Press them into the caramel layer before chilling if using them inside.
Crushed graham crackers or shortbread cookies add texture to the nougat. They make the bars feel more playful.
Optional Swaps, Variations, Add-Ins, and Serving Ideas
Classic Homemade Milky Way Bars
Make the bars with milk chocolate chips, marshmallow fluff, sweetened condensed milk, soft caramels, heavy cream, and a milk chocolate coating. This gives the classic soft nougat, caramel, and chocolate combination.
Chill each layer fully before adding the next. This helps the bars cut and dip neatly.
Dark Chocolate Milky Way Bars
Use dark chocolate instead of milk chocolate in the nougat or coating. You can also use dark chocolate in both places.
The flavor becomes richer and less sweet. Dark chocolate pairs especially well with the caramel.
Half Milk, Half Dark Chocolate Bars
Use a blend of milk and dark chocolate for balance. This gives sweetness from the milk chocolate and depth from the dark chocolate.
This option is helpful if full dark chocolate feels too intense. It still keeps the candy bar flavor familiar.
Sea Salt Caramel Bars
Sprinkle flaky sea salt over the bars immediately after dipping. The salt sticks to the wet chocolate coating.
The salty finish balances the sweetness of the nougat and caramel. Use a small pinch on each bar.
Nutty Homemade Candy Bars
Press chopped toasted almonds or pecans into the caramel layer before chilling. The nuts add crunch and a richer flavor.
This creates a more textured bar. Let the caramel set fully before cutting.
Graham Cracker Nougat Bars
Mix crushed graham crackers into the nougat layer. This adds a subtle cookie texture.
Do not add too much, or the nougat may become too firm. Keep the texture soft and sliceable.
Shortbread Cookie Crumble Bars
Mix crushed shortbread cookies into the nougat layer. The buttery cookie pieces make the bars taste richer.
This version feels especially nice for gift boxes. Keep the pieces small.
Peanut Butter Swirl Bars
Swirl warm peanut butter into the caramel layer. Use enough to create ribbons without making the caramel too loose.
The peanut butter adds a nutty flavor. It makes the bars feel more decadent.
Birthday Cake Candy Bars
Add rainbow sprinkles to the chocolate coating. Sprinkle them on before the chocolate sets.
This version is colorful and fun. It works well for birthdays or kid-friendly treats.
Vanilla Nougat Bars
Add ½ teaspoon vanilla to the nougat. This gives the filling a little more depth.
Mix it in after the chocolate, marshmallow fluff, and condensed milk come together. Keep the nougat smooth.
Bailey’s Caramel Bars
Swap the heavy cream in the caramel for Bailey’s Irish Cream. This creates an adults-only version.
Melt the caramels gently and stir until smooth. The flavor becomes richer and more grown-up.
Dairy-Free-Style Bars
Use coconut milk in the caramel and chocolate layers as needed. The flavor and texture may change slightly.
This can help create a dairy-free-style variation. Choose chocolate that fits your needs.
Extra Smooth Chocolate Coating
Use melting wafers instead of chocolate chips. They melt smoothly and coat evenly.
This is helpful if you want a clean candy-shop finish. Let the bars set on parchment.
Chocolate Drizzle Finish
After dipping the bars, drizzle extra melted chocolate over the top. This gives a bakery-style look.
Use a small spoon or piping bag. Let the drizzle set before storing.
Why This Recipe Works
This recipe works because each layer has a different texture. The nougat is soft and fluffy, the caramel is gooey, and the coating is smooth and firm.
The marshmallow fluff gives the nougat its light texture. It keeps the chocolate base from becoming too dense.
Sweetened condensed milk adds chew and creaminess. It also helps the nougat layer set once chilled.
Soft caramels melt easily with heavy cream. The cream makes them spreadable and keeps the layer gooey.
Chilling between layers is important. It keeps the nougat and caramel from blending together too much.
The oil in the chocolate coating makes dipping easier. It thins the chocolate slightly without making it watery.
Cutting the slab after chilling gives cleaner bars. The layers hold their shape better when cold.
Letting the finished bars set fully gives them the best bite. The chocolate coating should be firm before storing or serving.
Directions
Step 1: Prepare the Pan
Line an 8×8 inch pan with parchment paper. Leave enough overhang to lift the candy slab out later.
This step makes removing and cutting the bars much easier. Without parchment, the sticky layers can be difficult to release.
Step 2: Melt the Nougat Chocolate
Place 2 cups milk chocolate chips in a microwave-safe bowl. Microwave in 30-second bursts, stirring between each burst.
Stop once the chocolate is smooth. Do not overheat it because chocolate can burn.
Step 3: Add Marshmallow Fluff and Condensed Milk
Stir 1 cup marshmallow fluff and ¼ cup sweetened condensed milk into the melted chocolate. The mixture may look unusual at first.
Keep stirring until it becomes smooth, thick, and fluffy. Scrape the sides of the bowl so everything combines evenly.
Step 4: Spread the Nougat Layer
Transfer the nougat mixture into the parchment-lined pan. Spread it into an even layer.
An offset spatula works well for smoothing. Try to reach the corners so the bars cut evenly.
Step 5: Chill the Nougat
Place the pan in the refrigerator for 30 minutes. The nougat should firm up before the caramel is added.
Set a timer so it does not get forgotten. A firm base helps create clean layers.
Step 6: Unwrap the Caramels
While the nougat chills, unwrap 1 bag of soft caramels. Place them in a microwave-safe bowl.
This is a good step to do before melting so the process moves smoothly. Make sure you are using soft caramels, not hard candy.
Step 7: Melt the Caramel
Add 2 tablespoons heavy cream to the caramels. Microwave in 30-second intervals, stirring between each.
Continue until the caramel is melted and smooth. Be careful because melted caramel gets very hot.
Step 8: Adjust the Caramel if Needed
If the caramel layer seems too thick, add an extra tablespoon of heavy cream. Stir until smooth and spreadable.
If it begins to harden while spreading, microwave it for 10 seconds. That will loosen it again.
Step 9: Spread the Caramel Layer
Once the nougat has firmed, pour the melted caramel over it. Spread it evenly across the top.
Work gently so the nougat layer stays intact. Smooth the caramel into the corners.
Step 10: Chill the Caramel Layer
Return the pan to the refrigerator for another 30 minutes. This helps the caramel firm enough for cutting.
Do not poke or disturb the layers while they chill. Clean layers make better-looking bars.
Step 11: Melt the Coating Chocolate
Place 3 cups milk chocolate chips or melting wafers in a microwave-safe bowl. Add 2 tablespoons vegetable oil or coconut oil.
Microwave in 30-second bursts, stirring between each. Melt until smooth and fluid.
Step 12: Adjust the Chocolate Texture
If the chocolate coating feels too thick, add 1 teaspoon more oil and stir well. Add more only if needed.
The chocolate should coat the bars smoothly. It should not be scorching hot.
Step 13: Lift and Cut the Candy Slab
Use the parchment overhang to lift the chilled nougat and caramel slab from the pan. Place it on a cutting board.
Cut into about 12 bars. Use a sharp knife for cleaner edges.
Step 14: Dip Each Bar
Use two forks to lower one bar into the melted chocolate. Turn it gently so all sides are coated.
Lift it out and let excess chocolate drip back into the bowl. Work carefully so the layers stay together.
Step 15: Place on Parchment
Set the dipped bar on parchment paper. Repeat with the remaining bars.
Leave a little space between bars so they do not touch while setting. If desired, drizzle extra chocolate over the tops.
Step 16: Add Toppings if Using
If using sea salt, nuts, cookie crumbs, or sprinkles, add them while the chocolate is still wet. This helps them stick.
Do not wait until the chocolate hardens. Toppings need a soft surface.
Step 17: Let the Bars Set
Let the bars firm at room temperature for about 1 hour. For faster setting, chill for 15 minutes in the refrigerator.
The chocolate coating should be firm to the touch. Once set, the bars are ready to serve.
Step 18: Store the Bars
Store the bars in an airtight container with parchment between layers. Keep at room temperature for about 1 week.
For longer storage, wrap each bar in plastic wrap and freeze in a freezer bag for up to 2 months. Thaw at room temperature before serving.
Serving Ideas
Serve Homemade Milky Way Bars at room temperature for the best texture. The caramel becomes soft and gooey, and the nougat has a pleasant chew.
If the bars have been refrigerated, let them sit out for about 15 minutes before serving. This softens the caramel and improves the bite.
Arrange them on a plate with small parchment squares underneath. This gives them a candy-shop look.
For parties, place each bar in a cupcake liner. It makes them easy to pick up and keeps the plate neat.
Cut bars into smaller pieces for dessert trays. Small bites are perfect when serving alongside other sweets.
Wrap individual bars in plastic or parchment for gifts. They make lovely homemade candy treats.
Serve with coffee, milk, or hot chocolate. The chocolate and caramel taste especially cozy with a warm drink.
Keep a few hidden for later. These bars disappear quickly once people realize what they are.
Storage
Store finished bars in an airtight container. Place parchment between layers so the chocolate surfaces do not stick together.
They stay fresh at room temperature for about 1 week. Keep them in a cool spot away from heat.
If your kitchen is warm, refrigerate them. Let refrigerated bars sit at room temperature for about 15 minutes before serving.
The caramel tastes best when slightly softened. Very cold caramel can be firmer than ideal.
Do not store the bars uncovered. The chocolate can pick up odors and the layers can dry out.
If decorated with sprinkles or salt, keep the bars flat until the coating fully sets. This preserves the topping.
For gifting, wrap each bar once fully set. Individual wrapping keeps them neat.
Freezing
Homemade Milky Way Bars freeze well. Wrap each bar individually in plastic wrap.
Place the wrapped bars in a freezer bag. Freeze for up to 2 months.
Thaw at room temperature when ready to eat. The texture returns nicely once softened.
Do not microwave to thaw. The chocolate coating and caramel may melt unevenly.
Freeze plain or decorated bars. Sea salt and some toppings may change slightly, but the bars will still taste good.
For best results, freeze bars after the chocolate coating has fully set. This protects the layers.
A freezer stash is useful for last-minute cravings. Pull out only what you need.
Make-Ahead
These bars are great for making ahead because the layers need time to chill and set. Make them the day before serving if you want a stress-free dessert.
Prepare the nougat and caramel layers, chill fully, then coat in chocolate. Once set, store in an airtight container.
You can also freeze them for up to 2 months. Wrap each bar individually before freezing.
If making for a party, let them come to room temperature before serving. This gives the caramel the right texture.
If adding a chocolate drizzle, wait until the first coating has set. Then drizzle and let it set again.
For gifts, prepare and wrap once fully firm. Keep them cool until giving.
Make extra if possible. These bars tend to disappear quickly.
Helpful Notes for Best Results
Line the pan with parchment. This makes lifting out the chilled layers much easier.
Use soft caramels, not hard candies. Hard candies will not melt into the right filling.
Melt chocolate in short bursts. Stir between each round to prevent burning.
Let each layer chill fully. This creates cleaner bars.
If caramel hardens while spreading, microwave it for 10 seconds. It will loosen again.
If chocolate coating gets too thick, stir in 1 teaspoon more oil at a time. Stop once it dips smoothly.
If chocolate seizes, add oil gradually and stir gently. Keep all water away from the chocolate.
Room temperature is best for serving. Cold bars are firmer, while room-temperature bars have softer caramel.
Variations
Classic Homemade Milky Way Bars
Use milk chocolate chips, marshmallow fluff, sweetened condensed milk, soft caramels, heavy cream, and a milk chocolate coating. This creates the classic nougat-caramel-chocolate bite.
Cut into about 12 bars. Let the coating set fully before serving.
Dark Chocolate Milky Way Bars
Use dark chocolate in the nougat or coating. The flavor becomes richer and less sweet.
Use dark chocolate in both layers if you like bold flavor. The caramel will still bring sweetness.
Half Milk and Half Dark Bars
Use half milk chocolate and half dark chocolate for the coating. This creates a balanced flavor.
The bars still taste classic but slightly deeper. It is a good middle ground.
Sea Salt Homemade Bars
Sprinkle flaky sea salt on top right after dipping. The salt sticks to the wet chocolate.
This variation adds a sweet-salty finish. It works especially well with dark chocolate.
Nutty Candy Bars
Press chopped toasted almonds or pecans into the caramel layer before chilling. This adds crunch.
The nuts make the bars feel more like a fancy candy bar. Toasting gives extra flavor.
Graham Cracker Nougat Bars
Mix crushed graham crackers into the nougat layer. This adds texture and a light cookie flavor.
Keep the crumbs fine enough that the nougat still spreads. Chill as usual.
Shortbread Cookie Nougat Bars
Add crushed shortbread cookies to the nougat layer. The buttery cookie pieces make the bars richer.
This variation is great for holiday trays. It tastes sweet and nostalgic.
Peanut Butter Caramel Bars
Swirl warm peanut butter into the caramel layer. The peanut butter should be soft enough to ribbon through.
This creates a nutty twist. It makes the bars even more indulgent.
Birthday Sprinkle Bars
Add rainbow sprinkles to the chocolate coating before it sets. This makes the bars colorful and playful.
They are fun for birthdays or celebrations. Let the coating firm before storing.
Vanilla Nougat Candy Bars
Add ½ teaspoon vanilla to the nougat layer. This gives the filling extra depth.
Use vanilla after the chocolate mixture is smooth. Stir well.
Bailey’s Caramel Bars
Replace the heavy cream in the caramel with Bailey’s Irish Cream. This creates an adults-only version.
The caramel becomes richer with a different flavor. Chill well before cutting.
Coconut Milk Caramel Bars
Use coconut milk in the caramel and chocolate layers if needed. The flavor may become slightly coconutty.
This can help with a dairy-free direction depending on the chocolate used. Texture may vary.
Extra Chocolate Drizzle Bars
After dipping, drizzle more melted chocolate over each bar. This gives a polished finish.
Let the drizzle set completely. Store with parchment between layers.
Troubleshooting
The Nougat Looks Strange at First
That is normal. Chocolate, marshmallow fluff, and condensed milk may look uneven when first combined.
Keep stirring until the mixture becomes thick, smooth, and fluffy. Scrape the bowl as needed.
The Nougat Is Too Hard to Spread
It may have cooled too quickly. Warm it very briefly and stir again.
Spread it while it is still soft. Work it into the corners of the pan.
The Caramel Is Too Thick
Add an extra tablespoon of heavy cream while melting. Stir until smooth.
If it thickens while spreading, microwave for 10 seconds. It should loosen.
The Caramel Is Too Runny
Let it cool slightly before spreading. It thickens as it cools.
Chill the caramel layer for the full 30 minutes before cutting. This helps the bars hold shape.
The Layers Are Messy When Cut
They may not have chilled long enough. Chill the slab until firm before slicing.
Use a sharp knife. Wipe the knife between cuts if needed.
The Chocolate Coating Is Too Thick
Add 1 teaspoon more vegetable oil or coconut oil and stir. Add only a little at a time.
The coating should be smooth enough for dipping. Too much oil can make it too thin.
The Chocolate Seized
Water may have touched the chocolate. Keep bowls, spoons, and hands dry.
Add oil 1 teaspoon at a time and stir gently. It may smooth out.
The Bars Are Too Cold and Firm
Let them sit at room temperature for about 15 minutes before serving. This softens the caramel.
Room temperature gives the best candy bar texture. Cold bars are chewier.
The Coating Looks Uneven
Use two forks to dip and let excess chocolate drip off. Place each bar carefully on parchment.
A drizzle of extra chocolate can make uneven bars look intentional. Imperfect candy still tastes wonderful.
The Bars Stuck Together
They may have been stored without parchment between layers. Add parchment next time.
Make sure the chocolate is fully set before stacking. This keeps the coating neat.
Frequently Asked Questions
Can I use dark chocolate instead of milk chocolate?
Yes, dark chocolate works well. It will make the bars richer and less sweet.
You can use half milk and half dark for balance. That gives a nice middle ground.
My caramel layer is too thick. What should I do?
Add an extra tablespoon of heavy cream when melting the caramels. Stir until smooth.
If it thickens while spreading, microwave for 10 seconds. Then spread quickly.
How long do these stay fresh?
They stay fresh for about 1 week at room temperature in an airtight container. Use parchment between layers.
If your kitchen is warm, store them in the refrigerator. Let them sit out 15 minutes before serving.
Can I freeze these?
Yes, wrap each bar individually and freeze in a freezer bag. They keep for up to 2 months.
Thaw at room temperature before eating. Do not microwave to thaw.
What do I do if my chocolate seizes?
Add a little more oil, 1 teaspoon at a time, and stir gently. Keep water away from the chocolate.
Dry tools are important. Even a small amount of water can make chocolate seize.
Can I use melting wafers?
Yes, melting wafers work very well for the coating. They melt smoothly and give an even finish.
They are especially helpful if you want cleaner dipping. Use them in place of the 3 cups chocolate chips if desired.
Can I add nuts?
Yes, press chopped toasted almonds or pecans into the caramel layer before chilling. They add crunch.
You can also sprinkle nuts on top after dipping. Add them before the coating sets.
Can I make these dairy-free?
Coconut milk can work in both the caramel and chocolate layers, depending on the other ingredients used. Use chocolate that fits your needs.
The texture and flavor may vary. Chill well before cutting and dipping.
Why This Recipe Works So Well
Homemade Milky Way Bars work so well because the recipe focuses on texture. The nougat is soft, the caramel is stretchy, and the chocolate shell brings everything together.
The marshmallow fluff gives the nougat lift. It keeps the filling from becoming dense.
Sweetened condensed milk adds creaminess and chew. It also helps the nougat set in the refrigerator.
Soft caramels and heavy cream create a smooth filling without needing a candy thermometer. The microwave method keeps the process simple.
Chilling between layers is what makes the bars neat. It keeps the nougat from smearing and gives the caramel time to firm.
The oil in the chocolate coating makes dipping easier. It helps create a smoother shell around each bar.
Cutting the slab into about 12 bars gives homemade candy bar portions. They are big enough to feel satisfying but small enough to share.
The recipe also works because it is forgiving. If a coating looks imperfect, a drizzle or sprinkle can make it look charming.
Most of all, these bars work because they taste nostalgic and homemade at the same time. They feel like a candy aisle favorite with a softer, fresher, more personal touch.
Final Thoughts
Homemade Milky Way Bars are made with a chocolate marshmallow nougat layer, a soft caramel layer, and a smooth milk chocolate coating. The layers are chilled in an 8×8 inch pan, cut into about 12 bars, dipped in melted chocolate, and set until firm.
Serve them at room temperature for the best gooey caramel texture, package them for gifts, or freeze a batch for later chocolate cravings. With their simple microwave method, nostalgic candy bar flavor, customizable toppings, 1-week room-temperature storage, and 2-month freezer option, these homemade bars turn everyday ingredients into a sweet little candy-making victory.
Homemade Milky Way Bars
Sweet, chewy, creamy, and covered in milk chocolate, these Homemade Milky Way Bars are made with a chocolate nougat layer, a soft caramel layer, and a smooth chocolate coating. Marshmallow fluff, sweetened condensed milk, soft caramels, heavy cream, milk chocolate chips, and a little oil come together to make 12 candy-style dessert bars at home.
Recipe Details
- Prep Time: 30 minutes
- Cook Time: 15 minutes
- Total Time: 45 minutes
- Course: Dessert
- Cuisine: American
- Servings: 12 bars
Equipment
- Microwave-safe bowl
- 8×8 inch baking pan
Ingredients
Chocolate Coating
- 2 tablespoon vegetable oil or coconut oil for smooth melting
- 3 cups milk chocolate chips or melting wafers
Caramel Layer
- 2 tablespoon heavy cream
- 1 bag soft caramels 11 oz / 311 g, like Kraft or Werther’s soft
Nougat Layer
- ¼ cup sweetened condensed milk
- 1 cup marshmallow fluff or marshmallow crème
- 2 cups milk chocolate chips
Instructions
Step 1: Prepare the Pan
Line an 8×8 inch baking pan with parchment paper. Make sure the pan is ready before melting the chocolate for the nougat layer.
The parchment paper helps the chilled candy layers lift out more easily later. Keep the pan nearby so the nougat can be spread while the mixture is still soft.
Step 2: Melt the Chocolate for the Nougat
Melt 2 cups milk chocolate chips in a microwave-safe bowl. Heat in 30-second intervals, stirring between each interval until the chocolate is smooth.
Stir carefully so the chocolate melts evenly. Once it is fully smooth, the nougat base can be mixed together.
Step 3: Mix the Nougat Layer
Add the marshmallow fluff or marshmallow crème and sweetened condensed milk to the melted chocolate. Mix until well combined.
The mixture should become thick, smooth, and evenly blended. This creates the soft chocolate nougat layer for the bars.
Step 4: Chill the Nougat
Spread the nougat mixture evenly in the prepared 8×8 inch baking pan. Smooth it into an even layer.
Chill for 30 minutes. This helps the nougat firm up enough to hold the caramel layer on top.
Step 5: Make the Caramel Layer
Melt the soft caramels and heavy cream in a microwave-safe bowl. Stir until the caramel mixture is smooth.
Use 1 bag soft caramels, 11 oz / 311 g, like Kraft or Werther’s soft, as listed. The heavy cream helps the caramel spread more easily over the chilled nougat.
Step 6: Add and Chill the Caramel
Spread the melted caramel over the chilled nougat layer. Cover the surface as evenly as possible.
Chill for another 30 minutes. The caramel needs time to firm before the bars are cut and dipped.
Step 7: Melt the Chocolate Coating
Melt 3 cups milk chocolate chips or melting wafers with the vegetable oil or coconut oil in a microwave-safe bowl. Stir until smooth.
The oil helps the coating melt smoothly. Use either vegetable oil or coconut oil as listed.
Step 8: Cut and Dip the Bars
Cut the chilled bars into squares. Dip each square into the melted chocolate coating.
Place the dipped bars on parchment paper. Let them set before serving or storing.
Notes
- Store in an airtight container at room temperature for up to a week.
Serving Suggestions
Serve Homemade Milky Way Bars after the chocolate coating has fully set. The soft nougat, caramel layer, and milk chocolate coating create a sweet candy-style dessert that works well for dessert trays, homemade candy boxes, or simple make-ahead treats.
Cut the chilled layers into 12 bars before dipping so each piece is easy to coat. Let the chocolate set on parchment paper before moving the bars.
These bars are rich, so they are best served in neat portions. Keep the layers chilled long enough before cutting so the nougat and caramel stay defined.
Storage
How to Store
Store the bars in an airtight container at room temperature for up to a week. Make sure the chocolate coating has set before placing them in the container.
Nougat Tip
Melt the 2 cups milk chocolate chips slowly in 30-second intervals. Stir between each interval so the chocolate turns smooth before adding the marshmallow fluff and sweetened condensed milk.
Caramel Tip
Melt the soft caramels with heavy cream until smooth. Spread the caramel over the chilled nougat so the layers stay separate.
Coating Tip
Use 3 cups milk chocolate chips or melting wafers with 2 tablespoon vegetable oil or coconut oil. This helps the chocolate coating melt smoothly for dipping.
Chilling Tip
Chill the nougat for 30 minutes, then chill again for another 30 minutes after adding the caramel. These chilling steps help the bars hold their shape.
Cutting Tip
Cut the chilled bars into squares before dipping them into the melted chocolate. Let them set on parchment paper before serving.

Fernando is the creator and writer behind the food blog Eating with your Hands. Living and working in cities like Paris, Barcelona, and Berlin, and being married to a Canadian foodie, has given Fernando a passion and interest in food and inspired him to run EWYH.