
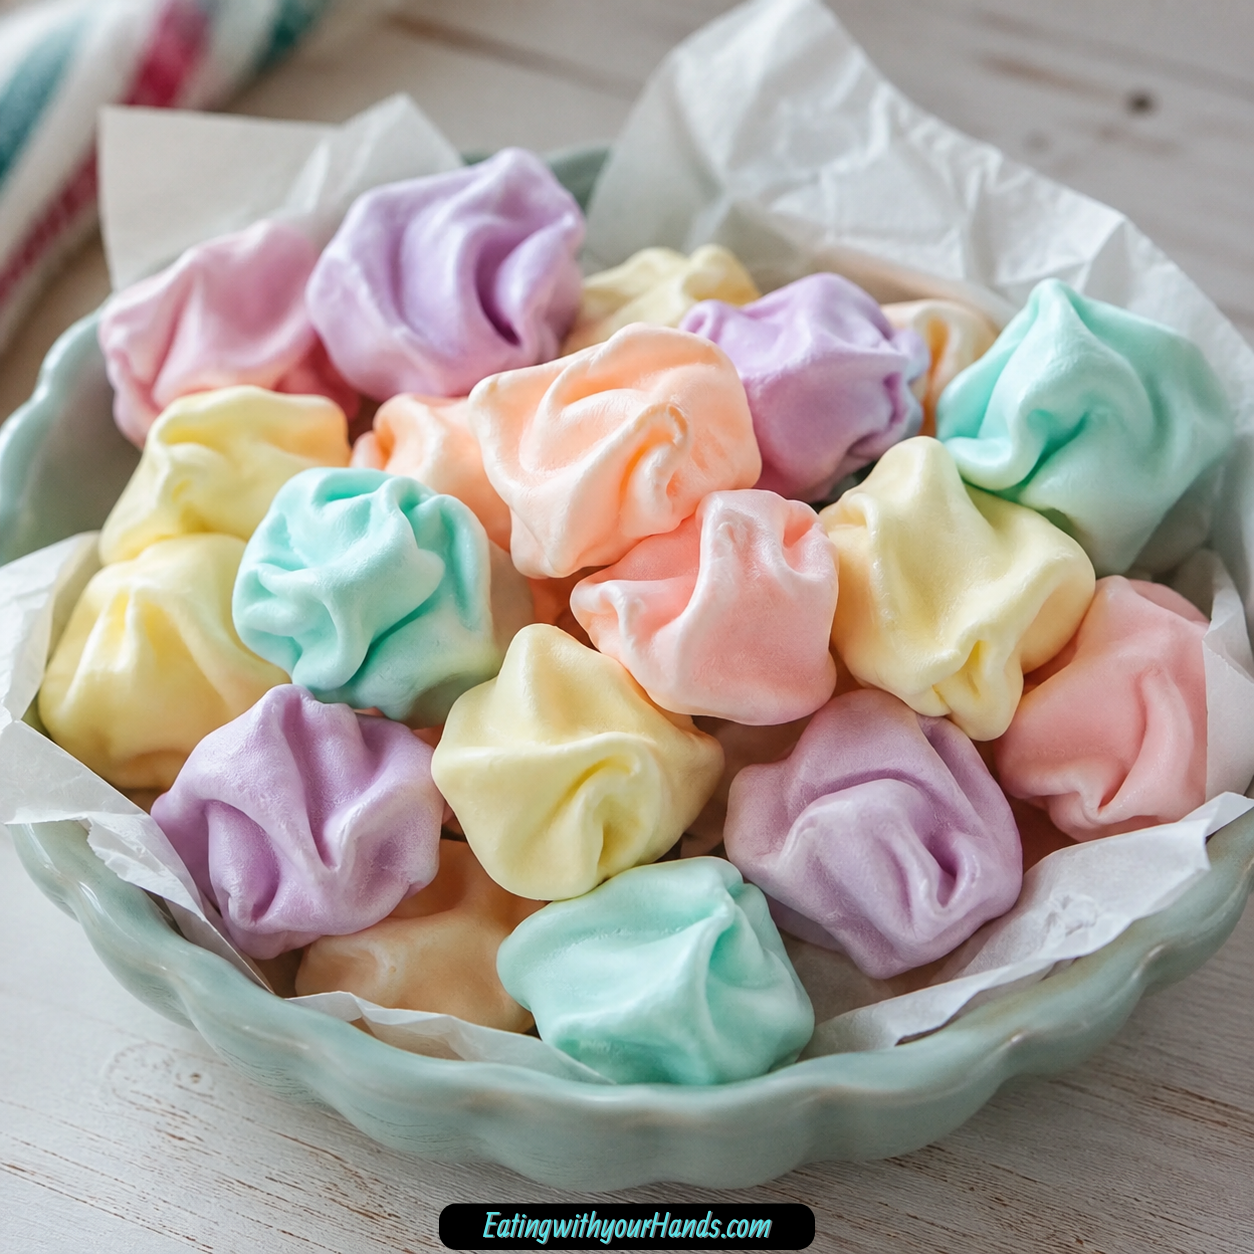
Homemade Saltwater Taffy is one of those candy projects that feels like stepping into a memory. It brings to mind bright candy-shop windows, summer boardwalk walks, paper-wrapped sweets, and the simple excitement of choosing a handful of colorful taffy pieces from a cheerful display.
There is something wonderfully nostalgic about making it at home. You begin with basic pantry ingredients, then watch them cook into a glossy syrup before pulling, stretching, folding, and shaping the candy into soft, chewy pieces.
Even though the name sounds like it belongs beside the ocean, saltwater taffy is not made with seawater. The name carries a coastal feeling, while the recipe itself uses a touch of salt to balance the sweetness and deepen the flavor.
The most magical part is the pulling. As the taffy is stretched and folded over and over, it becomes lighter in color, firmer in texture, and filled with tiny bits of air that give it that classic chewy bite.
This is the kind of recipe that turns a kitchen into an activity. It is perfect for a family weekend project, a party treat, a DIY gift, or a colorful candy-making afternoon when you want something playful and hands-on.
Table of Contents
- Why You’ll Love This Recipe
- Recipe Details
- Ingredients
- Optional Swaps, Variations, Add-Ins, and Serving Ideas
- Why This Homemade Saltwater Taffy Works
- Directions
- Step 1: Prepare the Workspace First
- Step 2: Butter Your Tools and Plan Ahead
- Step 3: Combine the Sugar and Cornstarch
- Step 4: Add Corn Syrup, Water, Butter, and Salt
- Step 5: Dissolve the Sugar Over Medium Heat
- Step 6: Attach the Candy Thermometer
- Step 7: Bring the Mixture to a Boil
- Step 8: Cook to 250°F
- Step 9: Use the Cold Water Method if Needed
- Step 10: Remove the Pan From the Heat
- Step 11: Add Vanilla and Food Coloring
- Step 12: Pour the Candy Onto the Prepared Surface
- Step 13: Let the Candy Cool Slightly
- Step 14: Butter Your Hands Generously
- Step 15: Begin Pulling the Taffy
- Step 16: Keep Pulling for 10–15 Minutes
- Step 17: Stretch Into a Long Rope
- Step 18: Cut Into 1-Inch Pieces
- Step 19: Wrap Each Piece Immediately
- Serving Ideas
- Storage
- Reheating
- Freezing
- Make-Ahead
- Helpful Notes for Best Results
- Variations
- Troubleshooting
- Frequently Asked Questions
- Why This Recipe Works So Well
- Final Thoughts
- Homemade Saltwater Taffy
Why You’ll Love This Recipe
Homemade Saltwater Taffy is nostalgic and fun. It brings the feeling of beach vacations, boardwalk candy shops, and old-fashioned sweets into your own kitchen.
It is completely customizable. You can choose the extract, add food coloring, make one color, or divide the candy after heating to create different colors.
It is perfect for gifting. Once cut and wrapped in wax paper, the pieces look charming in gift baskets, holiday treat bags, candy dishes, or homemade candy favors.
It is a hands-on activity. Pulling the taffy can involve kids or friends once the candy is cool enough to handle, though the hot sugar stage needs close supervision.
The ingredients are affordable and simple. Granulated sugar, cornstarch, light corn syrup, water, butter, salt, vanilla extract, and optional food coloring create a big batch of candy.
It also has a long shelf life compared with many homemade treats. When wrapped properly and stored in a cool, dry place, the taffy stays fresh for weeks.
Recipe Details
This Homemade Saltwater Taffy is cooked to 250°F, also known as the hard-ball stage. The exact temperature is crucial for the correct chewy texture.
The candy mixture is cooked in a large, heavy-bottomed saucepan. A candy thermometer should be clipped to the side of the pot, with the bulb submerged in the syrup but not touching the bottom.
The recipe begins by mixing 2 cups granulated sugar with 2 tablespoons cornstarch. Then 1 cup light corn syrup, ¾ cup water, 2 tablespoons unsalted butter, and 1 teaspoon salt are added.
The mixture is stirred gently over medium heat until the sugar dissolves completely. After that, it boils undisturbed until it reaches 250°F.
Once the candy reaches temperature, it is removed from the heat right away. Then 1 teaspoon vanilla extract and a few drops of food coloring are stirred in carefully because the mixture can bubble.
The hot candy is poured onto a greased marble slab or baking sheet. After cooling for about 5–10 minutes, it should still be pliable but comfortable enough to handle.
The taffy is pulled for about 10–15 minutes. It is stretched, folded, and repeated until it becomes lighter in color and firm.
The finished taffy is stretched into a rope about ½ inch thick, cut into 1-inch pieces with buttered scissors, and wrapped immediately in wax paper with the ends twisted closed.
Ingredients
Taffy Base
2 cups granulated sugar
2 tablespoons cornstarch
1 cup light corn syrup
¾ cup water
2 tablespoons unsalted butter
1 teaspoon salt
Flavor and Color
1 teaspoon vanilla extract
A few drops of food coloring, optional
Ingredient Notes
Granulated sugar provides the sweet base of the candy. It is the main ingredient that turns into the chewy taffy structure.
Cornstarch helps prevent crystallization and gives the candy a smooth texture. It should be stirred evenly into the sugar before the wet ingredients are added.
Light corn syrup adds elasticity and helps prevent crystallization. This is part of what gives the taffy its stretchy chew.
Water helps dissolve the sugar and cornstarch. It creates the liquid base that cooks down into candy syrup.
Unsalted butter adds richness and flavor. It also helps the taffy taste smoother and more rounded.
Salt balances the sweetness and deepens the flavor. Even though the candy is sweet, the salt keeps it from tasting flat.
Vanilla extract gives the taffy a classic flavor. Other extracts can be used if you want different flavors.
Food coloring is optional, but it gives homemade taffy its bright, playful look. A few drops are enough for a fun presentation.
Optional Swaps, Variations, Add-Ins, and Serving Ideas
Flavor Ideas
Vanilla is the classic flavor in this version. You can swap it for peppermint, lemon, almond, or fruit extracts.
Each extract gives the candy a different personality. Peppermint makes it cool and refreshing, lemon makes it bright, almond gives it a nostalgic candy flavor, and fruit extracts make it colorful and fun.
A few drops of essential oil, such as orange or lavender, can be used for a unique twist. Use flavorings carefully because some are strong.
Color Ideas
Food coloring lets you match the taffy to a party, holiday, or mood. Soft colors feel old-fashioned and sweet, while brighter colors make the candy look more playful.
You can also divide the candy after heating and add different colors to each portion. This makes it possible to create a mixed batch.
For themed events, mix and match colors. Pink and red work beautifully for Valentine’s Day.
Gift Ideas
Wrap each piece in wax paper and twist the ends closed. The wrapped pieces look charming and are easy to share.
Add the taffy to gift baskets or holiday treat bags. It also looks lovely in candy dishes at parties and gatherings.
Because the pieces are individually wrapped, they feel like old-fashioned candy favors. They are easy to portion and package.
Serving Ideas
Serve homemade taffy in candy dishes for parties. The colors make the table look cheerful.
You can also set out a mix of flavors and colors. This makes the candy feel extra special and lets guests choose their favorites.
Keep the wrapped taffy in a cool, dry place until serving. This helps preserve the texture.
Why This Homemade Saltwater Taffy Works
This taffy works because the syrup is cooked to the right stage and then pulled until it changes texture. The cooking creates the candy base, and the pulling transforms it into chewy taffy.
The 250°F temperature matters. If the candy cooks too high, it can become too hard; if it cooks too low, it can stay too sticky and soft.
Corn syrup and cornstarch both help with texture. They support a smoother candy and reduce the chance of crystallization.
The candy should not be stirred while it boils to temperature. Stirring during this stage can lead to graininess.
Pulling incorporates air into the candy. That is what gives saltwater taffy its lighter color and classic chewy texture.
Wrapping the pieces right away keeps them from sticking together. Wax paper makes each piece easy to store, serve, and gift.
Directions
Step 1: Prepare the Workspace First
Grease a large marble slab or baking sheet with butter. This keeps the hot candy from sticking once it is poured out.
You should also butter your scissors before the candy is ready. The taffy will be sticky, and buttered scissors make cutting much easier.
Set out pieces of wax paper for wrapping. Once the taffy is pulled and cut, you will want the wrappers ready so the pieces do not stick together.
Step 2: Butter Your Tools and Plan Ahead
Before cooking the candy, make sure your tools are ready. Candy can move quickly once it reaches temperature.
Have the candy thermometer nearby, the greased surface ready, the buttered scissors set aside, and the wax paper pieces waiting. This makes the process much smoother.
Do not wait until the syrup is finished to prepare everything. Hot candy needs immediate attention.
Step 3: Combine the Sugar and Cornstarch
In a large, heavy-bottomed saucepan, stir together 2 cups granulated sugar and 2 tablespoons cornstarch. Mix until they are fully combined.
This step helps the cornstarch distribute evenly through the sugar. Even mixing helps the candy cook smoothly.
A heavy-bottomed saucepan is helpful because candy needs steady heat. It reduces the chance of uneven hot spots.
Step 4: Add Corn Syrup, Water, Butter, and Salt
Pour in 1 cup light corn syrup, ¾ cup water, 2 tablespoons unsalted butter, and 1 teaspoon salt. Add them directly to the sugar and cornstarch mixture.
These ingredients create the syrup that will become taffy. The corn syrup helps with elasticity, the water dissolves the sugar, the butter adds richness, and the salt balances sweetness.
Stir gently to begin combining everything. The mixture will look loose and glossy before it cooks down.
Step 5: Dissolve the Sugar Over Medium Heat
Place the saucepan over medium heat. Stir gently until the sugar dissolves completely.
This step happens before the mixture reaches the boil stage. The goal is a smooth syrup without undissolved sugar.
Take your time here. Making sure the sugar dissolves helps prevent grainy taffy later.
Step 6: Attach the Candy Thermometer
Clip a candy thermometer to the side of the pot. Make sure the bulb is submerged in the syrup but not touching the bottom of the pan.
The thermometer needs to read the candy mixture, not the heat of the pan itself. If it touches the bottom, the reading may not be accurate.
Accurate temperature is very important for taffy. The finished texture depends on cooking the syrup to the right stage.
Step 7: Bring the Mixture to a Boil
Allow the mixture to come to a boil. Once it begins boiling, do not stir.
The syrup will bubble as it cooks. Let it boil undisturbed so the texture stays smooth.
Avoid scraping the sides or mixing during this stage. Stirring can encourage graininess.
Step 8: Cook to 250°F
Continue boiling the candy until it reaches 250°F. This is the hard-ball stage.
This temperature is crucial for the correct texture. Too high can make the taffy hard, while too low can make it sticky and soft.
Watch the thermometer carefully as it gets close. Candy can climb in temperature quickly near the end.
Step 9: Use the Cold Water Method if Needed
If you do not have a candy thermometer, use the cold water method. Drop a small bit of syrup into cold water.
If it forms a hard but pliable ball, it is ready. This method helps you judge the texture without a thermometer.
Be careful when handling the syrup because it is extremely hot. Let the test piece cool in the water before touching it.
Step 10: Remove the Pan From the Heat
Once the syrup reaches 250°F, immediately remove the pan from the heat. Do not let it continue cooking on the burner.
The temperature can keep rising if the pan stays hot. Removing it right away protects the chewy taffy texture.
Set the pan on a heat-safe surface. Move carefully because the candy is very hot.
Step 11: Add Vanilla and Food Coloring
Stir in 1 teaspoon vanilla extract and a few drops of food coloring if using. Be careful because the candy may bubble.
Mix just enough to distribute the flavor and color. Do not overwork the hot candy in the pot.
If you want multiple colors, divide the candy after heating and add different colors to each portion. Work carefully and quickly because the candy will begin to cool.
Step 12: Pour the Candy Onto the Prepared Surface
Pour the hot candy mixture onto the buttered marble slab or baking sheet. Let it spread naturally.
Do not touch it right away. The mixture is extremely hot and needs time to cool.
Use the prepared surface so the candy does not stick. This makes the next step much easier.
Step 13: Let the Candy Cool Slightly
Let the candy cool until it is comfortable to handle, about 5–10 minutes. It should still be pliable.
The timing can vary depending on the surface and room temperature. You want the candy cool enough to touch but warm enough to stretch.
Do not wait until it becomes hard. If it firms too much, pulling will be difficult.
Step 14: Butter Your Hands Generously
Butter your hands generously before touching the taffy. Reapply butter as needed during pulling.
The candy will be sticky at first. Butter keeps it from clinging too much to your hands.
This step also makes the pulling process more comfortable. Keep extra butter nearby.
Step 15: Begin Pulling the Taffy
Pick up the candy and stretch it out. Fold it back over itself, then stretch it again.
Repeat this motion steadily. Pull, fold, and pull again.
At first, the taffy may feel sticky and glossy. As you continue, it will become more elastic and easier to handle.
Step 16: Keep Pulling for 10–15 Minutes
Continue pulling the taffy for about 10–15 minutes. The candy should become lighter in color and firmer in texture.
This pulling process incorporates air. That air is what gives taffy its classic light, chewy texture.
Do not skip this step. Without pulling, the candy would be denser and less like traditional taffy.
Step 17: Stretch Into a Long Rope
Once the taffy is lighter and firm, stretch it into a long rope about ½ inch thick. Try to keep the rope as even as possible.
An even rope makes the pieces easier to cut. It also gives the wrapped taffy a more uniform look.
If the candy gets sticky, butter your hands again. Work steadily before the taffy firms too much.
Step 18: Cut Into 1-Inch Pieces
Use buttered scissors to cut the taffy rope into 1-inch pieces. Cut cleanly so the pieces separate without sticking.
Butter the scissors again if the candy starts clinging to the blades. This makes cutting smoother.
The pieces do not need to be perfect. Handmade taffy has a charming, old-fashioned look.
Step 19: Wrap Each Piece Immediately
Immediately wrap each piece in wax paper. Twist the ends to seal.
Wrapping right away keeps the pieces from sticking together. It also makes the candy easy to store and share.
Continue until every piece is wrapped. Once wrapped, the taffy is ready for serving, gifting, or storage.
Serving Ideas
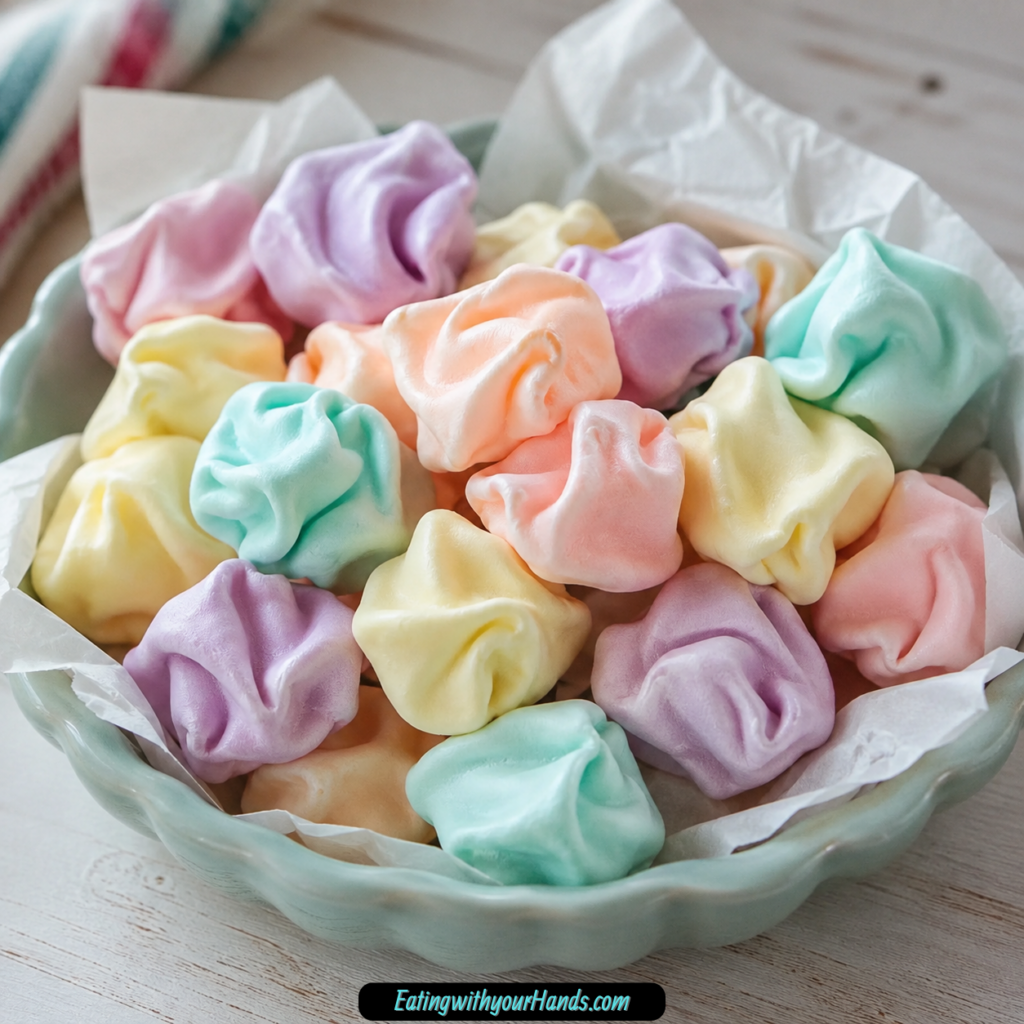
Serve Homemade Saltwater Taffy in candy dishes at parties or gatherings. The wrapped pieces make a colorful, nostalgic display.
Add the candies to gift baskets or holiday treat bags. They feel personal and cheerful because each piece is wrapped by hand.
Mix and match colors for themed events. Pink and red are especially sweet for Valentine’s Day.
A batch of taffy also makes a fun family project. Once the hot syrup is safe to handle, the pulling and wrapping steps can become part of the experience.
Keep the pieces wrapped until serving. This helps the taffy stay clean, fresh, and easy to enjoy.
Storage
Store wrapped taffy in an airtight container at room temperature. Keep the container in a cool, dry place away from direct sunlight.
The taffy is freshest within 2–3 weeks. It can last up to a month when wrapped and stored properly.
Wax paper keeps the pieces from sticking together. The twisted ends also make each piece easy to grab.
Avoid warm or humid storage areas. Heat and moisture can change the texture.
Reheating
Homemade Saltwater Taffy does not need reheating. It is meant to be served at room temperature.
Do not warm the wrapped pieces before serving. Heat can soften the candy too much and make it sticky.
If the candy has been stored in a cooler area, let it sit at room temperature before serving. It should be chewy, not hard.
Freezing
Freezing is not included as the recommended storage method for this taffy. The wrapped candies are intended to keep at room temperature in a cool, dry place.
For best quality, store them properly wrapped in wax paper and sealed in an airtight container. Enjoy within 2–3 weeks for the freshest texture.
Since the candy can last up to a month when stored correctly, room-temperature storage is usually enough. Keep it away from direct sunlight and moisture.
Make-Ahead
Homemade Saltwater Taffy is a great make-ahead candy. When each piece is wrapped properly, it stays fresh for weeks.
Make it before a party, holiday, or gift-giving day, then store the pieces in an airtight container. This keeps the candy ready without last-minute work.
For the freshest texture, plan to enjoy or gift it within 2–3 weeks. It can last up to a month if stored well.
If using multiple colors or flavors, label the containers or separate the batches. That makes serving and gifting easier.
Helpful Notes for Best Results
Do not stir the candy while it boils to 250°F. Stirring during this stage can cause grainy taffy.
Use a candy thermometer if possible. The texture depends on reaching exactly 250°F.
If you do not have a candy thermometer, use the cold water method. A small bit of syrup dropped into cold water should form a hard but pliable ball.
Butter your hands generously before pulling. Reapply butter as needed to prevent sticking.
The candy will be sticky at first but becomes more elastic as you pull. Keep going until it becomes lighter in color and firm.
Soak sticky pans and utensils in hot water for easy cleanup. Hot water helps loosen the hardened sugar.
If making taffy with kids, supervise closely. The sugar mixture is extremely hot, and children should only help once the candy is cool enough.
Variations
Vanilla Saltwater Taffy
Use vanilla extract for a classic flavor. This version is simple, sweet, and familiar.
Vanilla pairs well with almost any food coloring. It is a great starting point for a first batch.
Peppermint Taffy
Swap the vanilla extract for peppermint extract. This gives the taffy a cool, refreshing flavor.
Peppermint taffy works beautifully for holidays. Try it with red or green food coloring.
Lemon Taffy
Use lemon extract for a bright flavor. Lemon makes the candy taste fresh and lively.
A yellow color would match the flavor nicely. Use only a few drops of coloring for a soft look.
Almond Taffy
Use almond extract instead of vanilla. This gives the candy a nostalgic sweetness.
Almond pairs well with pastel colors. It is a lovely option for gift baskets.
Fruit-Flavored Taffy
Use fruit extracts to create different flavors. Match the colors to the flavor for a fun presentation.
This is a great way to make a mixed batch. Divide the candy after heating if you want multiple colors.
Orange or Lavender Twist
Add a few drops of essential oil, such as orange or lavender, for a unique twist. Use a light hand because these flavors can be strong.
This variation makes the taffy feel more unusual and special. It is a fun option for homemade candy gifts.
Multi-Color Taffy
Divide the candy after heating and add different colors to each portion. Work quickly because the candy cools as it sits.
This lets you create a colorful batch for parties or holidays. Wrap each piece in wax paper so the colors stay neat.
Troubleshooting
Why Is My Taffy Too Hard?
The candy may have cooked too high. Candy texture depends on temperature, and too high can turn taffy into hard candy.
Aim for exactly 250°F. Remove the pan from the heat as soon as it reaches the correct temperature.
Why Is My Taffy Too Soft or Sticky?
The candy may not have cooked high enough. Too low a temperature can leave the taffy sticky and soft.
Cook to 250°F for the correct texture. Also make sure the taffy is pulled long enough to become firm and elastic.
Why Is My Taffy Grainy?
The candy may have been stirred while boiling. Once the mixture reaches a boil, let it cook undisturbed.
Make sure the sugar dissolves completely before the boil stage. Cornstarch and corn syrup also help with smoothness.
Why Is the Taffy Sticking to My Hands?
The candy is naturally sticky at first. Butter your hands generously and reapply butter as needed.
As you pull, the taffy will become more elastic. Keep pulling until the texture changes.
Why Did My Taffy Not Get Lighter?
It may not have been pulled long enough. Pulling for 10–15 minutes incorporates air and lightens the color.
Continue stretching and folding until the candy becomes firmer. This step gives taffy its signature texture.
Frequently Asked Questions
Is Saltwater Taffy Made With Real Saltwater?
No, saltwater taffy is not made with real saltwater. The term is a historical reference.
This recipe includes salt, but it does not include seawater. The salt balances the sweetness.
Why Do I Need to Pull the Taffy?
Pulling incorporates air into the candy. This gives the taffy its light, chewy texture.
Without pulling, the candy would be dense. The pulling stage is what transforms the syrup into classic taffy.
What If I Do Not Have a Candy Thermometer?
Use the cold water method. Drop a bit of syrup into cold water.
If it forms a hard but pliable ball, it is ready. Handle the test piece only after it cools in the water.
Can I Make This Recipe With Kids?
Yes, but supervise closely. The sugar mixture is extremely hot.
Kids can help with pulling once the candy is cool enough. They can also help wrap the pieces in wax paper.
My Taffy Turned Out Too Hard or Too Soft. What Happened?
Candy texture depends on temperature. Too high makes hard candy, and too low makes taffy sticky and soft.
Aim for exactly 250°F. This gives the best chewy texture.
How Long Does Homemade Taffy Stay Fresh?
Wrapped taffy is freshest within 2–3 weeks. It can last up to a month when stored properly.
Keep it in an airtight container at room temperature. Store it in a cool, dry place away from direct sunlight.
Can I Make Different Colors in One Batch?
Yes, divide the candy after heating and add different colors to each portion. Work carefully because the candy will be hot and will cool as you work.
This is a fun way to make taffy for themed events. Wrap each piece after cutting so the candy stays separate and fresh.
Why This Recipe Works So Well
Homemade Saltwater Taffy works because it follows the classic candy rhythm of cooking, cooling, pulling, cutting, and wrapping. Each step changes the texture a little more until glossy syrup becomes chewy candy.
The sugar and corn syrup create the sweet candy base. Cornstarch helps with smoothness, while salt and butter balance the flavor.
Cooking to 250°F gives the candy the right firmness. That exact temperature keeps it from becoming too hard or staying too soft.
The pulling process is what gives taffy its character. Stretching and folding the candy brings in air, lightens the color, and creates the chewy texture people expect.
The wax paper wrapping is just as practical as it is nostalgic. It keeps pieces from sticking and makes them easy to serve or gift.
Most of all, this recipe works because it turns candy-making into an experience. It is colorful, hands-on, nostalgic, and sweet in a way that feels joyful from start to finish.
Final Thoughts
Homemade Saltwater Taffy is more than a candy recipe. It is a kitchen project filled with color, movement, patience, and that wonderful moment when the taffy begins to change under your hands.
I love how a few simple ingredients can turn into shiny ribbons of candy, then into little wrapped pieces that look like they came from a seaside shop. The process takes some attention, but the reward is chewy, sweet, nostalgic, and fun to share.
Make one classic vanilla batch, play with peppermint or fruit extracts, divide it into different colors, or wrap it for gifts and party favors. However you shape it, this homemade taffy brings a little boardwalk memory into your own kitchen, one twisted wax-paper piece at a time.
Homemade Saltwater Taffy
This Homemade Saltwater Taffy is chewy, sweet, colorful, and full of nostalgic candy-shop charm. Made with simple pantry ingredients, vanilla extract, and food coloring, it is a fun hands-on treat for parties, edible gifts, holiday candy trays, or a playful kitchen project.
Recipe Details
- Prep Time: 10 minutes
- Cook Time: 20 minutes
- Total Time: 30 minutes
- Servings: 40 pieces
- Calories: 110 kcal
Ingredients
- A few drops of food coloring
- 1 teaspoon vanilla extract
- 2 tablespoons unsalted butter
- 1 teaspoon salt
- ¾ cup water
- 1 cup light corn syrup
- 2 tablespoons cornstarch
- 2 cups granulated sugar
Instructions
Step 1: Prepare the Work Surface
Grease a marble slab or baking sheet and prepare wax paper squares for wrapping the finished taffy pieces.
Step 2: Combine the Sugar and Cornstarch
In a large saucepan, mix the granulated sugar and cornstarch until evenly combined.
Step 3: Add the Syrup Mixture
Add the light corn syrup, water, unsalted butter, and salt. Stir over medium heat until the sugar dissolves.
Step 4: Cook to Hard-Ball Stage
Attach a candy thermometer and cook without stirring until the mixture reaches 250°F, the hard-ball stage.
Step 5: Add Flavor and Color
Remove the saucepan from the heat and stir in the vanilla extract and food coloring.
Step 6: Pour the Candy
Pour the hot candy onto the greased marble slab or baking sheet.
Step 7: Cool and Pull the Taffy
Let the candy cool slightly, then butter your hands and pull the taffy until it becomes light and firm, about 10-15 minutes.
Step 8: Cut Into Pieces
Stretch the pulled taffy into a rope and cut it into bite-sized pieces with buttered scissors.
Step 9: Wrap the Taffy
Wrap each piece in wax paper, twisting the ends to secure each candy.
Notes
Use unsalted butter to control the salt level.
Butter your hands and scissors to help prevent sticking.
Customize the taffy with different extracts and food colorings.
Store wrapped taffy in an airtight container for up to 3 weeks.
For a rainbow batch, divide the cooked taffy and add different colors/flavors before pulling.
Serving Suggestions
- Wrap pieces individually and add them to candy jars or party favor bags.
- Serve on a homemade candy tray with fudge, caramels, or chocolate treats.
- Package in small boxes or tins for edible gifts.
- Make a colorful batch for birthdays, holidays, or themed parties.
- Enjoy as a chewy nostalgic treat for family candy-making days.
Storage
How to Store
Store wrapped taffy in an airtight container for up to 3 weeks.
Best Wrapping Tip
Wrap each piece in wax paper and twist the ends so the taffy stays separated and easy to serve.
Best Texture Tip
Butter your hands and scissors before handling the taffy to reduce sticking and help keep the pieces neat.
Rainbow Batch Tip
For a rainbow batch, divide the cooked taffy and add different colors/flavors before pulling.

Fernando is the creator and writer behind the food blog Eating with your Hands. Living and working in cities like Paris, Barcelona, and Berlin, and being married to a Canadian foodie, has given Fernando a passion and interest in food and inspired him to run EWYH.