
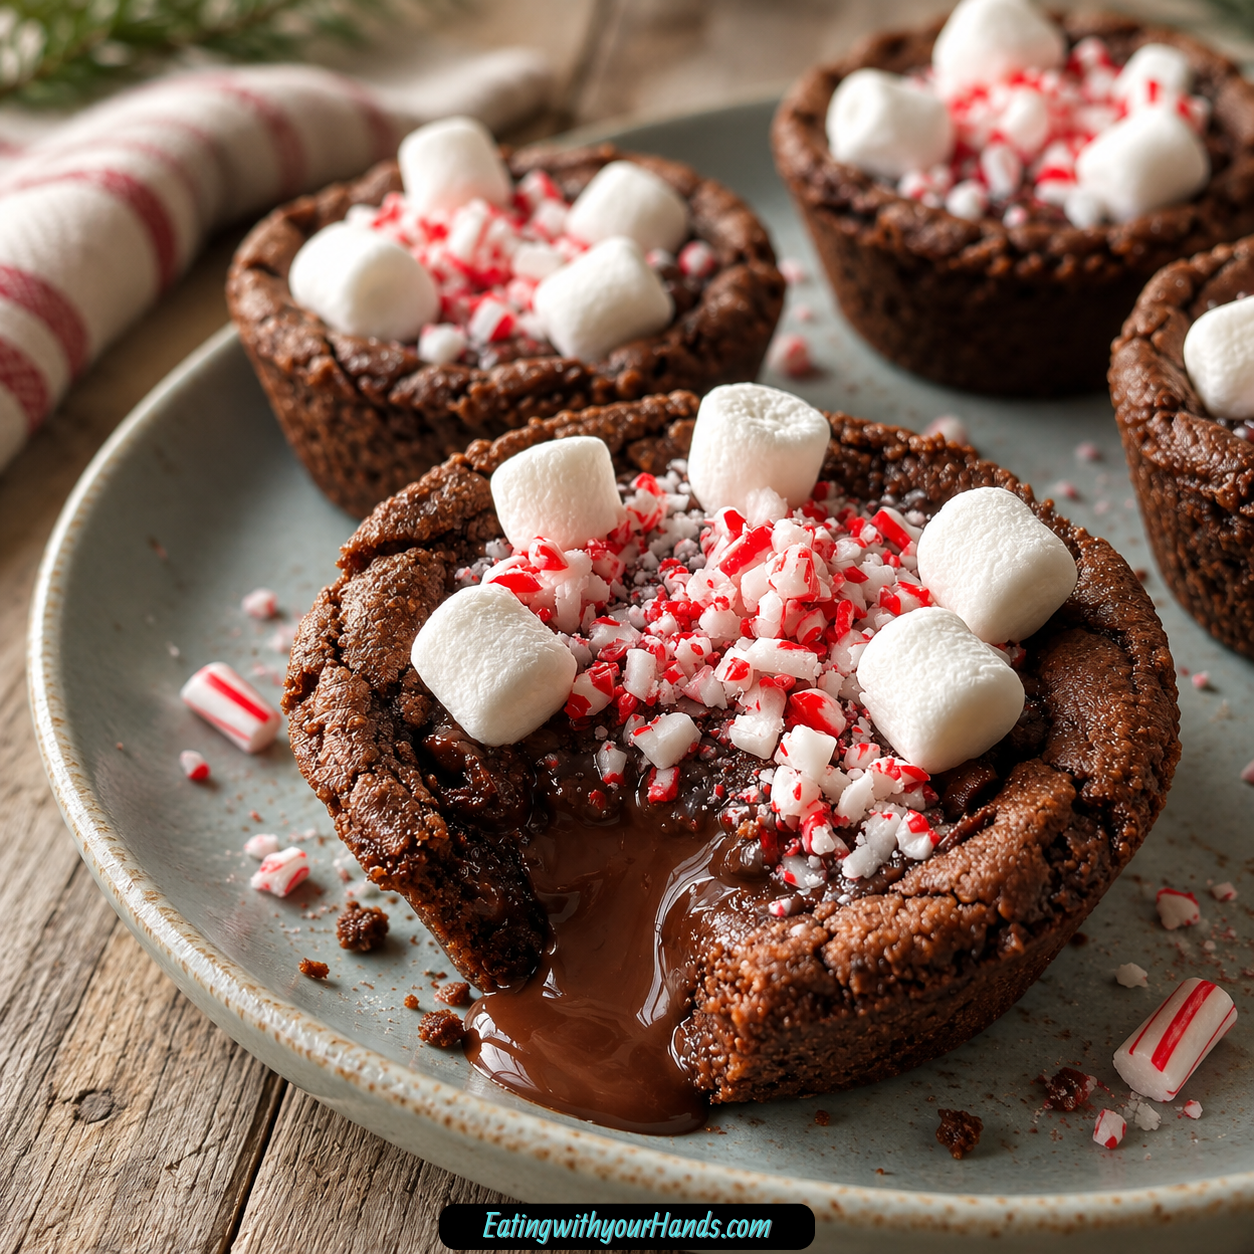
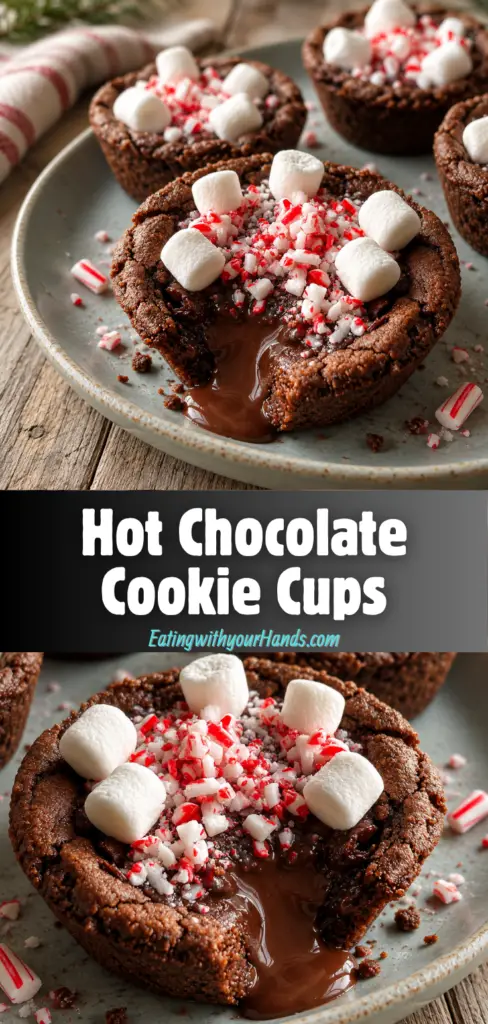
Hot Chocolate Cookie Cups are the kind of winter dessert that makes a cold evening feel softer, warmer, and sweeter. They bring together the comfort of chocolate chip cookies with the rich, gooey feeling of hot cocoa, all tucked into little edible cups.
These treats feel especially perfect during the holiday season. They are small, festive, easy to decorate, and full of the kind of chocolatey sweetness that makes everyone want to gather near the dessert table.
The outside starts with refrigerated chocolate chip cookie dough, pressed into a muffin tin to create little wells. Once baked, the cookie cups become golden around the edges while staying soft enough to feel cozy and tender.
The filling is made with semi-sweet chocolate chips, heavy cream, and vanilla extract. Melted gently over low heat, it becomes a smooth chocolate sauce that tastes rich without requiring complicated steps.
Once the cookie cups are filled, the real fun begins. Mini marshmallows, crushed peppermint, festive sprinkles, chocolate shavings, colored sugar, or other toppings can make every cup look like a tiny mug of holiday cheer.
These Hot Chocolate Cookie Cups are wonderful for winter gatherings, family movie nights, holiday dessert platters, and last-minute cravings. They are quick to prepare, simple to customize, and easy enough for kids to help decorate.
There is something playful about a dessert that looks like it belongs beside a mug of cocoa. Each cookie cup has a soft cookie base, a warm chocolate center, and a topping that makes it feel like a little celebration.
Table of Contents
- Why You’ll Love These Hot Chocolate Cookie Cups
- Recipe Details
- Ingredients
- For the Cookie Cups
- For the Chocolate Filling
- For the Toppings
- Ingredient Notes
- Optional Swaps, Variations, Add-Ins, and Serving Ideas
- Peppermint Hot Chocolate Cookie Cups
- Gluten-Free Cookie Cups
- White Chocolate Cookie Cups
- Coconut Cream Filling
- Half-and-Half Filling
- Whole Milk Filling
- Cinnamon Chocolate Filling
- Cookie Mix Shortcut
- Nutty Chocolate Filling
- Dairy-Free Cookie Cups
- Peanut Butter Chocolate Cups
- Melted Chocolate Drizzle
- Vanilla Ice Cream Serving
- Whipped Cream Serving
- Crushed Oreo Topping
- Fresh Berry Topping
- Caramel Sauce Drizzle
- Chocolate Syrup Finish
- Why This Recipe Works
- Directions
- Step 1: Preheat the Oven and Prepare the Muffin Tin
- Step 2: Slice the Cookie Dough
- Step 3: Shape the Dough into Cups
- Step 4: Bake the Cookie Cups
- Step 5: Cool the Cookie Cups Briefly
- Step 6: Make the Chocolate Filling
- Step 7: Fill the Cookie Cups
- Step 8: Add Marshmallows
- Step 9: Add Festive Toppings
- Step 10: Serve Warm
- Step 11: Add Optional Dessert Finishes
- Step 12: Cool Before Storing
- Step 13: Store at Room Temperature
- Step 14: Freeze for Later
- Step 15: Thaw and Rewarm
- Serving Ideas
- Storage
- Freezing
- Make-Ahead
- Helpful Notes for Best Results
- Variations
- Peppermint Hot Chocolate Cookie Cups
- Gluten-Free Hot Chocolate Cookie Cups
- White Chocolate Cookie Cups
- Coconut Cream Cookie Cups
- Cinnamon Hot Chocolate Cookie Cups
- Nutty Chocolate Cookie Cups
- Peanut Butter Chocolate Cookie Cups
- Dairy-Free Hot Chocolate Cookie Cups
- Festive Sprinkle Cookie Cups
- Crushed Oreo Cookie Cups
- Fresh Berry Cookie Cups
- Caramel Chocolate Cookie Cups
- Troubleshooting
- Frequently Asked Questions
- Why This Recipe Works So Well
- Final Thoughts
- Hot Chocolate Cookie Cups
Why You’ll Love These Hot Chocolate Cookie Cups
These cookie cups are quick to prepare. They are ready in just about 25 minutes, which makes them perfect for last-minute sweet cravings.
They use minimal ingredients. Refrigerated chocolate chip cookie dough, semi-sweet chocolate chips, heavy cream, vanilla, marshmallows, and toppings make the recipe simple.
They are family-friendly and fun to decorate. Kids can help press the dough, fill the cups, and add marshmallows or sprinkles.
They are freezer-friendly. You can bake a batch ahead of time and freeze them for later enjoyment.
They are easy to customize. Mini marshmallows, crushed peppermint, festive sprinkles, chocolate shavings, colored sugar, crushed Oreos, fresh berries, caramel sauce, or chocolate syrup can all change the final look.
They are perfect for gatherings. Their small size makes them easy to serve at holiday parties, cozy get-togethers, and dessert platters.
Recipe Details
Hot Chocolate Cookie Cups bake at 350°F (175°C). The cookie cups bake for 10 to 12 minutes.
They are ready when the edges are golden and the centers are still soft. The centers may puff up a bit, but they will settle as they cool.
The full recipe is ready in about 25 minutes. This includes shaping the cookie dough, baking the cups, making the filling, filling the cups, and adding toppings.
The cookie cup base uses 1 roll, 16.5 oz, refrigerated chocolate chip cookie dough. Nestlé Toll House is mentioned as a favorite, but any brand you like works.
The filling uses ½ cup semi-sweet chocolate chips, 2 tablespoons heavy cream, and ½ teaspoon vanilla extract. Ghirardelli or Guittard are mentioned as fantastic chocolate chip options.
The heavy cream gives the filling richness. Half-and-half or whole milk can be used for a lighter option, while coconut cream is a dairy-free alternative.
Mini marshmallows are used for topping. Regular marshmallows can also be used depending on preference.
Crushed peppermint or festive sprinkles add a holiday finish. Chocolate shavings or colored sugar can also be used for a fun twist.
Leftovers can be stored in an airtight container at room temperature for up to 3 days. They can also be frozen for up to 1 month.
Ingredients
For the Cookie Cups
- 1 roll (16.5 oz) refrigerated chocolate chip cookie dough – I love using Nestlé Toll House, but any brand you like works great!
For the Chocolate Filling
- ½ cup semi-sweet chocolate chips – Go for the good stuff; Ghirardelli or Guittard are fantastic options.
- 2 tablespoons heavy cream – This adds a lovely richness. If you’re looking for a lighter version, you can use half-and-half.
- ½ teaspoon vanilla extract – Always use pure vanilla extract if you can; it makes a world of difference!
For the Toppings
- Mini marshmallows – For topping; feel free to use regular or mini, depending on your preference.
- Crushed peppermint or festive sprinkles – Get creative with your toppings! You can even use chocolate shavings or colored sugar for a fun twist.
Ingredient Notes
Refrigerated chocolate chip cookie dough makes this recipe fast and simple. A 16.5 oz roll gives you the base for the cookie cups without needing to mix dough from scratch.
Nestlé Toll House is mentioned as a favorite option. Any brand you like can work well for these cookie cups.
Semi-sweet chocolate chips create the rich chocolate filling. Ghirardelli or Guittard are mentioned as great choices if you want a deeper chocolate flavor.
Heavy cream makes the filling smooth and rich. If you want a lighter version, half-and-half can be used instead.
Vanilla extract adds warmth to the chocolate filling. Pure vanilla extract is recommended when possible because it gives better flavor.
Mini marshmallows make the cookie cups look like little hot chocolate treats. Regular marshmallows can also be used depending on your preference.
Crushed peppermint adds a festive winter flavor. Festive sprinkles bring color and make the cups party-ready.
Chocolate shavings and colored sugar are other topping ideas. They let you decorate the cookie cups in a different way without changing the base recipe.
Optional Swaps, Variations, Add-Ins, and Serving Ideas
Peppermint Hot Chocolate Cookie Cups
Add a few drops of peppermint extract to the chocolate filling. This gives the cups a peppermint twist.
Top with crushed peppermint for even more holiday flavor. This version feels especially festive for winter gatherings.
Gluten-Free Cookie Cups
Use gluten-free cookie dough. This creates a gluten-free version of the cookie cups.
The baking time may vary slightly depending on the dough. Bake until the edges are golden and the centers stay soft.
White Chocolate Cookie Cups
Try white chocolate chips instead of semi-sweet chocolate chips. This gives the filling a different flavor profile.
The result will be sweeter and creamier in flavor. It also creates a lighter-colored filling.
Coconut Cream Filling
Use coconut cream instead of heavy cream for a dairy-free direction. Coconut cream also adds its own flavor to the filling.
This substitution changes the texture and taste. It works well if you need a dairy-free alternative.
Half-and-Half Filling
Use half-and-half instead of heavy cream for a lighter version. The filling will still be creamy, but less rich.
This is a simple swap when you want a softer chocolate sauce. Use the same low-heat melting method.
Whole Milk Filling
Whole milk can be used instead of heavy cream if needed. It creates a lighter filling.
The chocolate mixture may be less rich than the heavy cream version. Warm it gently and stir until smooth.
Cinnamon Chocolate Filling
Add a pinch of cinnamon to the filling for a warm, cozy spice. This gives the chocolate a wintery flavor.
Cinnamon works well with chocolate and vanilla. It is a simple addition for cold-weather baking.
Cookie Mix Shortcut
If you are short on time, you can use a cookie mix instead of refrigerated dough. This gives you another easy base option.
Prepare the cookie mix as needed, then shape it into muffin cups. The final texture may vary.
Nutty Chocolate Filling
Add chopped nuts like walnuts or pecans to the chocolate filling. This gives the cups a nutty flavor and added texture.
Use this variation only when nut allergies are not a concern. The nuts make the filling feel richer.
Dairy-Free Cookie Cups
Use dairy-free chocolate chips and coconut cream. This creates a dairy-free direction for the filling.
Pair it with a cookie dough that fits your needs. The flavor and texture may change based on the products used.
Peanut Butter Chocolate Cups
Add a spoonful of peanut butter to the chocolate mixture. This creates a delicious twist.
The peanut butter makes the filling richer and nuttier. Use this only if peanut allergies are not a concern.
Melted Chocolate Drizzle
Drizzle melted chocolate over the top before serving. This gives the cookie cups an elegant touch.
It also makes them look more finished on a dessert platter. Use it when serving for holidays or parties.
Vanilla Ice Cream Serving
Serve the cookie cups with a scoop of vanilla ice cream. The cold ice cream pairs beautifully with the warm cookie and chocolate filling.
This makes the dessert feel extra indulgent. It is perfect for cozy family nights.
Whipped Cream Serving
Add a dollop of whipped cream on top. This makes the cups look even more like hot chocolate.
Whipped cream gives the dessert a soft, creamy finish. It pairs well with marshmallows and peppermint.
Crushed Oreo Topping
Use crushed Oreos as a topping. They add more cookie crunch and chocolate flavor.
This is a fun option if you want extra texture. It also looks pretty sprinkled over the filling.
Fresh Berry Topping
Top with fresh berries for a brighter finish. The berries add color and freshness.
This variation changes the dessert from cozy and rich to slightly lighter. It works well for a party plate.
Caramel Sauce Drizzle
Drizzle caramel sauce over the tops for an extra indulgent treat. Caramel adds sweetness and richness.
It pairs well with chocolate and cookie dough. Use it just before serving.
Chocolate Syrup Finish
Drizzle chocolate syrup over the cookie cups. This adds even more chocolate flavor.
It is a simple topping for dessert platters. Add it close to serving for the best look.
Why This Recipe Works
Hot Chocolate Cookie Cups work because they turn simple cookie dough into a small, filled dessert. The muffin tin shapes the dough into edible cups, creating room for the chocolate filling.
The refrigerated dough keeps prep easy. You do not need to make cookie dough from scratch, which makes the recipe quick and approachable.
The chocolate filling is simple but rich. Semi-sweet chocolate chips, heavy cream, and vanilla melt into a smooth sauce over low heat.
Low heat matters because the filling should melt gently, not boil. Stirring slowly keeps the chocolate smooth.
The cookie cups are baked until the edges are golden and the centers stay soft. This gives them structure while keeping the texture tender.
The toppings make the dessert feel like hot chocolate. Marshmallows, peppermint, sprinkles, chocolate shavings, and colored sugar all add personality.
The recipe is also flexible. Gluten-free dough, white chocolate, coconut cream, half-and-half, whole milk, cinnamon, cookie mix, nuts, dairy-free chocolate chips, peanut butter, melted chocolate, ice cream, whipped cream, Oreos, berries, caramel, and chocolate syrup can all create different versions.
Directions
Step 1: Preheat the Oven and Prepare the Muffin Tin
Preheat your oven to 350°F (175°C). Set out a muffin tin so you can shape the cookie dough into cups.
Lightly grease the muffin tin if needed. This helps the cookie cups release cleanly after baking.
Step 2: Slice the Cookie Dough
Take the 16.5 oz roll of refrigerated chocolate chip cookie dough and slice it into equal pieces. Try to keep the pieces similar in size so the cookie cups bake evenly.
Each slice will become one cookie cup. Work with the dough while it is still easy to press and shape.
Step 3: Shape the Dough into Cups
Press each dough slice into the muffin tin. Mold the dough so it covers the bottom and sides of each cup.
You want to create little wells for the chocolate filling. Press gently but firmly so the dough holds its shape.
Step 4: Bake the Cookie Cups
Place the muffin tin in the preheated oven. Bake for 10 to 12 minutes.
Look for golden edges and soft centers. Do not overbake, because the cups should still feel tender.
Step 5: Cool the Cookie Cups Briefly
Remove the muffin tin from the oven. Let the cookie cups cool for a few minutes in the tin.
Do not worry if they puff up a bit. They will settle down as they cool.
Step 6: Make the Chocolate Filling
While the cookie cups cool, combine ½ cup semi-sweet chocolate chips, 2 tablespoons heavy cream, and ½ teaspoon vanilla extract in a small pot. Place the pot over low heat.
Stir gently until everything melts together and becomes smooth. The mixture should be warm enough to melt, but it should not boil.
Step 7: Fill the Cookie Cups
Once the cookie cups have cooled slightly, carefully fill each cup with the chocolate mixture. Fill them generously.
The chocolate filling should sit inside the cookie wells. Work gently so the cups stay intact.
Step 8: Add Marshmallows
Top each filled cookie cup with mini marshmallows. Regular marshmallows can also be used if you prefer.
The marshmallows give the cups their hot chocolate look. Add them while the filling is still soft enough to hold toppings.
Step 9: Add Festive Toppings
Sprinkle crushed peppermint or festive sprinkles over the tops. You can also use chocolate shavings or colored sugar.
This is the fun decorating step. Make each cookie cup feel festive and personal.
Step 10: Serve Warm
Serve the cookie cups warm for the gooey chocolate filling. This is when they feel the most like a cozy winter treat.
They can be served plain or with extra toppings. Vanilla ice cream or whipped cream makes them even more indulgent.
Step 11: Add Optional Dessert Finishes
If desired, drizzle melted chocolate over the top before serving. You can also add caramel sauce or chocolate syrup.
These finishing touches make the cups feel more dressed up. They work especially well for parties.
Step 12: Cool Before Storing
If you have leftovers, let the cookie cups cool completely. This helps protect their texture before storage.
Do not seal them while hot. Extra steam can make the cookie cups too soft.
Step 13: Store at Room Temperature
Place cooled leftovers in an airtight container. Store at room temperature for up to 3 days.
Keep the container sealed between servings. This helps the cookie cups stay fresh.
Step 14: Freeze for Later
For longer storage, place the cooled cookie cups in an airtight container. Freeze for up to 1 month.
Freezing lets you enjoy them later. Make sure they are fully cooled first.
Step 15: Thaw and Rewarm
Thaw frozen cookie cups at room temperature before enjoying. You can also warm them slightly in the microwave.
A brief warm-up helps the filling taste gooey again. Serve with marshmallows, whipped cream, or your favorite toppings.
Serving Ideas
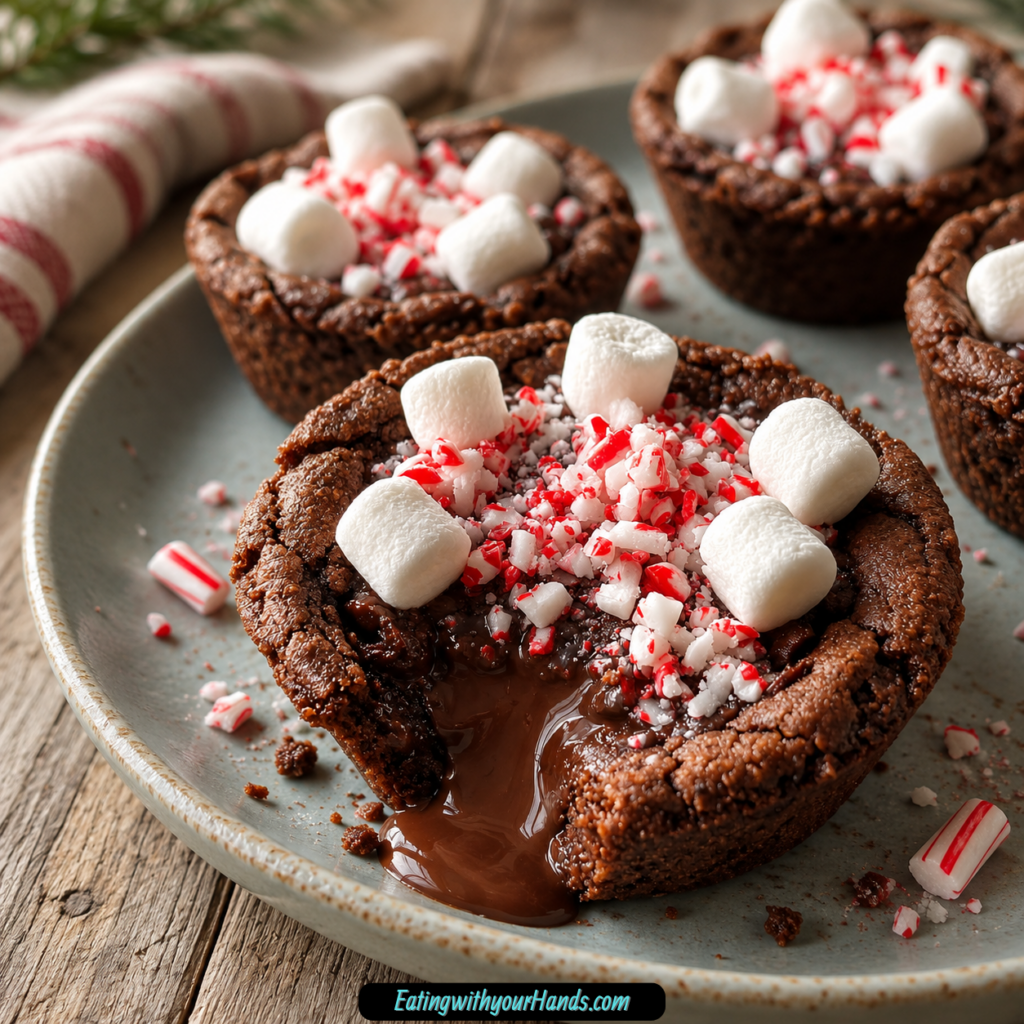
Hot Chocolate Cookie Cups are best served warm. The chocolate filling is gooey, soft, and rich when the cups are fresh.
They are wonderful with a scoop of vanilla ice cream. The cold ice cream melts slightly against the warm cookie and chocolate filling.
A dollop of whipped cream also makes them feel like hot chocolate. Add mini marshmallows on top for the full cozy effect.
For a holiday dessert platter, arrange the cookie cups on a serving tray. Use crushed peppermint, festive sprinkles, chocolate shavings, or colored sugar to make them colorful.
For a richer finish, drizzle melted chocolate over the top. Caramel sauce or chocolate syrup can also be used for extra indulgence.
These cookie cups are perfect for winter gatherings, cozy family nights, and holiday parties. Their small size makes them easy to pick up and share.
Storage
Store leftover Hot Chocolate Cookie Cups in an airtight container at room temperature. They will keep for up to 3 days.
Let them cool completely before storing. This helps keep the cookie cups from becoming too soft from trapped steam.
Keep the container sealed. The cookie cups are best when the cookie remains tender and the filling stays protected.
Freezing
Hot Chocolate Cookie Cups can be frozen for up to 1 month. Let them cool completely before freezing.
Place them in an airtight container. This helps protect the cookie texture and chocolate filling.
When ready to enjoy, thaw them at room temperature. You can also warm them slightly in the microwave.
Make-Ahead
These cookie cups are a helpful make-ahead treat for winter parties. Bake and cool them completely before storing or freezing.
If making them ahead for a gathering, keep the toppings simple or refresh them before serving. Marshmallows, sprinkles, peppermint, chocolate shavings, and drizzles look best when added neatly.
They can be made ahead and frozen for later enjoyment. Thaw them at room temperature, then warm slightly if you want the filling soft and gooey.
Helpful Notes for Best Results
Press the cookie dough firmly into the muffin tin. The dough should cover the bottom and sides so there is enough room for filling.
Keep an eye on the cookie cups as they bake. You want golden edges and soft centers after 10 to 12 minutes.
Let the cups cool for a few minutes in the tin before filling. This helps them settle and hold their shape.
Melt the chocolate filling over low heat. It should become smooth and warm, but it should not boil.
If you are short on time, you can use a cookie mix instead of refrigerated dough. This gives you another easy shortcut.
For a nutty flavor, add chopped walnuts or pecans to the chocolate filling. For a dairy-free version, use dairy-free chocolate chips and coconut cream.
Try adding a spoonful of peanut butter to the chocolate mixture for a delicious twist. For an elegant touch, drizzle melted chocolate over the top before serving.
Variations
Peppermint Hot Chocolate Cookie Cups
Add a few drops of peppermint extract to the chocolate filling. This gives the dessert a cool peppermint flavor.
Top with crushed peppermint for extra holiday style. This version is perfect for winter gatherings.
Gluten-Free Hot Chocolate Cookie Cups
Use gluten-free cookie dough. This creates a gluten-free version of the recipe.
The texture and baking time may vary depending on the dough. Bake until the edges are golden and the centers are soft.
White Chocolate Cookie Cups
Use white chocolate chips instead of semi-sweet chocolate chips. This gives the filling a sweeter, creamier flavor.
The filling color will also be lighter. It creates a different flavor profile.
Coconut Cream Cookie Cups
Substitute heavy cream with coconut cream. This creates a dairy-free direction and adds a different flavor.
Coconut cream can make the filling rich. Use it if you want a dairy-free alternative.
Cinnamon Hot Chocolate Cookie Cups
Add a pinch of cinnamon to the chocolate filling. This gives the dessert warm, cozy spice.
Cinnamon works well with chocolate and vanilla. It is a simple winter flavor boost.
Nutty Chocolate Cookie Cups
Add chopped walnuts or pecans to the chocolate filling. This brings texture and nutty flavor.
Use this variation only when nut allergies are not a concern. The nuts make the filling more textured.
Peanut Butter Chocolate Cookie Cups
Add a spoonful of peanut butter to the chocolate mixture. This creates a rich chocolate-peanut butter twist.
The flavor becomes deeper and more indulgent. Use this only if peanut allergies are not a concern.
Dairy-Free Hot Chocolate Cookie Cups
Use dairy-free chocolate chips and coconut cream. This gives the filling a dairy-free direction.
Make sure the cookie dough also fits your needs. The flavor and texture may vary.
Festive Sprinkle Cookie Cups
Top the filled cookie cups with festive sprinkles. This makes them colorful and party-ready.
Sprinkles are especially fun for kids. They are easy and cheerful.
Crushed Oreo Cookie Cups
Top with crushed Oreos for extra cookie crunch. This adds chocolate flavor and texture.
The crushed cookies make the cups look playful. They are a fun topping for parties.
Fresh Berry Cookie Cups
Add fresh berries on top. They bring color and brightness.
This variation makes the dessert feel a little fresher. It pairs nicely with the rich chocolate filling.
Caramel Chocolate Cookie Cups
Drizzle caramel sauce over the finished cookie cups. This makes them extra indulgent.
Caramel pairs well with chocolate chip cookie dough and chocolate filling. Add it right before serving.
Troubleshooting
The Cookie Cups Puff Up
The cookie cups may puff up while baking. This is normal, and they will settle down as they cool.
Let them sit in the muffin tin for a few minutes after baking. The centers will become easier to fill.
The Cookie Cups Stick to the Tin
Lightly grease the muffin tin before adding the dough if needed. This helps the cups release more easily.
Let them cool briefly before removing or filling. Hot cookie cups can be fragile.
The Cups Do Not Hold Filling
Press the dough into the bottom and sides of the muffin tin to create a well. Make sure there is enough space for the chocolate.
If the centers puff up, let them settle after baking. Then fill them carefully.
The Cookie Cups Are Too Hard
Bake only 10 to 12 minutes. Look for golden edges and soft centers.
Overbaking can make the cups too firm. Keep an eye on them near the end.
The Filling Is Grainy
Melt the chocolate chips, heavy cream, and vanilla over low heat. Stir gently until smooth.
Do not let the mixture boil. Gentle heat keeps the filling silky.
The Filling Is Too Thick
Use the filling while it is warm and smooth. Stir gently over low heat if it needs to loosen.
If using a lighter substitute like half-and-half or whole milk, the texture may be different. Coconut cream will also change the texture.
The Toppings Slide Off
Add toppings while the chocolate filling is still soft. Mini marshmallows, peppermint, and sprinkles need something to grip.
Do not wait until the filling has fully set. Decorate soon after filling the cups.
The Dessert Needs to Be Gluten-Free
Use gluten-free cookie dough. This is the listed gluten-free option.
Bake by visual cues because different doughs can behave differently. The edges should be golden.
The Dessert Needs to Be Dairy-Free
Use dairy-free chocolate chips and coconut cream. Choose a cookie dough that also fits your needs.
The final texture and flavor may change. Decorate with dairy-free toppings if needed.
The Cups Need Longer Storage
Freeze fully cooled cookie cups in an airtight container for up to 1 month. Thaw at room temperature before serving.
You can also warm them slightly in the microwave. This helps the filling feel soft again.
Frequently Asked Questions
Can I freeze Hot Chocolate Cookie Cups?
Yes, Hot Chocolate Cookie Cups can be frozen. Let them cool completely before storing.
Place them in an airtight container. They will keep well in the freezer for up to 1 month.
Thaw them at room temperature before enjoying. You can also warm them slightly in the microwave.
Warming them helps the chocolate filling become soft again. Add toppings after warming if needed.
What can I use instead of heavy cream?
Half-and-half or whole milk can be used for a lighter option. Coconut cream is also a dairy-free alternative.
The flavor and texture may change depending on the substitute. Heavy cream gives the richest result.
Can I use white chocolate chips?
Yes, white chocolate chips can be used instead of semi-sweet chocolate chips. This creates a different flavor profile.
The filling will be sweeter and lighter in color. Use it if you enjoy white chocolate.
Can I make these gluten-free?
Yes, use gluten-free cookie dough. This gives you a gluten-free version.
The cookie cups may bake slightly differently depending on the dough. Watch for golden edges and soft centers.
How can I customize the toppings?
You can use mini marshmallows, regular marshmallows, crushed peppermint, festive sprinkles, chocolate shavings, colored sugar, crushed Oreos, fresh berries, caramel sauce, or chocolate syrup. These toppings let you make the cookie cups your own.
You can also drizzle melted chocolate over the top for an elegant touch. Add toppings while the filling is still soft whenever possible.
Can I make them dairy-free?
Yes, use dairy-free chocolate chips and coconut cream. Make sure the cookie dough also fits your needs.
The texture and flavor may be different. Coconut cream adds richness and its own flavor.
What should I serve with Hot Chocolate Cookie Cups?
Serve them warm with vanilla ice cream or whipped cream. They also make a lovely addition to any holiday dessert platter.
Mini marshmallows, peppermint, sprinkles, and chocolate drizzle make them extra festive. Serve them for winter nights, holiday parties, or cozy get-togethers.
Why This Recipe Works So Well
Hot Chocolate Cookie Cups work so well because they take two comforting treats and turn them into one small dessert. The chocolate chip cookie dough creates a soft edible cup, while the chocolate filling gives the center that hot-cocoa feeling.
The refrigerated cookie dough keeps the recipe fast. It makes the dessert approachable even when you need something sweet in a hurry.
The muffin tin is what makes the shape possible. Pressing the dough into the bottom and sides creates little wells for the filling.
The filling is rich but simple. Semi-sweet chocolate chips, heavy cream, and vanilla melt together into a smooth sauce that tastes cozy and indulgent.
The toppings complete the theme. Marshmallows, peppermint, sprinkles, chocolate shavings, and colored sugar make the cups feel like tiny winter desserts.
The recipe is also easy to adapt. Peppermint extract, gluten-free cookie dough, white chocolate chips, coconut cream, cinnamon, cookie mix, walnuts, pecans, dairy-free chocolate chips, peanut butter, melted chocolate, vanilla ice cream, whipped cream, crushed Oreos, fresh berries, caramel sauce, and chocolate syrup all give you ways to personalize it.
Most of all, these cookie cups work because they feel joyful without being complicated. They are quick, warm, chocolatey, freezer-friendly, and perfect for sharing on chilly days.
Final Thoughts
Hot Chocolate Cookie Cups are cozy little desserts made with refrigerated chocolate chip cookie dough, semi-sweet chocolate chips, heavy cream, vanilla extract, marshmallows, and festive toppings. The cookie dough is pressed into a muffin tin, baked at 350°F for 10 to 12 minutes, filled with smooth chocolate, and decorated while the filling is still soft.
Serve them warm with mini marshmallows, crushed peppermint, festive sprinkles, whipped cream, vanilla ice cream, chocolate drizzle, caramel sauce, or chocolate shavings. With their 25-minute timing, gooey chocolate center, soft cookie base, freezer-friendly storage, and playful winter look, these cookie cups are an easy sweet treat for holidays, cozy nights, and family gatherings.
Hot Chocolate Cookie Cups
Sweet, chocolatey, festive, and fun to serve, these Hot Chocolate Cookie Cups turn refrigerated chocolate chip cookie dough into little edible cups filled with a rich chocolate mixture. Mini marshmallows, crushed peppermint, or festive sprinkles make them a cozy American dessert for holiday gatherings, dessert trays, or cheerful winter treats.
Recipe Details
- Prep Time: 10 minutes
- Cook Time: 15 minutes
- Total Time: 25 minutes
- Course: Dessert
- Cuisine: American
- Servings: 12 cookie cups
Equipment
- oven
- muffin tin
Ingredients
For the Topping
- mini marshmallows for topping
- crushed peppermint or festive sprinkles for topping
For the Filling
- ½ cup semi-sweet chocolate chips
- 2 tablespoons heavy cream
- ½ teaspoon vanilla extract
For the Cookie Cups
- 1 roll (16.5 oz) refrigerated chocolate chip cookie dough
Instructions
Step 1: Preheat the Oven
Preheat your oven to 350°F (175°C).
Step 2: Shape the Cookie Cups
Press cookie dough into the muffin tin to form cups. Shape each portion so it can hold the chocolate filling after baking.
Step 3: Bake Until Golden
Bake for 10-12 minutes until edges are golden. Let the cookie cups hold their shape before filling.
Step 4: Make the Chocolate Filling
In a small pot, melt chocolate chips with heavy cream and vanilla over low heat. Stir until the mixture is smooth and rich.
Step 5: Fill the Cookie Cups
Fill cookie cups with the chocolate mixture. Add enough filling to sit inside each cookie cup without overflowing.
Step 6: Add the Toppings
Top with mini marshmallows and crushed peppermint or sprinkles.
Notes
- These cookie cups are perfect for holiday gatherings.
- They can be customized with different toppings.
Serving Suggestions
Serve these Hot Chocolate Cookie Cups after the chocolate filling has been added and the festive toppings are in place. The chocolate chip cookie cups, rich chocolate filling, mini marshmallows, and crushed peppermint or sprinkles make them sweet, playful, and holiday-ready.
These cookie cups work well for Christmas dessert trays, winter parties, family gatherings, or cozy dessert tables. Customize them with different toppings, exactly as noted.
Storage
How to Store
The recipe does not provide specific storage instructions or storage duration, so no exact storage time is added here.
Best Texture Tip
Bake the cookie cups until the edges are golden before adding the filling. This helps the cups hold their shape around the chocolate mixture.
Filling Tip
Melt the semi-sweet chocolate chips with heavy cream and vanilla over low heat. Stir until smooth so the filling becomes rich and easy to spoon into the cookie cups.
Topping Tip
Top with mini marshmallows and crushed peppermint or festive sprinkles. No exact quantities are provided, so the toppings remain flexible.
Customization Tip
These cookie cups can be customized with different toppings. Keep the topping choices festive or simple based on how you want to serve them.

Fernando is the creator and writer behind the food blog Eating with your Hands. Living and working in cities like Paris, Barcelona, and Berlin, and being married to a Canadian foodie, has given Fernando a passion and interest in food and inspired him to run EWYH.