
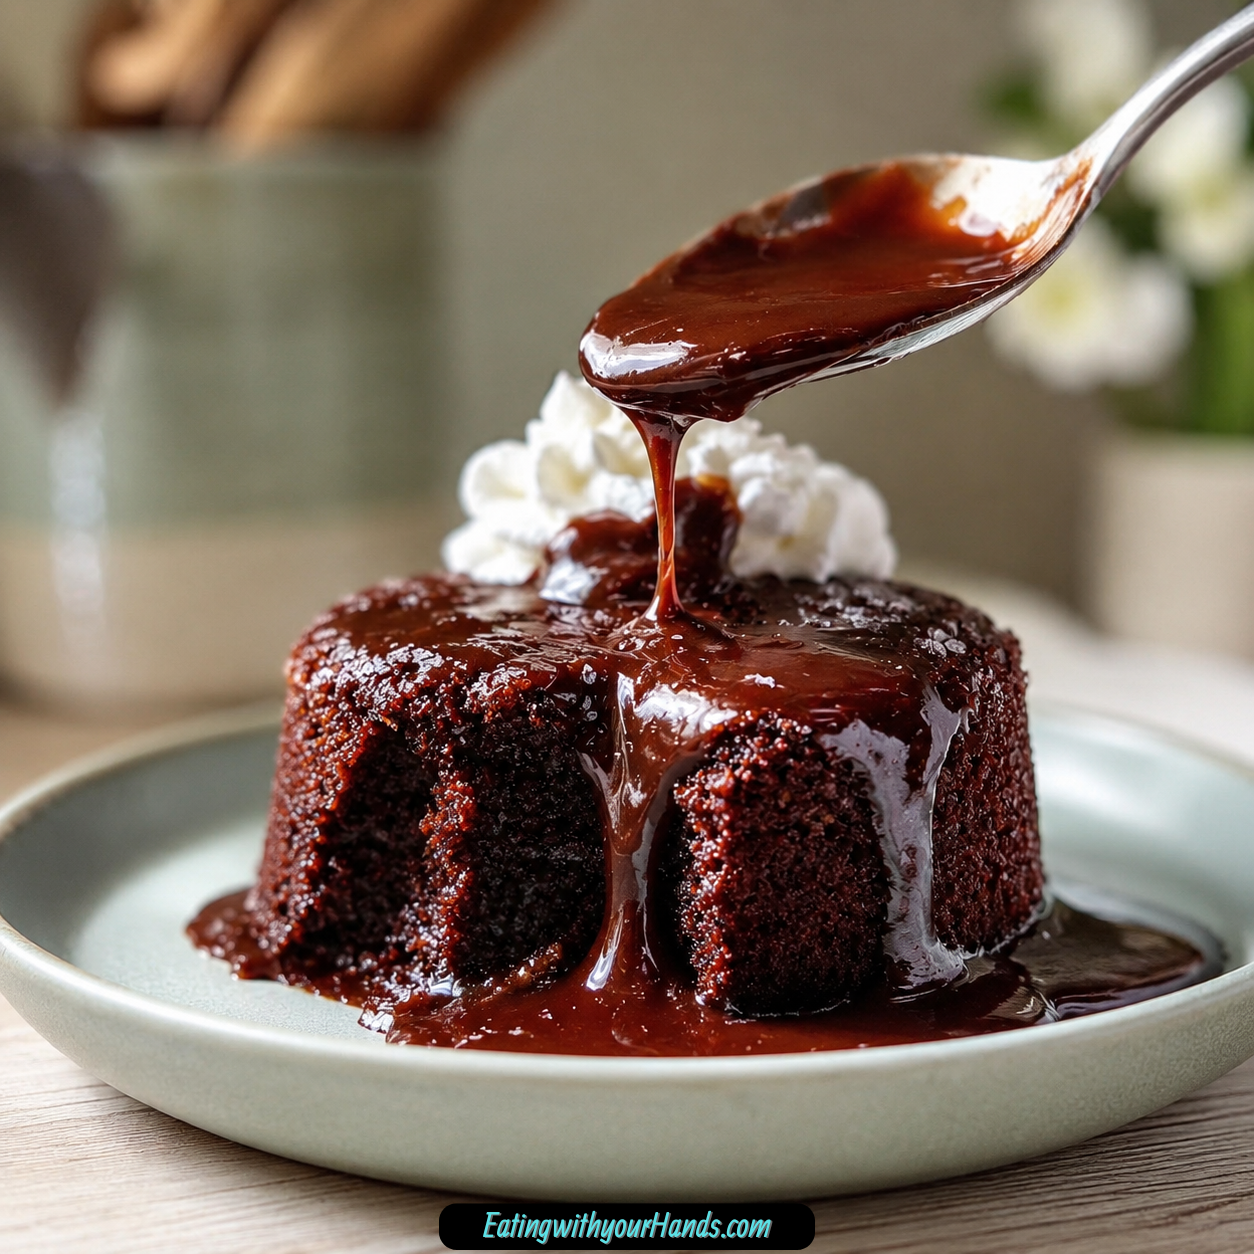
Hot Fudge Chocolate Pudding Cake is the kind of dessert that feels like a little kitchen miracle. It starts with a simple chocolate cake batter, gets covered with a cocoa-sugar topping, and then hot water is poured over everything before baking, creating a warm cake on top and a gooey fudge layer underneath.
I love desserts that come out of the oven looking humble but taste like pure comfort. This one fills the house with chocolate while it bakes, then rewards you with soft cake and warm fudge sauce in the same baking dish.
The recipe is simple enough for a last-minute dessert but rich enough for birthdays, family dinners, rainy nights, or any time a chocolate craving needs a cozy answer. It uses everyday pantry ingredients, which makes it easy to pull together when you want something sweet without a complicated plan.
What makes this cake special is the way the layers form while baking. You do not stir the hot water into the batter, because it settles and transforms into that saucy chocolate pudding layer everyone loves to find at the bottom.
Serve it warm in bowls with vanilla ice cream or whipped cream, and it becomes the kind of dessert people talk about after the spoons are empty. It can also be enjoyed chilled for a different texture, which makes the leftovers just as tempting.
Table of Contents
- Why You’ll Love This Hot Fudge Chocolate Pudding Cake
- Recipe Details
- Ingredients
- Optional Swaps, Variations, Add-Ins, and Serving Ideas
- Why This Hot Fudge Chocolate Pudding Cake Works
- Directions
- Step 1: Preheat the Oven
- Step 2: Prepare the Baking Dish
- Step 3: Measure the Cake Dry Ingredients
- Step 4: Whisk the Dry Ingredients
- Step 5: Add the Milk
- Step 6: Add the Melted Butter
- Step 7: Add the Vanilla Extract
- Step 8: Mix the Cake Batter
- Step 9: Spread the Batter Into the Dish
- Step 10: Measure the Fudge Topping Ingredients
- Step 11: Mix the Fudge Topping
- Step 12: Sprinkle the Topping Over the Batter
- Step 13: Heat the Water
- Step 14: Pour the Hot Water Over the Top
- Step 15: Move the Dish to the Oven
- Step 16: Bake the Cake
- Step 17: Let the Cake Cool Slightly
- Step 18: Scoop Into Bowls
- Step 19: Add Toppings
- Step 20: Store Leftovers
- Serving Ideas
- Storage
- Reheating
- Freezing
- Make-Ahead
- Helpful Notes for Best Results
- Variations
- Troubleshooting
- Frequently Asked Questions
- Why This Recipe Works So Well
- Final Thoughts
- Hot Fudge Chocolate Pudding Cake
Why You’ll Love This Hot Fudge Chocolate Pudding Cake
This cake has a quick prep time of just 15 minutes. That makes it a wonderful last-minute dessert when you want something homemade and chocolatey.
It uses simple, everyday ingredients. Flour, sugar, cocoa powder, baking powder, salt, milk, butter, vanilla, brown sugar, and hot water create the whole dessert.
It is family-friendly. Kids and adults both love warm chocolate cake with a gooey fudge layer.
It has a surprise pudding-style sauce that forms while baking. Every scoop has soft cake and rich chocolate underneath.
It can be served warm or chilled. Warm gives you the coziest gooey texture, while chilled gives the dessert a different feel.
It stores and reheats easily. Leftovers can be refrigerated, microwaved in individual portions, or frozen for longer storage.
Recipe Details
This Hot Fudge Chocolate Pudding Cake bakes at 350°F (175°C). The oven should be preheated before the baking dish goes in.
The cake batter uses 1 cup all-purpose flour, ¾ cup granulated sugar, 2 tablespoons cocoa powder, 2 teaspoons baking powder, ¼ teaspoon salt, ½ cup whole milk, 2 tablespoons melted unsalted butter, and 1 teaspoon vanilla extract.
The fudge topping uses ½ cup granulated sugar, ½ cup brown sugar, ¼ cup cocoa powder, and 1 ¼ cups hot water. The hot water should be steaming but not boiling.
The dry cake ingredients are whisked together first. Then the milk, melted butter, and vanilla are added and mixed until just combined.
The fudge topping begins as a dry mixture of granulated sugar, brown sugar, and cocoa powder. This mixture is sprinkled over the cake batter before the hot water is poured on top.
The hot water should not be stirred in. It sits over the batter and helps create the fudge layer as the cake bakes.
The cake bakes for about 30 minutes. The top should look set, and you may see bubbling around the edges.
The cake is best served warm after cooling for a few minutes. It can be scooped into bowls and topped with ice cream, whipped cream, chocolate syrup, or nuts.
Ingredients
Chocolate Cake Batter
1 cup all-purpose flour
¾ cup granulated sugar
2 tablespoons cocoa powder
2 teaspoons baking powder
¼ teaspoon salt
½ cup whole milk
2 tablespoons unsalted butter, melted
1 teaspoon vanilla extract
Fudge Topping
½ cup granulated sugar
½ cup brown sugar
¼ cup cocoa powder
1 ¼ cups hot water
Ingredient Notes
All-purpose flour creates the base of the cake. A gluten-free blend can be used for a similar texture if needed.
Granulated sugar sweetens both the cake batter and the fudge topping. It helps give the dessert its classic chocolate sweetness.
Cocoa powder gives the cake and fudge topping their chocolate flavor. Dutch-processed cocoa can be used for a deeper flavor if preferred.
Baking powder helps the cake rise. It keeps the top layer from becoming too heavy.
Salt balances the sweetness. A small amount helps the chocolate flavor taste fuller.
Whole milk adds richness to the batter. Almond milk, soy milk, oat milk, or low-fat milk can also be used, though the richness may be slightly different.
Melted unsalted butter adds flavor and moisture. Unsweetened applesauce can be used in place of butter for a lighter version.
Vanilla extract rounds out the chocolate flavor. Pure vanilla extract is always worth using if you have it.
Brown sugar can be light or dark. Use whichever you prefer in the fudge topping.
Hot water is essential for forming the pudding-like layer. It should be steaming but not boiling, and it should be poured over the top without stirring.
Optional Swaps, Variations, Add-Ins, and Serving Ideas
Mocha Hot Fudge Pudding Cake
Add a pinch of espresso powder to the batter for a mocha twist. This deepens the chocolate flavor and gives the cake a richer taste.
You can also add 1 tablespoon instant coffee granules to the cake batter for a stronger flavor. This creates a warm coffee-chocolate direction.
Dairy-Free Hot Fudge Pudding Cake
Use almond milk, soy milk, or oat milk instead of whole milk. Coconut milk can also be used for a tropical flair and dairy-free option.
The richness may vary depending on the milk you choose. The cake will still follow the same method.
Extra Chocolate Pudding Cake
Incorporate chocolate chips into the batter for extra chocolate goodness. They add little pockets of chocolate throughout the cake.
This is a great variation when you want the dessert to feel even more indulgent. Chocolate chips make the cake richer and sweeter.
Berry-Topped Chocolate Cake
Top the cake with fresh berries for a seasonal touch and a pop of color. The fruit adds brightness beside the warm chocolate.
This serving idea works especially well when you want the dessert to look pretty. The berries make each bowl feel a little fresher.
Lighter Chocolate Pudding Cake
Use unsweetened applesauce in place of butter for a lighter version. This changes the texture and flavor slightly.
The cake will still be chocolatey and comforting. It is a good option when you want a softer swap.
Gluten-Free Hot Fudge Pudding Cake
Use a gluten-free baking blend in place of all-purpose flour. Make sure the blend is designed for one-to-one substitution.
This helps maintain the cake’s texture. Follow the same mixing, topping, and baking steps.
Nutty Chocolate Pudding Cake
Add chopped walnuts or pecans on top before baking for a nutty flavor. They give the dessert extra texture.
Nuts also pair beautifully with chocolate and brown sugar. Use them if you like a little crunch with the gooey cake.
Ice Cream-Topped Pudding Cake
Serve the warm cake with a scoop of vanilla ice cream. The cold ice cream melts into the hot fudge layer.
This is one of the most indulgent ways to enjoy it. It turns a simple scoop into a full dessert bowl.
Whipped Cream-Topped Pudding Cake
Add a dollop of whipped cream on top. It softens the richness and makes the dessert feel a little lighter.
Whipped cream is especially nice when the cake is warm. It melts slightly over the top.
Chocolate Syrup Finish
Drizzle chocolate syrup over the served cake. This adds even more chocolate flavor.
Use it when you want the dessert to feel extra rich. A little drizzle is enough.
Why This Hot Fudge Chocolate Pudding Cake Works
This cake works because it bakes in layers that form almost by themselves. The cake batter rises to the top while the hot water and sugar-cocoa topping create a fudge-like sauce underneath.
The dry cake ingredients provide structure. Flour, cocoa powder, baking powder, sugar, and salt create the soft chocolate cake.
The milk, butter, and vanilla make the batter moist and flavorful. Mixing only until combined helps the cake stay tender.
The topping is the secret to the pudding effect. Granulated sugar, brown sugar, and cocoa powder melt with hot water as the cake bakes.
Not stirring after adding the hot water is important. The layers need to stay separate so the fudge sauce can form correctly.
The finished dessert gives you cake and sauce in one baking dish. That is what makes it so comforting and satisfying.
Directions
Step 1: Preheat the Oven
Preheat your oven to 350°F (175°C). This gives the cake the steady heat it needs from the beginning.
Let the oven fully preheat before placing the baking dish inside. An even oven temperature helps the top bake properly while the fudge layer forms beneath it.
While the oven warms, gather your ingredients, mixing bowls, whisk, and baking dish. Having everything ready makes the recipe easier to follow.
Step 2: Prepare the Baking Dish
Choose a baking dish for the cake. Set it near your mixing area so it is ready when the batter is done.
The batter will be spread into the dish before the fudge topping and hot water are added. Make sure the dish has enough room for the cake to bake and bubble around the edges.
Keep the baking dish steady on the counter. This recipe has a liquid topping, so you want a secure work surface.
Step 3: Measure the Cake Dry Ingredients
In a mixing bowl, add 1 cup all-purpose flour, ¾ cup granulated sugar, 2 tablespoons cocoa powder, 2 teaspoons baking powder, and ¼ teaspoon salt.
Measure each ingredient carefully. The balance of flour, cocoa, sugar, and baking powder helps create the soft cake layer.
This is the foundation of the dessert. Once the dry ingredients are mixed, the wet ingredients will turn them into batter.
Step 4: Whisk the Dry Ingredients
Whisk the dry ingredients together well. This helps distribute the cocoa powder, baking powder, salt, and sugar evenly through the flour.
Even mixing matters because baking powder needs to be spread throughout the batter. It helps the cake rise evenly.
The mixture should look uniform and chocolatey. Break up any cocoa clumps with the whisk.
Step 5: Add the Milk
Pour ½ cup whole milk into the dry mixture. Almond milk can be used instead for a dairy-free option.
The milk begins turning the dry mixture into cake batter. Add it gently so it does not splash dry ingredients out of the bowl.
Do not fully mix yet if you are adding the butter and vanilla right away. Everything can come together in the next step.
Step 6: Add the Melted Butter
Add 2 tablespoons melted unsalted butter. The butter should be melted but not scorching hot.
Melted butter gives the cake flavor and moisture. It blends easily into the batter.
If making the lighter variation, unsweetened applesauce can be used in place of butter. The texture and flavor will be different.
Step 7: Add the Vanilla Extract
Add 1 teaspoon vanilla extract to the bowl. Vanilla gives the chocolate batter a warmer flavor.
Pure vanilla extract gives the best taste if you have it. It helps make the dessert feel more complete.
Now the batter ingredients are all in the mixing bowl. They are ready to be combined gently.
Step 8: Mix the Cake Batter
Mix until everything is just combined. Do not worry if the batter looks a little lumpy.
A few small lumps are perfectly fine. Overmixing is not needed for this cake.
The batter should be thick enough to spread but still soft. It will become the cake layer as the dessert bakes.
Step 9: Spread the Batter Into the Dish
Pour the cake batter into the baking dish. Spread it out evenly.
Use a spatula or spoon to guide the batter toward the edges. An even layer helps the cake bake consistently.
Do not worry if the batter layer looks thin. The topping and hot water will do their work during baking.
Step 10: Measure the Fudge Topping Ingredients
In a separate bowl, add ½ cup granulated sugar, ½ cup brown sugar, and ¼ cup cocoa powder. Light or dark brown sugar can be used.
This dry topping mixture is what helps create the fudge layer. It may look like a lot, but it is important.
Measure the cocoa carefully. It gives the pudding layer its deep chocolate flavor.
Step 11: Mix the Fudge Topping
Stir the granulated sugar, brown sugar, and cocoa powder together until evenly combined. Break up any brown sugar clumps.
The mixture should look like a chocolate sugar blend. This is the magic sprinkle for the cake.
Set it close to the baking dish. You will sprinkle it over the batter next.
Step 12: Sprinkle the Topping Over the Batter
Sprinkle the fudge topping mixture evenly over the cake batter. Try to cover the whole surface.
Do not press it into the batter. It should sit on top as an even layer.
It may seem like a generous amount of topping. Trust the process, because this helps form the fudge sauce.
Step 13: Heat the Water
Prepare 1 ¼ cups hot water. The water should be steaming but not boiling.
Hot water helps dissolve the sugars and cocoa as the cake bakes. It is essential for the pudding-like bottom layer.
Handle the hot water carefully. Pour slowly to avoid splashing.
Step 14: Pour the Hot Water Over the Top
Carefully pour the hot water over the cake batter and fudge topping. Pour slowly across the surface.
Do not stir. This is one of the most important steps in the recipe.
The water may look strange sitting over the dry topping, but it will transform in the oven. It creates the gooey fudge layer as the cake bakes.
Step 15: Move the Dish to the Oven
Carefully transfer the baking dish to the preheated oven. Keep the dish level so the hot water layer does not spill.
Place it on the oven rack gently. The cake will bake into two textures, with cake on top and fudge underneath.
Close the oven and let the dessert bake undisturbed. Avoid stirring or shaking the dish.
Step 16: Bake the Cake
Bake for about 30 minutes. The top should look set when the cake is done.
You may see bubbling around the edges. That is a good sign that the fudge layer has formed.
The cake should not look completely dry because the pudding sauce is underneath. The surface should be set while the bottom remains gooey.
Step 17: Let the Cake Cool Slightly
Remove the cake from the oven. Let it cool for a few minutes before serving.
This short rest makes it easier to scoop. It also lets the hot fudge layer settle slightly.
Do not let it cool too long if you want the best warm texture. This cake is especially good while still cozy and gooey.
Step 18: Scoop Into Bowls
Scoop the cake into bowls while warm. Make sure each serving gets both cake and fudge sauce.
The top will be soft cake, and the bottom will be rich chocolate pudding-like sauce. Spoon from the bottom so the fudge layer comes with each serving.
The dessert may look rustic, and that is part of its charm. It is meant to be spooned, not cut into neat slices.
Step 19: Add Toppings
Top each warm serving with a scoop of vanilla ice cream if desired. The ice cream will melt into the fudge sauce.
A dollop of whipped cream is another delicious option. You can also drizzle chocolate syrup over the top.
For extra texture, sprinkle with nuts. Fresh berries can also add color and a seasonal touch.
Step 20: Store Leftovers
Let leftovers cool before storing. Transfer them to an airtight container.
Refrigerate for up to 3 days. Reheat individual portions in the microwave for 20–30 seconds for a quick dessert fix.
For longer storage, freeze the cake for up to 2 months. Thaw overnight in the refrigerator before serving or reheating.
Serving Ideas
Serve Hot Fudge Chocolate Pudding Cake warm for the best gooey texture. Scoop it into bowls after it cools slightly.
Vanilla ice cream is a perfect topping. The cold ice cream melts into the hot chocolate fudge layer.
Whipped cream also works beautifully. It gives the dessert a creamy, light finish.
Chocolate syrup can be drizzled over the top for extra chocolate flavor. This makes the dessert even richer.
Nuts can be sprinkled over each bowl for crunch. Chopped walnuts or pecans are especially nice if you enjoy texture.
Fresh berries add color and a seasonal touch. They brighten the look of the warm chocolate dessert.
Storage
Store leftovers in an airtight container in the refrigerator. They will keep for up to 3 days.
Let the cake cool before storing. This helps protect the texture and makes it easier to cover.
The fudge layer may thicken as it chills. That is normal.
Keep the container sealed. This helps the cake stay moist and protects the chocolate flavor.
Reheating
Reheat individual portions in the microwave for a quick dessert fix. About 20–30 seconds can warm a serving.
The exact reheating time may depend on the portion size and microwave. Warm just until the cake and fudge are heated through.
Stir or spoon the fudge layer over the cake after reheating if needed. This brings back some of the saucy texture.
Serve reheated portions with ice cream or whipped cream if desired. They taste cozy all over again.
Freezing
Hot Fudge Chocolate Pudding Cake can be frozen for up to 2 months. Make sure it is completely cooled first.
Wrap it tightly in plastic wrap and then aluminum foil. This helps protect it in the freezer.
Thaw overnight in the refrigerator before reheating. This gives the cake time to soften safely and evenly.
Once thawed, warm portions gently. The texture may be slightly different, but it will still be a sweet chocolate treat.
Make-Ahead
This cake is best served warm, but leftovers store well. You can bake it ahead and reheat individual portions later.
For short-term storage, refrigerate for up to 3 days. For longer storage, freeze for up to 2 months.
If serving for guests, baking it close to serving time gives the best gooey layer. The warm pudding texture is part of what makes the cake special.
You can still enjoy it chilled for a different texture. This gives the dessert another way to be served.
Helpful Notes for Best Results
Do not stir after pouring the hot water over the batter and topping. This is what allows the fudge layer to form underneath.
Use hot water that is steaming but not boiling. The water helps create the pudding sauce as the cake bakes.
Do not worry if the batter looks a little lumpy. Mix only until just combined.
The top should look set when baked, and bubbling around the edges is normal. The bottom should remain saucy.
Dutch-processed cocoa can be used for a deeper flavor. Instant coffee granules can also make the chocolate taste richer.
Light or dark brown sugar can be used in the fudge topping. Choose based on your preference.
Use almond milk, soy milk, oat milk, coconut milk, or low-fat milk if you do not have whole milk. The richness may be slightly different.
Use a gluten-free baking blend designed for one-to-one substitution if making the cake gluten-free. This helps maintain texture.
Variations
Mocha Chocolate Pudding Cake
Add a pinch of espresso powder to the batter. This creates a mocha twist.
For a richer flavor, add 1 tablespoon instant coffee granules. The chocolate will taste deeper.
Coconut Chocolate Pudding Cake
Substitute coconut milk for the whole milk. This gives the cake a tropical flair and dairy-free direction.
The coconut flavor may come through gently. It pairs well with chocolate.
Chocolate Chip Pudding Cake
Incorporate chocolate chips into the batter. This gives extra chocolate goodness.
The chocolate chips create little melted pockets in the cake. It makes the dessert even more indulgent.
Berry-Topped Pudding Cake
Top the cake with fresh berries. This gives the dessert a seasonal touch and pop of color.
The berries balance the richness. They also make each bowl look prettier.
Applesauce Chocolate Pudding Cake
Use unsweetened applesauce in place of butter for a lighter version. This changes the texture.
The cake will still be chocolatey. It simply has a lighter direction.
Gluten-Free Hot Fudge Cake
Use a gluten-free baking blend instead of all-purpose flour. Choose one designed for one-to-one substitution.
This helps the cake keep a similar texture. Follow the same directions.
Walnut Hot Fudge Cake
Add chopped walnuts on top before baking. This gives the dessert a nutty flavor.
Walnuts add crunch to the soft cake and fudge layer. They pair well with chocolate.
Pecan Hot Fudge Cake
Use chopped pecans on top before baking. Pecans give a slightly different nutty flavor.
They make the dessert feel richer. They also add a nice contrast to the pudding layer.
Chilled Chocolate Pudding Cake
Serve the cake chilled for a different texture. The fudge layer becomes thicker after refrigeration.
This is a nice option in warmer weather. It still tastes rich and chocolatey.
Winter Warm Pudding Cake
Serve the cake warm in winter. The gooey fudge layer makes it feel especially cozy.
Add whipped cream or ice cream if desired. It is a wonderful cold-weather dessert.
Troubleshooting
Why Didn’t My Fudge Layer Form?
The hot water may have been stirred into the batter. Do not stir after pouring the water over the topping.
The topping and water need to remain layered. That is how the pudding sauce forms while baking.
Why Is My Cake Too Dry?
It may have baked too long. Bake for about 30 minutes, until the top looks set.
Remember that the bottom should remain saucy. Do not wait for the entire dessert to look dry.
Why Is My Cake Too Runny?
It may need a little more baking time. The top should be set, with bubbling around the edges.
The bottom will stay gooey, but the cake layer should not be raw. Bake until the surface looks finished.
Why Does My Cake Taste Flat?
It may need the salt, vanilla, or a richer cocoa flavor. Do not skip the salt because it balances the sweetness.
Dutch-processed cocoa, espresso powder, or instant coffee granules can deepen the chocolate flavor. Use the options that fit your taste.
Why Did My Batter Look Lumpy?
A slightly lumpy batter is fine. The batter only needs to be mixed until just combined.
Overmixing is not necessary. The cake will still bake into a soft top layer.
Frequently Asked Questions
Can I Freeze Hot Fudge Chocolate Pudding Cake?
Yes, this cake can be frozen. Make sure it is completely cooled before wrapping it tightly in plastic wrap and then aluminum foil.
It will keep in the freezer for up to 2 months. Thaw overnight in the refrigerator before reheating.
What Can I Use Instead of Whole Milk?
Almond milk, soy milk, oat milk, or low-fat milk can be used instead of whole milk. Coconut milk can also be used for a tropical flair.
The richness might be slightly different. Choose the milk option that fits your needs.
How Do I Store Leftovers?
Store leftovers in an airtight container in the refrigerator for up to 3 days. Let the cake cool before storing.
Reheat individual portions in the microwave for about 20–30 seconds. This makes an easy dessert later.
Can I Make This Cake Gluten-Free?
Yes, substitute the all-purpose flour with a gluten-free baking blend. Choose one designed for one-to-one substitution to help maintain the texture.
Follow the same method. The cake should still have a soft top and a fudgy bottom.
Can I Add Chocolate Chips?
Yes, chocolate chips can be incorporated into the batter. This gives the cake extra chocolate goodness.
The chocolate chips make the dessert even richer. They are a great choice for chocolate lovers.
Can I Serve This Cake Cold?
Yes, the cake can be served chilled for a different texture. The fudge layer will become thicker.
Warm is the best choice for a gooey texture. Chilled is a fun option when you want something different.
What Should I Serve With This Cake?
Serve it with vanilla ice cream, whipped cream, chocolate syrup, nuts, or fresh berries. Each topping changes the dessert slightly.
Warm cake with cold ice cream is especially cozy. It makes the fudge layer even more delicious.
Why This Recipe Works So Well
Hot Fudge Chocolate Pudding Cake works because it creates two textures in one baking dish. The top bakes into chocolate cake, while the bottom becomes a rich fudge sauce.
The cake batter is simple and tender. Flour, sugar, cocoa, baking powder, salt, milk, butter, and vanilla create the soft chocolate layer.
The topping mixture is what gives the dessert its magic. Granulated sugar, brown sugar, cocoa powder, and hot water turn into the pudding-style fudge layer.
The hot water step may look unusual, but it is essential. Leaving it unstirred lets the cake and sauce separate as they bake.
The dessert is also flexible. Milk alternatives, gluten-free flour blends, chocolate chips, espresso powder, coffee granules, applesauce, nuts, berries, ice cream, and whipped cream can all adjust the final experience.
Most of all, this cake works because it delivers comfort quickly. In a short time, you get a warm bowl of chocolate cake and fudge sauce that feels much more special than the effort required.
Final Thoughts
Hot Fudge Chocolate Pudding Cake is warm, gooey, chocolatey, and wonderfully comforting. It turns simple pantry ingredients into a soft cake with a hidden fudge layer that forms right in the oven.
I love how this dessert feels both easy and exciting. You spread the batter, sprinkle the cocoa-sugar topping, pour hot water over the surface without stirring, and wait as the oven creates cake and sauce together.
Serve it warm in bowls with vanilla ice cream, whipped cream, chocolate syrup, nuts, or fresh berries, or chill leftovers for another texture later. Whether you make it for a rainy afternoon, a birthday, a family dinner, or a simple sweet craving, this Hot Fudge Chocolate Pudding Cake brings cozy chocolate comfort to every spoonful.
Hot Fudge Chocolate Pudding Cake
This Hot Fudge Chocolate Pudding Cake is rich, warm, gooey, and full of deep chocolate flavor. As it bakes, the simple cake batter and fudge topping create a soft chocolate cake with a saucy pudding-like layer underneath, making it perfect for cozy desserts, family dinners, or serving warm with ice cream or whipped cream.
Recipe Details
- Prep Time: 15 minutes
- Cook Time: 30 minutes
- Total Time: 45 minutes
- Course: Dessert
- Cuisine: American
- Servings: 8 people
- Calories: 350 kcal
Equipment
- Mixing bowl
- baking dish
Ingredients
For the Cake
- ½ cup whole milk
- 2 tablespoons unsalted butter, melted
- 1 teaspoon vanilla extract
- 1 cup all-purpose flour
- ¾ cup granulated sugar
- 2 tablespoons cocoa powder
- 2 teaspoons baking powder
- ¼ teaspoon salt
For the Fudge Topping
- 1 ¼ cups hot water
- ¼ cup cocoa powder
- ½ cup brown sugar
- ½ cup granulated sugar
Instructions
Step 1: Preheat the Oven
Preheat your oven to 350°F (175°C).
Step 2: Mix the Dry Cake Ingredients
In a mixing bowl, combine the all-purpose flour, granulated sugar, cocoa powder, baking powder, and salt.
Step 3: Add the Wet Ingredients
Add the whole milk, melted unsalted butter, and vanilla extract to the dry ingredients.
Step 4: Make the Batter
Mix until the cake batter is combined.
Step 5: Fill the Baking Dish
Pour the batter into a baking dish and spread it evenly.
Step 6: Make the Fudge Topping
In a separate bowl, mix the granulated sugar, brown sugar, and cocoa powder for the fudge topping.
Step 7: Add the Fudge Layer
Sprinkle the fudge mixture evenly over the cake batter.
Step 8: Pour Hot Water Over the Top
Pour the hot water over the top of the fudge mixture. Do not stir, so the pudding-style sauce can form as the cake bakes.
Step 9: Bake the Cake
Bake for 30 minutes.
Step 10: Cool Slightly and Serve
Let the cake cool slightly before serving.
Notes
Serve warm with ice cream or whipped cream for extra indulgence.
Serving Suggestions
- Serve warm with ice cream for a classic hot fudge-style dessert.
- Add whipped cream on top for a lighter creamy finish.
- Pair with coffee, cold milk, or hot cocoa.
- Serve after dinner while the fudge layer is still soft and spoonable.
- Scoop into bowls for an easy family-style dessert.
Storage
How to Store
Let leftovers cool, then cover the baking dish tightly or transfer portions to an airtight container. Refrigerate until ready to reheat.
How to Reheat
Warm individual portions gently until the cake is heated through and the fudge layer softens again.
Best Texture Tip
Serve the cake warm after it cools slightly so the fudgy pudding layer stays gooey and spoonable.

Fernando is the creator and writer behind the food blog Eating with your Hands. Living and working in cities like Paris, Barcelona, and Berlin, and being married to a Canadian foodie, has given Fernando a passion and interest in food and inspired him to run EWYH.